skip to main |
skip to sidebar
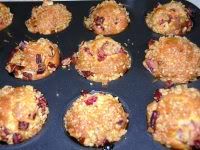
I decided to make these muffins only because I had the streusel topping left over from the strawberry streusel cake - but I'll be making them more often because they were so scrumptious! The muffins stayed nice for the next two days, too, with the demerara sugar still keeping some of its crunch. That was a nice surprise.
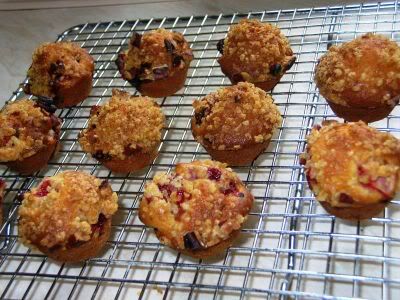
This recipe made 12 mini muffins and four large ones. I guess it would make 8 large ones if you didnt want them mini.
Recipe for: Strawberry streusel muffins

Ingredients:
2 eggs
2/3 cup sugar
1/2 cup milk
1/4 cup plain yogurt
1 tsp vanilla essence
1/2 cup butter or margarine, melted and cooled
2 cups flour
1 tbsp baking powder
1/4 tsp salt
1/2 tsp cinnamon powder
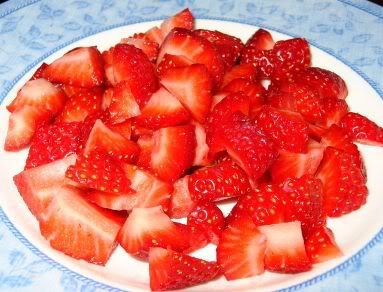
1 cup strawberries, cut in chunks
Streusel topping:
2 tbsp sugar (I used demerara)
2 tbsp flour
1/2 tsp cinnamon powder
1 tbsp cold butter
2 tbsp chopped nuts (I used pecans)
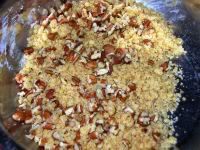
Cut the butter into the sugar, cinnamon and salt till it resembles coarse breadcrumbs, then add the chopped nuts.
Method:
1. Pre-heat oven to 180C/350F.
2. Grease an 8-cup large muffin tray.
3. In a bowl, sift together the flour, baking powder, salt and cinnamon.
4. In a large mixing bowl, whisk together the eggs and sugar until light.
5. Add the milk, yogurt, vanilla and melted butter/margarine. Whisk gently until well mixed.
6. Combine the flour mixture with the milk mixture and stir until the flour is moistened. Do not beat.
7. Gently stir in the strawberries. The batter should be thick.
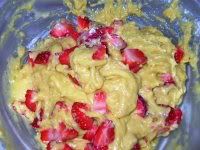
8. Spoon the batter into the muffin pans.
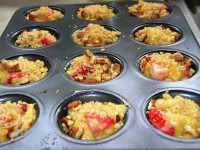
Sprinkle with the streusel topping and bake for about 25 minutes or until a toothpick inserted in the centre comes out clean. (If you're making mini muffins, check them for done-ness after 15 minutes.)
Serve warm. Re-heat in a microwave if required.
The muffins can be frozen. Re-heat for 10 minutes at 180C in the oven before serving.
One of life's pleasures is getting to eat perfect strawberries - deeply red, firm but ripe and so aromatic that your mouth waters just at the very first whiff of the fruit. The perfectly ripe strawberry doesnt need sugar or cream, in my opinion. (I've read that wild strawberries are even more flavourful, and one day I hope to be able to sample some).

I got two punnets of strawberries (although it's not anywhere near strawberry season in the UK yet) on a buy-one-get-one-free basis from Sainsbury's that turned out really lovely. I ate quite a few of them before reluctantly deciding to make the strawberry streusel cake as promised.
The cake was quite nice - Pete liked it very much more than I did. He's easily pleased... give him a cup (or a few dozen cups!) of coffee and a slice of cake, and he and his computer are as happy as clams.
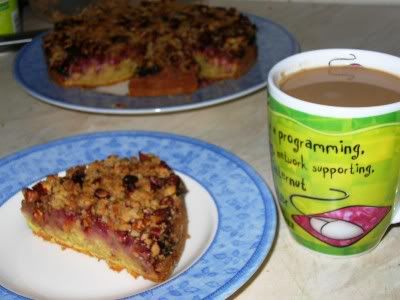
My considered opinion after tasting the cake was: "Not bad". The cake part of it did not turn out to my satisfaction (although, as I said, Pete loved it) - it seemed a bit too gluey, with very little crumb. But perhaps that's because I used Splenda instead of sugar in the batter. The topping didnt contain any Splenda...it wouldnt have worked quite right, anyway.
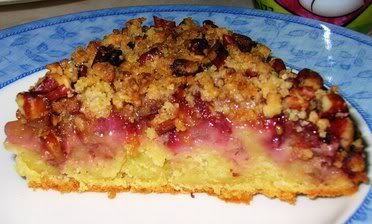
It was really at its best warm from the oven, with the aroma and flavour of the strawberries melding nicely with the crunchy streusel topping. And talking about the topping - I made way more than I required. No, not by choice. Sometimes things get out of hand in the quantities department... especially when I dont keep a mental eye on what I'm doing (hmm... there's got to be a better way of saying that, but I hope the meaning is clearer than the expression!).
Anyway, there was so much topping left over that I kept some by for another day.
Back to the cake - I'd say it would be best stored in the refrigerator after Day One, and each serving thereafter re-heated in the microwave. I guess some nice thick cream wouldnt go amiss at this point, to serve with the cake. It doesnt keep well because of the fresh strawberry content. But it's not at all bad when it's warm from the oven!
Recipe for: Strawberry streusel cake
Ingredients:
1 cup plain flour
1/2 cup sugar (I used Splenda)
2 tsp baking powder
1/2 tsp salt
1/2 cup milk
1 tsp vanilla essence
1 egg
2 tablespoons melted butter
1-1/2 cups strawberries, sliced
Streusel topping:
1/4 cup flour
1/4 cup sugar (I used demerara sugar for extra crunch)
2 tbsp butter
1/2 cup chopped pecan nuts
Method:
1. Grease and dust with flour a 7" round baking pan.
2. In a medium bowl, stir together the flour, sugar, baking powder and salt with a whisk.
3. Make a well in the middle and add the vanilla essence, the egg and melted butter (make sure it's not hot, or the egg will cook!). Beat this till well mixed.
4. Pour the batter into the prepared pan. Level with the back of a wet spoon. Arrange the sliced strawberries on the top, without pressing them into the batter.
5. In a small bowl, combine the flour and sugar for the topping. Cut in the butter with two knives, or rub it in with your fingertips till the mixture is the consistency of coarse breadcrumbs.

6. Mix in the pecan nuts and sprinkle thickly over the batter.
7. Bake at 180C/350F for 35-40 minutes or till the cake is done.
Serve hot plain, or warm with a scoop of thick cream or icecream, as per taste.
This dish is so chock-full of nutrition that I can actually feel the gleaming halo forming over my head even as I write about it... a dish that has three different dals for protein content, and seven different vegetables (different coloured ones, too) for the rest of the daily good things. I've got 5-a-day beat - seven vegetables, man! Count 'em - SEVEN! (ok, five in the pic, but I forgot the onions and tomatoes when taking the pics!)

Perhaps I should list them, so that they can be counted: Baby cauliflower (the most beautiful looking little thing - more on this later), baby turnips, a red potato, a carrot or two, bell peppers, onions and tomatoes. And garlic, if you can call it a vegetable, in which case the count goes up by one more to 8! And let's not forget my three dals: Masoor dal, tuvar dal and moong dal.

Clockwise from top right: Masoor dal, tuvar dal, moong dal
Better yet, this nourishing dal is tasty. Nothing deep fried here, and it's STILL tasty. (That halo is gleaming even more. Try not to be dazzled. Some people might find that wearing sunglasses helps.) So much so that Pete had two helpings with rice. Normally one helping of vegetarian Indian dishes (or things he's never tried before) is enough to satisfy him.
I dont quibble about that... I know from personal experience that sometimes even if you like something, you cant eat very much of it because it's not what you're used to. It's not something you were brought up eating, not something familiar from your childhood, not something you associate with comfort and home. So a little bit kind of goes a long way in satisfying your taste-buds. It does for me, at any rate. I hardly ever need to go back for seconds with any food other than Indian - my tastebuds are just not geared for more. Doesnt matter if it's pasta, pizza, stews, casseroles or anything else from any cuisine, and doesnt matter how much I like it either. Sometimes I think I could lose weight easily if only I could stick to eating non-Indian food!
Anyway, back to my recipe for the ARF event. I made up my own spice mix (garam masala) for the dal, using some of the unfamiliar spices that I'd bought. They did make a difference, but I'm certain that using regular garam masala would work just as well. I'm actually very glad that I took photos of the spices I used (and the proportions) because otherwise I'm not sure I'd have been able to remember them even to write up the recipe! Good ol' food blog!
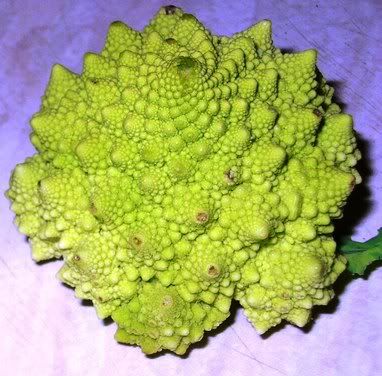
My fractal baby cauliflower
I've got to mention the baby cauliflowers that Pete bought. He knew at once that I'd be intrigued and he was right. Such symmetry - each floret, and each little pointy bit on each floret, curled in a tight spiral, becoming smaller and smaller towards the tip, but never deviating from the symmetry. A perfect example of fractals... fractals in nature - who woulda thought it!
Recipe for: Dal with vegetables


Ingredients:
For the dal:
2 tbsp masoor dal
2 tbsp thuvar dal
2 tbsp moong dal
3 cups mixed veg, cubed small and evenly (I used cauliflower, turnips, potatoes, bell peppers and carrots)
2 large tomatoes, chopped up fine
2 medium onions, chopped fine
1 tsp ginger-garlic paste
4-5 fresh green chillies, sliced thin (optional; or adjust to taste)
2 tsp oil
Salt to taste
7-8 fresh curry leaves
2 tsp cumin seeds
For the spice mix (garam masala):

Clockwise from top left: Aniseed, stick cinnamon, fennel, tukmaria, caraway seeds Centre: Star anise (one petal)
1/2 tsp whole aniseed
1/4 tsp fennel seeds
1/2 tsp tukmaria (basil) seeds
1/2 tsp caraway seeds
1" piece cinnamon bark
1 petal of star anise
1 tsp coriander seeds
4-5 black peppercorns
Method:
1. Dry-roast all the garam masala on medium-high heat, shaking the pan or stirring it all the time, until they become fragrant and change colour. Take off the heat and let them cool. Grind to a powder, preferably using a mortar and pestle. Reserve.
2. Cook the dals in a pressure cooker with a little turmeric powder till done - this will inevitably lead to a very creamy result, which is how I like it. If you prefer your dals to retain their shape, cook them in a pan of boiling water till done to your taste.
3. Put the vegetables (bar the tomatoes and onions) in a microwaveable container with a little water, and cook till nearly done (about 7-8 minutes).
4. In a large pan, heat the oil. Add the ginger-garlic paste and fry for 20 seconds, then add the prepared spice mix and stir well.
5. Next add the chopped onions and fry till they begin to soften. Add the tomatoes now and cook till the tomatoes break down into a thick sauce. Add a half-cup of water if required.
6. Now add the microwaved vegetables and stir. Cook covered on medium-low for 5 minutes till done.

7. Add the cooked dal mixture along with a cup of water and stir carefully. (Dont mash the vegetables if you can help it. It's best if they retain their shape and colour.)
8. Add salt to taste and let the mixture simmer on low for 5 minutes.

9. Heat a tsp of oil in a small pan and crackle the cumin seeds and curry leaves (about 20 seconds). Pour this seasoning over the dal and serve hot over steamed rice or with chapaties.
An odd (literally!) milestone number to celebrate, but I forgot to keep tabs on how many posts I'd done, and I crossed the 100-post mark without even noticing! The 100th, appropriately enough, was the entry for ARF/5-a-day Tuesday #12 - I'm pleased that it was a good healthy dish and not a fried one! :)
I'd better keep track of my 250th one, though. "Hurrah, my 253rd post!"
Nope... that has even less of an impressive ring than "my 105th post!"
Whatever - congrats to me and many many thanks to my regular readers! When I started I didnt think my food blog would hold enough interest (mine and others') but looks like we're all doing well enough to keep going.
Actually, come to think of it, my next milestone is the one-year mark, which comes up in early May. I'll be in the US then, holidaying, but I'm pretty sure I'll still be posting from there! (More on that as the departure date comes nearer...)
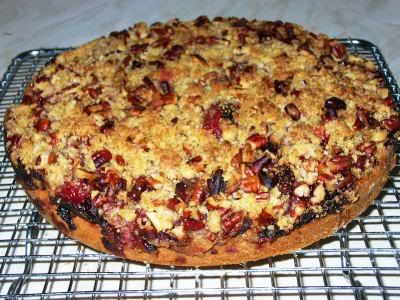
Another scrumptious cake - and this time it's eggless. I'm very pleased to have tried out this recipe because it's something I can make again when my mother comes visiting. It's mouth-wateringly tasty, especially on the second day. It might not look like much but believe me, the taste is gorgeous.

If anybody is wondering why I recommend so highly each and every cake I bake - well, it's because I choose those that sound nice but, more importantly, are easy to make. I'm no baker, and in any case complicated, ultra-rich ganache cakes and such-like things dont tempt my fancy. Simplicity is everything.
Recipe for: Eggless maple-syrup pecan cake

Ingredients:
1-1/2 cups cake flour
1 tsp baking powder
3/4 tsp baking soda
6 tbsp caster sugar (superfine sugar)
3 tbsp pure maple syrup
1/2 cup chopped pecans
1/2 cup vegetable oil
Juice of 1/2 lemon (I used lime)
1/2 cup milk
Vanilla sugar for dusting (optional)
Method:
1. Grease and line an 8" square baking pan.
2. Preheat the oven to 180C/350F.
3. Mix the flour, sugar, baking powder, baking soda, salt and pecans thoroughly.
4. Stir in *the remaining ingredients and mix well.
5. Pour into the cake tin and bake for 35 to 40 minutes or until a toothpick inserted in the centre comes out clean.

6. Cool in pan for 5 minutes, then turn out carefully onto a wire rack.
7. Dust with vanilla sugar (optional) while still warm.
8. Serve at room temperature.
Warning: This post contains a bad-tempered moan.
Right, if anybody's still reading, here it comes: WHY arent there recipes for sweets and halwas that cater for two persons or less? I wanted a recipe for bottle gourd (doodhi) halwa (after my first fiasco with halwa-making, I decided it would be better to go with an actual recipe), but I wasnt exactly preparing to feed the hungry hordes! I just wanted to make some halwa in a small quantity, as a sort of timid trial - I certainly didnt want to make enough halwa to last the rest of the year! So, two litres of milk, 1 kilo of grated doodhi, half a kilo of sugar, as required in most recipes I saw - well, they didnt quite fit in with my requirements.
Yes, I could have scaled down the recipe and yes, that IS what I did in the end, more or less. But I was pretty doubtful about the quantities, I can tell you, as I'm not particularly experienced in making halwa. I had about a cup and a half of grated doodhi after draining it of water - and goodness, it's got a LOT of water content! It really helps to put the grated vegetable in a colander and a heavy bowl of water on top if it (thanks for the tip once again, Saffron Hut!).
Anyway, I started out with the milk and sugar on a much smaller scale this time - and what do you know, it worked. Anybody out there looking for a halwa recipe that makes two (generous) servings for one person or one serving for two persons... THIS is where you'll get what you're looking for.
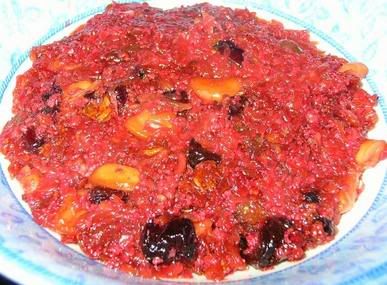
Oh, and if anybody is wondering how my doodhi halwa acquired the gorgeous scarlet colour - well, non-cochineal food-grade colouring, that's how. (Easy when you're in the know, isnt it?). I added the colour because I felt the original halwa looked somewhat pale and insipid. I would have preferred a nice orange colour, but I didnt have orange food colouring.
One last point - I added dried mixed berries (strawberries, sour cherries, cranberries) instead of raisins, and cashewnuts as well.
PS. It would seem I have yet another last point, and I promise this will live up to its name - I forgot to take a picture of the bottlegourd, but I'm sure there are plenty of sources on the Net that have information about this pale green squash-type vegetable.
Recipe for: Bottlegourd (doodhi) halwa
Ingredients:
1 medium bottlegourd, peeled and grated (about 1-1/2 cups after the liquid is squeezed out)
3/4 cup sugar
4 tbsp dried mixed berries (or raisins/sultanas)
1 tbsp cashewnuts, broken into pieces
2 tbsp ghee
1 cup milk + 1/4 cup extra if required
1/2 tsp cardamom seeds, powdered
1/2 tsp red food colouring (optional)
Method:
1. Heat the ghee in a pan and fry the cashewnuts till golden. Add the berries and fry for 10-15 seconds.
2. Add the grated squeezed doodhi and mix well, frying on medium-high for 5 minutes, stirring all the time.
3. Now pour in the milk and stir well. Let the doodhi cook on medium-high till the milk is nearly absorbed. Stir every once in a while.
4. Now add the sugar and the cardamom seeds and mix well again. Add the 1/4 cup milk if the halwa looks too dry. If you're using the red food colouring, add it now.
5. Let the halwa cook down till the liquid is absorbed. Serve hot or cold.
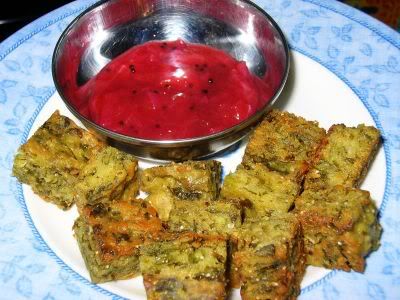
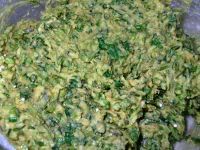
Kothimbir vadi is a snack from Maharashtra, made with coriander leaves, and methi na muthia is a snack from Gujarat, made with methi or fenugreek leaves. Both are basically made more or less the same way, and the ingredients are similar too.
I had half a bunch of coriander leaves and a bit of methi leaves - not enough to make either dish using just one or the other. But together, they made enough vadi as starters for four people. Three of them, who had never eaten these savoury, intensely flavoured vadi before, would have happily eaten twice as much after the first tasting, only there wasnt enough - it was that good!
The recipe I followed was pretty much Nupur's, except for minor changes (like using methi leaves!). By the way, the list of ingredients might look dauntingly long but the actual making is simple as simple can be. Really.
Recipe for: Coriander-methi vadi
Ingredients:
1 cup coriander leaves, chopped fine
1 cup methi leaves, chopped fine
1 cup chickpea/gram flour
2 tbsp. rice flour
1/4 cup wheat flour + millet flour (if you have it)
4 green chillies, minced fine
1 tsp ginger-garlic paste
1 tsp sesame seeds
1 tsp poppy seeds
1 tsp turmeric powder
pinch of asafoetida
1 tsp garam masala
1/2 tsp baking soda
1 tsp sugar
Juice of 1/2 lime
salt to taste
Oil for shallow-frying
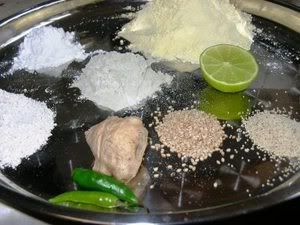
Clockwise from top right: Poppy seeds, sesame seeds, ginger, green chillies, wholewheat flour, rice flour, millet flour, gram flour. Oh, and half a lime.
Method:
1. In a large bowl, mix together all the ingredients except the oil.
2. Use just enough water to make a thick batter, stirring well to break up any lumps.
3. Grease a flat plate or a vessel with a wide flat bottom and pour the batter in to a depth of about half an inch. If required, divide the batter into two portions.
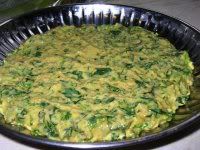
4. Steam for about 30 minutes in a pressure cooker (without the weight) or in a steamer.
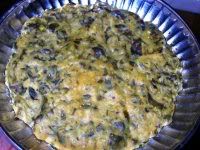
5. Let the steamed batter cool, then cut into squares.
6. In a wide shallow pan, heat 4-5 tbsp oil. Shallow-fry the vadi in batches, turning them over carefully until they get golden brown spots.
7. Serve hot with any chutney. They are also yummy cold. Lovely for picnics.
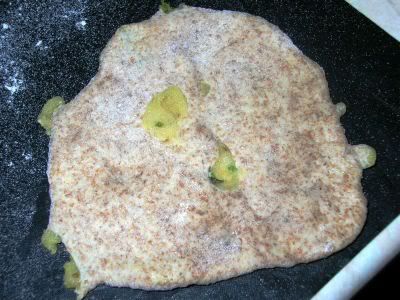
I love parathas, but I havent had the greatest success in making them myself. Invariably when I try to roll out a ball of dough filled with stuffing into a nice round paratha, what happens is that the uncooperative filling squirts out the edges. If I exert less pressure, the paratha doesnt roll out, looking instead like a dented pillow. More pressure, and the filling makes its triumphant reappearance, attaching itself to the rolling pin (ugh) and messing up my rolling board as well, looking something like this:
Ever tried getting mashed potato (mixed with bits of dough) off anything? It's not a pretty sight and definitely not an easy task. The saddest part is that the paratha doesnt evolve into anything edible.
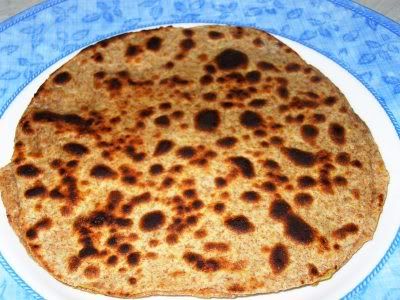
So I evolved my paratha-making technique instead, neatly side-stepping the ball-of-dough-with-filling-nearly-enclosed route by the simple method of cheating - that is, I roll out one two thin chapaties, spread the stuffing on the one, cover with the other and seal all around, then cook this double-chapati (a.k.a paratha) with a little ghee till it's nicely spotted golden brown all over.
So it isnt exactly the traditional method... but it works just fine!
PS. If anybody is interested in knowing how exactly a proper paratha is made, please check out Saffron Hut's fabulous post
Recipe for: Potato stuffed paratha (alu paratha)
Ingredients:
For the paratha:
3 cups wheat flour
2 tbsp oil or ghee
Water as required to make a stiff but pliable dough
Extra flour for dusting
For the potato stuffing:
2 large potatoes, peeled, boiled and mashed
1/2 tsp ginger-garlic paste
1/2 tsp cumin powder
1/2 tsp coriander powder
1/4 tsp garam masala
1/2 tsp ajwain (carom) seeds
1 tsp red chilli powder (optional)
OR
3 fresh green chillies, minced very fine
3 tbsp coriander leaves, chopped
1 tsp oil
Salt to taste
Method:
1. Heat the oil, add the ginger-garlic paste and fresh green chillies (if using) and fry for 20 seconds.
2. Then add the cumin and coriander powder, the garam masala and ajwain seeds and fry for 30 seconds.
3. Put in the mashed potatoes, salt and coriander leaves and mix well.
4. Heat through, then allow to cool.
5. Pinch off two lime-sized pieces of dough and roll into balls. Roll each ball out into a thin chapati, using flour to dust if required, to stop it sticking.
6. Take a generous tbsp of the stuffing and spread it over one chapati till about 1/2 inch from the edge.
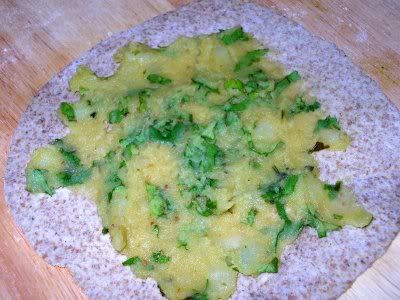
7. Take the other chapati and put it on top of the first one, pressing down gently but firmly (especially around the edges) to make them stick together. At this point you can use a pizza cutter to make the paratha square (looks nicer and removes uneven edges). I didnt bother to do this, but I'm lazy.
8. Carefully remove the paratha and place on a hot tava or frying pan that has been greased with a little oil. Let it cook for 15 seconds on that side, then turn it over with a flat spatula and spread some ghee or oil over that side. Turn it over again after 15 seconds and grease that side as well.
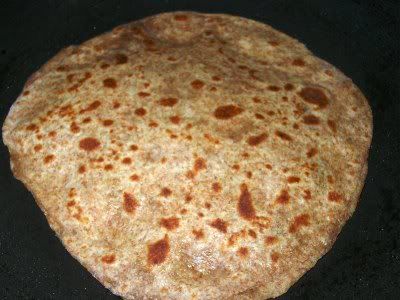
9. Let the paratha cook on medium high until it acquires golden brown spots. Repeat with remaining dough.
10. Serve hot with any pickle and a dollop of thick Greek yoghurt on the side.
http://sweetnicks.blogspot.com/2006/03/arf5-day-tuesday-12.html
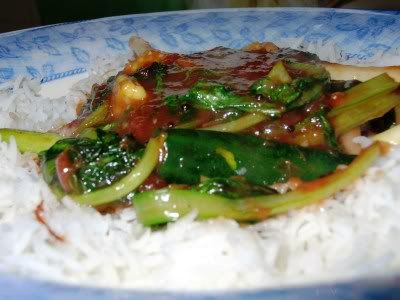
That Bengali plum chutney I was talking about, its versatility in particular? Well, with a quick whir in the blender, and diluted with some water, it made a cracking good sauce for a Chinese-style stir-fry. The mustard seeds - not exactly the most Chinese of ingredients - didnt get homogenised in the sauce, mainly because the plums didnt need much blending to become smooth. But they added visual and textural interest. Talk about fusion cuisine!
What I did - I sauteed some julienned vegetables in a tsp of sesame seed oil mixed with a tsp of vegetable oil, added some dark soy sauce and a moderate shake of Chinese five-spice. Stirred in my plum sauce and heated it up well, then served it over rice. Perfect for dinner and perfect for ARF Tuesday because of the plum content and all the veggies that went into it (six kinds, to be precise).
Recipe for: Stir-fried veggies in plum sauce
Ingredients:
2 cups mixed veg cut in strips (I used bell peppers, baby zucchini, mushrooms, spring onions, baby bok choy and baby corn)
1/2 cup plum chutney diluted with 1/4 cup
water
1/2 tsp chinese five-spice mix
1 tsp sesame oil
1 tsp vegetable oil
1 tbsp dark soy sauce
Method:
1. Heat the oils, add the spice mix and saute the vegetables over high heat till cooked but crunchy and the leafy veg are wilted.
2. Add the soy sauce and plum sauce and stir, till the sauce is heated through.

3. Serve hot over steamed rice or with egg-fried rice.
To Garam Masala, of The Spice is Right, without whose kind help my recipes would not have been classified in this user-friendly way. Thanks, lovely lady with the lovelier name! :)
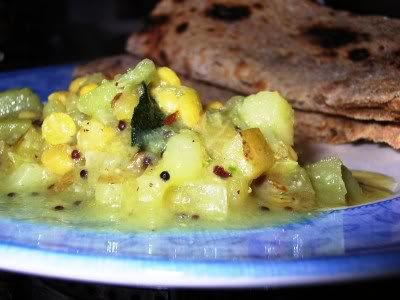
Another simple and homely dish for the overworked palate, and redolent of home and everyday food. Not - as ever - that I liked this combination when I was younger... but age, wisdom and about 5,000 miles of separation from home have brought about a radical revolution in the things I like. Which, to cut the story short, is most of the things I used to DISlike back in the days of my youth.
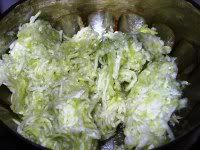
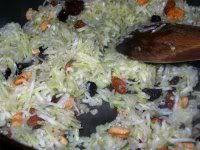
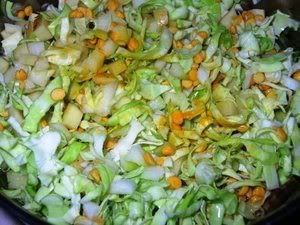
What I like about making kootu is that you can add as many as or as few vegetables you like, in any proportion and in any combination - the decision is up to you and your fridge's contents. I opted to finish up the cabbage that was waiting its turn patiently in my fridge, and added a potato to keep it company. I would have thrown in some green peas for colour but - horrors! - I had run out of the lil fellas and had to do without.
Do I hear gasps of disbelief? Do your hearts palpitate in unbearable suspense, wondering what I did in such a distressing situation? Not to worry, gentle readers, because I sent my husband out at once to fill the void. Yes, my freezer is once again stocked with that which it so woefully lacked. Once again, I am content.
Peas be in the homes of all who read this.
Recipe for: Cabbage-potato kootu
Ingredients:
1/2 small head cabbage, chopped
1 medium potato, cubed small
1 tbsp chana dal, soaked in hot water for 10 minutes
1/4 tsp turmeric powder
1 tsp mustard seeds
1 tsp cumin seeds
7-8 fresh curry leaves
1 tsp oil
Salt to taste
For the ground masala:
2 tbsp fresh grated coconut
1 tbsp poppy seeds (khus-khus), soaked in a little warm water for 10 minutes
2 green chillies
2 dry red chillies (or to taste)
1/2 tsp coriander seeds
2 fat garlic cloves
1 tsp cumin seeds
Method:
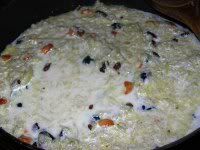
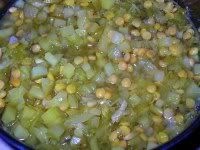
1. Cook the cabbage, potato, soaked chana dal in a covered pan on low heat, adding enough water to just cover the vegetables. Stir in the turmeric powder.
2. Meanwhile, grind the masala ingredients to a smooth paste using just enough warm water to help grind it.
3. Once the vegetables are cooked and soft, add in the ground masala, salt to taste and stir well. Let it simmer gently for 5-6 minutes.
4. In a small pan, heat the oil. Add the mustard seeds, cumin seeds and curry leaves, cover the pan and let the seeds pop.
5. Pour this hot seasoning over the kootu and stir. Serve hot over rice or with chapatis.
Ever since I saw Spicehut's Bengali plum chutney, I knew I HAD to make it. It sounded too yummy for words - and believe me, it was, despite the slight variations I incorporated by being too lazy to measure the ingredients exactly!
Making changes to a recipe I've never made before, without knowing how it might affect the end result and how different it might be from the original - well, it could have been a pretty dumb thing to do. Luckily it wasnt. This plum chutney was well agreeable to incorporating minor changes. The end result was not only delicious, it was also versatile... I used it as a dip, as a side-dish with rotis and as a sauce for vegetables! How cool is that?

It was also very nice to see the chutney take on its beautiful red colour. The plums I had werent particularly red inside. They were sort of dingy, really, and I was worried the chutney would look like sludge at the end. But no, as the plums cooked down, they took on the gorgeous scarlet of Spicehut's original. Phew! (I was seriously toying with the idea of adding red food colouring, had the chutney NOT turned the right colour by itself! Glad I didnt have to cheat!)
Recipe for: Plum chutney

Ingredients:
3 ripe plums, de-seeded and chopped
1/2 onion, chopped
2 dried red chillies, whole (broken in half ONLY if you want real heat in your chutney)
3 tbsp lime juice
1 tbsp balsamic vinegar
1 tsp cinnamon powder
2 tbsp sugar
1 tsp oil
1/2 tsp mustard seeds
Salt to taste
1 cup water
Method:
1. In a pan, heat the oil and fry the red chillies. Pop the mustard seeds with the pan covered.
2. Put in the chopped plums and stir, then add the cinnamon powder, balsamic vinegar, lime juice and salt. Stir well.

3. Let the plums soften a little, then add the water and cook on med-high until the plums disintegrate.
4. When the plums have cooked down to a fairly thick sauce, add the sugar. Let it simmer for 3-4 minutes longer.
5. Let cool and store in the fridge. This chutney can be used as a dip for savoury snacks or as a side-dish with chapatis.
Easy as chips. And yummy as low-fat can be. Need I say more?
Actually, I can answer that myself. I DO need to say more, if only to mention that I didnt use a knife to remove the peel - I used a peeler, which means that only a light scraping of the skin was required. I had in mind the guest post on home-made plantain chips by Vijay-garu (husband of Indira - Mahanandi). He had left some of the skin on, and the resulting chips looked really nice.
Now of course I didnt fry my chips, but the principle was the same... and they ended up really tasty (despite the unhappy/disapproving expressions on their faces), with the slightly thicker skin adding a nice crunch.
What can I say but thank you, Mr Vijay! :)
Recipe for: Oven-baked banana chips
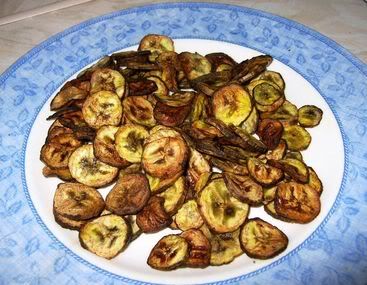
Damn, those chips are making a lot of sad faces, arent they?
Ingredients:
2-3 green bananas
2 tsp oil, or oil-spray as required
Salt to taste
Spices to taste (I used chilli powder and coriander powder)
Method:
1. Cut the ends off the bananas and scrape the skin lightly with a vegetable peeler.
2. Slice into 1/4-cm thick rounds.
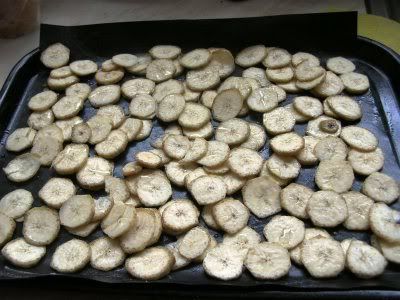
3. Heat the oven to 180C (350F).
4. In the meantime, toss the sliced bananas with some oil, or arrange them on a tray covered with non-stick baking paper, and spray with oil-spray.
5. Bake in the oven for 15 minutes or so, then turn the slices over and spray them again.
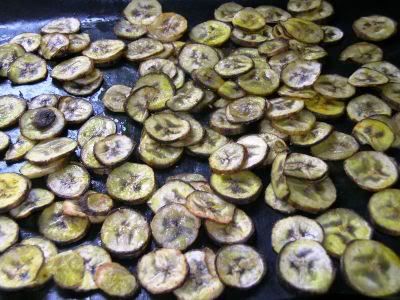
6. Cook till the banana slices are crisp and brown (be careful that they dont burn).
7. Toss with spices of choice and let cool. Serve as a snack or as a side dish with any rice meal. Store in an airtight container.
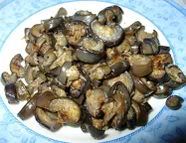
Here's one dish I never thought I'd be writing about in my blog, much less make it at home! Mainly because my taste-buds REALLY dislike aubergines from the bottom of their little souls. There's no way to disguise it, not even buried under tonnes of cheese - I always know when that slug-like vegetable has found its way into my food!
However, no more mentions of slugs in the same breath as aubergines, since this is a recipe that became reality and was, apparently, edible.
I made curried aubergine rice for my husband, to rave reviews. He said he'd never had anything like it ever. This I believe, because I was really going to make something else (Saffron Hut's Dahiwale Baingan) with the aubergines, not combine it with rice! But I found out a little too late that my sour cream had perished of old age (when it's a fuzzy green on top, you can pretty much be sure of its demise) and I didnt want to use yogurt. So there went that idea.
Then, since there was some leftover rice from yesterday, I decided to marry the aubergine to the rice. Not such an unlikely pairing, really, going by the end result.
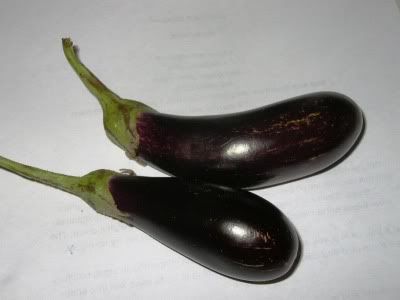
I want to say here that Saffron Hut's instructions worked out really well. She said to use the long thin kind of aubergines. So I did. She said to marinate the cut aubergines in a ginger-garlic-salt mix. So I did. She said to place it thereafter in a colander and put a bowl of water on top to squeeze out the bitter juices. So I did. And my goodness, did that ever work! It was pretty surprising to see just how much liquid got squeezed out. The aubergines also picked up the flavour of the marinade, according to feedback from my husband.
I pretty much followed the original recipe until the aubergines were cooked. Then I sauteed cumin seeds, coriander powder, mustard seeds and a bay leaf in a little oil and cooked two thinly sliced onions to a nice golden brown. (I would have added a few minced green chillies had I been making this for anyone but Pete - but he isnt fond of chillies really... something to do with HIS tastebuds, apparently!) Mixed in the rice and last of all, added the cooked aubergines. Served with a nice chilled tomato raita, this was quite a hit with Pete.
And because my taste buds rebel at the idea of eating aubergines, no matter how delectably cooked, I had toast and marmalade for dinner.
Recipe for: Kathirikkai sadham (curried brinjal/aubergine/eggplant rice)

Ingredients:
4 cups rice, cooked
2 cups sliced Japanese aubergines (cut them in half lengthwise, then slice into 1/2-cm thick half-moons)
2 tsp ginger-garlic paste
2 fresh green chillies, cut into very thin rounds (optional)
1 tsp salt
4 tsp oil
2 medium onions, sliced thin
1 tsp coriander powder
1 tsp whole cumin seeds
1 tsp mustard seeds
5-6 fresh curry leaves
1/2 tsp garam masala (optional)
2 tsp fresh coriander leaves, for garnish
Method:
1. Sprinkle salt over the aubergines, then mix with the ginger-garlic paste. Place in a colander, and put something heavy on top (a large bowl of water is what I used), so that the bitter juices drain away.
2. In a pan, heat 2 tsp oil and pop the mustard seeds and green chillies if using. Add in the sliced aubergines and stir well.
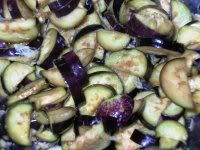
3. Cook on medium high, stirring occasionally, until the aubergine is cooked and acquiring brownish spots. Ser aside.
4. In a large pan, heat the remaining oil. Add the curry leaves, cumin seeds, coriander powder and garam masala and fry for 30 seconds until the cumin seeds turn a darker shade of brown.
5. Add the sliced onions, mix well and cook on medium high, until they start to turn golden brown. (Add an extra tsp of oil if you wish.)
6. Put in the rice and stir well, keeping it on the heat until it is warmed through. Mix in the cooked aubergines and check for salt.
7. Serve hot with a side of chilled tomato or cucumber raita, pickle and papads.

