skip to main |
skip to sidebar
I call it "special" only because I made it for Diwali - but maida chips are really basic when it comes to savoury snacks! Still, like a lot of fried things, they're very more-ish. Although I love all the savouries made for this festival, I have to say I lack the patience to make a lot of items. At this point I can only think back in complete admiration to those days when my grandmother/mother would make what seemed like TONNES of items!
One especially enduring memory for me is from when we were in Dar-es-Salaam, Tanzania. I remember my mother making an entire bucketful of "mixture" - literally a mix of a variety of savoury snacks. You could add as many items as you wanted to the mixture - the more the merrier. You could find everything ranging from fried peanuts, ribbon pakoda, thenkuzhal, fried chana, omapodi, cashewnuts, potato crisps, fried aval or poha, maida chips and so on. The really amazing thing was that my mother made each and every item separately, all by herself. At the end of that marathon effort, there was literally a bucketful of mixture - 17 kilos of it! This is a true story - I double checked with my mother just to make sure I hadnt had a hallucination!
Nowadays I doubt many people go to that much trouble, since very good quality sweets and savouries are easily available in the shops. Even my mother thinks back on to those 17 kilos of mixture with a considerable amount of awe - she cant imagine doing that sort of thing today. Not at home, certainly. I suppose caterers and cooks at weddings are the only people who are nowadays used to making such huge quantities!
I would probably have gone to more effort this Diwali if I'd had family or friends visiting! Maybe next year...
Recipe for: Maida "chips"

Ingredients:
4 cups flour (2:2 AP and wholewheat, if desired)
Water to make dough
1 tbsp chilli powder (or to taste)
2 tbsp sesame seeds
1/2 tsp asafoetida powder
1-1/2 tbsp butter
Salt to taste
10-15 curry leaves, chopped (optional)
Oil for frying
Method:
1. Put all the items (except the oil!) in a large bowl. Knead into a firm but elastic dough. Keep covered for 10 minutes.

2. Heat the oil in a large pan.
3. While it is heating, pinch off a tennis-ball sized piece from the dough. Roll it out into a thin circle. The thinner the circle, the crisper the chips will be.

4. Using a pizza cutter, cut the circle into strips.

5. Then cut it across again to make square or diamond shapes.

6. "Loosen" the chips using a thin-edged metal plate (or anything else that has a thin edge), being careful not to mush the pieces too much. Do not worry if the pieces seem to stick to each other - once they are in the oil, they will separate out.

7. Gather up the pieces on the plate and carefully slide into the hot oil. If there are any clumps, loosen them carefully with the spatula.

8. Fry the chips on medium heat, turning them over occasionally, until they are golden brown and crisp. Drain on kitchen paper. Store in an airtight tin and they will easily keep for two weeks and more (if you dont eat them all before that!).
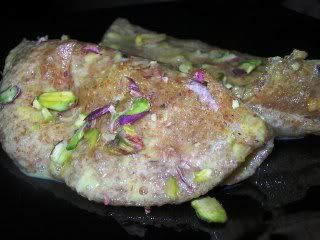
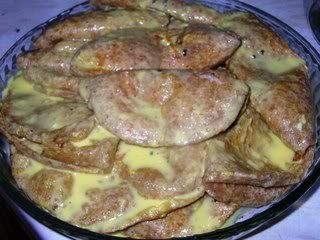
Pal poli (fried puris in sweetened flavoured thickened milk) is one of the sweets I love - I've been wanting to make it for ever but the thought of making the milk reduction (or syrup, I suppose, for want of a better word) kind of put me off. I knew it would be a slow, time-consuming process. Even the thought of the finished pal poli wasnt enough temptation to try making it.
About the only time I take extra EXTRA trouble to cook something is on special occasions. Deepavali has to be counted among those special occasions, so my offering this year in the sweets section was pal poli. I didnt have a specific recipe as such, because (so I thought) it seemed simple enough - puris soaked in sweetened reduced milk. I knew how to make puris. I was pretty sure that simmering the milk for an hour would reduce it. How difficult could that be, right?
Well, strictly speaking, it wasnt difficult... but I made a blunder or two. I didnt know I was supposed to add some oil or ghee while making the dough, so my pal poli turned out a bit hard. Also I used whole-wheat flour rather than all-purpose or maida. So the poli didnt look particularly attractive. (Could have added some yellow food colouring but that thought didnt cross my mind when it could have been useful.) Plus I guess I didnt roll out the puris thin enough. The milk syrup was fantastic in flavour, but the poli themselves were rather leathery. Oh well, live and learn.
Recipe for: Pal poli
Ingredients:
For the poli:
2 cups all-purpose flour (or use 1:1 wholewheat and AP)
1 tbsp oil or ghee
2-3 drops yellow food colouring (optional)
Water to make a firm but elastic dough
For the milk syrup:
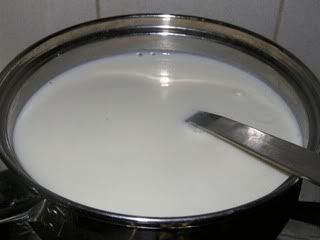
5 cups milk
3/4 cup sugar (make it 1 cup if you have a very sweet tooth)
Seeds of 8-10 cardamom pods, powdered
1/2 tsp saffron strands
Oil for frying
Thinly sliced almonds/pistachios, lightly toasted, for garnish
Method:
1. Make a firm, elastic dough with the flour, ghee and water (use 2-3 drops yellow food colouring if you wish). Cover and set aside.
2. Boil the milk and sugar in a heavy saucepan, then bring the heat down to a simmer and keep cooking the milk, stirring often to prevent a skin forming.
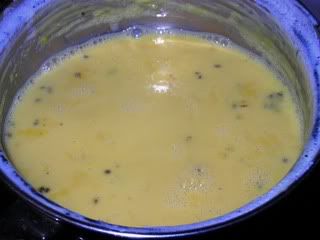
3. After about 10 minutes, add the saffron strands. Continue stirring the milk on a low simmer until it thickens and reduces to about a third in volume. (This should take about 45 minutes or so.)
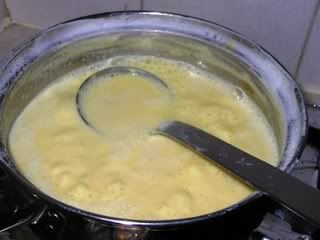
4. Add the cardamom powder and stir. Cover with cling film, with the cling film touching the surface so as to prevent a skin forming on the milk. Set aside till required.
5. Meanwhile, pinch off lime-sized balls of dough and roll them out into thin round puris.
If the puris stick to the board, dip each ball of dough very lightly in some oil (pour about a tsp in a saucer - should be enough to make all the puris) and roll out. Using flour to dust the puris would make the oil cloudy while frying, and the excess flour would also burn in the oil, giving the puris an unpleasant taste.
6. Heat the oil in a pan and deep-fry the puris. Let them drain on paper towels.
7. Dip each puri in the hot thickened milk till submerged (tongs are very useful here!), fold it in half and lay it on a serving platter.
Continue till all the puris are done. Pour over any remaining milk and sprinkle with the toasted almonds/pistachios. Serve warm or chilled.
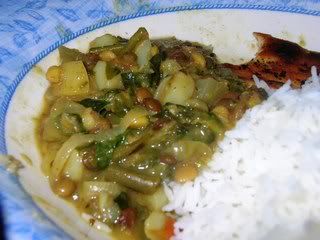
After making that fantastic smelling dhansak masala powder, the next thing to do - obviously - was use it. So I made dhansak with lots of vegetables. I tried to find what sounded like an "authentic" Parsi recipe for dhansak online, but ended up chasing dhansak recipes all over the Net, hopping from site to site until I'd wasted so much time, I finally had to resort to an amalgamation of what I remembered from all the recipes I'd read. Otherwise dinner would never have materialised. Good thing Pete was late coming back from work!
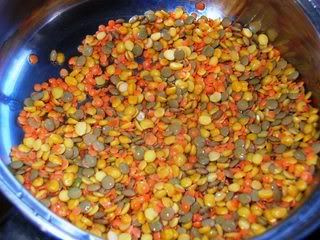
Of course, since I had made the dry dhansak masala powder, I didnt have to make a "wet" masala. I used a mix of chana and masoor dal and what's called "green lentils" in the supermarkets here. Puy lentils in other words, although I'm not really certain of that. Anyway, the last-mentioned lentils hold their shape well even when cooked and dont mush up - I like them! I guess you can use tur, urad or even moong dal, I suppose. Whatever's at hand and to your taste.
Recipe for: Vegetable Dhansak
Ingredients:
1 cup mixed dals (I used chana, masoor and green lentils)
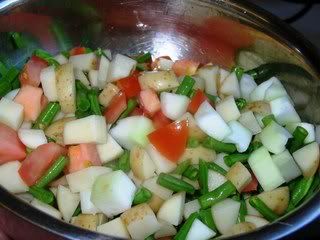
2 cups vegetables cut in medium chunks (potatoes, carrots, green beans, tomatoes)
1/2 tsp turmeric powder
1 cup fresh spinach or methi (fenugreek greens), chopped
1 large onion, chopped
1 tsp ginger-garlic paste
4-5 fresh green chillies, finely chopped or ground to a paste with the ginger and garlic (use chillies to taste or omit altogether)
1 tbsp dried fenugreek leaves (optional)
1 htsp dhansak masala powder
2 tsp oil
Salt to taste
Method:
1. Cook the dals till tender and done, not necessarily mushy, on the hob or in a pressure cooker. Drain, mash lightly and set aside.
2. Cook the vegetables on the hob with just enough water (to which the turmeric has been added) to cover, until done. Reserve.
2. Heat the oil in a pan and fry the ginger-garlic paste. Add and fry the onions till they're soft and turning brown.
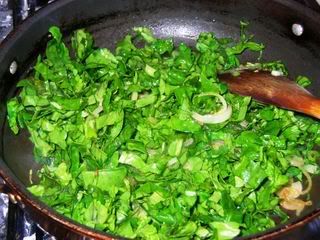
3. Then add the greens and stir well, sprinkle 2 tbsp water over it. Lower the heat, cover the pan and let the greens wilt, about 5 minutes.
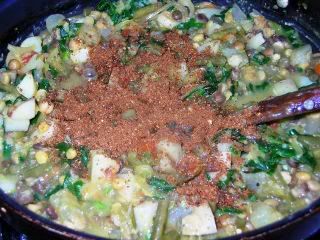
4. Add the dhansak masala along with the vegetables and stir well to mix.
5. Finally add the cooked dals and mix in gently. Add salt to taste.
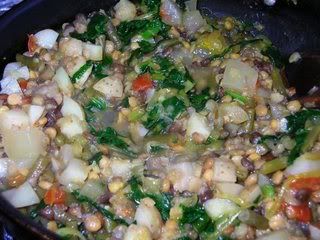
6. Let the dhansak simmer gently for 10 minutes, stirring gently from time to time. After you turn the heat off, let the dhansak sit tightly covered for a few hours, to let the flavours mellow a little. Re-heat before serving hot with with plain rice.
When I made garam masala to send as part of my Blogging By Post parcel, I also took the opportunity to make some dhansak masala for myself. The basic recipe is from here but I added a couple or three items extra to the list.
This recipe makes about 6 tbsp of masala powder. Store tightly sealed in a tin or box. Also use this masala sparingly because it is VERY strong. The flavour can be overwhelming if you use a large dollop of it the way one sees non-Indian chefs do it on cookery programmes (at least they do here in the UK). A little of this masala goes a long way. And makes fantastic dhansak, I might add.
(Oh by the way, I'm only going to mention in passing that dhansak is a typically Parsi dish. There's plenty of info about Parsis and their lovely cuisine floating around the Net so I wont bother to go on about it here! There. I'm done.)
Recipe for: Dhansak masala powder
Ingredients:
8-10 dry red chillies (reduce or even omit if you dont like chillies)
2 tsp cumin seeds
5 tsp coriander seeds
2 tsp mustard seeds
2 dried bay leaves
6 tsp fennel seeds
4" piece cinnamon stick
1 tbsp black peppercorns
1 tsp fenugreek seeds
1/2 tsp cardamom seeds
Seeds of 1 black cardamom
4 cloves
1 tsp sesame seeds
1/2 tsp nutmeg powder
Method:
1. Dry roast all the items (minus the nutmeg powder) one by one on a medium flame till they become aromatic.
2. Let them all cool down, then grind to as fine a powder as possible. Store in a tightly sealed jar for maximum freshness.
 The original recipe for this is from Kamala Swaminathan, a featured chef on the site Ammas.com. I had printed it off despite not having any curry leaves at that time (about a couple of years back, I guess, when I was a regular on that site), in the hope of getting to make it one day when I had lots of fresh green curry leaves.
Well, that day finally happened. The last time I went shopping for Indian veggies, I bought two packs of curry leaves because for once, they looked fresh. I guess they will never be as fresh as picked fresh off a plant, but at least they werent wilting brown and curling up. Most of the leaves went into the freezer - curry leaves freeze beautifully and as long as they go straight from freezer into pan without defrosting, they dont lose their lovely aroma or turn black.
Anyway, I remembered the recipe I'd downloaded and decided on the spot to make curry leaves kuzhambu. I guess tender leaves are best for this recipe, but I wasnt pushing my luck. Getting them fresh was a near miracle in itself - asking for tender was kind of like looking a gift horse in the mouth! :)
The kuzhambu tasted pretty much like thengai/eruvalli kuzhambu that is popular in Tamil Nadu - except, of course, that it had the added strong wonderful aroma of curry leaves. Definitely a recipe I'll be trying again - especially when I can get freshly plucked karuveppilai!
Recipe for: Karuveppilai (curry leaf) kuzhambu

1/2 cup fresh curry leaves (tender if possible)
1 onion, chopped fine
1 tsp tamarind paste
1/2 tsp red chilli powder (or to taste)
1 tsp coriander powder
1/2 tsp turmeric powder
1 tsp fenugreek seeds, powdered
3 tsp oil
3-4 dried red chillies
2 tbsp fresh grated coconut
1 tbsp rice flour
1 tsp mustard seeds
1/2 tsp asafoetida powder (optional)
Salt to taste
Method:
1. Dissolve the tamarind paste in 4 cups water along with the red chilli powder, coriander powder and turmeric powder. Stir well and reserve.

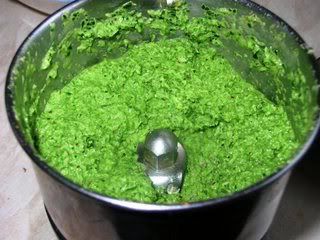
2. Heat 1 tsp oil in a saucepan and fry the curry leaves for a minute, stirring until they turn shiny.

3. Remove the curry leaves from the pan and grind them to a smooth paste with the rice flour, coconut and dried red chillies. Reserve.
4. In the same pan, add another tsp oil and fry the fenugreek powder for a few seconds, then add the chopped onions and cook till they begin to turn transparent.

5. Pour in the reserved spiced tamarind water and let it come to a boil. Turn the heat down to medium high, letting it simmer briskly for about 10 minutes or till the onions are well cooked.
6. Now add the ground coconut paste and mix well. Let the mixture simmer for another 5 minutes. Add salt to taste.
7. Meanwhile, heat a tsp of oil in a small pan. Sizzle the asafoetida powder in it for 5 seconds, then add the mustard seeds. COver and let them pop, then add the tempering to the kuzhambu. Serve hot with plain rice and any dry vegetable or kootu.
This recipe appeared in my inbox from a yahoo food group to which I subscribed a long time ago - the clincher for me was the lemon icing in the recipe. I love the sharpness of fresh lemon juice toned down by the sweetness of the powdered sugar - tart and sweet, mmmmm... what a flavour combination!
It's an easy cake (as always, a major criterion when I try out a new cake recipe) although actually this time my cake sank in the middle, for whatever reason. Not that I was bothered - I just turned it upside down and iced the nice flat bottom! :) Come to think of it, though... if anybody can take an educated guess as to WHY the cake sank, please do let me know. I havent had a cake sink in a very long time and I dont really have a clue as to why this one did.

The cake tasted extremely lemony and fresh. I have to say that the pistachio nuts didnt stand out in it particularly, taste-wise... perhaps they were too mild to stand up to the lemon. Pete suggested using walnuts the next time - maybe their slight bitterness would be tempered by the lemon without the walnutty flavour being overwhelmed.
Still, nice cake!
Recipe for: Lime and pistachio cake

Ingredients:
1-1/4 cups flour
1 tsp baking powder
1/2 tsp baking soda
2 large eggs
3/4 cup sugar
1/3 cup butter or margarine
Grated zest of two limes
Juice of 1 lime
1/4 cup chopped pistachio nuts
For icing:
1 cup icing sugar
Juice of 1 lime
2 tbsp toasted chopped pistachio nuts
Method:
1. Pre-heat the oven to 180C/350F. Grease a 7" round baking tin and dust lightly with flour.
2. Melt the butter/margarine and set aside to cool.
3. In a large bowl, beat the eggs and sugar till fluffy and pale.
4. Add the grated zest, lime juice and nuts and stir in.

5. Sift in the flour, baking powder and baking soda and stir till incorporated. Last of all add the lukewarm melted margarine/butter and mix well.
6. Pour the batter into the prepared tin and bake till the cake tests done.

7. Remove from the pan after 10 minutes and let cool completely on a wire rack.
8. To make the icing, stir the lime juice into the powdered sugar till smooth and spreadable.
9. Cover the top of the cake with the icing and let it dribble down the sides at random. Sprinkle the toasted pistachio nuts over the top.

