skip to main |
skip to sidebar
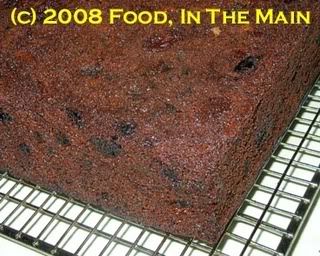
Anybody remember the powering-up war-cry of He-Man (of He-Man and the Masters of the Universe fame) – “Iiiiiiiiiiiiiiiiiiii’ve got the POWER!”? Well, if this cake had a voice – and the exaggerated V-shaped over-muscular animated cartoon body of He-Man - that’s what it would be shouting – “Iiiiiiiiiiiiiiiiiiiiiiiii’ve got the POWERRRRR!”. And it would be right, it’s got dried goji berries, blueberries, cranberries, sour cherries and currants, not to mention almonds, and if that doesn’t make a powerful cake, I don’t know what does.
Recipe for: Power fruit cake

Ingredients:
1/2 cup brown sugar
1 cup butter, cut into pieces
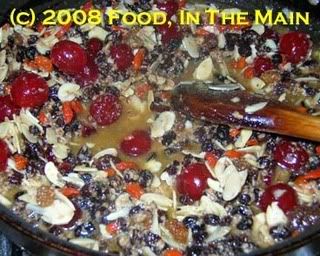
2 cups mixed fruit (I used cranberries, goji berries, blueberries, dried sour cherries and currants)
1/4 cup sliced almonds (or other chopped nuts of choice)
1 tsp mixed spice
1/4 tsp clove powder
1/4 tsp cinnamon powder
1/4 tsp cardamom powder
1/2 pint milk
1 cup glace cherries washed of excess syrup and dried on kitchen paper
2 eggs, beaten
1 cup self-raising flour
1 tsp soda bicarb
Method:
1. Place the sugar, butter, fruit, spices and milk in a large saucepan and bring to the boil.
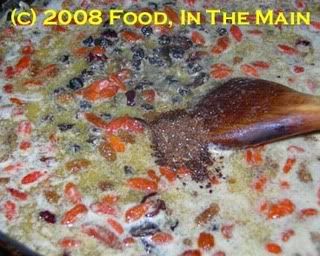
Boil for a minute or two, then switch off the heat and let the mixture cool. It might look curdled as it cools, but dont worry, all will be well.
2. Preheat the oven to 160C.
3. Add the nuts to the fruit mixture and stir,
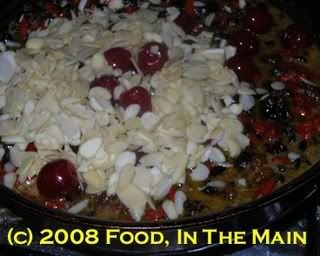
then add the beaten eggs and mix well.
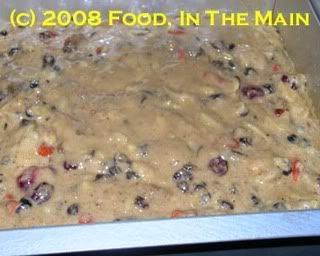
4. Add the flour and fold through the mix. The batter will be quite thick.

6. Place the mixture in a greased, deep square 8" cake tin.
Bake for about 1 hour, checking that the cake isnt burning on the top, after about 30 minutes. If it looks like browning too quickly, cover the top with brown paper.
7. The cake might need more than an hour to cook, or less, depending on the sort of oven you have. After 40 minutes, check the cake with a skewer to see if it's cooked. If not, check every 7 minutes until the tester comes out clean.
8. Cool in the cake tin for 5 minutes, then turn out onto a wire rack and cool completely.
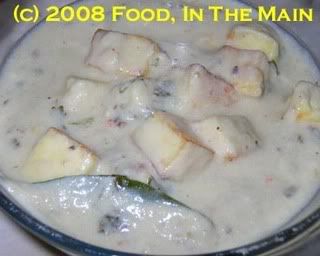
I’ve never made a gravy for paneer with just yogurt as the main ingredient, and it only happened because I didn’t have a tomato in the house. There must have been a blue moon in the sky because normally I’m NEVER without tomatoes – unfortunately I didn’t look out of the window to check. Not that looking out would have helped because it was a dreary, cold, rainy evening with nothing to look at but soggy, dripping vegetation. No self-respecting moon would have bothered to light up.
Anyway, this yogurty paneer was pretty good, although since the chilli levels were low on account of Pete, he liked the dish much more than I did. Besides, I kept having to fight off the feeling that I’d been cheated of something “real”, much as I did when, as a kid, my grandmother would make what we called “mor(u)-chaar(u)” – basically seasoned and tempered buttermilk - and serve that up as the first course of a meal. Usually this was when she hadn’t had enough time to make something more substantial, but what did I know or care about her kitchen dilemmas at that age! All that bothered me was that her quickfix solution was cheating me of a more interesting first course!
I usually put up a bit of a grumble because to me, the buttermilk wasn’t a “real” kuzhambu or gravy – not like sambar or even mor-kuzhambu (which has a spicy ground coconut masala to jazz it up). I guess my main gripe was that, with the curds only thinly disguised as the “chaar”, we ended up with curd rice for both courses. (My naaku was always neeLam – literally, that my tongue was always long… *heh* idiomatically, meaning that I had a keen sense for – and appreciation of - good food) right from when I was young.
Recipe for: Paneer in cashewnut-yogurt gravy
Ingredients:

1-1/2 cups fresh-made paneer cut into ½” cubes
1” piece ginger
2-3 cloves garlic
1 tsp coriander seeds
1 cm piece cinnamon bark
2 dried red chillies (or to taste)
7-8 cashewnuts
2 onions quartered and separated
1-1/2 cups low-fat Greek yogurt
1 bay leaf
1 cup water
2 tsp oil
2 tbsp coriander leaves
Salt to taste
1. Fry the paneer in 1 tsp oil till golden, and reserve.
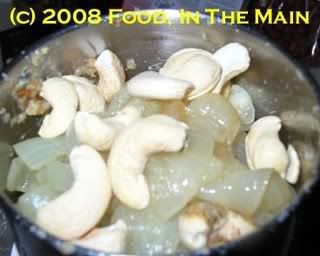
2. Put the onions in a saucepan and pour in just enough boiling water to cover them.

Cover the pan and simmer the onions for 6-7 minutes or till cooked (it will look transparent and soft). Cool (retain the cooking water if there is any left).

3. Grind the ginger, garlic, coriander seeds, cinnamon and red chillies if using into a fine paste. Reserve.

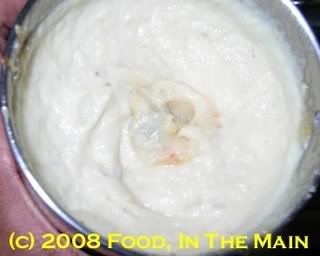
4. Next, grind the boiled onions with the cashewnuts to a smooth paste.
5. Heat the oil in a pan and fry the ginger-garlic paste for a minute or so. Add the bay leaf now.

6. Then add the cashewnut paste and stir for another minute.

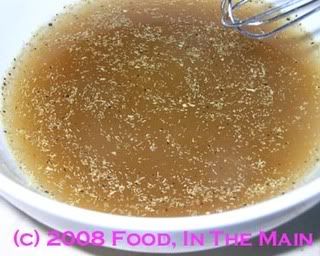
7. Pour in a ladleful of yogurt, stirring briskly, then add the rest of the yogurt and stir well to mix the contents thoroughly.

8. Add a cupful of water and stir, then bring the gravy to a gentle simmer. Add the paneer pieces and stir.

9. Simmer for 5-6 minutes, then sprinkle over the coriander leaves.

Serve hot with rotis.
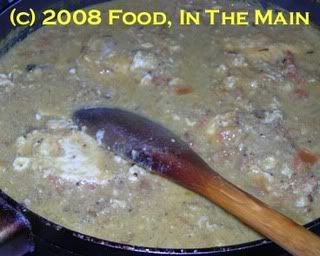
I’m no photographer, so even the most beautiful looking food becomes a little less beautiful seen through my camera lens – oh all right, a LOT less beautiful. So when it comes to food that isn’t straightforward, fuss-free food porn fodder, I really don’t stand a chance at making it look pretty. All I can promise is that it will taste great – like this poached egg curry I made. Original recipe here
I was in a rush and didn’t have the time to let the gravy boil down to the sort of thicker consistency I wanted, so I quickly whisked a beaten egg into the gravy to thicken it. Well, that worked fine, but what I hadn’t foreseen was that the beaten egg would make the gravy look like… well, let’s just say not particularly aesthetic.
Food porn to the eyes it wasn't, sisters (and the odd occasional brother)… but it was food porn for the palate, that’s fer sure. I probably wouldn’t serve this curry to guests as such, but it’ll do just fine for family and good friends! (That’s because they’ll have to love you to want to try this - ok, slight exaggeration):o) seriously, though, it’s good comfort food.
Recipe for: Poached egg curry

Ingredients:
4 eggs
2 onion, chopped
2 tomatoes, chopped
1/4 cup light coconut milk
1/4 tsp turmeric powder
1/2 tsp garam masala
1/2 chilli powder
3/4 tsp black peppercorns
1 tsp coriander seeds
1/2 tsp white poppy seeds (khus-khus)
1 tsp fennel seeds (saunf)
1 tsp mustard seeds
1/2 tsp urad dal
A few curry leaves
1 tbsp chopped coriander
2 tsp oil
1 cup water (or as required)
Salt to taste
Method:
1. Grind the coriander seeds, poppy seeds (khus-khus), fennel and black pepper to a fine powder.

Mix with 1 cup water and set aside.
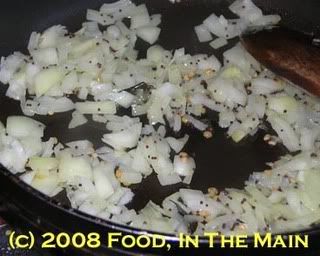
2. Heat the oil in a pan, add mustard seeds and urad dal, cover and let the mustard splutter. Then add the curry leaves and chopped onions. Fry till the onion becomes soft and light brown.
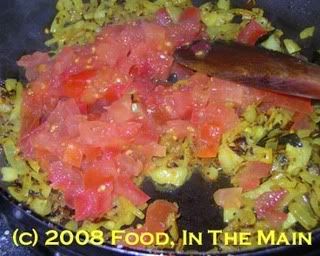
3. Now add the chopped tomatoes and fry till it becomes soft.
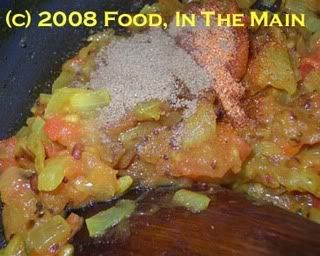
4. Add chilli powder, garam masala and turmeric powder and fry for 30 seconds, stirring.
5. Mix the coconut milk with the ground-masala water from Step 1.


Add salt to taste and mix well.
6. Pour this in the pan,

let it come to a boil,

then break the eggs gently, one by one, into the gravy.

7. Do not stir the gravy after this, but let it come to a gentle simmer and keep it on medium heat for 5-6 minutes, or till the eggs are cooked.
8. Garnish with coriander leaves and serve hot with plain rice or pulao.
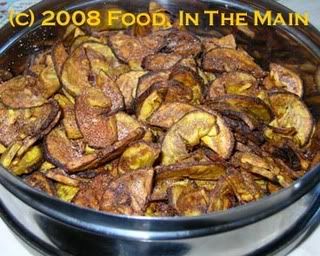
If anybody out there is wondering if plantain chips are better baked from raw or baked from parboiled, I have the answer: It doesn’t matter much either way. And if that same person (or persons) - or a different person (or persons) – is also wondering if they taste good when overbaked, the answer is a resounding NO.
Overbaking these chips is a bad, bad idea because then they turn into something resembling wood chips in looks, texture and taste. They’re very, very hard on the teeth (for obvious reasons), but what you might not know is that they’re also murder on the eardrums - because the noise that results in your head when you crunch them is off the decibel scale altogether. You can’t hear anything else for a while, so you get some quiet time to reflect on whether you’ve just shattered a plantain chip or your favourite chewing tooth, and come to the realisation (for the nth time) that it’s a bad idea to leave the kitchen and settle down with a book while the oven is on and an even worse idea to forget about what’s in the oven…
(Modus operandi in case of absent-minded overbaking:
1. Suddenly remember chips in oven.
2. Rush to oven and open the door.
3. Rear back from the rush of smoke and heat, bang the oven door shut.
4. Switch off the oven.
5. Search frantically for a magazine or a newspaper to wave at howling smoke detector in the foyer and hopefully stop the noise before some neighbour calls the firemen.
6. Open the doors and windows to get rid of the smoke.
7. Rush back to smoke detector and wave at it some more, cursing its sensitivity. 8. Cautiously return to oven to check on the condition of plantain chips within.
9. Repeat Step 7, but with more cursing.
10. Throw away burnt offering and restart baking procedure with second batch of parboiled plantains.)
Optional – Put away temptingly readable book for the duration. If not, see procedure as above.
Notwithstanding the above, if you do it right, you do get crunchy - but not deafening - plantain chips. Never as tasty as the fried kind, but definitely on the right side of palatable.
PS. I deep-fried a small handful of the parboiled plantains… and oh boy oh boy, were they goooooood! (My friend A, visiting at the time, might be able to endorse that. She missed the original burning ceremony, luckily for her.)
Recipe for: Oven-baked plantain chips - 2

Ingredients:
1 large plantain, lightly peeled, sliced 1/4 cm thick
2 tbsp oil (or oil spray)
Salt to taste
Spices to taste
Method:
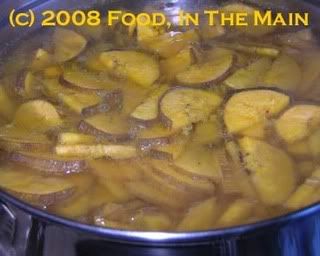
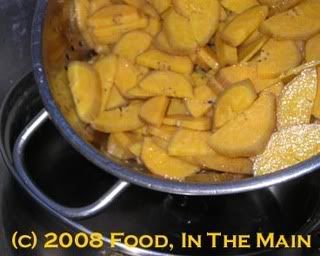
1. Parboil the plantain slices by putting them in boiling water for 5-6 minutes.
2. Drain water, pat slices reasonably dry with paper towels.
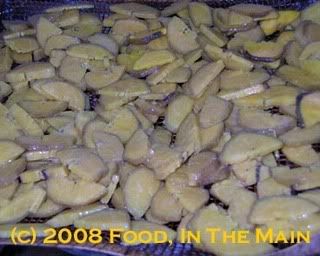
3. Line a baking tray with foil, spray foil with Pam or other cooking spray.
4. Toss the plantain slices with salt, spices and oil in a bowl, then spread on the prepared tray.
5. Bake at 180C (350F), turning the chps over after 12 minutes,
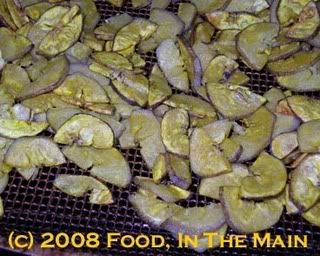
to crisp them evenly. Remove when done, cool and store in an airtight box.
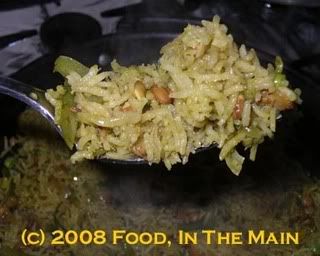
When I made this pulao, it was with the intention of submitting it for Sra’s Legume Love Affair. After I made it, though, I had a sudden rush of doubt… were green lentils legumes? I couldn’t remember if legumes meant just beans, or whether lentils were included under that heading.
I’m afraid this story doesn’t have much suspense in it – or even a story – and even I couldn’t spin it out to my usual preposterous lengths… because, when I googled “Are lentils legumes?”, Google promptly – and unsuspensefully - informed me that yes, they are. End of story. No more suspense.
But yay, this recipe can go out to Sra for the 4th Legume Love Affair – and it is. I do love it when a plan comes together!
What’s more, this also qualifies for Srivalli’s Rice Mela, so I’m sending it off there as well.
Now I'm twice as satisfied.
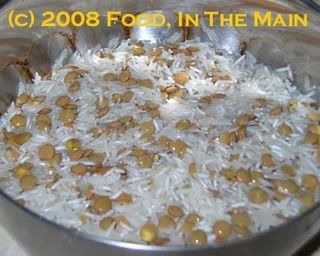
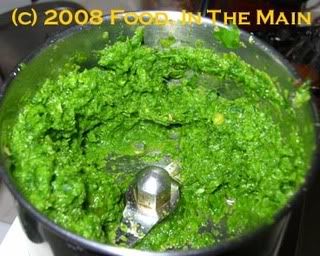
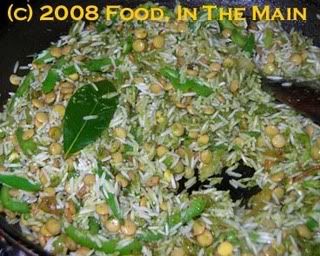
Recipe for: Green lentil pulao
Ingredients:
Wash well and soak together, for at least 30 minutes: ½ cup green or puy lentils (or any lentils that keep their shape when cooked)
2 cups basmati rice
Grind to a smooth paste:
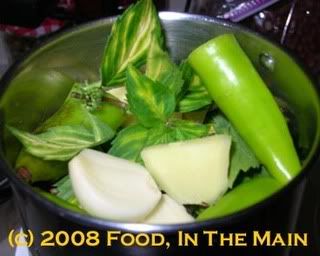
10-15 fresh mint leaves
¼ cup coriander stems (preferably) or leaves
1” piece ginger
4 fat garlic cloves
3-4 fresh green chillies (or to taste)
½ tsp coriander seeds (green ones if possible)
Vegetables and spices:
1/2 cup onions, sliced thin
1 medium tomato, chopped
1/4 cup green beans, sliced
1/4 cup frozen green peas
1/4 cup green bell pepper
1 tsp cumin seeds
1 bay leaf
2 tsp oil
Salt to taste
About 3 cups water or whey (I use rice:liquid ratio of 1:1.5)
Method:
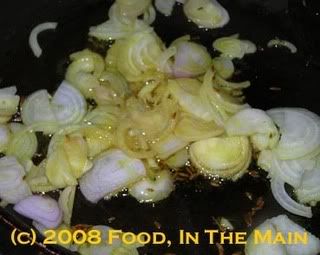
1. Heat 2 tsp oil in a large pan (which has a tight-fitting lid). Add the cumin seeds and fry for 30 seconds, then add the sliced onions and fry till they start softening.
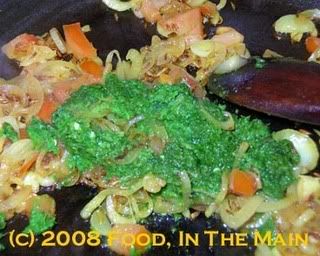
2. Add the chopped tomato and stir fry for 2 minutes,

then scrape in the mint paste and fry it on medium heat for 3 minutes, stirring till it begins to change colour.
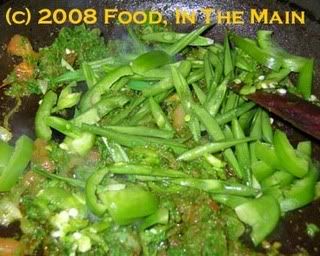
3. Now add the sliced vegetables and stir well, then let them cook for 5 minutes or so.
4. Next, add the soaked rice-lentils and bay leaf, stir till well mixed.
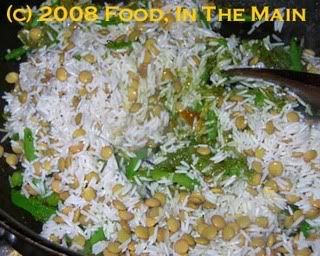
Turn the heat up to high and fry this, stirring continuously, for 2-3 minutes, till the rice grains begin to turn opaque.
Add salt to taste, then pour in the water (or whey, if you have it).
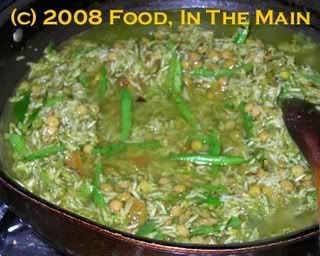
Stir well again, then turn the heat up again.
5. Once the water comes to a rolling boil, turn the heat right down, cover the pan and let the rice and vegetables cook for 15 -18 minutes, undisturbed, then turn off the heat. Let the pulao rest for 15 minutes. Ideally, do not lift the lid at all during this time.
6. After 15-20 minutes, lift the lid, sniff at the aroma, fluff the rice with a fork and serve hot with a cool cucumber raita.


