skip to main |
skip to sidebar
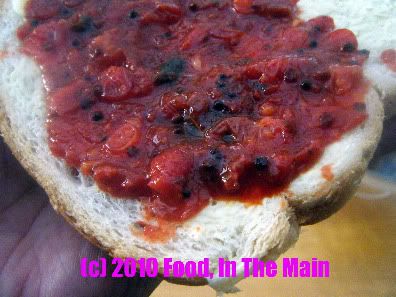
 Of all the recipes that I’ve tried with redcurrants, this jam is probably the best by far. I’m no jam maker, in part because it seems like a complicated procedure requiring sugar thermometers and pectin and setting temperatures and water baths and ultra-pasteurised (is that the right term for glass jars or is it only used to describe milk?) glass jars and so on. I’m not that big a fan of jam, in any case – although I guess I must confess to sometimes being taken over by a strawberry-conserve-“veri” (Tamil word for “frenzy”) and eating posh strawberry conserve straight out of the jar with a spoon, never mind the toast. I get that way with orange marmalade too, occasionally. But those are pretty rare occasions.
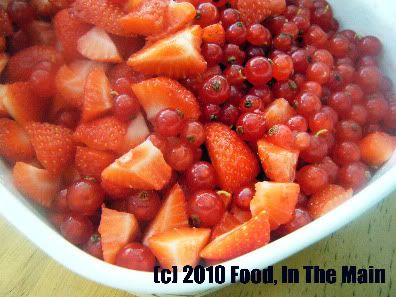
Like I’ve said earlier, when it came to redcurrants, I’d only ever heard of redcurrant jelly, but never tasted it – and still haven’t, if it comes to that. I’m still unsure if “redcurrant jelly” is the American for “redcurrant jam”. In any case, when I decided I would try making redcurrant jam, I also had a box of strawberries in the fridge, slightly too overripe for consumption but not yet at the stage of supporting fungus colonies. I googled redcurrant-strawberry jam recipes and bingo! up popped this one. It wanted 600 gms each of redcurrants and strawberries and twice as much sugar. It also came with jam-making instructions incorporating the use of a sugar thermometer which I don’t have and doubt I’ll be getting any time soon. So I did what I normally do in when there are instructions that I don’t care for – I ignored them.
I used a mixture of Splenda and sugar for the jam. I didn’t use pectin-rich sugar because I didn’t have any and to my mind I wasn’t making “serious” jam – I was just going to cook up two kinds of berries for an impromptu jam… but I also had the vague idea that strawberries naturally contain pectin anyway. So be warned, my instructions for this recipe are:
1. Kind of vague
2. Definitely not what serious jam-makers would approve of or follow.
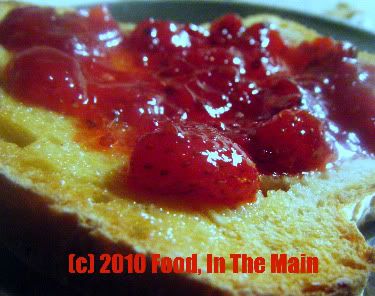
But if you don’t care about that, you’ll end up, like I did, with about 200gms of a sweet-tart jam that sort of explodes on your taste buds. It is just SO right on toast and for rolling up inside chapaties. Jam to my mind can’t really be filed under “mouthwatering” but I’ll make an exception in this case. It IS mouthwatering.
Recipe for: Redcurrant-strawberry jam
Ingredients:
1-1/4 cups redcurrants
1-1/2 cups strawberries
3/4 cup Splenda
1/2 cup sugar
2 tbsp fresh lemon juice
Method:
1. Chop the strawberries into 1-cm pieces. Place in a lidded container along with the redcurrants.
2. Add the sugar and Splenda to the berries.
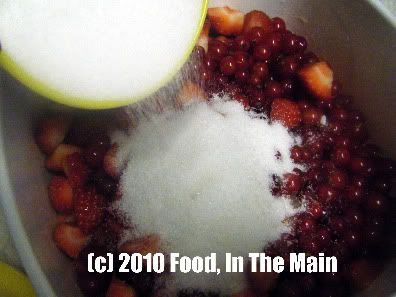
3. Toss together till the ingredients are mixed.

Place in a fridge overnight, tightly covered, so that the sugar melts and the berries release their juices.
4. The next day, place the fruit in a heavy-based saucepan along with the juices. Scrape out any sugar that may be stuck to the container. Bring the fruit to a gentle simmer to make sure that all the sugar is dissolved.
5. Once the sugar has all dissolved, bring the fruit to a boil.
Cook for 12-15 minutes, scraping around the sides of the pan once in a while, to stop the sugar crystallising. The jam is done when the juices are reduced and the fruit is no longer watery.
6. Turn off the heat, then add the lemon juice.
Mix well. The jam should be quite thick. It should thicken further on cooling.
7. Transfer the jam to a clean glass jar and let cool completely. It's lovely spread on scones along with thick cream. Or on toast. Or rolled up in chapaties...
RECIPE: REDCURRANT-STRAWBERRY JAM
Ingredients:
1-1/2 cups strawberries
3/4 cup Splenda
1/2 cup sugar
2 tbsp fresh lemon juice
Method:
1. Chop the strawberries into 1-cm pieces. Place in a lidded container along with the redcurrants.
2. Add the sugar and Splenda to the berries.
3. Toss together till the sugar is evenly distributed. Place in a fridge overnight, tightly covered, so that the sugar melts and the berries release their juices
4. The next day, place the fruit in a heavy-based saucepan along with the juices. Scrape out any sugar that may be stuck to the container. Bring the fruit to a gentle simmer to make sure that all the sugar is dissolved
5. Once the sugar has all dissolved, bring the fruit to a boil. Cook for 12-15 minutes, scraping around the sides of the pan once in a while, to stop the sugar crystallising. The jam is done when the juices are reduced and the fruit is no longer watery.
6. Turn off the heat, then add the lemon juice. Mix well. The jam should be quite thick. It will thicken further on cooling.
7. Transfer the jam to a clean glass jar and let cool completely. It's lovely spread on scones along with thick cream. Or on toast. Or rolled up in chapaties.
 This is the third recipe using redcurrants that I’ve tried. My overwhelming impression of these gloriously pretty little berries is that they’re enamel-shrivellingly sour. Lemons and limes have nothing on them. They don’t appear to have a flavour of their own, except for the sourness – did I say they’re sour? – which I might have mentioned before. A few times, even.
But used in judicious amounts as a souring ingredient, the redcurrant thokku I made as my first redcurrant recipe really came into its own. I’d been wanting to try a carrot thogayal recipe which I’d marked a few months ago, and instead of using tamarind paste, I added two tsp of the redcurrant thokku to, if I may say so myself, brilliant effect. If you don’t have redcurrant thokku, don’t worry – just cook 2 tsp redcurrants until the berries soften and break down, before adding your grated carrot, and all will be fine.
The redcurrant-carrot thogayal stays good for only a couple of days at room temperature. I didn’t refrigerate it, so I don’t know its shelf life when stored in the fridge. But acting on the general rule of thumb for thogayals, which is that refrigeration does not improve the taste any, I’ll go out on a limb and say it’s best to make the thogayal in small amounts and use it up while it’s fresh.
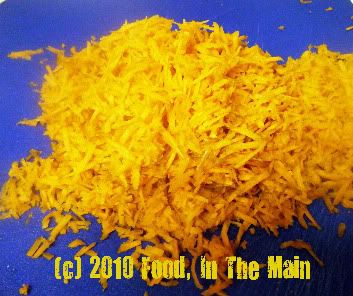
Recipe for: Carrot redcurrant thogayal

Ingredients:
1 cup carrots, grated
1 small tomato, chopped/2 heaping tbsp roasted tomatoes
2 small onions, sliced thin
2 tbsp redcurrants/2 tsp redcurrant thokku
1 tbsp urad dal
1/4 tsp asafoetida powder
1/4 tsp saunf (fennel) seeds
5-6 dried red chillies - or to taste
2-3 fresh green chillies (optional)
2 cloves garlic, chopped
3 tsp oil
10-12 fresh or frozen curry leaves
a big handful of fresh coriander leaves
Salt to taste
Method:
1. Heat the oil and add the asafoetida powder, turmeric powder, urad dal, red chillies, fennel seeds, garlic and curry leaves.
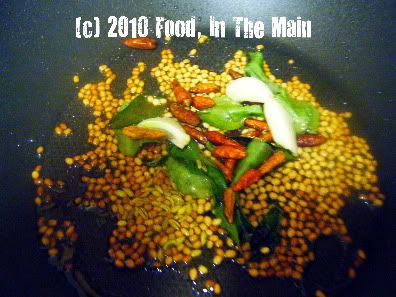
Fry till the dal turns golden and the red chillies are a darker shade of red.
2. If you are using raw redcurrants, add them now and cook them on medium high heat until they break down - about 5-7 minutes.
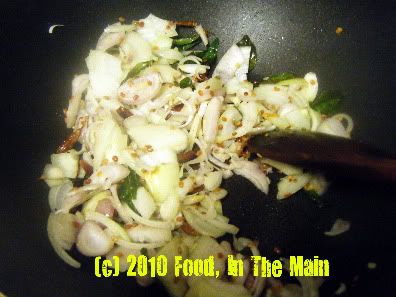
3. Add the sliced onions and fry till they start to become soft and translucent.
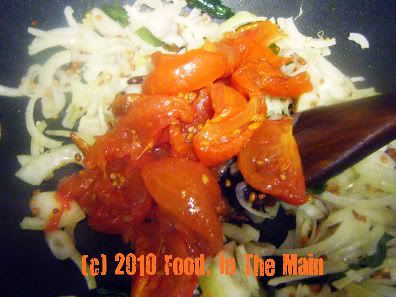
4. Now add the chopped/roasted tomatoes and stir them in, and let cook for 3-4 minutes till they become mushy.
5. Add the grated carrots along with the green chillies and mix well.

6. If you're using redcurrant thokku, add it now and mix in.
7. Let the carrots cook for 5 minutes or so, until they become soft. Then add the coriander leaves and mix in.

8. Let the cooked mixture cool completely, then grind to a coarse consistency. You will not need any added water. Add salt to taste and mix well. Serve with plain cooked rice, dal and a vegetable curry. Or serve as a side for dosas, idlis and so on, and to make sandwiches.
RECIPE: CARROT REDCURRANT THOGAYAL
Ingredients:
1 cup carrots, grated
1 small tomato, chopped/2 heaping tbsp roasted tomatoes
2 small onions, sliced thin
2 tbsp redcurrants/2 tsp redcurrant thokku
1 tbsp urad dal
1/4 tsp asafoetida powder
1/4 tsp saunf (fennel) seeds
5-6 dried red chillies - or to taste
2-3 fresh green chillies (optional)
2 cloves garlic, chopped
3 tsp oil
10-12 fresh or frozen curry leaves
a big handful of fresh coriander leaves
Salt to taste
Method:
1. Heat the oil and add the asafoetida powder, turmeric powder, urad dal, red chillies, fennel seeds, garlic and curry leaves.
Fry till the dal turns golden and the red chillies are a darker shade of red.
2. If you are using raw redcurrants, add them now and cook them on medium high heat until they break down - about 5-7 minutes.
3. Add the sliced onions and fry till they start to become soft and translucent.
4. Now add the chopped/roasted tomatoes and stir them in, and let cook for 3-4 minutes till they become mushy.
5. Add the grated carrots along with the green chillies and mix well.
6. If you're using redcurrant thokku, add it now and mix in.
7. Let the carrots cook for 5 minutes or so, until they become soft. Then add the coriander leaves and mix in.
8. Let the cooked mixture cool completely, then grind to a coarse consistency. You will not need any added water. Add salt to taste and mix well. Serve with plain cooked rice, dal and a vegetable curry. Or serve as a side for dosas, idlis and so on, and to make sandwiches.
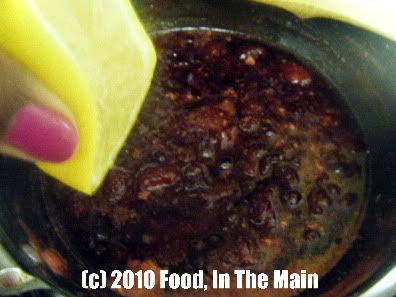
My first ever experiment with cooking with redcurrants was redcurrant thokku. It was, despite my best efforts, still rather too sour to be used as a mix for cooked rice - according to the feedback received from my palate. The best I could do with the thokku was use it – sparingly - as a condiment with (any) dal and rice.
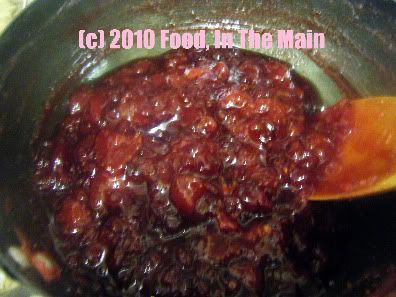
So, with the second of the three batches of redcurrants, as a further experiment, I made thokku with the addition of roasted tomatoes, which I usually have to hand in the fridge because roasted tomatoes make everything taste better. Need I add that “everything” is limited to whatever is made USING the roasted tomatoes? No, I thought not. (But I’ve added it anyway, in case there’s someone whose answer to that question was “Yes”. *heehee*)
This thokku was more readily palatable, with the sourness of the berries tempered by the sweetness of the roasted tomatoes. It’s as nice mixed with plain rice as any regular tomato thokku, and is also a good accompaniment for dosas, idlis and the like. The verdict from my palate, which while admitting that quality-wise this thokku is the much better improved version, also insists that it’s best had in smaller portions than regular tomato thokku. So there you have it – my palate has spoken.
Recipe for: Roasted tomato redcurrant thokku
Ingredients
1-1/4 cups redcurrants, washed and drained
2 cups chopped roasted or regular tomatoes, pureed
2 tbsp oil
2-3 cloves garlic
1 tsp cumin-coriander powder
1 htsp brown/black mustard seeds
5-6 fresh curry leaves
1/4 tsp asafoetida powder
1/4 tsp turmeric powder
1 tsp sambar powder (optional)
1 tsp jaggery
1 tbsp lemon juice
3 tsp red chilli powder (or to taste)
1/4 tsp roasted fenugreek seed powder
salt to taste
Method:
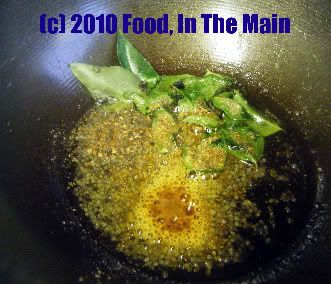
1. Heat the oil, add the garlic, cumin-coriander powder, mustard seeds, curry leaves, asafoetida powder and turmeric powder. Stir for 30 seconds or so.
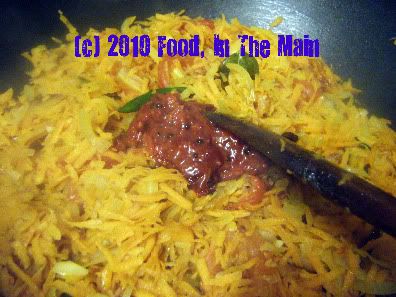
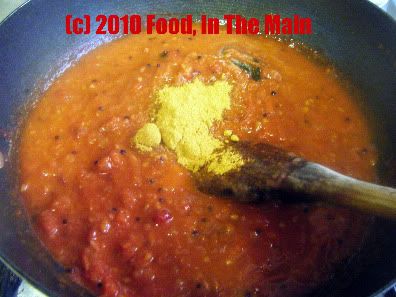
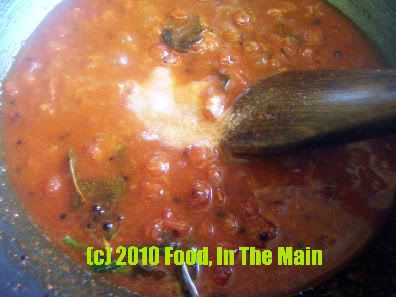
2. Add the redcurrants and red chilli powder. Mix well, cooking the berries on medium low flame until they are soft and squashed.
3. Now pour in the pureed tomatoes and mix again.
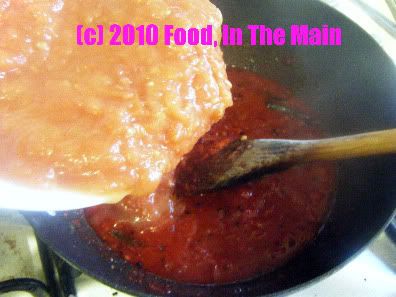
4. Bring the mixture to a boil, stirring every so often, then bring down the heat to low and let it bubble gently for 12-15 minutes, till it is thick. Add the sambar powder now, along with the jaggery and salt to taste.
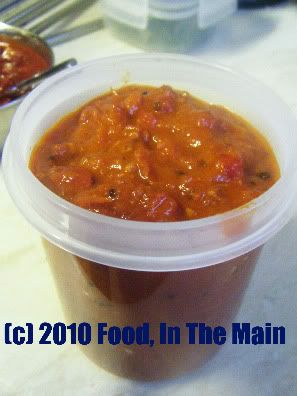
Stir well. If the thokku is a bit watery, let it cook for another 5 minutes on medium heart and leave the thokku on the heat for a couple of minutes longer. There should not be any liquid in the thokku, it should be quite thick. If you like a smooth texture, puree the thokku after it cools down.

Let the thokku cool down completely before transferring to a clean jar with a tight lid. The thokku stays good for 2-3 days at room temperature. Mix with plain rice to make tomato rice with a difference, or serve as a side dish with dosas, idli etc.RECIPE: ROASTED TOMATO REDCURRANT THOKKU
Ingredients:
1-1/4 cups redcurrants, washed and drained
2 cups chopped roasted or regular tomatoes, pureed
2 tbsp oil
2-3 cloves garlic
1 tsp cumin-coriander powder
1 htsp brown/black mustard seeds
5-6 fresh curry leaves
1/4 tsp asafoetida powder
1/4 tsp turmeric powder
1 tsp sambar powder (optional)
1 tsp jaggery
1 tbsp lemon juice
3 tsp red chilli powder (or to taste)
1/4 tsp roasted fenugreek seed powder
salt to taste
Method:
1. Heat the oil, add the garlic, cumin-coriander powder, mustard seeds, curry leaves, asafoetida powder and turmeric powder. Stir for 30 seconds or so.
2. Add the redcurrants and red chilli powder. Mix well, cooking the berries on medium low flame until they are soft and squashed.
3. Now pour in the pureed tomatoes and mix again.
4. Bring the mixture to a boil, stirring every so often, then bring down the heat to low and let it bubble gently for 12-15 minutes, till it is thick. Add the sambar powder now, along with the jaggery and salt to taste.
Stir well. If the thokku is a bit watery, let it cook for another 5 minutes on medium heart and leave the thokku on the heat for a couple of minutes longer. There should not be any liquid in the thokku, it should be quite thick. If you like a smoother texture, puree the thokku after it has cooled down.
Let the thokku cool down completely before transferring it to a clean jar with a tight lid. The thokku stays good for 2-3 days at room temperature. Mix with plain rice to make tomato rice with a difference, or serve as a side dish with dosas, idli etc.
I don’t understand why the supermarkets start stocking their shelves with Christmas-oriented goods fully three months ahead of the actual occasion. It pisses me off extremely much, not that anyone cares. Any small enthusiasm for the festival that I might otherwise muster goes right down the drain when almost everything is advertised as “perfect as a Christmas present”. I don’t know about everybody else, but if anybody thought to give me an electric toothbrush (for example) as a Christmas present, they would very soon get it jammed up an orifice not situated in the face and not meant for toothbrushes - electric or otherwise.
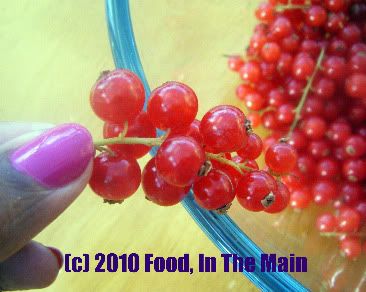
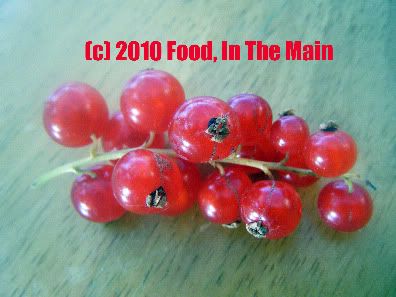
About the only thing I’m pleased about with regard to Christmas-oriented goods is when the produce shelves are stocked with things that are otherwise not to be found for the remainder of the year – cranberries, chestnuts, redcurrants, etc. Last week I found redcurrants on the shelves on a two-for-one offer, so I bought two boxes on an experimental basis. I’d never tasted redcurrants nor anything made with redcurrants. I thought this would be a good time to see what they were like and what I could make.
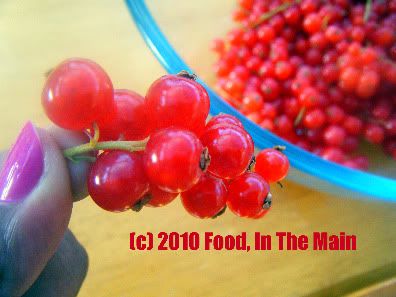
Here’s what I discovered: Redcurrants are sour. Mouth-puckeringly sour. Even when they'reinvitingly red and ripe, they're sharp enough to shrivel your fillings. There’s no way they could turn to sweet from that tart extreme - not without artificial help, anyway. They’re the most gorgeous looking berries, though… tiny, shiny and very red, like grape-bunches of little red rubies.
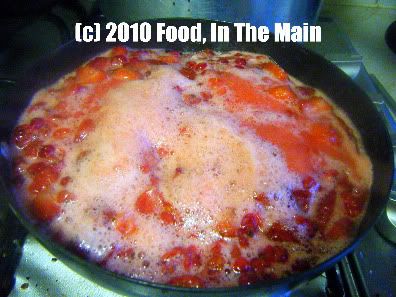
So, anyhow, eating those little rubies raw was out of the question. I googled redcurrant jam recipes and found one that combined redcurrants and strawberries. Perfect, because I had some somewhat squishily overripe strawberries in the fridge. But the recipe called for equal amounts by weight of both berries, and my strawberries were “currantly” (note the pun, note the pun!) outnumbered by about 2-1 in weight-y terms.
That was when I felt the Spirit of Enterprising Culinariness, so long dormant, take possession of me once again. (When one is possessed of this spirit, there’s nothing to do but give in to its directions.) Under its spell, I divided the berries into three more-or-less equal portions of about 1-1/4 cups. With the first portion I made redcurrant thokku/chutney. The thokku was a good use of the redcurrants, but the cooked-down berries retained so much of the tartness that the thokku had to go back on the hob for some repair-work. The ingredient quantities have been modified to reflect the “repair” so that you don’t have to cook the thokku twice like I did. But be warned, this is one sour chutney, best eaten along with dal and rice to give the meal extra zing. I ate it spread on toast, too.
Recipe for: Redcurrant thokku (chutney)
Ingredients:
1-1/4 cups redcurrants, washed and drained
2 tbsp oil
1 tsp cumin-coriander powder
1 htsp brown/black mustard seeds
5-6 fresh curry leaves
1/4 tsp asafoetida powder
1/4 tsp turmeric powder
2 tbsp sugar or jaggery
2 tsp red chilli powder
1/4 tsp roasted fenugreek seed powder
salt to taste
Method:
1. Heat the oil in a pan and add the cumin-coriander powder, curry leaves, mustard seeds and asafoetida powder.
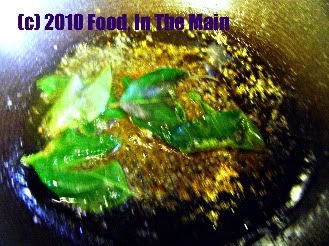
Fry them for about a minute, till the mustard seeds pop.
2. Add the redcurrants to the pan and stir well. Let them cook for 2-3 minutes.
3. Now add the turmeric powder and red chilli powder and stir again.

4. Let the redcurrants come to a gentle boil on medium heat, then stir in the sugar or jaggery.
5. Let the berries cook down on a low simmer for 10-15 minutes until they lose their shape. You can mash them with a spoon.
6. Add salt to taste and finally the roasted fenugreek seed powder. Mix well. The thokku is done when the mixture becomes thick. Let it cool, then store in a tightly covered container. This stays good for 4-5 days.
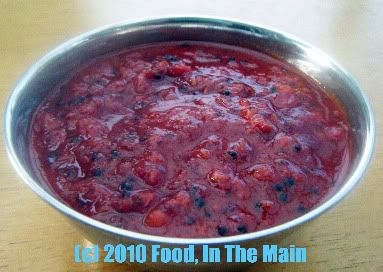
This redcurrant thokku is best used as a condiment with dal and rice.
RECIPE: REDCURRANT THOKKU (CHUTNEY)
Ingredients:
1-1/4 cups redcurrants, washed and drained
2 tbsp oil
1 tsp cumin-coriander powder
1 htsp brown/black mustard seeds
5-6 fresh curry leaves
1/4 tsp asafoetida powder
1/4 tsp turmeric powder
2 tbsp sugar or jaggery
2 tsp red chilli powder
1/4 tsp roasted fenugreek seed powder
salt to taste
Method:
1. Heat the oil in a pan and add the cumin-coriander powder, curry leaves, mustard seeds and asafoetida powder.
Fry them for about a minute, till the mustard seeds pop.
2. Add the redcurrants to the pan and stir well. Let them cook for 2-3 minutes.
3. Now add the turmeric powder and red chilli powder and stir again.
4. Let the redcurrants come to a gentle boil on medium heat, then stir in the sugar or jaggery. 5. Let the berries cook down on a low simmer for 10-15 minutes until they lose their shape. You can mash them with a spoon.
6. Add salt to taste and finally the roasted fenugreek seed powder. Mix well. The thokku is done when the mixture becomes thick. Let it cool, then store in a tightly covered container. This stays good for 4-5 days.
This redcurrant thokku is best used as a condiment with dal and rice.
The orange chocolate cake I’d made previously was so nice that I decided I’d take up a reader’s suggestion (thanks, Shvetha) and try out an eggless version. This time around, I boiled the orange in the microwave for about 10 minutes, in two tranches of 5 minutes each. It could take a couple of minutes more or less, depending on your microwave’s wattage/power, so go easy after the first 5 minutes. Of course, make sure to “drill” the orange through with a skewer, before microwaving it.
I don’t really know first-hand what would happen if you microwaved an orange that was not hole-y (what, did you think I’d pass up the opportunity for a godawful pun?). I don’t think it would explode, at least going by a video I watched on You Tube of three idiotic guys doing exactly that experiment. (I did my research, as you can see.) The orange didn’t explode for them - much to their disappointment - but since I wasn’t sure that my orange would refrain from creating an unhole-y mess in the microwave, it went in sanctified, thereby NOT going kablooey.
Anyway, microwaving the orange is MUCH quicker than cooking it on the hob till it’s soft, and I totally recommend it.
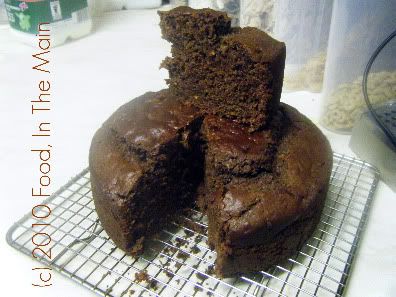
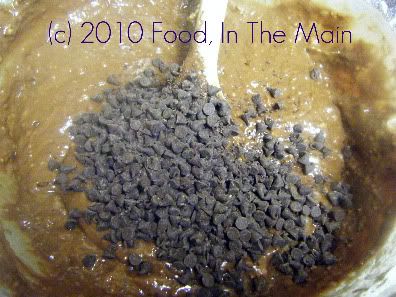
The rest of the ingredients are more or less the same as for the previous cake, sans eggs, of course. I substituted some of the sugar with Splenda, but it's not a "must-do" thing at all. This cake was actually even better than the eggy version, in my opinion – it tasted gooey and moist while looking quite deceptively fluffy. The cake keeps well for a couple of days under cover. I didn’t make any frosting this time, because I didn’t have any chocolate left, but I added ½ cup mini chocolate chips to the batter to intensify the chocolate experience.
Recipe for: Eggless chocolate orange cake
Ingredients:
2-1/4 cup all-purpose flour
2 tsp baking powder
1 tsp baking soda
120 gm dark chocolate, melted
1/2 tsp salt
3/4 cup splenda
1/2 cup sugar
1/2 cup oil
1 large Seville orange
4 tsp vinegar
1 cup milk
2 tsp orange oil extract
1 tsp vanilla extract
1/2 cup mini chocolate chips
Method:
1. Pierce the orange with a skewer 3-4 times, then place in a bowl of water and microwave it for 8-10 minutes.
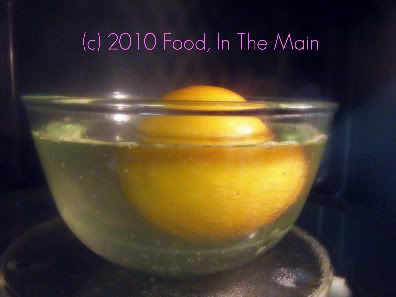
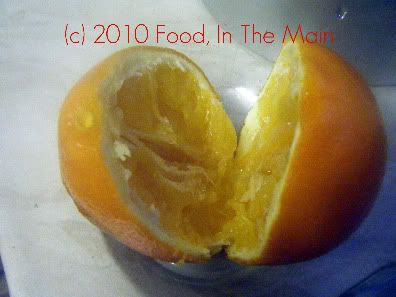
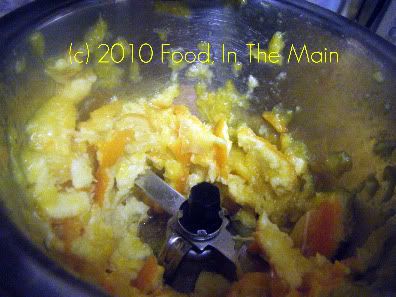
Throw away the water, let the orange cool, then puree it finely. Set aside till required.
2. Sift the flour, baking soda, baking sugar and salt.
3. Add the sugar and splenda and mix well.
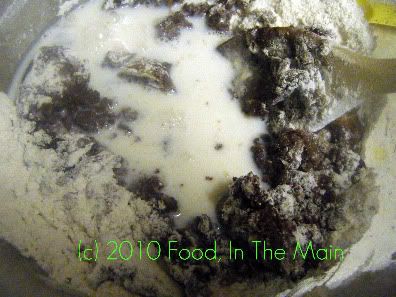
4. Make a well in the centre, and add the melted dark chocolate, the pureed orange, vinegar and oil.
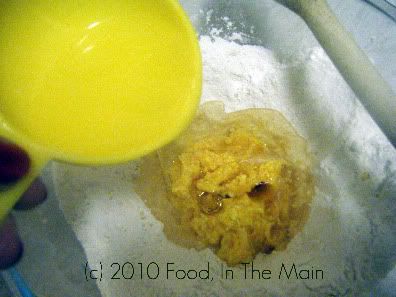
Stir this well, then add the milk and stir till thoroughly mixed.
5. Add the orange and vanilla extracts and mix them in.

6. Finally, add the chocolate chips and fold them gently into the batter.
7. Pour the batter into a 9” round baking tin
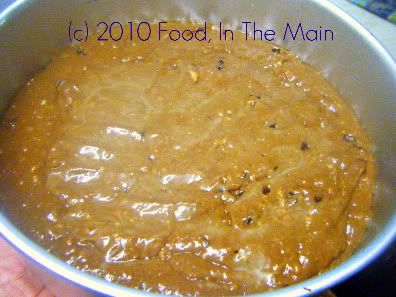
and bake at 180C till the cake tests done – this took about an hour in mine. To be on the safe side, check after 45 minutes.
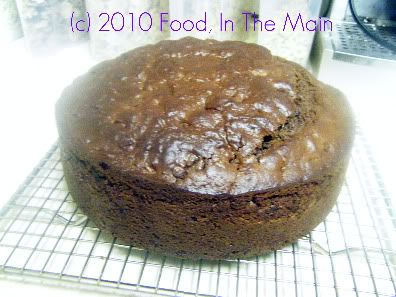
If desired, split the cake and fill with ganache frosting. RECIPE: EGGLESS CHOCOLATE ORANGE CAKE
Ingredients:
2-1/4 cup all-purpose flour
2 tsp baking powder
1 tsp baking soda
120 gm dark chocolate, melted
1/2 tsp salt
3/4 cup splenda
1/2 cup sugar
1/2 cup oil
1 large Seville orange
4 tsp vinegar
1 cup milk
2 tsp orange oil extract
1 tsp vanilla extract
Method:
1. Pierce the orange with a skewer 3-4 times, then place in a bowl of water and microwave it for 8 minutes. Throw away the water, let the orange cool, then puree it. Set aside till required.
2. Sift the flour, baking soda, baking sugar and salt.
3. Add the sugar and splenda and mix well.
4. Make a well in the centre, and add the melted dark chocolate, the pureed orange, vinegar and oil. Stir this well, then add the milk and stir till thoroughly mixed.
5. Add the orange and vanilla extracts and mix them in.
6. Finally, add the chocolate chips and fold them gently into the batter.
7. Pour the batter into a 9” round baking tin and bake at 180C till the cake tests done – this took about an hour in mine. To be on the safe side, check after 45 minutes.
If desired, split the cake and fill with ganache frosting.
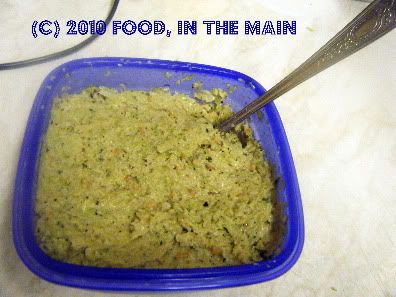
There's something I wanted to say before I began this post... I wonder what it was.... hmmm. Oh yeah. This recipe marks my 401th post. I can't help wondering how long it's going to take me to reach the 500 mark. When I see bloggers (like Raji at Talimpu) post one new recipe literally every day of the week (weekends not included), week after week, I cannot but feel genuine amazement and respect. I can bet that most of these bloggers have far, far busier lives than I do, with kids to look after and all... and yet I'm the one who is the least prolific. My problem is that I'd rather read than do anything else when I have the time - so I keep falling back on familiar recipes that don't take any extra time or effort. I've really got to change that procrastinatory attitude as well... I think I'll wait till the New Year for that, though. Yeah I know, pathetic. Joke and attitude both. However, I yam what I tuber, as Popeye would say... not. So, today's recipe is simple. Simple simple simple. In other words, simple. And, if you can reduce the oil-content to nil, it can quite literally be guilt-free (rather than almost guilt-free as it is now). The recipe is for cabbage thogayal/chutney, without using even a teaspoon of the dreaded coconut. It tastes so MUCH like the authentic version that it's unbelievable. Remember, I'm saying this as a person who's unable to fool her taste buds all of the time - I simply cannot bring myself to say that something is tasty when it is not... and sod how healthy it's meant to be. So if I say that this thogayal loses nothing but the cholesterol from the coconut while tasting exactly the same - believe me, it's true. My sister can vouch for it, too - both what I've just said and the thogayal. The first time I made it, I couldn't believe how yummy it was. I had to keep reminding myself that even if I ate ALL the thogayal at one sitting, it would still mean that I'd only eaten all the cabbage. It was an amazing realisation! Kind of like the way I felt when I started driving by myself after getting my licence - I had to keep reminding myself not to flinch if I saw a police car as I was a legitimate driver with a full driving licence! It took a while to stop feeling like a fraud. This thogayal, then, is the eating equivalent of your full driving licence, where you will need to feel neither guilty nor a fraud for eating all of it. The BEST part, however, is that you won't need a learner licence or pass any exams to get this licence. Is that a deal or is that a deal?Recipe for: Almost guilt-free cabbage thogayal
Ingredients:
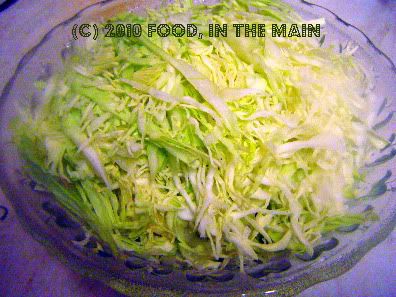
4 cups thinly sliced green cabbage
3-4 dried red chillies (or to taste)
2 tsp oil
1 tbsp urad dal
10 fresh curry leaves
1/2 tsp tamarind paste (or large marble-sized piece of dried tamarind)
1/4 tsp asafoetida powder
Salt to taste
Method:
1. Heat the oil in a frying pan and add the curry leaves, red chillies, urad dal and asafoetida powder.
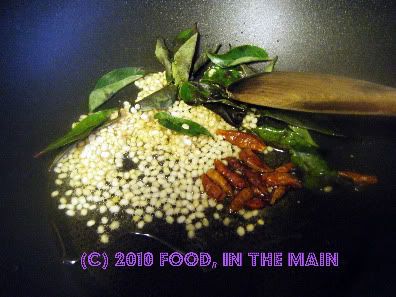
2. Fry these till the dals are golden brown and the red chillies a darker shade. Remove all the red chillies and most of the dal and curry leaves. Reserve for later.
3. Add the sliced green cabbage to the pan (adding a tsp oil more if you feel like it), stir well and let it cook on medium heat till the cabbage is soft and wilted.
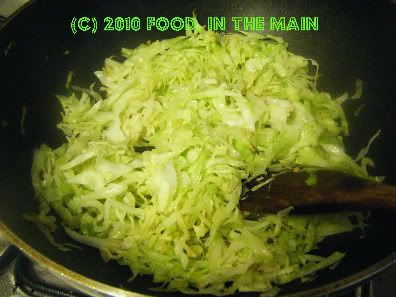
4. Let the cabbage cool.
5. Put all the chillies, the tamarind, and all but 1/2 tsp of the dal/curry leaves in a mixie along with some of the cabbage, and grind it to a smooth paste.
6. Now add the rest of the cabbage and grind to a more coarse paste. Add the remaining 1/2 tsp dal/curry leaves and give it all one quick final whirl so that the dal remains mostly whole to provide a bit of crunch.
7. Remove to a serving bowl and add salt to taste. Mix well and serve immediately with hot plain rice and ghee and any vegetable dish. This thogayal is also good as a side dish for dosas, idlis, etc and makes a great base for sandwiches.
Note: The thogayal's shelf life is not particularly good if left outside, especially in hot weather; any leftovers should be stored in the fridge in a tightly-closed container and used within 2 days.
RECIPE FOR: ALMOST GUILT-FREE CABBAGE THOGAYAL
Ingredients:
4 cups thinly sliced green cabbage
3-4 dried red chillies (or to taste)
2 tsp oil
1 tbsp urad dal
10 fresh curry leaves
1/2 tsp tamarind paste (or large marble-sized piece of dried tamarind)
1/4 tsp asafoetida powder
Salt to taste
Method:
1. Heat the oil in a frying pan and add the curry leaves, red chillies, urad dal and asafoetida powder.
2. Fry these till the dals are golden brown and the red chillies a darker shade. Remove all the red chillies and most of the dal and curry leaves. Reserve for later.
3. Add the sliced green cabbage to the pan (adding a tsp oil more if you feel like it), stir well and let it cook on medium heat till the cabbage is soft and wilted.
4. Let the cabbage cool.
5. Put all the chillies, the tamarind, and all but 1/2 tsp of the dal/curry leaves in a mixie along with some of the cabbage, and grind it to a smooth paste.
6. Now add the rest of the cabbage and grind to a more coarse paste. Add the remaining 1/2 tsp dal/curry leaves and give it all one quick final whirl so that the dal remains mostly whole to provide a bit of crunch.
7. Remove to a serving bowl and add salt to taste. Mix well and serve immediately with hot plain rice and ghee and any vegetable dish. This thogayal is also good as a side dish for dosas, idlis, etc and makes a great base for sandwiches.
Note: The thogayal's shelf life is not particularly good if left outside, especially in hot weather; any leftovers should be stored in the fridge in a tightly-closed container and used within 2 days.
Wow, it’s been so long since my previous post that I feel like I’m starting a new blog and certainly the chances that I’ll need to accumulate a new fan base are pretty good, too. Not that I’m accusing anybody of neglect. I mean, I know better than anyone else how I keep pruning my link list according to how long the linked blog has been inactive. It wouldn’t be fair or sensible to expect people to continue to visit my blog over an indefinite period with nothing new to look at or read. Anyway, it’s been a combination of family emergency (all of July) and general sloth (all of August).
I did have a few folders with photographs of recipes I’d made prior to July, but the long gap undid my memory. In other words, I couldn’t remember the ingredient list/substitutions, or the steps involved. That’s the problem with winging it with recipes, exacerbated by a bad memory.
Anyway, to mark my return to the food blogging world, from this recipe on, I’ll be incorporating a small change to the sequence of steps involved in the recipe. This is something that I’ve seen on a blog that I (and a zillion others) enjoy reading – me mainly for the droll humour of Ree Drummond, but also because I’m fascinated by her cheerful use of vast quantities of butter and cream in practically every recipe. (I haven't yet tried any of her recipes, but chances are very good that when I do, it will be a baking recipe.)
I’ll be the first to admit that I’m not a fanatic about cooking healthy all the time, but she’s something else again. I love her bindaas attitude in the kitchen, but I have to assume that she does not indulge much in her own cooking, otherwise she would be top contender for “fattest woman in the USA”.
Looks like my train of thought has wandered off-track again. So, as I was saying, I’m – finally – going to incorporate something that the Pioneer Woman uses on her blog. No, not her sense of humour. I doubt I could do that. No, it’s the composite recipe that she gives at the end of each post, to make it easy for anyone who’s copy-pasting the recipe into a Word document to save on their computer. Right now, anybody who does that with recipes off my blog would find all the photos used in the recipe also being copied, forcing them to delete each photo from the Word document and all the extra space that the photos occupied for each step. It can be a pain if you want just the recipe and method without the photos (again, I’ve experienced it on other blogs), so I’m going to do as the Pioneer Woman does. Monkey see, monkey do.
I don’t think this is copyright infringement, as it’s not the contents of her blog or blogposts that I’m copying but just one stylistic element. At least, I hope I’m right. If anybody is more informed about this, please let me know.
So, finally, the recipe.
I wanted to make a chocolate-orange cake for my cousin and her husband who were visiting me last weekend, but I didn’t want it to be any recipe that I’d tried. It is always a risky affair to try a new recipe for guests without first doing a trial-run... but then I like to live life dangerously, sometimes (haha). I’d never used a whole cooked orange – peel, pith and all - in any cake, so I decided this would be the perfect occasion to try out the recipe. I didn’t know what a cooked, pureed orange would bring to the cake, but I kinda hoped that it would be a good, strong orange flavour – something I love. As it happened, the cake was nice and moist, but I have to say the orange flavour was not as pronounced as I’d hoped for. And this after I’d used orange oil extract as well! But it was a lovely cake, all the same.
For those who don’t like the taste of 85% cacao content dark chocolate, I suggest you use milk chocolate, or perhaps a lighter dark chocolate (as contradictory as that sounds). The cake as I made it is also on the less sweet side, because I used 90% dark chocolate to flavour the cake as well as for the frosting. If you stick with really dark chocolate, serve the cake with Chantilly cream or vanilla icecream to mellow the darkness a bit.
Recipe for: Dark chocolate orange cake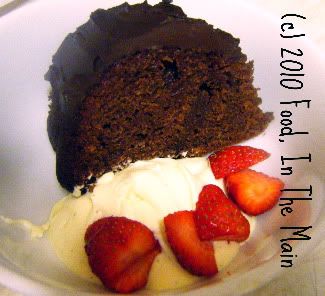
Ingredients:
1 large Minneolas or Seville orange
125g 85% dark chocolate , broken into pieces
3 eggs
1 cup caster sugar
1 cup sunflower oil 2 tsp orange oil extract
1-1/4 cup plain flour
1½ tsp baking powder
For the chocolate ganache
200g 85% dark chocolate, broken into pieces 1 tsp orange oil extract
225ml double cream
Method:
Ganache
Make the chocolate ganache first, as it will take time for it to cool to spreading consistency. To make the ganache, put the chocolate in a heatproof bowl. Heat the cream to boiling, then pour over the chocolate. Let it sit for 3 minutes, then stir till the mixture is glossy and smooth. Set aside until firm enough to spread.
Cake
1. Pierce the orange with a skewer (right through).

Cook in boiling water for 30 minutes until soft,
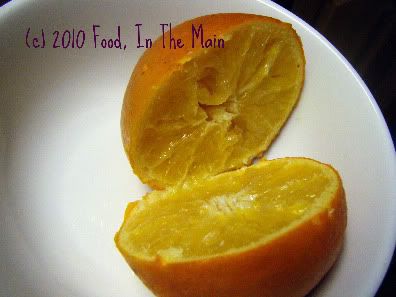
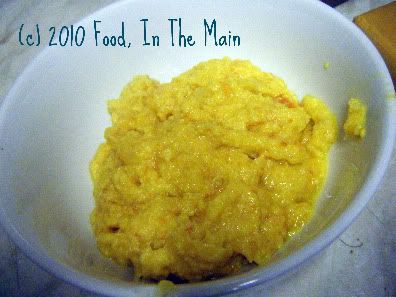
then puree it.
2. Preheat the oven to 180/375F. Spray a round 9" cake tin (or a bundt tin) with Pam.
3. Melt the chocolate in the microwave - 2 minutes on high, stir, then heat for 45 seconds at a time till melted. Let cool.
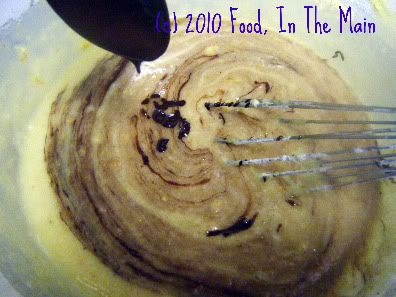
4. Place the sugar and oil in a large bowl, then add the eggs.
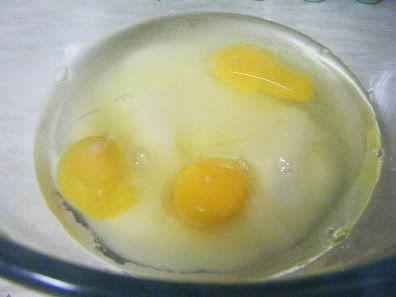
Beat them lightly till amalgamated, but dont whip it all to a froth.

5. Gradually beat in the puréed orange.
6. Sift the flour and baking powder, then add it to the batter.
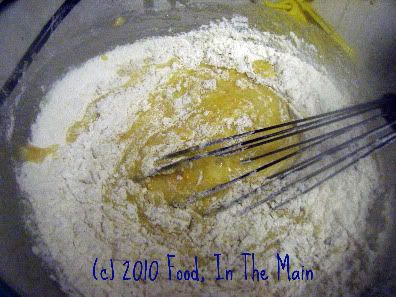
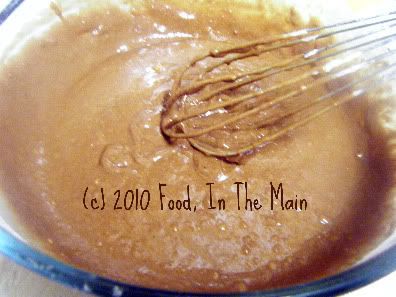
7. Stir in the cooled melted chocolate
and mix well.
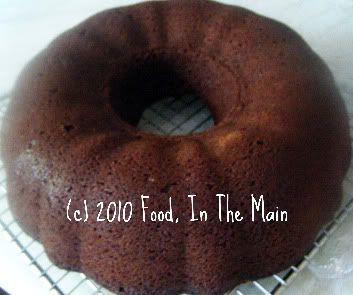
8. Pour into the prepared tin and bake in the centre of the oven until the cake tests done - in my oven it took about 60 minutes. Allow to cool for 10 minutes in the tin, then turn out on to a wire rack to cool completely.
8. Place the cake on a serving plate, then swirl the prepared ganache over the top (and sides if you like).
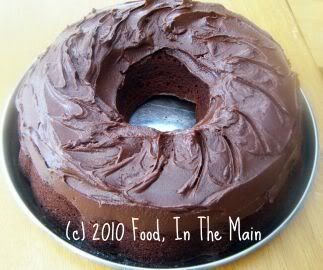
Serve at room temperature with vanilla icecream or Chantilly cream.
RECIPE: DARK CHOCOLATE ORANGE CAKEIngredients:
1 large Minneolas or Seville orange
125g 85% dark chocolate , broken into pieces
3 eggs
1 cup caster sugar
1 cup sunflower oil
1-1/4 cup plain flour
1½ tsp baking powder
For the chocolate ganache
200g 85% dark chocolate , broken into pieces
225ml double cream
Method:
Ganache
Make the chocolate ganache first, as it will take time for it to cool to spreading consistency. To make the ganache, put the chocolate in a heatproof bowl. Heat the cream to boiling, then pour over the chocolate. Let it sit for 3 minutes, then stir till the mixture is glossy and smooth. Set aside until firm enough to spread.
Cake
1. Pierce the orange with a skewer (right through). Cook in boiling water for 30 minutes until soft, then puree it.
2. Preheat the oven to 180/375F. Spray a round 9" cake tin (or a bundt tin) with Pam.
3. Melt the chocolate in the microwave - 2 minutes on high, stir, then heat for 45 seconds at a time till melted. Let cool.
4. Place the sugar and oil in a large bowl, then add the eggs. Beat lightly till amalgamated, but dont whip the eggs to a froth.
5. Gradually beat in the puréed orange.
6. Sift the flour and baking powder, then stir it into the batter.
7. Stir in the cooled melted chocolate and mix well.
8. Pour into the prepared tin and bake in the centre of the oven until the cake tests done - in my oven it took about 60 minutes. Allow to cool for 10 minutes in the tin, then turn out on to a wire rack to cool completely.
9. Place the cake on a serving plate, then swirl the prepared ganache over the top (and sides if you like).
Serve at room temperature with vanilla icecream or Chantilly cream.

