skip to main |
skip to sidebar
What does the term "salad" mean to you? Something with green leaves, tomatoes and cucumber and radishes, perhaps with a dressing? That's what denotes a salad to me - even now, when I know that practically anything can be a "salad".
I have to say it used to puzzle me. What is pasta salad, anyway? Or - a very strange thing to a South Indian - rice salad? Could South Indian lemon rice or tamarind rice be classified as rice salad?
I'm still not entirely sure why something that is not a salad when hot becomes a salad when cold. Examples? Well, pasta. Eat it cold, and it's a pasta salad. Eat it hot, and it's... well, pasta. Rice, too, undergoes that transition - especially if there's wild rice in there. Take couscous, too. Pizza Hut has cold couscous in its salad bar. When is couscous a side dish, and when is it a salad? More to the point, why is it a salad when it's cold? And then those hot salads - how do THOSE come about without becoming not-salad?
I don't mean any disrespect to the West when I say that perhaps everything is a "salad" here because they don't know how else to classify the various cooked foods from other cultures? What do you think?
This recipe could be a salad, or not. It could be a side dish. Or merely a form of couscous upma. Here's a thought - perhaps we Southies call everything "upma" because salads aren't really in our culinary heritage?
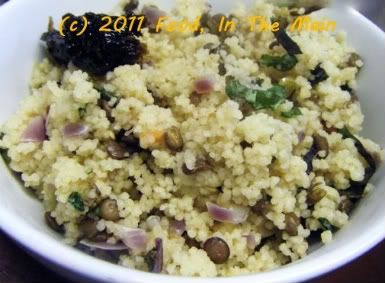
Because I don't know what to call my recipe - salad, side dish, upma, whatever - I'm terming it "couscous with lentils". At least it has the virtue of literalness.
Recipe for: Couscous with lentils
 Ingredients:
1/4 cup green lentils
1 bay leaf
1 cup couscous
1 red onion, chopped finely
2 green chillies, chopped
Ingredients:
1/4 cup green lentils
1 bay leaf
1 cup couscous
1 red onion, chopped finely
2 green chillies, chopped
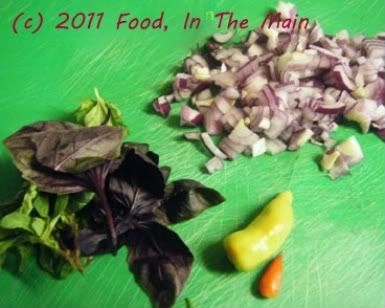 1 small tomato, chopped
2 cloves garlic, minced
a handful of fresh basil leaves
Salt and pepper to taste
about 1-1/2 cups vegetable stock (or water)
1 tsp oil
Method:
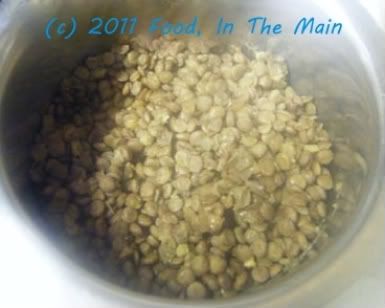
1. Cook the lentils in salted water along with the bay leaf, till they're cooked but not mushy.
1 small tomato, chopped
2 cloves garlic, minced
a handful of fresh basil leaves
Salt and pepper to taste
about 1-1/2 cups vegetable stock (or water)
1 tsp oil
Method:
1. Cook the lentils in salted water along with the bay leaf, till they're cooked but not mushy.
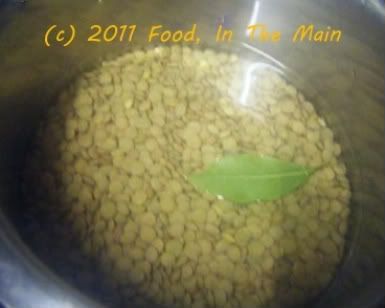 Drain and reserve.
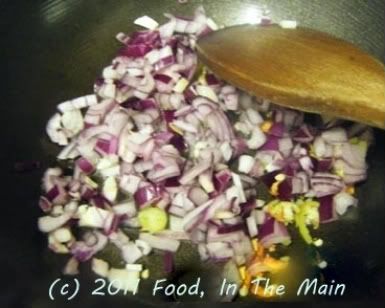
 2. In a medium size pan, heat the oil and add the chopped chillies, garlic and red onion. Stir well.
 3. Let the onions soften a little, then add the chopped tomato.
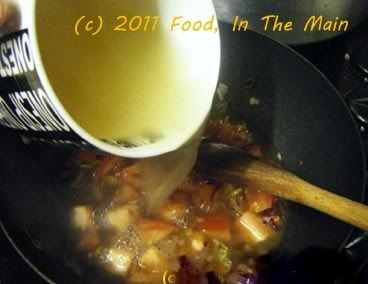
 4. Once the tomatoes are beginning to break down, pour in the stock and bring to a brisk boil.
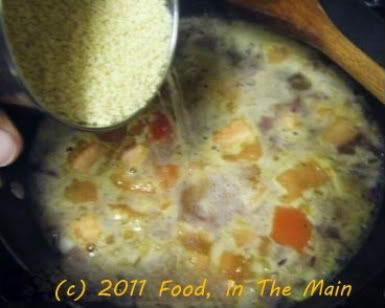
 5. Now add the couscous and stir it well. Add salt to taste and bring back to the boil.
 6. Turn off the heat and cover the pan with a well-fitting lid. Let the couscous rest for 10-15 minutes.
7. Once all the water has been absorbed, fluff up the couscous with a fork. Add the reserved lentils and freshly ground pepper to taste, and toss to mix, or fork it through to mix.
6. Turn off the heat and cover the pan with a well-fitting lid. Let the couscous rest for 10-15 minutes.
7. Once all the water has been absorbed, fluff up the couscous with a fork. Add the reserved lentils and freshly ground pepper to taste, and toss to mix, or fork it through to mix.
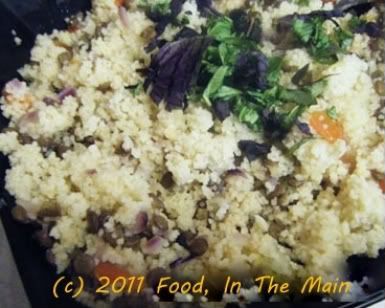 8. Garnish generously with shredded basil leaves and serve the couscous warm as a side with lamb dishes, or as a snack.
RECIPE: COUSCOUS WITH LENTILS
Ingredients:
1/4 cup green lentils
1 bay leaf
1 cup couscous
1 red onion, chopped finely
2 green chillies, chopped
1 small tomato, chopped
2 cloves garlic, minced
a handful of fresh basil leaves
Salt and pepper to taste
about 1-1/2 cups vegetable stock (or water)
1 tsp oil
Method:
1. Cook the lentils in salted water along with the bay leaf, till they're cooked but not mushy. Drain and reserve.
2. In a medium size pan, heat the oil and add the chopped chillies, garlic and red onion. Stir well.
3. Let the onions soften a little, then add the chopped tomato.
4. Once the tomatoes are beginning to break down, pour in the stock and bring to a brisk boil.
5. Now add the couscous and stir it well. Add salt to taste and bring back to the boil.
6. Turn off the heat and cover the pan with a well-fitting lid. Let the couscous rest for 10-15 minutes.
7. Once all the water has been absorbed, fluff up the couscous with a large fork. Add the reserved lentils and freshly ground pepper to taste, and toss to mix, or fork it through to mix.
8. Garnish generously with shredded basil leaves and serve the couscous warm as a side dish with meat dishes, or as a snack.
8. Garnish generously with shredded basil leaves and serve the couscous warm as a side with lamb dishes, or as a snack.
RECIPE: COUSCOUS WITH LENTILS
Ingredients:
1/4 cup green lentils
1 bay leaf
1 cup couscous
1 red onion, chopped finely
2 green chillies, chopped
1 small tomato, chopped
2 cloves garlic, minced
a handful of fresh basil leaves
Salt and pepper to taste
about 1-1/2 cups vegetable stock (or water)
1 tsp oil
Method:
1. Cook the lentils in salted water along with the bay leaf, till they're cooked but not mushy. Drain and reserve.
2. In a medium size pan, heat the oil and add the chopped chillies, garlic and red onion. Stir well.
3. Let the onions soften a little, then add the chopped tomato.
4. Once the tomatoes are beginning to break down, pour in the stock and bring to a brisk boil.
5. Now add the couscous and stir it well. Add salt to taste and bring back to the boil.
6. Turn off the heat and cover the pan with a well-fitting lid. Let the couscous rest for 10-15 minutes.
7. Once all the water has been absorbed, fluff up the couscous with a large fork. Add the reserved lentils and freshly ground pepper to taste, and toss to mix, or fork it through to mix.
8. Garnish generously with shredded basil leaves and serve the couscous warm as a side dish with meat dishes, or as a snack.
I suppose I should be embarrassed about even considering this a recipe - and I suppose I am, a bit. But if I didn't write about it, there wouldn't be a post. There needs to be a post, and many more posts, if I am to reach my target of 500 posts. Not 500 posts this year (I wish!), but 500 posts in total since I started this blog. Looked at it that way, my output isn't particularly noteworthy, really. But it's all I have.
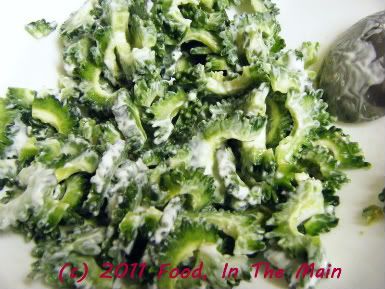
Anyway, I wish I could remember which blog it was where a commenter had mentioned that she always mixed raw karela with some yogurt and microwaved it for 3 minutes before going on to cook the vegetable on the hob.. and this way the karela was NEVER bitter.
I thought I’d try that out too, but I’m not sure how much it helped, if it did at all. Maybe it reduced the bitterness a little - but then I don’t have a huge problem with the bitterness of the vegetable when it’s shallow fried, especially as a side dish with rice. In any case, unless you try it cooked with yogurt and without, and compare the two side-by-side, it’s pretty hard to quantify any reduction in the level of bitterness in any useful way. Next time, maybe.
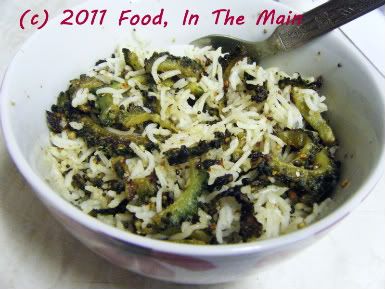
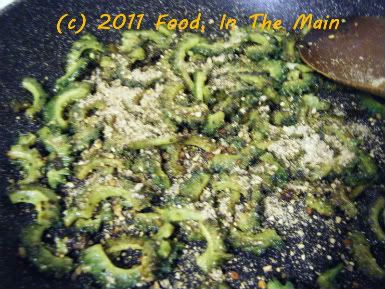
The karela rice only happened because I forgot to make sambar or any other kuzhambu, and I didn’t have any paruppu podi or thogayal ready – and only realized this when I got hungry for my dinner.
No problem – I mixed the karela dry-fry with the rice and called it “karela rice” and had that with yogurt, thereby getting around the problem of the missing sambar. Inspired innovation? Or merely good spin put on a pathetic situation? You decide.
Recipe for: Karela rice
 Ingredients:
1 cup basmati rice, cooked and cooled
2 medium karela (bitter melon/gourd)
2 tbsp yogurt/curd
1 tsp mustard seeds
5-6 fresh curry leaves
2 tbsp oil
Salt to taste
3 tbsp vegetable spice mix
Method:
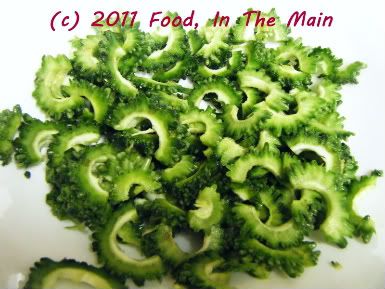
1. Halve the karela lengthwise, then slice it into thin half-moons.
Ingredients:
1 cup basmati rice, cooked and cooled
2 medium karela (bitter melon/gourd)
2 tbsp yogurt/curd
1 tsp mustard seeds
5-6 fresh curry leaves
2 tbsp oil
Salt to taste
3 tbsp vegetable spice mix
Method:
1. Halve the karela lengthwise, then slice it into thin half-moons.
 2. Toss the pieces with the yogurt/curd until they are evenly coated. Microwave, covered, for 3 minutes. Reserve.
 3. Heat the oil in a pan and add the curry leaves and mustard seeds. Let the seeds pop on meium-high heat, then add the karela pieces and stir well.
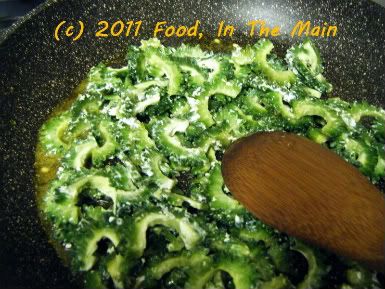 4. Let the karela cook on low heat for 8-10 minutes, till they are soft and cooked. Then turn the heat up to medium so that they can become a little crisp and brown. Add salt to taste and mix in.
5. Now add the 3 tbsp vegetable spice mix and stir well.
4. Let the karela cook on low heat for 8-10 minutes, till they are soft and cooked. Then turn the heat up to medium so that they can become a little crisp and brown. Add salt to taste and mix in.
5. Now add the 3 tbsp vegetable spice mix and stir well.
 6. Now mix in the rice gently with the karela, so as not to break the grains. Turn the heat down to low and let the rice heat up thoroughly. Serve hot with raita and papad or potato chips.
RECIPE: KARELA RICE
Ingredients:
1 cup basmati rice, cooked and cooled
2 medium karela (bitter melon/gourd)
2 tbsp yogurt/curd
1 tsp mustard seeds
5-6 fresh curry leaves
2 tbsp oil
Salt to taste
3 tbsp vegetable spice mix
Method:
1. Halve the karela lengthwise, then slice it into thin half-moons.
2. Toss the pieces with the yogurt/curd until they are evenly coated. Microwave, covered, for 3 minutes. Reserve.
3. Heat the oil in a pan and add the curry leaves and mustard seeds. Let the seeds pop on meium-high heat, then add the karela pieces and stir well.
4. Let the karela cook on low heat for 8-10 minutes, till they are soft and cooked. Then turn the heat up to medium so that they can become a little crisp and brown. Add salt to taste and mix in.
5. Now add the rice to the karela along with 3 tbsp of the vegetable spice mix. Mix it in gently so as not to break the rice grains.
6. Turn the heat down to low and let the rice heat up thoroughly. Serve hot with raita and papad or potato chips.
6. Now mix in the rice gently with the karela, so as not to break the grains. Turn the heat down to low and let the rice heat up thoroughly. Serve hot with raita and papad or potato chips.
RECIPE: KARELA RICE
Ingredients:
1 cup basmati rice, cooked and cooled
2 medium karela (bitter melon/gourd)
2 tbsp yogurt/curd
1 tsp mustard seeds
5-6 fresh curry leaves
2 tbsp oil
Salt to taste
3 tbsp vegetable spice mix
Method:
1. Halve the karela lengthwise, then slice it into thin half-moons.
2. Toss the pieces with the yogurt/curd until they are evenly coated. Microwave, covered, for 3 minutes. Reserve.
3. Heat the oil in a pan and add the curry leaves and mustard seeds. Let the seeds pop on meium-high heat, then add the karela pieces and stir well.
4. Let the karela cook on low heat for 8-10 minutes, till they are soft and cooked. Then turn the heat up to medium so that they can become a little crisp and brown. Add salt to taste and mix in.
5. Now add the rice to the karela along with 3 tbsp of the vegetable spice mix. Mix it in gently so as not to break the rice grains.
6. Turn the heat down to low and let the rice heat up thoroughly. Serve hot with raita and papad or potato chips.
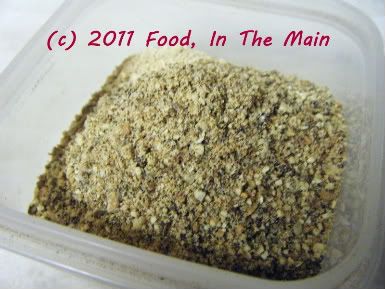
This is a spice mix that I improvised. Stop. Made improvised karela (bitter melon/gourd) rice with it. Stop. Yummy. Stop. Karela rice recipe to follow. Stop. End of message. Stop. I mean it. Stop. Stop it! Stop. Stop! it! STOP.
Recipe for: Vegetable rice spice mix
 Ingredients:
3 tbsp toor dal
3 tbsp chana dal
1/2 tsp cumin seeds (shahjeera if you have it)
1 tbsp coriander seeds
2 petals of star anise
1/2" piece cinnamon stick
1/4 tsp fennel seeds
4-5 cloves
seeds of 1 black cardamom
5-6 dried red chillies (optional)
Ingredients:
3 tbsp toor dal
3 tbsp chana dal
1/2 tsp cumin seeds (shahjeera if you have it)
1 tbsp coriander seeds
2 petals of star anise
1/2" piece cinnamon stick
1/4 tsp fennel seeds
4-5 cloves
seeds of 1 black cardamom
5-6 dried red chillies (optional)
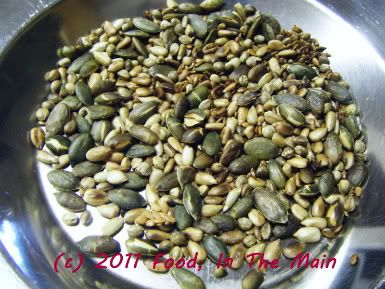
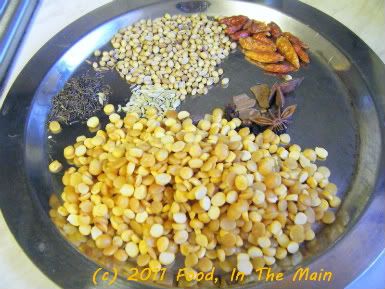 3 tbsp mixed seeds (pumpkin seeds, linseeds, hemp)
Method:
1. Dry-roast the chana dal, toor dal, coriander seeds and red chillies together, till the dals turn a light brown and the red chillies turn darker. Set aside to cool.
3 tbsp mixed seeds (pumpkin seeds, linseeds, hemp)
Method:
1. Dry-roast the chana dal, toor dal, coriander seeds and red chillies together, till the dals turn a light brown and the red chillies turn darker. Set aside to cool.
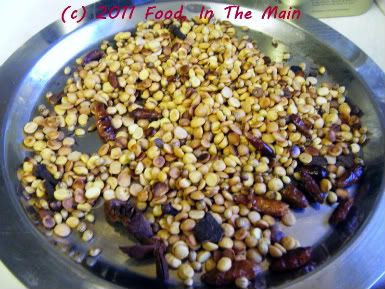 Roast the mixed seeds over medium-low flame they are toasted. Set aside to cool.
 Roast the remaining ingredients on medium-low flame till they turn colour and give off a nice aroma. Be very careful not to over-toast or burn any of the ingredients.
2. Grind all the toasted ingredients except the mixed seeds to a fairly smooth texture (like sand).
3. Then grind the pumpkin seeds/linseeds/hemp separately to a slightly coarser texture, being careful not to turn them to a paste.
4. Mix the two powders together and store tightly sealed. This should stay good for 2-3 weeks. Use as required to flavour dry vegetable curries or rice dishes.
RECIPE: VEGETABLE RICE SPICE MIX
Ingredients:
3 tbsp toor dal
3 tbsp chana dal
1/2 tsp cumin seeds (shahjeera if you have it)
1 tbsp coriander seeds
2 petals of star anise
1/2" piece cinnamon stick
1/4 tsp fennel seeds
4-5 cloves
seeds of 1 black cardamom
5-6 dried red chillies (optional)
3 tbsp mixed seeds (pumpkin seeds, linseeds, hemp)
Method:
1. Dry-roast the chana dal, toor dal, coriander seeds and red chillies together, till the dals turn a light brown and the red chillies turn darker. Set aside to cool.
Roast the mixed seeds over medium-low flame they are toasted. Set aside to cool.
Roast the remaining ingredients on medium-low flame till they turn colour and give off a nice aroma. Cool.
Be very careful not to over-toast or burn any of the ingredients.
2. Grind all the toasted ingredients except the mixed seeds to a fairly smooth texture (like sand).
3. Then grind the pumpkin seeds/linseeds/hemp separately to a slightly coarser texture, being careful not to turn them to a paste.
4. Mix the two powders together and store tightly sealed. Use as required to flavour dry vegetable curries or rice dishes.
Roast the remaining ingredients on medium-low flame till they turn colour and give off a nice aroma. Be very careful not to over-toast or burn any of the ingredients.
2. Grind all the toasted ingredients except the mixed seeds to a fairly smooth texture (like sand).
3. Then grind the pumpkin seeds/linseeds/hemp separately to a slightly coarser texture, being careful not to turn them to a paste.
4. Mix the two powders together and store tightly sealed. This should stay good for 2-3 weeks. Use as required to flavour dry vegetable curries or rice dishes.
RECIPE: VEGETABLE RICE SPICE MIX
Ingredients:
3 tbsp toor dal
3 tbsp chana dal
1/2 tsp cumin seeds (shahjeera if you have it)
1 tbsp coriander seeds
2 petals of star anise
1/2" piece cinnamon stick
1/4 tsp fennel seeds
4-5 cloves
seeds of 1 black cardamom
5-6 dried red chillies (optional)
3 tbsp mixed seeds (pumpkin seeds, linseeds, hemp)
Method:
1. Dry-roast the chana dal, toor dal, coriander seeds and red chillies together, till the dals turn a light brown and the red chillies turn darker. Set aside to cool.
Roast the mixed seeds over medium-low flame they are toasted. Set aside to cool.
Roast the remaining ingredients on medium-low flame till they turn colour and give off a nice aroma. Cool.
Be very careful not to over-toast or burn any of the ingredients.
2. Grind all the toasted ingredients except the mixed seeds to a fairly smooth texture (like sand).
3. Then grind the pumpkin seeds/linseeds/hemp separately to a slightly coarser texture, being careful not to turn them to a paste.
4. Mix the two powders together and store tightly sealed. Use as required to flavour dry vegetable curries or rice dishes.
I’ve always found it difficult to force myself to eat something simply because it’s considered healthy. Health-giving properties alone don’t make the cut, as far as my tastebuds are concerned. I accept that it is entirely my loss. But I am trying to trick my tastebuds into accepting non-rice (or non-white-rice) wholegrains as tasty, mainly by disguising them in familiar recipes.
I don’t know if you’ve heard of how shepherds help orphaned newborn lambs survive, by putting them together with ewes whose own lambs died at birth. Basically, they tie the fleece from the dead lambs onto the orphaned ones, and then introduce them to the mama sheep… and the mama sheep, smelling only their own dead lambs’ smell, accept the orphans as their own. Eventually, they get used to the adopted lambs’ own smell and then there is no need for the fleece to do the tricking job.
In other words:
Shyam (me) = mama sheep, who can’t/won’t accept
other lambs = brown rice, millet, broken wheat, quinoa, etc.,
in place of
her own beloved lamb = white rice.
Did y’awl get that awesome symbolism? Good, isn’t it? I’ve been planning my acceptance speech for the Nobel Prize for Literature ever since I’ve been able to put pen to paper. (Please try not to hurt my feelings by saying I’m baaaaaaaaaad (get the pun! get the pun!) at metaphors.)
So anyway, I think mama sheep was quite reasonably fooled into accepting the millet “curd rice” lamb as a reasonable substitute for her own white rice baby.
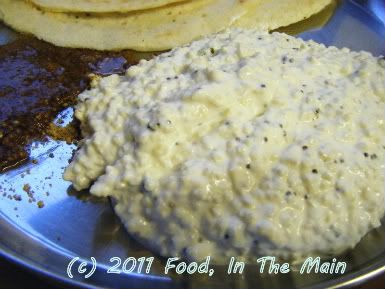
I’ve listed a few optional extras in the recipe below to add to the millet, none of which you will see in my photos – but that is because I didn’t have green grapes or cucumber handy, and couldn’t be fagged to grate any carrots because I was doing other things at the time.
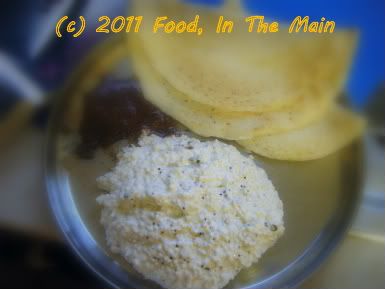
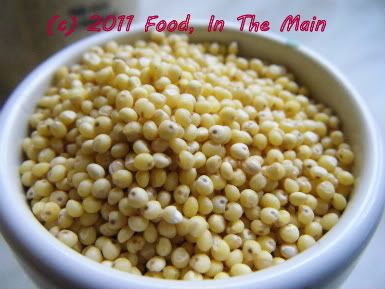
One thing I noticed about the cooked millet – how much it resembled cooked quinoa, but luckily without the distinctive taste. The millet took less getting used to than quinoa. Which is a good reason why it worked so well in this recipe. My dinner was millet "curd rice" with 1-1/2 brown rice dosas and molagapodi. Pretty satisfying, all said.
Recipe for:
Ingredients:
1/2 cup millet
Water as required
Yogurt as required (I used Greek-style yogurt)
1 tsp oil
1 tsp mustard seeds
A few curry leaves, torn up
1/4 tsp asafoetida powder
2-3 green chillies (or to taste), sliced into thin rounds
Optional: 2-3 tbsp cucumber cubed small OR 2-3 tbsp grated carrots OR a few halved green grapes
Method:
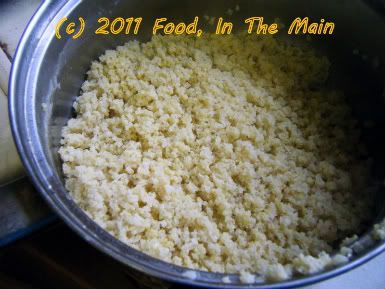
1. Cook the millet in plenty of boiling water till soft and cooked (takes about 15 minutes, but keep testing the millet during the cooking period to see if it's done).
2. Drain the water off as well as you can and let the millet sit covered for 10 minutes. Let it cool.
3. Add as much yogurt to the millet as required, mixing gently, until it's of a consistency you like.
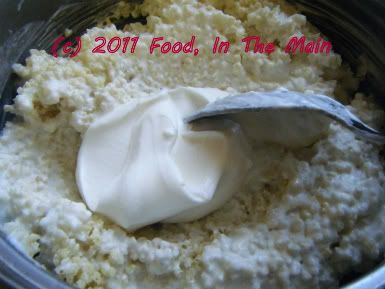
Ideally, it shouldn't be sloppy/runny, and it should also not be thick and dry.
4. For the tempering, heat the oil in a small pan, add the asafoetida powder, green chillies (if using), mustard seeds and curry leaves. Cover the pan and let the mustard seeds pop.

5. Now pour this tempering over the millet and mix it in gently. You can also mix in the cucumber, carrots or grapes at this point.
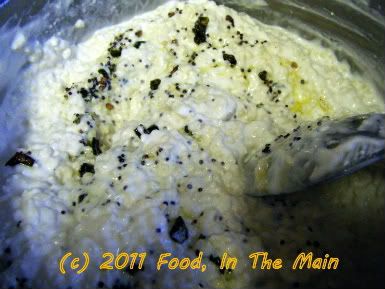
Serve cold or at room temperature.
This can be had by itself or with pickles and any vegetable curry.
RECIPE: MILLET "CURD RICE"
Ingredients:
1/2 cup millet
Water as required
Yogurt as required (I used Greek-style yogurt)
1 tsp oil
1 tsp mustard seeds
A few curry leaves, torn up
1/4 tsp asafoetida powder
2-3 green chillies (or to taste), sliced into thin rounds
Optional: 2-3 tbsp cucumber cubed small OR 2-3 tbsp grated carrots OR a few halved green grapes
Method:
1. Cook the millet in plenty of boiling water till soft and cooked (takes about 15 minutes, but keep testing the millet during the cooking period to see if it's done).
2. Drain the water off as well as you can and let the millet sit covered for 10 minutes. Let it cool.
3. Add as much yogurt to the millet as required, mixing gently, until it's of a consistency you like. Ideally, it shouldn't be sloppy/runny, and it should also not be thick and dry.
4. For the tempering, heat the oil in a small pan, add the asafoetida powder, green chillies (if using), mustard seeds and curry leaves. Cover the pan and let the mustard seeds pop.
5. Now pour this tempering over the millet and mix it in gently. You can also mix in the cucumber, carrots or grapes at this point. Serve cold or at room temperature. This can be had by itself or with pickles and any vegetable curry. Millet "curd rice"
It feels like a really long time since I’ve written anything, and I’m finding it a bit difficult to get started. You’re not likely to know, unless I specifically mention it here, that I’ve deleted half-a-dozen different starting lines and spent over a quarter of an hour staring at a blank page between deletions. Yes, I have specifically mentioned it here so that you’d all know. I’m determined to continue with this opening paragraph no matter where it goes – no more deletions!
Isn’t the ability to compose and instantly delete a total godsend? That, or it has a lot to answer for - depending on how you look at it. I’m sure that if I was writing this long-hand, I would think harder, write more carefully and delete a lot less – and I’d also write a lot, lot less! (I’m firmly on the side of “godsend”, just so you know. Three cheers for computers and instant deletions - and the instant “undo delete” facility, too).
It doesn’t help that I’ve just come back from a trip to Seattle and I’m still missing my family – specifically, my little 9-month-old niece. Although I took my laptop with me, I literally didn’t even take it out of my suitcase for the 2 weeks that I was in the States. And since I didn't cook anything except a particularly bad cake, it certainly wasn’t worth the time and effort that would’ve been required to blog about, and so my laptop stayed in its case. Add that to the general lethargy I was feeling before the trip, and it explains the long silence on this blog.
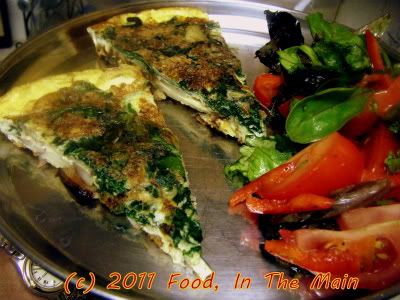
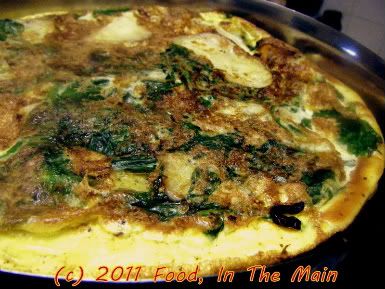
That’s not to say that I didn’t have any good intentions – I did take photos while making this frittata, just a day before we left for Seattle when we had my mother-in-law staying with us. There’s a glut of spinach (in the frittata AND in the side salad) because I was doing my best to finish what I could of it along with the eggs.
For a last-minute effort, this was an absolutely delicious frittata. Granted, it’s pretty hard to make a bad-tasting frittata. The most difficult part here was sliding the frittata from the frying pan onto a large plate, prior to flipping it back into the pan again… but if you have a cast-iron frying pan that can go directly into the oven, there’s no dicey sliding or flipping involved in browning the top of the frittata – it can be grilled as it is.
(Note to self: MUST get large cast-iron frying pan. Wonder if I can float a loan to buy a top-of-the-range pre-seasoned cast-iron pan...)
Recipe for: Spinach potato frittata
Ingredients:
6 large eggs
2 medium onions, thinly sliced
2 cups spinach
2 medium potatoes, thinly sliced
2 tbsp olive oil
4 tbsp milk or cream
3/4 tsp dried herbs (I used an Italian mix), optional
3 tbsp chopped mixed herbs to taste (I used sage, basil, lemon thyme and a bit of rosemary)
Salt and pepper to taste
Method:
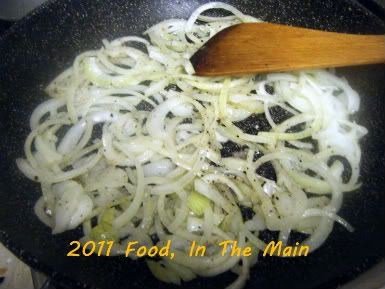
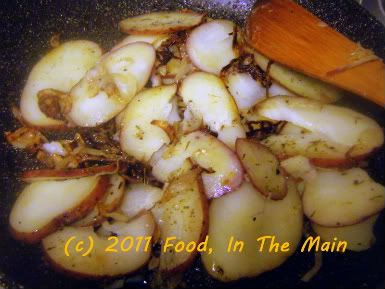
1. Heat the olive oil in a large frying pan and saute the onions till they're soft and just turning pale brown.
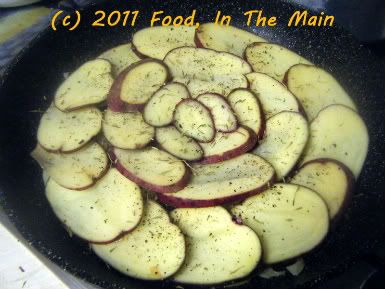
2. Arrange the sliced potatoes over the onions. Add the dried herbs if using and cover the pan till the potatoes are cooked.
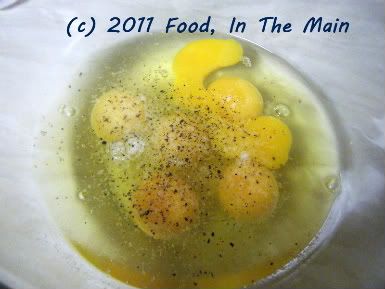
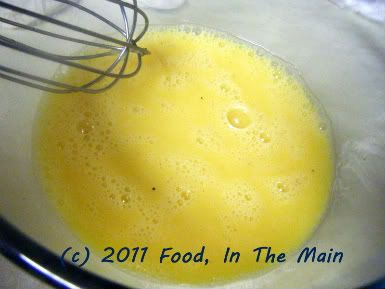
3. In the meantime, break the eggs into a large bowl and add pepper to taste.
4. Then add the milk or cream
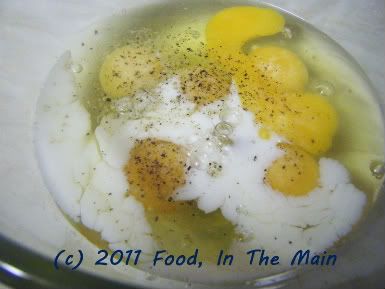
and beat the eggs till lightly frothy.
5. Stir the cooked potatoes gently, turning them over if desired.
6. Add the spinach and cover the pan for 2-3 minutes, till the spinach starts to wilt.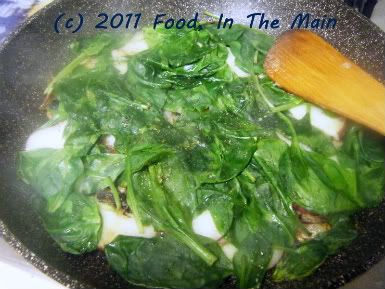
7. Add salt to taste and the chopped fresh herbs to the beaten eggs and pour it over the vegetables.
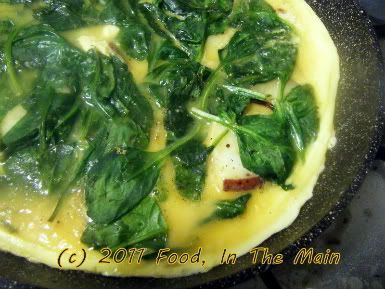
8. Cook over medium-low heat with the pan covered, till the frittata is mostly set - it should jiggle a bit in the centre, but the eggs should not be runny. Loosen the frittata carefully around the edges and slide it gently onto a large plate (ideally it should be bigger than the frying pan). Place the hot pan over the frittata on the plate, and carefully flip the plate so that the top part of the frittata becomes the bottom. (The frittata should now be a lovely golden brown to look at.) Put the frying pan back on the heat and cook the frittata for 2-3 minutes longer to brown the bottom.
Serve the frittata cold or hot.
RECIPE: SPINACH POTATO FRITTATA
Ingredients:
6 large eggs
2 medium onions, thinly sliced
2 cups spinach
2 medium potatoes, thinly sliced
2 tbsp olive oil
4 tbsp milk or cream
3/4 tsp dried herbs (I used an Italian mix), optional
3 tbsp chopped mixed herbs to taste (I used sage, basil, lemon thyme and a bit of rosemary)
Salt and pepper to taste
Method:
1. Heat the olive oil in a large frying pan and saute the onions till they're soft and just turning pale brown.
2. Arrange the sliced potatoes over the onions. Add the dried herbs if using and cover the pan till the potatoes are cooked.
3. In the meantime, break the eggs into a large bowl and add pepper to taste.
4. Then add the milk or cream and beat the eggs till lightly frothy.
5. Stir the cooked potatoes gently, turning them over if desired.
6. Add the spinach and cover the pan for 2-3 minutes, till the spinach starts to wilt.
7. Add salt to taste and the chopped fresh herbs to the beaten eggs and pour it over the vegetables.
8. Cook over medium-low heat with the pan covered, till the frittata is mostly set - it should jiggle a bit in the centre, but the eggs should not be runny. Loosen the frittata carefully around the edges and slide it gently onto a large plate (ideally it should be bigger than the frying pan).
Place the pan over the frittata on the plate, and carefully flip the plate so that the frittata falls back into the pan; the top part becomes the bottom. The frittata should be a lovely golden brown to look at. Put the frying pan back on the heat and cook the frittata for 2-3 minutes longer to brown the bottom. Serve the frittata cold or hot.

