Showing posts with label yeast. Show all posts

Monday, February 02, 2009

White bread - Trial 1

This bread baking bug seems to have taken me over big-time.

It’s one thing for a newbie baker to be well-informed about the recipe and what the yeast should or shouldn’t be doing – but when the yeast too appears to have read and digested the same recipe (so to speak) as its user, and knows its role in the whole process and, what’s more, executes that role perfectly... well, the satisfaction felt by the baker just about defies description. But if you want an inkling of how it feels, just think of an artist with his or her masterpiece, an author with his or her completed novel, a parent with a perfect child... it’s like that, only the process is easier, and better still, the satisfaction goes just as deep. (It does with me, at any rate.)

I made
pav buns fairly recently (yes, still mentioning it, thanks) with great success. The same recipe, doubled to make a (very) large loaf, didn’t stay soft. It made fantastic toast for 3-4 days, but was too dry for sandwiches.

When I tried it with one cup whole-wheat flour and 2 cups of strong white bread flour, it made a reasonable loaf, but I found it rather heavy. I have to admit that I really don’t care for (health-freaks please stop reading here and move on to next para) whole-wheat bread much. I quite like bread with seeds in, and I love German rye bread... but whole wheat bread especially with oats in really doesn’t do anything to endear itself to my taste buds.

So I decided to try and work through a few recipes for white bread (which I will try one by one over the next few weeks or so), using unbleached enriched strong white bread flour, to see which one proved (baking pun there, ahaha, yes I had to point it out in case it was missed due to its feebleness) to be the best in terms of taste and texture.

The first recipe from my collection turned out to have an egg among its ingredients. An egg! For plain white bread! I’d never heard of an egg used in baking regular bread, although I do know that special breads like brioche and challah require eggs. Still, I thought I would give it a go and see how the bread turned out.

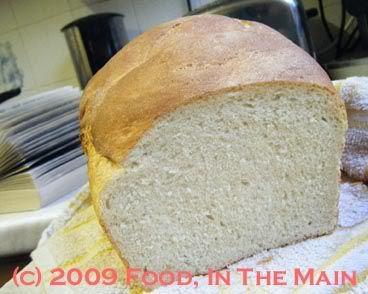
The loaf was quite good, actually – there was no eggy aftertaste, although the inside seemed ever so slightly yellow... but I put that down to the fact that the egg I used had a remarkably yellow yolk, thanks to the corn-fed hen (one of many many) raised by a friend on his smallholding.

The texture of the bread was a bit heavy, I thought, but not unduly so. It wasn’t airy and light, certainly, but perhaps I’ve been used to store-bought bread which certainly has no weight to it. (That fluffy weightlessness is one of the reasons why I’ve preferred to buy bread from a proper, stand-alone, independent bakery whenever possible. Bread isn’t meant to be feather-light, I don’t think.)

Anyway, you certainly wouldn’t have wanted to use the loaf I baked as a brick. It sliced simply beautifully and also made quite good toast. It didn’t dry out quickly either. All in all, not a bad start to my bread baking... but this recipe is also not The Ultimate White Bread recipe for me. I still can't really get my head around the fact that regular bread needs eggs in the ingredients... so on to Trial 2 next week!

Recipe for:
White bread (Trial 1)
Photobucket

Ingredients:

4-3/4 cups very strong white bread flour
1-1/2 tsp salt
1-1/2 tbsp sugar
2 tsp yeast
1 large egg, slightly beaten so that the egg yolk amalgamates with the egg white
2-1/2 tbsp butter/margarine/oil
1-3/4 cups buttermilk (I mixed 3/4 cup non-fat Greek yogurt with 3/4 cup water and 1 tbsp vinegar because I didnt have buttermilk)

Method:

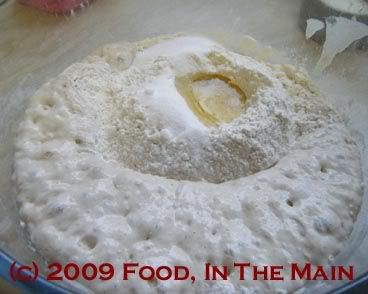
1. Mix flour, salt, sugar and yeast in a large bowl.

Photobucket

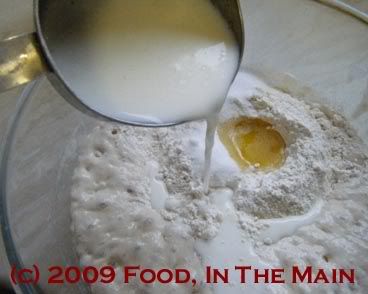
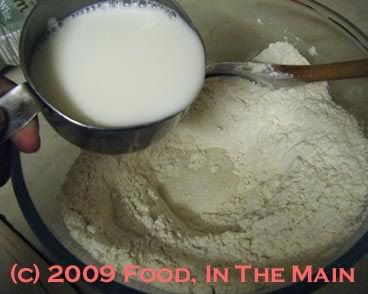
2. Make a well in the centre and pour in the buttermilk
Photobucket

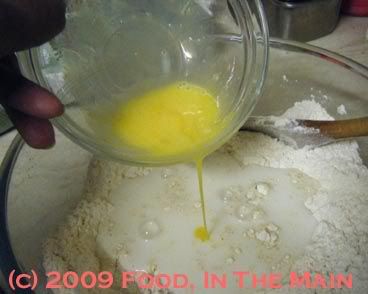
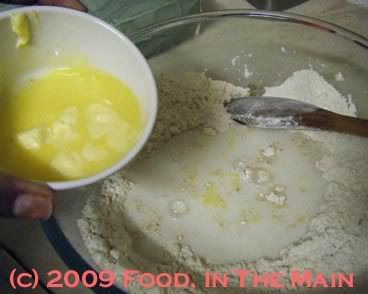
beaten egg

Photobucket

butter/margarine/oil (if using butter or margarine, melt it and cool it a little)
Photobucket

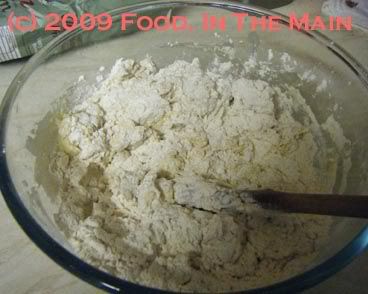
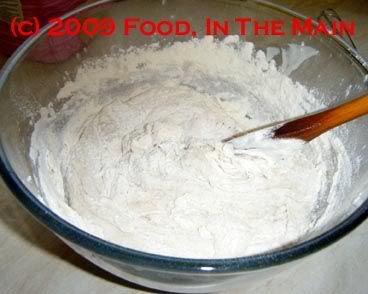
and stir with a wooden spoon

Photobucket

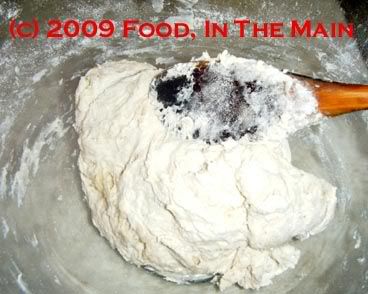
to bring the dough together.

Photobucket

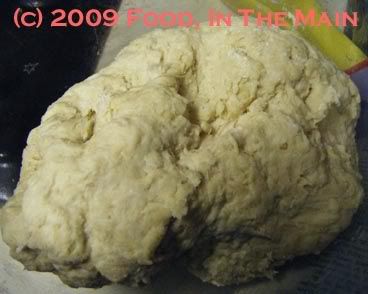
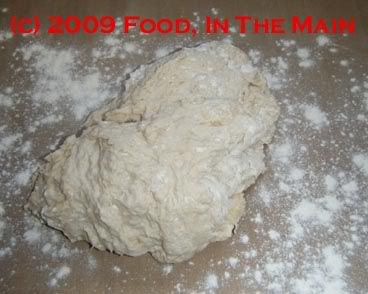
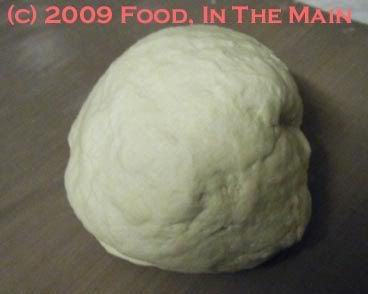
3. Turn the dough out onto a lightly floured worktop and knead for 6-8 minutes till it becomes smooth and soft. It's ok if it's slightly sticky, but it shouldn't be too dry.
Photobucket

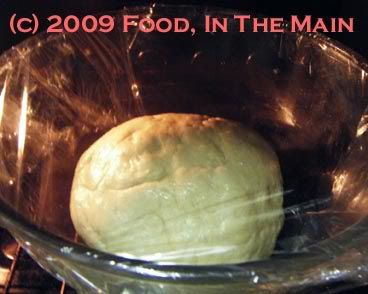
4. Place the dough in a large, lightly oiled bowl and turn it over once or twice to coat it. Cover the bowl with clingwrap
Photobucket

and place in a warm draught-free place (mine was in the oven with the light on) till the dough is doubled in volume. (About 2 hours or so)

5. Now punch the dough down gently and knead lightly for a minute, shaping it to fit in a lightly greased loaf pan that can take a 2-pound loaf of bread.

6. Spray the top of the loaf lightly with non-stick spray and cover loosely with clingwrap. Let the dough rise again (30-45 minutes) till it rises above the rim of the pan.

7. Bake in a 180C oven for 30-40 minutes or till the loaf is golden on top.
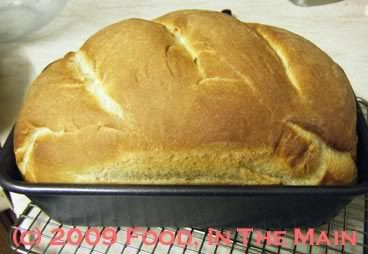
Photobucket

The bread can be considered to be done if it sounds hollow when tapped on the bottom (you'll have to remove it from the pan first!).

8. Let cool for a few minutes in the pan,
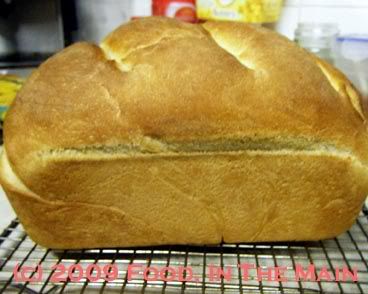
Photobucket

then remove and wrap the loaf in a clean tea towel till required.

Photobucket

Slice when cool.
Wednesday, January 07, 2009

Pav buns/dinner/sandwich rolls - the pictorial

This recipe is actually for the pav buns/dinner rolls that I made a few days back. And yes, before you ask, I am not yet tired of mentioning the fact that I baked them myself! (Twice!) The photos were taken the second time I made the same recipe, but I decided to shape the buns like sandwich baps (English term for a flattish soft flour-topped sandwich roll) - which is why the finished-product photo doesn’t show pav bun-shaped bread. It's the same recipe as in the earlier post, though.

The post is basically a pictorial, so for a change I’ll let the photos do the talking. One photo equals a thousand words, to quote an oft-repeated phrase, so … er (hoping my maths skills are up to the task) ... I guess that means I’ve written some 18,000 words, not counting the words in this paragraph. A pretty good effort, all said, wouldn’t you agree?

In pictures, then:


Photobucket
The bubbly result of one cup of flour, one cup of warm water and 2.5 tsp yeast, mixed well and left to ferment in the oven for about an hour with the pilot light turned on.

Photobucket
Adding the remaining 2 cups flour, 1 tbsp melted butter, salt and sugar.

Photobucket
1/2 cup buttermilk going into the bowl now...

Photobucket
Stirring the whole thing with a wooden spoon to bring the ingredients into a rough dough.

Photobucket
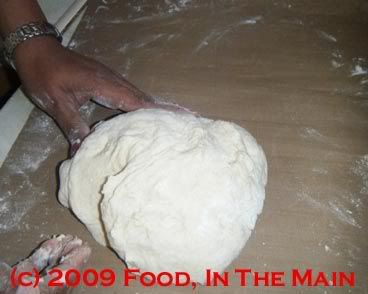
Now that the dough has come together reasonably well, time for some kneading.

Photobucket
Remove the dough to a lightly floured surface.

Photobucket
This is hungry dough - it's taken up the extra flour from the kneading surface.

Photobucket
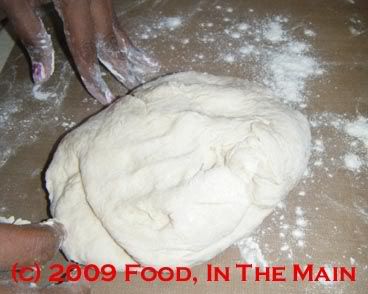
Don't be afraid to scatter more flour on the surface - like so - while kneading.

Photobucket
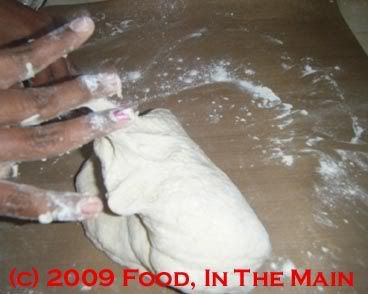
Fold the dough towards you while kneading

Photobucket
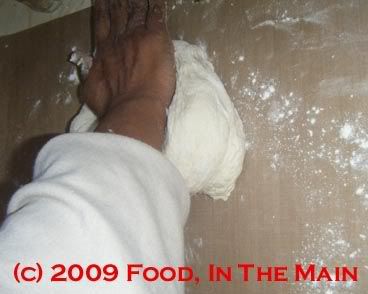
Then push it away from you with the heel of your hand. Turn the dough a quarter circle, then repeat the folding-pushing maneouvre for 6-8 minutes.

Photobucket
At last - the dough is now elastic and smooth, ready for the next step.

Photobucket
The dough now back in the greased bowl, covered with cling film, for 1-1/2 to 2 hours in the pilot-light-lit oven.

Photobucket
After about 1 hour 45 minutes - the dough has risen nicely to double the original volume.

Photobucket
Punch it down gently.

Photobucket
Put the dough back on the kneading surface to be pinched off and rolled into bun shapes, ready for the second rising. (Nothing to do with religion!)

Photobucket
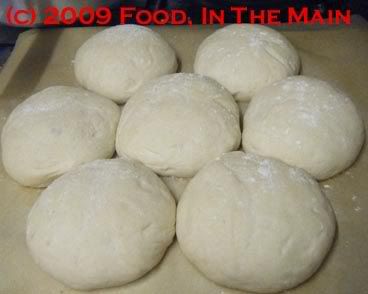
After 45 minutes in the oven, the bun-shaped dough balls have risen again and filled the gaps to stick together. Sprinkle extra flour on them before baking.


Photobucket
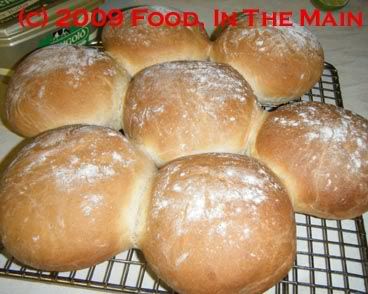
Golden-brown sandwich baps, fresh from the oven. These took about 30 minutes to bake at 180C.

Photobucket
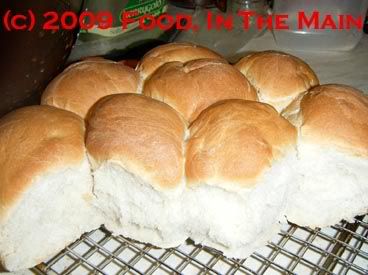
Sliced and ready to become a sandwich - use a filling of your choice, and enjoy the soft, yeastily aromatic bread baked by your own hands!

Saturday, January 03, 2009

I say pav buns, you say dinner rolls...

It's been such a long time - 2 months, pretty much exactly - since I felt like posting anything on this blog that I myself was beginning to wonder if I would ever get back to it. Not in a "I MUST resurrect this blog" way, but more in a "I wonder if I'll get around to resurrecting this blog" sort of way. I have lots of recipes which havent made their way here yet... and I'm not sure that they will even though most of them have photos. It's been awhile since I made them, and the josh (enthusiasm) has just sort of leaked away.

Still, the new year deserves a new effort - and mine this time was to bake bread from scratch, by hand. I had tried making stuffed buns (minus the stuffing) some few days back, and although the buns were edible enough, they didnt quite make the cut. Then I tried the
pav buns from the Jugalbandits and that was a very much better effort. The flavour and aroma were lovely, but the texture still left something to be desired - probably because of something I did (or didnt). It wasnt soft like I wanted my pav buns to be.

Today, I tried out a recipe for
dinner rolls from Nic, of Baking Bites - and that was a spectacular success. I've tried baking bread before, with not much success when it came to hand baking. Using a bread machine sort of worked, but it didn't seem like I was really baking, y'know? Neither the experience nor the bread was authentic.

Anyway, this time I decided I wouldn’t worry about the outcome. In fact, I was so laidback, I was practically horizontal (so I took advantage of that position and had a snooze while the yeast did its business - twice!). It worked. The dinner rolls came out absolutely perfect - golden brown top, soft fluffy interior - exactly as I've seen in bakeries. It was just amazing.


I personally think the texture was so glorious because of Nic's specification to mix 1 cup of flour with 1 cup of warm water and 2.5 tsp of instant dried yeast and let it sit for at least an hour and up to 3 hours. I think that starter was what made the rolls so incredibly good. I didn’t use white whole-wheat flour as she did, though (because I didn’t have it and didn’t know where to get it)... so I used strong white bread flour throughout, and it worked just fine! I didn’t bother with the egg wash, either. I meant to brush the tops of the rolls with milk, but I forgot. It didn't seem to matter anyway. The rolls were perfect - pav buns, in Indian terms. Even the shape was pav-like because the round baking tin I used was slightly too small to accommodate all the buns, and they turned out tall-ish rather than round. Soft, fluffy, gorgeous...

Forgive my exuberance (and master-bakers, don't snigger, please!) - it's the first time that any bread I've baked with yeast, made from scratch, has come out so well, and I'm really rather thrilled. Yes, I've only made simple dinner rolls, but for someone like me, a non-bread-baker, it's quite an achievement. Thanks, Nic! Happy New Year, all!

PS. There's no point trying out these buns unless you have a lot of time - and contrarily enough (and this is VERY important), lots of things to fill that time. Otherwise, simply waiting for the dough to rise will drive you over the borders of wherever you live and right into the land of Insania.)

Recipe for:
Pav buns/dinner rolls


Photobucket
Ingredients:

3-1/2 cups strong white bread flour
1 cup water, warm
2-1/2 tsp active dry yeast
1/2 cup buttermilk
1 tbsp butter, melted
2 tbsp sugar
1-1/2 tsp salt

1. Mix 1 cup bread flour, 1 cup water and the yeast in a large bowl so that there are no lumps. Let this stand, covered with plastic wrap, for 1-3 hours in a warm place. The idea is for the mixture to get bubbly and rise a bit. (This starter took about an hour, with the bowl placed in the oven and just the pilot light turned on.
)

2. Now stir 2 cups of the remaining flour, the buttermilk, melted butter, sugar and salt into the starter. Mix with a wooden spoon till the dough pulls away from the side of the bowl.

3. Turn the dough out onto a clean, lightly floured surface and knead, adding the remaining flour a tbsp at a time, if required. The dough should be springy, smooth and elastic when done (takes 6-8 minutes of kneading by hand).

4. Now grease the bowl lightly with butter or oil, and put the dough in, turning it around once or twice so that it is coated. Cover with plastic wrap and pop back into your warm place. (Mine was again the oven.) Leave it for 1-1/2 hours or so till the dough is doubled in volume.

5. Turn the risen dough back onto the lightly floured surface and punch down lightly, then divide into golf-ball sized rounds.

6. Grease a 9” round cake pan lightly and line the bottom with non-stick silicone paper. Place the rolls into the pan, leaving about ½” gap between each – about 7 around the edge and 2 or three in the centre). (I left only ¼” gap, which made the buns tall-ish rather than round in the final rising.) Cover the rolls with a clean dish towel and let them rise for 45 minutes or so – yes, again in a warm place. The rolls should have “fused” where theytouched.

7. Preheat the oven to 180C and bake the rolls for 30 minutes (by all means remove the dish towel before baking, because I don’t know what would happen if the towel stayed on.) They should ALL be uniformly golden brown on top.

8. Remove the rolls from the pan and cool on a wire rack for 10 minutes. Serve warm with butter, and at the table, let each person pull apart a roll from the main bunch.

Tuesday, August 05, 2008

No-knead bread - the second rising

So, it turns out that “slow rising” in the refrigerator really means “no rising at all whatsoever, not a millimetre, no way no how, uh-HUH”, as far as I’m concerned.

But wait, that’s not the beginning. In the beginning there was dough, which happened when flour and a bit of yeast and some water were stirred together.

This time around, though, I thought I would let it rise in the fridge overnight, to see if a slow rising would really give rise to a better crumb. So the dough went into the fridge one Wednesday evening, and because I really don’t have the time to spare for baking bread in the morning on workdays, it remained there all the next day as well.

When I came back from work on Thursday evening, I peeked into the fridge and found the dough still sitting there in its bowl, giving an astonishingly good impression of a large unresponsive lump. Thinking that it perhaps needed more fridge time, I left it there overnight. Friday morning, it still hadn’t moved from its original position, so I took it out of the fridge and placed it in the conservatory with a towel over the top of the bowl. That Friday, of course, turned out surprisingly warm with the sun shining all day. In the closed conservatory, the temperature must have been quite high, so the dough had risen nicely, as it was meant to.

I did the smell test to make sure that the dough hadn’t turned from friendly yeasty to dangerously beasty, and found it had a nice sourdoughy sort of aroma. I tipped it out of the bowl and briefly kneaded it on a well-floured surface, greased a length of silicone paper, transferred the dough on to that and put the whole thing back in the bowl, paper and all, for the second rising. (Odd phrase, that... has the ring of something supernatural in a religious sort of way, doesn’t it?). Only, as it turned out, I’d forgotten we were going out, so I couldn’t leave the dough outside as I wouldn’t have the time to bake it later.

Back it went into the fridge.

The next day, Saturday, the dough was as I had left it the previous evening – cosy in the bowl, cocooned in its wrapping of silicone paper, and not even a hundredth of a millimetre higher. Evidently it resented being out in the cold.

So I took it out and put it back in the conservatory so that it could thaw out and begin the second uprising. (Yeah, if that sounds like a battle, at that point it was so a battle between me and the dough!) It stayed out there for 4-5 hours, but at least it had risen to the challenge. I gave it a second smell test, which it passed without much trouble. It seemed rather more sticky inside than the first time around, with the top surface being kind of dry, like a skin had formed on it.

By this time I had no idea what would happen to the dough if I baked it – would it explode in the oven? The only way to find out was to bake it.

I turned on the oven to 220C, and when it had reached the right temperature, I turned out the dough into my Pyrex casserole, pulling it off the silicone paper…

… and then realisation struck. The bowl was meant to have heated up in the oven before the dough was put into it to bake.

As Homer Simpson would say in this situation - D’oh! (oh yeah, pun intended)


Oh well. Too late to do anything about it now, so I popped the covered casserole into the heated oven and let the bread bake for 40 minutes (10 minutes extra to make up for the casserole not being pre-heated), then uncovered it and baked it for 20 minutes more – by which time the top of the bread was beginning to look close to being burnt. Hastily removed from the oven, the loaf looked allright.

Fifteen impatient minutes later, I tried to up-end the casserole to see if the bread had stuck to it or would fall out (as per the first time). It didn’t pop out. Uh-oh. That probably meant disaster.

I waited another 15 minutes, then tried to prise out the bread with a strong metal spatula… and to my surprise, I found that the bread had stuck to the bottom of the dish in only one bit. After some huffing and puffing, I managed to lever the loaf out whole, with only that little burnt bit left stuck to the casserole – which I thought was a miracle in itself.

And the best part? The bread tasted just as lovely as the first time, despite everything that had happened to the dough. So I’m here to confirm that it really IS quite difficult to ruin no-knead bread, no matter how disorganised you are as a baker. I will also add that the dough probably didn’t become beasty because of having been refrigerated off and on, rather than being outside for 3 days straight.

If any of you find yourself baking this bread in my patented method as described above, for heavens sake remember to grease the casserole dish before putting the dough in it (but ONLY if you’ve neglected to pre-heat your chosen baking dish). Otherwise be prepared to do battle with the casserole dish for possession of the baked bread because by golly it will resist you with every ounce of gluten it has.

Sunday, July 27, 2008

All aboard the no-knead bus…

It’s only been a year and a half since the New York Times came out with Jim Lahey’s recipe for no-knead bread, and I guess I’m… ummmm… let’s see – yeah, absolutely bang on target for being possibly the last person on earth to hop on to the no-kneadwagon and join the teeming masses of all the other bakers and cookers and bloggers who have grown roots on that wagon from being there for so long.

I’m not going to bother with giving a recipe for no-knead bread on this post because there are hundreds out there - everybody and their pet dog has tried it and put up a post on their blog (or so it seemed when I went to look at reviews). Plus I’ve linked to the original recipe anyway.


About the recipe, all I will say is that I don’t do fractions (5/8th of a cup of water??? how much is that in normal person terms? Who on earth gives instructions in *irregular fractions anyway?), so I used 1-1/2 cups of water with 3 cups of flour to make the dough. It didn’t seem to affect the dough (not that I noticed) and I needed that amount anyway to get the flour to hold together.

The dough bubbled beautifully in its bowl, although when I turned it out on a floured surface, I had my doubts about whether it would pull together. But it did, beautifully. And then, after being shaped and placed on non-stick paper to rise for two hours, it rose beautifully.

I’m pretty certain that it would not have risen, though, were we not having very warm weather right now. I’m not a confident or enthusiastic baker of bread (due to past unsuccessful experiments where the yeast went on hartal and stubbornly refused to rise to anything, leave alone the occasion), so you can say this is pretty much the first time I’ve baked bread that was edible.

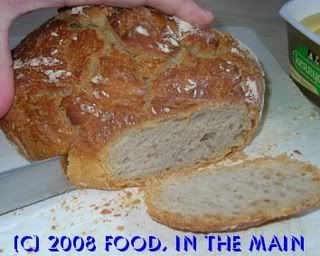
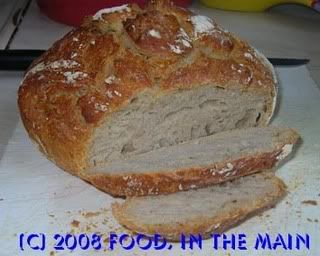
Actually it was MORE than edible, it was fantastic! The bread smelt incredibly good while baking, and the crust… oh the crust! It crackled while it cooled, just as all the recipes said, and it was crusty and gorgeously tasty. Pete was all ready to have a go at it the moment it came out of the oven, but I put up a barrier complete with yellow “Keep Out – this means YOU, Pete” tape all around it, so that it could sit undisturbed and cool for the requisite period of time. Which was meant to be an hour, really, but I could only manage 45 minutes before our self-control died an abrupt death.

Since Pete had been really very good about waiting for the bread despite being very hungry (he’d postponed his breakfast after smelling the bread baking, preferring to wait for fresh home-baked bread), I decided that it was only right that he do the honours and inaugurate my very first crusty loaf of beautifully rustic bread.


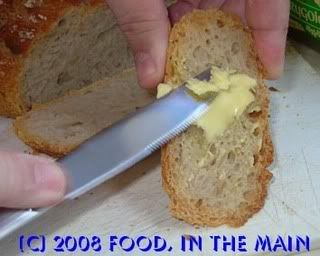
So now, ladies and gentlemen, for the first time since May 2005, I present to you all without further ado, the long-deferred debut of... Pete’s hands on Food, In The Main! And when I say that, I mean right after you read my disclaimer footnote!

* When I say “irregular fractions” I have no clue what it means in mathematical terms. Basically, to me, “regular” fractions are those that are etched on my measuring spoons and cups – 1/2, 3/4, 1/3, 1/4. Any weird fractions like 3/5, 5/8 and so on, that don’t show up on my measuring spoons and cups, are “irregular” as far as I’m concerned. Not only irregular, but downright weird. Any recipes that specify such abnormalities will have their instructions ignored. You have been told.


Ta-DAAAAAAAAAAA!


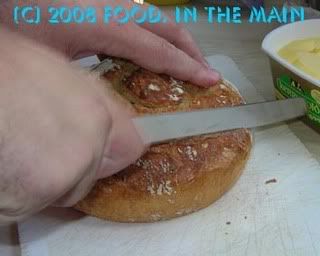
The ceremonial slicing of the loaf...


A no-hands view


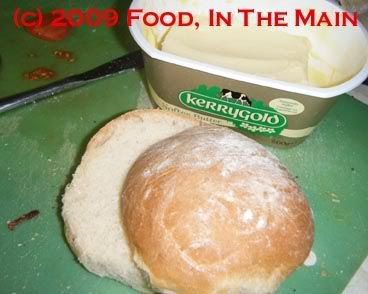
And finally, the slathering of the butter...mmm mmm MMMM!