Showing posts with label butter. Show all posts

Sunday, November 13, 2016

Triple ginger white-chocolate cookies


Okay, I have a confession to make - I might as well be up front about it. I hate white chocolate. I think it's far too sweet and it isn't even proper chocolate. Another confession: I've kind of gone off chocolate bakes in general, although I did like my orgasmic brownies. More to the point, everybody else liked it a lot more, so they disappeared very quickly. 

The problem of the day was there was half a bar of white chocolate in my cupboard that had been there for absolutely ages - possibly even years, because I can't remember the last time I used white chocolate in anything! Still, I didn't want to throw it away because I'm stingy like that. 

I was toying with the idea of making a white chocolate and raspberry something but wasn't sure what that should be - apart from the small matter of not having any raspberries in the house. My husband tried to convince me to let the white chocolate be and make ginger nut biscuits instead. I make a really mean spicy ginger nut biscuit that he loves, but I wasn't in the mood because they're quite labour-intensive. Also because I didn't want that white chocolate sitting around for a single moment longer. So, as a compromise, I finally decided I would make cookies with ginger AND the white chocolate. And that is how these cookies happened. 

My husband thought the cookies were lovely. Some friends who popped by also thought the same, so they went back home happily accompanied by a dozen. My husband was happy, my friends were happy. I tried a cookie myself and I thought it was ok (considering it contained white chocolate). Still, I was happy too, because no more white chocolate in the house... and no more coming in ever if I have a say in it! 

Recipe for:
Triple-ginger white chocolate cookies
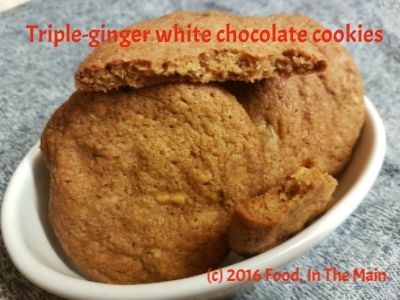
 photo 6fcea889-71aa-4fe5-9764-eff51452c169_zpsrpteivsy.jpg

Ingredients:

2 tsp grated ginger
1 tsp ginger powder
2 tbsp chopped stem ginger
225gm plain flour
3/4 tsp baking soda
1 large egg
150gm butter
100gm light brown sugar
50gm dark brown sugar
150gm white chocolate, chopped into small pieces (or use white chocolate chips)
2 tsp vanilla extract
1/2 tsp nutmeg

Method:

1. In a large bowl, cream together the butter and sugar until light and fluffy. Add the egg and the vanilla and beat until well combined.

2. Now add the flour, grated ginger, nutmeg and ginger powder to the bowl and mix with a wooden spoon until it comes together in a dough. Fold in the chopped stem ginger and the white chocolate until they are evenly distributed. Refrigerate the dough for at least 30 minutes, as it will be too sticky to work with otherwise.

3. Preheat the oven to 180C/350F. While the oven is heating, form walnut-sized balls from the chilled dough and place 1.5 inches apart on a baking sheet lined with non-stick foil. Bake for about 10 minutes or until the cookies are golden brown. (The time will vary a little depending on your oven - mine is a fan-assisted oven.) If you have to bake the cookies in batches like I did (because I only have one baking sheet that I actually like), remember to keep the dough refrigerated between bakes so that it doesn't soften too much.

The cookies will be quite soft at first, so leave them on the tray for 2 minutes before carefully removing them to a wire rack to cool completely. They will crisp up as they cool.

If you like your cookies crisp around the edges but softer in the middle (I do), take them out of the oven after about 8-9 minutes. My husband likes them crisp so I baked his for the full 10 minutes.

Monday, January 25, 2016

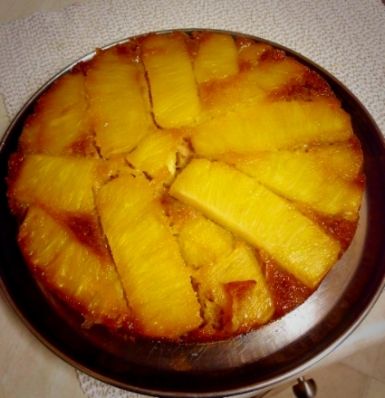
Pineapple upside down cake

All these years of blogging, all these cakes I've made... and I've never posted a pineapple upside down cake recipe! It's kinda retro and old fashioned, apparently, but I've never understood how anything can be "in fashion" or "outdated" when it comes to food - especially if it's a tasty, delicious recipe. Who cares if it's from the '70s or the '50s or the '80s? For heaven's sake, it's FOOD, not fashion. It annoys me tremendously when some idiot foodista or television chef somewhere labels a particular greens or grain or fruit as "fashionable" or "healthy" or "THE must-have item", and the entire bleddy food blog world immediately features it, so that there is a landslide of samey same posts. I dislike food fads with a passion! Okay, my soapbox rant is over for today. 

So, pineapple cake. I only made it because Pete bought a bag of fresh pineapple "fingers" that was so acidic and sharp, it could have stripped the enamel from your teeth no problem. He then had the brainwave of making pineapple upside down cake. Or rather, getting me to make it. Since I had a simple, one-bowl sort of recipe (based on a BBC Good Food recipe) for this cake, I acceded to his request. 

While the recipe called for pineapple syrup and vanilla extract to flavour the cake, I didn't have either ingredient, my pineapple being fresh rather than canned. But there was enough pineapple juice at the bottom of the bag, which I substituted for the syrup. And then simply ignored the fact that there was no vanilla extract in my store cupboard. It didn't matter, anyway. The cake smelt amazing as it baked, so fragrant and pineappley, and it tasted as beautiful as it smelt. I love this cake - I just can't understand why it took me so long to post the recipe!

Recipe for: Pineapple upside down cake
 photo 2d2ece7f-b3c8-47c1-b7db-79daeb003197_zps6kmbngue.jpg

Ingredients: 

For the topping

50 gm softened butter
50 gm soft light brown sugar
Fresh pineapple fingers or tinned pineapple slices

For the cake

100 gm softened butter
100 gm soft light brown sugar
125 gm plain flour
1 tsp baking powder
1/2 tsp baking soda
2 large eggs
2 tbsp pineapple juice
1 tsp vanilla extract (if you have it)

Method:

1. Preheat the oven to 180C/350F. 

2. Beat the butter and sugar for the topping until soft and creamy. Spread this as best as possible around the bottom and halfway up the sides of a 7" round cake pan. 

3. Arrange the pineapple slices and cherries (if using) over this such that the entire bottom of the tin is covered with as few spaces as possible. 

4. In a big bowl, add all the cake ingredients and beat until the batter is soft and smooth, and the ingredients well mixed. 

5. Drop the batter by spoonfuls over the pineapple rings and spread evenly to cover.

6. Bake for 30-45 minutes until a tester inserted in the cake comes out clean. The cake could take longer than 45 minutes, or be done in less. Test at 35 minutes, then every 5-7 minutes until it is cooked. 

7. Let it sit in the pan for 10 minutes, then turn it out onto a serving plate. Eat warm, with or without vanilla ice cream.

Saturday, March 22, 2014

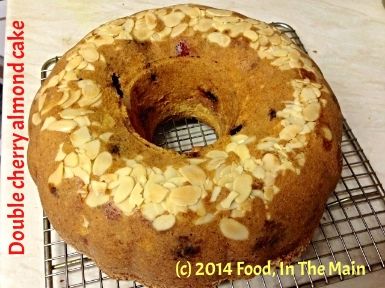
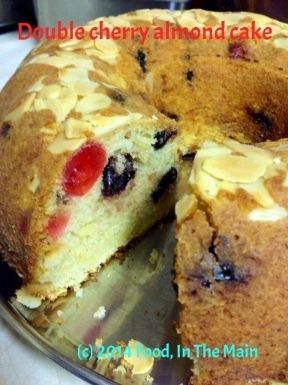
Double cherry almond cake

Can you believe it's over 6 months since I last posted anything on this blog? It's amazing how quickly times flies - the truth is that while I've kind of missed posting new recipes, I've also felt some relief to be able to ignore the tyranny of the blog itself. (Kind of. Obviously, since I'm posting a recipe now, I've not exactly totally escaped the tyrant!) Anyway, my husband keeps saying that it would be a shame to shut down this blog, considering how many years I've been keeping it going. I guess that's true, too. 

So, I made this cake because Pete loves maraschino cherries. I'd bought a big bag of these in the run-up to Christmas 2013, and while I did use some in fruit cake and Christmas cake, I've also been half toying with the idea of throwing the remainder of the cherries away. It's their sticky sweetness that puts me off. 


Pete would have been happy if I'd used just those cherries in a cake, but that really did not appear to me one bit. So I compromised by using the maraschinos, but also added Kirsch-soaked Morello cherries (I thought I had some dried sour cherries, but turns out not) that were lurking in my dried fruits container. Again left over from last Christmas, but no complaints there. 


For some crunch, and because I like nuts in my cakes to cut through the sweetness, I used flaked almonds both in the cake batter and in the topping. Of course, since this was baked in a Bundt pan, the "topping" is really the "bottoming", to coin a phrase. Doesn't sound particularly graceful, but that's how it hangs, my friends. In other words, you sprinkle the almonds in the pan, pour the batter on top, bake the cake, invert the baked cake - and voila, the bottoming is now the much nicer topping!


 photo photo12_zps6f5b8a10.jpg

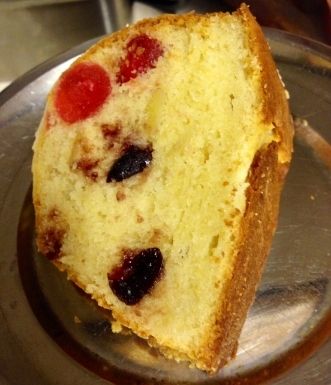
This cake smelt to me like a combination of sweet bread and cake all at once, while baking. No idea why, but it was lovely. The texture of the cake is moist and moreish, and the combination of the dark Morello cherries and the jewel-coloured maraschinos in every slice made the cake look beautiful!


 photo cd891771-ea36-45f7-94c7-ef490bbeb344_zps61502db4.jpg
 
Recipe for: Double cherry almond cake


 photo photo14_zpsb8695ea0.jpg

Ingredients:

1-1/2 cups all-purpose flour
1/2 cup ground almonds
1 cup butter at room temperature
1 cup Quark (you can use cream cheese)
1 cup white sugar
1/2 cup maraschino cherries
1/2 cup kirsch-soaked Morello cherries (or plain dried Bing cherries)
4 eggs
3 tsp baking powder
1/2 tsp salt
2 tsp vanilla extract
1 tsp almond extract
1/3 cup + 2 tbsp flaked almonds

Method:

1. Butter and flour an 8" Bundt pan and knock off the excess flour. Sprinkle the 2 tbsp flaked almonds evenly on the bottom of the cake pan. Preheat the oven to 165 degrees C. 

2. Mix together the flour, salt and baking powder, and set aside.

3. Beat the butter and sugar together until fluffy and light, then beat in the Quark and flavourings. 

4. Beat in the eggs one at a time, then mix in the flour until just combined. Stir in the maraschino and Morello cherries as well as the flaked almonds. 

5. Dollop the cake batter into the prepared Bundt pan. Tie or pin a wet towel around the cake pan. This helps the cake to rise evenly and not "dome" too quickly or crack. 

6. Bake the cake for about 70 minutes, testing with a skewer to see if it is done. If the top of the cake browns too quickly, cover it with a piece of foil. The cake is done when a tester or skewer poked into it comes out clean. 

Leave the cake in the pan for 5 minutes, then turn it out onto a cooling rack. Let ir cool for 15 minutes or so, then slice and serve.

Sunday, September 29, 2013

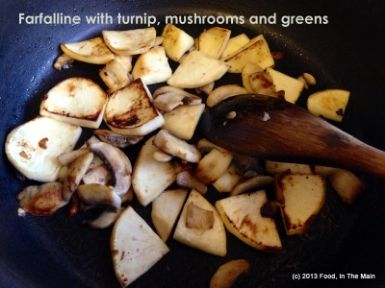
Farfalline with turnip, mushrooms and greens

This post is dedicated to a dear blogger whose every post reflects her sincerity and sweetness - Linda OutOfTheGarden(AndLatelyByTheLake). If it hadn't been for her timely rant, you wouldn't be reading this - because there wouldn't have been anything to read. Oh by the way, do read her rant - you'd be hard pressed to find a gentler, sweeter one! When I rant, I rant; when Linda rants... well, she's as likable as ever!
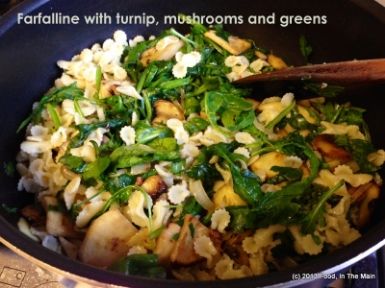
About this recipe, it was meant to be mild and mostly monochrome (white turnip, white pasta, white onion, white mushrooms) but I decided to greenify it a bit by adding spinach and rocket (love the stuff) and a tiny touch of red and heat by way of a fresh red chilli - and then some crunch in the form of pine nuts... and pretty soon it wasn't the original recipe any more. It was better (she said humbly). 

Recipe for: Farfalline with turnip, mushrooms and greens
 photo 6eac00eb-16a2-42c7-9c87-a1f3f081c277_zps3c975f68.jpg
Ingredients:

1/2 cup farfalline or orzo pasta
1 medium turnip, peeled and sliced about 1/4 cm thick and each slice quartered
1 small onion or 2 banana shallots, chopped fine
1/3 cup chestnut mushrooms, sliced
Good handful of spinach leaves, torn
Good handful of rocket leaves
1 red chilli, minced very fine (optional)
1 fat clove garlic, sliced
1 tsp butter
2 tsp olive oil
Salt and pepper to taste
2 tbsp basil and parsley, sliced

1 tbsp toasted pine nuts, for garnish

Method:

1. Cook the orzo/farfalline according to directions in plenty of boiling salted water. Drain, toss with a little olive oil and set aside.

2. Heat 1 tsp oil in a pan and add the garlic, chillies and shallots and stir. Cook over medium heat until the shallots are soft and light brown. Remove from the pan and set aside.

3. In the same pan, heat the remaining oil and butter, add the sliced turnip and mushrooms. Fry until they're golden brown, about 7-8 minutes.
 photo d03aa369-8184-4696-8c6e-81dd911e4ba0_zpsd0aea3d6.jpg
4. Add the cooked shallots to the pan and mix them in. Toss in the spinach and rocket, then stir in the cooked pasta. Add salt and pepper to taste. Stir in the basil and parsley, scatter over the pine nuts, and serve hot or at room temperature.

Saturday, March 23, 2013

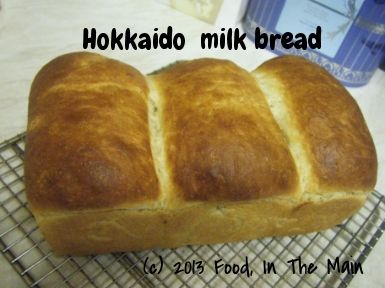
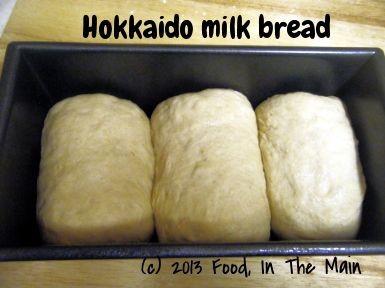
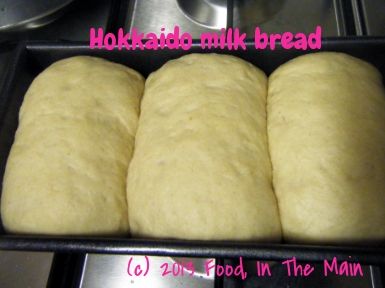
We Knead to Bake #3 - Hokkaido Milk Bread

 photo 0eb68333-7485-4f50-9e2e-bf9572af6399_zps87ad1e05.jpg

 photo d0af005b-9053-45f3-ab27-adb7cfa86d49_zps13b8df7e.jpg

Last month's baking challenge saw me at my whiny worst, because the croissants that we were supposed to make nearly got the better of me. But I persevered, rather to my surprise, and at least I can say "I tried it". This month's challenge was much more in keeping with my ability and my interest, because I can make bread. I can knead dough. I've been experimenting with different types of bread, with different proportions of strong white, wholewheat, wholemeal spelt and wholemeal rye flours. Mostly they've been successful bakes. 

That is why this Hokkaido bread didn't faze me. Yes, the dough was irritatingly sticky. Yes, I kneaded the dough by hand, because I don't have a machine to do the job... but to be fair, I didn't put my entire being into the kneading. That's because of the technique recommended by Dan Lepard of the Guardian newspaper (jeez, the number of times I've mentioned this man in my posts, he should be paying me a commission!). 

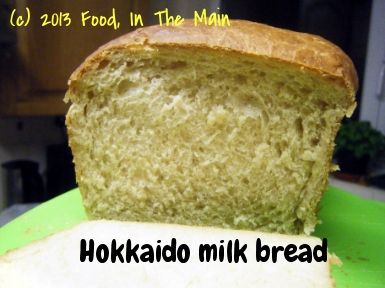
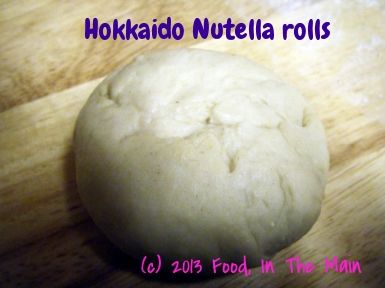
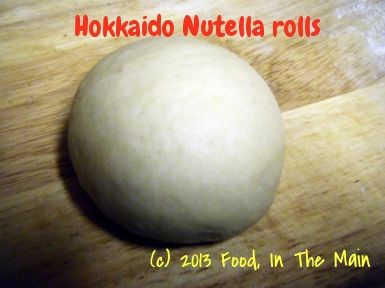
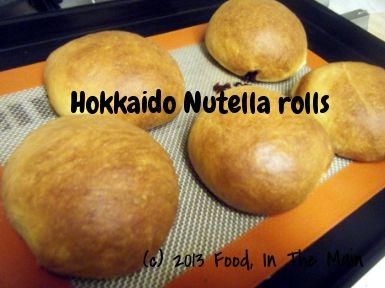
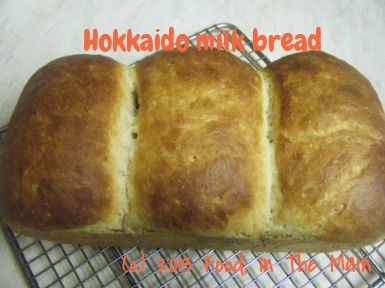
Anyway, I didn't do a 10-second knead with this dough, but I certainly didn't knead for 15 minutes at a time either. It turned out so soft and buttery, it was unbelievable. I made one big loaf, and some Nutella rolls and some with a spicy potato filling. They all turned out incredibly moreish. I'm planning to use the tangzhong technique with regular baking flours rather than just all-purpose. The tangzhong will continue to be made with AP flour, though. However, that's for another post. In the meantime, thank you once again, Aparna Balasubramanian, for introducing me to this bread technique that was completely new to me. 

Recipe for: Hokkaido milk bread
 photo b4229644-0f25-4796-95c3-4a83929b70b9_zpscb27837d.jpg
(Original Recipe from 65 Degrees Tangzhong “65C Bread Doctor” by Yvonne Chen, and adapted from Kirbie’s Cravings)
http://kirbiecravings.com/2011/05/hokkaido-milk-toast.html

Ingredients:
For The Tangzhong (Flour-Water Roux)
1/3 cup all-purpose flour
1/2 cup water
1/2 cup milk


For The Dough:
2 1/2 cups all-purpose flour
3 tbsp sugar
1tsp salt
2 tbsp powdered milk
2 tsp instant dried yeast
1/2 cup milk (and a little more if needed)
1/8 cup cream (25% fat)
1/3 cup tangzhong (use HALF of the tangzhong from above)
1/4 tsp salt
25gm unsalted butter (cut into small pieces, softened at room temperature)
1/2 to 3/4 cup mini chocolate chips if making the rolls

Method:
The Tangzhong (Flour-Water Roux):
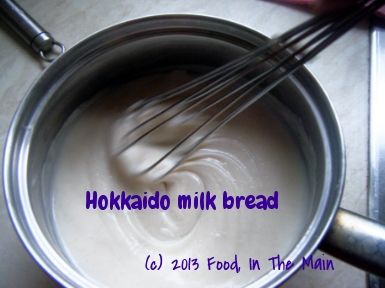
Whisk together lightly the flour, water and milk in a saucepan until smooth and there are no lumps. Place the saucepan on the stove, and over medium heat, let the roux cook till it starts thickening. Keep stirring/ whisking constantly so no lumps form and the roux is smooth.

If you have a thermometer, cook the roux/ tangzhong till it reaches 65C (150F) and take it off the heat. If like me, you don’t have a thermometer, then watch the roux/ tangzhong until you start seeing “lines” forming in the roux/ tangzhong as you whisk/ stir it. Take the pan off the heat at this point.
 photo 9478cba3-9d49-4ce1-adcc-1bd93af88891_zpse02e385d.jpg
Let the roux/ tangzhong cool completely and rest for about 2 to 3 hours at least. It will have the consistency of a soft and creamy crème patisserie. If not using immediately, transfer the roux to a bowl and cover using plastic wrap. It can be stored in the fridge for about a day. Discard the tangzhong after that.

The Bread Dough:
I made this bread by hand. This dough dough is a bit sticky and can take some time and effort to knead by hand. If you have some sort of machine which will do the kneading for you, use it. Don’t punish yourself. And do not add more flour to make it less sticky either!

Put the flour, salt, sugar, powdered milk and instant yeast in a large bowl and pulse a couple of times to mix. In another small bowl mix the milk, cream and Tangzhong till smooth and add to the bowl. Mix with a wooden spoon until the dough comes together. Now add the butter and knead till you have a smooth and elastic dough which is just short of sticky.

The dough will start out sticky but kneading will make it smooth. If the dough feels firm and not soft to touch, add a couple of tsps of milk till it becomes soft and elastic. When the dough is done, you should be able to stretch the dough without it breaking right away. When it does break, the break should be form a circle.

Form the dough into a ball and place it in a well-oiled bowl turning it so it is well coated. Cover with a towel, and let the dough rise for about 45 minutes or till almost double in volume.

Place the dough on your working surface. You don’t need flour to work or shape this dough. This recipe makes enough dough to make one loaf (9” by 5” tin), 2 small loaves (6” by 4” tins) or 1 small loaf (6” by 4”) and 6 small rolls (muffin tins). Depending on what you are making, divide your dough. If you are making 1 loaf, divide your dough in 3 equal pieces. If you are making two smaller loaves, divide your dough into 6 equal pieces.

The shaping of the portions, whether for the loaf or the rolls, is the same.

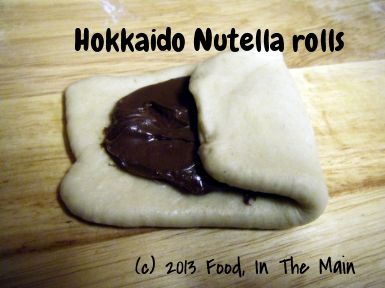
Roll out each portion of the dough with a rolling pin into an oval shape, about 1/8” thick. If you are using a filling, spread it on the dough now, before shaping it into a ball with your hands, bringing the edges to cover the filling.

Roll this folded dough with the rolling pin so the unfolded edges are stretched out to form a rectangle. Roll the rectangle from one short edge to the other, pinching the edges to seal well. Do this with each of the three larger pieces and place them, sealed edges down, in a well-oiled loaf tin.
 photo c757d852-82e8-461c-951a-b4a20a658d37_zpsdbcdcab3.jpg
Cover with a towel and leave the dough to rise for about 45 minutes.
 photo e8dd20bc-4e92-4e03-9217-95b71b07cd5d_zps6ca12d99.jpg
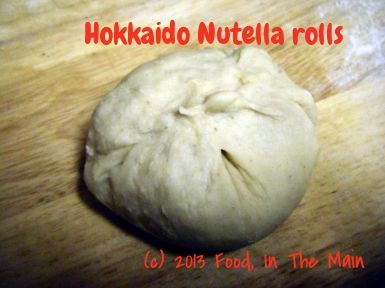
To make the rolls fold them in the same manner described above, but before rolling them up, put in the filling.
 photo 65884c2f-336b-42c7-9421-f042fd27a4ff_zps9f964e3a.jpg
 photo ecb61269-f3ea-400a-8c53-5ebfbcea2332_zps91f0ecbb.jpg
Turn the roll over so the seam side is down, and shape it with both hands, sort of cupping it so that the top is smooth and tight, and the underside is sealed.
 photo 1fae9820-872d-40f4-b118-03419a36c62c_zpsd898dbce.jpg
 photo 86f4b90c-d533-42da-85e0-5498c7ed74e3_zps4f39ef68.jpg

Carefully brush the tops of the rolls and the loaf with milk (or cream) and bake them at 170C (325F) for about 20 to 30 minutes till they are done (if you tap them they’ll sound hollow) and beautifully browned on top.
 photo 22b009b7-4f7b-4c30-8b96-2ffccd986d86_zpsb0e3ee51.jpg
Let them cool on the tray for about 5 minutes and then transfer to a rack till slightly warm or cool.
 photo 038a10f0-7791-4350-8687-bd31fc937235_zpscea6043b.jpg
 photo ec5dc6b1-9eaa-4837-a5ca-20e687caac69_zps244cfff3.jpg
Serve or else store in a bread bin. This bread stays soft and delicious even the next day. This recipe makes enough dough to make one loaf (9” by 5” tin), 2 small loaves (6” by 4” tins) or 1 small loaf (6” by 4”) and 6 small rolls (muffin tins).

Sunday, March 17, 2013

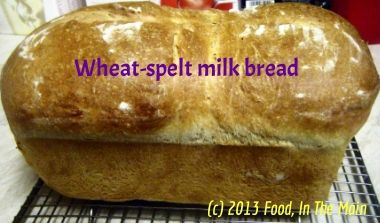
Wheat-spelt milk bread

Man, I have to say I'm beginning to find it really difficult to come up with something to say for every post. Usually when I stop thinking too hard about what to write, I tend to unblock the stoppage, as it were... but this is beginning to work less and less often.

I've actually thought about not writing anything at all, just posting the recipe and a couple of photos, but I don't know how well that would work.

I mean, when I go to a food blog and find nothing there but the recipe, I get annoyed, even if the recipe is fantastic. I need at least one photo. If there is a photo or two, or even many photos, but no write-up to go with the recipe, that makes me feel annoyed too.

So you'd imagine that when there is a recipe, a photo or two (or even many photos) and a write-up to boot, I'd be a happy camper? Reasonable assumption, right?

Nope.

You see, I'm unreasonable in my wants. I'm not content with just a recipe, a photo or two (or even many photos), and a write-up. No, I want that write-up to be funny and warm and honest and interesting and readable and at the very least I want the recipe to be fabulous - in other words, pretty much like any post you'd care to choose from the lovely Nupur's wonderful blog One Hot Stove.

Unfortunately it is not given to many of us to successfully combine humour and warmth and honesty and readability and foster a loyal readership of our blog... so we just have to struggle on. And if for some people it's a struggle to write a decent post, it's a struggle for others to read a dull one - even if they know how hard it is to actually write a post, never mind pleasing anyone with it!

And on that philosophical note, I guess I will say a few words about this recipe before I close. You will know some of the words, like "variation of Dan Lepard recipe", "The Guardian newspaper", "minimal kneading" and "tasty", so I'll just say the ones that you may NOT know, which is "tighter crumb because I added spelt flour".

Recipe for: Wheat-spelt milk bread

 photo 52a265c8-3b96-42fc-9a56-b2086b38432d_zpsd98c45d7.jpg

Ingredients:

2-1/4 cups strong white bread flour
1/4 cup very strong wholewheat bread flour
1/2 cup wholemeal spelt flour
100 ml warm water
200 ml warm whole milk
1 tsp quick-rise yeast
1-1/4 tsp salt
Oil for kneading
Flour for sprinkling
Butter for greasing 7" x 5" loaf pan

Method:

1. Mix together the flours in a big bowl and whisk in the salt and yeast. Then make a hole in the centre and pour in the yeast and warm milk-water mixture. Mix together with a wooden spoon until the dough comes together in a rough ball. Cover the bowl and let the dough rest for 10 minutes.
3. Lightly oil your work area/kneading board and scrape the dough onto it. It will be quite sticky. Knead lightly for 10 seconds. Then put the dough back in the bowl, cover it and let rest for 10 minutes. Repeat this cycle twice more, oiling the work area lightly each time, if required.
4. After the fourth 10-second knead, the dough should be elastic and not very sticky. This time, let the dough rise in the covered bowl for 40 minutes to an hour, or till doubled.

5. Now punch the dough down gently. Lightly flour the work area and pat the dough into an oblong, then roll it up and place it in your buttered 7" x 5" loaf pan. Flour the top of the dough, cover with a clean tea towel and let the dough rise in a warm draught-free area for 45 minutes to an hour - it should be at least 1" over the rim of the loaf pan.

6, Preheat the oven to 200C/450F and place a dish of boiling water on the floor of the oven. Bake for 30-40 minutes, or till the loaf is golden brown on top and sounds hollow when tapped on the bottom. Let cool before slicing.

Saturday, February 09, 2013

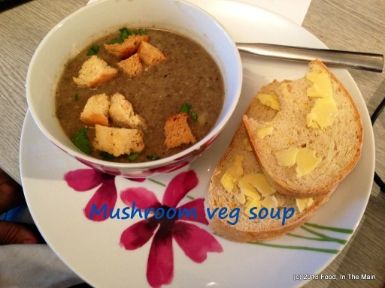
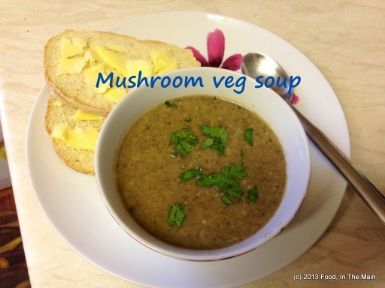
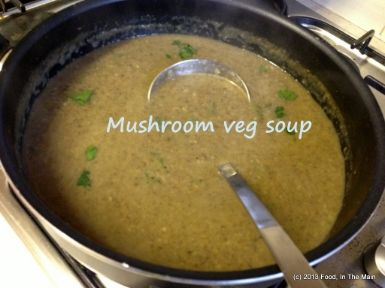
Vegetable-mushroom soup

I made a version of this soup last month when I was with my family in Seattle, to go with the herby cheese pull-apart bread that was our first baking challenge set by Aparna Balasubramaniam. The soup is not exactly as I made it the first time, because mixed vegetable soup can be whatever you make of it. 
 photo 1818b2c3-2936-4011-b603-d51fdad37b43_zps30e1a159.jpg

If you're a wannabe Masterchef contestant or judge, or have more money than sense, you can use expensively exotic ingredients - mushrooms that have been grown in soil imported from a remote corner of the Brazilian rain forest and watered with dew gathered in moonlight on a full moon night in June; the rarest blue-spotted heirloom potatoes from Venezuela that have been hand picked by an endangered tribe (gotta support them, don't y'know); cream from milk where the cattle were exclusively hand fed on the finest grass prepared by Cordon Bleu chefs while classical music was played by the London Philharmonic live in their air-conditioned, state-of-the-art barn (the cows' barn, I mean, not the London Philharmonic's. The London Philharmonic wouldn't be allowed to live in the same building as these super-exclusive posh cows!)... you get the idea.

OR, you could just use whatever vegetables you have in your refrigerator that need using up, and standard chestnut or white mushrooms (or whatever you can get), to make this soup. It's a guide more than a recipe, anyway.

That said, though, I bought the mushrooms specifically to make this soup. But because I have more sense than I have money, I bought them from the "reduced for quick sale" section. Yay me! 

Recipe for: Vegetable-mushroom soup
 photo 74b493ab-1ac2-4863-b4c9-04e0af666ce3_zps18307846.jpg
Ingredients:

4 small onions, sliced thinly
2 baby leeks (green and white parts), sliced thinly
4 cups mixed mushrooms (I used portobello/cremini, shiitake and oyster), sliced
1 medium potato, chopped (skin on)
1 medium carrot, chopped
1 litre (4-5 cups) vegetable stock/broth
1 tsp dried thyme or Italian herb mix
1 bay leaf
4 sprigs fresh thyme
1 tbsp olive oil + 1 tbsp butter
2 tbsp sour cream/Greek yogurt or full fat milk (optional)
Salt and pepper to taste
2 tbsp parsley for garnish

Method:

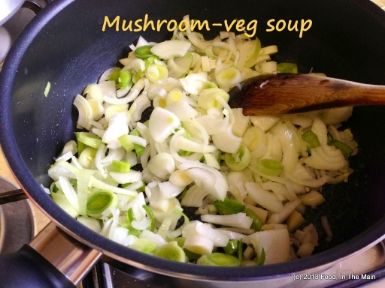
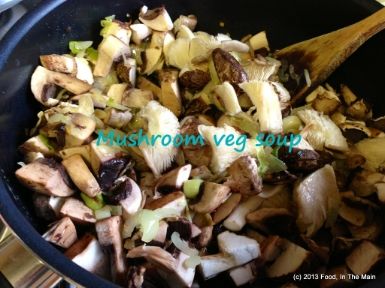
1. Heat the oil and butter in a large pan, add the onions and leeks and cook over medium heat till they begin to soften (about 5 minutes), stirring frequently.
 photo 926a8690-7157-4d95-9d17-f5ad2b845c87_zpscf25d3ba.jpg
2. Add the mushrooms and cook for 2-3 minutes or till they start to reduce.
 photo ac50babb-497c-4857-81a3-5f1d2a983b9a_zps1bbc7e11.jpg
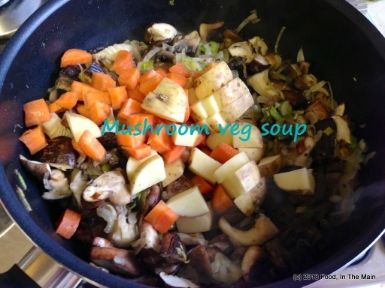
3. Add the potatoes and carrots along with the dried herbs and bay leaf. Stir for a couple of minutes.
 photo 36732c75-556d-4f98-95f7-b0ccbfb8f08a_zpsab2b3eb1.jpg
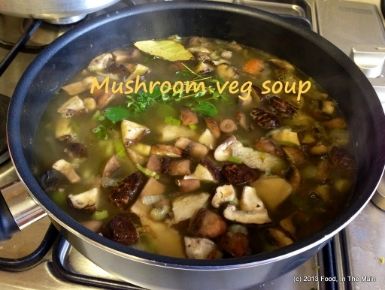
4. Then add the stock and the fresh thyme sprigs.
 photo d14c8f97-de9b-49a5-b8c5-ec1bb3534093_zps9b86703a.jpg
Bring this to a boil, cover the pan and let the stock simmer for 10-15 minutes or till the carrots and potatoes are soft and cooked.

5. Fish out the fresh thyme sprigs and bay leaf, then turn off the heat. Let the soup cool, then blend it to a smooth consistency.
 photo c7ca8f9c-c1ef-422e-8e5b-4b6e57128ab1_zps7763d580.jpg
If you would like a bit more texture to the soup, blend only about 3/4 of the soup smooth, then add it to the remaining unblended soup in the pan. 
Add the milk or sour cream/yogurt, if using, and stir it in. Add salt and pepper to taste. Reheat on low heat till thoroughly warmed, but do not let it boil. Serve with parsley sprinkled on top, and croutons if you like, and crunchy buttered toast on the side. 

Sunday, January 20, 2013

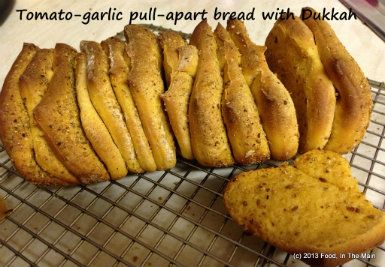
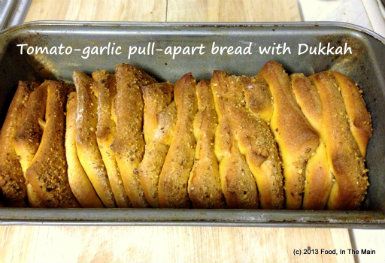
Tomato-garlic pull-apart bread with dukkah

I just wanted to try the pull-apart recipe again, to see if I could manage the miraculous "second rising" of the bread dough. I started this before I checked to see if I had any cheese - and sure enough, when I did get around to checking the fridge, there was no cheese - no, not even a bog-standard Cheddar *sigh*. I couldn't go out to get cheese because of all the snow (it's been snowing all day) and because I didn't want to venture out into the freezing cold. 

This should have been a CHEESY bread... ideally I was hoping to use feta, as a Mediterranean cheese to go with the somewhat Mediterraneanish Dukkah (Sainsbury's finest version, I'll have you know). 

(Ok, yeah, I know Dukkah is Egyptian, but it's kinda sorta close to Mediterranean cuisine, no? Work with me here, people... I suppose you could say that Dukkah and feta are about as compatible as Dukkah and cheddar - but that's for YOU to say. I say different.) 

Anyway... I halved the quantity of ingredients in the original recipe because I'm back home and there are fewer than half the people that were there when I made my first attempt in Seattle earlier this month. I'm glad to say that, on the plus side, the second rising in my second attempt was successful. Unfortunately, while I turned the former negative into a present positive, a couple of other negatives arose in the present version - one being, as mentioned earlier, a lack of cheese; the second being that the tomato flavour was at best only mild. I guess 1 tbsp of concentrated tomato paste was not enough even though the ingredients were halved. Next time I'd probably double the amount of paste and use finely chopped sun-dried tomatoes in oil too.

Oh well, live and learn. 

The bread, by the way, was good, but it would have been better with cheese (a friend of mine at work insists that most things are better with cheese). 

Recipe for
: Tomato-garlic pull-apart bread with dukkah

Tom-garlicdukkahbread_zpscba4c302 photo Tom-garlicdukkahbread_zpscba4c302-1_zps030d9c4e.jpg
Ingredients:
For the Dough
1/4 cup warm milk
1/2 tsp sugar
1 tsp active dry yeast
1.5 cups bread flour (+ a couple of tbsp more for dusting if necessary)
1/2 tsp salt
1 tbsp butter, soft at room temperature
1 tbsp concentrated tomato paste
2 fat cloves garlic, grated (use only 1 clove or 1/2 tsp garlic paste if you want a milder flavour)
1/3 cup milk
1 tbsp milk for brushing
For the Filling
1 tbsp melted butter
2 tsp Dukkah (I pounded it with a mortar and pestle to make it more uniformly sized)

Method:
1. In a small bowl, dissolve the sugar and the yeast in the 1/4 cup of warm milk. Keep aside for about 5 minutes till the yeast mixture bubbles up.

2. Put 1.5 cup of flour, salt, softened butter, and grated garlic in a large bowl and mix. Then add the yeast mixture and most of the 1/3 cup of milk and mix together. If there is more than a tbsp of flour that keeps dropping off from the dough (i.e, it isn't coming together) and the dough itself seems dry, add the remainder of the milk and knead it in. 


Transfer the dough to a non-stick mat (lightly flour your kneading area if it is not non-stick) and knead away till you have a soft, smooth and elastic/ pliable dough which is not sticky (about 10 minutes of energetic kneading). Add a little extra flour if your dough is sticking, but only just as much as is necessary.

3. Shape the dough into a ball and place it in a well-oiled bowl, turning the dough to coat it completely with oil. Cover and let it rise for about 1 to 1 1/2 hours or until almost doubled in volume.

4. Dust your work surface lightly with flour. Deflate the dough, shape it into a square and roll the dough out into a square that is about 8" by 8". Brush the surface of the square with the melted butter.

5. Evenly sprinkle the Dukkah mix. Use a rolling pin to very lightly press the topping into the dough to ensure the topping doesn’t fall off when you are stacking the strips.

6. Using a pizza cutter, slice the dough from top to bottom into 4 long and even strips – they do not have to be perfect. Lay each strip on top of the next, with the topping facing upwards, until you have a stack of the strips. You can put the 2 strips cut from the sides in the middle of the stack so it looks neater. Using a pastry scraper or a sharp knife, cut straight down through the stack dividing it into 3 or 4 equal pieces.

7. Grease and lightly flour a small loaf tin that will fit the pieces comfortably (or any other baking container you like). Layer the slices, cut sides down into the loaf tin. Cover the loaf tin dough with a towel and allow the dough to rise for an hour. Lightly brush some milk over the top of the loaf.

8. Bake the dough at 180C (350F) for about 25-30 minutes (but check from 25 minutes, as every oven differs in its performance) until it is done and the top is golden brown, and the bread sounds hollow when tapped on the bottom.
Tom-garlicdukkahbread1_zps503a6d82 photo Tom-garlicdukkahbread1_zps503a6d82-1_zpsaa02b5bb.jpg
9. Serve hot with soup.

Saturday, January 19, 2013

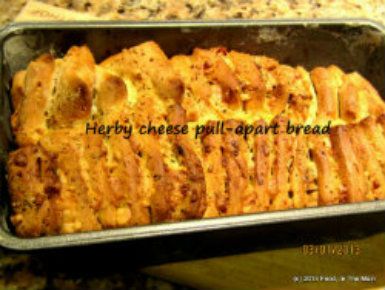
Herby cheese pull-apart bread - Bread #1, January 2013

pull2_zpsfb6ba548 photo pull2_zpsfb6ba548.jpg
This is the first challenge of the monthly baking event started by Aparna Balasubramaniam of My Diverse Kitchen - she of the gorgeous photos and amazing baking ability in particular and lovely recipes in general. When I signed up to join the group, I happened to be in the States, visiting my family in Seattle. It was the perfect opportunity to try the recipe for pull-apart bread, especially as I'd kinda sorta earmarked it for making (at some unspecified point) when I'd seen the original photo on the Huffington Post's selection of photos of pull-apart breads.

The other point was, of course, that there were lots of people at home who would help demolish the bread... whereas at home in Shrewsbury, there's usually just me and Pete. It's difficult to invite people over when you can't be sure that you can provide something edible - I'm a million miles from being the world's best baker, that's the problem.


Happily, family don't fall into the worrisome category, so I was quite pleased to make them my guinea pigs as far as this bread was concerned. As it happened, the dough didn't rise as much as it should have, or as evenly. And since the oven was unfamiliar to me, I didn't really know anything thing about its particular quirks - its hot spots, or cold spots, etc.


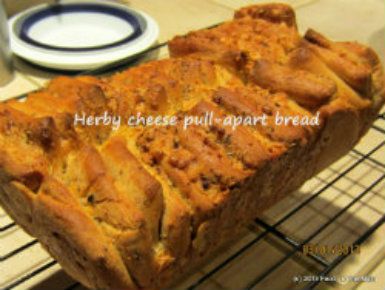
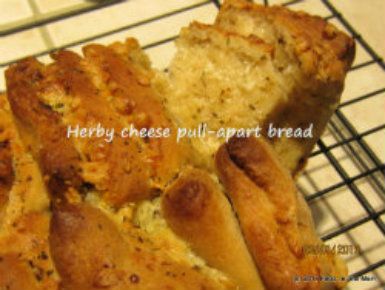
But - and this is important - the bread turned out beautifully golden and really tasty with the mushroom-vegetable soup that I'd made.

pull1_zps6d40efe9 photo pull1_zps6d40efe9.jpg

The aroma as it was baking nearly drove us mad, and there was nothing to do but tear into it the moment it came out of the oven! Granted, the texture of the bread was a bit dense, but I don't think anybody cared.


I changed the original recipe just a tad - I used Pepperjack cheese on request from my sister, instead of cheddar, and I used an Italian herb mix, because that's what I had. I hope to make this bread again, with slightly different toppings. If I do, I'll definitely post it here. But for now, here's my tear-and-share bread.

Recipe for:
Herby cheese pull-apart bread

Ingredients:
For the Dough
1/2 cup warm milk
1 tsp sugar
2 tsp active dry yeast
2-3/4 - 3 cups all-purpose flour
1 tsp salt
25gm butter, soft at room temperature
3/4 to 1 tsp garlic paste
3/4 cup milk (+ a couple of tbsp to brush over the bread)
For the Filling:
15 to 20gm melted butter
2 tsp dried Italian-style herb mix
1 tsp crushed cumin seeds
1/2 cup grated Pepperjack cheese

Method:
1. In a small bowl, dissolve the sugar and the yeast in the 1/2 cup of warm milk. Keep aside for about 5 minutes till the yeast mixture bubbles up.


2. Put 2 3/4 cup of flour, salt, softened butter, and garlic paste in a large bowl and mix. Then add the yeast mixture and the 3/4 cup of milk and knead till you have a soft, smooth and elastic/ pliable dough which is not sticky. Add a little extra flour if your dough is sticking, but only just as much as is necessary.


3. Shape the dough into a ball and place it in a well-oiled bowl, turning the dough to coat it completely with oil. Cover and let it rise for about 1 to 1 1/2 hours or until almost doubled in volume.


4. Dust your work surface lightly with flour. Deflate the dough, shape it into a square and roll the dough out into a larger square that is about 12’ by 12”. Brush the surface of the square with the melted butter.


5. Evenly sprinkle the herbs and the cumin seeds and then the grated cheese. Use a rolling pin to very lightly press the topping into the dough to ensure the topping doesn’t fall off when you are stacking the strips.


6. Using a pizza cutter, slice the dough from top to bottom into 6 long and even strips – they do not have to be perfect. Lay each strip on top of the next, with the topping facing upwards, until you have a stack of the strips. You can put the 2 strips cut from the sides in the middle of the stack so it looks neater. Using a pastry scraper or a sharp knife, cut straight down through the stack dividing it into 6 equal pieces (6 square stacks).


7. Grease and lightly flour a 9” by 4” (or 5”) loaf tin. Layer the square slices, cut sides down into the loaf tin. Cover the loaf tin dough with a towel and allow the dough to rise for an hour. Lightly brush some milk over the top of the loaf.


8. Bake the dough at 180C (350F) for about 30 to 40 minutes until it is done and the top is golden brown.


pull3_zps8450eb20 photo pull3_zps8450eb20.jpg
This recipe bakes one 9” by 5” loaf.


9. Serve hot with any soup.

Monday, May 21, 2012

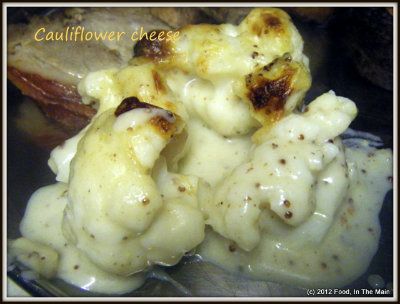
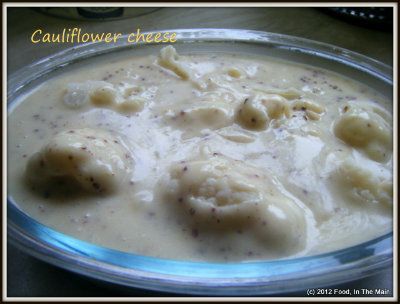
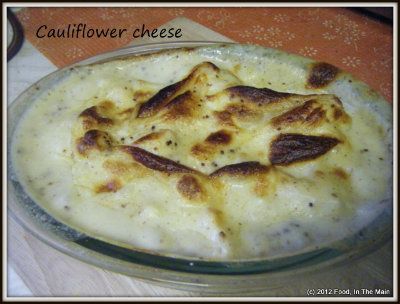
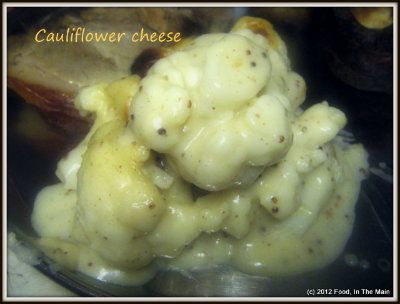
Cauliflower cheese

While I could probably eat my weight in green cabbage and would do so willingly, cauliflower isn't as welcome on my plate. While there are a couple of ways of making cauliflower that can be snuck past my fussy tastebuds (think oven-roasted cauliflower or cauliflower usili), there is literally only one way that Pete can be persuaded to eat this vegetable - and that is if it's hidden under a layer of cheese and white sauce. Yesterday turned out to be the day that I made this for my husband for the first time, because there was just too much cauliflower for one person to finish off especially when that person is not particularly fond of this smelly vegetable (but ask her to eat potatoes and see what happens - just stay a safe distance away while you watch!).
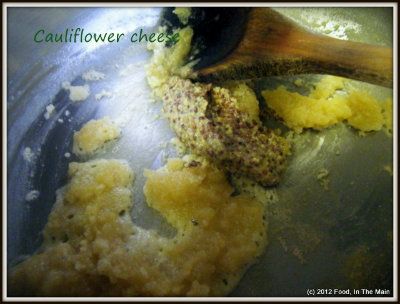
Oh, do you remember me saying that mustard just loves cheese? I proved it for the umptieth time with this recipe.
Recipe for:
Cauliflower cheese
DSCF8258a
Ingredients:

1/2 small cauliflower, separated into more or less evenly sized florets
1/2 cup + 2 cups milk + more as required
1/2 cup Cheddar cheese, grated
2 tbsp butter
2 tbsp plain flour
1 tbsp wholegrain prepared mustard
freshly ground black pepper, to taste
sea salt, to taste

Method:
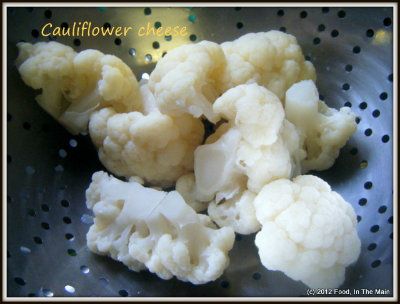
1. Cook the cauliflower with 1/2 cup milk and enough water to cover the florets, until done but not overcooked. (It is cooked when a skewer goes through the thickest part of the floret without too much resistance.
DSCF8248a
Drain and place in an oven-safe casserole dish.
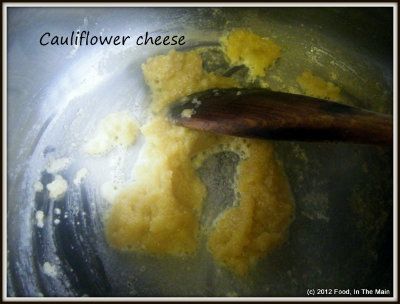
2. Heat a heavy-based saucepan and put the flour and butter in.
DSCF8249a
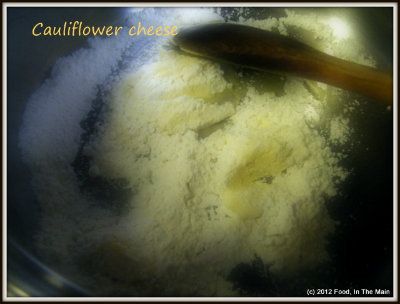
Cook it on medium heat, stirring continuously until the butter and flour are well incorporated and the flour smells good (3-4 minutes).
DSCF8250a
3. Stir in the mustard,
DSCF8251a
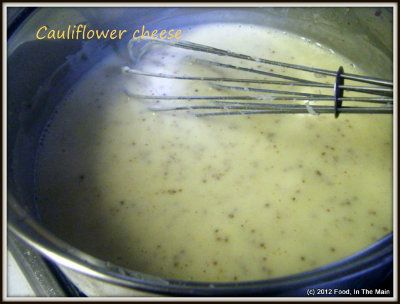
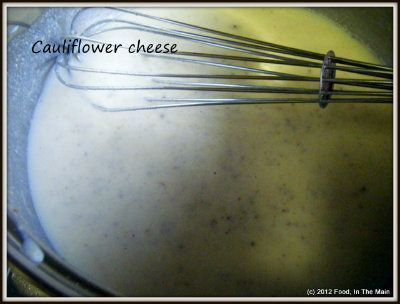
then add the remaining 2 cups milk all at once and whisk the mixture well so that there are no lumps.
DSCF8252a
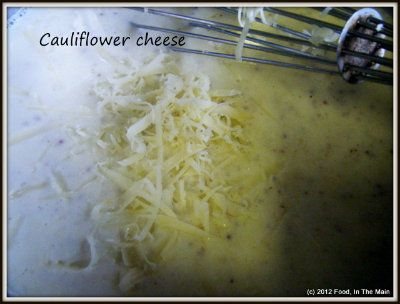
Add the cheese and stir till it melts in.
DSCF8253a
5. Cook the sauce till it thickens and becomes glossy (about 5 minutes on medium-low heat), stirring it to stop it catching on the bottom.
DSCF8254a
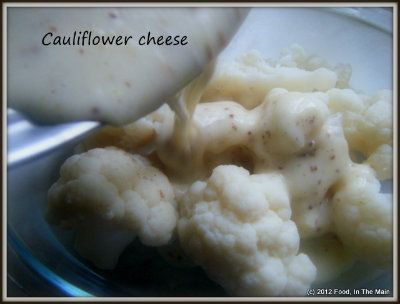
6. Add salt and pepper to taste. Pour the sauce over the cooked florets.
DSCF8255a
You can sprinkle on some more cheese now if you like.
DSCF8256a
7. Cook it at 180C/350F for 15-20 minutes until the sauce is bubbling and the top is golden brown.
DSCF8257a
Let the cauliflower cheese rest for 2-3 minutes before serving it up.
DSCF8259a


RECIPE: CAULIFLOWER CHEESE
Ingredients:

1/2 small cauliflower, separated into more or less evenly sized florets
1/2 cup + 2 cups milk + more as required
1/2 cup Cheddar cheese, grated
2 tbsp butter
2 tbsp plain flour
1 tbsp wholegrain mustard
freshly ground black pepper, to taste
sea salt, to taste

Method:
1. Cook the cauliflower with 1/2 cup milk and enough water to cover the florets, until done but not overcooked. The cauliflower is cooked when a skewer goes through the thickest part of the floret without too much resistance. Drain and place in an oven-safe casserole dish.
2. Heat a heavy-based saucepan and put the flour and butter in. Cook it on medium heat, stirring continuously until the butter and flour are well incorporated and the flour smells good (3-4 minutes).
3. Stir in the mustard, then add the remaining 2 cups milk all at once and whisk the mixture well so that there are no lumps. Add the cheese and stir till it melts in.
5. Cook the sauce till it thickens and becomes glossy (about 5 minutes on medium-low heat), stirring it to stop it catching on the bottom.
6. Add salt and pepper to taste. Pour the sauce over the cooked florets. You can sprinkle on some more cheese now if you like.
7. Cook it at 180C/350F for 15-20 minutes until the sauce is bubbling and the top is golden brown. Let the cauliflower cheese rest for 2-3 minutes before serving it up.

Friday, May 04, 2012

Pinto bean parathas

I'm beginning to wonder if I should call these "recipes" - they're so basic and samey in the making, especially if you're Indian and make/eat rotis/parathas/etc often. Still, the difference in flavour is obviously marked, different with every filling you choose to use (well, duh, I know).


I don't think I've used a beany filling before, so it's an opportunity to say I used a beany filling and, at the same time, increase the number of recipes on my blog by one. My aim this year is to reach 500 posts, and oh man, is it ever a slooooowwww process! I'm currently at 467, and it's high time I touched the 500 mark - especially as this blog has been going for close on 7 years!


(Actually, it will complete 7 years on the 17th of May - I just checked!). All compliments, congratulations and wah-bhai-wahs as well as encouragement to continue will be graciously and humbly accepted.)

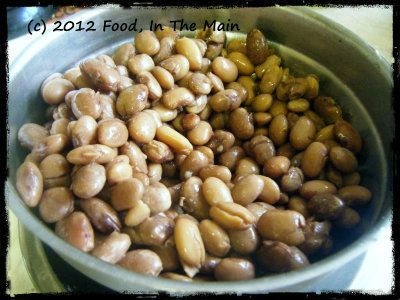
So, the pinto bean filling - it came about simply because there was a small box of leftover cooked beans in the fridge. I just LOVE pinto beans - they're so creamy when cooked, the texture is just lovely. They're probably my most favourite bean, next to chickpeas which, ok, are not a bean really, I know... but you know what I mean, don't you?

Recipe for: Pinto bean parathas
DSCF8137

Ingredients:
2 cups whole wheat flour
1/2 cup plain yogurt
1/2 tsp omam (ajwain/bishopsweed/carom seeds)
1/3 cup cooked pinto beans
DSCF8128
1/2 tsp garam masala/pav bhaji masala or spice mix of choice
Water as required
Salt to taste
Pam spray/oil/butter/ghee as required


Method:
1. Put the flour and omam in a medium size bowl, make a well in the middle and add the yogurt. Mix it in, then make a soft dough using just as much water as required. Knead for 2-3 minutes, then cover the bowl and leave the dough to rest for 30 minutes.
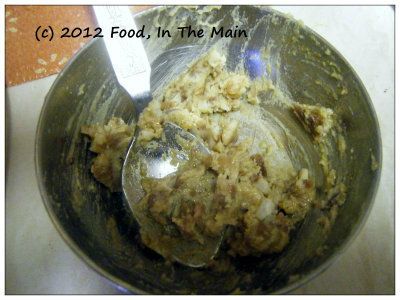
2. Mash together the pinto beans, garam masala/pav bhaji masala and salt to taste. Reserve.
DSCF8129
3. Pinch off a small lime-sized bit off the dough and roll it out on a lightly floured board.
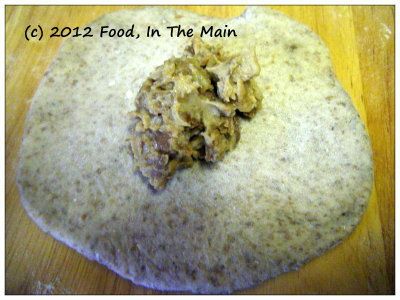
4. Place a tablespoon of the pinto bean paste in the middle of the rolled out dough,
DSCF8130
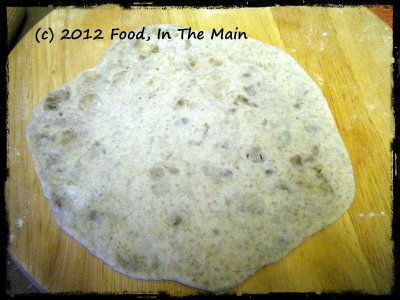
bring the edges in and make a ball, being careful to seal the filling inside fully. Then roll the ball out into a round paratha.
DSCF8127
5. Heat a tava/pancake pan on medium high and place a paratha on it. Cook the paratha for about 30 seconds, then flip it over and spray it with Pam or spread a little butter/oil/ghee.
DSCF8136
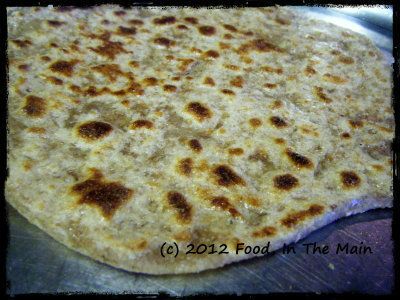
Turn it over again and do the same with the other side. Cook both sides until the paratha acquires golden brown spots. Continue the same way with the rest of the dough.
6. Serve hot with pickles and yogurt, or with any gravy curry, or even coconut chutney.


RECIPE FOR: PINTO BEAN PARATHAS

Ingredients:
2 cups whole wheat flour
1/2 cup plain yogurt
1/2 tsp omam (ajwain/bishopsweed/carom seeds)
1/3 cup cooked pinto beans
1/2 tsp garam masala/pav bhaji masala or spice mix of choice
Water as required
Salt to taste
Pam spray/oil/butter/ghee as required


Method:
1. Put the flour and omam in a medium size bowl, make a well in the middle and add the yogurt. Mix it in, then make a soft dough using just as much water as required. Knead for 2-3 minutes, then cover the bowl and leave the dough to rest for 30 minutes.
2. Mash together the pinto beans, garam masala/pav bhaji masala and salt to taste. Reserve.
3. Pinch off a small lime-sized bit off the dough and roll it out on a lightly floured board. 
4. Place a tablespoon of the pinto bean paste in the middle of the rolled out dough, bring the edges in and make a ball, being careful to seal the filling inside fully. Then roll the ball out into a round paratha. 
5. Heat a tava/pancake pan on medium high and place a paratha on it. Cook the paratha for about 30 seconds, then flip it over and spray it with Pam or spread a little butter/oil/ghee. Turn it over again and do the same with the other side. Cook both sides until the paratha acquires golden brown spots. Continue the same way with the rest of the dough. 
6. Serve hot with pickles and yogurt, or with any gravy curry or even chutney.