This post has been languishing since Christmas 2016, and I think it's time it saw the light of day.
For Christmas lunch, I made roast chicken for Pete (and Pete alone, as the sole non-vegetarian). The rest of the menu consisted of a large tray of roasted vegetables with lots of roasted garlic, cauliflower cheese, pulao, dal, rmint and cauliflower parathas, rasam, yogurt rice and plain rice. And boondi raita.
There were three desserts - gulab jamun cheesecake brought by a friend, cranberry and orange pies made by my sister (spectacular with cream) and this pudding pie that I made. With two non-ovo people in the family (my mother doesn't eat eggs, and my older niece is allergic to eggs so ditto), I wanted to make a dessert that everyone could eat. It had to be chocolate flavoured on request from my sister-in-law because she is a chocolate fiend and will eat practically anything if it has chocolate in it. As an added bonus, my niece is almost as crazy about chocolate. The icing on the cake (in a matter of speaking, that is) was that my niece's best friend ... but you know what I was going to say, right?
So chocolate pudding it was, a non-baked version made with cornflour. To be absolutely honest, I didn't care for it much - I can take or leave chocolate, and I don't really like moussey desserts. It's the texture of mousse that puts me off, mostly.
Anyway, everybody who mattered liked it, and that's all I wanted. Be warned though, this pudding pie doesn't keep well, even refrigerated.
(As for me, I had no room for dessert, but I did have cranberry-orange pie for breakfast the next morning.)
Recipe for: Chocolate pudding pie
Ingredients:
1 9-inch pie crust, readymade or prepared at home
3 cups whole milk (almond milk if you want it to be vegan)
1/4 cup cornflour
1/3 cup sugar
3 tbsp cocoa powder
3 tbsp chocolate chips (semi-sweet if you have it)
1 tsp vanilla extract
pinch of sea salt
Method:
1. Whisk together the cornflour and one cup of the milk to a smooth mixture in a medium saucepan. Then add the remaining milk and cocoa powder, the sugar and the salt. (Note: The cocoa powder will not combine with the milk until you start to whisk the mixture over heat.)
2. Bring the mixture to a boil over medium heat, whisking occasionally. Once it comes to a boil, lower the heat and keep it to a slow rolling boil, whisking constantly until it thickens, about 5 minutes or so.
3. Take the pan off the heat and add the chocolate chips and vanilla, stirring until the chips have dissolved. Pour the filling into the pie shell and let it cool for about 3 minutes, then place a sheet of non-stick paper over the top to form a skin from forming. After 10 minutes, put the pie in the refrigerator and leave it there for a minimum of 3 hours.
Showing posts with label vanilla extract. Show all posts
Showing posts with label vanilla extract. Show all posts
Wednesday, February 01, 2017
Sunday, November 13, 2016
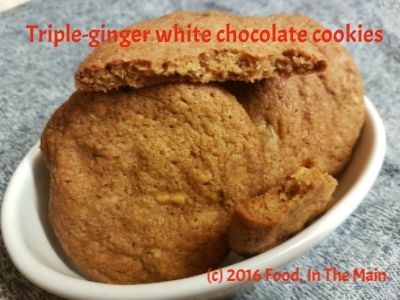
Triple ginger white-chocolate cookies
Okay, I have a confession to make - I might as well be up front about it. I hate white chocolate. I think it's far too sweet and it isn't even proper chocolate. Another confession: I've kind of gone off chocolate bakes in general, although I did like my orgasmic brownies. More to the point, everybody else liked it a lot more, so they disappeared very quickly.
The problem of the day was there was half a bar of white chocolate in my cupboard that had been there for absolutely ages - possibly even years, because I can't remember the last time I used white chocolate in anything! Still, I didn't want to throw it away because I'm stingy like that.
I was toying with the idea of making a white chocolate and raspberry something but wasn't sure what that should be - apart from the small matter of not having any raspberries in the house. My husband tried to convince me to let the white chocolate be and make ginger nut biscuits instead. I make a really mean spicy ginger nut biscuit that he loves, but I wasn't in the mood because they're quite labour-intensive. Also because I didn't want that white chocolate sitting around for a single moment longer. So, as a compromise, I finally decided I would make cookies with ginger AND the white chocolate. And that is how these cookies happened.
My husband thought the cookies were lovely. Some friends who popped by also thought the same, so they went back home happily accompanied by a dozen. My husband was happy, my friends were happy. I tried a cookie myself and I thought it was ok (considering it contained white chocolate). Still, I was happy too, because no more white chocolate in the house... and no more coming in ever if I have a say in it!
Recipe for: Triple-ginger white chocolate cookies
Ingredients:
2 tsp grated ginger
1 tsp ginger powder
2 tbsp chopped stem ginger
225gm plain flour
3/4 tsp baking soda
1 large egg
150gm butter
100gm light brown sugar
50gm dark brown sugar
150gm white chocolate, chopped into small pieces (or use white chocolate chips)
2 tsp vanilla extract
1/2 tsp nutmeg
Method:
1. In a large bowl, cream together the butter and sugar until light and fluffy. Add the egg and the vanilla and beat until well combined.
2. Now add the flour, grated ginger, nutmeg and ginger powder to the bowl and mix with a wooden spoon until it comes together in a dough. Fold in the chopped stem ginger and the white chocolate until they are evenly distributed. Refrigerate the dough for at least 30 minutes, as it will be too sticky to work with otherwise.
3. Preheat the oven to 180C/350F. While the oven is heating, form walnut-sized balls from the chilled dough and place 1.5 inches apart on a baking sheet lined with non-stick foil. Bake for about 10 minutes or until the cookies are golden brown. (The time will vary a little depending on your oven - mine is a fan-assisted oven.) If you have to bake the cookies in batches like I did (because I only have one baking sheet that I actually like), remember to keep the dough refrigerated between bakes so that it doesn't soften too much.
The cookies will be quite soft at first, so leave them on the tray for 2 minutes before carefully removing them to a wire rack to cool completely. They will crisp up as they cool.
If you like your cookies crisp around the edges but softer in the middle (I do), take them out of the oven after about 8-9 minutes. My husband likes them crisp so I baked his for the full 10 minutes.
Wednesday, September 21, 2016
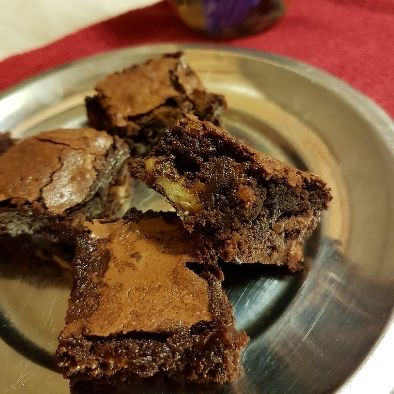
Orgasmic cocoa walnut brownies
Brownies are my nemesis. I don't make them particularly often, and pretty much every past effort has ended up overbaked, dry and crumbly - not exactly ideal, when I like them chewy on the outside and fudgy in the centre. And with nuts in, to cut through the sweetness.
Two weeks back I baked brownies again, using fancy dark chocolate, because I wanted to take them to a friend's new apartment where we had been invited for dinner. While those brownies were not too bad, they were still drier than I wanted. Sort of dusty tasting. This was disappointing and annoying, especially because I'd used expensive chocolate to make it. Nobody else seemed to mind and the brownies were gobbled down, but I was still not really happy with the result.
I nearly decided not to bother making them again, but those darned brownies kept bobbing about in the back of my mind, never quite going away. (Well, obviously not the ACTUAL brownies, but the thought of them.) Yesterday around midnight I finally gave in to the compulsion and decided to make them with cocoa powder (and the remainder of the dark chocolate from last time). Just regular cocoa powder (actually Tesco's own brand, so the very opposite of posh!) which had been lurking in the back of the cupboard for ages.
I made the brownies with hope, but no expectation that it would be what I wanted. For once, I managed to ignore my inner voice which was as usual screaming "but it's not FULLY baked yet!" and removed the brownies from the oven when the centre was still slightly shiny. A toothpick inserted into the centre went in with just a little resistance and came out mostly clean - perfect! The brownies were absolutely sensational - orgasmic, even. Just goes to show that expensive ingredients do not necessarily transform into fabulous baked goods. If you have not come across this tattuvam (truth, in Tamil) anywhere else before, or realised it for yourself during your own cooking experiments, then this is where you heard it first. Credit where it's due, after all, haha!
Here's another truth - underbaking a brownie is preferable to overbaking it. If, like me, you've baked cakes but are not particularly experienced with brownies, your instinct will be to ensure that the toothpick comes out clean. This is a good instinct when it comes to cakes, where underbaking would be disastrous, but it does not apply to brownies. Keep that in mind, and you'll be fine! More importantly, so will your brownies.
Recipe for: Orgasmic walnut cocoa brownies
Ingredients:
140gm unsalted butter, cut into cubes
230gm granulated sugar
50gm unsweetened cocoa powder
30gm dark chocolate
1 htsp instant coffee granules
1/4 tsp kosher salt (or regular if you don't have kosher)
1 tsp pure vanilla extract
2 large eggs
65gm all-purpose flour
1/3 cup nuts of choice (I used walnuts), broken into small pieces
Method:
1. Preheat your oven to 170C. Line an 8"square tin with nonstick aluminium foil such that there is an overhang on all sides. This will make removing the brownies from the pan way easy!
2. Put the butter, sugar, salt, coffee granules and chocolate in a microwave safe bowl and heat it on high for 30 seconds, then stir with a wooden spoon. Repeat until the butter and chocolate are completely melted and smooth.
3. Tip in the cocoa powder and vanilla and stir until fully incorporated.
4. Add the eggs one at a time, stirring well. Then the flour, first mixing it in, then beating the mixture vigorously until it is thick and shiny. Stir in the nuts, if using.
5. Pour/scrape the mixture into the prepared tin - it will be quite thick - and level it. Bake for 20 minutes, or until the top of the mixture loses its shine. This may take a little more time in your oven, but after 20 minutes keep a very sharp watch on the brownies. Underbaking is always preferable to overbaking! A toothpick inserted into the center of the mix should come out mostly clean.
Remove the tin from the oven and let the brownies cool completely before cutting. If you can resist temptation, after the brownies are cool, put them in the fridge for 30 minutes. When cutting them, dip your knife in water every so often, to get clean cuts. Or, if you're like me, never mind refrigerating, just dive in!
Two weeks back I baked brownies again, using fancy dark chocolate, because I wanted to take them to a friend's new apartment where we had been invited for dinner. While those brownies were not too bad, they were still drier than I wanted. Sort of dusty tasting. This was disappointing and annoying, especially because I'd used expensive chocolate to make it. Nobody else seemed to mind and the brownies were gobbled down, but I was still not really happy with the result.
I nearly decided not to bother making them again, but those darned brownies kept bobbing about in the back of my mind, never quite going away. (Well, obviously not the ACTUAL brownies, but the thought of them.) Yesterday around midnight I finally gave in to the compulsion and decided to make them with cocoa powder (and the remainder of the dark chocolate from last time). Just regular cocoa powder (actually Tesco's own brand, so the very opposite of posh!) which had been lurking in the back of the cupboard for ages.
I made the brownies with hope, but no expectation that it would be what I wanted. For once, I managed to ignore my inner voice which was as usual screaming "but it's not FULLY baked yet!" and removed the brownies from the oven when the centre was still slightly shiny. A toothpick inserted into the centre went in with just a little resistance and came out mostly clean - perfect! The brownies were absolutely sensational - orgasmic, even. Just goes to show that expensive ingredients do not necessarily transform into fabulous baked goods. If you have not come across this tattuvam (truth, in Tamil) anywhere else before, or realised it for yourself during your own cooking experiments, then this is where you heard it first. Credit where it's due, after all, haha!
Here's another truth - underbaking a brownie is preferable to overbaking it. If, like me, you've baked cakes but are not particularly experienced with brownies, your instinct will be to ensure that the toothpick comes out clean. This is a good instinct when it comes to cakes, where underbaking would be disastrous, but it does not apply to brownies. Keep that in mind, and you'll be fine! More importantly, so will your brownies.

Recipe for: Orgasmic walnut cocoa brownies
Ingredients:
140gm unsalted butter, cut into cubes
230gm granulated sugar
50gm unsweetened cocoa powder
30gm dark chocolate
1 htsp instant coffee granules
1/4 tsp kosher salt (or regular if you don't have kosher)
1 tsp pure vanilla extract
2 large eggs
65gm all-purpose flour
1/3 cup nuts of choice (I used walnuts), broken into small pieces
Method:
1. Preheat your oven to 170C. Line an 8"square tin with nonstick aluminium foil such that there is an overhang on all sides. This will make removing the brownies from the pan way easy!
2. Put the butter, sugar, salt, coffee granules and chocolate in a microwave safe bowl and heat it on high for 30 seconds, then stir with a wooden spoon. Repeat until the butter and chocolate are completely melted and smooth.
3. Tip in the cocoa powder and vanilla and stir until fully incorporated.
4. Add the eggs one at a time, stirring well. Then the flour, first mixing it in, then beating the mixture vigorously until it is thick and shiny. Stir in the nuts, if using.
5. Pour/scrape the mixture into the prepared tin - it will be quite thick - and level it. Bake for 20 minutes, or until the top of the mixture loses its shine. This may take a little more time in your oven, but after 20 minutes keep a very sharp watch on the brownies. Underbaking is always preferable to overbaking! A toothpick inserted into the center of the mix should come out mostly clean.
Remove the tin from the oven and let the brownies cool completely before cutting. If you can resist temptation, after the brownies are cool, put them in the fridge for 30 minutes. When cutting them, dip your knife in water every so often, to get clean cuts. Or, if you're like me, never mind refrigerating, just dive in!
Saturday, August 20, 2016
Lime-vanilla sugar cookies
The basic sugar cookie recipe was from a colleague who made hers first from a recipe on the back of some cookie mix or other. She brought some leftover cookies to work just before Christmas break last year, and they were SO delicious that I asked her for the recipe. I'm not really a cookie person - either eating or making - but her cookies really were incredibly moreish.
The first time I made the plain sugar cookies was last Saturday - they turned out really well, and Pete loved them. He insisted that we should take some to a friend's barbeque party. She had two types of desserts for the guests but her daughter decided that she was going to make herself a dessert with my cookies, layering them with strawberries that been macerated with sugar, and clotted cream (like an ersatz strawberry shortcake) and declared it a superhit.
In the meantime, my friend's husband was quietly putting away cookie after cookie, looking sheepish when he was rumbled, but not letting it stop him from taking a couple more. There must have been at least 40 cookies in the container, but by the end of the party they were all gone to the last crumb. That was definitely a pleasing result in my eyes, both because the cookies came out so well and because everyone liked them, from the 7-year-old granddaughter to the 70-year old neighbour!
All week since, Pete had been begging me to make some more. Yesterday I chose to make them but give it a citrusy twist, because I love citrus-flavoured things. Lime was my flavouring of choice. Again, the cookies turned out really well - which I guess convinced me that it wasn't a fluke the first time around (really, I'm not famous for baking cookies).
I liked these lime-flavoured cookies quite a lot myself, and so did Pete. And so did Pete's son and his girlfriend who dropped by. Like me, Andy is not really a cookie person, but he said "these are the best cookies I've ever eaten" and went on to prove it by eating half a dozen in quick succession. As for his girlfriend, she scarfed down a few, and then took charge of the bag containing the 2-3 dozen that I packed for them to take away. I'm not sure Andy will be seeing very much of them, unless he is V E R Y nice to her...
By the way, I got about 60 cookies from the amount of dough that this recipe makes - but mine were small, about the diameter of an Oreo. If you make bigger cookies, you will get fewer (yes, well, duh). I also toyed with the idea of icing them with a simple lemon icing (lemon juice + icing sugar mixed to a spreadable consistency) but laziness got the better of me. Besides, I didn't really think the icing was essential.
One last tip - the dough is best worked with when chilled.
Recipe for: Lime-vanilla sugar cookies

Ingredients:
150gm softened unsalted butter
150gm caster (superfine) sugar
300gm plain (AP) flour
1.5 tsp best-quality vanilla extract
1/2 tsp pure lime oil (optional)
Zest of one lime
1 medium egg, beaten
Method:
1. Cream butter and sugar using a wooden spoon in a large mixing until light and fluffy (I did this by hand, takes about 7-8 minutes).
2. Add the beaten egg, the lime zest, lime oil and vanilla extract and beat it in.
3. Add the flour in 4-5 installments, mixing just until incorporated. When it comes together into a rough dough, dust your hands with some flour and form the dough into a ball. Place the ball on some clingfilm or a sheet of non-stick foil and flatten it evenly till about 1/2 inch thick. Cover completely and place in the refrigerator to chill for about an hour.
4. Scatter some flour on your working space. Turn out the chilled dough onto the floured space and gently roll the dough out until it is evenly 3-4mm thick. You may need to dip the rolling pin into flour now and then to stop the dough sticking. You can divide the dough into two before rolling out, to make it easier. Keep the other half chilled in the meantime.
5. Using a cookie cutter of choice, stamp out the cookies, dipping the cutter into flour each time. Re-roll the remaining dough and cut out until the dough is used up.
6. Transfer the cookies onto a sheet lined with non-stick foil or baking paper, leaving about an inch in between them as they will spread a little. Place the cookie sheet in the fridge again to chill for 15 minutes.
7. Preheat your oven to 180C/350F (mine is a fan-assisted oven) and bake the cookies for 10-11 minutes or until they are a pale golden brown. You can turn the sheet around after 5-6 minutes to let them brown evenly, if you like.
8. Let them cool on the sheet for a couple of minutes, then transfer carefully to a cooling rack until completely cool. Store in an airtight jar.
Labels:
AP flour,
caster sugar,
egg,
lime oil,
lime zest,
plain flour,
superfine sugar,
unsalted butter,
vanilla extract
Sunday, April 24, 2016
Eggless orange almond cookies
My little niece, who is nearly 6 years old, has been allergic to eggs since she was a baby. If she eats anything with even a trace of eggs, within about 15 minutes of ingesting it, she gets very uneasy and then invariably throws up. Once she's evacuated the contents of her little tummy, she's right back to normal, bouncy and happy while people around her deal with the aftermath.
Obviously an allergy to eggs, while not as terrible as various other food-related allergies that children can have, does mean that she has to be very careful when she eats away from home - especially when it's a kiddie birthday party and there are tempting cakes and cookies on offer. Also because no party-organising parent really wants to have to deal with a kid who's having an allergic reaction that could escalate to life-endangering! However, touch wood, my niece is not fatally allergic to eggs, so her allergy is probably one of the easier types of problems to deal with. After all, it's easy enough to make egg-free food, especially cakes, cookies and ice creams. This holds true especially for home bakers.
I made these orange almond cookies last week as a trial, to see how they would turn out prior to making them for my sister to take back for my niece when she returns to Seattle next week. The cookies turned out incredibly crisp and orangey and really tasty, and they disappeared really rather quickly. So I'm making a double batch today, because there would be a one-man mutiny if I didn't keep a few cookies back for home consumption. And here's the recipe so YOU can make it too.
Oh by the way, I've taken to weighing out my ingredients for baking - I have the most basic of Salter kitchen scales that can weigh up to 500gms or 1/2 kilo. What's more, it can be tucked away neatly in its weighing bowl with its own plastic lid. Don't ask what's the big deal here, if you're the kind that weighs things automatically - until now I've not been the sort of person who bothered with all that "fussiness" (as I considered it). I'm not yet 100% on the side of weighing every single time...but I'm far more likely to do it than not. I consider myself to be the new improved version of me.
Recipe for: Eggless orange almond cookies
Ingredients:
115 gms unsalted butter, softened
100 gms caster or granulated) sugar (I've tried it with both and it doesn't seem to have made any difference to the end result)
155 gms plain flour
1 tbsp orange juice
1/2 tsp pure orange oil (optional)
3-4 drops of orange food colouring (optional)
Zest of one orange
1 tsp vanilla extract (or 1/2 tsp cardamom seed powder if you prefer)
1/4 cup slivered or sliced almonds
Method:
1. Beat the butter and sugar in a large bowl until light and fluffy. By hand will do - I used a wooden spoon.
2. Add the rest of the ingredients apart from the sliced/slivered almonds and mix together until fully incorporated. Place the almonds on a plate.
3. Chill the dough in the refrigerator for an hour for it to firm up. Line a flat baking sheet with a Silpat mat or with nonstick baking paper.
4. Break off pieces of dough (about the size of a large marble), roll them into a ball and press them into the almonds.
5. Place the cookie dough balls on the lined tray (almond side up) and flatten each one slightly. (You may need to wash and dry your hands every so often to stop the dough sticking as it starts to warm up). Leave 2 inches space between cookies as they will spread. Put the remaining dough back in the fridge if you can't use it all in one batch.
6. Bake the cookies in a 180C oven for 9-12 minutes (or until the edges turn golden brown). Leave the cookies on the sheet for a minute, then transfer carefully with a spatula on to wire cooling racks. They will crisp up as they cool.
Monday, January 25, 2016
Pineapple upside down cake
All these years of blogging, all these cakes I've made... and I've never posted a pineapple upside down cake recipe! It's kinda retro and old fashioned, apparently, but I've never understood how anything can be "in fashion" or "outdated" when it comes to food - especially if it's a tasty, delicious recipe. Who cares if it's from the '70s or the '50s or the '80s? For heaven's sake, it's FOOD, not fashion. It annoys me tremendously when some idiot foodista or television chef somewhere labels a particular greens or grain or fruit as "fashionable" or "healthy" or "THE must-have item", and the entire bleddy food blog world immediately features it, so that there is a landslide of samey same posts. I dislike food fads with a passion! Okay, my soapbox rant is over for today.
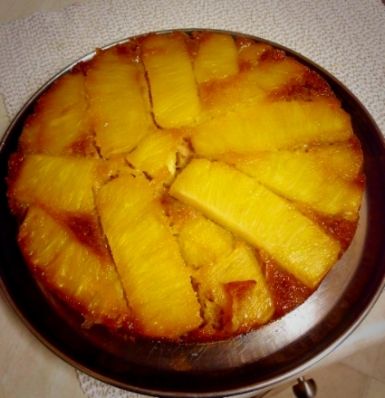
So, pineapple cake. I only made it because Pete bought a bag of fresh pineapple "fingers" that was so acidic and sharp, it could have stripped the enamel from your teeth no problem. He then had the brainwave of making pineapple upside down cake. Or rather, getting me to make it. Since I had a simple, one-bowl sort of recipe (based on a BBC Good Food recipe) for this cake, I acceded to his request.
While the recipe called for pineapple syrup and vanilla extract to flavour the cake, I didn't have either ingredient, my pineapple being fresh rather than canned. But there was enough pineapple juice at the bottom of the bag, which I substituted for the syrup. And then simply ignored the fact that there was no vanilla extract in my store cupboard. It didn't matter, anyway. The cake smelt amazing as it baked, so fragrant and pineappley, and it tasted as beautiful as it smelt. I love this cake - I just can't understand why it took me so long to post the recipe!
Recipe for: Pineapple upside down cake

Ingredients:
For the topping
50 gm softened butter
50 gm soft light brown sugar
Fresh pineapple fingers or tinned pineapple slices
For the cake
100 gm softened butter
100 gm soft light brown sugar
125 gm plain flour
1 tsp baking powder
1/2 tsp baking soda
2 large eggs
2 tbsp pineapple juice
2 tbsp pineapple juice
1 tsp vanilla extract (if you have it)
Method:
1. Preheat the oven to 180C/350F.
2. Beat the butter and sugar for the topping until soft and creamy. Spread this as best as possible around the bottom and halfway up the sides of a 7" round cake pan.
3. Arrange the pineapple slices and cherries (if using) over this such that the entire bottom of the tin is covered with as few spaces as possible.
4. In a big bowl, add all the cake ingredients and beat until the batter is soft and smooth, and the ingredients well mixed.
5. Drop the batter by spoonfuls over the pineapple rings and spread evenly to cover.
6. Bake for 30-45 minutes until a tester inserted in the cake comes out clean. The cake could take longer than 45 minutes, or be done in less. Test at 35 minutes, then every 5-7 minutes until it is cooked.
7. Let it sit in the pan for 10 minutes, then turn it out onto a serving plate. Eat warm, with or without vanilla ice cream.
Saturday, March 22, 2014
Double cherry almond cake
Can you believe it's over 6 months since I last posted anything on this blog? It's amazing how quickly times flies - the truth is that while I've kind of missed posting new recipes, I've also felt some relief to be able to ignore the tyranny of the blog itself. (Kind of. Obviously, since I'm posting a recipe now, I've not exactly totally escaped the tyrant!) Anyway, my husband keeps saying that it would be a shame to shut down this blog, considering how many years I've been keeping it going. I guess that's true, too.
So, I made this cake because Pete loves maraschino cherries. I'd bought a big bag of these in the run-up to Christmas 2013, and while I did use some in fruit cake and Christmas cake, I've also been half toying with the idea of throwing the remainder of the cherries away. It's their sticky sweetness that puts me off.
Pete would have been happy if I'd used just those cherries in a cake, but that really did not appear to me one bit. So I compromised by using the maraschinos, but also added Kirsch-soaked Morello cherries (I thought I had some dried sour cherries, but turns out not) that were lurking in my dried fruits container. Again left over from last Christmas, but no complaints there.
For some crunch, and because I like nuts in my cakes to cut through the sweetness, I used flaked almonds both in the cake batter and in the topping. Of course, since this was baked in a Bundt pan, the "topping" is really the "bottoming", to coin a phrase. Doesn't sound particularly graceful, but that's how it hangs, my friends. In other words, you sprinkle the almonds in the pan, pour the batter on top, bake the cake, invert the baked cake - and voila, the bottoming is now the much nicer topping!
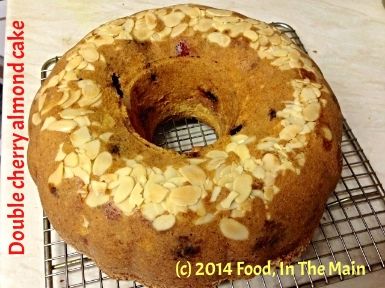
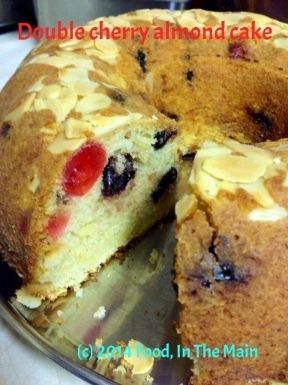
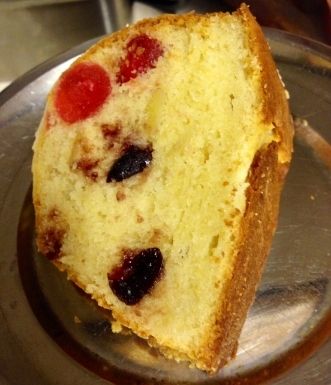
This cake smelt to me like a combination of sweet bread and cake all at once, while baking. No idea why, but it was lovely. The texture of the cake is moist and moreish, and the combination of the dark Morello cherries and the jewel-coloured maraschinos in every slice made the cake look beautiful!
Recipe for: Double cherry almond cake
So, I made this cake because Pete loves maraschino cherries. I'd bought a big bag of these in the run-up to Christmas 2013, and while I did use some in fruit cake and Christmas cake, I've also been half toying with the idea of throwing the remainder of the cherries away. It's their sticky sweetness that puts me off.
Pete would have been happy if I'd used just those cherries in a cake, but that really did not appear to me one bit. So I compromised by using the maraschinos, but also added Kirsch-soaked Morello cherries (I thought I had some dried sour cherries, but turns out not) that were lurking in my dried fruits container. Again left over from last Christmas, but no complaints there.
For some crunch, and because I like nuts in my cakes to cut through the sweetness, I used flaked almonds both in the cake batter and in the topping. Of course, since this was baked in a Bundt pan, the "topping" is really the "bottoming", to coin a phrase. Doesn't sound particularly graceful, but that's how it hangs, my friends. In other words, you sprinkle the almonds in the pan, pour the batter on top, bake the cake, invert the baked cake - and voila, the bottoming is now the much nicer topping!

This cake smelt to me like a combination of sweet bread and cake all at once, while baking. No idea why, but it was lovely. The texture of the cake is moist and moreish, and the combination of the dark Morello cherries and the jewel-coloured maraschinos in every slice made the cake look beautiful!

Recipe for: Double cherry almond cake
Ingredients:
1-1/2 cups all-purpose flour
1/2 cup ground almonds
1 cup butter at room temperature
1 cup Quark (you can use cream cheese)
1 cup white sugar
1/2 cup maraschino cherries
1/2 cup kirsch-soaked Morello cherries (or plain dried Bing cherries)
4 eggs
3 tsp baking powder
1/2 tsp salt
2 tsp vanilla extract
1 tsp almond extract
1/3 cup + 2 tbsp flaked almonds
Method:
1. Butter and flour an 8" Bundt pan and knock off the excess flour. Sprinkle the 2 tbsp flaked almonds evenly on the bottom of the cake pan. Preheat the oven to 165 degrees C.
2. Mix together the flour, salt and baking powder, and set aside.
3. Beat the butter and sugar together until fluffy and light, then beat in the Quark and flavourings.
4. Beat in the eggs one at a time, then mix in the flour until just combined. Stir in the maraschino and Morello cherries as well as the flaked almonds.
5. Dollop the cake batter into the prepared Bundt pan. Tie or pin a wet towel around the cake pan. This helps the cake to rise evenly and not "dome" too quickly or crack.
6. Bake the cake for about 70 minutes, testing with a skewer to see if it is done. If the top of the cake browns too quickly, cover it with a piece of foil. The cake is done when a tester or skewer poked into it comes out clean.
Leave the cake in the pan for 5 minutes, then turn it out onto a cooling rack. Let ir cool for 15 minutes or so, then slice and serve.
Monday, April 30, 2012
Oaty banana snack cake
I don't know where I got this recipe - it was in my collection of recipes, hand-written in those days when I (presumably) didn't have a printer handy. I can't imagine why else I would have written it out painstakingly rather than printing it. Once upon a time, I used to be an enthusiastic letter writer, writing chatty letters of up to a dozen pages to penpals and friends. In fact, the number of handwritten pages doubled if I was writing to my German penpals at the time, because I'd have to compose my letter in "rough" (because of the many stop-starts and cross-outs) and then copy it out again in "fair".
And to think that now, if I have to write more than 10 lines at a stretch, I get cramps in my hand...! Yes, actual cramps - and honestly I don't know whether that's due to old age or the unaccustomedness of exerting pressure on a pen with my fingers. I did attempt to write longhand letters to a couple of old friends recently, but the effort didn't last beyond two exchanges. The fact that I don't write anymore has no bearing on my love for writing paper and fountain pens - I just LOVE both!
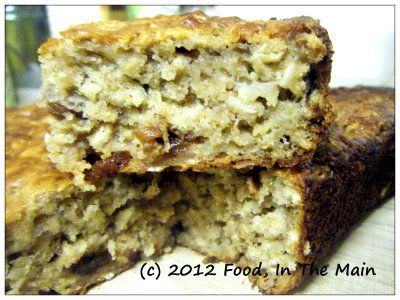
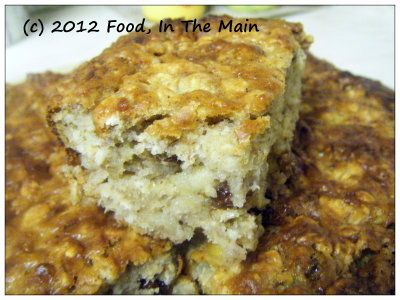
Um... yes, I do realise that pens, paper and handwritten letters have no bearing on this recipe. The cake is chewy with oats, rich with the flavour of bananas and not very sweet. I used an expensive brand of orange oil extract because I didn't have any oranges (for zest). But do use actual fresh orange zest (and 1/4 cup of orange juice) if you have them. The batter is thick enough to take the optional 1/4 cup of juice without becoming overly runny.
Recipe for: Oaty banana cake
Ingredients:
1-1/2 cups oats (I used organic jumbo oats)
1 cup all-purpose flour
1 tsp baking powder
1/2 tsp baking soda
1/4 tsp salt
1 tsp cinnamon powder
1/3 heaping cup demerara sugar (or use brown sugar)
1/3 cup sultanas or raisins
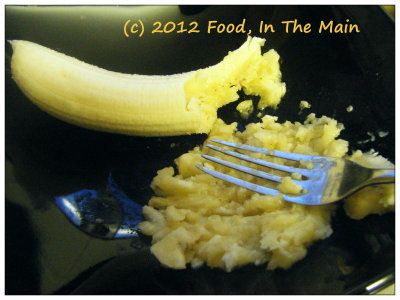
1 cup mashed ripe bananas (two medium)
1 large egg
1 cup yogurt (I used low-fat Greek style)
2 tsp vanilla extract
1 tbsp orange zest or 2 tsp orange oil extract
2 tbsp oil
1/4 cup orange juice (optional)
Method:1-1/2 cups oats (I used organic jumbo oats)
1 cup all-purpose flour
1 tsp baking powder
1/2 tsp baking soda
1/4 tsp salt
1 tsp cinnamon powder
1/3 heaping cup demerara sugar (or use brown sugar)
1/3 cup sultanas or raisins
1 cup mashed ripe bananas (two medium)

1 large egg
1 cup yogurt (I used low-fat Greek style)
2 tsp vanilla extract
1 tbsp orange zest or 2 tsp orange oil extract
2 tbsp oil
1/4 cup orange juice (optional)
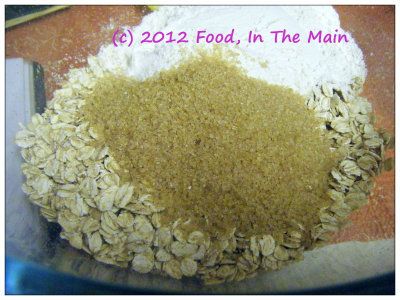
1. Mix together the oats, flour, sugar, baking powder, baking soda, salt, raisins and cinnamon powder in a large bowl.
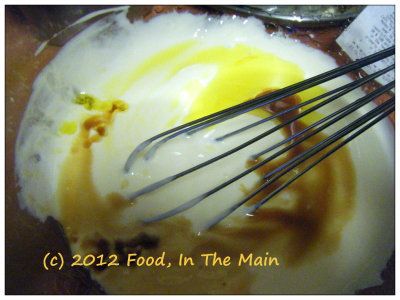
2. In another bowl, lightly beat the egg, then whisk in the yogurt, oil, vanilla extract, orange zest
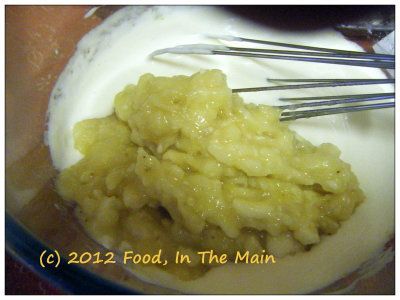
and mashed bananas.
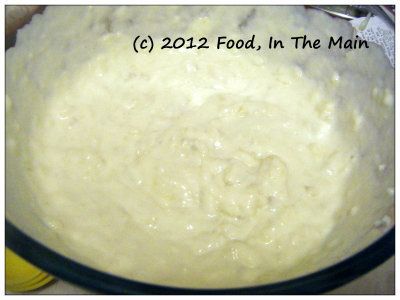
3. Pour the wet batter into the dry mix,
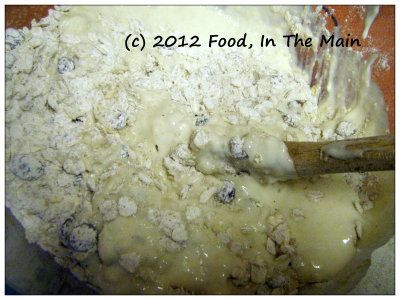
then lightly stir until just mixed.
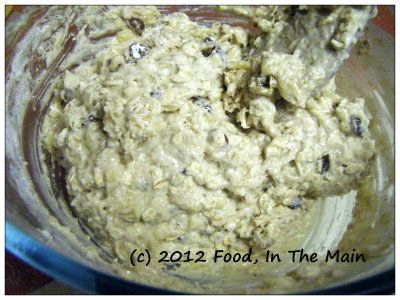
Do not overbeat. The batter will be quite thick.
4. Spray a 7" square baking pan with Pam (or grease thoroughly with butter, if you like), and pour the batter into the pan.
5. Bake at 180C/350F for about 30-40 minutes, or till a tester comes out clean.
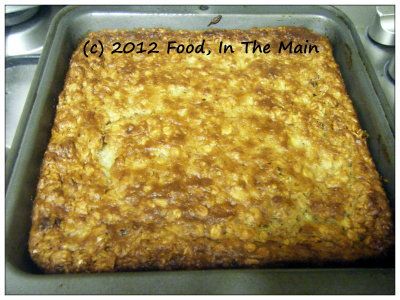
Check the cake after 30 minutes and keep an eye on it thereafter. Once the cake is done, let it remain in the pan for 5 minutes. Remove to a wire cooling rack.
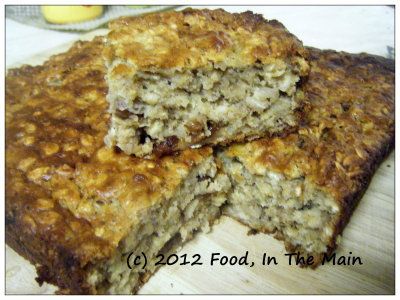
When the cake is cool, cut into bars and serve.

2. In another bowl, lightly beat the egg, then whisk in the yogurt, oil, vanilla extract, orange zest

and mashed bananas.


3. Pour the wet batter into the dry mix,

then lightly stir until just mixed.

Do not overbeat. The batter will be quite thick.
4. Spray a 7" square baking pan with Pam (or grease thoroughly with butter, if you like), and pour the batter into the pan.
5. Bake at 180C/350F for about 30-40 minutes, or till a tester comes out clean.

Check the cake after 30 minutes and keep an eye on it thereafter. Once the cake is done, let it remain in the pan for 5 minutes. Remove to a wire cooling rack.

When the cake is cool, cut into bars and serve.
RECIPE: OATY BANANA SNACK CAKE
Ingredients:
1-1/2 cups oats (I used organic jumbo oats)
1 cup all-purpose flour
1 tsp baking powder
1/2 tsp baking soda
1/4 tsp salt
1 tsp cinnamon powder
1/3 heaping cup demerara sugar (or use brown sugar)
1/3 cup sultanas or raisins
1 cup mashed ripe bananas (two medium)
1 large egg
1 cup yogurt (I used low-fat Greek style)
2 tsp vanilla extract
1 tbsp orange zest or 2 tsp orange oil extract
2 tbsp oil
1/4 cup orange juice (optional)
1/4 cup orange juice (optional)
Method:
1. Mix together the oats, flour, sugar, baking powder, baking soda, salt, raisins and cinnamon powder in a large bowl.
2. In another bowl, lightly beat the egg, then whisk in the yogurt, oil, vanilla extract, orange zest and mashed bananas.
3. Pour the wet batter into the dry mix, then lightly stir until just mixed. Do not overbeat. The batter will be quite thick.
4. Spray a 7" square baking pan with Pam (or grease thoroughly with butter, if you like), and pour the batter into the pan.
5. Bake at 180C/350F for about 30-40 minutes, or till a tester comes out clean. Check the cake after 30 minutes and keep an eye on it thereafter. Once the cake is done, let it remain in the pan for 5 minutes. Remove to a wire cooling rack. When the cake is cool, cut into bars and serve.
Sunday, April 29, 2012
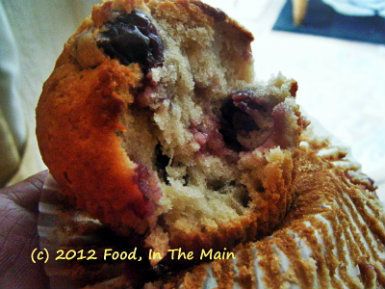
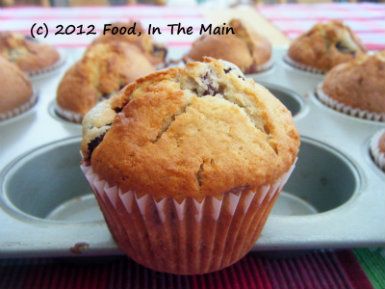
Cherry muffins
This is a simple muffin recipe - not that muffins are overly complicated things to make, but there are recipes which do turn them into a full-scale production. For this one, however, you mix the dry and the wet separately, then introduce the wet to the dry to make the batter, fold the cherries in briefly and voila! Bob's your uncle and the muffin batter is all ready to go in the muffin pans. (If, by the way, Bob IS your uncle, do say hello from me. I don't have an uncle Bob in my life.)
Recipe for: Cherry muffins
Recipe for: Cherry muffins
Ingredients:
2 cups sour cherries (I used canned cherries, drained)
2-3/4 cups all-purpose flour
2/3 cup sugar
2 tsp baking powder
2 tsp vanilla extract
4 tbsp butter, melted
2 large eggs
1 cup milk
Method:
1. Mix together the flour, baking powder and sugar in a large bowl.
2. In a smaller bowl, mix the melted butter,
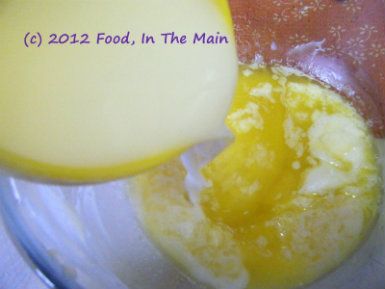
milk,

eggs and vanilla
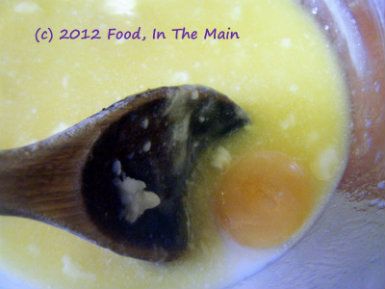
and stir till well combined.
3. Make a well in the flour, then pour in the wet milk mixture and stir together lightly until the flour is just combined.
4. Stir in the cherries,
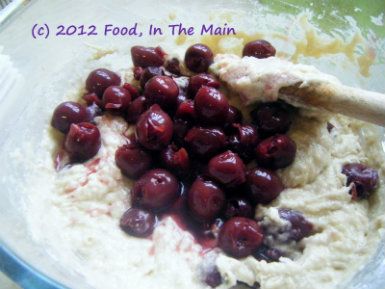
then spoon the batter into a muffin pan lined with paper cases. Bake at 180C for about 30 minutes, till the muffins are golden brown on top.
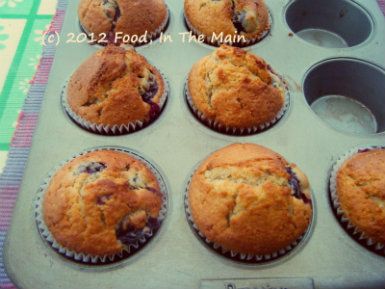
Remove from the oven and let the muffins cool in the pan for 10 minutes.
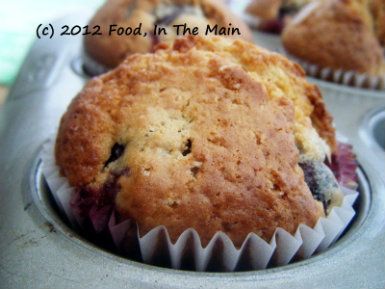
Serve warm.
RECIPE: CHERRY MUFFINS
Ingredients:
2. In a smaller bowl, mix the melted butter,

milk,

eggs and vanilla

and stir till well combined.
3. Make a well in the flour, then pour in the wet milk mixture and stir together lightly until the flour is just combined.
4. Stir in the cherries,

then spoon the batter into a muffin pan lined with paper cases. Bake at 180C for about 30 minutes, till the muffins are golden brown on top.

Remove from the oven and let the muffins cool in the pan for 10 minutes.

Serve warm.
RECIPE: CHERRY MUFFINS
Ingredients:
2 cups sour cherries (I used canned cherries, drained)
2-3/4 cups all-purpose flour
2/3 cup sugar
2 tsp baking powder
2 tsp vanilla extract
4 tbsp butter, melted
2 large eggs
1 cup milk
Method:
1. Mix together the flour, baking powder and sugar in a large bowl.
2. In a smaller bowl, mix the melted butter, milk, eggs and vanilla and stir till well combined.
3. Make a well in the flour, then pour in the wet milk mixture and stir together lightly until the flour is just combined.
4. Stir in the cherries, then spoon the batter into a muffin pan lined with paper cases. Bake at 180C for about 30 minutes, till the muffins are golden brown on top. Remove from the oven and let the muffins cool in the pan for 10 minutes. Serve warm.
Labels:
all-purpose flour,
baking powder,
butter,
eggs,
milk,
sour cherries,
sugar,
vanilla extract
Thursday, June 09, 2011
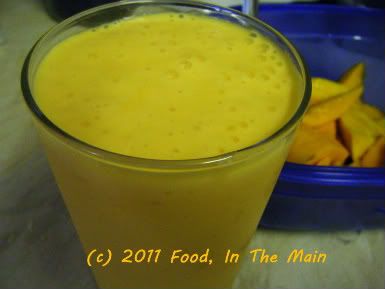
Alphonso mango milkshake
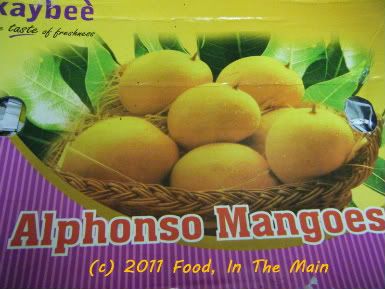
Ok, I’m just boasting because I had Alphonso mangoes to spare (because they were too squishily ripe to eat, really, by the time I got to the last two or three.) If you don’t have Alphonsos, don’t fret, you can still make this recipe. Just use any really ripe mangoes, although preferably the kind that aren’t stringy. Meanwhile, I’m going to continue calling this recipe “Alphonso mango milkshake”, because yeah, I’m still boasting. Those Alphonso mangoes are just SO gorgeous!
Anyway, I like my home-made mango milkshakes (or smoothies – what’s the difference, if any?), Alphonso or otherwise, to be on the liquidy side rather than thick; or if not, I like them to be whizzed with plenty of ice, like frappes.
Sometimes I combine the two styles. I don’t have a name for this hybrid, mainly because I haven’t found a way to combine “frappe” and “shake” to make anything meaningful or catchy, no matter which way around I try it. Could “shakeapp” mean anything to you, apart from sounding vaguely like something that might be downloaded onto your iPhone or Android?
Okay - remember, if you come across the term on either appliance, the copyright belongs to ME and if I’m not acknowledged as the creator, I shall sue for millions! Yes, MILLIONS (of £££s)! You heard it here first, Steve Jobs.
Yeah, that threat should really “shake” ol’ Steve “app”.
HAHAHAHAHA.
*koff koff*
Recipe for: Alphonso mango milkshake
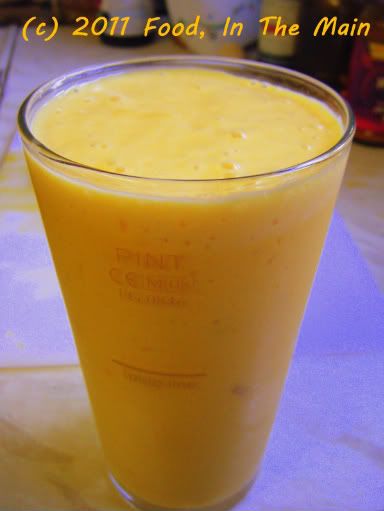
Ingredients:
2 ripe alphonso mangoes, peeled and cubed
1 cup vanilla icecream
1-2 cups cold milk (as required)
A couple of drops of vanilla extract OR rosewater OR 1/4 tsp cardamom powder
Sugar if required
Ice cubes or crushed ice as required
Method:
1. Put the mangoes, vanilla icecream, 1 cup milk, sugar to taste and ice-cubes/crushed ice in a blender.
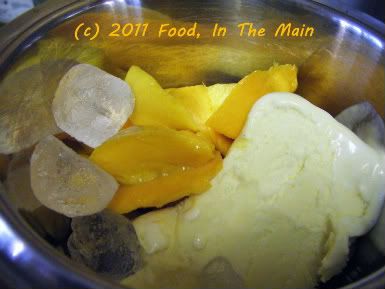
Blitz them till they are liquidised.
2. Blend in more milk or crushed ice as required to make the milkshake the consistency you like.
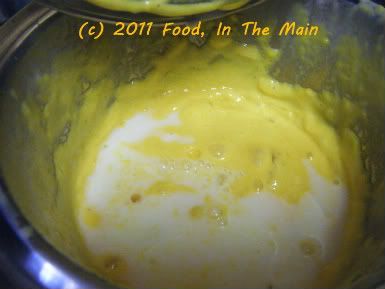
Blend in the vanilla extract, rosewater or cardamom powder, if using.
3. Serve the milkshake immediately in tall glasses.
RECIPE: ALPHONSO MANGO MILKSHAKE
Ingredients:
2 ripe alphonso mangoes, peeled and cubed
1 cup vanilla icecream
1-2 cups cold milk (as required)
A couple of drops of vanilla extract OR rosewater OR 1/4 tsp cardamom powder
Sugar if required
Ice cubes or crushed ice as required
Method:
1. Put the mangoes, vanilla icecream, 1 cup milk, sugar to taste and ice-cubes/crushed ice in a blender. Blitz them till they are liquidised.
2. Blend in more milk or crushed ice as required to make the milkshake the consistency you like. Blend in the vanilla extract, rosewater or cardamom powder, if using.
3. Serve the milkshake immediately in tall glasses.
Wednesday, February 23, 2011
Blueberry cake
I usually opt for the simplest cake recipes, as I’ve said before (often) (TOO often, sigh regular readers – and if you’re not sighing, regular readers, you should be). The simpler, the better. My most favourite cake recipes are one-bowl affairs where fussy sifting and beating and careful folding and so on do not figure in the instructions.
But this time, in a dramatic departure from my usual modus operandi, the recipe involves fussy separating, AND beating, AND sifting, AND careful folding AND plenty of elbow grease. Sounds disgusting, doesn’t it, especially the elbow grease? If you usually make use of an electric egg beater, you can safely omit the elbow grease, but the rest of the dramatic departure method still holds good. Don’t say you haven’t been warned. And don't ask why I went for the dramatic departure. I still can't believe I chose a recipe where I had to whip the egg whites by hand...
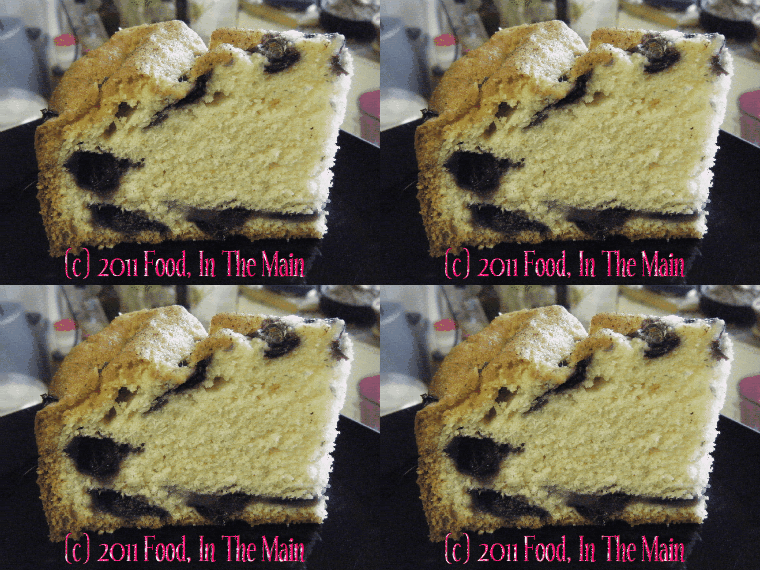
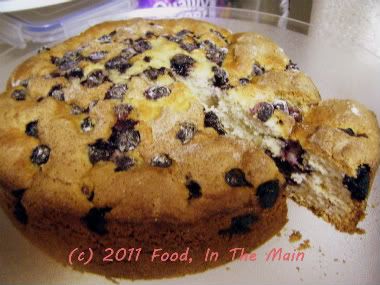
Anyway, after seeing the finished cake, I thought that the procedure had been fussy for no real reason… but on reflection (and after tasting), I think it resulted in a lighter, fluffier, higher rising cake – especially considering that the cake tin I’d used had seemed a bit too big for the amount of batter involved.
And what a delicious cake it was, too.
Recipe for: Blueberry cake
Ingredients:
2 eggs, separated
1/4 cup + 1/2 cup sugar
1/2 cup butter/margarine, softened
1/4 tsp salt
2 tsp vanilla extract
1-1/2 cups flour
1 tbsp flour to coat berries
1 tsp baking powder
1/3 cup milk
1-1/2 cup fresh blueberries
cinnamon sugar for topping
Method:
1. Preheat oven to 180C.
2. Beat egg whites until it forms soft peaks.
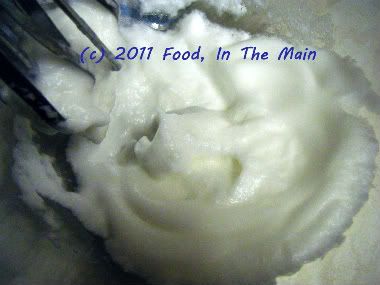
Beat in 1/4 cup of sugar.
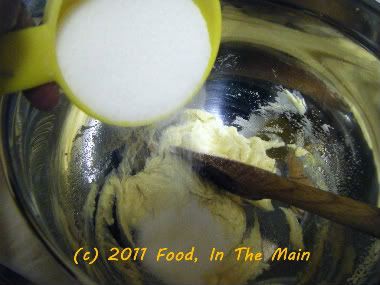
3. In another bowl, cream margarine/butter.
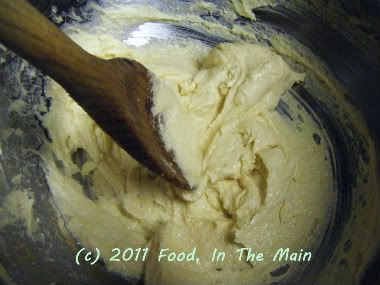
Add salt, vanilla, and remaining sugar gradually.
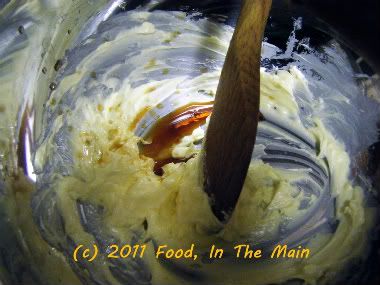
4. Add egg yolks and beat until creamy.
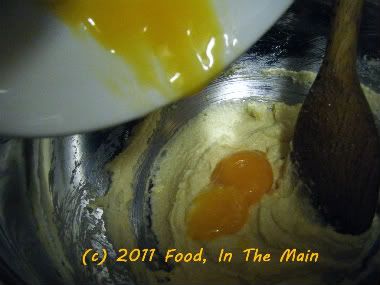
5. Mix flour with baking powder.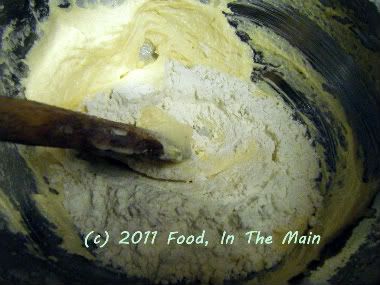
Add alternately to creamed mixture with milk.
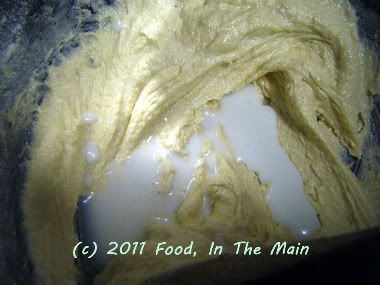
6. Fold in beaten egg whites.
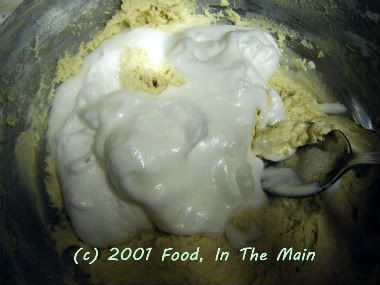
7. Turn out half the batter into an 8" round pan that has been sprayed with Pam.
8. Coat the blueberries with 1 tablespoon of flour,
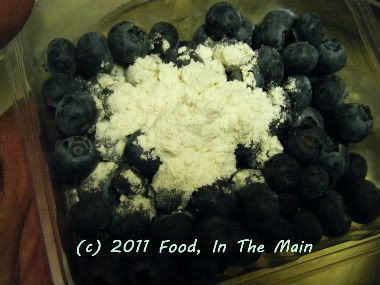
then add half of the berries to the batter in the pan, as far as possible spacing them out evenly without letting them touch the edges of the pan.
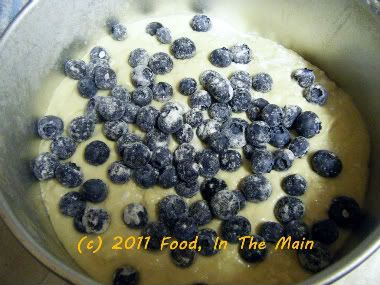
9. Pour in the remaining batter over the berries, then sprinkle the rest of the berries over the top.
10. Sprinkle cinnamon sugar over the top of the batter.
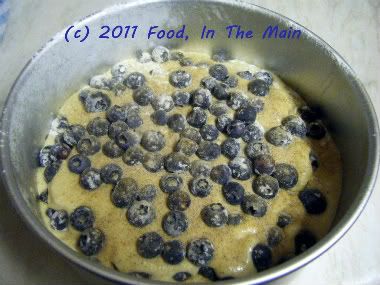
Bake in the oven for about an hour or so, or till a cake tester inserted in the centre comes out clean.
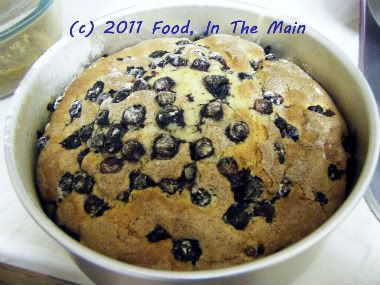
11. Let the cake remain in the pan for 10 minutes, then remove to a wire rack.
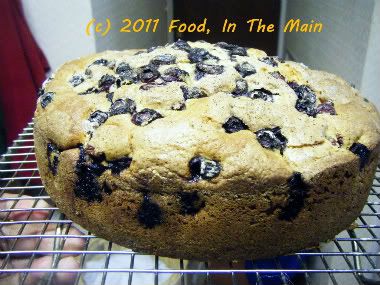
Serve warm with a cup of coffee or tea.
RECIPE: BLUEBERRY CAKE
Ingredients:
2 eggs, separated
1/4 cup + 1/2 cup sugar
1/2 cup butter/margarine, softened
1/4 tsp salt
2 tsp vanilla extract
1-1/2 cups flour
1 tbsp flour to coat berries
1 tsp baking powder
1/3 cup milk
1-1/2 cup fresh blueberries
cinnamon sugar for topping
Method:
1. Preheat oven to 180C.
2. Beat egg whites until it forms soft peaks.
Beat in 1/4 cup of sugar.
3. In another bowl, cream margarine/butter. Add salt, vanilla, and
remaining sugar gradually.
4. Add egg yolks and beat until creamy.
5. Mix flour with baking powder.
Add alternately to creamed mixture with milk.
6. Fold in beaten egg whites.
7. Turn out half the batter into an 8" round pan that has been sprayed with Pam.
8. Coat the blueberries with 1 tablespoon of flour, then add half of the berries to the batter in the pan, as far as possible spacing them out evenly without letting them touch the edges of the pan.
9. Pour in the remaining batter over the berries, then sprinkle the rest of the berries over the top.
10. Sprinkle cinnamon sugar over the top of the batter. Bake in the oven for about an hour or so, or till a cake tester inserted in the centre comes out clean.
11. Let the cake remain in the pan for 10 minutes, then remove to a wire rack. Serve warm with a cup of coffee or tea.
But this time, in a dramatic departure from my usual modus operandi, the recipe involves fussy separating, AND beating, AND sifting, AND careful folding AND plenty of elbow grease. Sounds disgusting, doesn’t it, especially the elbow grease? If you usually make use of an electric egg beater, you can safely omit the elbow grease, but the rest of the dramatic departure method still holds good. Don’t say you haven’t been warned. And don't ask why I went for the dramatic departure. I still can't believe I chose a recipe where I had to whip the egg whites by hand...
Anyway, after seeing the finished cake, I thought that the procedure had been fussy for no real reason… but on reflection (and after tasting), I think it resulted in a lighter, fluffier, higher rising cake – especially considering that the cake tin I’d used had seemed a bit too big for the amount of batter involved.
And what a delicious cake it was, too.
Recipe for: Blueberry cake

Ingredients:
2 eggs, separated
1/4 cup + 1/2 cup sugar
1/2 cup butter/margarine, softened
1/4 tsp salt
2 tsp vanilla extract
1-1/2 cups flour
1 tbsp flour to coat berries
1 tsp baking powder
1/3 cup milk
1-1/2 cup fresh blueberries
cinnamon sugar for topping
Method:
1. Preheat oven to 180C.
2. Beat egg whites until it forms soft peaks.

Beat in 1/4 cup of sugar.

3. In another bowl, cream margarine/butter.

Add salt, vanilla, and remaining sugar gradually.

4. Add egg yolks and beat until creamy.

5. Mix flour with baking powder.

Add alternately to creamed mixture with milk.

6. Fold in beaten egg whites.

7. Turn out half the batter into an 8" round pan that has been sprayed with Pam.
8. Coat the blueberries with 1 tablespoon of flour,

then add half of the berries to the batter in the pan, as far as possible spacing them out evenly without letting them touch the edges of the pan.

9. Pour in the remaining batter over the berries, then sprinkle the rest of the berries over the top.
10. Sprinkle cinnamon sugar over the top of the batter.

Bake in the oven for about an hour or so, or till a cake tester inserted in the centre comes out clean.

11. Let the cake remain in the pan for 10 minutes, then remove to a wire rack.

Serve warm with a cup of coffee or tea.

RECIPE: BLUEBERRY CAKE
Ingredients:
2 eggs, separated
1/4 cup + 1/2 cup sugar
1/2 cup butter/margarine, softened
1/4 tsp salt
2 tsp vanilla extract
1-1/2 cups flour
1 tbsp flour to coat berries
1 tsp baking powder
1/3 cup milk
1-1/2 cup fresh blueberries
cinnamon sugar for topping
Method:
1. Preheat oven to 180C.
2. Beat egg whites until it forms soft peaks.
Beat in 1/4 cup of sugar.
3. In another bowl, cream margarine/butter. Add salt, vanilla, and
remaining sugar gradually.
4. Add egg yolks and beat until creamy.
5. Mix flour with baking powder.
Add alternately to creamed mixture with milk.
6. Fold in beaten egg whites.
7. Turn out half the batter into an 8" round pan that has been sprayed with Pam.
8. Coat the blueberries with 1 tablespoon of flour, then add half of the berries to the batter in the pan, as far as possible spacing them out evenly without letting them touch the edges of the pan.
9. Pour in the remaining batter over the berries, then sprinkle the rest of the berries over the top.
10. Sprinkle cinnamon sugar over the top of the batter. Bake in the oven for about an hour or so, or till a cake tester inserted in the centre comes out clean.
11. Let the cake remain in the pan for 10 minutes, then remove to a wire rack. Serve warm with a cup of coffee or tea.
Labels:
all-purpose flour,
baking powder,
blueberries,
butter,
cinnamon sugar,
eggs,
margarine,
milk,
salt,
sugar,
vanilla extract
Monday, February 07, 2011
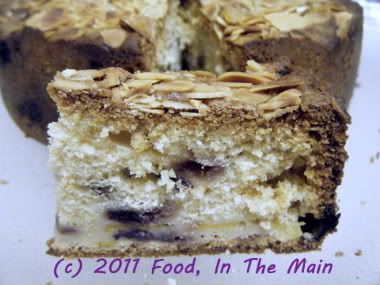
Blueberry nectarine cake
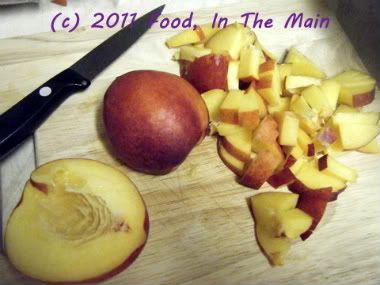
“Perfectly ripe nectarines – ready to eat now” is what the label on the package said. HA! The nectarines were anything but perfectly ripe… and unless you like your tongue twisting itself into a knot while your eyes do the Lalita Pawar squint, they most certainly were NOT ready to eat “now” or any time in the near future. Man, were they sour or what!
So there were these four nectarines taking up valuable fridge space and not getting any riper for being in there… and I had to do something with them before I forgot about them. Naturally, the first thing that came to mind was “CAKE”. To my husband’s mind, that is, not mine.
To add to the nutrition quota of fresh fruit cake (and thereby pay lip service to the "healthy" aspect), I threw in a cupful of blueberries left over from a previous muffin making day.
I have only one thing to say about the cake – actually, it’s Pete’s thing I’m going to say because I don’t want to sound like I’m praising my own effort – “It’s sensational”.
I think that about covers my opinion, too.
Recipe for: Blueberry nectarine cake
Ingredients:
1 cup butter/margarine, softened
1 cup sugar
3 large eggs
1/3 cup cream/milk
1-1/2 tsp vanilla extract
2 cups all-purpose flour
4 tbsp flaked almonds
1-1/2 tsp baking powder
1/4 tsp salt
1 cup fresh blueberries
2 large nectarines, chopped
Method:
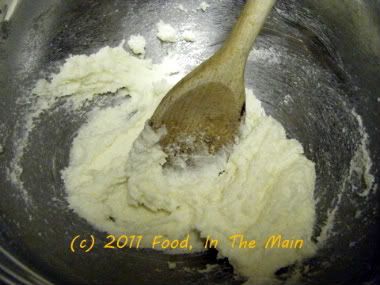
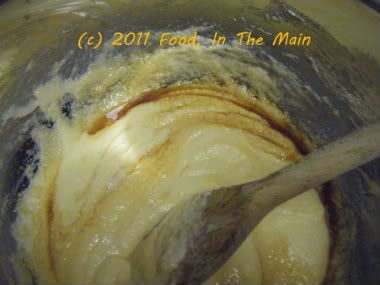
1. Beat butter/margarine until creamy. Gradually add sugar, beating until light and fluffy.
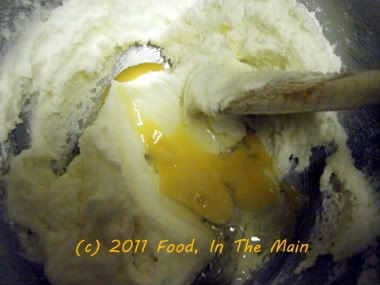
2. Add eggs, one at a time, beating just until the yolk disappears.
3. Add vanilla, beating just until blended.
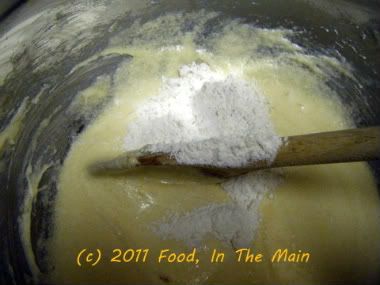
4. Sift together flour, baking powder, and salt. Gradually add flour mixture to butter mixture, stirring well.
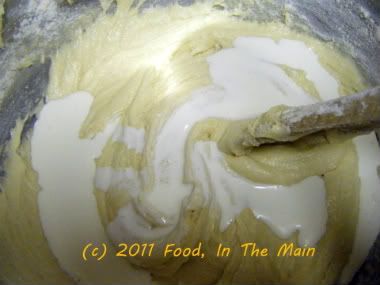
5. Add cream/milk and stir it in, then beat the batter fo 2 minutes till well blended.
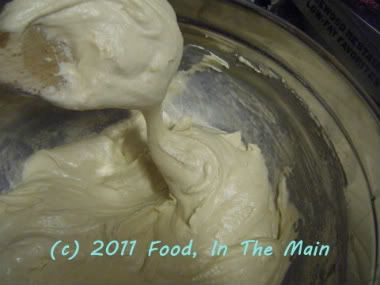
The batter will be fairly thick.
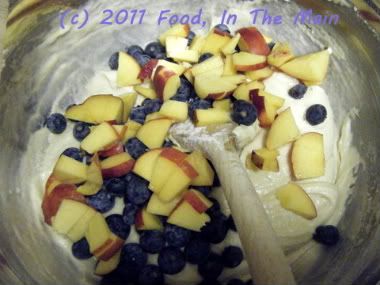
6. Gently fold in nectarines and blueberries. Pour batter into a deep 8" round cake pan.
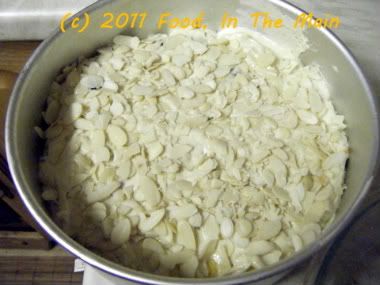
7. Sprinkle the flaked almonds evenly over the top, then press them in lightly. Not ALL the way in, but just enough that the batter rises over the edges when the cake is in the oven.
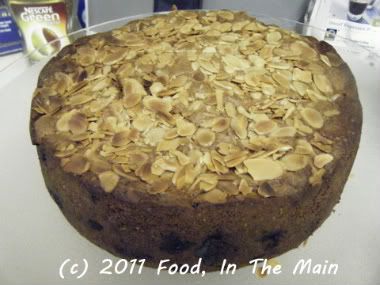
8. Bake at 180°C for 40 minutes or so, until a wooden pick inserted in centre comes out clean. Cool the cake in the pan for 10 minutes, then turn it out onto a wire rack.
Serve warm. For a decadent option, serve warm with vanilla-flavoured double cream.
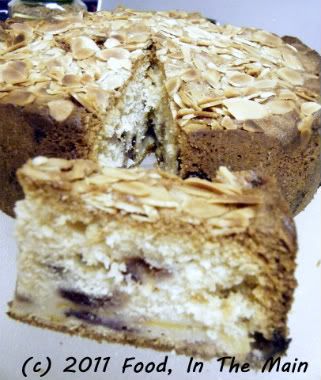
Note: For the best taste, warm every subsequent cake slice for 20-30 seconds in the microwave before serving.
RECIPE: BLUEBERRY NECTARINE CAKE
Ingredients:
1 cup butter/margarine, softened
1 cup sugar
3 large eggs
1/3 cup cream/milk
1-1/2 tsp vanilla extract
2 cups all-purpose flour
4 tbsp flaked almonds
1-1/2 tsp baking powder
1/4 tsp salt
2 large nectarines, chopped
1 cup fresh blueberries
Method:
1. Beat butter/margarine until creamy. Gradually add sugar, beating until light and fluffy.
2. Add eggs, one at a time, beating just until the yolk disappears.
3. Add vanilla, beating just until blended.
4. Sift together flour, baking powder, and salt. Gradually add flour mixture to butter mixture, stirring well.
5. Add cream/milk and stir it in, then beat the batter fo 2 minutes till well blended. The batter will be fairly thick.
6. Gently fold in nectarines and blueberries. Pour batter into a deep 8" round cake pan.
7. Sprinkle the flaked almonds evenly over the top, then press them in lightly. Not ALL the way in, but just enough that the batter rises over the edges when the cake is in the oven.
8. Bake at 180°C for 40 minutes or so, until a wooden pick inserted in centre comes out clean. Cool the cake in the pan for 10 minutes, then turn it out onto a wire rack. For a decadent option, serve warm with vanilla-flavoured double cream.
Note: For the best taste, warm every cake slice for 20-30 seconds in the microwave before serving.
So there were these four nectarines taking up valuable fridge space and not getting any riper for being in there… and I had to do something with them before I forgot about them. Naturally, the first thing that came to mind was “CAKE”. To my husband’s mind, that is, not mine.
To add to the nutrition quota of fresh fruit cake (and thereby pay lip service to the "healthy" aspect), I threw in a cupful of blueberries left over from a previous muffin making day.
I have only one thing to say about the cake – actually, it’s Pete’s thing I’m going to say because I don’t want to sound like I’m praising my own effort – “It’s sensational”.
I think that about covers my opinion, too.
Recipe for: Blueberry nectarine cake

Ingredients:
1 cup butter/margarine, softened
1 cup sugar
3 large eggs
1/3 cup cream/milk
1-1/2 tsp vanilla extract
2 cups all-purpose flour
4 tbsp flaked almonds
1-1/2 tsp baking powder
1/4 tsp salt
1 cup fresh blueberries
2 large nectarines, chopped

Method:
1. Beat butter/margarine until creamy. Gradually add sugar, beating until light and fluffy.

2. Add eggs, one at a time, beating just until the yolk disappears.

3. Add vanilla, beating just until blended.

4. Sift together flour, baking powder, and salt. Gradually add flour mixture to butter mixture, stirring well.

5. Add cream/milk and stir it in, then beat the batter fo 2 minutes till well blended.

The batter will be fairly thick.

6. Gently fold in nectarines and blueberries. Pour batter into a deep 8" round cake pan.

7. Sprinkle the flaked almonds evenly over the top, then press them in lightly. Not ALL the way in, but just enough that the batter rises over the edges when the cake is in the oven.

8. Bake at 180°C for 40 minutes or so, until a wooden pick inserted in centre comes out clean. Cool the cake in the pan for 10 minutes, then turn it out onto a wire rack.

Serve warm. For a decadent option, serve warm with vanilla-flavoured double cream.

Note: For the best taste, warm every subsequent cake slice for 20-30 seconds in the microwave before serving.
RECIPE: BLUEBERRY NECTARINE CAKE
Ingredients:
1 cup butter/margarine, softened
1 cup sugar
3 large eggs
1/3 cup cream/milk
1-1/2 tsp vanilla extract
2 cups all-purpose flour
4 tbsp flaked almonds
1-1/2 tsp baking powder
1/4 tsp salt
2 large nectarines, chopped
1 cup fresh blueberries
Method:
1. Beat butter/margarine until creamy. Gradually add sugar, beating until light and fluffy.
2. Add eggs, one at a time, beating just until the yolk disappears.
3. Add vanilla, beating just until blended.
4. Sift together flour, baking powder, and salt. Gradually add flour mixture to butter mixture, stirring well.
5. Add cream/milk and stir it in, then beat the batter fo 2 minutes till well blended. The batter will be fairly thick.
6. Gently fold in nectarines and blueberries. Pour batter into a deep 8" round cake pan.
7. Sprinkle the flaked almonds evenly over the top, then press them in lightly. Not ALL the way in, but just enough that the batter rises over the edges when the cake is in the oven.
8. Bake at 180°C for 40 minutes or so, until a wooden pick inserted in centre comes out clean. Cool the cake in the pan for 10 minutes, then turn it out onto a wire rack. For a decadent option, serve warm with vanilla-flavoured double cream.
Note: For the best taste, warm every cake slice for 20-30 seconds in the microwave before serving.
Labels:
AP flour,
baking powder,
blueberries,
butter,
caster sugar,
eggs,
flaked almonds,
maida,
margarine,
nectarines,
salt,
vanilla extract
Subscribe to:
Posts (Atom)

