Showing posts with label nutmeg. Show all posts

Sunday, November 13, 2016

Triple ginger white-chocolate cookies


Okay, I have a confession to make - I might as well be up front about it. I hate white chocolate. I think it's far too sweet and it isn't even proper chocolate. Another confession: I've kind of gone off chocolate bakes in general, although I did like my orgasmic brownies. More to the point, everybody else liked it a lot more, so they disappeared very quickly. 

The problem of the day was there was half a bar of white chocolate in my cupboard that had been there for absolutely ages - possibly even years, because I can't remember the last time I used white chocolate in anything! Still, I didn't want to throw it away because I'm stingy like that. 

I was toying with the idea of making a white chocolate and raspberry something but wasn't sure what that should be - apart from the small matter of not having any raspberries in the house. My husband tried to convince me to let the white chocolate be and make ginger nut biscuits instead. I make a really mean spicy ginger nut biscuit that he loves, but I wasn't in the mood because they're quite labour-intensive. Also because I didn't want that white chocolate sitting around for a single moment longer. So, as a compromise, I finally decided I would make cookies with ginger AND the white chocolate. And that is how these cookies happened. 

My husband thought the cookies were lovely. Some friends who popped by also thought the same, so they went back home happily accompanied by a dozen. My husband was happy, my friends were happy. I tried a cookie myself and I thought it was ok (considering it contained white chocolate). Still, I was happy too, because no more white chocolate in the house... and no more coming in ever if I have a say in it! 

Recipe for:
Triple-ginger white chocolate cookies
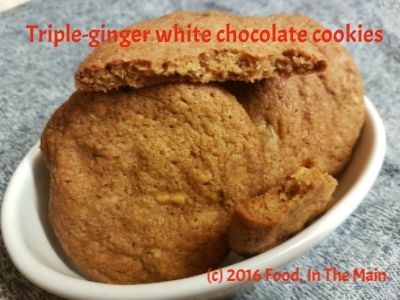
 photo 6fcea889-71aa-4fe5-9764-eff51452c169_zpsrpteivsy.jpg

Ingredients:

2 tsp grated ginger
1 tsp ginger powder
2 tbsp chopped stem ginger
225gm plain flour
3/4 tsp baking soda
1 large egg
150gm butter
100gm light brown sugar
50gm dark brown sugar
150gm white chocolate, chopped into small pieces (or use white chocolate chips)
2 tsp vanilla extract
1/2 tsp nutmeg

Method:

1. In a large bowl, cream together the butter and sugar until light and fluffy. Add the egg and the vanilla and beat until well combined.

2. Now add the flour, grated ginger, nutmeg and ginger powder to the bowl and mix with a wooden spoon until it comes together in a dough. Fold in the chopped stem ginger and the white chocolate until they are evenly distributed. Refrigerate the dough for at least 30 minutes, as it will be too sticky to work with otherwise.

3. Preheat the oven to 180C/350F. While the oven is heating, form walnut-sized balls from the chilled dough and place 1.5 inches apart on a baking sheet lined with non-stick foil. Bake for about 10 minutes or until the cookies are golden brown. (The time will vary a little depending on your oven - mine is a fan-assisted oven.) If you have to bake the cookies in batches like I did (because I only have one baking sheet that I actually like), remember to keep the dough refrigerated between bakes so that it doesn't soften too much.

The cookies will be quite soft at first, so leave them on the tray for 2 minutes before carefully removing them to a wire rack to cool completely. They will crisp up as they cool.

If you like your cookies crisp around the edges but softer in the middle (I do), take them out of the oven after about 8-9 minutes. My husband likes them crisp so I baked his for the full 10 minutes.

Wednesday, January 19, 2011

Overnight blueberry muffins

I first heard of Paul Hollywood, the chef, when I watched a recent TV show/competition to determine Britain’s best amateur baker. The contestants were amazing, their skills superb – they were absolutely NOT amateurs. I mean, if at all they were “amateurs” it was only in that they were not famous “professional” chefs, running restaurants or publishing cookbooks. Otherwise, in terms of skills, talent and imagination, I’m pretty certain they would have given any “professional chefs” a run for their money if they (the professionals) were in the competition rather than merely judging it!

Anyway, Paul Hollywood is an expert on baking, and I came across his recipe for blueberry muffins on the BBC Food website. According to him, they were the best muffins ever. I would probably have just glanced at the recipe and continued browsing, had it not been for a couple of things – the minimal number of ingredients and the simple instructions and, more intriguingly, his advice to refrigerate the batter, preferably overnight, before baking the muffins.

Refrigerate? OVERNIGHT? And here I’d been under the impression, courtesy the gazillion muffin recipes on the Net, that the biggest selling point of this particular type of baked goody was that it was practically instantaneous – basically, make the batter (don’t even stop to break up the lumps) and bake the muffins.

He said his recipe would make 12 muffins. I thought that the batter wouldn’t stretch to 6 muffins never mind 12, there was so little of it. But it did, just... although the 12 muffins were the size of small cupcakes. (I never like to specify the number of muffins, in any case. It’s such a subjective thing, depending very much on how small or how large you wish to make them.)

I made only one change to Mr Hollywood’s recipe – I added some vanilla extract because I love it, because I simply can’t help myself, and because I’m not entirely sure that I would ever love just nutmeg as a flavouring.

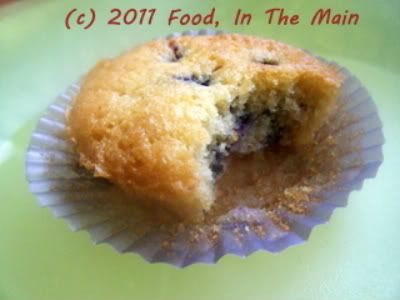
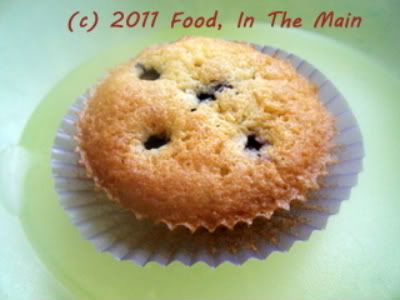
And so to the muffins... Oh. My. God. They were not so much muffins as fairy cakes, so light and lovely that I was quite happy there were others in the house to eat ‘em, or I would have demolished them all myself. They were THAT good. I dunno if it was the overnight resting, or the butter in the recipe (it’s been a while since I used butter in a muffin recipe) but the muffins were sensational!

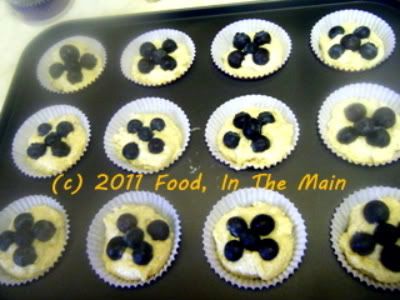
I try to learn a new technique or ingredient from every recipe I try, familar or unfamiliar. The abiding lesson from this recipe was: Always stud the batter with blueberries after putting the batter into the cake cases (this goes for any berry or soft fruit), rather than mix them in with the batter and THEN fill the cases. That way you can control where the berries go so they don’t burst messily against the side of the cases while cooking; they stay in the centre, where they were placed, making for a neat result. This really is a brilliant tip, one to always remember. I don’t know why I couldn’t have come up with the idea myself, it's so simple. But sadly I didn't, and a vote of thanks is definitely due Mr Hollywood!

Recipe for:
Overnight blueberry muffins

Photobucket

Ingredients:

1/2 cup plain flour
1/2 cup butter
1/4 cup caster sugar
2 free-range eggs
1-1/2 tsp baking powder
1/2 cup fresh blueberries
pinch nutmeg
1 tsp good quality vanilla extract

Method:

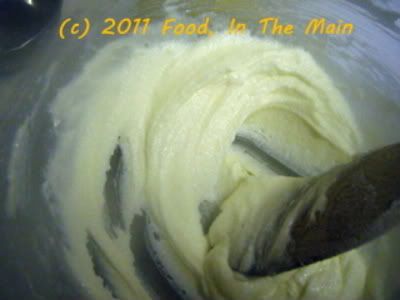
1. Cream the butter and sugar together till fluffy.
Photobucket

2. Then add the eggs one by one.

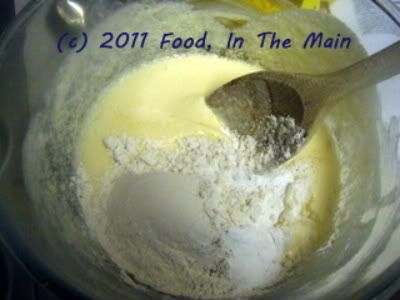
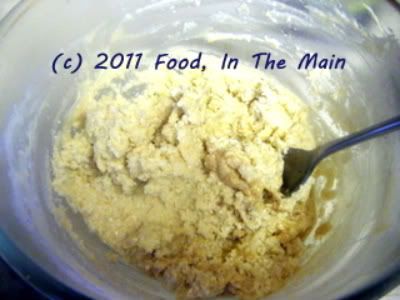
3. Mix for three minutes. Then add the flour, baking powder and nutmegPhotobucket,
stir to combine into a thick batter. Do not beat.
Photobucket

4. Refrigerate the batter for at least an hour, preferably overnight. Just before baking, stir in the vanilla.

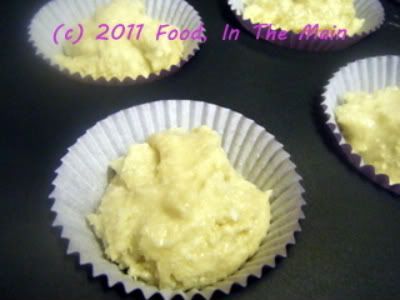
5. Place paper cases in a muffin pan. Place a spoonful of muffin mixture into each muffin case, filling each to just over half way.
Photobucket

6. Stud each muffin with 5-8 blueberries, pushing them very lightly into the batter.
Photobucket

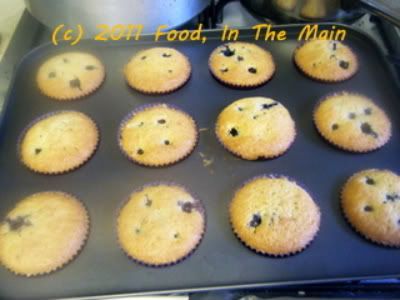
7. Bake in an oven set at 200C/400F for 20 minutes, or until golden on top.
Photobucket
Serve warm.
Photobucket

RECIPE: OVERNIGHT BLUEBERRY MUFFINS

Ingredients:

1/2 cup plain flour
1/2 cup butter
1/4 cup caster sugar
2 free-range eggs
1-1/2 tsp baking powder
1/2 cup fresh blueberries
pinch nutmeg
1 tsp good quality vanilla extract

Method:

1. Cream the butter and sugar together till fluffy.
2. Then add the eggs one by one.
3. Mix for three minutes. Then add the flour, baking powder and nutmeg, stir to combine. Do not beat.
4. Refrigerate for at least an hour, preferably overnight.
5. Place paper cases in a muffin pan. Place a spoonful of muffin mixture into each muffin case, filling each to just over half way.
6. Stud each muffin with about five blueberries.
7. Bake in an oven set at 200C/400F for 20 minutes, or until golden on top. Serve warm.

Tuesday, January 04, 2011

Bara brith (Welsh tea bread)

Photobucket
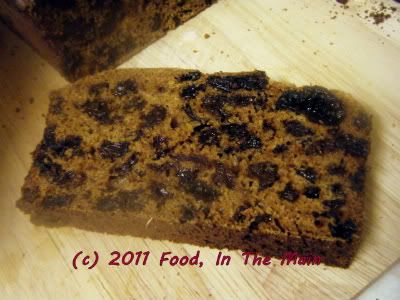
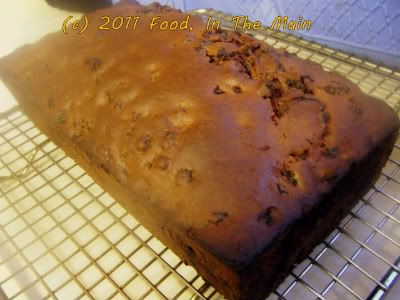
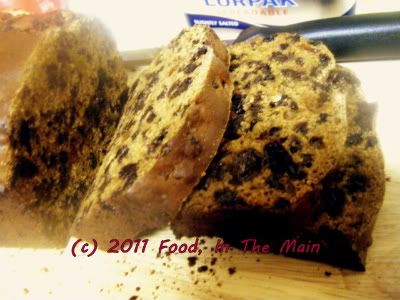
Bara brith in Welsh apparently means “speckled bread” – the “speckles” being the currants/raisins/sultanas that generously dot the bread. This is a tea bread – literally, because the dried fruit are soaked overnight in strong black tea, and also because it’s meant to be eaten at tea-time… or so I imagine. I can’t vouch for the second half of the previous sentence but I can tell you the first half is undoubtedly true. I got the recipe from a TV cookery competition show that I watched on and off (whenever I remembered) last year.
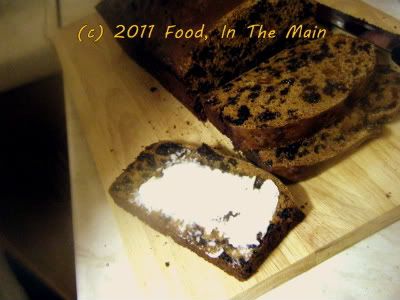
I don’t really know why this is regarded as a tea bread rather than a fruitcake. Texture-wise, the crumb was not really cake-y… not even fruitcake-y - insofar as you could see the crumb in between all that fruit, that is. (I might have overdone the dried fruits just a tad). I guess it was more like bread, somewhat denser than cake. Bara brith is meant to be eaten spread with butter, just like bread. It’s also meant to be yum, and it sure was. (Not that anybody would deliberately cook anything that wasn’t meant to be yum… but y’know it had to be said.) Easy-peasy recipe, too.  
Recipe for: Bara brith (Welsh tea bread)
Photobucket

Ingredients:

250gm mixed dried fruit (currants, sultanas and/or raisins)
100gm dark brown muscovado sugar
225ml strong hot tea (no milk)
1/4 tsp salt
1/4 tsp cinnamon powder
1/4 tsp nutmeg powder
1 large egg, beaten
250gm self-raising white or brown flour

Method:

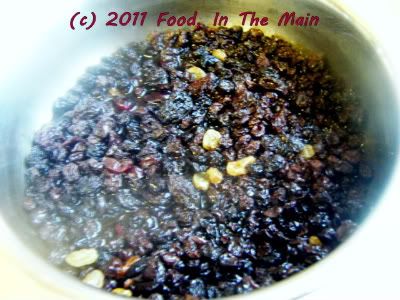
1. Put the dried fruit and sugar into a large mixing bowl. Pour over the hot tea and stir well. Cover the bowl and leave to soak overnight.
Photobucket

2. When you are ready to bake the bara brith, spray a 450gm loaf tin with Pam and set aside. Preheat oven to 160C.

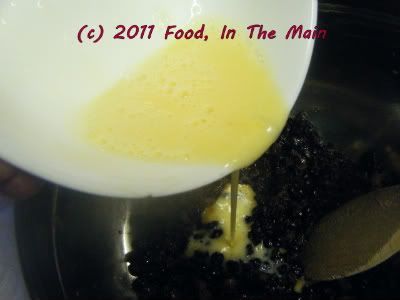
3. Drain any remaining tea from the fruit. Add the salt, cinnamon and nutmeg and stir well with a wooden spoon. Add the beaten egg and stir again.
Photobucket

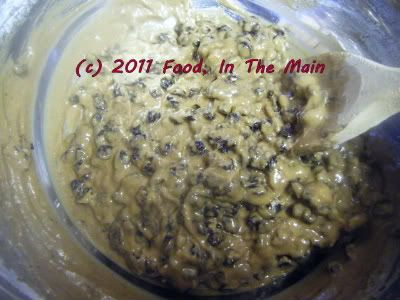
4. Mix in the flour and transfer the batter to the prepared loaf pan.
Photobucket

5. Bake in the heated oven for about an hour (but start checking at around 40 minutes) till the bara brith is done and a tester inserted in the centre comes out clean.
Photobucket

6. Leave the loaf in the tin for 15 minutes, then turn it out onto a wire cooling rack and let it cool completely.

7. Serve thickly sliced and buttered.
Photobucket

Photobucket

RECIPE: BARA BRITH (Welsh tea bread)

Ingredients:

250gm mixed dried fruit (currants, sultanas and/or raisins)
100gm dark brown muscovado sugar
225ml strong hot tea (no milk)
1/4 tsp salt
1/4 tsp cinnamon powder
1/4 tsp nutmeg powder
1 large egg, beaten
250gm self-raising white or brown flour

Method:

1. Put the dried fruit and sugar into a large mixing bowl. Pour over the hot tea and stir well. Cover the bowl and leave to soak overnight.
2. When you are ready to bake the bara brith, spray a 450gm loaf tin with Pam and set aside. Preheat oven to 160C.
3. Drain any remaining tea from the fruit. Add the salt, cinnamon and nutmeg and stir well with a wooden spoon. Add the beaten egg and stir again.
4. Mix in the flour and transfer the batter to the prepared loaf pan.
5. Bake in the heated oven for about an hour (but start checking at around 40 minutes) till the bara brith is done and a tester inserted in the centre comes out clean.
6. Leave the loaf in the tin for 15 minutes, then turn it out onto a wire cooling rack and let it cool completely.
7. Serve thickly sliced and buttered.

Monday, March 06, 2006

Apple kuchen with golden sultanas

The basic recipe for this really yummy kuchen (German for cake) was from Nic at Bakingsheet - the only added extra from me were the golden sultanas, which I think are nice in nearly anything.

I wanted to make something different for Pete's birthday - not the usual chocolate cake, so this seemed to fit the bill just nicely.

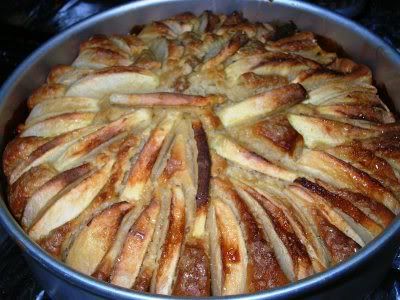
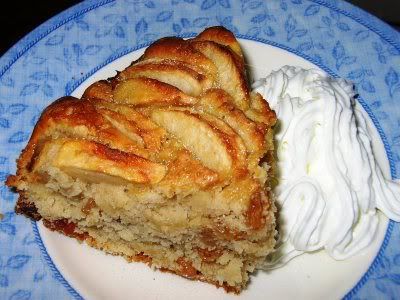
I cant praise this kuchen enough (and Pete loved it too) - the batter rises up beautifully around the apples and then pulls back as the cake cools, giving a very nice effect to the top of the cake. Anybody with better apple-arranging skills will probably end up with an even more picturesque cake, but even my haphazardly placed apples looked very nice.


This kuchen is absolutely delicious served warm with thick cream or icecream. And the aroma and flavour of the vanilla coming through is to die for. Some people find vanilla bland, but I just love it - its flavour is so gentle and elegant. In fact, I also sprinkled vanilla sugar over each serving, which turned out to be an excellent idea.

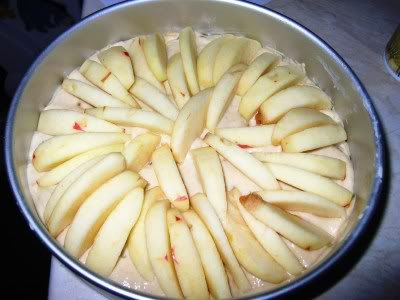
I used three Pink Lady apples - peeled, cored and sliced - for my kuchen. Or rather, I used two and a bit, and ate the remaining because there really was no space left on top. With hindsight, two apples will do nicely.

Recipe for:
Apple kuchen with golden sultanas


Ingredients:

Two Pink Lady apples, peeled, cored and sliced into 1/2 cm thick wedges
1/3 cup butter, softened
1/2 cup brown sugar
1/4 cup white sugar
1 large egg
2 tsp vanilla extract
1-1/2 cups plain flour
2 tsp baking powder
1/4 tsp salt
1/2 tsp nutmeg
3/4 tsp cinnamon
1/2 cup milk
1/2 cup golden sultanas
1 tbsp sugar for topping (I used demerara)
Vanilla sugar for dusting (optional)

Method:

1. Preheat the oven to 180C (350F). Grease a round 8" cake pan (I used one with a loose base).

2. In a medium bowl, whisk together the flour, salt, baking powder, nutmeg and cinnamon.

3. In a large bowl, beat the butter and sugar until soft and fluffy.

4. Beat in the egg and vanilla extract.

5. Add the flour mix and milk in 4 alternating additions, starting and ending with the flour.

6. Fold in the sultanas and spread the batter in the prepared cake pan.

7. Arrange the apple slices on the top and sprinkle with the demerara sugar.


8. Bake for 45 minutes or so, or until a tester inserted in the centre comes out clean.

9. Serve warm, dusted with vanilla sugar and accompanied by thick cream or icecream.

Wednesday, January 25, 2006

Orange-scented blueberry pancakes

I've been wanting to make American-style pancakes for a while now, because Pete's never had them. Do I hear gasps of horror? I admit I was quite surprised myself when I discovered that fact, but apparently he's only ever had crepes. Which are nice, but I like the chunky American-style ones too, and I wanted to make a convert of him.

Blueberries were the fruit of the day, as far as I was concerned - so blueberry pancakes were on the breakfast menu for the day.

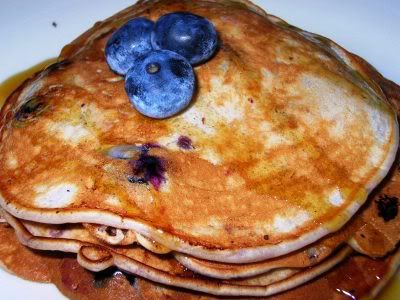
I like a gentle flavour of orange (lemon, too) with the blueberries, so I added 3-4 tbsp of orange juice and a generous tsp of grated orange and lemon peel to the batter. It worked beautifully, especially with a drizzle of maple syrup over the top. And yes, I have a convert.

Recipe for:
Orange-scented blueberry pancakes


Ingredients:

1 cup flour
1/2 tsp grated nutmeg
1/2 tsp cinnamon powder
1 tsp baking powder
3-4 tbsp sugar (I used Splenda)
3 tbsp orange juice
1 htsp grated orange and/or lemon peel
1/2 cup milk
1/2 cup yogurt (I used mixed berry-flavour yogurt, but plain is fine too)
2 tbsp melted butter (or vegetable oil, which is what I used)
1 large egg
1 cup blueberries

Method:

1. Mix the flour, spices, baking powder and sugar together. Set aside.

2. In a medium bowl, mix the milk, orange juice, yogurt, butter/oil, grated peel and egg together, until the egg is well incorporated.

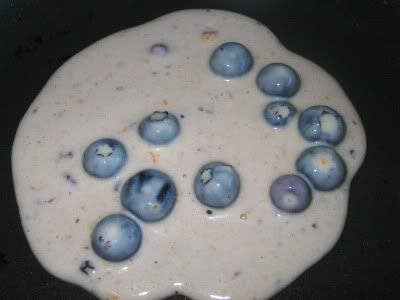
3. Add the flour mix to the wet mix, about 2 tbsp at a time, stirring with a large form all the time so that there are no lumps. The batter will be quite thick - it should drip only very slowly off a ladle.

4. Stir in the blueberries.

5. Heat a non-stick, shallow pan on medium heat. Pour a ladleful of the batter in and cook it on medium-low, till holes form on the surface.


6. Turn the pancake over and let the other side cook to a pale golden colour. Keep the cooked pancakes warm in the oven while making the rest.

7. Serve hot or warm with a generous drizzle of maple syrup.

Note: The batter has to be thick. If it is too thin, it will not coat the blueberries, which will burst open quietly when the pancake is cooking, leaking the juices and making a mess of the pancake (and the pan). This is the voice of experience talking.

Tuesday, September 27, 2005

This time it's apple pie

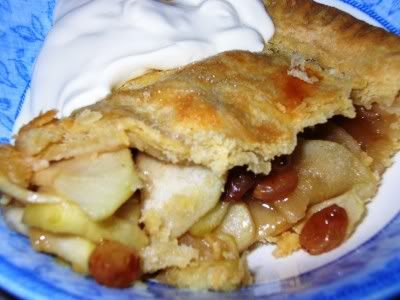
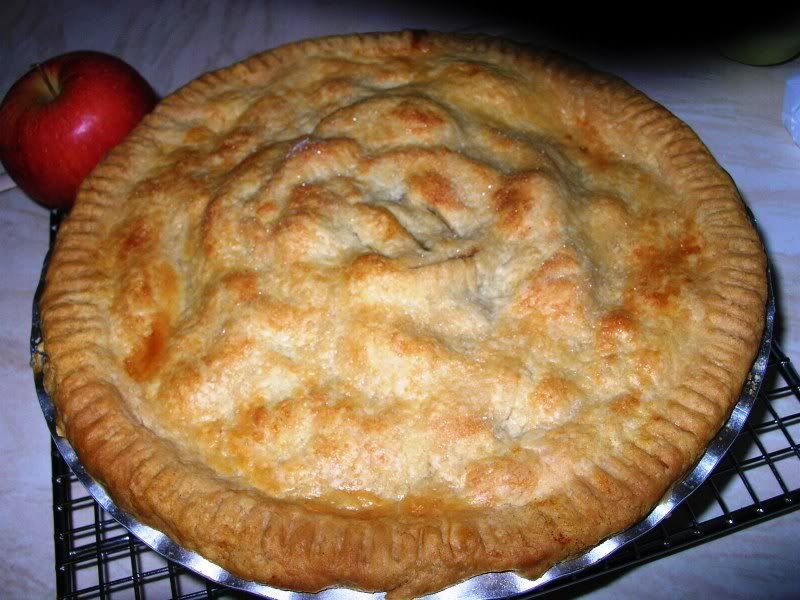
And a better pie than my first attempt, although still not anywhere near perfect to look at. I'm not going to make any more pies for awhile, though... they're simply too calorious (to coin a word) for words - all that butter and margarine and sugar - extravagantly sinful. I baked this pie just to ensure that the first one wouldnt remain a one-off effort :)


This was a deliberate pie. With raisins. Too, I remembered to brush the top of the pie with milk AND sprinkle it with white sugar before baking - something I'd neglected the first time around. The milk gave the pie a beautiful golden glaze, and the sparkly sugar crystals provided the finishing touch. I have to say it looked very pretty! I ate the odd bit of it but my sweet tooth is very easily satisfied and I was glad of the unsweet crust to temper the sweetness of the filling.

My husband and friends demolished the pie in two sittings. Well, I'm glad about that, that's a good thing, else I'd have been a very sad bunny. There's nothing more disheartening than to see something you've made (expending great effort, too) sitting there uneaten and unappreciated until you have to throw it away.

Recipe for:
Double-crust apple pie


Ingredients:

For the pie dough (crust):

2 1/2 cups plain flour
1/2 teaspoon salt
1 tsp cinnamon powder
1/2 cup cold butter, cut into small pieces
6 tablespoons cold margarine (can use shortening instead)
5-7 tablespoons ice water

Method:

1. Stir together the flour, cinnamon powder and salt in a medium bowl.

2. Cut in the butter with two knives. Add the margarine and combine with a large fork until the mixture resembles coarse oatmeal.

3. Sprinkle the water, 1 tablespoon at a time, over the flour mixture and stir
with a fork until all the flour is moistened and the dough holds together
and doesn’t crumble.

4. Gather into a ball. Knead lightly (but not too much) until the dough is smooth. It's ok if the butter is still a bit lumpy. Lumpy is good!

5. Divide the dough into two, form into smooth balls, wrap each ball in clingfilm and refrigerate for at least 30 minutes.

For the apple filling:

4 large Granny Smith apples, cored, peeled and evenly sliced (or cubed, according to preference. I sliced mine.)
Juice of one lemon
1/2 cup white sugar
1/2 cup light brown sugar
1 tsp cinnamon powder
1/2 tsp grated nutmeg/cloves or allspice
1/2 cup golden raisins
1-1/2 tbsp cornflour
1-1/2 tbsp quick cooking tapioca, powdered

1. Toss the apple slices with the lemon juice.

2. Mix the rest of the ingredients together in a separate bowl and set aside.

Assembling the pie:

Method:

1. Roll out one ball of pie dough (leave the other in the fridge till required) on a lightly floured surface into a 10-inch circle, about 1/2 cm thick.

2. Lift up the circle of dough carefully and centre it in an 8" pie dish. Pat it gently in place at the bottom and up the sides.

3. Trim the edge even with the rim of the pie dish.

4. Roll out the other ball of dough into a circle that is about 1 inch larger than the rim of the pie dish. Set aside.

5. Put in a layer of sliced or cubed apples and sprinkle liberally with the sugar-raisin mixture. Add layers of fruit, sprinkling each layer with the sugar mixture. Mound the apples slightly in the centre and top off with the remaining sugar mixture.

5. Place the second circle of pastry over the fruit filling and trim the edge to about half an inch larger than the bottom crust. (I used scissors!)

6. Tuck the overhanging top edge under the bottom crust. Crimp the edges all around with the tines of a fork. Make a few slits at the top so that the steam can come out while the pie is baking.

7. Refrigerate the uncooked pie for 15-20 minutes. Then brush the top with some cold milk and sprinkle some white sugar all over.

8. Place in a pre-heated oven and cook at 180C (350F) for 45 minutes or so, until the top is golden and a skewer passes easily through the fruit when it's poked in the top.

9. Let the pie cool completely before slicing. It can be served warm (re-heat in a hot oven for 5 minutes or use the microwave) or cold with cream/vanilla icecream.