Showing posts with label lemon juice. Show all posts

Monday, November 07, 2016

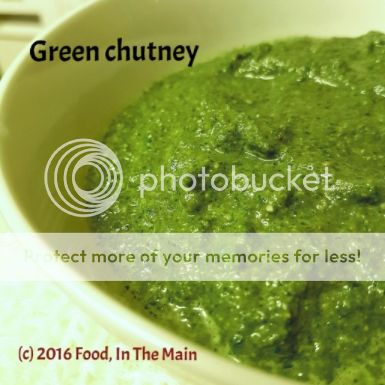
No-cook green chutney

This is such a simple recipe that I'm slightly embarrassed that I'm making it an actual post. However, consider this a record of the ingredients for this chutney. Bear in mind that the ingredients are not set in stone. The coriander and mint are necessary, but the spinach can be omitted, you can use peanuts or walnuts instead of the almonds, add or omit the sunflower seeds or substitute some other seeds... you get the idea.

This chutney can be used as is, as a condiment to go with samosas and other Indian snacks, as a sandwich spread, as a dip mixed into yogurt. It could even be good with pasta, if you consider it as a sort of fat-free Indian "pesto". I haven't tried that, but there's no reason to think it won't be nice. It's versatiie, zingy and easy to make. Last but not the least. this is a healthy chutney - 
not in the sense of "I've halved the sugar so I'm calling this healthy" or "I've added spinach to the vegetable pakodas that I deep fried, so I'm calling it healthy" - but actually good for you. That's all.

Oh - one more thing. I had this chutney with khatta dhokla yesterday (made from a packet mix, so sue me). And today, I dolloped a couple of spoonfuls over my bowlful of oven-roasted veggies (Charlotte potatoes, broccoli, cauliflower, red onion) and enjoyed every last bite of my light supper. See what I'm saying about this green chutney being versatile?

Recipe for: Green chutney

 photo 741f192e-023b-42ad-9e51-83ada681778e_zpstbxa8yqe.jpg


Ingredients:

3 cups chopped coriander
1 cup chopped mint
1/2 cup chopped spinach
1-2 green chillies, chopped (or to taste)
10-12 almonds, skinned
2 tbsp mixed seeds (I used sunflower and melon)
1/2 tsp cumin seeds
1/2 tsp sugar
Juice of half a lemon (or to taste)
Salt to taste
Water as required

Method:

1. Grind together all the ingredients (except the salt and lemon juice) to a smooth paste.

2. Mix in the lemon juice and salt to taste. The consistency should be softly runny, not very thick. 

3. That's it. It's ready to use. 

Sunday, January 27, 2013

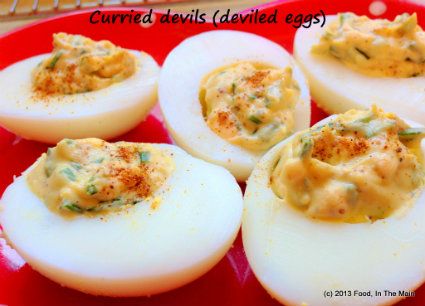
Curried devils (deviled eggs)

I recently read a book called "The Secret Supper Club" by Dana Bate, which was about this woman who worked as a research assistant, but whose dream was to become a cook - or chef, I suppose (which is really just a posh word for "cook"). It was a good if light read, just what I'd wanted at that point. 
currieddevil1_zps3757ac92 photo currieddevil1_zps3757ac92-1_zps4f045cec.jpg

I'm not really going to do a book review, but I had to mention the book because there were a few recipes at the end, of things that she'd made for her secret supper club guests, and the first of them was a recipe for deviled eggs. The rest of the recipes I was not interested in because they were rather too elaborately non-vegetarian. But this one seemed doable, so I did. 

I made a couple of minor changes, but mostly this recipe is as the book had it. The filling turned out to be much more lemon-sharp than I'd anticipated, and I think it's because I used perhaps a tablespoon's worth of lemon juice rather than the 1/2 tsp called for. It wasn't really a huge mistake for us, in any case, because Pete and I both love the sourness.

Recipe for: Curried devils (deviled eggs)
currieddevil_zpsb0e41ab3 photo currieddevil_zpsb0e41ab3-1_zps754e8507.jpg
Ingredients:

8 large eggs
1/4 cup mayonnaise
1 tsp Dijon mustard
1/2 tsp medium or mild curry powder (or use 1/4 tsp garam masala)
1/2 tsp lemon juice
1 tbsp finely chopped fresh chives
1/4 tsp smoked hot paprika/cayenne pepper
Kosher salt & freshly milled black pepper, to taste
1/2 tsp sweet paprika for garnish

Method:
1. Place the eggs carefully in a large saucepan and fill with cold water to come up to 1" above the eggs.
2. Bring to a bubbling boil, then turn the heat off, cover the pan and leave for exactly 14 minutes.
3. Then drain off the water and fill the pan again with very cold water, to stop the eggs cooking any further. Set aside for 10 minutes, then peel the eggs and slice them in half vertically.
4. Remove the yolks to a small bowl. Mash them smooth with a fork, then add the mayonnaise, Dijon mustard, curry powder/garam masala, lemon juice, chives and hot paprika and mix thoroughly. Taste the mixture, adding a bit more of whatever you feel is lacking. Add salt (careful with this as the mayonnaise will already have salt) and pepper to taste and mix one final time.
5. Spoon the egg yolk mixture into a sealable sandwich bag or Ziploc bag (or use a disposable pastry bag) piling the filling as far as possible into one corner. Snip off the corner of the bag with scissors, then pipe the mixture into the egg whites. Sprinkle with a little sweet paprika to garnish, and serve at room temperature or cold.
Note: If you have any mixture left over (and going by my experience, you will), use it in a sandwich, or as a spread on toast. You can store the unused mixture in a sealed container in the refrigerator for a day.

Tuesday, October 04, 2011

Lemony vegetable rice

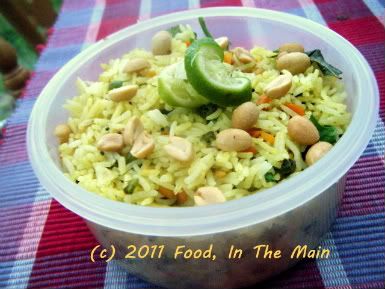
Are you wondering why this recipe is described as a lemony vegetable rice rather than a vegetable-y lemon rice? Well, why ARE you wondering that? Which of the two do you think is catchier? Welllll??? Yeah, I thought so too. Now you know the intricate thought process behind the title of this post.

I could tell you about how I arrived at all my other post titles too, but you might get bored, and the last thing I want is for my little audience to be bored. Boredom is not the right reward for dogged faithfulness, is it? So let’s just say that the reasoning for any or all of them is usually not far off that for this post. I mean, if I were to tax my brain for the title, what would I do for the main body of the post?

Actually, the answer to that is: Probably what I’ve just done so far.

There it is, peoples of the world. I save my deepest thoughts for finding a cure for an itchy nose, not for blog posts or their titles. That, right there, is the naked truth. Not particularly exciting for something that is naked, is it? Kind of like getting a 65-year-old pot-bellied nondescript-looking man in a beefcake magazine centrespread where you were expecting… oooh, I dunno, say Hrithik Roshan or Colin Firth or Hugh Jackman or …  *slurrrrrrp*

Excuse me while I go off in search of a towel to mop up the drool.

But please, don’t wait for me to return, go right ahead to the recipe. I insist.

Recipe for: Lemony vegetable rice
Photobucket
Ingredients:

2 cups basmati rice, cooked and cooled
2 cups vegetables, chopped into little cubes (potatoes, carrots, green beans, peas, etc)
½ cup chopped red or white onion
2 cloves garlic
4-5 green chillies, sliced into thin rounds (add to taste or omit entirely)
1 tsp chana dal/kadalai paruppu
1 tsp urad dal/ulutham paruppu
1 tsp brown mustard seeds
1/2 tsp turmeric powder
1 tbsp oil
Salt to taste
Lemon/lime juice to taste
Coriander leaves and roasted/fried peanuts for garnish

Method:

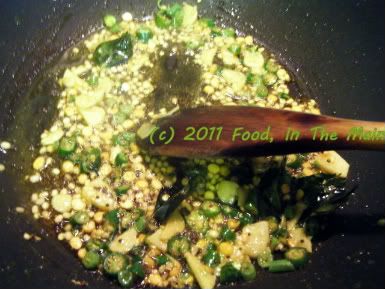
1. Heat the oil in a big pan, then add the chana dal/kadalai paruppu, urad dal/ulutham paruppu and mustard seeds. Cover and let the mustard seeds pop.
Photobucket
2. When the dals are golden brown, add the chopped garlic, the chillies and the onion along with the turmeric powder and fry on medium heat till the onions begin to turn translucent and soft.

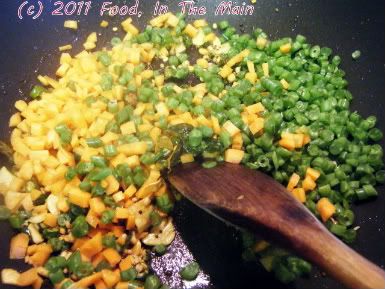
3. Now add the chopped vegetables and sprinkle 3-4 tbsp water over them. Turn the heat down as low as it will go, then cover the pan and let the vegetables cook till they’re done – say 10-12 minutes.
Photobucket
4. Once the vegetables are cooked, get rid of any excess water by turning the heat up and stirring the vegetables about for 1-2 minutes.

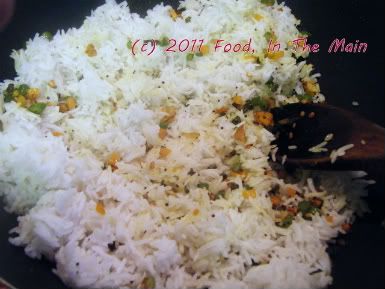
5. Now add the cooked rice, sprinkle on salt to taste and add 3-4 tbsp of lemon/lime juice.
Photobucket
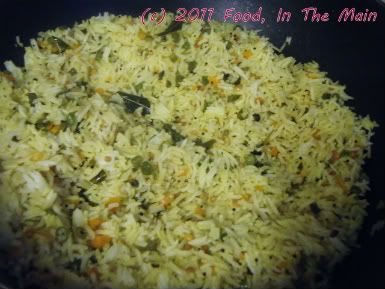
Mix carefully till the ingredients are well incorporated. Add more lime/lemon juice according to taste.
Photobucket
6. Garnish with coriander leaves and fried peanuts. Serve hot with potato crisps or other fried snacks or pickles of choice. (I like it with avakkai.)

RECIPE: LEMONY VEGETABLE RICE

Ingredients:

2 cups basmati rice, cooked and cooled
2 cups vegetables, chopped into little cubes (potatoes, carrots, green beans, peas, etc)
½ cup chopped red or white onion
2 cloves garlic
4-5 green chillies, sliced into thin rounds (add to taste or omit entirely)
1 tsp chana dal/kadalai paruppu
1 tsp urad dal/ulutham paruppu
1 tsp brown mustard seeds
1/2 tsp turmeric powder
1 tbsp oil
Salt to taste
Lemon/lime juice to taste
Coriander leaves and roasted/fried peanuts for garnish

Method:

1. Heat the oil in a big pan, then add the chana dal/kadalai paruppu, urad dal/ulutham paruppu and mustard seeds. Cover and let the mustard seeds pop.
2. When the dals are golden brown, add the chopped garlic, the chillies and the onion along with the turmeric powder and fry on medium heat till the onions begin to turn translucent and soft.
3. Now add the chopped vegetables and sprinkle 2-3 tbsp water over them. Turn the heat down as low as it will go, then cover the pan and let the vegetables cook till they’re done – say 10-12 minutes.
4. Once the vegetables are cooked, get rid of any excess water by turning the heat up and stirring the vegetables about for 1-2 minutes.
5. Now add the cooked rice, sprinkle on salt to taste and add 3-4 tbsp of lemon/lime juice. Mix carefully till the ingredients are well incorporated. Add more lime/lemon juice according to taste.
6. Garnish with coriander leaves and fried peanuts. Serve hot with potato crisps or other fried snacks, or pickles of choice.
Thursday, September 30, 2010

Redcurrant-strawberry jam

Photobucket

Of all the recipes that I’ve tried with redcurrants, this jam is probably the best by far. I’m no jam maker, in part because it seems like a complicated procedure requiring sugar thermometers and pectin and setting temperatures and water baths and ultra-pasteurised (is that the right term for glass jars or is it only used to describe milk?) glass jars and so on. I’m not that big a fan of jam, in any case – although I guess I must confess to sometimes being taken over by a strawberry-conserve-“veri” (Tamil word for “frenzy”) and eating posh strawberry conserve straight out of the jar with a spoon, never mind the toast. I get that way with orange marmalade too, occasionally. But those are pretty rare occasions.

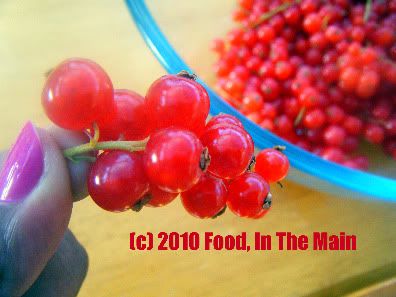
Like I’ve said earlier, when it came to redcurrants, I’d only ever heard of redcurrant jelly, but never tasted it – and still haven’t, if it comes to that. I’m still unsure if “redcurrant jelly” is the American for “redcurrant jam”. In any case, when I decided I would try making redcurrant jam, I also had a box of strawberries in the fridge, slightly too overripe for consumption but not yet at the stage of supporting fungus colonies. I googled redcurrant-strawberry jam recipes and bingo! up popped this one. It wanted 600 gms each of redcurrants and strawberries and twice as much sugar. It also came with jam-making instructions incorporating the use of a sugar thermometer which I don’t have and doubt I’ll be getting any time soon. So I did what I normally do in when there are instructions that I don’t care for – I ignored them.

I used a mixture of Splenda and sugar for the jam. I didn’t use pectin-rich sugar because I didn’t have any and to my mind I wasn’t making “serious” jam – I was just going to cook up two kinds of berries for an impromptu jam… but I also had the vague idea that strawberries naturally contain pectin anyway. So be warned, my instructions for this recipe are:

1. Kind of vague
2. Definitely not what serious jam-makers would approve of or follow.
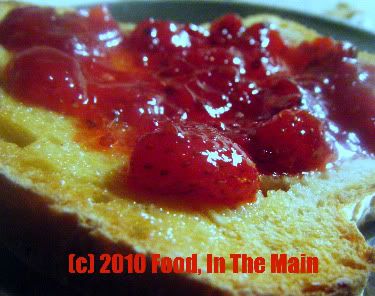
But if you don’t care about that, you’ll end up, like I did, with about 200gms of a sweet-tart jam that sort of explodes on your taste buds. It is just SO right on toast and for rolling up inside chapaties. Jam to my mind can’t really be filed under “mouthwatering” but I’ll make an exception in this case. It IS mouthwatering.


Recipe for: Redcurrant-strawberry jam

Photobucket


Ingredients:
1-1/4 cups redcurrants
1-1/2 cups strawberries
3/4 cup Splenda
1/2 cup sugar
2 tbsp fresh lemon juice


Method:
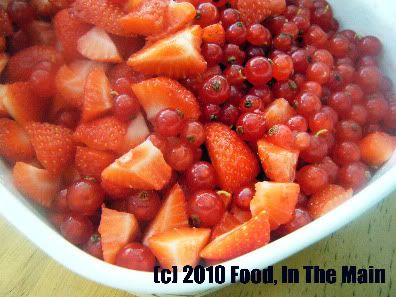
1. Chop the strawberries into 1-cm pieces. Place in a lidded container along with the redcurrants.


Photobucket


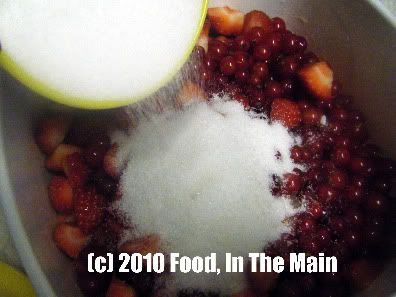
2. Add the sugar and Splenda to the berries.


Photobucket


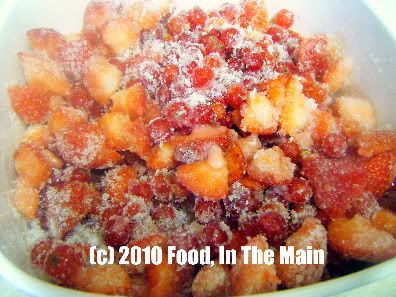
3. Toss together till the ingredients are mixed.


Photobucket


Place in a fridge overnight, tightly covered, so that the sugar melts and the berries release their juices.


4. The next day, place the fruit in a heavy-based saucepan along with the juices. Scrape out any sugar that may be stuck to the container. Bring the fruit to a gentle simmer to make sure that all the sugar is dissolved.


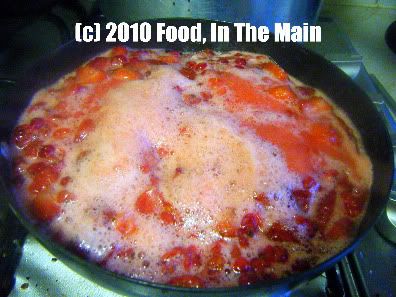
5. Once the sugar has all dissolved, bring the fruit to a boil.


Photobucket


Cook for 12-15 minutes, scraping around the sides of the pan once in a while, to stop the sugar crystallising. The jam is done when the juices are reduced and the fruit is no longer watery.


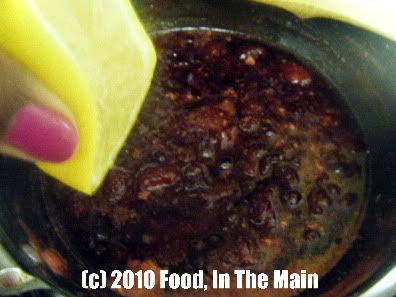
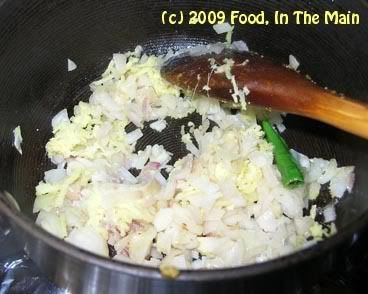
6. Turn off the heat, then add the lemon juice.

Photobucket


Mix well. The jam should be quite thick. It should thicken further on cooling.


Photobucket


7. Transfer the jam to a clean glass jar and let cool completely. It's lovely spread on scones along with thick cream. Or on toast. Or rolled up in chapaties...

RECIPE: REDCURRANT-STRAWBERRY JAM
Ingredients:
1-1/2 cups strawberries
3/4 cup Splenda
1/2 cup sugar
2 tbsp fresh lemon juice


Method:
1. Chop the strawberries into 1-cm pieces. Place in a lidded container along with the redcurrants.
2. Add the sugar and Splenda to the berries.
3. Toss together till the sugar is evenly distributed. Place in a fridge overnight, tightly covered, so that the sugar melts and the berries release their juices
4. The next day, place the fruit in a heavy-based saucepan along with the juices. Scrape out any sugar that may be stuck to the container. Bring the fruit to a gentle simmer to make sure that all the sugar is dissolved
5. Once the sugar has all dissolved, bring the fruit to a boil. Cook for 12-15 minutes, scraping around the sides of the pan once in a while, to stop the sugar crystallising. The jam is done when the juices are reduced and the fruit is no longer watery.
6. Turn off the heat, then add the lemon juice. Mix well. The jam should be quite thick. It will thicken further on cooling.
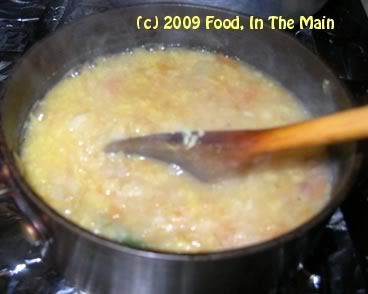
7. Transfer the jam to a clean glass jar and let cool completely. It's lovely spread on scones along with thick cream. Or on toast. Or rolled up in chapaties.

Wednesday, September 22, 2010

Roasted tomato redcurrant thokku (chutney)

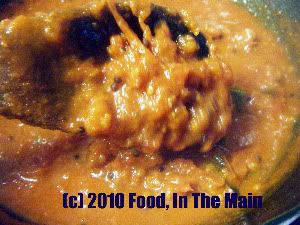
My first ever experiment with cooking with redcurrants was redcurrant thokku. It was, despite my best efforts, still rather too sour to be used as a mix for cooked rice - according to the feedback received from my palate. The best I could do with the thokku was use it – sparingly - as a condiment with (any) dal and rice.
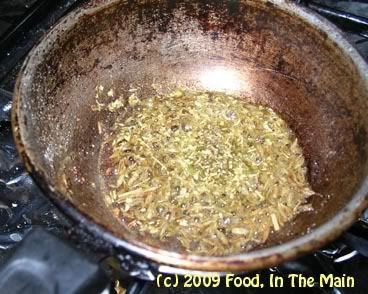
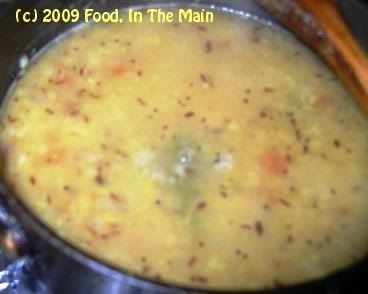
So, with the second of the three batches of redcurrants, as a further experiment, I made thokku with the addition of roasted tomatoes, which I usually have to hand in the fridge because roasted tomatoes make everything taste better. Need I add that “everything” is limited to whatever is made USING the roasted tomatoes? No, I thought not. (But I’ve added it anyway, in case there’s someone whose answer to that question was “Yes”. *heehee*)

This thokku was more readily palatable, with the sourness of the berries tempered by the sweetness of the roasted tomatoes. It’s as nice mixed with plain rice as any regular tomato thokku, and is also a good accompaniment for dosas, idlis and the like. The verdict from my palate, which while admitting that quality-wise this thokku is the much better improved version, also insists that it’s best had in smaller portions than regular tomato thokku. So there you have it – my palate has spoken.

Recipe for: Roasted tomato redcurrant thokku

Photobucket

Ingredients

1-1/4 cups redcurrants, washed and drained
2 cups chopped roasted or regular tomatoes, pureed
2 tbsp oil
2-3 cloves garlic
1 tsp cumin-coriander powder
1 htsp brown/black mustard seeds
5-6 fresh curry leaves
1/4 tsp asafoetida powder
1/4 tsp turmeric powder
1 tsp sambar powder (optional)
1 tsp jaggery
1 tbsp lemon juice
3 tsp red chilli powder (or to taste)
1/4 tsp roasted fenugreek seed powder
salt to taste

Method:

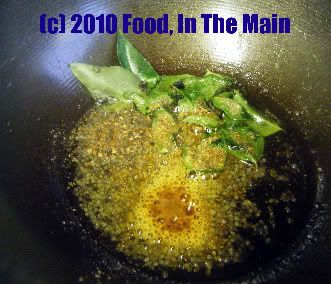
1. Heat the oil, add the garlic, cumin-coriander powder, mustard seeds, curry leaves, asafoetida powder and turmeric powder. Stir for 30 seconds or so.

Photobucket

2. Add the redcurrants and red chilli powder. Mix well, cooking the berries on medium low flame until they are soft and squashed.

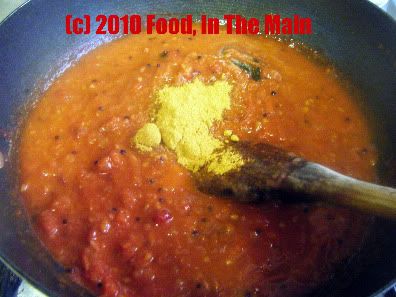
3. Now pour in the pureed tomatoes and mix again.

Photobucket

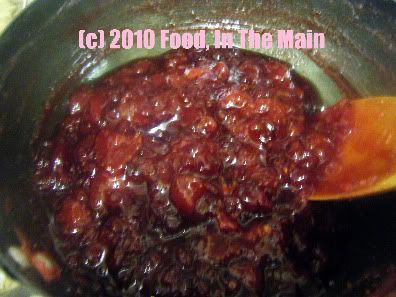
4. Bring the mixture to a boil, stirring every so often, then bring down the heat to low and let it bubble gently for 12-15 minutes, till it is thick. Add the sambar powder now, along with the jaggery and salt to taste.

Photobucket

Stir well. If the thokku is a bit watery, let it cook for another 5 minutes on medium heart and leave the thokku on the heat for a couple of minutes longer. There should not be any liquid in the thokku, it should be quite thick. If you like a smooth texture, puree the thokku after it cools down.

Photobucket

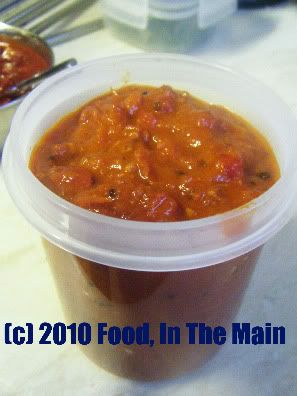
Let the thokku cool down completely before transferring to a clean jar with a tight lid. The thokku stays good for 2-3 days at room temperature. Mix with plain rice to make tomato rice with a difference, or serve as a side dish with dosas, idli etc.


RECIPE: ROASTED TOMATO REDCURRANT THOKKU

Ingredients:

1-1/4 cups redcurrants, washed and drained
2 cups chopped roasted or regular tomatoes, pureed
2 tbsp oil
2-3 cloves garlic
1 tsp cumin-coriander powder
1 htsp brown/black mustard seeds
5-6 fresh curry leaves
1/4 tsp asafoetida powder
1/4 tsp turmeric powder
1 tsp sambar powder (optional)
1 tsp jaggery
1 tbsp lemon juice
3 tsp red chilli powder (or to taste)
1/4 tsp roasted fenugreek seed powder
salt to taste

Method:

1. Heat the oil, add the garlic, cumin-coriander powder, mustard seeds, curry leaves, asafoetida powder and turmeric powder. Stir for 30 seconds or so.
2. Add the redcurrants and red chilli powder. Mix well, cooking the berries on medium low flame until they are soft and squashed.
3. Now pour in the pureed tomatoes and mix again.
4. Bring the mixture to a boil, stirring every so often, then bring down the heat to low and let it bubble gently for 12-15 minutes, till it is thick. Add the sambar powder now, along with the jaggery and salt to taste.
Stir well. If the thokku is a bit watery, let it cook for another 5 minutes on medium heart and leave the thokku on the heat for a couple of minutes longer. There should not be any liquid in the thokku, it should be quite thick. If you like a smoother texture, puree the thokku after it has cooled down.
Let the thokku cool down completely before transferring it to a clean jar with a tight lid. The thokku stays good for 2-3 days at room temperature. Mix with plain rice to make tomato rice with a difference, or serve as a side dish with dosas, idli etc.

Friday, October 09, 2009

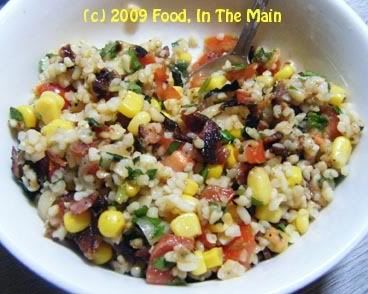
Fat-free bulgur salad

Photobucket

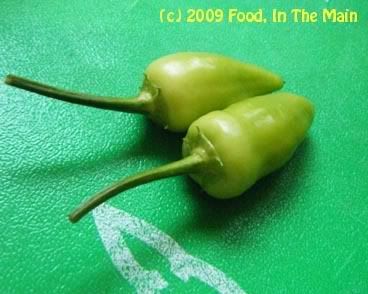
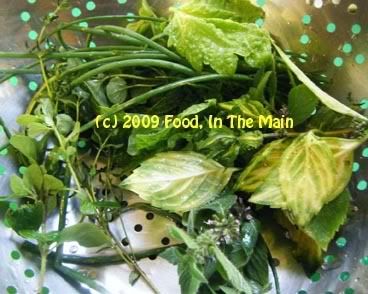
There's no real reason to post the photo above (even though I used the chillies in the recipe), just as there was no real reason to take the photo in the first place. My heatless green chillies have been remarked on enough times, and photographed and posted enough times on this blog, that any regular reader would likely recognise them and wait with sinking heart for the inevitable whine about how chillies with no heat aren't worth the time...

But I'm not going to whine this time. Besides, I grew the darn things from scratch - and just the fact that the plant survived and the chillies fruited is remarkable enough in itself to merit a mention without the accompanying whine.

The reason I took the photo is because I thought the two chillies looked really cute. Yes, anthropomorphising food items is probably not, strictly speaking, entirely normal - but sue me, I thought they were cute. Like little green mice with long tails, plotting to raid the pantry in secret.

Thanks for indulging me in my moment of whimsy. Now back to the real world and on with the recipe. It's totally fat-free (aside from the garnish of roasted peanuts, which is entirely optional - so any nit-picking anonymous dissenting commenters please take note, without the garnish, this IS totally fat-free) and makes a nice cold (or warm) vegetarian "salad". For non-vegetarians and fishytarians, serve warm as a side with roasted meat dishes, or as a light lunch mixed with smoked mackerel or tuna chunks (as Pete did).

Recipe for:
Fat-free bulgur salad

Photobucket

Ingredients:

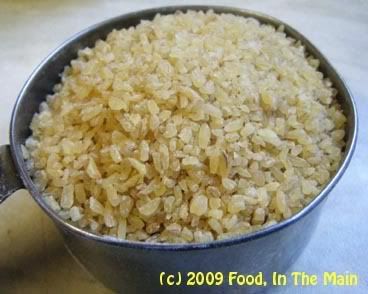
1 cup bulgur wheat
1 large onion
Handful of herbs of choice (I used mint, oregano, chives and basil)
2 green chillies, de-seeded and chopped fine (optional)
1 cup canned sweetcorn, drained
1 medium tomato, chopped
3 tbsp lemon juice
Salt to taste
Fresh ground black pepper to taste
Handful of roasted peanuts (optional, for crunch)


Photobucket
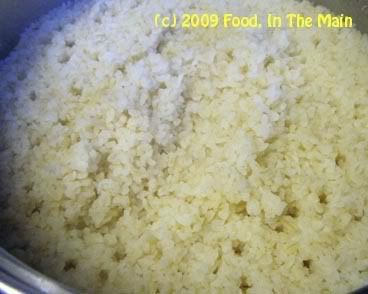
1. Cook the bulgur wheat according to the packet instructions (or boil 1.75 cups water, add the bulgur, stir well, let it boil for 2 minutes, then turn the heat off, cover the pan tightly and let the bulgur sit for 20 minutes undisturbed. Fluff with a fork to separate the grains.)

Photobucket
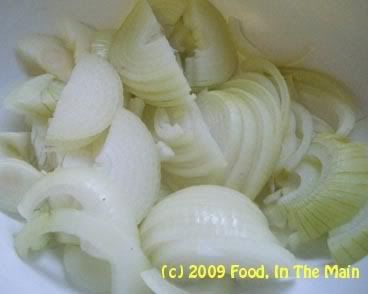
2. Slice the onion thinly.

Photobucket
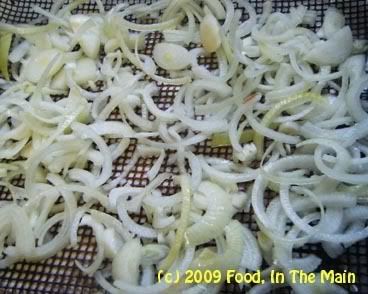
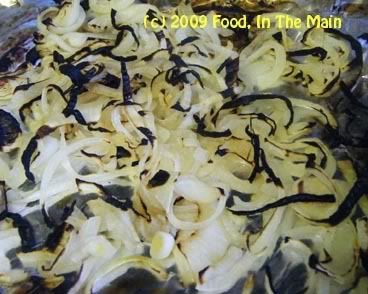
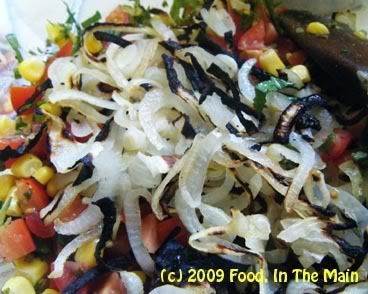
3. Toss the sliced onions with the lemon juice and place under a hot grill for 5-7 minutes,
Photobucket
or till the onions start browning slightly and are done to taste. Remove from the oven.

Photobucket
4. Fluff up the cooked bulgur and place in a large bowl.

Photobucket
6. Chop the herbs finely and add to the bowl.

Photobucket
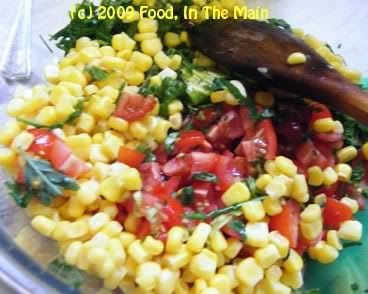
7. Add the chopped tomato and the sweetcorn,


Photobucket
and the grilled onions.


Photobucket
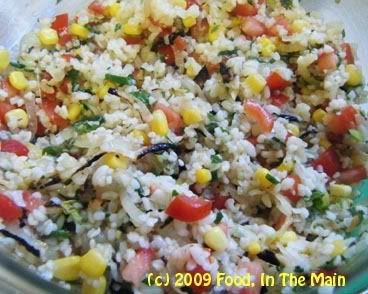
8. Mix with a large fork, add salt to taste. Squeeze a little more lemon juice over, if required. Garnish with roasted peanuts if desired, for crunch, and serve the bulgur as a side dish with fish, or eat by itself as a healthy snack or a light lunch.

Thursday, August 20, 2009

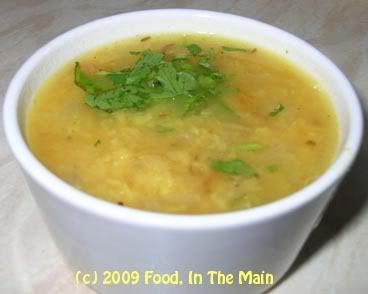
Light lemony moong dal

Last week was a busy one, socially speaking, and we went out for dinner three times in the week – quite out of the norm for me, because I don’t care to eat out much. Or rather, I get easily bored with restaurant food, no matter what the cuisine, so the occasional meal out is much more to my liking than eating out often.

After having been to two “Indian” (read Bangladeshi) restaurants, and one birthday party with a buffet-style spread, both Pete and I were craving simple comfort food. However, the term "comfort food" represents entirely different things to me and Pete – no surprise considering that I was brought up on standard South (and some North) Indian vegetarian cuisine, and Pete on just as standard English fare.

One of my few talents is that I am capable of is making both kinds of comfort food – which ability my husband doesn’t share. (Just as well, otherwise he’d be perfect, and perfection is a quality that I can’t really come to terms with because to me it denotes “smug and/or boring”.)

What was I saying? Oh yes, comfort food. Pete’s comfort food is shepherds pie, and mine is home-style simple food, preferably based around rice. So I made shepherds pie for Pete, and for myself, dal – a simple, very basic, fuss-free and gentle-on-the-digestion dal, enlivened by the sharp freshness of lemon juice and aromatic with a tempering of ghee-fried cumin seeds. That dal over plain steamed rice was, for that meal, absolutely perfect.

What? I’m not being contrary. I have nothing against perfection in food - in fact, I try actively to achieve it. Perfection in human beings is what I can’t live with. Are we clear now?

Recipe for:
Light gingery lemon dal

Photobucket

Ingredients:

1 cup yellow moong dal
2 small tomatoes, chopped
1 onion, chopped fine
1 tbsp fresh ginger root, grated
1 fresh green chilli, slit vertically from the tip
1/2 tsp oil
1/2 tsp ghee
1 tsp cumin seeds
1/2 tsp coriander powder
2 tbsp lemon juice (or to taste)
Salt to taste
Chopped coriander leaves for garnish

Method:

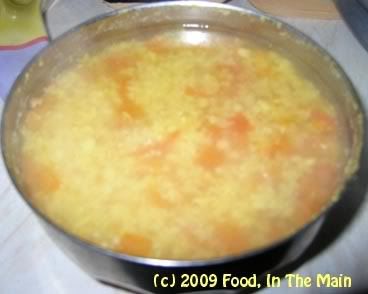
1. Pressure cook the moong dal and chopped tomatoes with 1-1/2 cups water for 3 whistles. Reserve.

Photobucket

2. Heat 1/2 tsp oil in a pan and add the chopped onions and green chilli. Cook on a low flame till the onions soften. Don't let them brown.

Photobucket

3. When the onions are cooked, add the cooked dal and mix in. On med-high heat, bring the dal to a gentle boil.

Photobucket

4. Meanwhile, heat the 1/2 tsp ghee in a small pan and add the cumin seeds and coriander powder. Let the seeds turn a darker aromatic brown (about 30 seconds).

Photobucket

5. Pour this tempering immediately on the bubbling dal and turn off the heat. Add salt to taste and 1 tbsp lemon juice, stir it in and taste for sourness. Add more lemon juice if required.

Photobucket

Serve hot over plain boiled rice, with any spicy, dry vegetable preparation.

Tuesday, October 14, 2008

Making paneer - a tutorial

There are plenty of blogs that detail how to make paneer at home – and really it is the simplest thing, taking perhaps just a little time. A quick google (like I did) would show you what I mean. But because I’ve been literally inundated with a request (anonymous, but still a request) to post a recipe for home-made paneer, I thought I would add my bit to the information superhighway.

My extra tip is to NOT throw away the whey that’s left behind (as I regrettably did the first time), but to use it in place of water when cooking rice for pulao or biriyani. Whey can also be used to knead chapatti dough, but that doesn’t use up much whey really, unless you have a very large family which eats lots of chapattis! The whey stays good for 2-3 days (or maybe longer, but I haven’t tried it personally) in the fridge. Ditto the paneer.

Recipe for:
Home-made paneer


Photobucket

Ingredients

2 litres milk (full fat or half-fat)
2-3 tbsp fresh lime juice or fresh curd/yogurt

Method:

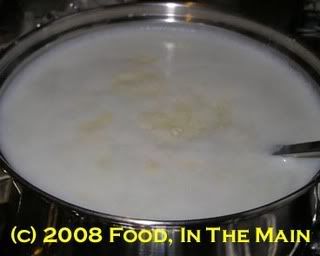
1. Bring milk to a boil,

Photobucket

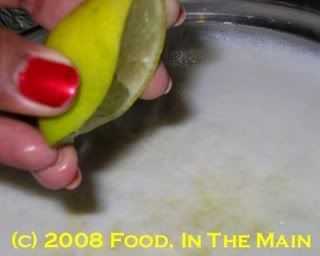
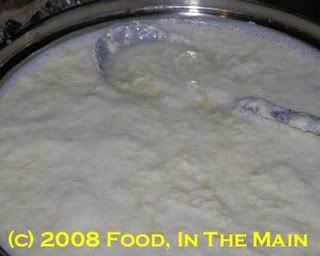
then add 2 tbsp lemon juice to it and stir, turning down the heat to medium.

Photobucket

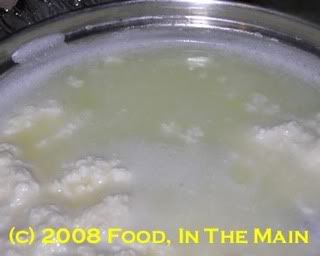
2. Let the milk solids separate from the liquid (whey).

Photobucket

If the whey looks milky and not thin enough, add a little more lemon juice and simmer for a few minutes more.

Photobucket

The whey should be almost transparent liquid.

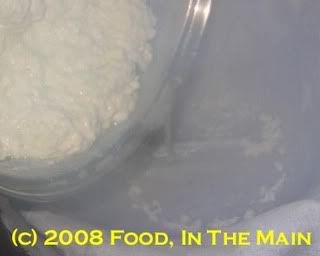
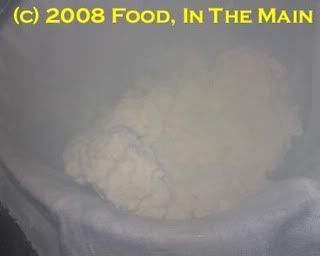
3. Strain the paneer through a muslin cloth

Photobucket

and let the whey drain into a vessel.

Photobucket

Photobucket

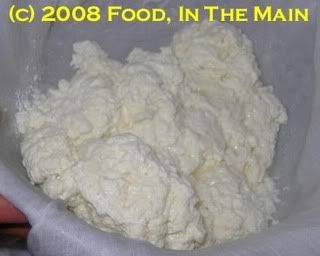
Hang up the paneer for 4-5 hours to let all the whey drip through…

Photobucket

or if you’re impatient like me, squeeze it through the cloth (when it’s cool enough to handle without discomfort) to help the whey on its whey out… er, I mean way out. (Yes. HAHAHA!)

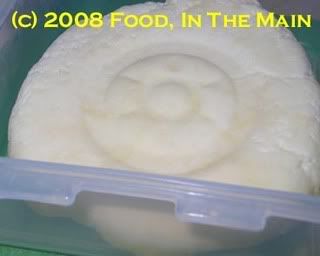
4. Shape the paneer into a round or rectangle as best as possible and put it under a heavy weight for 2-3 hours (if you want to be able to cut it into pieces, and for the pieces to hold their shape).

Monday, January 16, 2006

Easy peanut salad

The last time Pete and I were in Bangalore (2003), after a bit of bar-hopping with friends, we broke from the main party to walk around by ourselves. I must have been quite mellow by then because I remember putting up only the mildest objection when Pete decided he wanted to check in on a nightclub - out of professional interest, he said, a Brit DJ's curiosity about what music was played by Indian DJs.

I cant remember the name of the nightclub but it was on the first floor, a bit seedy, with lurid UV lighting that gave a ghoulish glow to teeth and the whites of the eyes. The music was ok, but what distinguished the place as far as we were concerned was the superb peanut salad that came free with the drinks. It was the absolute best I've ever had anywhere and as far as I could tell (remember my mellowness, which luckily didnt affect my taste buds), the ingredients were bog standard.

I made my version of this salad yesterday when some friends came home, and although (as always) the salad didnt, in my opinion, reach the standard of the nightclub one, everybody said it was the perfect accompaniment for beer and alcohol in general. Well hey, deserving or not, you gotta take the kudos as you find it, so I sat back and sipped my margarita, glowing in the manner of the amateur cook who has just had a lot of praise for a very simple preparation. It works for me!


Recipe for:
Easy peanut salad


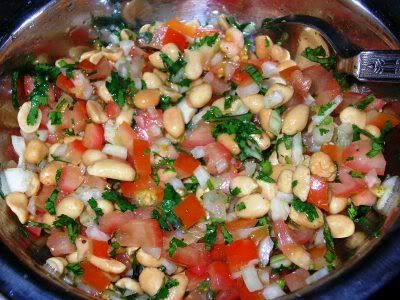
2 cups lightly salted peanuts (ready-bought ones will do fine)
2-3 green chillies, minced fine (optional or to taste)
2 medium tomatoes, de-seeded and chopped
1 medium onion, chopped fine
Juice of one lemon/lime (to taste)
1/2 tsp freshly ground peppercorns (to taste)
1/2 cup fresh coriander leaves, chopped
1/2 tsp chaat masala for garnish (optional)

Method:

1. Mix all the ingredients together, sprinkle the chaat masala on top if using, and serve at room temperature as a snack to go with drinks.

Thursday, November 03, 2005

Diwali special sweet 1 - Jilebi

There's a traditional way of making jilebi that I just didnt bother with for two reasons: 1. I didnt have enough time. 2. I wasn't sure I could get the batter to ferment (kinda cold here now, plus see Reason 1 again).

So I followed a recipe (adapted only very slightly) from Bilbo of
Smorgasboard for instant jilebis. I have to say it worked out rather well... Pete loved it (he even said it was as good as those from my favourite sweetshop in Birmingham - which, although not true, was very nice to hear!) and as for Rebecca, his daughter, she couldnt get enough of them.

Cant blame them, I love jilebis as well. They're one of the few Indian sweets that I can go on eating indefinitely... perhaps it's because they're not just tooth-achingly sweet but have a sour tang to them that comes from fermenting the batter.

Jilebis are lovely to eat crisp and hot, of course, but I especially love them the next day - I store them in the refrigerator - by which time they've lost most, but not all, of their crispness and gained a softness (and a sticky sugar glaze) that is just irresistible combined with the tangy/sweet taste. (I'm drooling here.)

Strangely enough, I dont like jangri, IMO jilebi's less attractive cousin, which starts out dripping with syrup and with a soft texture. (If anybody's thinking "jeez, what a fuss-budget she is" by now, I will gracefully admit to being one... sometimes.)

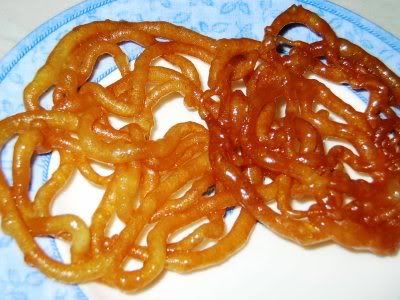
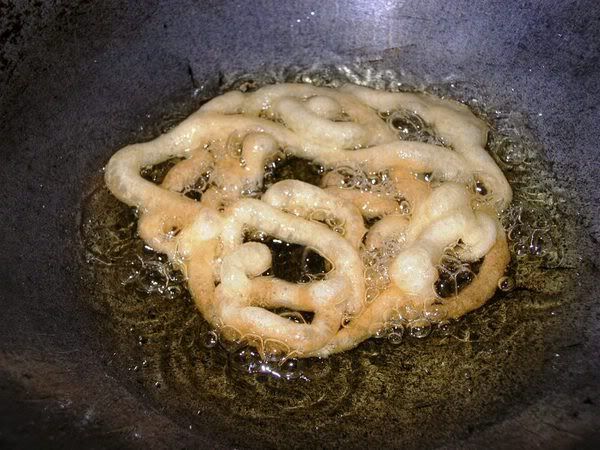
Anyway... back to my Diwali jilebis. Turned out I didnt have a proper jilebi press (press, mold, whatever), and my icing accessories had unaccountably gone AWOL. So I made do with a conical disposable plastic icing bag with the tip cut off, and poured the batter into it. Not the best idea, really - it kind of worked, but a good portion of the batter was wasted as it squirted out of the top and oozed down my hand and down the bag. It also meant that my jilebis turned out a bit wonky in shape. Then again, I'm not a professional halwai (sweet-maker) so they would have been shapeless no matter what I used.

I would suggest using one of the medium-size icing/piping nozzle to make jilebis... havent tried it that way, so I cant be more accurate. Odd, now that I think of it, but I havent actually seen jilebis being made so I dunno how the professionals do it!

Recipe for:
Instant jilebi


Ingredients:

For the jilebi
--------------
1 cup plain flour
1 tsp chickpea/gram flour
1/2 tsp active dry yeast
1 cup water (a few tbsp more or less as required)
2 tablespoons fresh lemon juice
Oil for deep frying

For the sugar syrup
-------------------

2 cups sugar
2 cups water
1 tbsp rosewater
OR
1/2 tsp powdered cardamom seeds

Method:

1. Combine the flours and yeast in a bowl, add enough water to make a fairly thick but pourable batter. Let this sit for 10 minutes, then stir in the lemon juice.

2. To make the sugar syrup, combine the water and sugar in a pan, stirring over medium heat until the sugar dissolves completely.

3. Let the mixture boil briskly for 10-15 minutes and then turn off the heat.

4. Heat the oil in a wok. Fit a medium nozzle (not sure of size, but it shouldnt be one with a big opening, because the batter expands in the oil) onto an icing bag and pour the batter into it.

5. Squeeze the batter directly into the hot oil, looping the stream to make pretzel-shapes. Fry the jilebis one or two at a time (depending on the size of your wok) until a golden brown on both sides.


6. Drain and drop directly into the sugar syrup, soaking the jilebis for about 30 seconds each side.

7. Remove with a slotted spoon and place on a plate. Serve hot, cold or at room temperature.