skip to main |
skip to sidebar
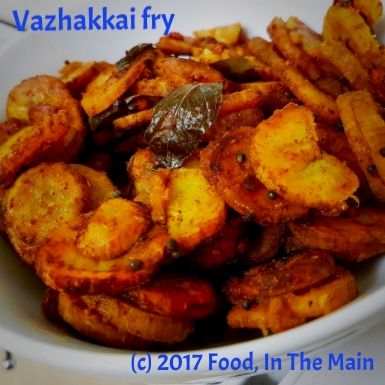
My entire family likes this vegetable, but my sister and I, we're "lattoo" (Hindi slang for "crazy") when it comes to vazhakkai. If we were asked to eat it every day for a year, we would probably beg to have it twice a day! The recipe below is how my mother makes it, and I see no reason to mess with something that I think is perfect. The flavour that the coconut oil gives this vegetable is unbelievable. The two just go together, no question.
That said, if when I get my hands on vazhakkai again, I hope to make a recipe that I've had in my folder for literally years, involving fresh mustard paste. You would think I could hold back at least one vazhakkai for the mustardy recipe... but no. I haven't yet made it because each time I end up making this same one. This dry fry with my mother's thengai kuzhambu (South Indian coconut-and-fenugreek-seed gravy)and steamed rice - I couldn't want for more!
Recipe for: Vazhakkai fry
Ingredients:
3 green (raw) bananas
2 tbsp coconut oil
A few fresh/frozen curry leaves (optional)
1/4 tsp turmeric powder
1/8 tsp asafoetida powder (optional)
1/2 tsp urad dal
1 tsp mustard seeds
1/4 tsp black pepper powder
Red chilli powder to taste
Salt to taste
1 tsp tamarind paste
Method:
1. Wear disposable gloves or grease your hands with oil before peeling the bananas as the sap will otherwise stick to your hands. Make sure to get all the thick green skin off the bananas.
2. Slice the bananas into even slices about 1/4cm thick and put them in a saucepan of water. The water should be enough to cover the slices generously. Dissolve the tamarind paste and turmeric powder in the water.
3. Parboil the sliced bananas, then place in a colander to drain off the cooking water. Handle carefully so that the slices don't break up too much.
4. Heat the coconut oil in a wide saucepan, then add the mustard seeds, curry leaves and urad dal. Cover and let the seeds splutter. The urad dal should be golden by now.
5. Now add the chilli powder and black pepper powder, stir it for 20 seconds, then add the parboiled banana slices along with salt to taste. Stir carefully to coat the slices evenly.
6. Cover the pan and let the slices roast for 8-10 minutes on a medium heat, until the slices turn golden and are fully cooked. Turn the slices carefully over and let them roast for about 5 minutes more. Serve hot as a side with rice, rasam or sambar and any South Indian "gravy" like moar kuzhambu, vattha kuzhambu or thengai kuzhambu (recipes for all these are on my blog).
If you're unfamiliar with British cuisine, you'll probably be expecting a recipe for a dessert of some sort - but this is no dessert, even though they're termed "puddings". They're savoury, airy puffs of pure carb and, filled with gravy, they're an indispensable part of "Sunday lunch" along with the roast potatoes, parsnips, carrots and other vegetables that accompany the roast chicken or beef.
I'd never made them before, and while it's not a complicated recipe, the recipes on BBC Food asked for the ingredients to be precisely measured. I was leery of doing this - I hate having to weigh things carefully; the detail work just doesn't appeal to my slapdash nature.
Then I came across a ridiculously simple recipe, and I really doubt this can be made any easier. It's just brilliant! I added some herbs to the batter, but otherwise there's no change to the recipe. Eggs, flour, milk, seasoning. That's it.
If you don't have proper Yorkshire pudding pans, you can make them just as well in muffin pans, like I did. Be warned, these puddings puff up quite a lot. Mine turned out all sizes and shapes because my oven doesn't heat evenly... but the puddings tasted great. They were, if anything, slightly burnt on top, but that was deliberate because that's how Pete likes them.
 Pete (actually, his hand) trying to sneak a Yorkie from the tin even as I was taking a photograph!
And unless you're competing in Masterchef, the weird sizes and shapes don't matter one bit. Taste is king.
Recipe for: Easy peasy Yorkshire puddings

Ingredients:
2 large eggs
Plain flour, equal in volume to the eggs
Milk, equal in volume to the eggs
Salt to taste
Freshly ground pepper to taste
1/2 tsp minced fresh thyme
1/4 tsp dried rosemary
Oil for cooking
Method:
1. Preheat the oven to 220C/425F.
2. Place three glasses of equal size and shape side by side. Break the eggs into one glass. Pour milk in the next glass to come up to the same level as the eggs. In the third glass, put in enough flour to come up to the same level as the eggs/milk.
3. Now put the flour in a medium mixing bowl and add the salt, pepper and herbs. Stir together.
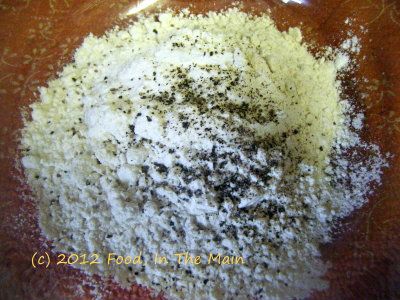
4. Make a well in the centre of the flour and pour in the eggs.
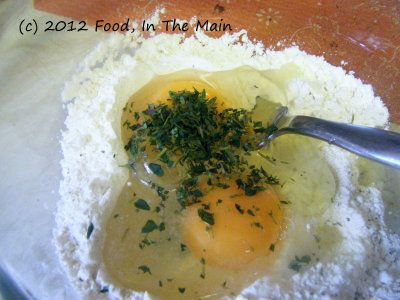
Beat with a fork till the eggs and flour are well mixed.
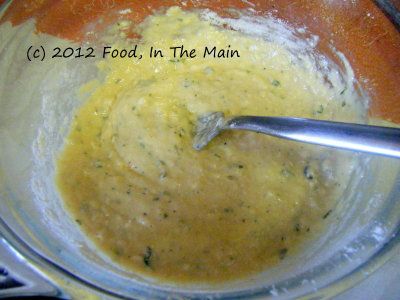
5. Now pour the milk in a steady, thin stream while whisking the mixture constantly to make a smooth batter.
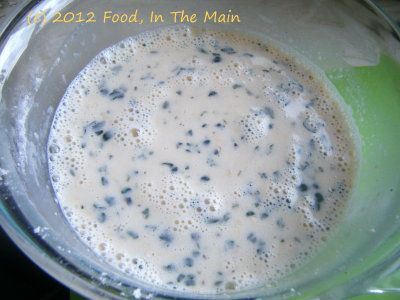
Rest the batter for at least 10 minutes. (According to other recipes I've read, the batter can be stored covered in the fridge for up to 12 hours before baking - but I haven't tried this out and don't know what difference it will make to the puddings.)
6. Take a 12-tray muffin pan. Pour a tsp of oil into each cup to cover the bottom, and grease the sides as well. Heat the muffin pan in the hot oven for 5-6 minutes or till the oil is smoking hot.
7. Pour a small ladleful of the batter into each cup as quickly as possible(fill it no more than half-way),
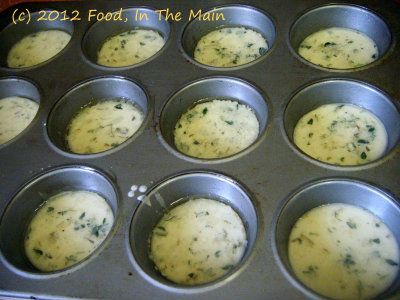
then return the tray to the oven immediately. Let the puddings bake for 10-15 minutes (do not open the oven for the first 10 minutes) or until they are golden brown.

Remove and serve immediately.

They can also be frozen after they're completely cool.
RECIPE: EASY PEASY YORKSHIRE PUDDINGS
Ingredients:
2 large eggs
Plain flour, equal in volume to the eggs
Milk, equal in volume to the eggs
Salt to taste
Freshly ground pepper to taste
1/2 tsp minced fresh thyme
1/4 tsp dried rosemary
Oil for cooking
Method:
1. Preheat the oven to 220C/425F.
2. Place three glasses of equal size and shape side by side. Break the eggs into one glass. Pour milk in the next glass to come up to the same level as the eggs. In the third glass, put in enough flour to come up to the same level as the eggs and milk.
3. Now put the flour in a medium mixing bowl and add the salt, pepper and herbs. Stir together.
4. Make a well in the centre of the flour and pour in the eggs. Beat with a fork till the eggs and flour are well mixed.
5. Now pour the milk in a steady, thin stream, whisking the mixture constantly until a smooth batter is formed. Rest the batter for at least 10 minutes. (According to other recipes I've read, the batter can be stored covered in the fridge for up to 12 hours before baking - but I haven't tried this out and don't know what difference it will make to the puddings.)
6. Take a 12-tray muffin pan. Pour a tsp of oil into each cup to cover the bottom, and grease the sides as well. Heat the muffin pan in the hot oven for 5-6 minutes or till the oil is smoking hot.
7. Pour a small ladleful of the batter into each cup as quickly as possible (fill it no more than half-way), then return the tray to the oven. Let the puddings bake for 10-15 minutes (do not open the oven for the first 10 minutes) or until they are golden brown. Remove and serve immediately. They can also be frozen after they're completely cool.
While vegetarian food is not hard to find in most pubs, hotels etc, the choice is woefully limited – usually pasta of some kind, vegetarian chili, bean burger, sometimes a vegetable curry or Mediterranean-veg lasagna chock full of gross aubergines/eggplant and zucchini (because, you know, they’re Mediterranean vegetables and apparently no other veggies are known to ever be used in Mediterranean cuisine). Some places offer two vegetarian options, if you’re lucky. But usually it’s just one of the above, and vegetarians have to like it or lump it.
I should be glad that there’s at least SOMETHING non-meaty and non-fishy to eat in Western restaurants, and I suppose I am... but I still can’t help wishing that their chefs would show just a little imagination for vegetarians. Which is why I like a little pub in Wem (Pete’s hometown), called the Old Post Office (Pete’s home-away-from), which is owned and run by Pete’s business partner Guy, and a couple of his friends. The pub is called the Old Post Office because before it was converted to a pub, it used to be the old post office premises before they moved lock stock and barrel to the new post office premises – well, why did you think the pub’s name is what it is?
Anyway, I like the pub for all sorts of reasons – one, the younger crowd (the noisy, binge drinking, annoying kind) stay away because it doesn’t offer them much in the way of a “hep” ambience. Two, the pub plays good music on an excellent sound system (which Pete set up). Three, the décor is homely (I especially love the squashy-soft sofas from whose hug it’s difficult to get out) but with an exotic touch in the way of beautiful sculptures and paintings and wall-hangings which Guy brought back from his trips to Africa. The effect is casual and comfortable.
And now for the fourth and most important reason - the food. The pub offers a carvery every Sunday, with at least two different choices of meat, which Pete loves. The Sunday carvery has had very good reviews in the local newspapers, because the servings and accompaniments are generous – and all freshly cooked that day, nothing from frozen. I would be happy to eat just the accompaniments that are available – roast potatoes, boiled potatoes, cabbage, peas, cauliflower or broccoli cheese, roast parsnips, carrots, leeks, stuffing balls, Yorkshire puddings - a veritable feast!
But I get a special entree just for me as the only vegetarian who goes there for Sunday lunch. The two lady chefs make it a point to try out a new recipe for me, even though – or perhaps especially because – vegetarian food is not their comfort zone. It’s not even as if I’m a guinea pig… apparently they try out their new recipes during the week on the regulars (the pub makes it a point to provide sandwiches and other finger food on the house, in the evening), asking them for feedback. And then, on a Sunday, the recipe makes its formal debut – just for me (or any other vegetarian, assuming any comes along. It hasn’t happened yet, they say.)
Since I know that there won’t be any aubergine in anything (the staff all know of my loathing for this gross slimy-when-cooked vegetable), I’m always delighted to try whatever they've made – and so far, every single thing has been a hit. It's really nice of them to take the trouble to make anything, just for one person, especially when they've got their hands full catering for all the regular guests.
One time it was peppers stuffed with a really nice rice mixture, and since I had peppers at home last Sunday (when Pete and Bex were having a Sunday lunch at home), I decided to make my own main course and share the accompaniments (called “trimmings”) with my husband and stepdaughter for our family meal. Pete served everything in a giant Yorkshire pudding - yummy!
Recipe for: Stuffed green peppers with nutty rice

Ingredients:
2 green peppers (capsicum/bell pepper)
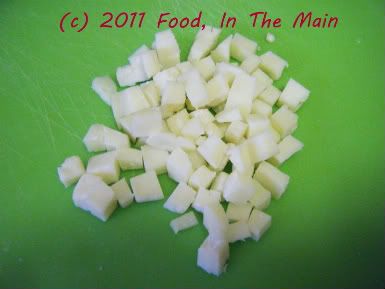
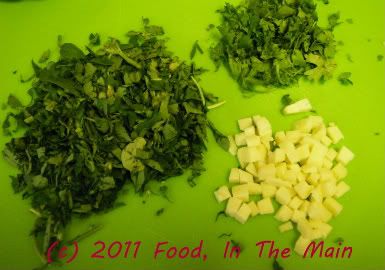
1/4 cup paneer, diced into 1/2 cm cubes
1 cup cooked basmati rice
1 green chilli, sliced into thin rings
4 tbsp shredded methi leaves (optional)
1/2 cup shredded coriander leaves
1/2 tsp cumin powder
2 tbsp mixed nuts (peanuts, cashewnuts, pecans), chopped
2 tsp raisins or sultanas
1/2 tsp freshly ground black pepper
1/4 tsp garam masala
2 tsp oil
Salt to taste
Method:
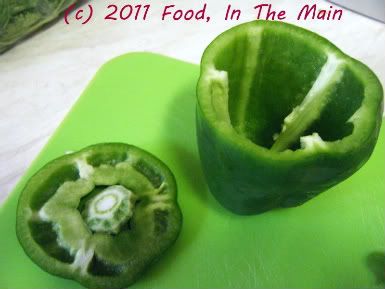
1. Slice off the tops of the peppers and carefully remove the seeds and pith. Make sure the peppers can remain upright; even up the bottoms if required so that they sit flat. Reserve the tops, don't throw them away.
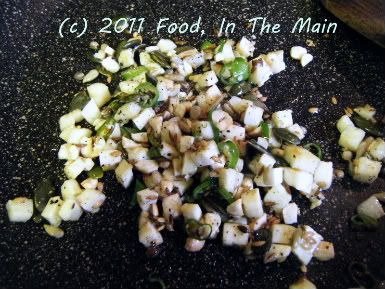
2. Heat the oil in a pan and add the chillies, paneer and chopped nuts. Stir fry till the nuts and the paneer are pale golden brown.
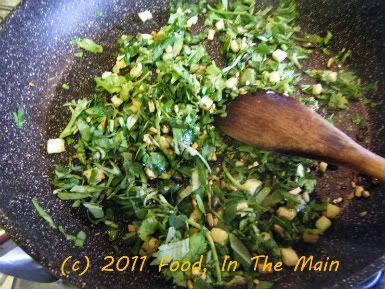
3. Add the coriander and methi leaves and fry till they wilt.
4. Add the sultanas/raisins.
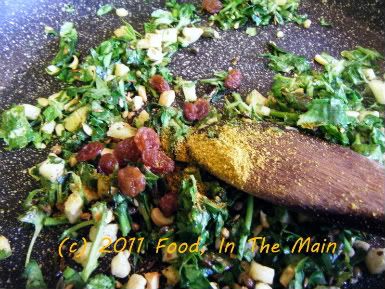
5. Now mix in the rice, garam masala, black pepper powder and salt to taste. Heat this stuffing thoroughly, then turn the heat off and let it cool.
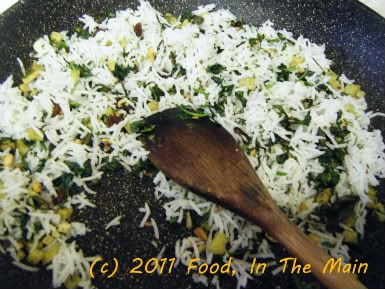
6. Spoon the filling into the prepared peppers, pressing down with the back of the spoon to get as much of the stuffing in as possible,
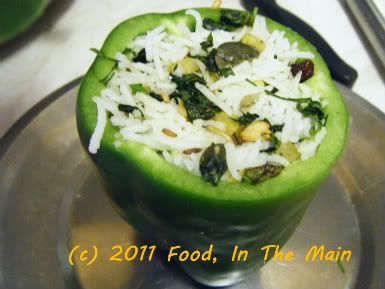
then put the tops of the peppers back on.
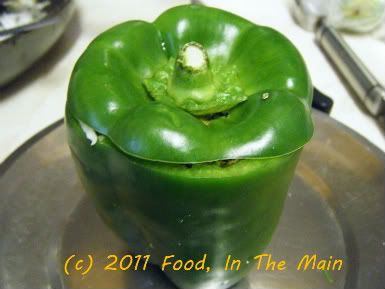
7. Place the stuffed peppers on a baking tray and spray them with Pam on the outside, or brush them with a little oil. Bake in the oven at 200C for 15 minutes or so, or till the peppers are a soft and wrinkled. Don't overcook them.
8. Serve the peppers hot as a main course with a selection of vegetables, and vegetarian gravy.


RECIPE: STUFFED GREEN PEPPERS WITH NUTTY RICE
Ingredients:
2 green peppers (capsicum/bell pepper)
1/4 cup paneer, diced into 1/2 cm cubes
1 cup cooked basmati rice
1 green chilli, sliced into thin rings
4 tbsp shredded methi leaves (optional)
1/2 cup shredded coriander leaves
1/2 tsp cumin powder
2 tbsp mixed nuts (peanuts, cashewnuts, pecans), chopped
2 tsp raisins or sultanas
1/2 tsp freshly ground black pepper
1/4 tsp garam masala
2 tsp oil
Salt to taste
Method:
1. Slice off the tops of the peppers and carefully remove the seeds and pith. Make sure the peppers can remain upright; even up the bottoms if required so that they sit flat. Reserve the tops, don't throw them away.
2. Heat the oil in a pan and add the chillies, paneer and chopped nuts. Stir fry till the nuts and the paneer are pale golden brown.
3. Add the coriander and methi leaves and fry till they wilt.
4. Add the sultanas/raisins.
5. Now mix in the rice, garam masala, black pepper powder and salt to taste. Heat this stuffing thoroughly, then turn the heat off and let it cool.
6. Spoon the filling into the prepared peppers, pressing down with the back of the spoon to get as much of the stuffing in as possible, then put the tops of the peppers back on.
7. Place the stuffed peppers on a baking tray and spray them with Pam on the outside, or brush them with a little oil. Bake in the oven at 200C for 15 minutes or so, or till the peppers are a soft and wrinkled. Don't overcook them.
8. Serve the peppers hot as a main course with a selection of vegetables, and vegetarian gravy.
I don’t particularly like ready-made curry pastes, so I very rarely buy them and even more rarely use them. But recently, when we had guests over for dinner, my husband bought a small bottle of mild tandoori paste to make a side-dish of oven-roasted tandoori turkey chunks, with leftover turkey. (It was a hit, incidentally.)
However, there was still a half-bottle of paste left. I didn’t really know what to do with the paste – Perhaps make something else for Pete with it? ... but he didn’t really fancy that. Throw it away? ... but I didn’t really want to do that. Make something for myself with it? ... hmm, maybe, but what?
For a couple of days the bottle sat in the fridge while I debated what to do with its contents. I knew that if I didn’t decide to make SOMEthing with it soon, the question would become moot as it would have to be dumped - like it or not – because the use-by time of the opened jar was three days.
I even considered praying for a miracle from heaven, specifically from the god in charge of the Food Wastage (Prevention & Control) Department. I was all set to do so, but then the thought struck me that merely hoping for a miracle could be considered as good as a prayer, given that the hope was in a good cause i.e, non-wastage of food.
Still, Food Wastage (Prevention) Dept gods presumably follow the example set by their Big Boss in helping only those who help themselves - so I didn’t give up racking my brains for some idea of what to make, even while awaiting the miracle. For the umpteenth time I opened the fridge door, hoping for a) inspiration, or b) a miracle... but no, the jar hadn't helpfully and miraculously disappeared, it was still there on the shelf along with its contents.
Disappointed, I was about to shut the door again when I noticed some decaying leaves in the vegetable section and suddenly realised that they belonged to a head of cauliflower I had bought a few days ago. (I often have a cauliflower slowly withering in the fridge, although it is always bought with the virtuous intention of using it “to make something healthy” – a perverse virtue and intention, if anything, because I’m not crazy about cauliflower. So why do I buy it, you ask? Because I like the virtuous feeling I get when I decide to cook a vegetable I don’t like very much.) Anyway... aha! Inspiration had arrived and it looked very much like a cauliflower.
(I wasn't particularly surprised that the miracle hadn't happened - I probably didn't believe in it enough. Please let's not confuse the issue by suggesting that the inspiration WAS the miracle! Let's be very clear that they are two separate and very different things. Inspiration = my work. Miracle = godly work in the form of disappearing half-bottle of tandoori paste. Which didn't happen.)
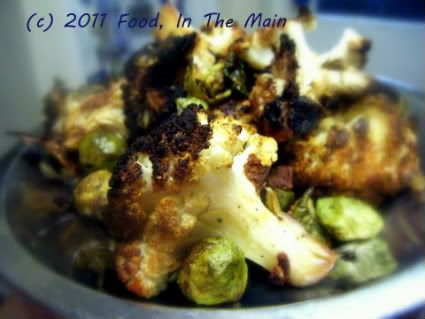
So that's what I made - oven-roasted tandoori cauliflower. I didn't parboil the cauliflower (although I should have) because it felt like too much work. I just trimmed the hard stem underneath and cut the head into quarters (again, I should have broken them into florets, but laziness struck again). Then I spread the tandoori paste over the quarters and made a foil packet in which to steam-cook the pieces in the oven. It took blinkin' AGES before the cauliflower pieces were even part-cooked, so I would definitely recommend parboiling the cauliflower. The recipe below reflects this rather than the method I followed.
Oh, and the baby brussels sprouts you see in the photo? They have nothing to do with the recipe so feel free to ignore them. There were fewer than a dozen and I threw them in with the cauliflower because I didn't want to save them for another occasion.
Recipe for: Oven roasted tandoori cauliflower
 Ingredients:
1 medium cauliflower
4-5 tbsp tandoori paste (readymade)
1/2 tsp freshly ground black pepper
1 tbsp oil
2-3 slices of lime or lemon
Method:
1. Cut the cauliflower into large florets.
 2. Dunk the florets in a pan of boiling water for 3-4 minutes, or until they are partly cooked. Then drain and pat dry. Mix the oil and tandoori paste together, then smear the paste evenly over the florets.
 At this point you can let them marinate for an hour or so, before baking.
3. Place the cauliflower florets on a tray covered with foil which has been greased with oil or sprayed with a non-stick spray.
 Bake the florets at 200C for 15-20 minutes, carefully turning them over after 10 minutes or so. The florets should be cooked and beginning to lightly char, but not so soft that they fall apart when touched.
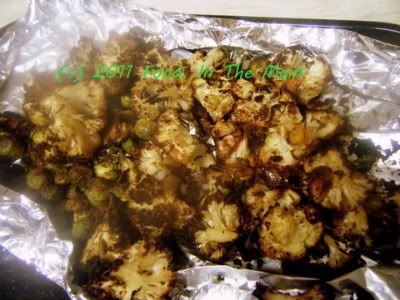 4. Serve hot with a squeeze of lemon over.
RECIPE: OVEN ROASTED TANDOORI CAULIFLOWER
Ingredients:
1 medium cauliflower
4-5 tbsp tandoori paste/marinade (readymade)
1/2 tsp freshly ground black pepper
1 tbsp oil
2-3 slices of lime or lemon
Method:
1. Cut the cauliflower into large florets.
2. Dunk the florets in a pan of boiling water for 3-4 minutes, or until they are partly cooked. Then drain and pat dry. Mix the oil and tandoori paste together, then smear the paste evenly over the florets. At this point you can let them marinate for an hour or so, before baking.
3. Place the cauliflower florets on a tray covered with foil which has been greased with oil or sprayed with a non-stick spray. Bake the florets at 200C for 15-20 minutes, carefully turning them over after 10 minutes or so. The florets should be cooked and beginning to lightly char, but not so soft that they fall apart when touched.
4. Serve hot with a squeeze of lemon over.
4. Serve hot with a squeeze of lemon over.
RECIPE: OVEN ROASTED TANDOORI CAULIFLOWER
Ingredients:
1 medium cauliflower
4-5 tbsp tandoori paste/marinade (readymade)
1/2 tsp freshly ground black pepper
1 tbsp oil
2-3 slices of lime or lemon
Method:
1. Cut the cauliflower into large florets.
2. Dunk the florets in a pan of boiling water for 3-4 minutes, or until they are partly cooked. Then drain and pat dry. Mix the oil and tandoori paste together, then smear the paste evenly over the florets. At this point you can let them marinate for an hour or so, before baking.
3. Place the cauliflower florets on a tray covered with foil which has been greased with oil or sprayed with a non-stick spray. Bake the florets at 200C for 15-20 minutes, carefully turning them over after 10 minutes or so. The florets should be cooked and beginning to lightly char, but not so soft that they fall apart when touched.
4. Serve hot with a squeeze of lemon over.
Squashes and pumpkins - especially the yellow kind - are usually prized by people who love them for their sweetish taste. Me, I'm kind of meh about them for precisely that reason... they're not quite sweet and not quite savoury either, and when you roast them they turn squidgy. (Parsnips, which are also kind of sweetish, at least have the decency to turn crisp on the outside when oven-roasted, so I tend to like those. But squashes... they just squash.)
Anyway, I've bought butternut squashes before and let them sit around till even they were too awful to be used (and believe me, they take a very very long time to get that way because of their incredibly hard outer skin or shell), and then thrown them away. This time I was determined to use the squash, so after 15 minutes of determined - and sometimes downright dangerous - sawing, I had the squash halved vertically, to see its innards for the first time ever with my own two eyes (four if you count my contact lenses).
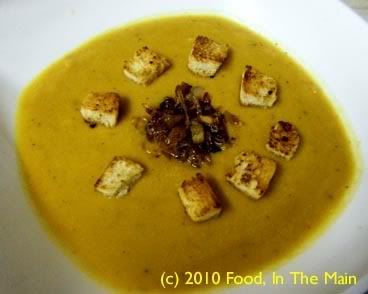
Once the thing was peeled, it was a doddle. It roasted without any trouble and I made the soup without any trouble either. I cooked up some masoor dal for protein and pureed that with the roasted squash as well. Pete liked the soup quite a lot, although I was a bit ambivalent about its taste, myself. It was, as I had known it would be, a bit too sweet for me even with the addition of plenty of ground pepper. But even Pete had to admit that the caramelised onions and croutons were what raised the stakes in the soup arena. Without those savoury garnishes the butternut squash soup would have been just too... yup, you guessed it, sweet.
Recipe for: Roasted butternut squash soup with caramelised onions

Ingredients:
1 medium butternut squash
3 cups vegetable stock
1 medium onion, chopped
1/3 cup evaporated skim milk
1/4 tsp cinnamon
1 tsp black peppercorns, freshly ground to powder
2 cloves garlic
1/4 cup masoor dal
2 tbsp olive oil
a few toasted herbed croutons for garnish (NOT optional)
salt to taste
For caramelised onions:
1 small onion, very thinly sliced
1 tsp butter
2 tsp sugar
Method:
1. Preheat the oven to 350F/180C.
2. Cut the butternut squash in half lengthwise and scoop out the seeds and stringy bits with a spoon.
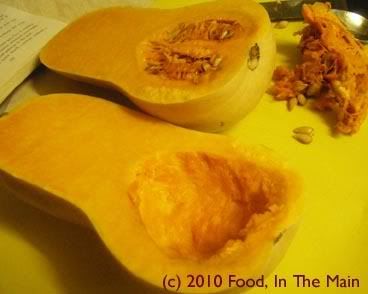
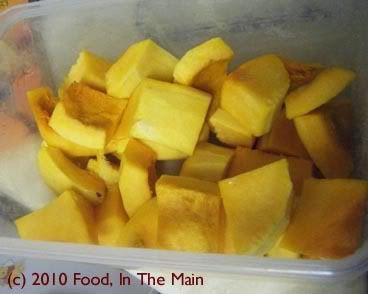
Peel the squash and chop it into 2" chunks.
Roast, uncovered, until the squash is soft - about 45 minutes, but check to see.
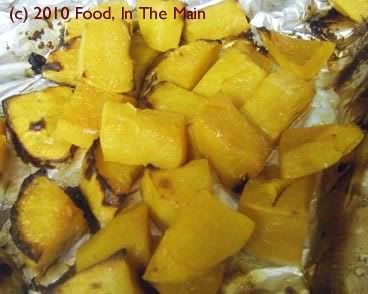
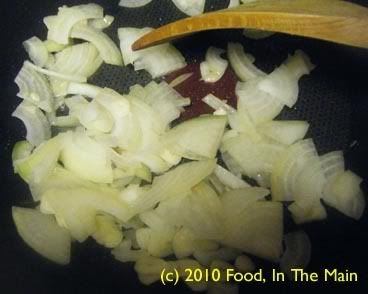
3. Heat 1 tbsp olive oil in a pan and sweat the garlic and chopped onion until slightly translucent.
4. Add the stock and masoor dal along with the cinnamon.

5. Let this bubble gently on medium high heat until the lentils are nearly transparent and soft.
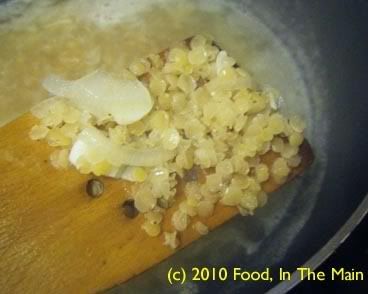
Set aside to cool.
6. In the meantime, heat the butter in a small pan.
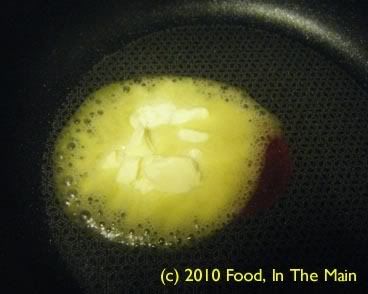
Let it melt and turn golden brown (be careful not to burn it), then add the sliced onion.
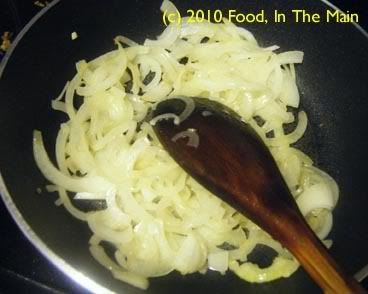
Turn down the heat and let the onions soften slowly, stirring now and then, till they're soft and caramelised to a golden brown. This should take about 10 minutes or so.
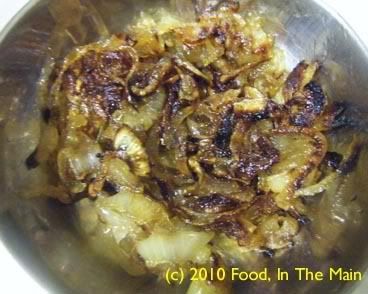
Reserve the caramelised onions for garnish.
7. Now scoop out the cooked lentils along with half the cooking liquid,
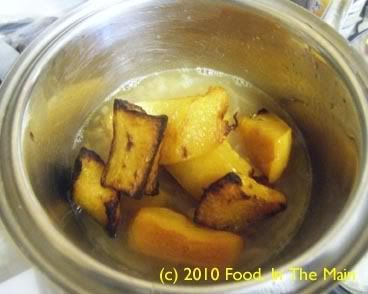
and blend to a puree along with the roasted squash.
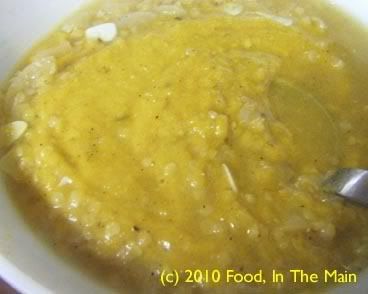
8. Return the blended vegetables to the pan containing the remaining cooking water and stir it all till well mixed.
9. Pour in the evaporated milk and stir it in.
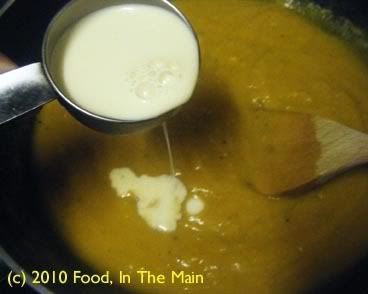
Bring to a gentle simmer,
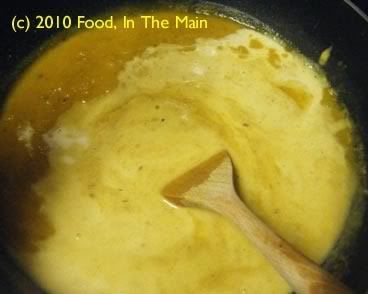
then add the freshly ground black pepper and salt to taste. Stir it in. Let the soup simmer for 2-3 minutes longer, then switch off the heat.
10. Serve the soup in warmed bowls topped with some caramelised onions and the croutons.
 When I tasted cornbread for the first time (I made it myself) I have to say that I was not particularly impressed – it was so bland! Now, I know that at that point, I considered all foods bland that were not chilli-hot. That’s an attitude endemic to (most of) us Indians because so much of our food contains chillies and/or strong spices and flavourings. If you’re used to loading vegetables with lots of masala, for instance, plain boiled green beans with just salt and pepper would definitely be termed as “bland”. It’s not just vegetarians, either – even non-veg Indians find it difficult to face plain roasted chicken (or other meat)… they usually like their meat cooked in a spicy sauce or maybe coated in a fiery masala.
I remember going with my friend Lakshmi (or KiwiGee fame, such as it is) to a restaurant in Mount Road that specialised in “western” food (I cant remember the restaurant name now, it was many years ago while I was working in the Indian Express). We had been there before and enjoyed the vegetable au gratin – or maybe it was the sheer novelty of it, vegetables in a cheesy white sauce - and decided it was time we educated another colleague and friend in the ways of international cuisine.
Poor chap, he had the most awful struggle to get it down. He was through-and-through a traditional South Indian - he wasn't even really into North Indian cuisine, and he had probably never wanted to try anything European at all. But he was a sweet uncomplaining pal, and he let himself be forced by us into having a go. Two forkfuls into the gratin, and he turned green and said he couldn’t finish it. We, being cruel to be kind, perhaps – or maybe just determined to introduce him to “sophisticated” food - sat there, one on either side of him, insisting that he shouldn’t give up so easily. He sprinkled crushed red chillies, stirred in industrial quantities of chilli sauce, and in general did all he could to mask the blandness of the white sauce and the grilled cheese topping… but in the end, he just balked at eating any more of it. For quite a while after that I think he avoided any mention of “treats” from us…
What I didn’t realize then, I do now – that it takes a conscious effort to let your taste buds slow down and adjust to fewer spices, and enjoy the real flavour of whatever vegetable you’re eating... or even get used to the lack of chillies and the presence of unfamiliar spices and seasonings. Of course, in this I speak mostly for myself and my taste buds, which sadly did not grow up amidst authentic international cuisine and therefore were ignorant and inexperienced in many ways for the longest time.
So anyway, long story short, I did eventually learn to like vegetables that weren’t cooked to mush, steamed veg that had the most basic of seasonings - I may have mentioned this before, but fresh green beans cooked just so, eaten immediately with just a sprinkling of salt is probably one of my greatest pleasures now! - pasta that did not have crushed red chillies (at the very least) sprinkled all over it, cheese-on-toast without sliced green chillies on it… and so on. I tried to keep my mind and tastebuds open to new flavours and give new foods at least one good try before condemning them.
But this cornbread – plain cornbread without cheese or onions or anything else savoury... it literally WAS too bland and boring. It was just blah - and blah it remained despite my sternest lectures to myself to be open-minded. I didn’t bother with making cornbread again for ages, until I came across other recipes for it on the Net (this after I had started this food blog) and decided to give the whole thing another go.
Now of course I adore cornbread – as long as there’s no sweetness involved. I don’t understand or like the addition of honey or sugar. I do add onions, scallions, quick-cook vegetables like spinach, cheese (although not excessively) but, most important of all, green chillies. Yes, I'm aware that I lectured about chillies or the lack thereof, thanks - but there are SOME things which totally require heat. Cornbread, as far as I’m concerned, is one of those things. That’s how it has to be. It’s just one of those things.
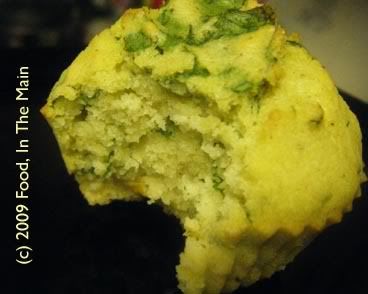
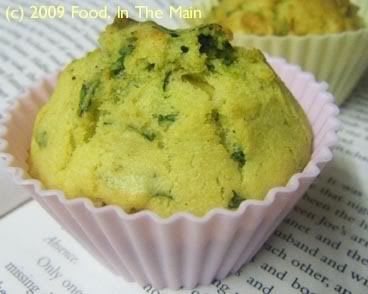
These muffins make a nice snack by themselves or, more traditionally, you could serve them with chili con (or sin, in my case) carne. I didnt use fresh chillies this time - I just chopped up some super-hot-but-fruity sliced manzano chillies in vinegar that were lurking in my fridge, and used those.
Recipe for: Spinach corn muffins
Ingredients:
1 cup yellow cornmeal
1 cup plain flour
1 large egg
1 cup milk (I used semi-skim)
1/2 cup canned corn niblets
1/8 cup oil
1/2 cup spinach leaves, shredded
1 tbsp baking powder
1/2 tsp freshly milled black pepper
2 tsp finely chopped jalapeno peppers (I used manzano chillies)
salt to taste
Method:
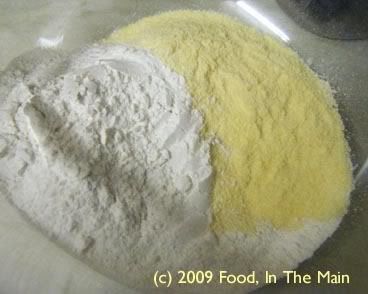
1. In a medium mixing bowl, mix together the cornmeal, flour, baking powder and salt.
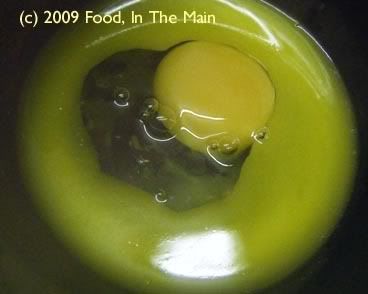
2. In another, smaller bowl, whisk together the oil and egg.
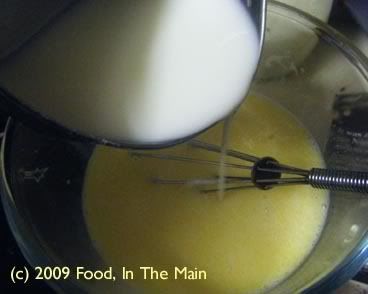
3. Pour in the milk and stir it in.
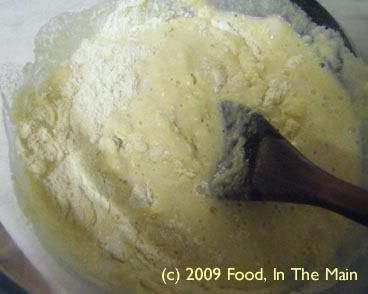
4. Pour the egg-milk mixture into the bowl containing the flour
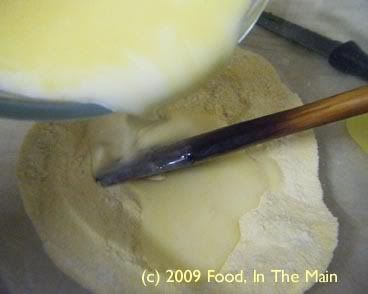
and stir till just combined. Do not beat.
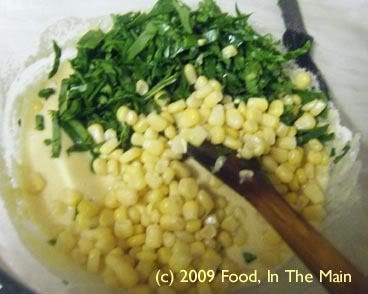
5. Add the corn and spinach and stir them in gently.
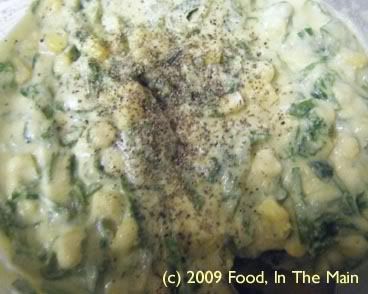
6. Sprinkle the ground pepper
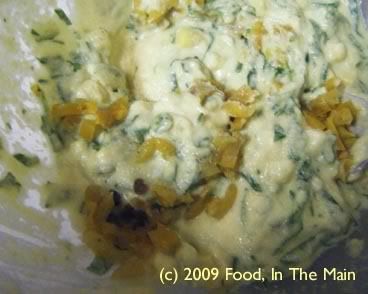
and add the jalapenos (if using), and stir them in.
7. Fill muffin pans with the batter about 3/4 of the way to the top and bake in a 180C/350F oven for about 15 minutes. Test to see if the muffins are done; if not, give them another 5 minutes. Let cool in the pan for 10 minutes, and serve warm.
