Showing posts with label oil. Show all posts

Sunday, March 17, 2013

Wheat-spelt milk bread

Man, I have to say I'm beginning to find it really difficult to come up with something to say for every post. Usually when I stop thinking too hard about what to write, I tend to unblock the stoppage, as it were... but this is beginning to work less and less often.

I've actually thought about not writing anything at all, just posting the recipe and a couple of photos, but I don't know how well that would work.

I mean, when I go to a food blog and find nothing there but the recipe, I get annoyed, even if the recipe is fantastic. I need at least one photo. If there is a photo or two, or even many photos, but no write-up to go with the recipe, that makes me feel annoyed too.

So you'd imagine that when there is a recipe, a photo or two (or even many photos) and a write-up to boot, I'd be a happy camper? Reasonable assumption, right?

Nope.

You see, I'm unreasonable in my wants. I'm not content with just a recipe, a photo or two (or even many photos), and a write-up. No, I want that write-up to be funny and warm and honest and interesting and readable and at the very least I want the recipe to be fabulous - in other words, pretty much like any post you'd care to choose from the lovely Nupur's wonderful blog One Hot Stove.

Unfortunately it is not given to many of us to successfully combine humour and warmth and honesty and readability and foster a loyal readership of our blog... so we just have to struggle on. And if for some people it's a struggle to write a decent post, it's a struggle for others to read a dull one - even if they know how hard it is to actually write a post, never mind pleasing anyone with it!

And on that philosophical note, I guess I will say a few words about this recipe before I close. You will know some of the words, like "variation of Dan Lepard recipe", "The Guardian newspaper", "minimal kneading" and "tasty", so I'll just say the ones that you may NOT know, which is "tighter crumb because I added spelt flour".

Recipe for: Wheat-spelt milk bread
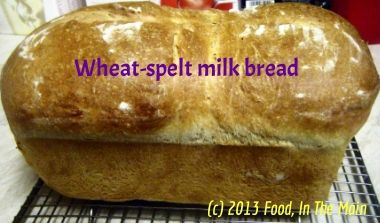
 photo 52a265c8-3b96-42fc-9a56-b2086b38432d_zpsd98c45d7.jpg

Ingredients:

2-1/4 cups strong white bread flour
1/4 cup very strong wholewheat bread flour
1/2 cup wholemeal spelt flour
100 ml warm water
200 ml warm whole milk
1 tsp quick-rise yeast
1-1/4 tsp salt
Oil for kneading
Flour for sprinkling
Butter for greasing 7" x 5" loaf pan

Method:

1. Mix together the flours in a big bowl and whisk in the salt and yeast. Then make a hole in the centre and pour in the yeast and warm milk-water mixture. Mix together with a wooden spoon until the dough comes together in a rough ball. Cover the bowl and let the dough rest for 10 minutes.

3. Lightly oil your work area/kneading board and scrape the dough onto it. It will be quite sticky. Knead lightly for 10 seconds. Then put the dough back in the bowl, cover it and let rest for 10 minutes. Repeat this cycle twice more, oiling the work area lightly each time, if required.

4. After the fourth 10-second knead, the dough should be elastic and not very sticky. This time, let the dough rise in the covered bowl for 40 minutes to an hour, or till doubled.

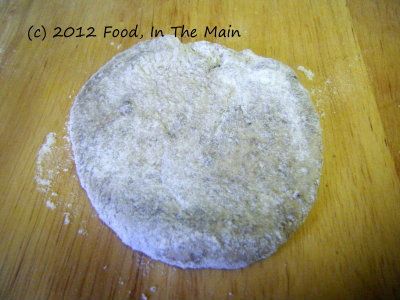
5. Now punch the dough down gently. Lightly flour the work area and pat the dough into an oblong, then roll it up and place it in your buttered 7" x 5" loaf pan. Flour the top of the dough, cover with a clean tea towel and let the dough rise in a warm draught-free area for 45 minutes to an hour - it should be at least 1" over the rim of the loaf pan.

6, Preheat the oven to 200C/450F and place a dish of boiling water on the floor of the oven. Bake for 30-40 minutes, or till the loaf is golden brown on top and sounds hollow when tapped on the bottom. Let cool before slicing.

Friday, August 24, 2012

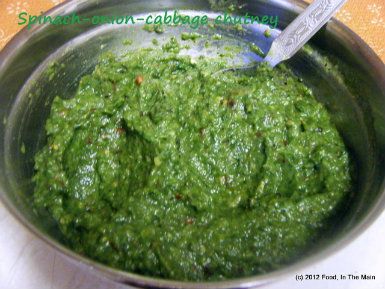
Spinach-onion-cabbage chutney

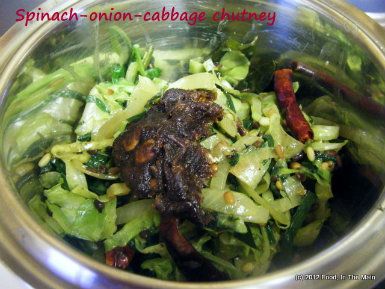
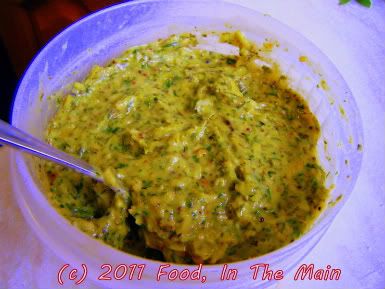
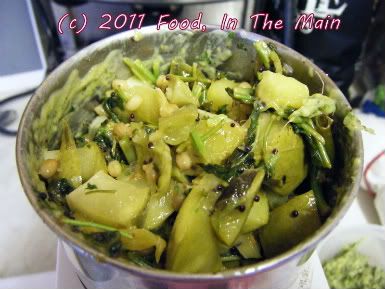
This gorgeous emerald coloured chutney is many kinds of pretty - pretty beautiful, pretty tasty, pretty versatile, pretty healthy, pretty easy to make...

So go and make it. Pretty please.

Recipe for:
Spinach-onion-cabbage chutney
DSCF8331a
Ingredients:
1 cup spinach leaves
1/2 cup cabbage, sliced
1 medium onion, sliced
A good handful of chives
2 cloves garlic, sliced
1 tbsp oil
2 tsp urad dal
1 tsp tamarind paste or a gooseberry sized piece of tamarind
5-6 dried red chillies (or to taste)
1/4 tsp asafoetida powder (optional)
2 tsp mustard seeds
4-5 fresh or frozen curry leaves
Salt to taste

Method:
1. Heat the oil and when it shimmers, add the mustard seeds and cover the pan till they finish popping.
2. Now add the urad dal, red chillies, curry leaves and asafoetida powder. Stir-fry till the urad dal turns a pale golden brown and the red chillies are a shiny darker shade.
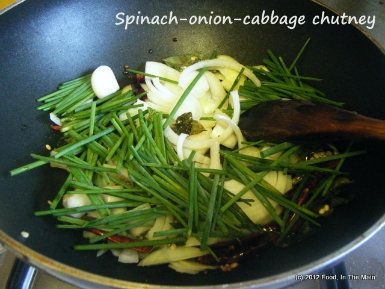
3. Add the garlic, chives and onion and stir-fry till the onions start to soften and turn translucent.
DSCF8326a
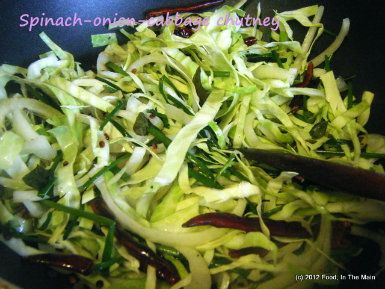
4. Add the cabbage and fry it till it wilts,
DSCF8327a
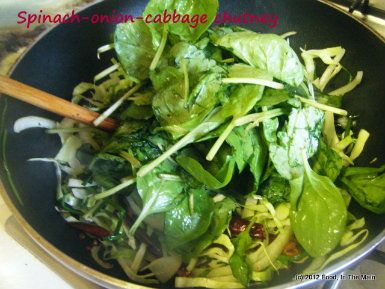
then the spinach until it wilts too.
DSCF8328a
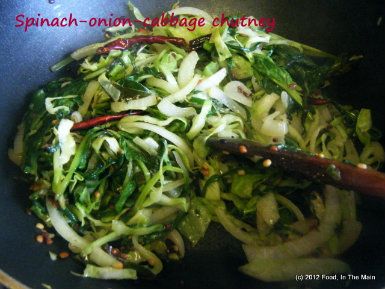
Let this mixture cool.
DSCF8329a
5. Pick out the red chillies and grind them to a smooth paste with the tamarind and a couple of spoonfuls of the vegetable mixture.
6. Now add the rest of the cabbage-onion-spinach mix
DSCF8330a
and grind it to a fairly smooth consistency - but not to a puree. It should be a little bit coarse.
7. Remove the chutney to a bowl, add salt to taste and mix well. This can be mixed with rice or eaten as a side dish/dip with chapaties, dosas, idlis etc.


RECIPE: SPINACH-ONION-CABBAGE CHUTNEY
 Ingredients:
1 cup spinach leaves
1/2 cup cabbage, sliced
1 medium onion, sliced
A good handful of chives
2 cloves garlic, sliced
1 tbsp oil
2 tsp urad dal
1 tsp tamarind paste or a gooseberry sized piece of tamarind
5-6 dried red chillies (or to taste)
1/4 tsp asafoetida powder (optional)
2 tsp mustard seeds
4-5 fresh or frozen curry leaves
Salt to taste

Method:
1. Heat the oil and when it shimmers, add the mustard seeds and cover the pan till they finish popping.
2. Now add the urad dal, red chillies, curry leaves and asafoetida powder. Stir-fry till the urad dal turns a pale golden brown and the red chillies are a shiny darker shade.
3. Add the garlic, chive and onion and stir-fry till the onions start to soften and turn translucent.
4. Add the cabbage and fry it till it wilts, then the spinach until it wilts too. Let this mixture cool.
5. Pick out the red chillies and grind them to a smooth paste with the tamarind and a couple of spoonfuls of the vegetable mixture..
6. Now add the rest of the cabbage-onion-spinach mix and grind it to a fairly smooth consistency - but not to a puree. It should be a little bit coarse.
7. Remove the chutney to a bowl, add salt to taste and mix well. This can be mixed with rice or eaten as a side dish/dip with chapaties, dosas, idlis etc.

Tuesday, June 19, 2012

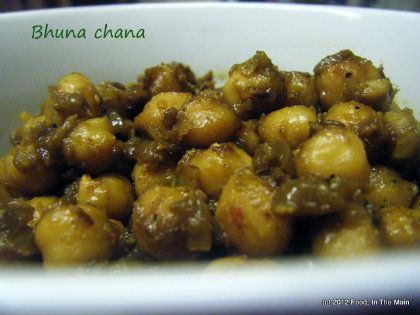
Chana (chickpeas) bhuna

I think I may have found the most PERFECT masala recipe I've ever tried, and all thanks to Sangeeta of Banaras ka Khana blog. Her blog is one of my favourites, because she has North Indian recipes which are not so well known (at least to me) as the usual things you get endlessly everywhere. I like reading about typical everyday recipes which are still not common outside of individual homes, and Sangeeta's blog is the perfect place to find these.
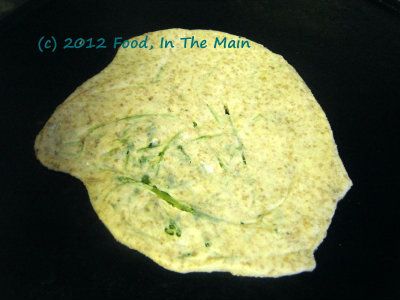
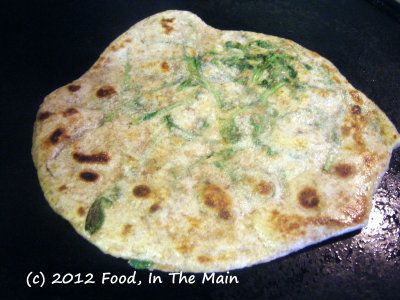
I tried this masala with cooked chickpeas because I had some, and loved the result so much that I've made it (with different dals) four times in the last 10 days... although not (yet) with the original split chickpeas (or chana dal) that Sangeetha used. I've tried it both as a thick sauce and as a runnier one, and it makes not a whit of difference - other than the clingy sauce is better with whole chickpeas.

I reduced the peppercorns to 1/2 tsp because I can't take the heat from them (but chilli-heat is more than bearable, go figure), but otherwise the recipe is no different - well, apart from having used chickpeas, that is. Do try it - it's pretty quick to make, too, especially if you use canned chickpeas.

Recipe for:
Chana bhuna
DSCF8296
Ingredients:3-4 cups cooked chickpeas (or two cans' worth)
1 large onion, chopped fine
1 tbsp ghee or oil (I used oil)
1 tsp cumin seeds
Salt to taste

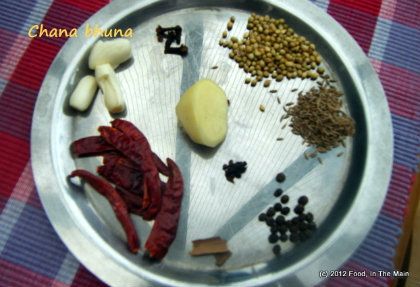
For grinding:
DSCF8268-1
1/2" piece cinnamon stick
1 small black cardamom (seeds only)
1 htsp coriander seeds
1 htsp cumin seeds
2 cloves
4-5 dried red chillies (or to taste)
3 garlic cloves
1" ginger root
1/2 tsp black peppercorns
1/2 tsp turmeric powder
1/2 tsp amchoor (dried raw mango) powder - optional
3-4 tbsp water

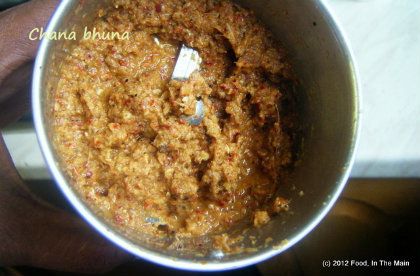
Method:1. Grind all the ingredients for the masala into a smooth, fairly thick paste. Use only as much water as required to make it smooth.
DSCF8270-1
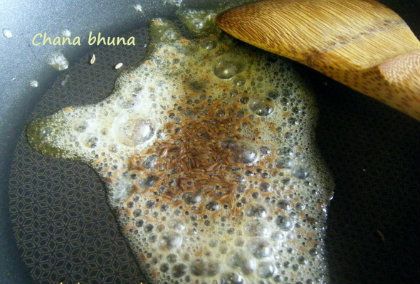
2. Heat the oil/ghee in a pan, then add the cumin seeds.
DSCF8271-1
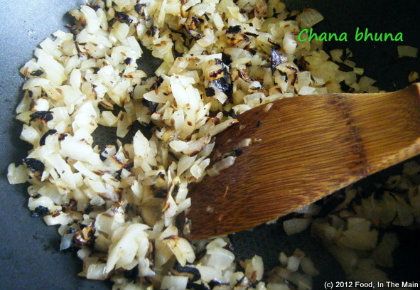
3. Once the seeds sizzle, add the chopped onion and stir.
DSCF8274-1
Let it cook on low heat for 15 minutes or so, till it becomes soft and pinkish.
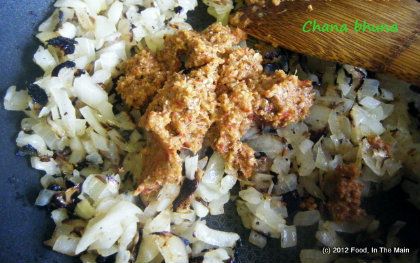
4. Now add the ground masala paste to the cooked onion
DSCF8275-1
and stir it in.
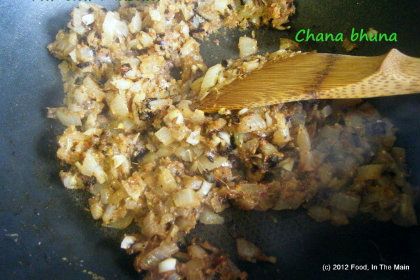
DSCF8276-1
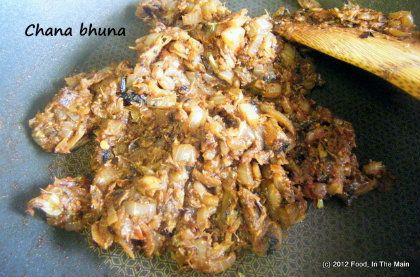
5. Fry it (bhuno) on low heat for 5-7 minutes, stirring frequently, till the paste is well amalgamated, thick and intensely aromatic. Any excess water should have evaporated.
DSCF8279-1
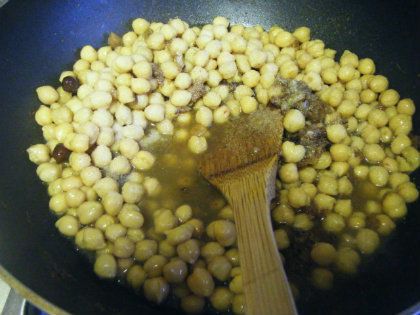
6. Now add the chickpeas along with salt to taste
DSCF8288-1
and stir till it is all well mixed.
DSCF8291-1
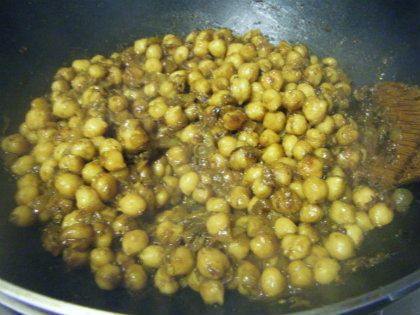
7. Let it cook for 2-3 minutes more (longer if it is watery), then take it off the heat.
DSCF8292-1
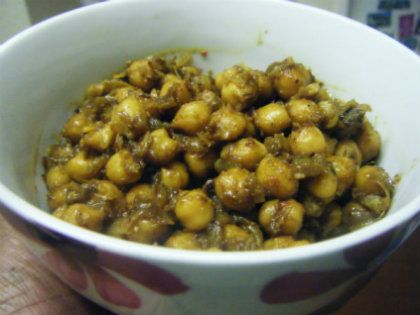
Serve hot with chapaties or puris.
Note: The curry tastes best when the masala coats the chickpeas thickly, so make sure the masala is not runny.


RECIPE: CHANA BHUNA
Ingredients:
3-4 cups cooked chickpeas (or two cans' worth)
1 large onion, chopped fine
1 tbsp ghee or oil
1 tsp cumin seeds
Salt to taste
For grinding:
1/2" piece cinnamon stick
1 small black cardamom (seeds only)
1 htsp coriander seeds
1 htsp cumin seeds
2 cloves
4-5 dried red chillies (or to taste)
3 garlic cloves
1" ginger root
1/2 tsp black peppercorns
1/2 tsp turmeric powder
1/2 tsp amchoor (dried raw mango) powder - optional
3-4 tbsp water
Method:
1. Grind all the ingredients for the masala into a smooth, fairly thick paste. Use only as much water as required to make it smooth.
2. Heat the oil in a pan, then add the cumin seeds.
3. Once the seeds sizzle, add the chopped onion and stir. Let it cook on low heat for 15 minutes or so, till it becomes soft and pinkish.
4. Now add the ground masala paste to the cooked onion and stir it in.
5. Fry it (bhuno) on low heat for 5-7 minutes, stirring frequently, till the paste is well amalgamated, thick and intensely aromatic. Any excess water should have evaporated.
6. Now add the chickpeas along with salt to taste and stir till it is all well mixed.
7. Let it cook for 2-3 minutes more, then take it off the heat. Serve hot with chapaties or puris.
Note: The curry tastes best when the masala coats the chickpeas thickly, so make sure the masala is not runny.

Sunday, May 06, 2012

Easy peasy Yorkshire puddings

If you're unfamiliar with British cuisine, you'll probably be expecting a recipe for a dessert of some sort - but this is no dessert, even though they're termed "puddings". They're savoury, airy puffs of pure carb and, filled with gravy, they're an indispensable part of "Sunday lunch" along with the roast potatoes, parsnips, carrots and other vegetables that accompany the roast chicken or beef.

I'd never made them before, and while it's not a complicated recipe, the recipes on BBC Food asked for the ingredients to be precisely measured. I was leery of doing this - I hate having to weigh things carefully; the detail work just doesn't appeal to my slapdash nature.

Then I came across a ridiculously simple recipe, and I really doubt this can be made any easier. It's just brilliant! I added some herbs to the batter, but otherwise there's no change to the recipe. Eggs, flour, milk, seasoning. That's it.

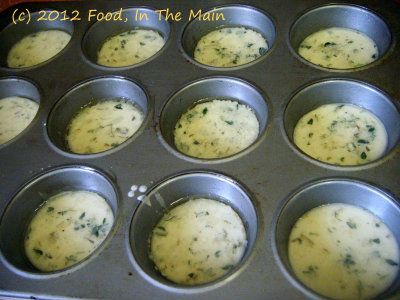
If you don't have proper Yorkshire pudding pans, you can make them just as well in muffin pans, like I did. Be warned, these puddings puff up quite a lot. Mine turned out all sizes and shapes because my oven doesn't heat evenly... but the puddings tasted great. They were, if anything, slightly burnt on top, but that was deliberate because that's how Pete likes them.
DSCF8193a
Pete (actually, his hand) trying to sneak a Yorkie from the tin even as I was taking a photograph!

And unless you're competing in Masterchef, the weird sizes and shapes don't matter one bit. Taste is king.

Recipe for: Easy peasy Yorkshire puddings
DSCF8195a

Ingredients:
2 large eggs
Plain flour, equal in volume to the eggs
Milk, equal in volume to the eggs
Salt to taste
Freshly ground pepper to taste
1/2 tsp minced fresh thyme
1/4 tsp dried rosemary
Oil for cooking

Method:
1. Preheat the oven to 220C/425F.
2. Place three glasses of equal size and shape side by side. Break the eggs into one glass. Pour milk in the next glass to come up to the same level as the eggs. In the third glass, put in enough flour to come up to the same level as the eggs/milk.
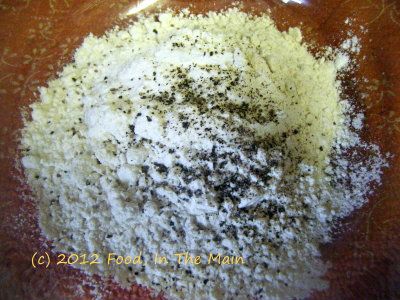
3. Now put the flour in a medium mixing bowl and add the salt, pepper and herbs. Stir together.
DSCF8183a
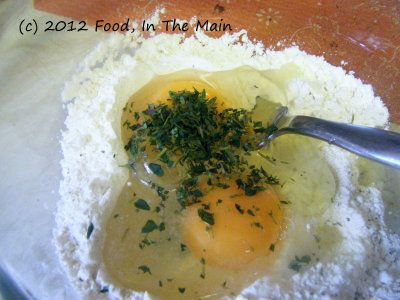
4. Make a well in the centre of the flour and pour in the eggs.
DSCF8186a
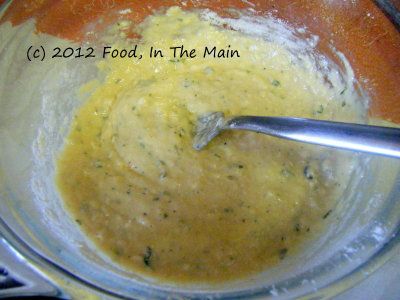
Beat with a fork till the eggs and flour are well mixed.
DSCF8187a
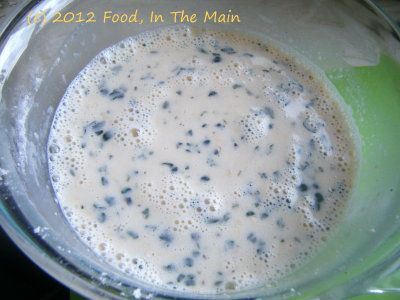
5. Now pour the milk in a steady, thin stream while whisking the mixture constantly to make a smooth batter.
DSCF8188a
Rest the batter for at least 10 minutes. (According to other recipes I've read, the batter can be stored covered in the fridge for up to 12 hours before baking - but I haven't tried this out and don't know what difference it will make to the puddings.)
6. Take a 12-tray muffin pan. Pour a tsp of oil into each cup to cover the bottom, and grease the sides as well. Heat the muffin pan in the hot oven for 5-6 minutes or till the oil is smoking hot.
7. Pour a small ladleful of the batter into each cup as quickly as possible(fill it no more than half-way),
DSCF8192a
then return the tray to the oven immediately. Let the puddings bake for 10-15 minutes (do not open the oven for the first 10 minutes) or until they are golden brown.
DSCF8194a
Remove and serve immediately.
DSCF8196a
They can also be frozen after they're completely cool.


RECIPE: EASY PEASY YORKSHIRE PUDDINGS
Ingredients:
2 large eggs
Plain flour, equal in volume to the eggs
Milk, equal in volume to the eggs
Salt to taste
Freshly ground pepper to taste
1/2 tsp minced fresh thyme
1/4 tsp dried rosemary
Oil for cooking


Method:
1. Preheat the oven to 220C/425F.
2. Place three glasses of equal size and shape side by side. Break the eggs into one glass. Pour milk in the next glass to come up to the same level as the eggs. In the third glass, put in enough flour to come up to the same level as the eggs and milk. 
3. Now put the flour in a medium mixing bowl and add the salt, pepper and herbs. Stir together. 
4. Make a well in the centre of the flour and pour in the eggs. Beat with a fork till the eggs and flour are well mixed. 
5. Now pour the milk in a steady, thin stream, whisking the mixture constantly until a smooth batter is formed. Rest the batter for at least 10 minutes. (According to other recipes I've read, the batter can be stored covered in the fridge for up to 12 hours before baking - but I haven't tried this out and don't know what difference it will make to the puddings.) 
6. Take a 12-tray muffin pan. Pour a tsp of oil into each cup to cover the bottom, and grease the sides as well. Heat the muffin pan in the hot oven for 5-6 minutes or till the oil is smoking hot. 
7. Pour a small ladleful of the batter into each cup as quickly as possible (fill it no more than half-way), then return the tray to the oven. Let the puddings bake for 10-15 minutes (do not open the oven for the first 10 minutes) or until they are golden brown. Remove and serve immediately. They can also be frozen after they're completely cool. 

Friday, May 04, 2012

Pinto bean parathas

I'm beginning to wonder if I should call these "recipes" - they're so basic and samey in the making, especially if you're Indian and make/eat rotis/parathas/etc often. Still, the difference in flavour is obviously marked, different with every filling you choose to use (well, duh, I know).


I don't think I've used a beany filling before, so it's an opportunity to say I used a beany filling and, at the same time, increase the number of recipes on my blog by one. My aim this year is to reach 500 posts, and oh man, is it ever a slooooowwww process! I'm currently at 467, and it's high time I touched the 500 mark - especially as this blog has been going for close on 7 years!


(Actually, it will complete 7 years on the 17th of May - I just checked!). All compliments, congratulations and wah-bhai-wahs as well as encouragement to continue will be graciously and humbly accepted.)

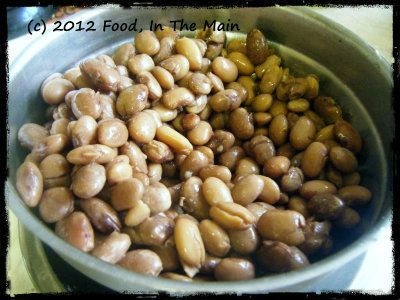
So, the pinto bean filling - it came about simply because there was a small box of leftover cooked beans in the fridge. I just LOVE pinto beans - they're so creamy when cooked, the texture is just lovely. They're probably my most favourite bean, next to chickpeas which, ok, are not a bean really, I know... but you know what I mean, don't you?

Recipe for: Pinto bean parathas
DSCF8137

Ingredients:
2 cups whole wheat flour
1/2 cup plain yogurt
1/2 tsp omam (ajwain/bishopsweed/carom seeds)
1/3 cup cooked pinto beans
DSCF8128
1/2 tsp garam masala/pav bhaji masala or spice mix of choice
Water as required
Salt to taste
Pam spray/oil/butter/ghee as required


Method:
1. Put the flour and omam in a medium size bowl, make a well in the middle and add the yogurt. Mix it in, then make a soft dough using just as much water as required. Knead for 2-3 minutes, then cover the bowl and leave the dough to rest for 30 minutes.
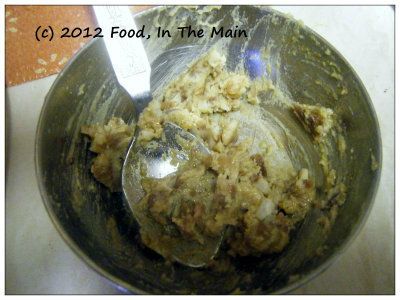
2. Mash together the pinto beans, garam masala/pav bhaji masala and salt to taste. Reserve.
DSCF8129
3. Pinch off a small lime-sized bit off the dough and roll it out on a lightly floured board.
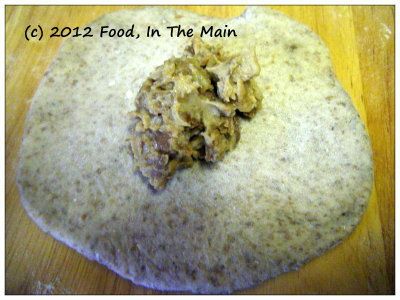
4. Place a tablespoon of the pinto bean paste in the middle of the rolled out dough,
DSCF8130
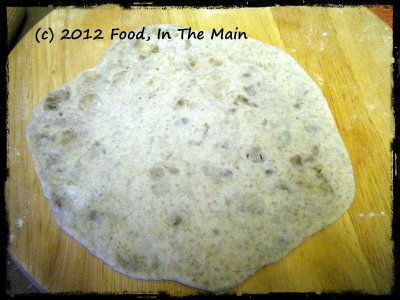
bring the edges in and make a ball, being careful to seal the filling inside fully. Then roll the ball out into a round paratha.
DSCF8127
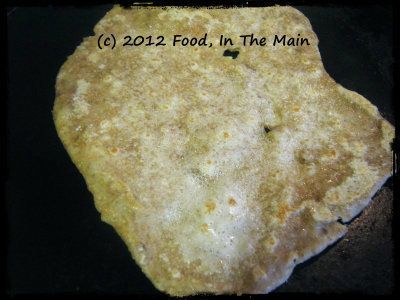
5. Heat a tava/pancake pan on medium high and place a paratha on it. Cook the paratha for about 30 seconds, then flip it over and spray it with Pam or spread a little butter/oil/ghee.
DSCF8136
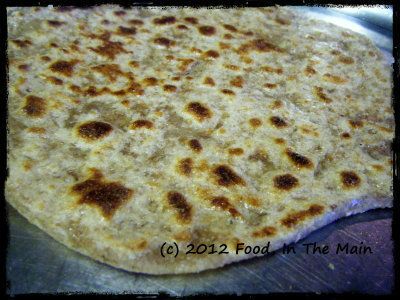
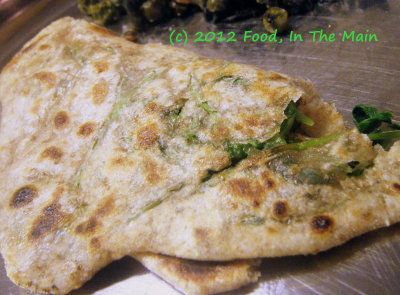
Turn it over again and do the same with the other side. Cook both sides until the paratha acquires golden brown spots. Continue the same way with the rest of the dough.
6. Serve hot with pickles and yogurt, or with any gravy curry, or even coconut chutney.


RECIPE FOR: PINTO BEAN PARATHAS

Ingredients:
2 cups whole wheat flour
1/2 cup plain yogurt
1/2 tsp omam (ajwain/bishopsweed/carom seeds)
1/3 cup cooked pinto beans
1/2 tsp garam masala/pav bhaji masala or spice mix of choice
Water as required
Salt to taste
Pam spray/oil/butter/ghee as required


Method:
1. Put the flour and omam in a medium size bowl, make a well in the middle and add the yogurt. Mix it in, then make a soft dough using just as much water as required. Knead for 2-3 minutes, then cover the bowl and leave the dough to rest for 30 minutes.
2. Mash together the pinto beans, garam masala/pav bhaji masala and salt to taste. Reserve.
3. Pinch off a small lime-sized bit off the dough and roll it out on a lightly floured board. 
4. Place a tablespoon of the pinto bean paste in the middle of the rolled out dough, bring the edges in and make a ball, being careful to seal the filling inside fully. Then roll the ball out into a round paratha. 
5. Heat a tava/pancake pan on medium high and place a paratha on it. Cook the paratha for about 30 seconds, then flip it over and spray it with Pam or spread a little butter/oil/ghee. Turn it over again and do the same with the other side. Cook both sides until the paratha acquires golden brown spots. Continue the same way with the rest of the dough. 
6. Serve hot with pickles and yogurt, or with any gravy curry or even chutney. 

Thursday, May 03, 2012

Pea shoot parathas

I honestly didn’t know I was going to make pea shoot parathas until I grabbed a handful of pea shoots (left over from making a salad) and used them to make a paratha (which was actually only going to be a phulka until the pea shoots stuffed themselves into the equation, as it were).

So this is not a recipe so much as a way of recording the fact that I used pea shoots – raw, unadorned, not even so much as chopped – to make parathas. The only flavouring came from the omam seeds (bishopsweed/ajwain/carom) which I had added to the paratha dough. Basically I was trying to interfere as minimally as possible with the gentle flavour of the pea shoots. I ate the parathas with stir-fried cabbage as a side, and was quite pleased with the end result.

One note of warning, though – don’t roll out the parathas much in advance of cooking them, because the pea shoots will release enough moisture to make the uncooked parathas stick miserably to whatever you placed them on. Basically, just get a rhythm going where one paratha cooking on the hob while you’re rolling out the next.

If you don’t like the thought of the unseasoned pea-shoot filling, feel free to use whatever seasoning/masala takes your fancy – just make sure that it’s as dry as possible.

I’d recommend chopping the pea shoots, because it will make it easier to roll out the parathas with the filling. I didn’t get around to chopping mine because I hadn’t given any thought beforehand to using them in the first place!

Recipe for: Pea shoot parathas
DSCF8135
Ingredients:
2 cups whole wheat flour
1/2 tsp carom seeds
1/2 tsp salt
1/2 cup pea shoots, chopped
water as required
Pam spray/butter/ghee/oil to cook the parathas
Extra flour for dusting

Method:
1. Combine the flour, carom seeds and salt, and make a pliant, soft dough using as much water as required. Let the dough rest covered for 30 minutes.
2. Pinch a lemon-sized piece of dough and roll it into a ball, then flatten it between your palms. Roll it out on a lightly floured board into a small circle, using more flour to dust the dough as required to stop it from sticking.
DSCF8123
3. Place 2 tablespoons of chopped pea shoots in the centre of the dough, then fold to enclose the filling.
DSCF8124
Lightly flatten the dough, then roll out into a circle that's about 6cm across and 1/4 cm thick.
DSCF8125
4. Place the paratha on a medium hot tava/pancake pan and let it cook for 30 seconds or so.
DSCF8132
Flip it over and grease the top, then turn it over again after 30 seconds and grease that side as well.
DSCF8134
Let the paratha cook until both sides acquire golden spots and are cooked. Keep warm in a cloth-lined container while you make the rest of the parathas. Serve them warm with any curry.

RECIPE: PEA SHOOT PARATHAS
Ingredients:
2 cups whole wheat flour
1/2 tsp carom seeds
1/2 tsp salt
1/2 cup pea shoots, chopped
water as required
Pam spray/butter/ghee/oil to cook the parathas
Extra flour for dusting


Method:
1. Combine the flour, carom seeds and salt, and make a pliant, soft dough using as much water as required. Let the dough rest covered for 30 minutes.
 2. Pinch a lemon-sized piece of dough and roll it into a ball, then flatten it between your palms. Roll it out on a lightly floured board into a small circle, using more flour to dust the dough as required to stop it from sticking.
 3. Place 2 tablespoons of the chopped pea shoots in the centre of the dough, then fold  to enclose the filling. Lightly flatten the dough, then roll out into a circle that's about 6cm across and 1/4 cm thick.
 4. Place the paratha on a medium hot tava/pancake pan and let it cook for 30 seconds or so. Flip it over and grease the top, then turn it over again after 30 seconds and grease that side as well. Let the paratha cook until both sides acquire golden spots and are cooked. Keep warm in a cloth-lined container while you make the rest of the parathas in the same way. Serve the parathas warm with any curry.

Wednesday, June 08, 2011

Green mango and coriander thokku (chutney)

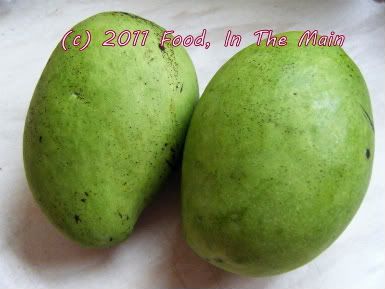
I saw a recipe for cilantro mango chutney on Talimpu foodblog and immediately wanted to try it, because I love mango thokku. I had to wait a few days before I could get the star ingredient for this recipe, of course, but thereafter everything was quicker than quick – a nearly unprecedented turn of events on this blog. (The main reason for the promptness being, of course, that raw green mangoes don’t stay raw for long.)

The chutney was far too sour and not hot enough for my tastes - my fault for using two mangoes rather than one, plus not having enough coriander leaves to offset the extra mango. So I had to resort to frying some red chilli powder in extra oil, then mixing the chutney in it, frying it all for a few more minutes before trying it again. This time around it was perfect – spicy-hot and sour and redolent with the coriander.

Like regular mango thokku except – and I feel obliged to point this out - different. Thanks for your original recipe, Raji!

Recipe for: Green mango and coriander thokku (chutney)
Photobucket
Ingredients:
Photobucket
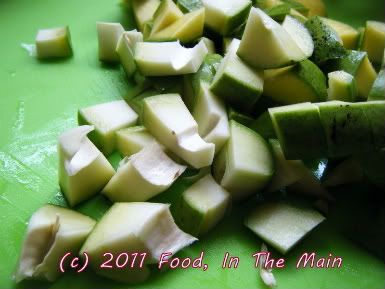
2 green (unripe) mangoes, cubed
Photobucket
1 tbsp urad dal
1 tsp mustard seeds
5-6 green chillies (or to taste), chopped
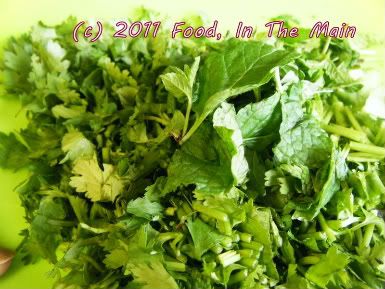
1-1/2 cups chopped coriander
1 tsp red chilli powder (or to taste, optional)
1/4 tsp asafoetida powder
2 tbsp oil
Salt to taste

Method:

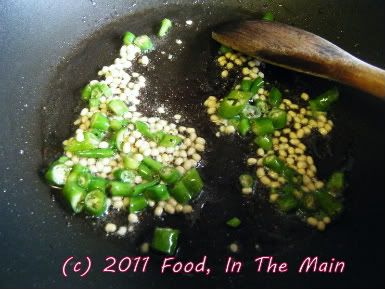
1. Heat the oil and add the mustard seeds, asafoetida powder, green chillies, urad dal and red chilli powder (if using), and stir-fry for for a minute or two, till the dal turns a light brown and the mustard seeds have popped.
Photobucket
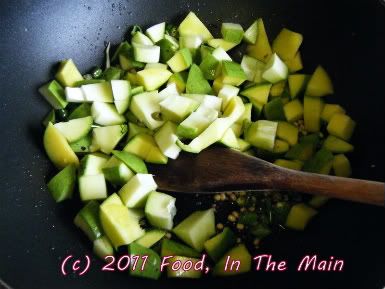
2. Add the green mangoes and fry them for 4-5 minutes, till they soften.
Photobucket
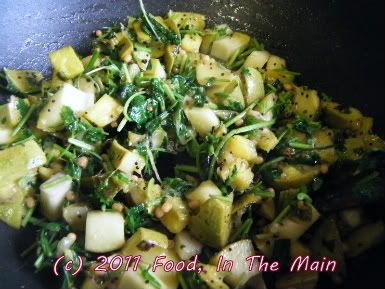
3. Add the coriander and fry till the leaves wilt.
Photobucket
Remove from the heat and let cool.
Photobucket

Photobucket
4. Grind to a fairly smooth consistency. This is good as a sandwich spread or as a side with idlis, dosa and chapaties.

RECIPE: GREEN MANGO AND CORIANDER THOKKU (CHUTNEY)

Ingredients:
2 green (unripe) mangoes, cubed
1 tbsp urad dal
1 tsp mustard seeds
5-6 green chillies (or to taste), chopped
1-1/2 cups chopped coriander
1 tsp red chilli powder (to taste, optional)
1/4 tsp asafoetida powder
1 tbsp oil
Salt to taste

Method:
1. Heat the oil and add the mustard seeds, asafoetida powder, green chillies, urad dal and red chilli powder (if using), and stir-fry for for a minute or two, till the dal turns a light brown and the mustard seeds have popped.
2. Add the green mangoes and fry them for 4-5 minutes, till they soften.
3. Add the coriander and fry till the leaves wilt. Remove from the heat and let cool.
4. Grind to a fairly smooth consistency. This is good as a sandwich spread or as a side with idlis, dosa and chapaties.

Thursday, March 31, 2011

Onion gravy

And this time it's REAL gravy, the Western kind, not the inadequate translation of some South Indian kuzhambu into English!

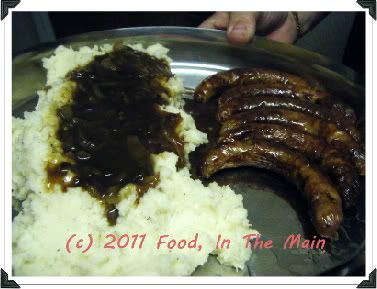
Yesterday's supper for Pete was sausages and mash (mashed potatoes), and he was hankering after onion gravy to go with it. So I looked through some gravy recipes online and discovered that it's not exactly a complicated thing to make. The main ingredients are onions and stock.

I don't usually go to the trouble of making stock from scratch, so I used a fancy pork-flavour Knorr stock cube (the one currently being peddled by chef Marco Pierre White on TV) to make the stock. I'm sure a vegetarian stock cube will do just as well, for those of you who are purists. They probably taste the same, anyhow.

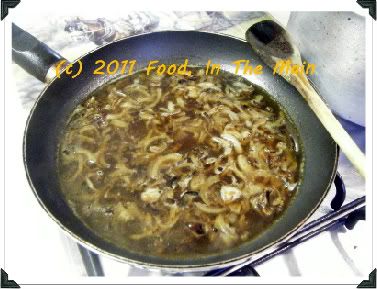
Anyway, the secret to a lipsmacking onion gravy lies in the way the onions are cooked - basically with some butter, long and slow, till they are brown and caramelised BUT NOT BURNT. The balsamic vinegar is the final touch.

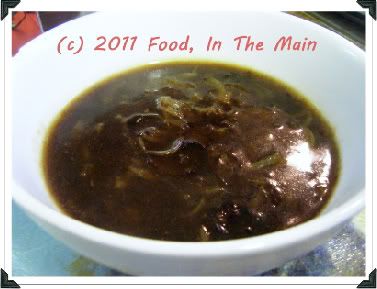
The onion gravy was oh-my-GOD yummy and savoury - the balsamic giving that extra oomph, if you ask me. I barely managed to get some photos before Pete whisked away his plate.

Onion gravy is not particularly photogenic, especially in my hands - I'm a crap photographer. So that's why the mash and gravy look the way they do in the photos... but if flavour could be uploaded into the pix, believe me, you'd totally be licking your computer screens!

Recipe for: Onion gravy
Photobucket
Ingredients:

2 medium onions, halved and sliced thinly
2-1/2 cups stock, instant or home-made
1/2 tbsp good quality balsamic vinegar
3/4 tsp butter
1 tsp sugar
1 tbsp cornflour
1 tsp oil (any mild/flavourless oil)
Pepper and salt to taste

Method:

1. Heat the butter and oili n a saucepan, add the sliced onion and stir well. Fry the onions on medium-high heat for 3-4 minutes, stirring, until they just start to turn colour.

2. Then turn the heat right down, cover the pan and let the onions cook for 10 minutes or till they are brown and soft.

3. Now stir in the sugar and balsamic vinegar and cook the onions for 2-3 minutes on medium-low heat.

4. Then pour in the stock and bring to a boil. After 2-3 minutes, dissolve the cornflour in some water (or in some stock taken from the pan) and add it to the gravy.

Photobucket

5. Stir well, then add salt and pepper to taste. Let the gravy simmer till it thickens. Ideally, it should not be runny.

Photobucket

Serve hot with vegetarian (or real) sausages and mashed potatoes for a very English supper.

RECIPE: ONION GRAVY

Ingredients:
2 medium onions, halved and sliced thinly
2-1/2 cups stock, instant or home-made
1/2 tbsp good quality balsamic vinegar
3/4 tsp butter
1 tsp sugar
1 tbsp cornflour
1 tsp oil (any mild/flavourless oil)
Pepper and salt to taste

Method:
1. Heat the butter and oili n a saucepan, add the sliced onion and stir well. Fry the onions on medium-high heat for 3-4 minutes, stirring, until they just start to turn colour.
2. Then turn the heat right down, cover the pan and let the onions cook for 10 minutes or till they are brown and soft.
3. Now stir in the sugar and balsamic vinegar and cook the onions for 2-3 minutes on medium-low heat.
4. Then pour in the stock and bring to a boil. After 2-3 minutes, dissolve the cornflour in some water (or in some stock taken from the pan) and add it to the gravy.
5. Stir well, then add salt and pepper to taste. Let the gravy simmer till it thickens. Ideally, it should not be runny.
Serve hot with vegetarian (or real) sausages and mashed potatoes for a very English supper.