skip to main |
skip to sidebar
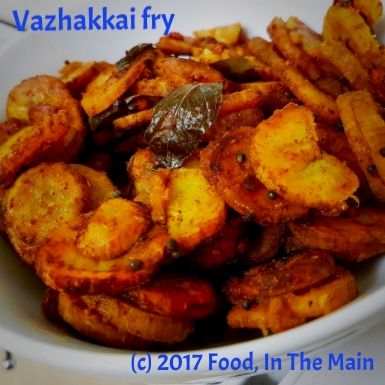
My entire family likes this vegetable, but my sister and I, we're "lattoo" (Hindi slang for "crazy") when it comes to vazhakkai. If we were asked to eat it every day for a year, we would probably beg to have it twice a day! The recipe below is how my mother makes it, and I see no reason to mess with something that I think is perfect. The flavour that the coconut oil gives this vegetable is unbelievable. The two just go together, no question.
That said, if when I get my hands on vazhakkai again, I hope to make a recipe that I've had in my folder for literally years, involving fresh mustard paste. You would think I could hold back at least one vazhakkai for the mustardy recipe... but no. I haven't yet made it because each time I end up making this same one. This dry fry with my mother's thengai kuzhambu (South Indian coconut-and-fenugreek-seed gravy)and steamed rice - I couldn't want for more!
Recipe for: Vazhakkai fry
Ingredients:
3 green (raw) bananas
2 tbsp coconut oil
A few fresh/frozen curry leaves (optional)
1/4 tsp turmeric powder
1/8 tsp asafoetida powder (optional)
1/2 tsp urad dal
1 tsp mustard seeds
1/4 tsp black pepper powder
Red chilli powder to taste
Salt to taste
1 tsp tamarind paste
Method:
1. Wear disposable gloves or grease your hands with oil before peeling the bananas as the sap will otherwise stick to your hands. Make sure to get all the thick green skin off the bananas.
2. Slice the bananas into even slices about 1/4cm thick and put them in a saucepan of water. The water should be enough to cover the slices generously. Dissolve the tamarind paste and turmeric powder in the water.
3. Parboil the sliced bananas, then place in a colander to drain off the cooking water. Handle carefully so that the slices don't break up too much.
4. Heat the coconut oil in a wide saucepan, then add the mustard seeds, curry leaves and urad dal. Cover and let the seeds splutter. The urad dal should be golden by now.
5. Now add the chilli powder and black pepper powder, stir it for 20 seconds, then add the parboiled banana slices along with salt to taste. Stir carefully to coat the slices evenly.
6. Cover the pan and let the slices roast for 8-10 minutes on a medium heat, until the slices turn golden and are fully cooked. Turn the slices carefully over and let them roast for about 5 minutes more. Serve hot as a side with rice, rasam or sambar and any South Indian "gravy" like moar kuzhambu, vattha kuzhambu or thengai kuzhambu (recipes for all these are on my blog).
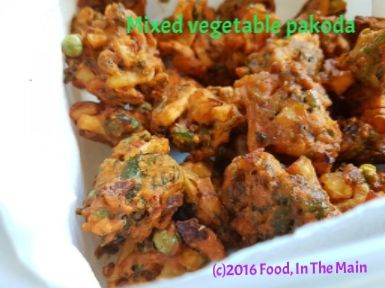
I've posted a pakoda recipe before, but I thought I'd do a post on this version because, for one, it IS slightly different and for another, I really REALLY like my photo and think it deserves to be enshrined on my blog for posterity to view over and over.
HAHAHAHA!
My mother's version (which is the only one I've used all these years) for vegetable pakoda does not involve ginger-garlic paste. This time I decided to add it, and gosh, what a difference it made to the taste! The mint also added a refreshing note. I recommend it.
Oh, and while you're considering my recommendation, make sure you guys admire my beautiful photo of the pakodas. I recommend that too.
Recipe for: Mixed vegetable pakoda
Ingredients:
1 medium potato
10-12 green beans
1/5 small cauliflower
1 medium carrot
1 cup spinach
1/4 cup green peas
1 medium onion
1 tbsp ginger-garlic paste
2 tbsp finely chopped mint
1 tsp omam/ajwain/oregano seeds
1 tsp red chilli powder
1 tsp coriander powder
1.5 - 2 cups chickpea flour
2 tbsp rava/semolina
Salt to taste
Oil for deep frying
Method:
1. Peel the carrot. Chop all the vegetables into thin 1/2-inch long strips.
2. Heat the oil in a deep wok. While the oil is heating, in a large mixing bowl, mix together all the chopped vegetables, spice powders, grated ginger and garlic, the semolina and the chickpea flour. Mix well, then add salt to taste and mix again. Add 1/4 cup water and mix with your hands to a thick dough. It should not be runny at all, because the vegetables will exude water. And once the dough is mixed, use it straightaway.
3. Drop a small piece of dough in the oil - if it floats to the top rightaway, the oil is ready. Drop the mixture carefully into the oil by the tablespoonful. Don't crowd the oil or the pakodas will not be crisp and soak up the oil. Once they are an even golden brown, remove from the oil and drain onto kitchen paper.
4. Serve warm. Great with drinks.
I can't seem to get enough of karela or bittergourd nowadays - I really love these ugly knobbly vegetables that look like a bit like rats with a long tail. A couple of days back, I went to my favourite "Indian" shop in Wellington for vegetables, and was beyond thrilled to find small baby karela for sale. I picked out the freshest 10 and came home joyfully, having decided how I was going to cook them. Stuffed, basically. I didn't want the stuffing to be the usual onion masala or potato masala or peanut-based masala - mainly because I didn't want to spend time cooking the stuffing. Bad enough that I would have to wait for the karela itself to cook.
So I just put together a random mixture of flours and spices, toasted the mix in a dry pan until fragrant, then used some oil and water to bind the powdery mix and make it amenable to stuffing, basically.
I admit that this recipe uses more oil than usual, but it's worth it if you love karela and only make it once in a while. It was SO delicious. I had the stuffed karela with lemon masoor dal and rice and a little ghee, and felt like I had gone to heaven without having to die first. Yes, THAT good.
So good that I forgot to take a photo before diving into the karela. Oops...
Recipe for: Stuffed karela
Ingredients:
6-8 small (about 4-5 inches length) tender karela
For the masala paste
1/4 cup soya flour or jowar flour
1/2 cup chickpea flour (besan/kadalai maavu)
1/8 cup rice flour
4 tbsp coriander powder
1 tsp cumin powder
1/2 tsp aniseed powder
1/2 tsp fennel powder
1 tsp garam masala/rasam powder/any other masala you prefer
2 tsp red chilli powder (or to taste)
1/4 tsp asafoetida powder
Salt to taste
4 tbsp oil
Method:
1. Lightly peel the karela so that the ridges no longer stick out. Make a slit in each karela from end to end, being careful not to cut right through to the other side.
2. Use the handle of a small spoon to gouge out the inner seeds and membrane.
3. At this point you can rub salt on the inside and outside of the karela and let it sit for a few hours so that some of the bitter juices are drawn out. If you do this, be sure to squeeze the juices out, then wash the karela well to remove the excess salt. Pat dry with kitchen paper and reserve.
4. Mix together all the ingredients for the masala paste, bar the oil. Heat a pan and dry toast the mixed masala powder, stirring constantly, until the flours start to smell fragrant and savoury. Be careful not to burn it.
5. Once the masala mix is toasted, transfer it to a container. This might be more than you require, but you can always store the excess for another day in an airtight container. I prefer to make extra, because I don't like it when I find out halfway through stuffing that there isn't enough masala paste to fill all the karela. so you can use all of the toasted mix, or just half, depending on how many karela you have and their size.
6. Now add 2 tbsp of the oil to the masala powder and stir it in. The paste needs to come together enough that if you pinch some together, it shouldn't fall apart. You can add a bit more oil to get the powder to that stage, or you can add a little water. Either way, don't make it into a gooey paste.
7. Once the masala mix is ready, use your fingers to stuff it into the karela. Once they are all stuffed, you can use kitchen string to tie the karela so the stuffing doesn't come out (it tends to expand a bit as it cooks), but it's not strictly necessary especially if the karela is small.
8. Heat the remaining 2 tbsp oil in a pan and add 1/4 tsp asafoetida to it. As soon as it sizzles, put the stuffed karela in the pan and stir them gently so they are coated in the oil. Sprinkle 2-3 tbsp water over the karela and close the pan. Cook the karela covered over medium-low heat for 15 minutes or until they soften and turn a paler green. After that take the lid off and turn up the heat a bit more, occasionally turning them over, until they turn brown and crisp on all sides.
Serve hot with dal and rice.
I saw a recipe for cilantro mango chutney on Talimpu foodblog and immediately wanted to try it, because I love mango thokku. I had to wait a few days before I could get the star ingredient for this recipe, of course, but thereafter everything was quicker than quick – a nearly unprecedented turn of events on this blog. (The main reason for the promptness being, of course, that raw green mangoes don’t stay raw for long.)
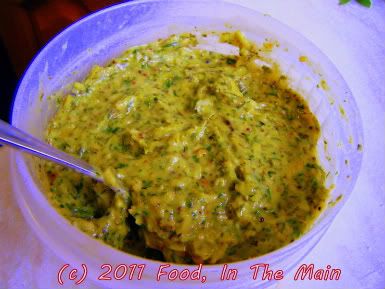
The chutney was far too sour and not hot enough for my tastes - my fault for using two mangoes rather than one, plus not having enough coriander leaves to offset the extra mango. So I had to resort to frying some red chilli powder in extra oil, then mixing the chutney in it, frying it all for a few more minutes before trying it again. This time around it was perfect – spicy-hot and sour and redolent with the coriander.
Like regular mango thokku except – and I feel obliged to point this out - different. Thanks for your original recipe, Raji!
Recipe for: Green mango and coriander thokku (chutney)
 Ingredients:
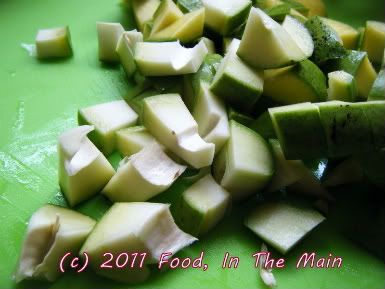
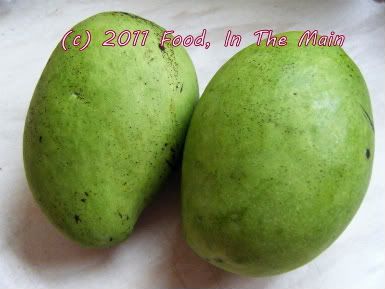 2 green (unripe) mangoes, cubed
 1 tbsp urad dal
1 tsp mustard seeds
5-6 green chillies (or to taste), chopped
1-1/2 cups chopped coriander
1 tsp red chilli powder (or to taste, optional)
1/4 tsp asafoetida powder
2 tbsp oil
Salt to taste
Method:
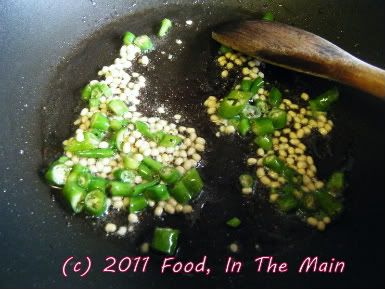
1. Heat the oil and add the mustard seeds, asafoetida powder, green chillies, urad dal and red chilli powder (if using), and stir-fry for for a minute or two, till the dal turns a light brown and the mustard seeds have popped.
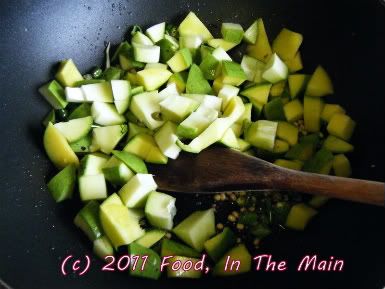
 2. Add the green mangoes and fry them for 4-5 minutes, till they soften.
 3. Add the coriander and fry till the leaves wilt.
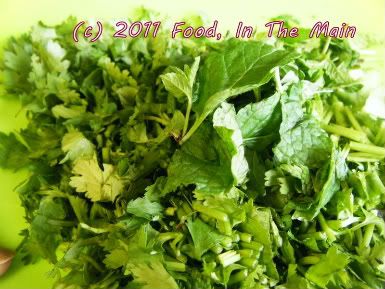 Remove from the heat and let cool.
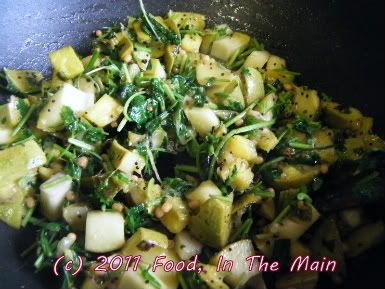
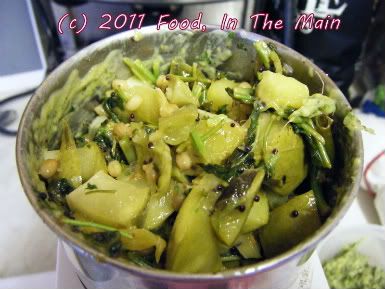 4. Grind to a fairly smooth consistency. This is good as a sandwich spread or as a side with idlis, dosa and chapaties.
RECIPE: GREEN MANGO AND CORIANDER THOKKU (CHUTNEY)
Ingredients:
2 green (unripe) mangoes, cubed
1 tbsp urad dal
1 tsp mustard seeds
5-6 green chillies (or to taste), chopped
1-1/2 cups chopped coriander
1 tsp red chilli powder (to taste, optional)
1/4 tsp asafoetida powder
1 tbsp oil
Salt to taste
Method:
1. Heat the oil and add the mustard seeds, asafoetida powder, green chillies, urad dal and red chilli powder (if using), and stir-fry for for a minute or two, till the dal turns a light brown and the mustard seeds have popped.
2. Add the green mangoes and fry them for 4-5 minutes, till they soften.
3. Add the coriander and fry till the leaves wilt. Remove from the heat and let cool.
4. Grind to a fairly smooth consistency. This is good as a sandwich spread or as a side with idlis, dosa and chapaties.
4. Grind to a fairly smooth consistency. This is good as a sandwich spread or as a side with idlis, dosa and chapaties.
RECIPE: GREEN MANGO AND CORIANDER THOKKU (CHUTNEY)
Ingredients:
2 green (unripe) mangoes, cubed
1 tbsp urad dal
1 tsp mustard seeds
5-6 green chillies (or to taste), chopped
1-1/2 cups chopped coriander
1 tsp red chilli powder (to taste, optional)
1/4 tsp asafoetida powder
1 tbsp oil
Salt to taste
Method:
1. Heat the oil and add the mustard seeds, asafoetida powder, green chillies, urad dal and red chilli powder (if using), and stir-fry for for a minute or two, till the dal turns a light brown and the mustard seeds have popped.
2. Add the green mangoes and fry them for 4-5 minutes, till they soften.
3. Add the coriander and fry till the leaves wilt. Remove from the heat and let cool.
4. Grind to a fairly smooth consistency. This is good as a sandwich spread or as a side with idlis, dosa and chapaties.
I don’t understand why the supermarkets start stocking their shelves with Christmas-oriented goods fully three months ahead of the actual occasion. It pisses me off extremely much, not that anyone cares. Any small enthusiasm for the festival that I might otherwise muster goes right down the drain when almost everything is advertised as “perfect as a Christmas present”. I don’t know about everybody else, but if anybody thought to give me an electric toothbrush (for example) as a Christmas present, they would very soon get it jammed up an orifice not situated in the face and not meant for toothbrushes - electric or otherwise.
About the only thing I’m pleased about with regard to Christmas-oriented goods is when the produce shelves are stocked with things that are otherwise not to be found for the remainder of the year – cranberries, chestnuts, redcurrants, etc. Last week I found redcurrants on the shelves on a two-for-one offer, so I bought two boxes on an experimental basis. I’d never tasted redcurrants nor anything made with redcurrants. I thought this would be a good time to see what they were like and what I could make.
Here’s what I discovered: Redcurrants are sour. Mouth-puckeringly sour. Even when they'reinvitingly red and ripe, they're sharp enough to shrivel your fillings. There’s no way they could turn to sweet from that tart extreme - not without artificial help, anyway. They’re the most gorgeous looking berries, though… tiny, shiny and very red, like grape-bunches of little red rubies.
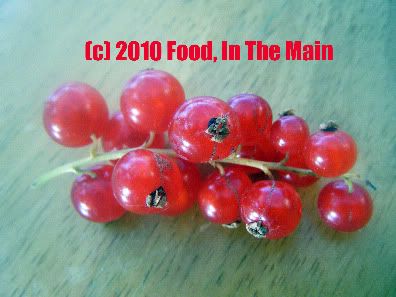
So, anyhow, eating those little rubies raw was out of the question. I googled redcurrant jam recipes and found one that combined redcurrants and strawberries. Perfect, because I had some somewhat squishily overripe strawberries in the fridge. But the recipe called for equal amounts by weight of both berries, and my strawberries were “currantly” (note the pun, note the pun!) outnumbered by about 2-1 in weight-y terms.
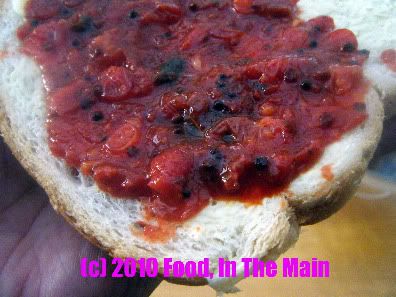
That was when I felt the Spirit of Enterprising Culinariness, so long dormant, take possession of me once again. (When one is possessed of this spirit, there’s nothing to do but give in to its directions.) Under its spell, I divided the berries into three more-or-less equal portions of about 1-1/4 cups. With the first portion I made redcurrant thokku/chutney. The thokku was a good use of the redcurrants, but the cooked-down berries retained so much of the tartness that the thokku had to go back on the hob for some repair-work. The ingredient quantities have been modified to reflect the “repair” so that you don’t have to cook the thokku twice like I did. But be warned, this is one sour chutney, best eaten along with dal and rice to give the meal extra zing. I ate it spread on toast, too.
Recipe for: Redcurrant thokku (chutney)
Ingredients:
1-1/4 cups redcurrants, washed and drained
2 tbsp oil
1 tsp cumin-coriander powder
1 htsp brown/black mustard seeds
5-6 fresh curry leaves
1/4 tsp asafoetida powder
1/4 tsp turmeric powder
2 tbsp sugar or jaggery
2 tsp red chilli powder
1/4 tsp roasted fenugreek seed powder
salt to taste
Method:
1. Heat the oil in a pan and add the cumin-coriander powder, curry leaves, mustard seeds and asafoetida powder.

Fry them for about a minute, till the mustard seeds pop.
2. Add the redcurrants to the pan and stir well. Let them cook for 2-3 minutes.
3. Now add the turmeric powder and red chilli powder and stir again.
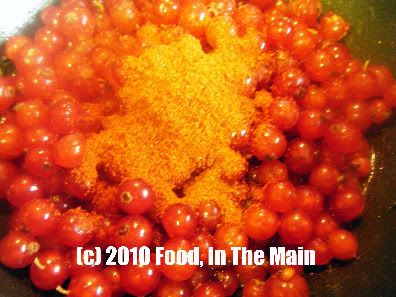
4. Let the redcurrants come to a gentle boil on medium heat, then stir in the sugar or jaggery.
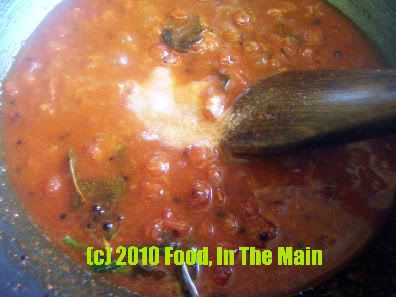
5. Let the berries cook down on a low simmer for 10-15 minutes until they lose their shape. You can mash them with a spoon.
6. Add salt to taste and finally the roasted fenugreek seed powder. Mix well. The thokku is done when the mixture becomes thick. Let it cool, then store in a tightly covered container. This stays good for 4-5 days.
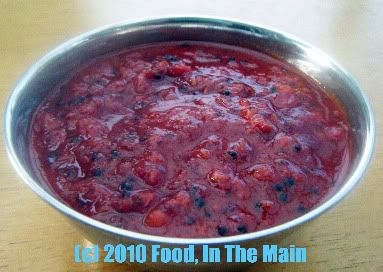
This redcurrant thokku is best used as a condiment with dal and rice.
RECIPE: REDCURRANT THOKKU (CHUTNEY)
Ingredients:
1-1/4 cups redcurrants, washed and drained
2 tbsp oil
1 tsp cumin-coriander powder
1 htsp brown/black mustard seeds
5-6 fresh curry leaves
1/4 tsp asafoetida powder
1/4 tsp turmeric powder
2 tbsp sugar or jaggery
2 tsp red chilli powder
1/4 tsp roasted fenugreek seed powder
salt to taste
Method:
1. Heat the oil in a pan and add the cumin-coriander powder, curry leaves, mustard seeds and asafoetida powder.
Fry them for about a minute, till the mustard seeds pop.
2. Add the redcurrants to the pan and stir well. Let them cook for 2-3 minutes.
3. Now add the turmeric powder and red chilli powder and stir again.
4. Let the redcurrants come to a gentle boil on medium heat, then stir in the sugar or jaggery. 5. Let the berries cook down on a low simmer for 10-15 minutes until they lose their shape. You can mash them with a spoon.
6. Add salt to taste and finally the roasted fenugreek seed powder. Mix well. The thokku is done when the mixture becomes thick. Let it cool, then store in a tightly covered container. This stays good for 4-5 days.
This redcurrant thokku is best used as a condiment with dal and rice.
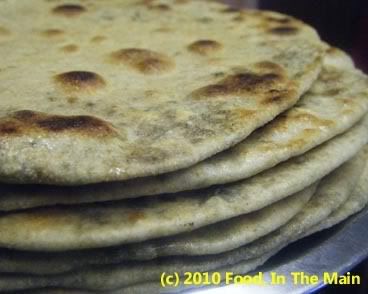
I've always thought that puris referred to only one thing - small, airy, puffed up fry-breads made with plain or wholewheat flour. When I came across a recipe for "besan ki puri" on The Veggie Hut, I fully expected it to be a deep-fried recipe, differing from a regular "atte ki puri" (wheatflour puris) by the addition of besan or chickpea/gram flour. I was quite surprised to find that these besan ki puri were merely shallow-fried, and they looked like regular chapaties or parathas. So perhaps besan ki puri is a regional or colloquial name for this type of stuffed paratha/chapati, although I'm not sure where this recipe originated or which State it's from.
The recipe was interesting, though - I'd never come across a seasoned chickpea flour filling for chapaties, nor even heard of such. The filling was simple enough to make, and certainly I found it a lot easier to handle while rolling out the chapaties. (Wetter fillings have been known to squirt out annoyingly no matter how gently I wielded the belan (rolling pin).)
Until now I've only had the western-type pastry rolling pin, very large and very heavy and the same width from end to end, compared to the Indian ones which are far lighter and tapered towards the ends. I've recently acquired one of the latter kind, so yaaay! I'll have to see if they make a difference while rolling out chapaties. It could well be that my faulty technique, and not the rolling pin, is the factor that brings the filling leaping so joyfully and messily out of the chapati dough...
Anyway, what I discovered while rolling out these chickpea-flour-filled chapaties is that I got a few air pockets at the start... but some light pressure while rolling them out ensured that the air leaked away gently instead of literally tearing its way out of the dough. That's my kitchen tip for the day.
PS. The term "kitchen tip" does NOT imply that my kitchen is a rubbish area. Just so you're aware.
Recipe for: Chapaties with gram flour filling
Ingredients:
3 cups wheat flour
Salt to taste
water as required
For the filling:
1 cup chickpea/gram flour
5-6 green chillies, chopped finely
1 tbsp coriander powder
1/2 tsp cumin powder
2 tbsp dried fenugreek leaves (kasoori methi)
1 tsp red chilli powder
3-4 tbsp water 1 tbsp oil
Salt to taste
Pam or other non-stick spray (or oil for cooking)
Method:
1. Put the flour into a deep mixing bowl, add a little salt and knead to a smooth pliable dough using as much water as required. Cover the dough and let it rest for 15-20 minutes. 2. Heat the oil in a frying pan and add the green chillies, coriander powder, cumin powder and kasoori methi.
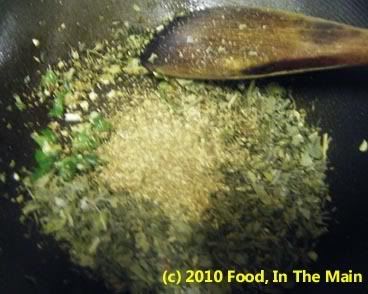
3. Stir-fry them for 30 seconds on high heat.
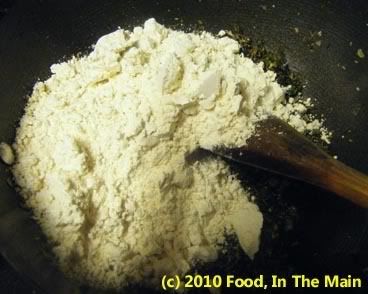
 4. Add the besan (gramflour/chickpea flour), stir till the ingredients are well mixed.
5. Continue stir-frying on medium heat, till the flour turns a darker shade and emits a roasted aroma. Be careful not to burn the flour. 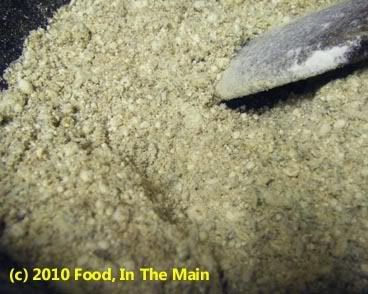
6. Add the turmeric powder, red chilli powder and salt to taste, and mix well. 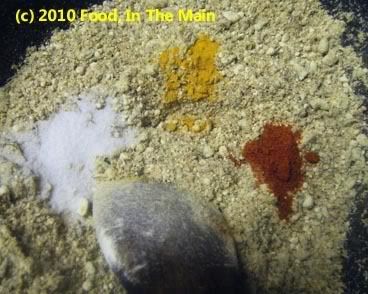
7. Now add water, tbsp by tbsp, stirring between each addition, 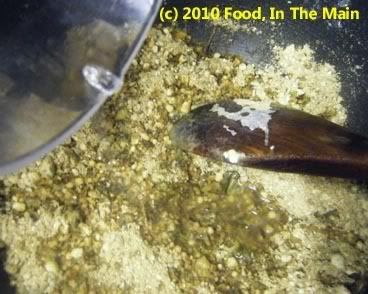 until the roasted flour begins to come together in clumps.
  Only add enough water to lightly moisten all the flour, but it's better to stop while the flour is still a bit dry than to add too much and make it sticky wet. If that happens, the best thing to do is start over. Let the filling cool completely once it has become moist.
8. To make the chapaties, pinch off a ping-pong ball sized piece of dough. Flatten it in a saucer of dry flour, shake off the excess flour, then roll the dough out into a 4" circle. Place 2 tbsp of the filling in the centre. 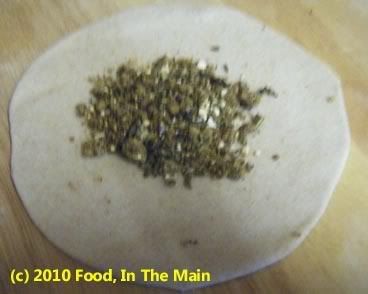
Bring the edges of the chapati together to enclose the filling completely. 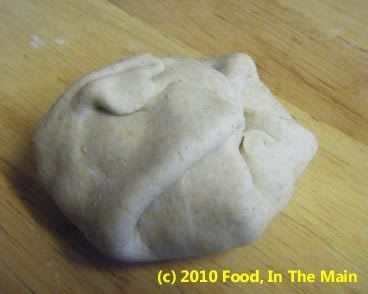
Turn it over so that it lies seam-side down, then start rolling it out again. If any air pockets are visible (the puffed up area), continue rolling but do it more gently, so as to get rid of the air. 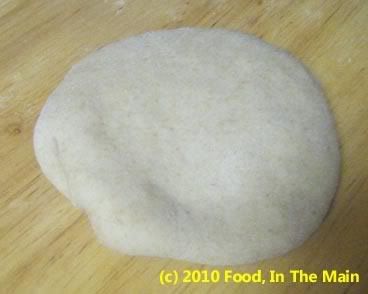
Continue rolling out the chapati till it is evenly thin all over. 
9. Heat a tava or frying pan on medium heat, then place a chapati on the tava for 10-15 seconds, or till small brown spots appear. 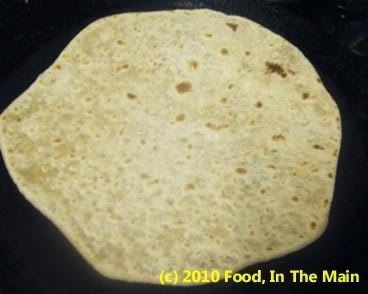
Turn it over and spray the partially cooked side with Pam, then flip it over again to spray that side as well. 10. Cook on medium heat for about 2 minutes for each side, pressing down with a spatula to let the chapati cook evenly all over. Keep the cooked chapaties covered and warm in a clean cloth-lined plate while you make the rest of the chapaties the same way. They can be cooked till very crisp (which will take longer), almost like a cracker, if you like. 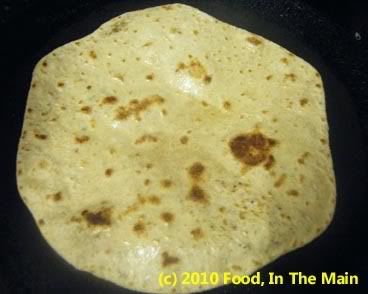
11. Serve hot with a curry, or with pickles and yogurt.
I've always been convinced that white rice is best for South Indian food - Sona Masoori rice, for preference. Even basmati rice, that queen of all rice, comes second here... if only because its own heavenly aroma and flavour tend to get downplayed by the competing flavours of the accompanying dishes. Sona masoori rice, however, is the perfect vehicle to exhibit the pungent, spicy, hot, sour and piquant flavours that are the trademark of South Indian dishes such as sambar, rasam, kootu etc, without itself taking centre stage. So with sona masoori and basmati rice in my pantry, I was not sure that brown rice would play a big role in my cooking. Still, when I came across a small packet of brown basmati rice in the supermarket, I impulsively bought it. It was surprising how long it took to cook the rice - way more than any white rice, and the typical aroma of basmati wasn't immediately evident either. Since I didn't quite know what to make with the cooked brown rice, I decided to make a sort of vegetable fried rice, only without too much of the frying. I have to say that I was pleasantly surprised by the taste of the brown basmati. It was chewy in a nice way, with a flavour reminiscent of "aval" or "poha" (beaten rice). I liked it a lot, and while it will not be replacing my beloved sona masoori or Tilda basmati any time soon for traditional Southie dishes, I think I will be using brown rice a lot more in other areas. It's nice to no longer be a brown rice virgin! Recipe for: Curried brown rice
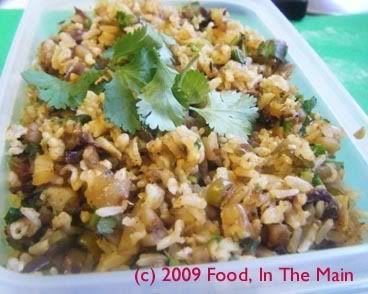
Ingredients:
3 cups brown basmati rice, cooked and cooled
1/2 cup green beans, sliced into thin rounds1 medium potato, chopped into 1/2 cm pieces1 medium onion, sliced thin1 scallion, sliced thin2 green chillies, sliced vertically1 tsp cumin seeds1/2 tsp red chilli powder
1 tsp sambar powder2 tsp oilSalt to tasteFresh coriander leaves, to garnishMethod:
1. Heat the oil in a pan, add the cumin seeds and green chillies. Fry for 40 seconds or till the seeds turn a darker shade of brown. 2. Add the vegetables to the pan now and stir, then pour in 1/8 cup water, cover the pan, turn the heat down to medium-low, and let the vegetables steam-cook till done. 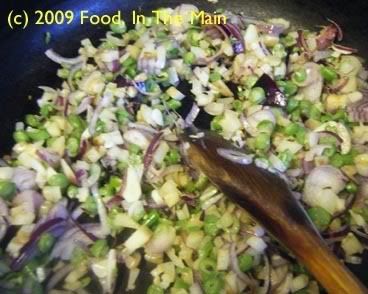
3. Now add the red chilli powder and sambar powder to the cooked vegetables along with salt to taste, and mix it well. Turn the heat up and let the vegetables caramelize a little. 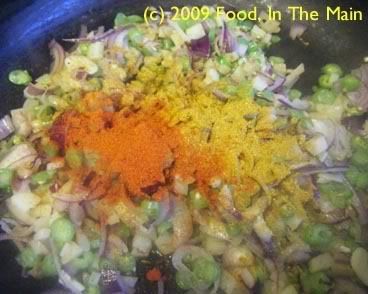
4. Throw in the cooked brown rice and stir till everything is well mixed. 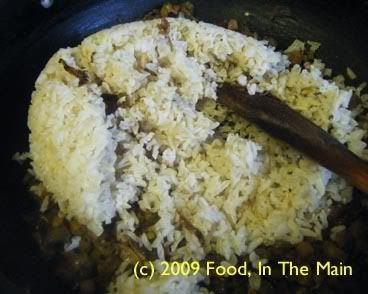
5. Add chopped coriander leaves and serve hot with a raita, if preferred. 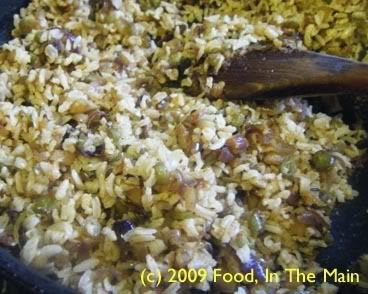
This recipe is totally inspired by – or rather, copied from - the lovely Nupur’s “samosas for breakfast” post. The filling I made has a few differences, of course, but the basic idea is entirely hers.
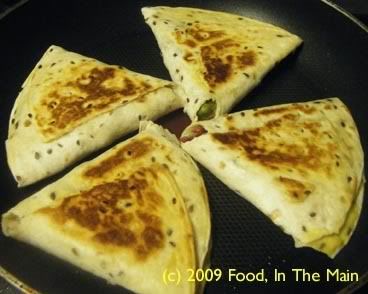
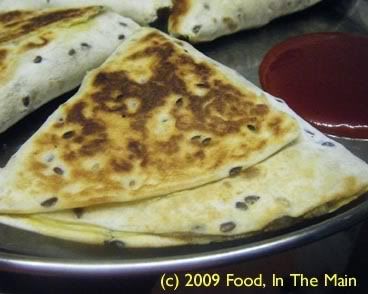
These tava samosas (as rechristened by me) are very, very acceptable stand-ins for the real thing, and they’re ever so much healthier for not being deep fried. Of course the flakiness of real samosa pastry can’t be achieved, because these are made with chapaties/tortilla wraps... but believe me, they taste wonderful all the same. I didn’t have the usual feeling of “damn, I wish I could get real samosas” after chomping down on one of these impromptu samosas – and that’s a rare thing.
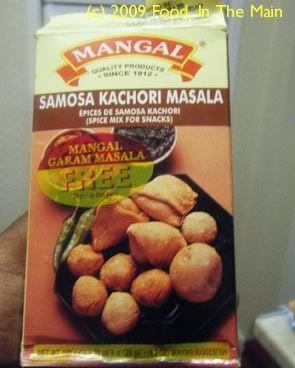
I used a readymade – and unfamiliar to me - brand of samosa/kachori masala which I got free with some shopping expedition long back, and to my surprise, when the spices had had a chance to mellow in the filling, the aroma was pretty authentic.
Anyway, the samosas were absolutely delightful hot off the tava, but they were just as good at lunch time the next day.
I don’t think I’ll bother with making “real” samosas at home ever again. This is much easier, much quicker and much healthier. Plus, you get to use up leftover stale chapaties or wraps. It's all good!
Recipe for: Tava samosa
Ingredients:
2-3 chapaties, tortillas or wholewheat wraps (I used seeded wholewheat)
2 medium potatoes, boiled, peeled and mashed coarsely into small lumps
1 medium onion , sliced thin
3-4 green chillies, sliced thin (option or to taste)
1/4 cup red bell pepper, thinly sliced
1/2 cup frozen green peas
1/2 cup cooked chickpeas
1 tsp cumin seeds
1/4 tsp fennel seeds
1/s tsp red chilli powder
1 tsp samosa/kachori masala powder (or garam masala)
2 tsp oil
Salt to taste
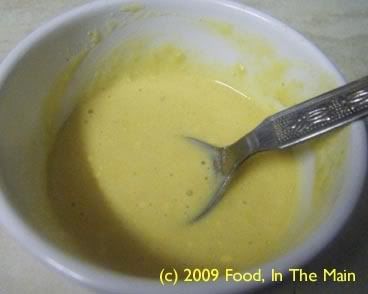
Thick paste made with 2 tbsp gramflour (chickpea flour) and some water
Method:
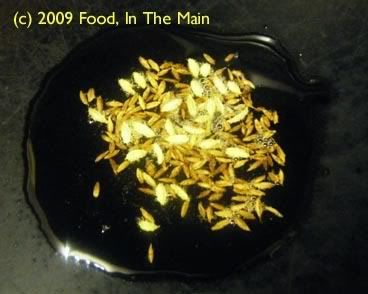
1. Heat the oil and toss in the cumin and fennel seeds, let fry for 30 seconds or till they turn a darker shade.
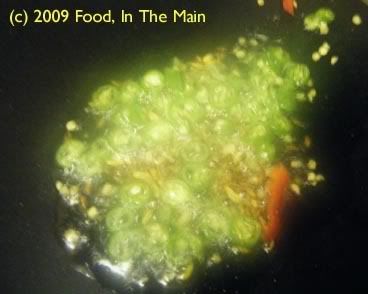
2. Add the green chillies if using and fry them for 30 seconds on medium heat.
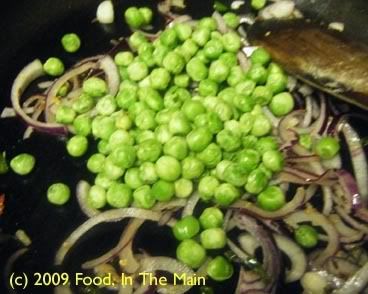
3. Now add the sliced onions and cook them till they begin to turn soft.

4. Next, add the cooked green peas,
the sliced red bell pepper
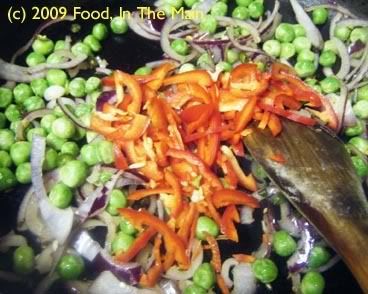
and the garam masala.
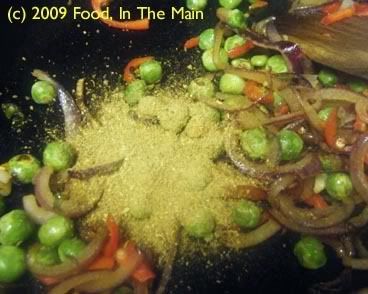
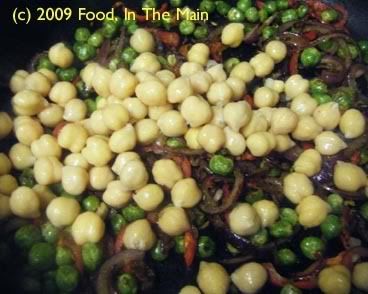
5. Stir the masala powder in, then add the chick peas, crushing some of them lightly.
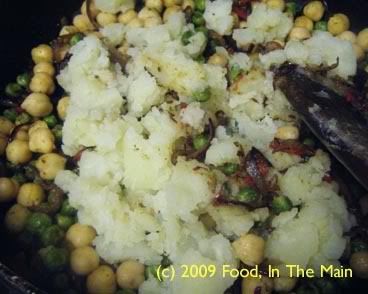
6. Add the boiled mashed potatoes now,
and the coriander leaves, along with salt and red chilli powder to taste.
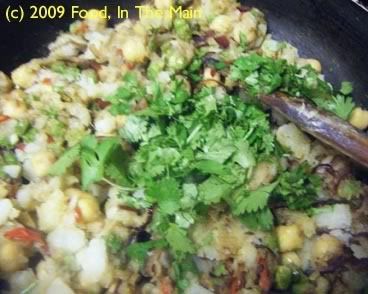
7. Stir everything till the ingredients are well incorporated. Fry this stuffing for 3-4 minutes on medium heat, stirring occasionally. Let cool.
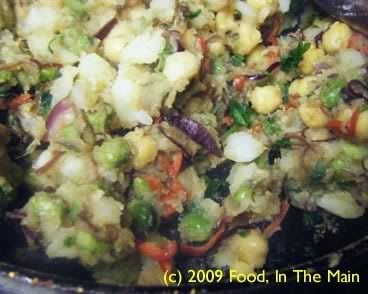
8. Cut the wrap/tortilla in half and put 2-3 tbsp of the stuffing in the centre.
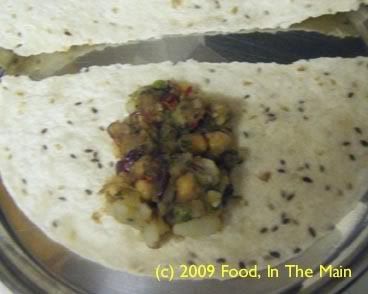
9. Fold one edge halfway across, spread some of the gramflour paste, then fold the other corner, pressing lightly so that the paste acts as a seal. Turn the samosa over so that the seam side is underneath.
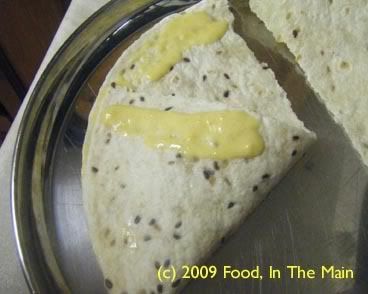
10. Drizzle 1 tsp oil on a non-stick frying pan and spread it over the surface. Place the samosas on it and fry for 2-3 minutes on each side on medium heat, pressing down gently with a spatula to help the tortilla/wrap brown nicely.

11. When the samosas are golden brown on both sides, remove them from the heat. Serve hot with tomato ketchup and/or green chutney.
