skip to main |
skip to sidebar
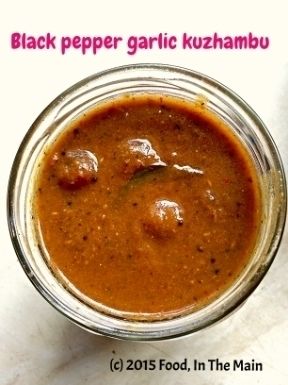
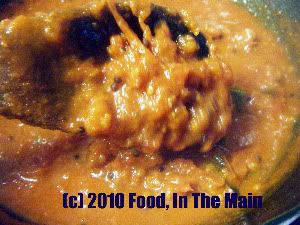
I simply had to post this kuzhambu recipe, because it is just literally so lip-smackingly good - thick, tangy, hot, spicy, a tiny bit sweet and entirely irresistible! The recipe is from a foodie group on Facebook of which I am a member, and I can't seem to find it again on FB (which I wanted to do for crediting purposes on my blog). I am SO pleased that I wrote it down on a piece of paper when I saw it on FB (not having had access to a printer or my own computer at that point). I state freely that this is not my own recipe, and I do really wish I knew whose it was. All I DO know for certain that it is comfort food whose ingredients are good for health.
I made the kuzhambu and refrigerated it just before going on a week-long trip on a narrowboat with my husband. It was a lovely, relaxing, stressfree holiday, with the most gorgeous, eye-poppingly pretty scenery... but that's only by the way. The main thing is, I knew that the food I would be eating on the boat (and off it, at the various canal-side pubs that we stopped at) would not be spicy enough for me, and I would be dying for something to tickle my palate when we got back.
And so it turned out.
I certainly enjoyed the food en route, but I couldn't wait to get stuck into hot and spicy comfort food when we got home - and this kuzhambu was absolutely just the thing. I could not have asked for anything better. All I had to do was make some rice - and because it was too late to make any vegetable side-dish to accompany it (and because I was much too hungry), I just microwaved a couple of poppadoms and ladled the kuzhambu on the rice. It tasted like heaven - but there was rather too much of the kuzhambu on the rice, because it was so full-on hot and peppery. It's really meant to be mixed with rice in small amounts, not in quantities like regular sambar or rasam. I had to tone the spice quotient down somewhat with a large dollop of Greek yogurt on the side of my plate, but that was a wonderful combination anyway.
Oh, and if you're wondering why I didn't mention the taste of the large amounts of garlic that went into the kuzhambu, it's because it doesn't come across as overly garlicky. So don't worry about it, and don't skimp on the garlic; in fact, next time I will probably add even more garlic. It's good for you, anyway, so no harm done.
One other thing - the correct amount of salt is essential, otherwise the kuzhambu tends to be on the sweetish side. I'm used to making do with less salt in my cooking than (after all, you can always add more, but you can't really undo oversalting disasters!) but in this case I did have to add some more. So, it would probably be best to start by adding 3/4 tsp salt, then taste-testing to see if your palate requires more. Let your tongue and palate be the judge.
Happy eating!
Recipe for: Black pepper garlic kuzhambu
Ingredients:
1/4 cup baby shallots/sambar onions
1 tbsp tamarind paste, dissolved in 1/2 cup water
1/2 tsp turmeric powder
1 tsp jaggery (raw palm sugar) (optional)
1 tbsp neutral oil
Salt to taste
To grind:
1-2 tsp black peppercorns (more if you love your black pepper)
6-8 dried red chillies
1 whole head of garlic (about 1/8 cup garlic cloves, peeled and chopped into chunks if very large)
2 tsp cumin seeds
1 medium onion
1 medium tomato
3 sprigs curry leaves
To temper:
1 tbsp nallennai (unrefined sesame oil)
1/2 tsp vendhayam (methi/fenugreek seeds)
2 tsp mustard seeds
10 curry leaves
Method:
1. Heat 1/2 tbsp oil in a small pan and add the first four items on the "To grind" list. Saute for 2-3 minutes on med-high, stirring, until the chillies turn a darker shade of red and the garlic is starting to turn colour. Then add the remaining ingredients and fry until the garlic is golden. Allow to cool, then grind to a smooth paste. Set aside till required.
2. Heat the remaining neutral oil, add the small onions and fry till golden (approx 3-4 minutes). Add the tamarind water, salt to taste, turmeric and jaggery. Bring it to a boil and let it bubble for 2 minutes.
3. Now add the ground paste and 2 cups water and mix well. Bring to a boil again and let it simmer for 10 minutes, or until it is thick enough to coat the back of a spoon.
4. As a final touch, heat the nallennai in a small pan, then add the mustard seeds and curry leaves. Cover and let the mustard seeds pop. Now tip in the fenugreek seeds and fry for 30 seconds or until the seeds turn a darker shade of brown. Be careful not to burn the seeds or they will be horribly bitter. Pour the tempering over the kuzhambu and stir it in. Let it simmer for another 3 minutes, then take the pan off the heat.
Serve sparingly over steamed white rice with a dollop of ghee, any dry vegetable curry and microwaved poppadoms.
Yesterday I went to a supermarket called Morrisons, which I visit only occasionally. It turned out to be very exciting, in the event, because I saw display after display of vegetables and fruits that I'd only ever seen in "ethnic" markets before... bittergourd (albeit the Chinese kind), colocasia, bottlegourd, plantains, curry leaves and so on, along with even more exotic heirloom items - tomatoes and golden beets and pink beets.
To say that I was thrilled is an understatement - Pete was amused by my ecstatic squeaks of joy as I came upon more and more things, some of which I'd only seen in Singapore, or heard of from other food blogs. My first instinct was to buy everything in sight, but in the end I restricted myself to buying some heirloom tomatoes and beetroots (and some spiky looking rambutan. I just couldnt resist those fruits).
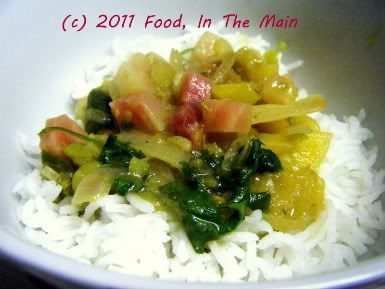
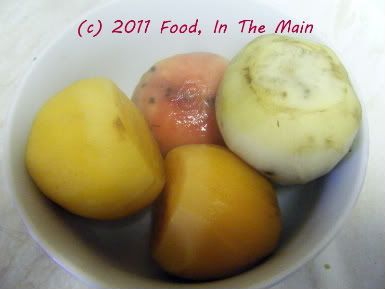
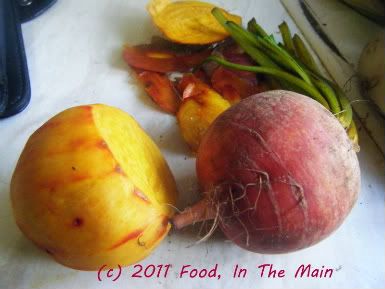 To get back to the beets, they looked absolutely lovely when they were peeled - a sort of golden orangey pink, all the shades of a glorious sunset. The intensity of the colours lessened somewhat when the beets were cooked, but they were still very apparent. I have to say I prefer these heirloom beets to the regular red ones because they don't turn everything they touch to a lurid pink. And they still taste like proper beets. They definitely made my dal look pretty in pastel shades! Don't you think so too?
PS. The rambutan? Pete and I ate them. They were beautifully sweet.
Recipe for: Golden beet and split-pea dal
  Ingredients:
2-3 medium heirloom golden/pink beets, cooked
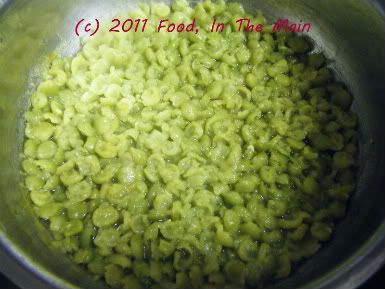
 1 cup green split-peas, cooked
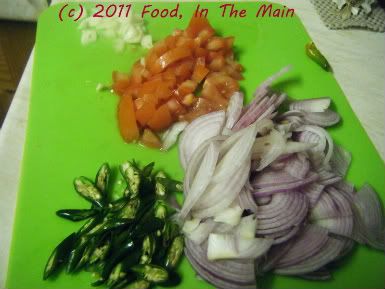
  2 medium red onions, sliced thinly
-5 fresh green chillies, sliced thinly
2 medium tomatoes, chopped
2-3 garlic cloves, sliced
 1 tsp cumin-coriander powder
1 tsp Kitchen King masala (or other garam masala)
1 tbsp oil
Fresh coriander leaves for garnish
Salt to taste
1-2 cups water
Method:
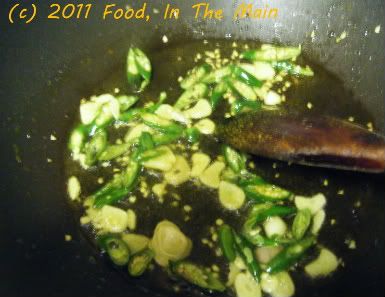
1. Heat the oil in a pan and add the chillies and garlic cloves. Fry for a minute or so, until it's fragrant, then add the cumin-coriander powder.
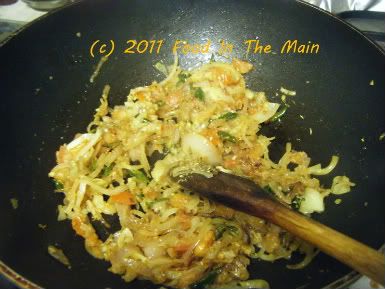
  2. Add the sliced onions and fry till they start to become soft
 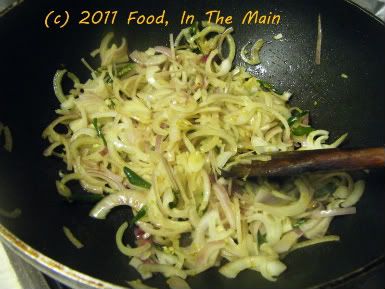 then add the chopped tomatoes and fry till they're mushy and soft.
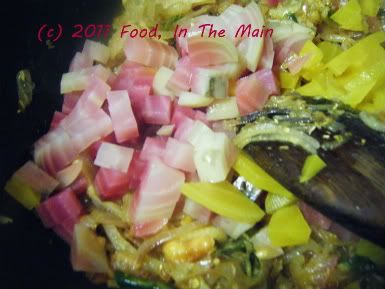
  3. Add the chopped cooked beets and mix them in with the masala,
  then add the cooked split-peas.
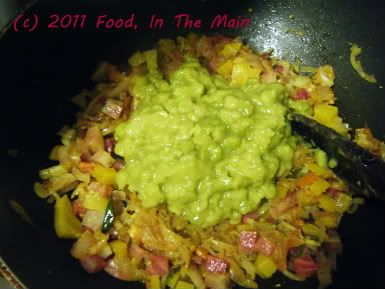 Pour in a cup or two of water, depending on how thick you want the dal, and stir well.
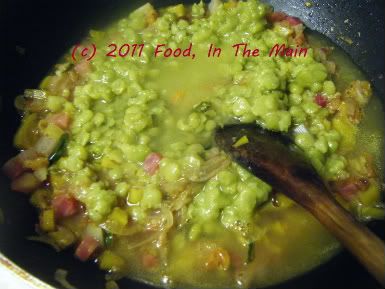 4. Bring to a gentle boil, then stir in the Kitchen King/garam masala. Add salt to taste.
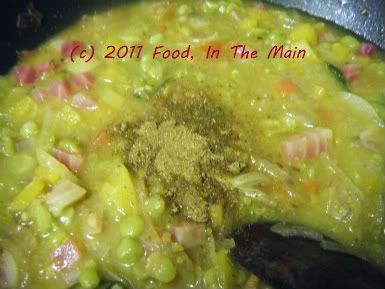 5. Turn off the heat after a couple of minutes, then stir in the chopped coriander.
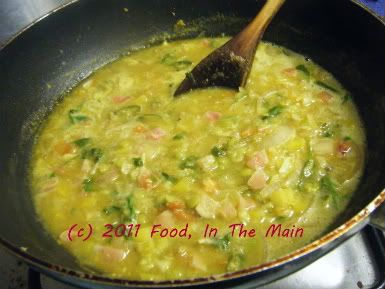 Serve hot over rice or with rotis.
RECIPE: GOLDEN BEET AND SPLIT-PEA DAL
Ingredients:
2-3 medium heirloom golden/pink beets, cooked
1 cup green split-peas, cooked
2 medium red onions, sliced thinly
4-5 fresh green chillies, sliced thinly
2 medium tomatoes, chopped
2-3 garlic cloves, sliced
1 tsp cumin-coriander powder
1 tsp Kitchen King masala (or other garam masala)
1 tbsp oil
Fresh coriander leaves for garnish
Salt to taste
1-2 cups water
Method:
1. Heat the oil in a pan and add the chillies and garlic cloves. Fry for a minute or so, until it's fragrant, then add the cumin-coriander powder.
2. Add the sliced onions and fry till they start to become soft then add the chopped tomatoes and fry till they're mushy and soft.
3. Add the chopped cooked beets and mix them in with the masala, then add the cooked split-peas. Pour in a cup or two of water, depending on how thick you want the dal, and stir well.
4. Bring to a gentle boil, then stir in the Kitchen King/garam masala. Add salt to taste.
5. Turn off the heat after a couple of minutes, then stir in the chopped coriander. Serve hot over rice or with rotis.
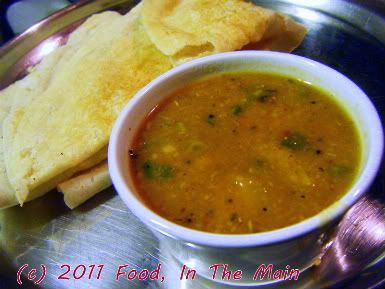
This variation on the classic arachuvitta vengaya sambar, that I posted way back when, came about thanks indirectly to my cousin Chitra, who is not only a fun person but also a really good cook. She’s in Seattle now on holiday and I deeply regret that I did not get the opportunity to invite myself over for a meal at her daughter’s place while I was there – mainly because I had to leave pretty much as she arrived, and there was no time.
I still vividly remember the chole she had made when we were in Madras – this is going back well over 10 years – which was hands down the best I’ve ever had, EVER. I haven’t had the opportunity of pigging out on her food in years now, and she can only have got better and better.
Anyway, the other day when I was Skyping with my mother, she mentioned Chitra's variation on arachuvitta sambar, so of course I had to try it out rightaway. It came out absolutely spectacular, and I kid you not, I was more than happy to eat it morning noon and night – with plain rice, with curd rice, with dosas, with idlis, with Greek yogurt... it was the star turn every single time. Needless to say, the sambar didn’t even last three days – and I was the only one eating it! If there was anybody else to share it with, I’d have had to make TWO bucketsful!
Note: If you can get the little Indian sambar onions or shallots, use those. I think they’re far more flavourful than regular onions – especially if you’re going to the trouble of making this arachuvitta sambar.
And for my fellow Tamils... this literally IS "arachuvitta vengaya sambar" :-)
Recipe for: Arachuvitta vengaya sambar - Version 2
 Ingredients:
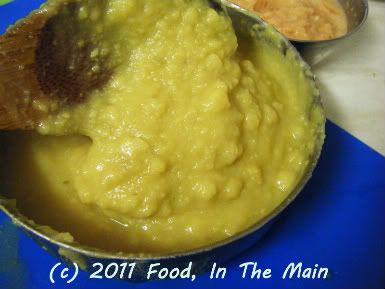
1 cup tuvar/toor dal/thuvaram paruppu, to make 2 cups well cooked and mashed dal
 2 tsp tamarind paste dissolved in 5-6 cups water OR lime-sized ball of tamarind, pulp extracted to make 5-6 cups tamarind water
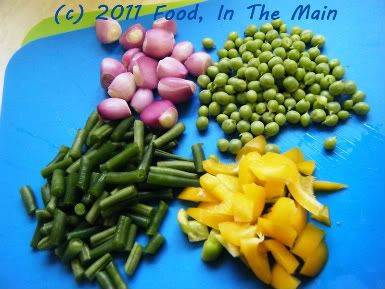 1/4 cup green beans sliced
1/4 cup fresh peas
10-12 sambar onions or 1 medium onion sliced
1/4 cup capsicum, cut in 1/2" pieces
Ground masala 1
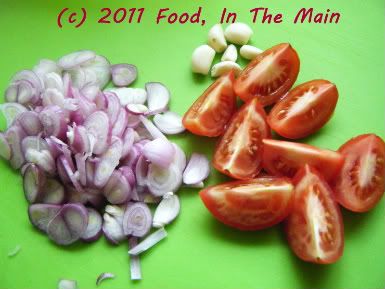 1 tsp oil
5-6 cloves garlic
10-15 sambar onions (preferably), to make 1/4 cup sliced
2 small tomatoes, cut into pieces
Ground masala 2
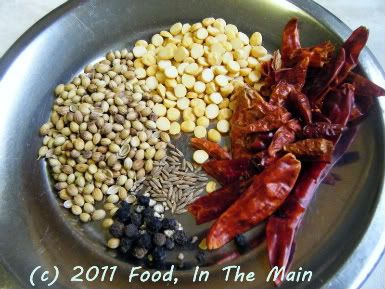 1 tsp oil
2 tsp coriander seeds
2 tsp kadala paruppu/chana dal
5-6 dried red chillies (or to taste)
1/2 tsp cumin seeds
1/2 tsp black peppercorns
3-4 tbsp fresh coconut (pieces or grated)
For tempering
1 tsp oil
1 htsp mustard seeds
a few fresh or frozen curry leaves
1/2 tsp turmeric powder
1/4 tsp asafoetida powder
3-4 tbsp coriander leaves chopped, for garnish
Method:
1. Heat 1 tsp oil and add the mustard seeds, curry leaves, turmeric powder and asafoetida powder.
1 tsp oil
2 tsp coriander seeds
2 tsp kadala paruppu/chana dal
5-6 dried red chillies (or to taste)
1/2 tsp cumin seeds
1/2 tsp black peppercorns
3-4 tbsp fresh coconut (pieces or grated)
For tempering
1 tsp oil
1 htsp mustard seeds
a few fresh or frozen curry leaves
1/2 tsp turmeric powder
1/4 tsp asafoetida powder
3-4 tbsp coriander leaves chopped, for garnish
Method:
1. Heat 1 tsp oil and add the mustard seeds, curry leaves, turmeric powder and asafoetida powder.
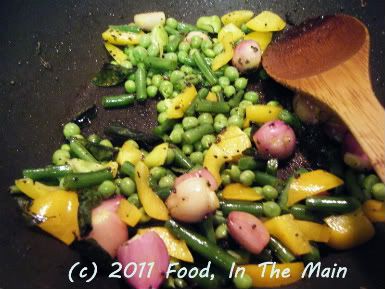
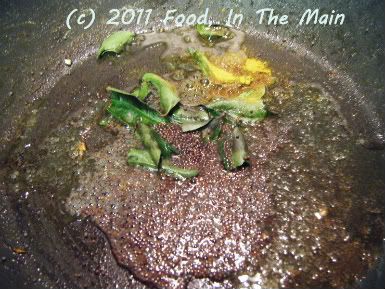 Let the mustard seeds pop, then add the green beans, peas, sambar onions and capsicum, sauteing for 3-4 minutes.
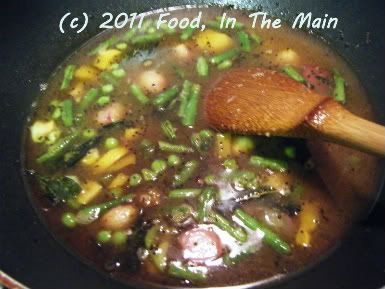
 Pour in the tamarind water and bring to a boil, then turn down the heat to a gentle simmer till the vegetables are cooked - 10 minutes or so.
 2. While the vegetables are cooking, make the tempering. Heat 1 tsp oil in a small pan and add the garlic, sliced onions and tomatoes.
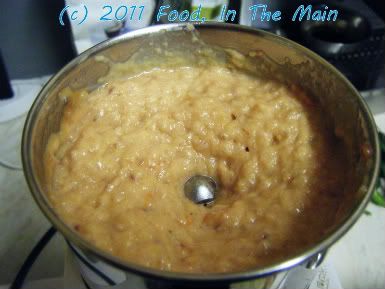
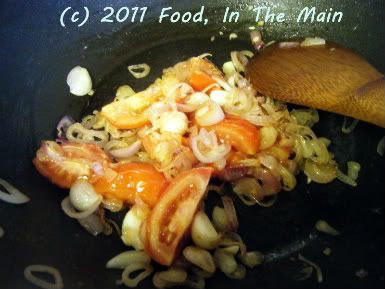 Cook till the onions are soft and the tomatoes are breaking down. Remove from the heat. Once they are cool, grind them to a smooth paste. Reserve.
 3. To make Ground Masala 2, heat a tsp of oil and add the ingredients, stir frying till the red chillies turn a darker shade and the dal and coriander seeds are aromatic and turn colour. If you are using pieces of coconut rather than grated, fry them for a little bit longer, but make sure not to burn any of the ingredients.
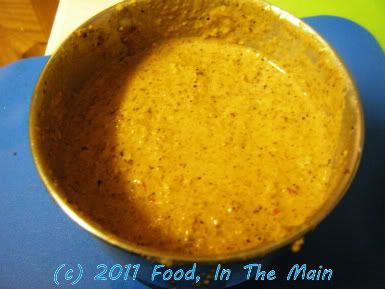
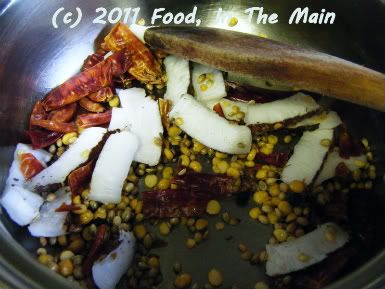 Remove from the heat and let cool, then grind to a smooth paste using a few tbsp of warm water as required. Reserve.
 4. Once the vegetables are cooked, stir the tomato-onion paste into the tamarind water and let it boil for 2 minutes.
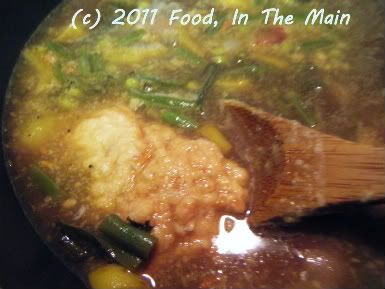 5. Now stir in the mashed cooked dal, making sure there are no lumps.
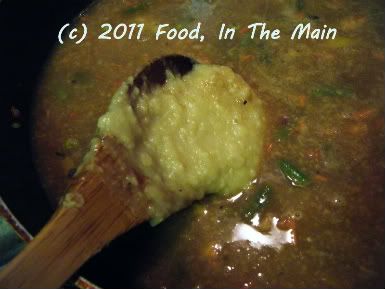 6. After a couple more minutes, add the ground coconut masala
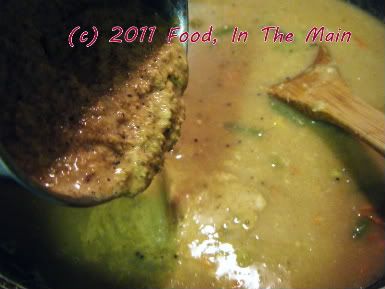 and salt to taste, then bring the sambar back to a gentle simmer. Let it cook for 4-5 minutes longer, till the contents are well homogenised.
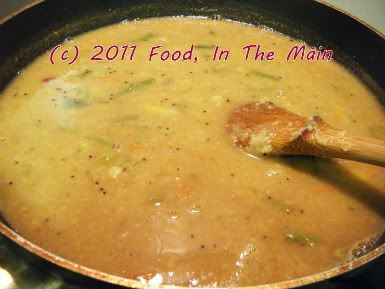 7. Garnish with the chopped coriander and serve hot with rice and any dry vegetable curry, or with dosas and idlis for an extra-special meal.
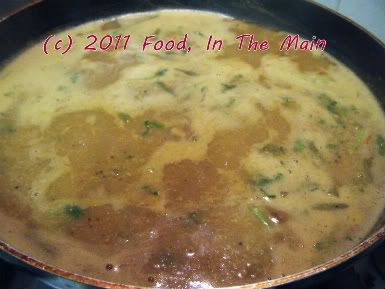 RECIPE: ARACHUVITTA VENGAYA SAMBAR - VERSION 2
Ingredients:
1 cup tuvar/toor dal/thuvaram paruppu, to make 2 cups well cooked and mashed dal
2 tsp tamarind paste dissolved in 5-6 cups water OR lime-sized ball of tamarind, pulp extracted to make 5-6 cups tamarind water
1/4 cup green beans sliced into 1" lengths
1/4 cup fresh peas
10-12 sambar onions or 1 medium onion sliced
1/4 cup capsicum, cut in 1/2" pieces
Ground masala 1
1 tsp oil
5-6 cloves garlic
10-15 sambar onions (preferably), to make 1/4 cup sliced
2 small tomatoes, cut into pieces
Ground masala 2
1 tsp oil
2 tsp coriander seeds
2 tsp kadala paruppu/chana dal
5-6 dried red chillies (or to taste)
1/2 tsp cumin seeds
1/2 tsp black peppercorns
3-4 tbsp fresh coconut (pieces or grated)
For tempering
1 tsp oil
1 htsp mustard seeds
a few fresh or frozen curry leaves
1/2 tsp turmeric powder
1/4 tsp asafoetida powder
3-4 tbsp coriander leaves chopped, for garnish
Method:
1. Heat 1 tsp oil and add the mustard seeds, curry leaves, turmeric powder and asafoetida powder. Let the mustard seeds pop, then add the green beans, peas, sambar onions and capsicum, sauteing for 3-4 minutes. Pour in the tamarind water and bring to a boil, then turn down the heat to a gentle simmer till the vegetables are cooked - 10 minutes or so.
2. While the vegetables are cooking, make the tempering. Heat 1 tsp oil in a small pan and add the garlic, sliced onions and tomatoes. Cook till the onions are soft and the tomatoes are breaking down. Remove from the heat. Once they are cool, grind them to a smooth paste. Reserve.
3. To make Ground Masala 2, heat a tsp of oil and add the ingredients, stir frying till the red chillies turn a darker shade and the dal and coriander seeds are aromatic and turn colour. If you are using pieces of coconut rather than grated, fry them for a little bit longer, but make sure not to burn any of the ingredients. Remove from the heat and let cool, then grind to a smooth paste using a few tbsp of warm water as required. Reserve.
4. Once the vegetables are cooked, stir the tomato-onion paste into the tamarind water and let it boil for 2 minutes.
5. Now stir in the mashed cooked dal, making sure there are no lumps.
6. After a couple more minutes, add the ground coconut masala and salt to taste, then bring the sambar back to a gentle simmer. Let it cook for 4-5 minutes longer, till the contents are well homogenised.
7. Garnish with the chopped coriander and serve hot with rice and any dry vegetable curry, or with dosas and idlis for an extra-special meal.
(Caution to my squeamish readers: Disgusting imagery alert! Read from Para 4 if you have a weak stomach.)
Although I quite like mushrooms, I’m not really crazy about them – I think it’s to do with their texture. I love mushroom soup, because it has the flavour without the texture. I absolutely cannot stand mushrooms in a cold curry because to me they taste like floppy rubber bands, and look like something that died but inexplicably didn’t get a decent burial.
Hm. After that appetizing description, I have no doubt that non-mushroom eaters will be rushing en masse to try the delights of cold cooked mushrooms for themselves. Oh well… I figure that people who dislike mushrooms will continue to dislike them (and perhaps agree with me) and those who love ‘em will continue to love ‘em no matter what I say. (It’s what I call a win-win situation for my writing skills.)
Anyway, it’s been a looooooong time since I cooked with mushrooms last, mainly because the low-fat yogurt I’d used curdled in the sauce to rather gross effect – in fact, binge-drinkers outside nightclubs on a Friday night could not have reproduced anything worse-looking. The effect, basically, was to make me shy away from putting yogurt anywhere near boiling sauce that contained mushrooms.
As I learnt from my disastrous episode with heating very low-fat yogurt, it’s best to use full-fat or regular yogurt, or at worst 2%, if you’re planning to cook with it. Otherwise, reheating leftovers could pose the same problems as heating while cooking.
The Greek yogurt I used was a branded one which I had been asked to try out, and although I’d been assured that the 2% yogurt would not curdle, I must admit I was a bit nervous when adding it to the hot sauce. But it was no lie, the yogurt didn’t “turn” and the finished dish was deeelish, thankfully dislodging the images that had attached themselves to my inner eye after the previous experience.
Recipe for: Mushroom peas yogurt curry
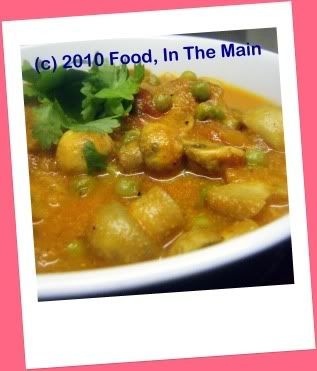 Ingredients:
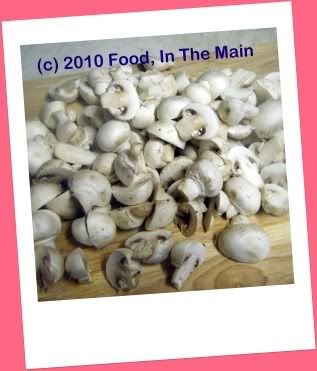 3 cups baby button mushrooms, halved
1 cup frozen petit pois
1/2 cup thick Greek yogurt (I used Total Greek yogurt)
3/4 tsp whole black peppercorns
1/2 tsp cumin seeds
1/2 tsp coriander seeds
1/2 cup thinly sliced onions
1/2 cup thick pureed tomatoes (I also used a few baby cherry tomatoes)
1 tsp grated ginger root
1/4 tsp garam masala
2 tsp oil
Salt to taste
Coriander leaves for garnish
Method:
1. Pound the black peppercorns, coriander seeds and cumin seeds to powder in a mortar and pestle.
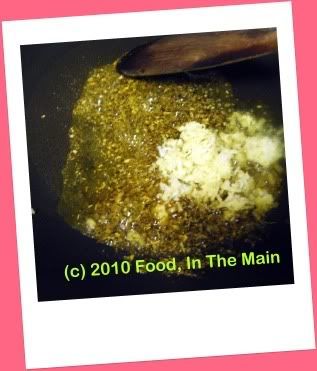
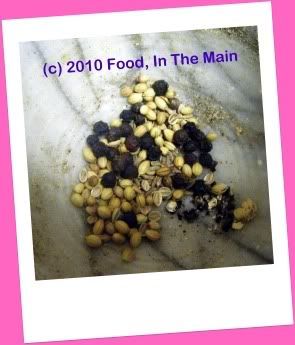 2. Heat the oil, add the masala powder and let fry for 15 seconds, then add the grated ginger.
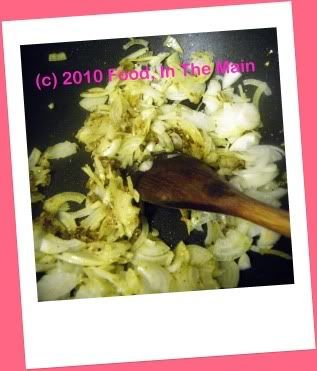
 3. Throw in the sliced onions and mix well. Skip Step 4 if you are not using cherry tomatoes.
 4. When the onions start softening, add the halved cherry tomatoes (if using).
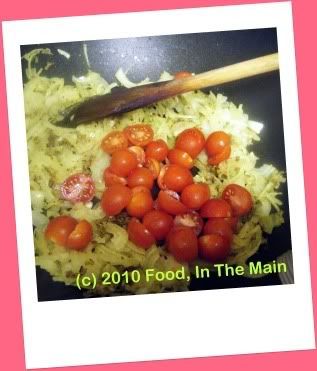 Cook until the tomatoes are mushy.
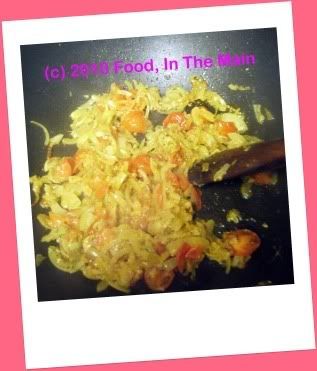 5. When the onions are soft, pour in the tomato puree and add the garam masala, then add 1/2 cup water.
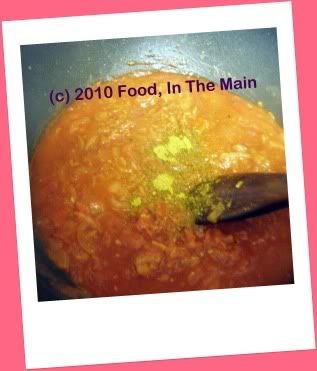 6. Let it simmer for 3-4 minutes, then add the mushrooms.
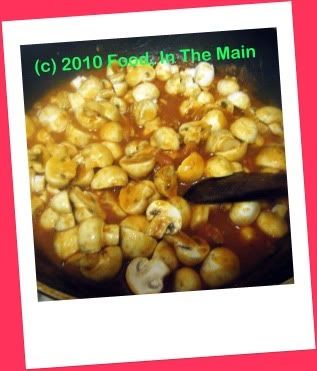 Let the mushrooms cook for 3-4 minutes until they release their liquid and shrink in size.
7. Now add the frozen petit pois and mix them in.
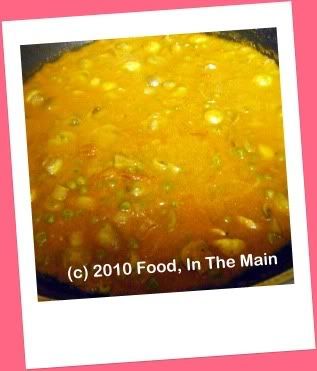
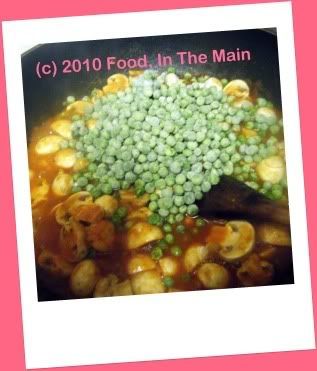 8. Cover the pan and let the mixture simmer for 5 minutes. If the gravy is watery, boil it on high for 2-3 minutes. When the gravy has reduced to your liking, add the Greek yogurt.
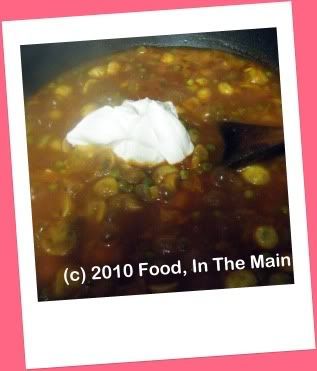 9. Add salt to taste and stir in the Greek yogurt. Let the curry simmer for another 3-4 minutes, then turn off the heat.
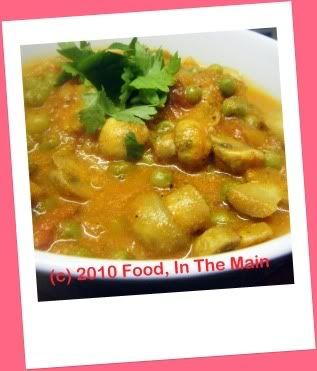
 10. Garnish with coriander leaves and serve hot with plain rice or as a side dish for pulao and biriyani.
 RECIPE: MUSHROOM PEAS YOGURT CURRY
Ingredients:
3 cups baby button mushrooms, halved
1 cup frozen petit pois
1/2 cup thick Greek yogurt (I used Total Greek yogurt)
3/4 tsp whole black peppercorns
1/2 tsp cumin seeds
1/2 tsp coriander seeds
1/2 cup thinly sliced onions
1/2 cup thick pureed tomatoes (I also used a few baby cherry tomatoes)
1 tsp grated ginger root
1/4 tsp garam masala
2 tsp oil
Salt to taste
Coriander leaves for garnish
Method:
1. Pound the black peppercorns, coriander seeds and cumin seeds to powder in a mortar and pestle.
2. Heat the oil, add the masala powder and let fry for 15 seconds, then add the grated ginger.
3. Throw in the sliced onions and mix well. Skip Step 4 if you are not using cherry tomatoes.
4. When the onions start softening, add the halved cherry tomatoes (if using). Cook until the tomatoes are mushy.
5. When the onions are soft, pour in the tomato puree and add the garam masala, then add 1/2 cup water.
6. Let it simmer for 3-4 minutes, then add the mushrooms. Let the mushrooms cook for 3-4 minutes until they release their liquid and shrink in size.
7. Now add the frozen petit pois and mix them in.
8. Cover the pan and let the mixture simmer for 5 minutes. If the gravy is watery, boil it on high for 2-3 minutes. When the gravy has reduced to your liking, add the Greek yogurt.
9. Add salt to taste and stir in the Greek yogurt. Let the curry simmer for another 3-4 minutes, then turn off the heat. Let the curry sit covered for 5 minutes.
10. Then garnish with coriander leaves and serve hot with plain rice or as a side dish for pulao and biriyani.
Occasionally I buy a bag of “monkey nuts” from the supermarket, because I love me some boiled goobers, I do. Aren’t both those weird terms for peanuts? Monkey nuts are sort of descriptive, therefore understandable - but goobers? I wonder who was the first person who picked up a bunch of the infinity-shaped shells, broke ‘em, took out the red nuts inside and thought “Oh yeah, I know those things! They’re goobers!”
The more you say the "goobers", the more absurd it sounds. But the more absurd it sounds, the more I want to say it, simply because it’s absurd. Eventually I have to stop, though, because people tend to look at me strangely and cross to the other side of the road. I don’t understand why they do that. And when I follow them to explain that I’m merely getting some harmless amusement out of a weird word, they walk away even faster. Strange phenomenon, that...
Anyway, I usually pressure-cook the unshelled peanuts. You can put them in salted water to cook them, but I mostly don’t bother because I like the natural taste of the cooked peanuts hot from the shells. They still taste good when they cool down, don’t get me wrong. I like adding the cold peanuts to salads for texture and protein.
For a change, I made dal with the boiled peanuts. I usually pressure-cook the raw peanuts along with the dal if I’m using tuvar or masoor, where it doesn’t matter if the longer cooking time mushes up the dal entirely. But if chana dal features in the recipe, the peanuts stay separate. Since I’ve used a mixture of masoor and chana dal in this recipe, I cooked the peanuts separately. The reason is that the peanuts take longer to cook than the dals. I like the masoor dal cooked to shapelessness and the chana dal to retain its shape, and putting the two together in a pressure cooker for 3 quick whistles cooks them both just the way I like them. Peanuts don’t figure in this equation, so they get cooked separately.
Now, if we’re all unanimous that I have belaboured that point quite thoroughly, I will move on to the recipe.
Recipe for: Boiled peanut dal
 Ingredients:
1/2 cup peanuts, boiled
1/2 cup masoor dal
1/4 cup chana dal
2 small onions, sliced thin
3-4 green chillies (or to taste), sliced in thin strips
1 tsp ginger-garlic paste
1/2 cup roasted tomatoes, mashed
1/2 tsp cumin powder
1 tsp coriander powder
1/4 tsp turmeric powder
1 tsp garam masala/Kitchen King masala
3 tsp oil
Salt to taste
Coriander leaves for garnish
Method:
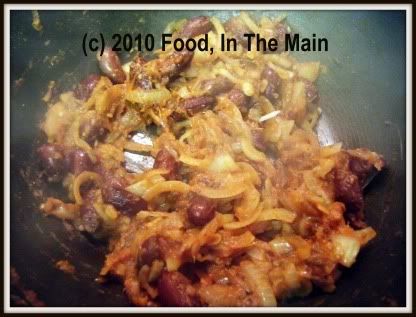
1. Heat the oil and add the ginger-garlic paste and green chillies. Fry this for 30 seconds, then add the cumin and coriander powder along with the sliced onions.
2. Fry the onions till they start turning soft and translucent. Now add the roasted tomatoes and mash it all with a spatula.
3. Stir-fry the masala for 2-3 minutes, then stir in the boiled peanuts.
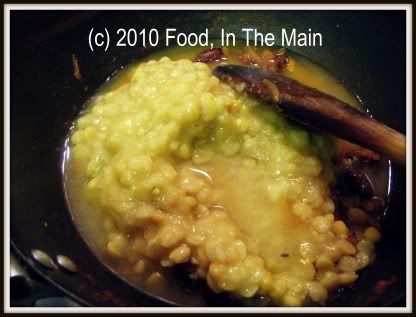
 4. Add the cooked dals and mix well. Add 1/3 cup water if the dal seems too thick.
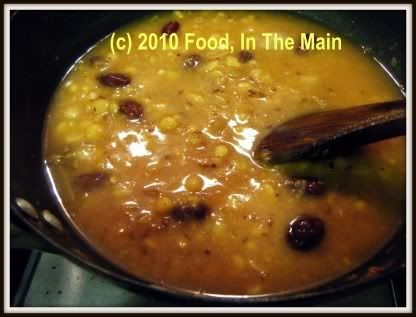
 5. Stir well once again, add salt to taste, and bring the dal to a gentle boil on medium heat.
6. Now sprinkle the garam masala, turn the heat to low and let the dal simmer for 6-7 minutes.
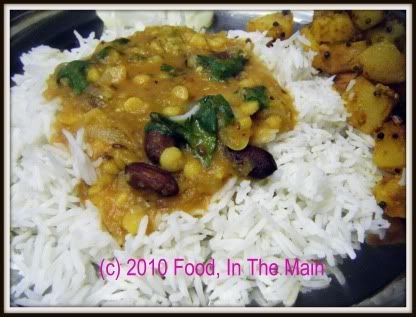
 Garnish with coriander leaves and serve hot with rice or rotis.
RECIPE: BOILED PEANUT DAL
Ingredients:
1/2 cup raw peanuts
1/2 cup masoor dal
1/4 cup chana dal
2 small onions, sliced thin
3-4 green chillies (or to taste), sliced in thin strips
1 tsp ginger-garlic paste
1/2 cup roasted tomatoes, mashed
1/2 tsp cumin powder
1 tsp coriander powder
1/4 tsp turmeric powder
1 tsp garam masala/Kitchen King masala
3 tsp oil
Salt to taste
Coriander leaves for garnish
Method:
1. Heat the oil and add the ginger-garlic paste and green chillies. Fry this for 30 seconds, then add the cumin and coriander powder along with the sliced onions.
2. Fry the onions till they start turning soft and translucent. Now add the roasted tomatoes and mash it all with a spatula.
3. Stir-fry the masala for 2-3 minutes, then stir in the boiled peanuts.
4. Add the cooked dals and mix well. Add 1/3 cup water if the dal seems too thick.
5. Stir well once again, add salt to taste, and bring the dal to a gentle boil on medium heat.
6. Now sprinkle the garam masala, turn the heat to low and let the dal simmer for 6-7 minutes. Garnish with coriander leaves and serve hot with rice or rotis.
My first ever experiment with cooking with redcurrants was redcurrant thokku. It was, despite my best efforts, still rather too sour to be used as a mix for cooked rice - according to the feedback received from my palate. The best I could do with the thokku was use it – sparingly - as a condiment with (any) dal and rice.
So, with the second of the three batches of redcurrants, as a further experiment, I made thokku with the addition of roasted tomatoes, which I usually have to hand in the fridge because roasted tomatoes make everything taste better. Need I add that “everything” is limited to whatever is made USING the roasted tomatoes? No, I thought not. (But I’ve added it anyway, in case there’s someone whose answer to that question was “Yes”. *heehee*)
This thokku was more readily palatable, with the sourness of the berries tempered by the sweetness of the roasted tomatoes. It’s as nice mixed with plain rice as any regular tomato thokku, and is also a good accompaniment for dosas, idlis and the like. The verdict from my palate, which while admitting that quality-wise this thokku is the much better improved version, also insists that it’s best had in smaller portions than regular tomato thokku. So there you have it – my palate has spoken.
Recipe for: Roasted tomato redcurrant thokku
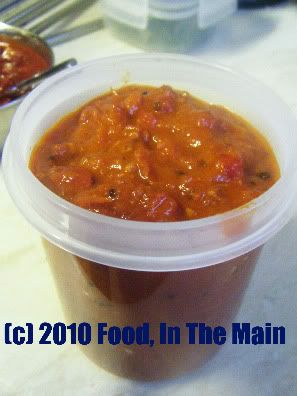
Ingredients
1-1/4 cups redcurrants, washed and drained
2 cups chopped roasted or regular tomatoes, pureed
2 tbsp oil
2-3 cloves garlic
1 tsp cumin-coriander powder
1 htsp brown/black mustard seeds
5-6 fresh curry leaves
1/4 tsp asafoetida powder
1/4 tsp turmeric powder
1 tsp sambar powder (optional)
1 tsp jaggery
1 tbsp lemon juice
3 tsp red chilli powder (or to taste)
1/4 tsp roasted fenugreek seed powder
salt to taste
Method:
1. Heat the oil, add the garlic, cumin-coriander powder, mustard seeds, curry leaves, asafoetida powder and turmeric powder. Stir for 30 seconds or so.
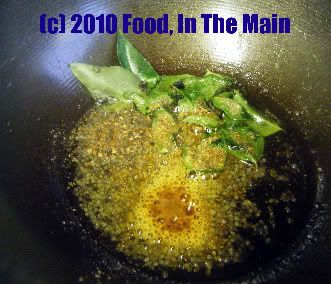
2. Add the redcurrants and red chilli powder. Mix well, cooking the berries on medium low flame until they are soft and squashed.
3. Now pour in the pureed tomatoes and mix again.
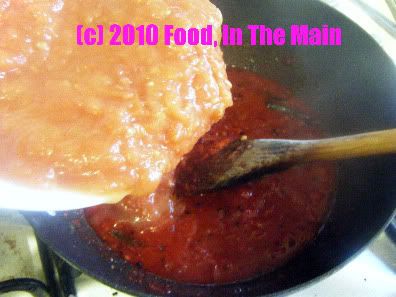
4. Bring the mixture to a boil, stirring every so often, then bring down the heat to low and let it bubble gently for 12-15 minutes, till it is thick. Add the sambar powder now, along with the jaggery and salt to taste.
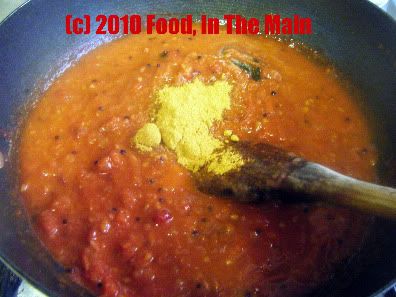
Stir well. If the thokku is a bit watery, let it cook for another 5 minutes on medium heart and leave the thokku on the heat for a couple of minutes longer. There should not be any liquid in the thokku, it should be quite thick. If you like a smooth texture, puree the thokku after it cools down.
Let the thokku cool down completely before transferring to a clean jar with a tight lid. The thokku stays good for 2-3 days at room temperature. Mix with plain rice to make tomato rice with a difference, or serve as a side dish with dosas, idli etc.RECIPE: ROASTED TOMATO REDCURRANT THOKKU
Ingredients:
1-1/4 cups redcurrants, washed and drained
2 cups chopped roasted or regular tomatoes, pureed
2 tbsp oil
2-3 cloves garlic
1 tsp cumin-coriander powder
1 htsp brown/black mustard seeds
5-6 fresh curry leaves
1/4 tsp asafoetida powder
1/4 tsp turmeric powder
1 tsp sambar powder (optional)
1 tsp jaggery
1 tbsp lemon juice
3 tsp red chilli powder (or to taste)
1/4 tsp roasted fenugreek seed powder
salt to taste
Method:
1. Heat the oil, add the garlic, cumin-coriander powder, mustard seeds, curry leaves, asafoetida powder and turmeric powder. Stir for 30 seconds or so.
2. Add the redcurrants and red chilli powder. Mix well, cooking the berries on medium low flame until they are soft and squashed.
3. Now pour in the pureed tomatoes and mix again.
4. Bring the mixture to a boil, stirring every so often, then bring down the heat to low and let it bubble gently for 12-15 minutes, till it is thick. Add the sambar powder now, along with the jaggery and salt to taste.
Stir well. If the thokku is a bit watery, let it cook for another 5 minutes on medium heart and leave the thokku on the heat for a couple of minutes longer. There should not be any liquid in the thokku, it should be quite thick. If you like a smoother texture, puree the thokku after it has cooled down.
Let the thokku cool down completely before transferring it to a clean jar with a tight lid. The thokku stays good for 2-3 days at room temperature. Mix with plain rice to make tomato rice with a difference, or serve as a side dish with dosas, idli etc.


