skip to main |
skip to sidebar
Yesterday I went to a supermarket called Morrisons, which I visit only occasionally. It turned out to be very exciting, in the event, because I saw display after display of vegetables and fruits that I'd only ever seen in "ethnic" markets before... bittergourd (albeit the Chinese kind), colocasia, bottlegourd, plantains, curry leaves and so on, along with even more exotic heirloom items - tomatoes and golden beets and pink beets.
To say that I was thrilled is an understatement - Pete was amused by my ecstatic squeaks of joy as I came upon more and more things, some of which I'd only seen in Singapore, or heard of from other food blogs. My first instinct was to buy everything in sight, but in the end I restricted myself to buying some heirloom tomatoes and beetroots (and some spiky looking rambutan. I just couldnt resist those fruits).
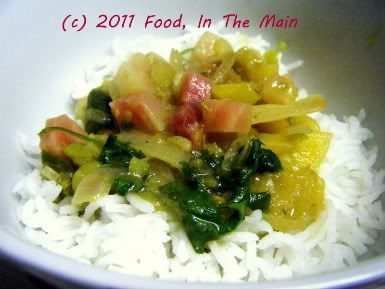
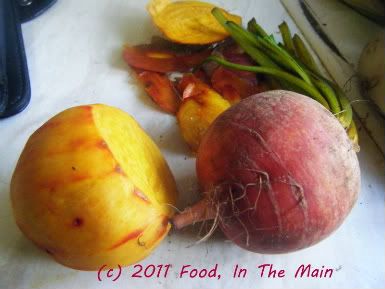 To get back to the beets, they looked absolutely lovely when they were peeled - a sort of golden orangey pink, all the shades of a glorious sunset. The intensity of the colours lessened somewhat when the beets were cooked, but they were still very apparent. I have to say I prefer these heirloom beets to the regular red ones because they don't turn everything they touch to a lurid pink. And they still taste like proper beets. They definitely made my dal look pretty in pastel shades! Don't you think so too?
PS. The rambutan? Pete and I ate them. They were beautifully sweet.
Recipe for: Golden beet and split-pea dal
  Ingredients:
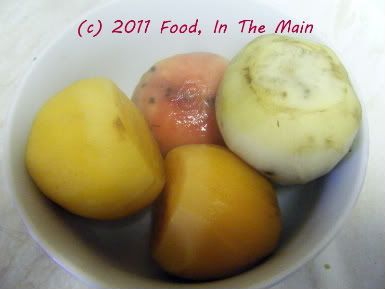
2-3 medium heirloom golden/pink beets, cooked
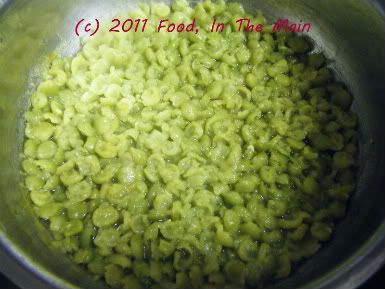
 1 cup green split-peas, cooked
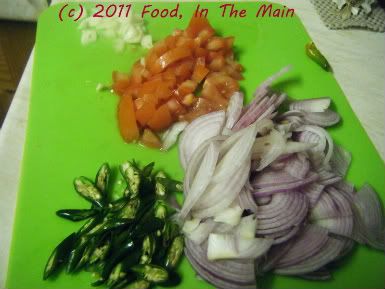
  2 medium red onions, sliced thinly
-5 fresh green chillies, sliced thinly
2 medium tomatoes, chopped
2-3 garlic cloves, sliced
 1 tsp cumin-coriander powder
1 tsp Kitchen King masala (or other garam masala)
1 tbsp oil
Fresh coriander leaves for garnish
Salt to taste
1-2 cups water
Method:
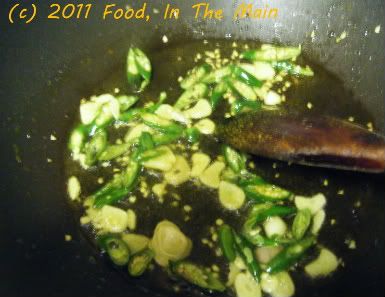
1. Heat the oil in a pan and add the chillies and garlic cloves. Fry for a minute or so, until it's fragrant, then add the cumin-coriander powder.
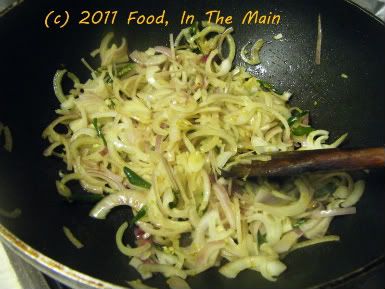
  2. Add the sliced onions and fry till they start to become soft
  then add the chopped tomatoes and fry till they're mushy and soft.
 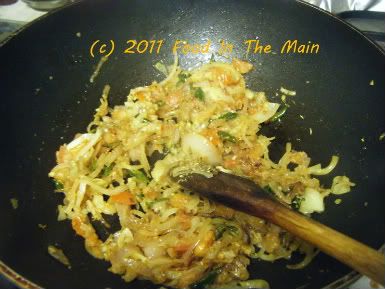 3. Add the chopped cooked beets and mix them in with the masala,
 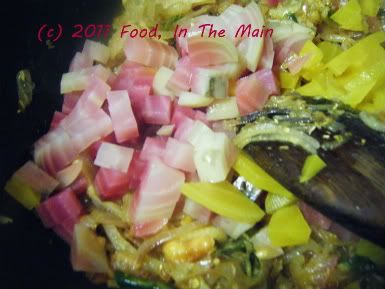 then add the cooked split-peas.
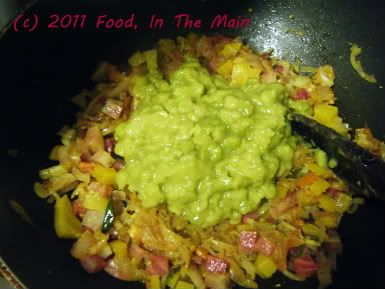 Pour in a cup or two of water, depending on how thick you want the dal, and stir well.
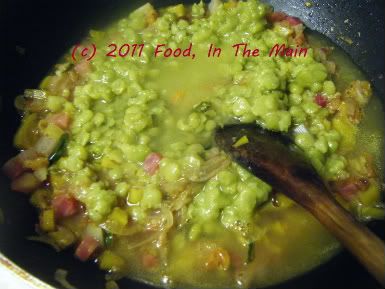 4. Bring to a gentle boil, then stir in the Kitchen King/garam masala. Add salt to taste.
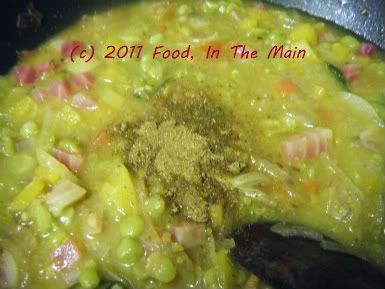 5. Turn off the heat after a couple of minutes, then stir in the chopped coriander.
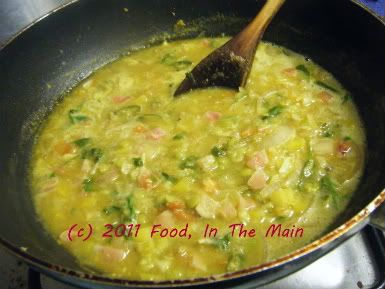 Serve hot over rice or with rotis.
RECIPE: GOLDEN BEET AND SPLIT-PEA DAL
Ingredients:
2-3 medium heirloom golden/pink beets, cooked
1 cup green split-peas, cooked
2 medium red onions, sliced thinly
4-5 fresh green chillies, sliced thinly
2 medium tomatoes, chopped
2-3 garlic cloves, sliced
1 tsp cumin-coriander powder
1 tsp Kitchen King masala (or other garam masala)
1 tbsp oil
Fresh coriander leaves for garnish
Salt to taste
1-2 cups water
Method:
1. Heat the oil in a pan and add the chillies and garlic cloves. Fry for a minute or so, until it's fragrant, then add the cumin-coriander powder.
2. Add the sliced onions and fry till they start to become soft then add the chopped tomatoes and fry till they're mushy and soft.
3. Add the chopped cooked beets and mix them in with the masala, then add the cooked split-peas. Pour in a cup or two of water, depending on how thick you want the dal, and stir well.
4. Bring to a gentle boil, then stir in the Kitchen King/garam masala. Add salt to taste.
5. Turn off the heat after a couple of minutes, then stir in the chopped coriander. Serve hot over rice or with rotis.
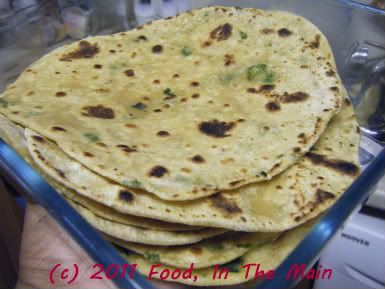
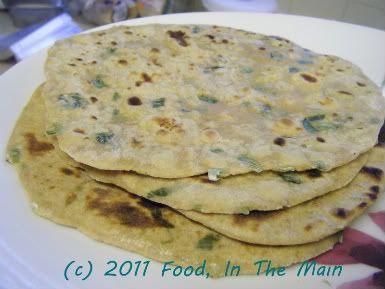
I like making chapaties with spring onions because you get their lovely delicate flavour and you can still have a romantic evening without worrying about allium breath. Not that I had a romantic evening when I made these yesterday – I was by myself because Pete’s in Scotland on work… or so he says. Personally I think it’s because he wanted to take the new love of his life – a Range Rover Sport Supercharged – on a long journey, hoping to find a Porsche or Ferrari en route that would be willing to take him on. Not that I was bothered. I mean, if you had a choice between spring onion chapaties and a road trip in a supercharged Range Rover, which would you go for, huh? The spring onion chapaties, right? Right?
*sighhhhhhhhhhhhhh* Still - the chapaties are very yummy. Just not as exciting as the road trip.
Recipe for: Spring onion and carom seed (ajwain/omam) chapaties
 Ingredients:
3 cups wholewheat flour
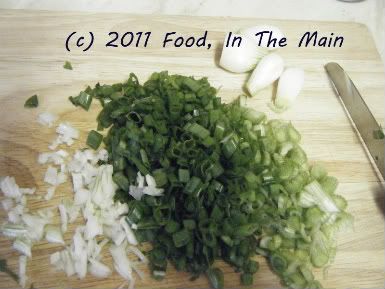
5-6 spring onions, green and white parts chopped fine
 1/2 tsp Kitchen King or other garam masala
1 tsp carom seeds/ajwain/omam
Milk as required
Salt to taste (optional)
Method:
1. Put the flour, garam masala and ajwain/carom seeds along with salt to taste in a large bowl and mix well.
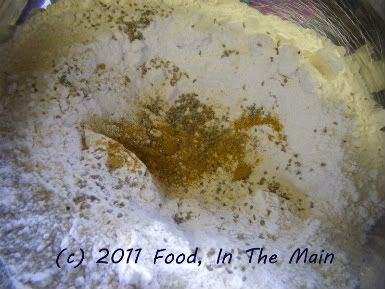 Then add the chopped spring onions and stir them in.
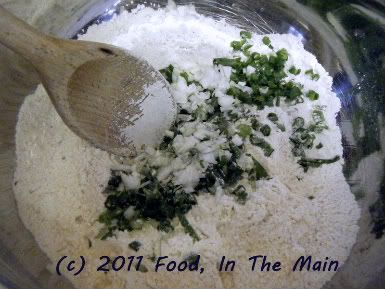 2. Make a well in the centre and add milk, a little at a time.
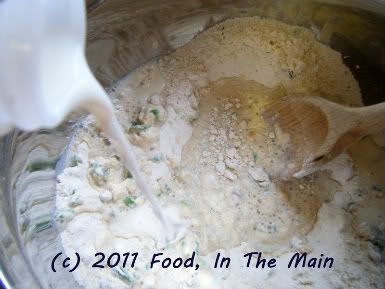 3. Stir the milk into the flour mix until it comes together, then knead into a pliable but fairly stiff dough.
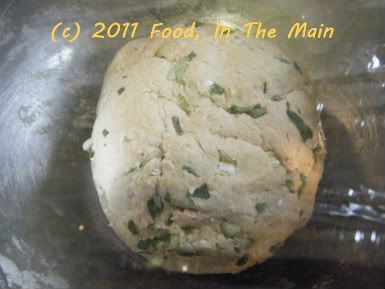 4. Pinch off lemon-sized pieces of dough and roll them into chapaties, using more flour to dust the chapaties and stop them sticking.
5. Cook the chapaties one by one on a tava, spraying each side with Pam, occasionally pressing down lightly with a spatula to let them acquire golden brown spots.
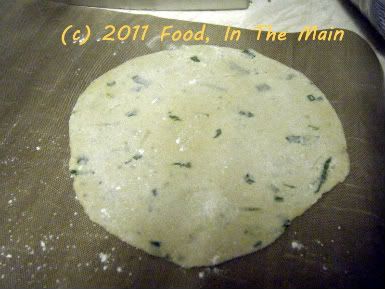 6. Keep warm in a cloth-lined tin and serve hot with dal and any curry.
 RECIPE: SPRING ONION AND AJWAIN/CAROM SEED/OMAM CHAPATIES
Ingredients:
3 cups wholewheat flour
5-6 spring onions, green and white parts chopped fine
1/2 tsp Kitchen King or other garam masala
1 tsp carom seeds/ajwain/omam
Milk as required
Salt to taste (optional)
Method:
1. Put the flour, garam masala and ajwain/carom seeds along with salt to taste in a large bowl and mix well.
Then add the chopped spring onions and stir them in.
2. Make a well in the centre and add milk, a little at a time.
3. Stir the milk into the flour mix until it comes together, then knead into a pliable but fairly stiff dough.
4. Pinch off lemon-sized pieces of dough and roll them into chapaties, using more flour to dust the chapaties and stop them sticking.
5. Cook the chapaties one by one on a tava, spraying each side with Pam, occasionally pressing down lightly with a spatula to let them acquire golden brown spots.
6. Keep warm in a cloth-lined tin and serve hot with dal and any curry.
Cassava/tapioca is one of the many root vegetables I like because of its association with the years that I lived in Dar-es-Salaam as a kid. I mainly knew it in its roasted or fried form, although I also liked its boiled and salted avatar. I’d seen recipes for cassava from fresh, but never any for dried cassava.
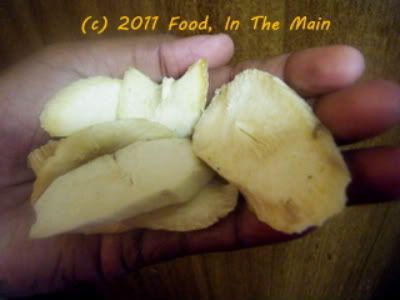
I'd come into possession of dried cassava pieces a few weeks ago, when I had tagged along with Pete to York (or somewhere thereabouts) where he was to meet someone to collect some esoteric sound equipment. The ride was itself worth it for the scenery, but even better was the fact that the meeting point turned out to be right next to a reasonably big “Indian” store – well, it was actually an Iraqi store, but it contained enough Indian/Mediterranean/Middle-Eastern stuff to make me happy.
I wanted to explore the shop, but Pete said his contact would be there imminently and the whole exchange wouldn’t take 5 minutes, so I resigned myself to a quick trip into the store to get some whole urad dal which I’d run out of. I saw plenty of interesting things in there to make me wish I could browse for a bit, but I didn’t hang around as we had a 3-hour drive back to Shrewsbury (and I was working the next day, so it was in my best interests to get back home as soon as possible) - and I was on a promise to my husband, in any case.
I believe that keeping my virtuous promise to Pete (“I’ll only be a minute at the shop, honest” - which he didn’t really believe since he knew what I was like) was instantly rewarded in the form of a serendipitous call from Pete’s contact to say that he was running late by about 30-40 minutes. I must have lit up the street with my delighted smile, because my husband gave me a grin and said “Oh all right, go on with you, only don’t buy up the shop will ya?”
I didn’t buy up the shop, but I did have a thoroughly enjoyable time browsing every aisle and its contents, trying to figure out what the items were (made somewhat difficult because sometimes I didn’t know the script or the language), and finding things to buy that I didn’t know I wanted to try until I saw them. Among other, more mundane things, I bought two (to me) exotic items - a bag of dried cassava/tapioca pieces, and something called “mograbiyeh”, made of semolina (which Google revealed later was like couscous, except the grains were the size of peppercorns).
I reserved the mograbiyeh for later and decided to experiment with the dried cassava/tapioca first. To be honest, I didn’t have the first idea what to make with it, but I figured Step 1 would be to rehydrate them. So I turned out a third of the bag into a bowl of water and let it soak overnight. I still didn’t know what Step 2 ought to be, and Google didn’t really suggest any recipes specifically using dried cassava.
I decided to bake the rehydrated pieces (which, I assumed, had been originally cooked and then dried) in the oven, because I really do love cassava chips and I had my Dar-es-Salaam memories in mind. Sadly, they mostly turned into baked wood chips and had to be consigned to the bin, my teeth not being what they once were.
My second experiment was to soak and then deep-fry the pieces to see if that would make better chips. The experiment was a success in a way, because the end result was definitely better wood chips; but in terms of edibility, not so much. My teeth continued to be not what they once were.
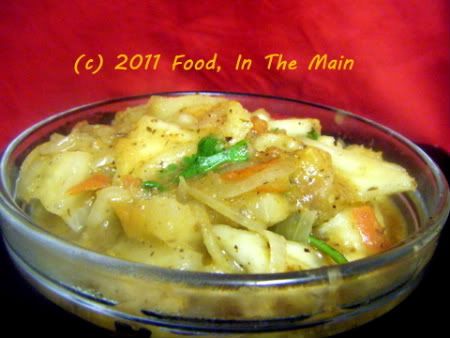
Now there was only the final third of the bag left to play around with, and I decided that the only thing to do now was improvise a curry. So I did. And here it is in recipe form, in all its successful glory.
Recipe for: Cassava/tapioca in flaxseed masala
 Ingredients:
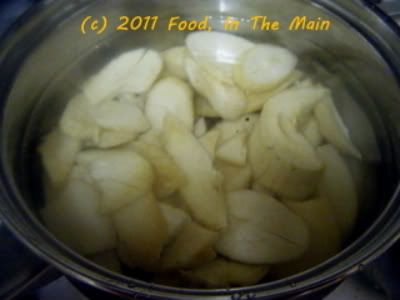 1 cup dried cassava/tapioca pieces, soaked in water for 3-4 hours
1 tbsp flaxseeds
6-7 black peppercorns
1/2 tsp cumin seeds
1/2 tsp coriander seeds
2 cloves garlic
4-5 dry red chillies (or to taste)
1/2 tsp tamarind paste
2 medium onions, sliced thin
1 cup chopped tomatoes
1/2 tsp garam masala (I used Kitchen King)
1 tbsp oil
Salt to taste
Coriander leaves to garnish
Method:
1. Break up the soaked cassava/tapioca pieces into more or less even bits. Boil them in water until they are cooked. They should be very soft (easily pierced with a knife tip) but not mushy.
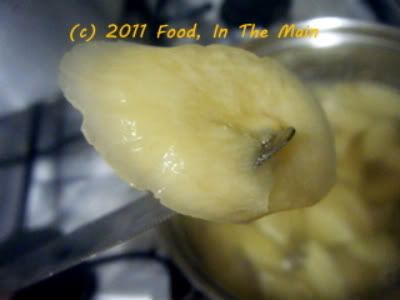 Drain and reserve.
2. Grind the flaxseeds, peppercorns, cumin seeds, coriander seeds, garlic and red chillies to a fairly smooth paste, without adding water.
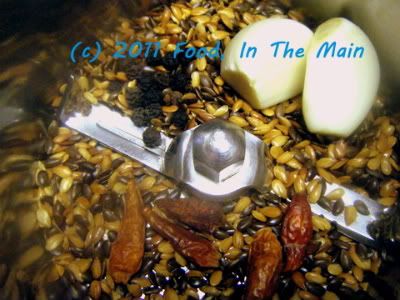 3. Heat the oil in a pan and fry and ground masala paste for 1 minute, stirring briskly.
4. Add the sliced onions and fry for 3-4 minutes, or until they start to turn translucent.
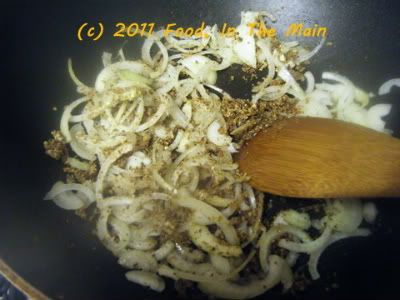 5. Now add the tomatoes and stir them in.
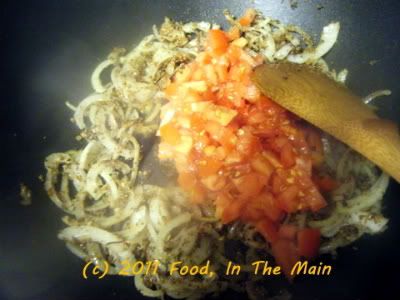 Let them cook down with the onions until mushy.
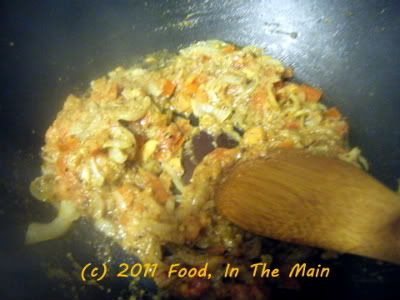 6. Next, add the cooked cassava/tapioca pieces
 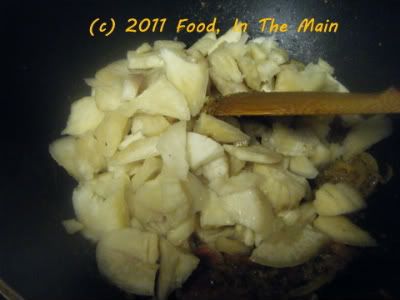 and mix them with the tomato-onion masala.
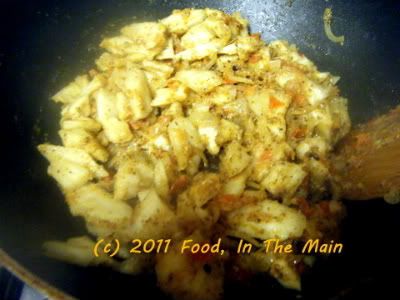 7. Dissolve the tamarind paste in 1-1/2 cups water and pour it in. Stir well and add salt to taste.
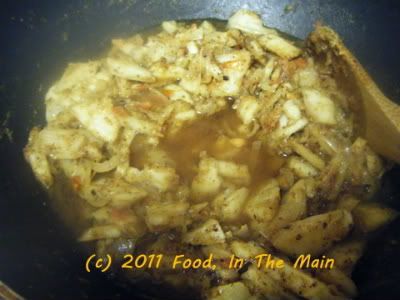 8. Bring to a gentle boil, then turn down the heat and let the curry simmer for 5 minutes while the gravy thickens.
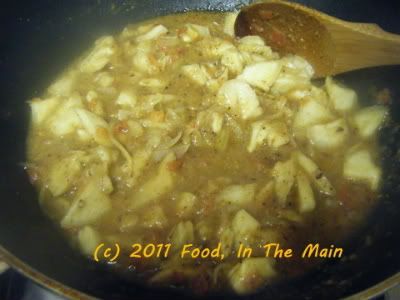 Garnish with coriander leaves before serving hot with cooked millet or quinoa. Can also be eaten with chapaties/rotis.
RECIPE: CASSAVA/TAPIOCA IN FLAXSEED MASALA
Ingredients:
1 cup dried cassava pieces, soaked in water for 3-4 hours
1 tbsp flaxseeds
6-7 black peppercorns
1/2 tsp cumin seeds
1/2 tsp coriander seeds
2 cloves garlic
4-5 dry red chillies (or to taste)
1/2 tsp tamarind paste
2 medium onions, sliced thin
1 cup chopped tomatoes
1/2 tsp garam masala (I used Kitchen King)
1 tbsp oil
Salt to taste
Coriander leaves to garnish
Method:
1. Break up the soaked cassava/tapioca pieces into more or less even bits. Boil them in water until they are cooked. They should be very soft (easily pierced with a knife tip) but not mushy. Drain and reserve.
2. Grind the flaxseeds, peppercorns, cumin seeds, coriander seeds, garlic and red chillies to a fairly smooth paste, without adding water.
3. Heat the oil in a pan and fry and ground masala paste for 1 minute, stirring briskly.
4. Add the sliced onions and fry for 3-4 minutes, or until they start to turn translucent.
5. Now add the tomatoes and stir them in. Let them cook down with the onions until mushy.
6. Next, add the cooked cassava/tapioca pieces and mix them with the tomato-onion masala.
7. Dissolve the tamarind paste in 1-1/2 cups water and pour it in. Stir well and add salt to taste.
8. Bring to a gentle boil, then turn down the heat and let the curry simmer for 5 minutes. Garnish with coriander leaves before serving hot with cooked millet or quinoa. Can also be eaten with chapaties/rotis.
One of the things I do very well is daydream. The more important it is for me to pay attention, the easier I find it to slip into my own world – not to mention, the daydream is correspondingly detailed. One recurring bare-bones daydream is to have a cook at home. The actual details vary depending on my prevailing mood, but on different occasions I’ve day-dreamed about having a live-in cook (only briefly), someone who would make what I wanted the way I wanted it made, someone who would be a trained nutritionist and make healthy but superbly tasty dishes… the permutations are many and varied.
But the one daydream that keeps occurring with monotonous regularity is the one where I have a cook who does the necessary prepwork and all the other jobs that I find boring – peeling and cutting vegetables, searching out spices, beating eggs, chopping nuts, shallow-frying things on low heat, stirring milk, whatever. After which, he (or she – I’m an equal-opportunity day-dreamer) clears the workspace, throws away the rubbish and gets everything ready for me.
Then, when all is perfectly laid out in the kitchen, I sail in and set about cooking my chosen recipe. And, naturally, when I am done, my cook does the washing up and drying and putting away of all the utensils, leaving my kitchen in perfect order for the next time…
*sighhhhh*
A sous chef is what I need, come to think of it. Someone who will never aspire to chefdom or doing anything more interesting than the prepwork and the donkey work.
*sighhhhhhhhhhhhhhhhhhhhhhhhhhhhh*
Anyway, here’s the recipe for the patties. Believe me when I say that I felt the lack of a sous chef very, very, very deeply indeed… but still, the takes-you-forever-to-cook-and-just-seconds-for-someone-to-eat patties are worth the annoying bitwork. In other words, they taste good enough to eat.
Recipe for: Vegetable chickpea patties
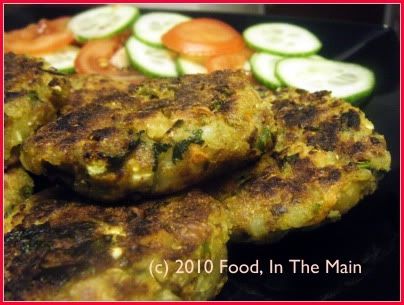 Ingredients:
1/2 cup carrots, grated
1/2 cup potatoes, chopped
1/4 cup green beans, sliced into thin rounds
1/4 cup green pepper (capsicum), chopped
1/4 cup onions, chopped
2 cups cooked potatoes, mashed coarsely
1 tin (1-1/4 cups) cooked chickpeas, rinsed and drained
1 cup wholewheat breadcrumbs
1/4 cup coriander leaves, chopped
1 tsp Kitchen King masala (or garam masala)
1/4 tsp turmeric powder
1 tsp red chilli powder (or to taste)
1 tsp coriander seeds, powdered
1/2 tsp cumin seed powder
salt to taste
2 tbsp oil
Pam spray or more oil to shallow-fry
Method:
1. Place the chopped potatoes, carrots and green beans in a microwave-safe bowl and microwave covered for 5 minutes with 3-4 tbsp water, till half-cooked.
2. Add the mashed potatoes and the spices and mix well.
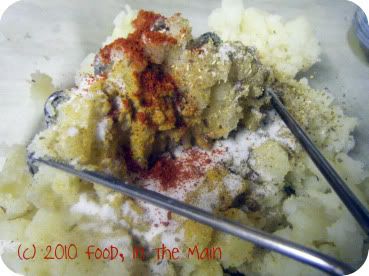 3. Then add the chickpeas and chopped onions.
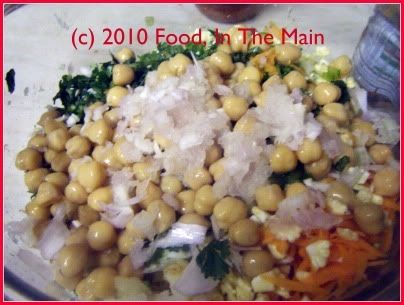 Crush the chickpeas coarsely with a masher or the back of a sturdy spoon.
4. Add the breadcrumbs and mix in.
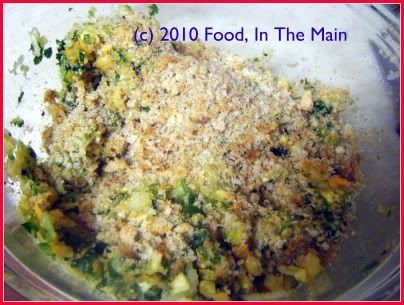 5. Heat the 2 tbsp oil and pour it on the mixture. Add salt to taste along with the coriander leaves, and mix thoroughly.
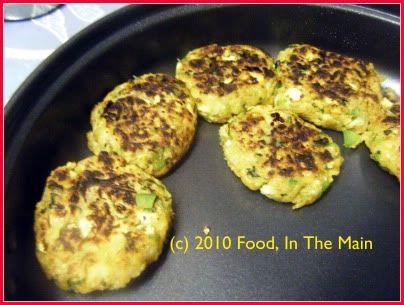
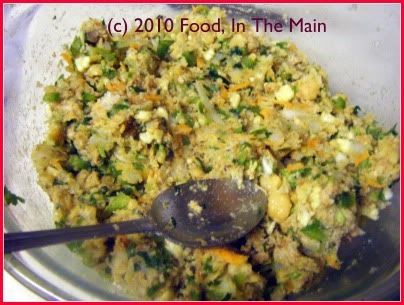 6. Now form small patties from the mixture and shallow-fry them in a non-stick pan (without crowding them) over medium-high heat.
 7. Brush the top surface of the patties with some oil (or spray some Pam) and turn the patties over carefully when golden brown on the underside.
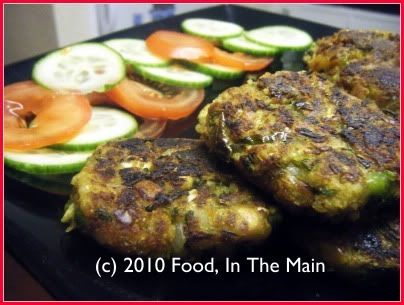
 8. Serve warm with a salad for a light meal, or with ketchup for a snack.
 RECIPE: VEGETABLE CHICKPEA PATTIES
Ingredients:
1/2 cup carrots, grated
1/2 cup potatoes, chopped
1/4 cup green beans, sliced into thin rounds
1/4 cup green pepper (capsicum), chopped
1/4 cup onions, chopped
2 cups cooked potatoes, mashed coarsely
1 tin (1-1/4 cups) cooked chickpeas, rinsed and drained
1 cup wholewheat breadcrumbs
1/4 cup coriander leaves, chopped
1 tsp Kitchen King masala (or garam masala)
1/4 tsp turmeric powder
1 tsp red chilli powder (or to taste)
1 tsp coriander seeds, powdered
1/2 tsp cumin seed powder
salt to taste
2 tbsp oil
Pam spray or more oil to shallow-fry
Method:
1. Place the chopped potatoes, carrots and green beans in a microwave-safe bowl and microwave covered for 5 minutes with 3-4 tbsp water, till half-cooked.
2. Add the mashed potatoes and the spices and mix well.
3. Then add the chickpeas and chopped onions. Crush the chickpeas coarsely with a masher or the back of a sturdy spoon.
4. Add the breadcrumbs and mix in.
5. Heat the 2 tbsp oil and pour it on the mixture. Add salt to taste along with the coriander leaves, and mix thoroughly.
6. Now form small patties from the mixture and shallow-fry them in a non-stick pan (without crowding them) over medium-high heat.
7. Brush the top surface of the patties with some oil (or spray some Pam) and turn the patties over carefully when golden brown on the underside.
8. Serve warm with a salad for a light meal, or with ketchup for a snack.
Occasionally I buy a bag of “monkey nuts” from the supermarket, because I love me some boiled goobers, I do. Aren’t both those weird terms for peanuts? Monkey nuts are sort of descriptive, therefore understandable - but goobers? I wonder who was the first person who picked up a bunch of the infinity-shaped shells, broke ‘em, took out the red nuts inside and thought “Oh yeah, I know those things! They’re goobers!”
The more you say the "goobers", the more absurd it sounds. But the more absurd it sounds, the more I want to say it, simply because it’s absurd. Eventually I have to stop, though, because people tend to look at me strangely and cross to the other side of the road. I don’t understand why they do that. And when I follow them to explain that I’m merely getting some harmless amusement out of a weird word, they walk away even faster. Strange phenomenon, that...
Anyway, I usually pressure-cook the unshelled peanuts. You can put them in salted water to cook them, but I mostly don’t bother because I like the natural taste of the cooked peanuts hot from the shells. They still taste good when they cool down, don’t get me wrong. I like adding the cold peanuts to salads for texture and protein.
For a change, I made dal with the boiled peanuts. I usually pressure-cook the raw peanuts along with the dal if I’m using tuvar or masoor, where it doesn’t matter if the longer cooking time mushes up the dal entirely. But if chana dal features in the recipe, the peanuts stay separate. Since I’ve used a mixture of masoor and chana dal in this recipe, I cooked the peanuts separately. The reason is that the peanuts take longer to cook than the dals. I like the masoor dal cooked to shapelessness and the chana dal to retain its shape, and putting the two together in a pressure cooker for 3 quick whistles cooks them both just the way I like them. Peanuts don’t figure in this equation, so they get cooked separately.
Now, if we’re all unanimous that I have belaboured that point quite thoroughly, I will move on to the recipe.
Recipe for: Boiled peanut dal
 Ingredients:
1/2 cup peanuts, boiled
1/2 cup masoor dal
1/4 cup chana dal
2 small onions, sliced thin
3-4 green chillies (or to taste), sliced in thin strips
1 tsp ginger-garlic paste
1/2 cup roasted tomatoes, mashed
1/2 tsp cumin powder
1 tsp coriander powder
1/4 tsp turmeric powder
1 tsp garam masala/Kitchen King masala
3 tsp oil
Salt to taste
Coriander leaves for garnish
Method:
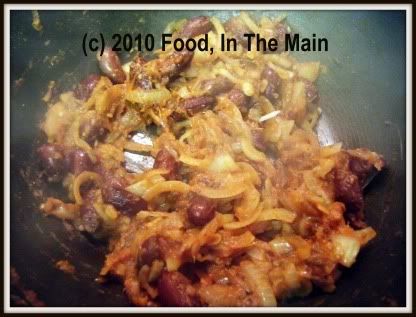
1. Heat the oil and add the ginger-garlic paste and green chillies. Fry this for 30 seconds, then add the cumin and coriander powder along with the sliced onions.
2. Fry the onions till they start turning soft and translucent. Now add the roasted tomatoes and mash it all with a spatula.
3. Stir-fry the masala for 2-3 minutes, then stir in the boiled peanuts.
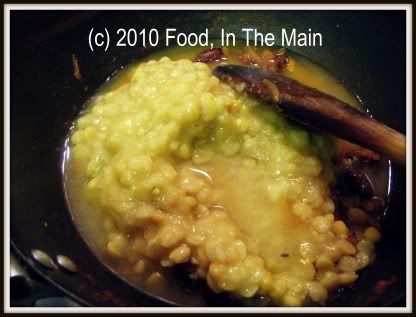
 4. Add the cooked dals and mix well. Add 1/3 cup water if the dal seems too thick.
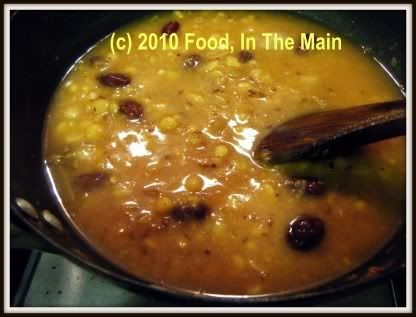
 5. Stir well once again, add salt to taste, and bring the dal to a gentle boil on medium heat.
6. Now sprinkle the garam masala, turn the heat to low and let the dal simmer for 6-7 minutes.
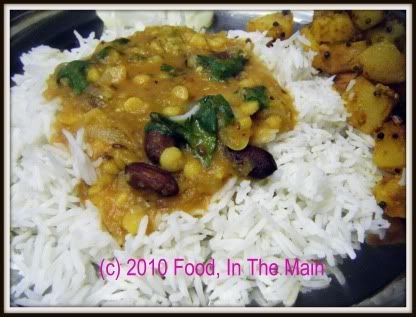
 Garnish with coriander leaves and serve hot with rice or rotis.
RECIPE: BOILED PEANUT DAL
Ingredients:
1/2 cup raw peanuts
1/2 cup masoor dal
1/4 cup chana dal
2 small onions, sliced thin
3-4 green chillies (or to taste), sliced in thin strips
1 tsp ginger-garlic paste
1/2 cup roasted tomatoes, mashed
1/2 tsp cumin powder
1 tsp coriander powder
1/4 tsp turmeric powder
1 tsp garam masala/Kitchen King masala
3 tsp oil
Salt to taste
Coriander leaves for garnish
Method:
1. Heat the oil and add the ginger-garlic paste and green chillies. Fry this for 30 seconds, then add the cumin and coriander powder along with the sliced onions.
2. Fry the onions till they start turning soft and translucent. Now add the roasted tomatoes and mash it all with a spatula.
3. Stir-fry the masala for 2-3 minutes, then stir in the boiled peanuts.
4. Add the cooked dals and mix well. Add 1/3 cup water if the dal seems too thick.
5. Stir well once again, add salt to taste, and bring the dal to a gentle boil on medium heat.
6. Now sprinkle the garam masala, turn the heat to low and let the dal simmer for 6-7 minutes. Garnish with coriander leaves and serve hot with rice or rotis.
Take-out. Take-away. Call it what you will, all it means is that you're going to be eating something cooked in some pokey little kitchen by Bangladeshi cooks (most likely if it's a takeaway in the Midlands) who labour under the misapprehension that a bucketload of oil is a good substitute for taste and flavour. I might be doing a disservice to the rare takeaway place which doesn’t follow this rule of thumb, but on the whole, my statement holds true, sadly enough.
I don’t see why takeaways shouldn’t be able to do good, healthy, wholesome food, considering they have at hand all the resources they need. Various friends have asked me – probably only in jest – why I don’t start my own takeaway, but the thought just doesn’t appeal. I do like cooking, but if I had to do it all day every day, whether from home or a business premises, I would come to hate it very quickly. (I admit that about the only activity - if you can call it that - I could or would do all day, every day, all the time would be reading... but nobody’s paying me to read books just for personal enjoyment, more’s the pity.)
Anyway, since I had a couple of packets of okra from India (via Tesco, of course - "eat local" doesn't even come into the question!) to use up and Pete likes okra, I decided to make a restaurant-style side dish – with plenty of green chillies (fried separately) for myself, and with no chillies for him. Both versions were just so simple but tasty. To harp away on the same topic, I honestly don’t understand how the takeaway chefs could oilify (new word there) a basic dish like this and ruin it. Shame that most takeaway eaters will never realise what they're missing in the way of authentic fare. If they only knew...
Recipe for: Take-away style bhindi (okra) bhaji
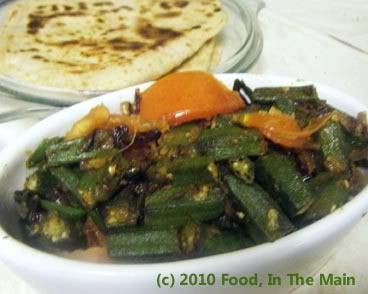
Ingredients:
500 gm okra (about 4 cups, sliced 1" long)2 small onions2 small tomatoes1 large garlic clove, sliced into thin matchsticks3-4 green chillies, sliced diagonally into strips2 tsp cumin seeds1 tsp coriander powder1/2 tsp turmeric powder1 tsp Kitchen King masala (or use garam masala)Salt to taste2 tsp oil
Method:
1. Slice the tomatoes into 1/2-cm thick wedges and slice up the onions thinly.
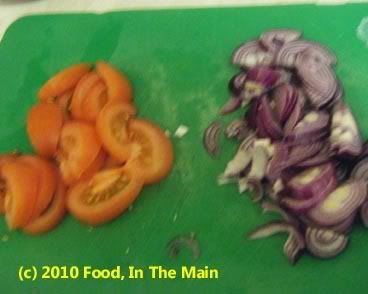
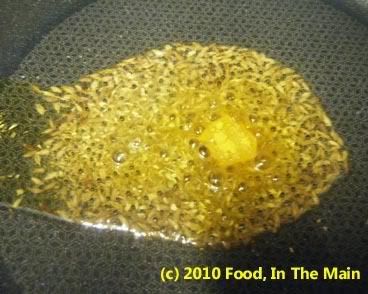
2. Heat the oil in a pan and add the cumin seeds and turmeric powder; fry for 20 seconds. They should become a darker shade of brown.
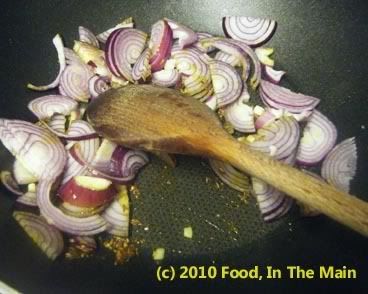
3. Add the sliced onions and garlic, and green chilli strips (if using), and stir-fry till they begin to turn translucent, about 5 minutes.
4. Now add the okra and stir it in. Let it cook on medium-high heat, stirring once in a while.

5. Once the okra is cooked and the onions are nicely browned, add the tomato wedges.
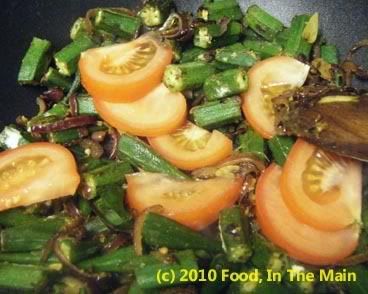
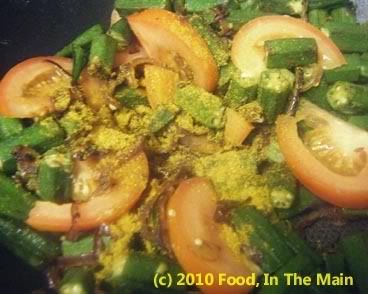
6. Stir-fry on high for 2-3 minutes or till the tomatoes JUST begin to soften. They should not get mushy. Add the Kitchen King/garam masala and salt to taste, and mix it in. Cook the okra for another couple of minutes. Serve warm with chapaties and any dal.


 2 medium red onions, sliced thinly


