Showing posts with label peanuts. Show all posts

Thursday, March 29, 2012

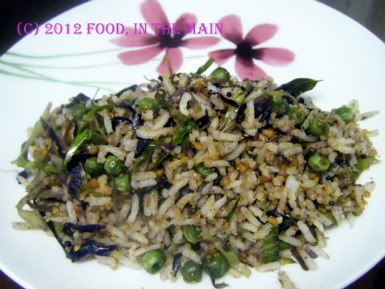
Cabbage and peas rice

Photobucket
Cabbage is one of my favourite vegetables, pretty much no matter how it’s cooked – as long as that doesn’t mean cooking it to a stinky sulphur-y mush. I don’t care much for white cabbage, because (in my opinion) it’s stinkier and sulphur-ier than green cabbage. (It might not be any more or less smelly, you understand - I’m just quoting the opinion put forward by my nose). Purple cabbage is kinda like white cabbage except purple… and because it’s a pretty colour for cabbage, I don’t shun it.

But the cabbage I use the most is a pointy, tear-drop shaped green cabbage marketed under the name “sweetheart cabbage” in the supermarkets here. That said, I quite like the round green kind too. But sweetheart by name, sweetheart by taste – no, ok, that simile doesn’t work. There’s a good reason I’m not a world-famous writer, I suppose. 

Anyway, those are the three types of cabbage available - unless you count the round green cabbage as a different variety from the pointy green one… in which case, the cabbage count goes from three to four. I’m sure that, like potatoes, there are hundreds of different varieties of cabbage, all of which have individual names, again like potatoes. I probably just don’t know about them.


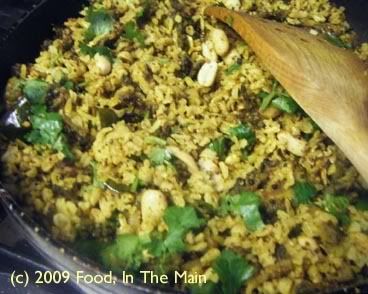
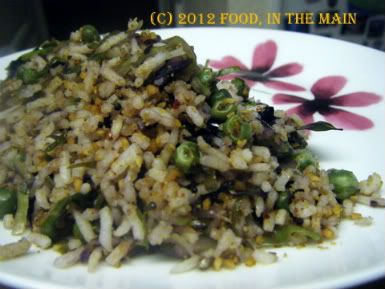
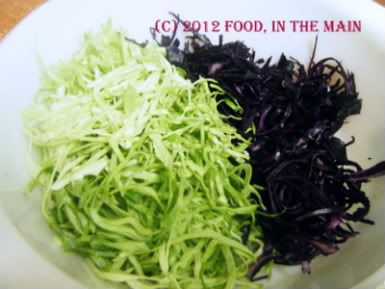
So, coming back to what I do know (a much shorter topic, haha), which is that I love cabbage, what I made with a combination of green and purple cabbage was a luvverly rice dish. With added peas. There's hardly anything that doesn't benefit from the addition of peas, unless it's a cake. Although I bet someone somewhere has tried a green peas cake and written about it on their blog... Ok, I'm off to google for green peas cake now, but you please feel free to read my recipe below and try it out, because it's really, really tasty - especially if you're a cabbage enthusiast like me.


Recipe forCabbage and peas rice

Photobucket
Ingredients:


2 cups cooked basmati rice
3 cups cabbage, finely shredded
Photobucket
1/2 cup peas (fresh or frozen)
1 tsp oil
2 tsp mustard seeds
1/4 tsp asafoetida powder
a few fresh/frozen curry leaves
Salt to taste
Peanuts and chopped coriander leaves for garnish (optional)


For the masala powder:


1/2 tsp oil
1 htsp urad dal
1 htsp tuvar dal
1 htsp chana dal
1 htsp coriander seeds
4-5 dried red chillies (or to taste)
2 tbsp shredded fresh or dry coconut


Method:


1. Heat 1/2 tsp oil in a large pan. Photobucket
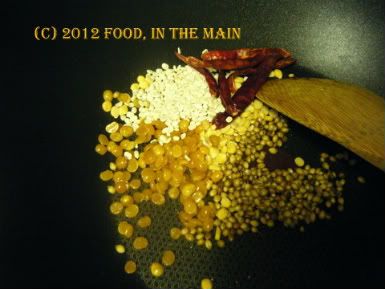
Fry the masala powder ingredients (bar the coconut) over a low flame till the dals turn a pale golden brown, and the chillies are a shiny dark red. Remove to a plate and let cool.
2. Grind the cooled roasted dals along with the coconut to a fairly smooth powder.Photobucket
Reserve.
Photobucket
3. Heat the remaining oil in the same pan and add the asafoetida powder, curry leaves and mustard seeds. Cover the pan and let the seeds pop.
Photobucket
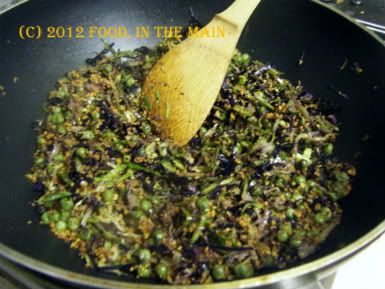
4. Now add the shredded cabbage and peas and stir well. Photobucket
Cover the pan tightly and let the vegetables cook on a very low heat for about 7 minutes, till the cabbage is cooked but still retains some bite.

Photobucket
5. Once the cabbage is done, add the ground coconut masala powder and salt to taste, and mix well.
Photobucket


Photobucket
6. Then add the rice and mix it in carefully until it is distributed evenly. Photobucket
Add the chopped coriander (if using) and scatter the roasted peanuts over. Serve hot with cucumber raita and papad or crisps on the side.


RECIPE: CABBAGE AND PEAS RICE


Ingredients:
2 cups cooked basmati rice
3 cups cabbage, finely shredded
1/2 cup peas (fresh or frozen)
1 tsp oil
2 tsp mustard seeds
1/4 tsp asafoetida powder
a few fresh/frozen curry
Salt to taste
Peanuts and chopped coriander leaves for garnish (optional)


For the masala powder:
1/2 tsp oil
1 htsp urad dal
1 htsp tuvar dal
1 htsp chana dal
1 htsp coriander seeds
4-5 dried red chillies (or to taste)
2 tbsp shredded fresh or dry coconut


Method:
1. Heat 1/2 tsp oil in a large pan and fry the masala powder ingredients (bar the coconut) over a low flame till the dals turn a pale golden brown, and the chillies are a shiny dark red. Remove to a plate and let cool.
2. Grind the cooled roasted dals along with the coconut to a fairly smooth powder. Reserve.
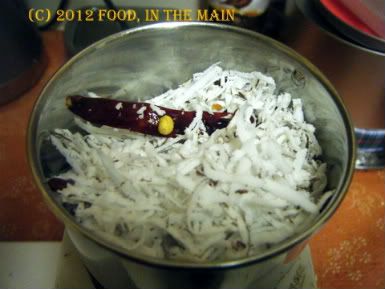
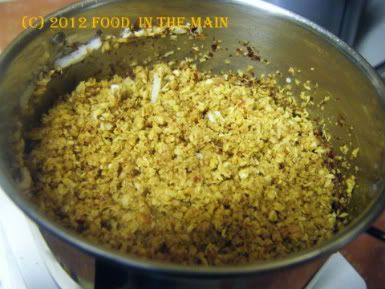
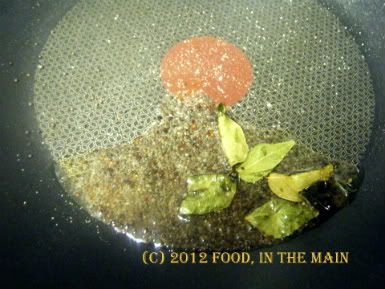
3. Heat the remaining oil in the same pan and add the asafoetida powder, curry leaves and mustard seeds. Cover the pan and let the seeds pop.
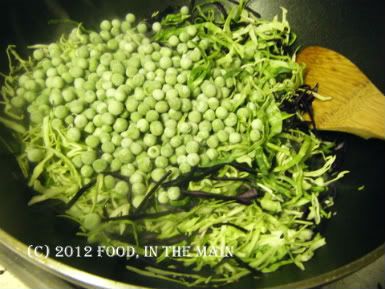
4. Now add the shredded cabbage and peas and stir well. Cover the pan tightly and let the vegetables cook on a very low heat for about 7 minutes, till the cabbage is cooked but still retains some bite.
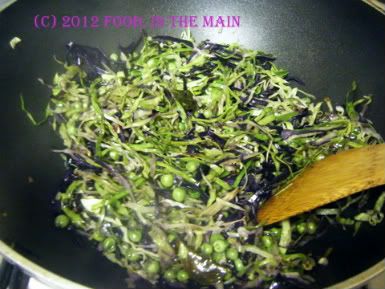
5. Once the cabbage is done, add the ground coconut masala powder and salt to taste, and mix well.
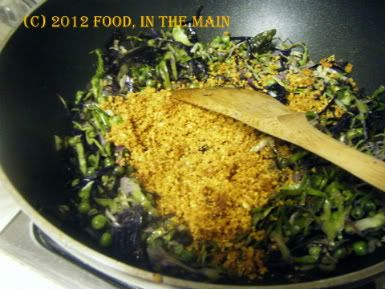
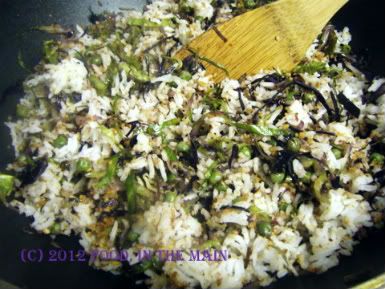
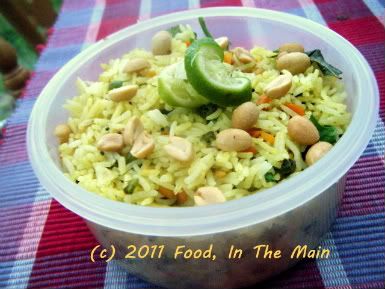
6. Then add the rice and mix it in carefully until it is distributed evenly. Add the chopped coriander (if using) and scatter the roasted peanuts over. Serve hot with cucumber raita.
Tuesday, October 04, 2011

Lemony vegetable rice

Are you wondering why this recipe is described as a lemony vegetable rice rather than a vegetable-y lemon rice? Well, why ARE you wondering that? Which of the two do you think is catchier? Welllll??? Yeah, I thought so too. Now you know the intricate thought process behind the title of this post.

I could tell you about how I arrived at all my other post titles too, but you might get bored, and the last thing I want is for my little audience to be bored. Boredom is not the right reward for dogged faithfulness, is it? So let’s just say that the reasoning for any or all of them is usually not far off that for this post. I mean, if I were to tax my brain for the title, what would I do for the main body of the post?

Actually, the answer to that is: Probably what I’ve just done so far.

There it is, peoples of the world. I save my deepest thoughts for finding a cure for an itchy nose, not for blog posts or their titles. That, right there, is the naked truth. Not particularly exciting for something that is naked, is it? Kind of like getting a 65-year-old pot-bellied nondescript-looking man in a beefcake magazine centrespread where you were expecting… oooh, I dunno, say Hrithik Roshan or Colin Firth or Hugh Jackman or …  *slurrrrrrp*

Excuse me while I go off in search of a towel to mop up the drool.

But please, don’t wait for me to return, go right ahead to the recipe. I insist.

Recipe for: Lemony vegetable rice
Photobucket
Ingredients:

2 cups basmati rice, cooked and cooled
2 cups vegetables, chopped into little cubes (potatoes, carrots, green beans, peas, etc)
½ cup chopped red or white onion
2 cloves garlic
4-5 green chillies, sliced into thin rounds (add to taste or omit entirely)
1 tsp chana dal/kadalai paruppu
1 tsp urad dal/ulutham paruppu
1 tsp brown mustard seeds
1/2 tsp turmeric powder
1 tbsp oil
Salt to taste
Lemon/lime juice to taste
Coriander leaves and roasted/fried peanuts for garnish

Method:

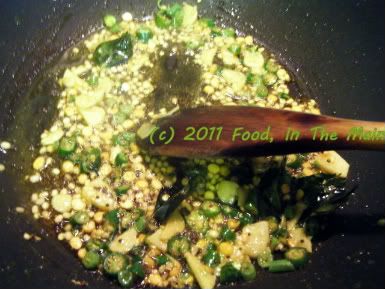
1. Heat the oil in a big pan, then add the chana dal/kadalai paruppu, urad dal/ulutham paruppu and mustard seeds. Cover and let the mustard seeds pop.
Photobucket
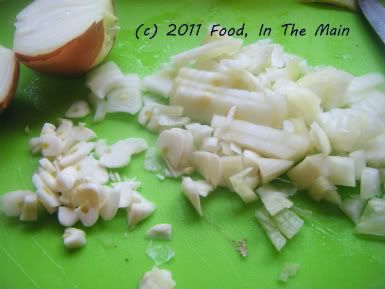
2. When the dals are golden brown, add the chopped garlic, the chillies and the onion along with the turmeric powder and fry on medium heat till the onions begin to turn translucent and soft.

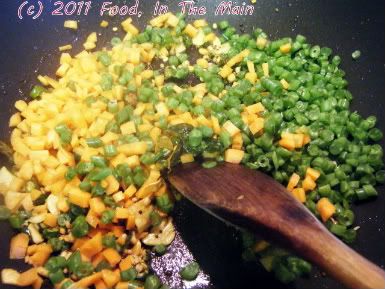
3. Now add the chopped vegetables and sprinkle 3-4 tbsp water over them. Turn the heat down as low as it will go, then cover the pan and let the vegetables cook till they’re done – say 10-12 minutes.
Photobucket
4. Once the vegetables are cooked, get rid of any excess water by turning the heat up and stirring the vegetables about for 1-2 minutes.

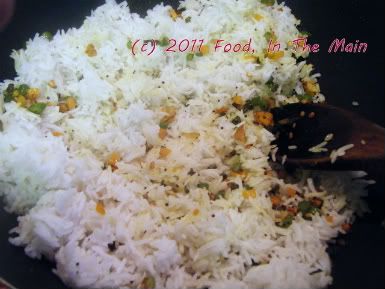
5. Now add the cooked rice, sprinkle on salt to taste and add 3-4 tbsp of lemon/lime juice.
Photobucket
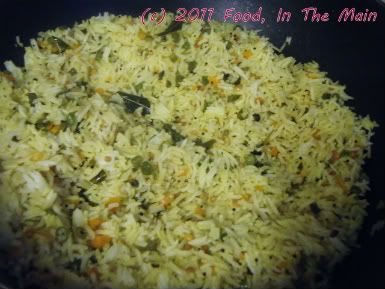
Mix carefully till the ingredients are well incorporated. Add more lime/lemon juice according to taste.

Photobucket
6. Garnish with coriander leaves and fried peanuts. Serve hot with potato crisps or other fried snacks or pickles of choice. (I like it with avakkai.)

RECIPE: LEMONY VEGETABLE RICE

Ingredients:

2 cups basmati rice, cooked and cooled
2 cups vegetables, chopped into little cubes (potatoes, carrots, green beans, peas, etc)
½ cup chopped red or white onion
2 cloves garlic
4-5 green chillies, sliced into thin rounds (add to taste or omit entirely)
1 tsp chana dal/kadalai paruppu
1 tsp urad dal/ulutham paruppu
1 tsp brown mustard seeds
1/2 tsp turmeric powder
1 tbsp oil
Salt to taste
Lemon/lime juice to taste
Coriander leaves and roasted/fried peanuts for garnish

Method:

1. Heat the oil in a big pan, then add the chana dal/kadalai paruppu, urad dal/ulutham paruppu and mustard seeds. Cover and let the mustard seeds pop.
2. When the dals are golden brown, add the chopped garlic, the chillies and the onion along with the turmeric powder and fry on medium heat till the onions begin to turn translucent and soft.
3. Now add the chopped vegetables and sprinkle 2-3 tbsp water over them. Turn the heat down as low as it will go, then cover the pan and let the vegetables cook till they’re done – say 10-12 minutes.
4. Once the vegetables are cooked, get rid of any excess water by turning the heat up and stirring the vegetables about for 1-2 minutes.
5. Now add the cooked rice, sprinkle on salt to taste and add 3-4 tbsp of lemon/lime juice. Mix carefully till the ingredients are well incorporated. Add more lime/lemon juice according to taste.
6. Garnish with coriander leaves and fried peanuts. Serve hot with potato crisps or other fried snacks, or pickles of choice.

Wednesday, August 17, 2011

Vengaya vattha kuzhambu (Onion-tamarind gravy)

Every day in every way I’m getting lazier and lazier.
This is not what I want to be confessing, dear reader. Believe me, I’d much rather be declaring the more conventional - and infinitely more impressive – version that goes “Every day in every way I’m getting better and better”.

The truth is that I have, at the very least, half a dozen recent recipes to post about and over a dozen older ones which have been ageing gracefully without seeing the light of publication. It’s so easy to take photos while cooking – that’s become second nature now – but it’s a lot less fun to have to edit them (even the simplest, most basic edit that I do which is basically adding my blog name to the photo). It’s infinitely less appealing still to write up the recipes step by step and match the correct photos every step of the way.

I know, nobody’s forcing me to do the whole step-by-step thing, and there wasn’t a gun held to my head when I began to write up the instructions this way. Call me short-sighted but I didn’t envisage a point where I would find it boring to continue doing it in such a painstakingly detailed way. More fool me, because it’s been ever thus with every single one of my enthusiasms over the years.

Don’t get me wrong, I’m not bored with cooking. I’m not even bored of taking photographs while cooking. (And I’m certainly not bored with eating – no fear.) I enjoy writing the posts too, 98% of the time - probably because I feel no urge to stick to the point and no pressure to be topical or even informative. So it’s just the recipe itself, with the ingredients and instructions.

I guess I could stop the step-by-step routine… but after so many years of my blog, I can’t bring myself to do that. (Apparently I can bring myself to ignore my blog and the recipes that are clamouring for release… apparently that isn’t wrong. But simplifying things so that I can bring myself to post more often – oh golly gee gosh, that would feel so wrong.) Look, I can’t explain why this is so – but that is how it is.

Anyway, I decided to post this fairly standard, easy, everyday recipe that I make often - I haven’t posted about it thus far because, you know, it’s fairly standard, easy… etc etc. However, it struck me recently that it might not be standard to everybody, and not everybody might make it this way. So in the interests of posterity, and so on.

I feel quite noble to be dragging myself out of my lethargy comfort zone just for the sake of posterity. How nice of me to do this.


If you’ve finished acknowledging my nobility and niceness, you may go on to the recipe. Which is actually a fairly standard, easy…

Oh. I’ve said this before.
Recipe for: Vengaya vattha kuzhambu
Photobucket
Ingredients:

2 tsp tamarind paste
4-5 cloves garlic, chopped
2 medium onions, chopped
Photobucket
1/4 tsp vendhayam/fenugreek seeds
1 tbsp toor/tuvar dal
1 tbsp manathakkali vatthal
1 tbsp gingelly oil/nallennai
3-4 dried red chillies, broken in half (or to taste)
1 tsp mustard seeds
a few fresh/frozen curry leaves (optional)
1/2 tsp turmeric powder
1/4 tsp asafoetida powder
2-3 tsp sambar powder or vattha kuzhambu powder (if available)
2 tbsp rice flour
1/2 tsp black pepper powder
handful of roasted peanuts (optional)

Method:

1. Dissolve the tamarind paste in 5 cups water. Reserve.
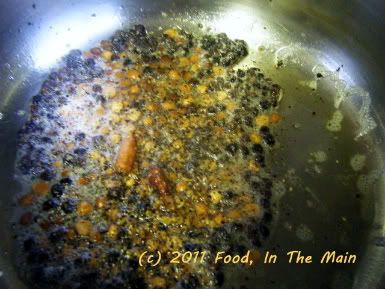
2. Heat the oil and add the manathakkali vatthal, the tur dal, dried red chillies, mustard seeds, fenugreek seeds, curry leaves, asafoetida powder and turmeric powder.
Photobucket
Fry all these for a couple of minutes on high heat, stirring to prevent burning.
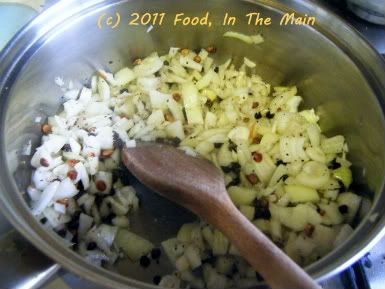
3. Next, add the chopped onions and garlic and stir.
Photobucket
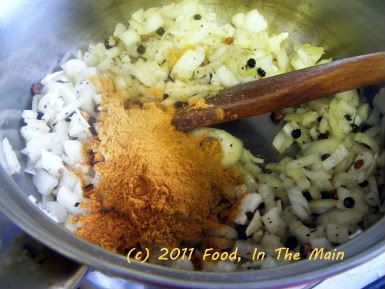
4. When the onions start to soften, add the sambar/vattha kuzhambu powder and stir it in, along with the black pepper powder.
Photobucket
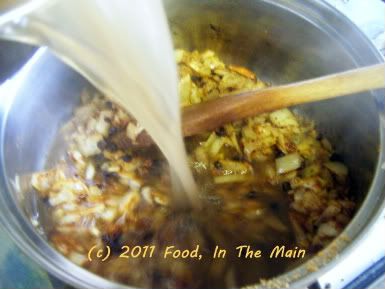
5. Now pour in the tamarind water.
Photobucket
Bring to a boil on high heat, then turn it down to medium-low and let it simmer gently for 10 minutes or so.
6. Whisk together 2 tbsp rice flour with some water to make a thick, pourable paste and stir it into the kuzhambu. Let it boil for another 4-5 minutes until the kuzhambu thickens and becomes less watery.
Photobucket
Add salt to taste and throw in the peanuts now, if using. Serve hot with steamed white rice and a dry vegetable curry.

RECIPE: VENGAYA VATTHA KUZHAMBU

Ingredients:
2 tsp tamarind paste
4-5 cloves garlic, chopped
2 medium onions, chopped
1/4 tsp vendhayam/fenugreek seeds
1 tbsp toor/tuvar dal
1 tbsp manathakkali vatthal
1 tbsp gingelly oil/nallennai
3-4 dried red chillies, broken in half (or to taste)
1 tsp mustard seeds
a few fresh/frozen curry leaves (optional)
1/2 tsp turmeric powder
1/4 tsp asafoetida powder
2-3 tsp sambar powder or vattha kuzhambu powder (if available)
2 tbsp rice flour
1/2 tsp black pepper powder
handful of roasted peanuts (optional)

Method:
1. Dissolve the tamarind paste in 5 cups water. Reserve.
2. Heat the oil and add the manathakkali vatthal, the tur dal, dried red chillies, mustard seeds, fenugreek seeds, curry leaves, asafoetida powder and turmeric powder. Fry all these for a couple of minutes on high heat, stirring to prevent burning.
3. Next, add the chopped onions and garlic and stir.
4. When the onions start to soften, add the sambar/vattha kuzhambu powder and stir it in, along with the black pepper powder.
5. Now pour in the tamarind water. Bring to a boil on high heat, then turn it down to medium-low and let it simmer gently for 10 minutes or so.
6. Whisk together 2 tbsp rice flour with some water to make a thick, pourable paste and stir it into the kuzhambu. Let it boil for another 4-5 minutes until the kuzhambu thickens and become less watery. Add salt to taste and throw in the peanuts now, if using. Serve hot with steamed white rice and a dry vegetable curry.

Tuesday, July 12, 2011

Baked cabbage-onion masala vada

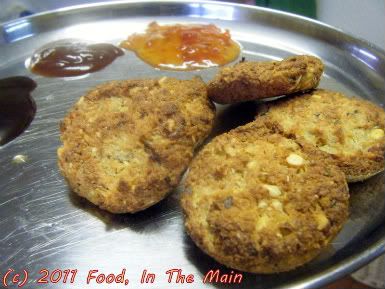
I was inspired to make these baked vadas – or rather, reminded that such a thing existed on my blog – by a new friend based in Australia when she wrote to me saying that she had made the vadas (adding flaxseed as per the original recipe on The Taste Tinkerer’s blog). That’s when I suddenly remembered how LOVELY the baked vadas had tasted and wondered why on earth (and how on earth too) I’d not made them in such a long time!

And naturally I wanted them immediately (or as close to immediately as I could get) – so I ended up soaking the dals at around 10.30 p.m, just as Pete was delicately putting forward a suggestion of retiring to bed. But I wasn’t sleepy – no, the Sandman had been pushed into the background (and was probably sulking at being so rudely dismissed). I wanted to make those vadas there and then. Also, I was thrilled that I had flaxseeds at hand… and when you’re in the grip of a sudden obsession backed by having all the requisite ingredients – well, ya gotta do what ya gotta do, as they say.


By the way, I soaked the dals in very hot water for quick results because of the lateness of the hour, but the preferable method is to soak the dals in water for a few hours so that they rehydrate naturally.

So by 11 p.m, I was doing what I hadda do with the soaked dals, adding finely shredded cabbage as well as onions to make the batter... and 15 minutes later, the Sandman had officially given up on Pete as well, as he (Pete) had been awakened well and truly by the AMAZING aroma of the baking vadas that was wafting around the house.

By 11.40 p.m or so, I was taste-testing very hot baked masala vadas fresh from the oven, while Pete watched me somewhat grumpily – he was left out of the whole vada love-fest because they contained (to him) insane amounts of fresh chillies. Well, how was I to know he’d want some too?

But don’t worry, gentle reader… I satisfied his suddenly-awakened vada craving the next evening by baking some more vadas just for him at a reasonable hour of the evening, to the general satisfaction and happiness of all concerned (the Sandman included).

Recipe for: Baked cabbage-onion masala vadaPhotobucket
Ingredients:

1/2 cup chana dal
1/2 cup toor dal
1/3 cup flax seeds
1/3 cup red onion, chopped
1/3 cup green cabbage, shredded
Photobucket
3-5 fresh green/red chillies
3-4 tbsp roasted peanuts, coarsely crushed
1" piece ginger
a few curry leaves, torn up (optional)
1 tsp baking powder
1 tbsp oil
Salt to taste
Oil-spray/Pam

1. Soak the chana dal and toor dal for 3-4 hours.

2. Grind a handful of the dals along with the flax seeds, red chillies and ginger to a smooth paste, adding a little water.
Photobucket
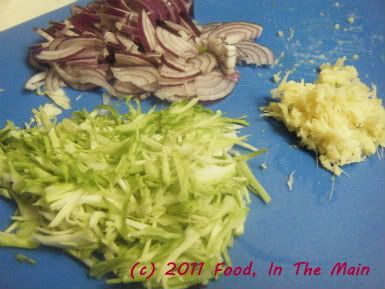
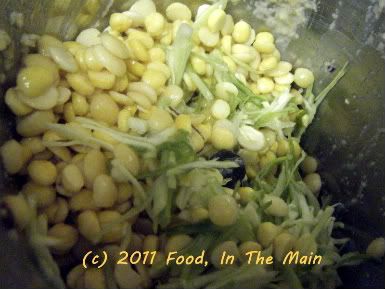
3. Next, add the remaining dal, the red onion and cabbage and grind to a coarse consistency using as little water as possible. The batter must be thick enough to hold its shape when made into patties.
Photobucket
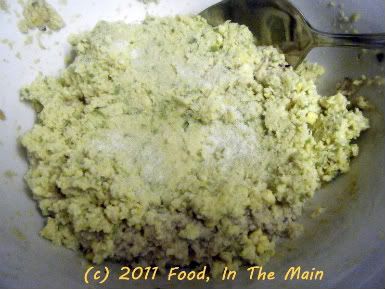
4. Turn the batter out into a bowl and add the 1 tbsp oil, salt to taste, peanuts and 1 tsp baking powder. Stir thoroughly to ensure the ingredients are mixed in evenly.
Photobucket
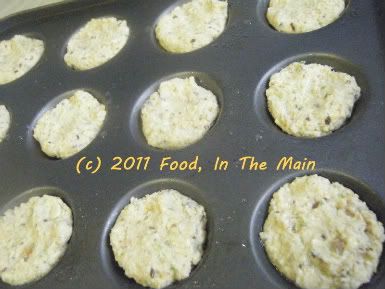
4. Grease a small cupcake or mini-muffin tray, then place lime-sized pieces of the batter in the depressions, patting them level with the top of the tray.
Photobucket
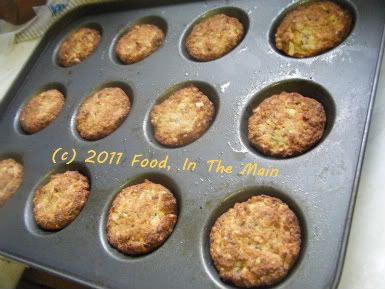
5. Heat the oven to 180C/350F. Spray the tops of the batter with Pam or brush lightly with oil, and bake for 15-20 minutes in the middle of the oven, turning the tray around mid-way. When the vadas are golden brown on top, turn off the heat.
Photobucket
Let the vadas remain in the tray for 5 minutes, then turn them out. Serve hot as a snack with dips or chutney. These are best eaten hot and fresh, as they tend to become somewhat dry the next day and aren't as much fun to eat as a snack.

RECIPE: BAKED CABBAGE-ONION MASALA VADA

Ingredients:
1/2 cup chana dal
1/2 cup toor dal
1/3 cup flax seeds
1/3 cup red onion, chopped
1/3 cup green cabbage, shredded
3-5 fresh green/red chillies
3-4 tbsp roasted peanuts, coarsely crushed
1" piece ginger
a few curry leaves, torn up (optional)
1 tsp baking powder
1 tbsp oil
Salt to taste
Oil-spray/Pam

Method:

1. Soak the chana dal and toor dal for 3-4 hours.
2. Grind a handful of the dals along with the flax seeds, red chillies and ginger to a smooth paste, adding a little water.
3. Next, add the remaining dal, the red onion and cabbage and grind to a coarse consistency using as little water as possible. The batter must be thick enough to hold its shape when made into patties.
4. Turn the batter out into a bowl and add the 1 tbsp oil, salt to taste, peanuts and 1 tsp baking powder. Stir thoroughly to ensure the ingredients are mixed in evenly.
5. Grease a small cupcake or mini-muffin tray, then place lime-sized pieces of the batter in the depressions, patting them level with the top of the tray.
6. Heat the oven to 180C/350F. Spray the tops of the batter with Pam or brush lightly with oil, and bake for 15-20 minutes in the middle of the oven, turning the tray around mid-way. When the vadas are golden brown on top, turn off the heat.
7. Let the vadas remain in the tray for 5 minutes, then turn them out. Serve hot as a snack with dips or chutney. These are best eaten hot and fresh, as they tend to become somewhat dry the next day and aren't as much fun to eat as a snack.

Monday, October 18, 2010

Boiled peanut dal

Occasionally I buy a bag of “monkey nuts” from the supermarket, because I love me some boiled goobers, I do. Aren’t both those weird terms for peanuts? Monkey nuts are sort of descriptive, therefore understandable - but goobers? I wonder who was the first person who picked up a bunch of the infinity-shaped shells, broke ‘em, took out the red nuts inside and thought “Oh yeah, I know those things! They’re goobers!”

The more you say the "goobers", the more absurd it sounds. But the more absurd it sounds, the more I want to say it, simply because it’s absurd. Eventually I have to stop, though, because people tend to look at me strangely and cross to the other side of the road. I don’t understand why they do that. And when I follow them to explain that I’m merely getting some harmless amusement out of a weird word, they walk away even faster. Strange phenomenon, that...

Anyway, I usually pressure-cook the unshelled peanuts. You can put them in salted water to cook them, but I mostly don’t bother because I like the natural taste of the cooked peanuts hot from the shells. They still taste good when they cool down, don’t get me wrong. I like adding the cold peanuts to salads for texture and protein.

For a change, I made dal with the boiled peanuts. I usually pressure-cook the raw peanuts along with the dal if I’m using tuvar or masoor, where it doesn’t matter if the longer cooking time mushes up the dal entirely. But if chana dal features in the recipe, the peanuts stay separate. Since I’ve used a mixture of masoor and chana dal in this recipe, I cooked the peanuts separately. The reason is that the peanuts take longer to cook than the dals. I like the masoor dal cooked to shapelessness and the chana dal to retain its shape, and putting the two together in a pressure cooker for 3 quick whistles cooks them both just the way I like them. Peanuts don’t figure in this equation, so they get cooked separately.

Now, if we’re all unanimous that I have belaboured that point quite thoroughly, I will move on to the recipe.

Recipe for: Boiled peanut dal

Photobucket

Ingredients:

1/2 cup peanuts, boiled
1/2 cup masoor dal
1/4 cup chana dal
2 small onions, sliced thin
3-4 green chillies (or to taste), sliced in thin strips
1 tsp ginger-garlic paste
1/2 cup roasted tomatoes, mashed
1/2 tsp cumin powder
1 tsp coriander powder
1/4 tsp turmeric powder
1 tsp garam masala/Kitchen King masala
3 tsp oil
Salt to taste
Coriander leaves for garnish

Method:

1. Heat the oil and add the ginger-garlic paste and green chillies. Fry this for 30 seconds, then add the cumin and coriander powder along with the sliced onions.

2. Fry the onions till they start turning soft and translucent. Now add the roasted tomatoes and mash it all with a spatula.
3. Stir-fry the masala for 2-3 minutes, then stir in the boiled peanuts.
Photobucket

4. Add the cooked dals and mix well. Add 1/3 cup water if the dal seems too thick.

Photobucket

5. Stir well once again, add salt to taste, and bring the dal to a gentle boil on medium heat.

6. Now sprinkle the garam masala, turn the heat to low and let the dal simmer for 6-7 minutes.

Photobucket

Garnish with coriander leaves and serve hot with rice or rotis.

RECIPE: BOILED PEANUT DAL
Ingredients:
1/2 cup raw peanuts
1/2 cup masoor dal
1/4 cup chana dal
2 small onions, sliced thin
3-4 green chillies (or to taste), sliced in thin strips
1 tsp ginger-garlic paste
1/2 cup roasted tomatoes, mashed
1/2 tsp cumin powder
1 tsp coriander powder
1/4 tsp turmeric powder
1 tsp garam masala/Kitchen King masala
3 tsp oil
Salt to taste
Coriander leaves for garnish

Method:
1. Heat the oil and add the ginger-garlic paste and green chillies. Fry this for 30 seconds, then add the cumin and coriander powder along with the sliced onions.
2. Fry the onions till they start turning soft and translucent. Now add the roasted tomatoes and mash it all with a spatula.
3. Stir-fry the masala for 2-3 minutes, then stir in the boiled peanuts.
4. Add the cooked dals and mix well. Add 1/3 cup water if the dal seems too thick.
5. Stir well once again, add salt to taste, and bring the dal to a gentle boil on medium heat.
6. Now sprinkle the garam masala, turn the heat to low and let the dal simmer for 6-7 minutes. Garnish with coriander leaves and serve hot with rice or rotis.

Tuesday, March 30, 2010

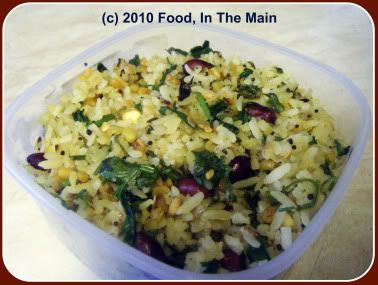
Flaxseed/linseed aval upma

This is the third recipe using flaxseeds that I'm posting here in as many weeks... I haven't gone totally flaxseed crazy, honest. I do have other posts to write, and I have made other things (NOT using flaxseeds!) that need to be posted on my blog. But I'm still feeling an inexplicable antipathy to editing the darn photos, especially if there are lots of photos to choose from, and lots of photos to use with each recipe. Part of the problem is having to use a new photo editing tool (Picnik, free and online, which Nupur mentioned in a comment and which I latched on to quicker than quick) which seems slower than what I was using. Not that Picnik is difficult to use, it's just different... and yes, I'm just cribbing because I can... simbly only.

So yeah, before my solitary (but persistent) troll, who has cribbed before about the number and the quality of pics I use for each recipe, suggests that I use NO pix at all and thus resolve my anti-editing issues, I hasten to say that YES, that would be one solution. The other solution would be to perhaps cut down on the number of pics for each recipe... but I'm averse to doing that too. What I need is for someone to take over and kindly edit my photos. Actually what I need is someone who will take AND edit the photos, thereby hopefully making my blog a thing of beauty... but sadly that is not going to happen any time soon. *deep sigh* So until then I'm going to be posting recipes which have only a few instructions, and therefore only a few photos!

So, about today's recipe - the upma is really quite nice. But I'd probably powder the roasted flaxseeds next time, so as to release their aroma and flavour. (This is an older recipe than the previous one, and I hadn't discovered that powdered roasted flaxseeds are far superior in taste and aroma!)


PS. If you're wondering why there are no trolly comments to be seen on any of my posts, it's because I delete them. Not because they're critical of my efforts, but because the troll chooses to stay anonymous. I'll be damned if I let a coward take up any space on my blog.

Recipe for:
Flaxseed aval/poha upma

Photobucket

Ingredients:

1 cup aval/poha/beaten rice
2 tbsp golden flaxseeds/linseeds
1 tsp chana dal
1 tsp urad dal (I used whole)
1 medium onion, chopped finely
3-4 green chillies (or to taste), sliced finely
3 tsp oil

2 tbsp chopped coriander leaves

Handful of red peanuts with skin
salt to taste
lemon juice to taste

Method:

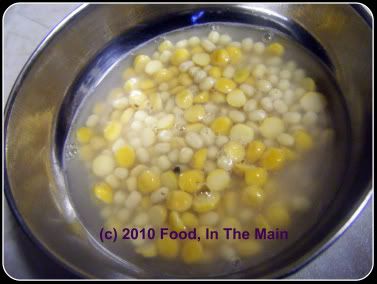
1. Soak the chana dal and urad dal in hot water for 15 minutes.

Photobucket

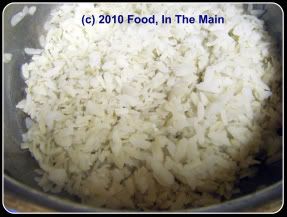
2. Rinse the aval/poha in water once or twice, sprinkle with 3-4 tbsp water and set aside covered so that the aval can absorb the water and rehydrate. The soaked aval/poha should be soft but not gooey or sticky.

Photobucket

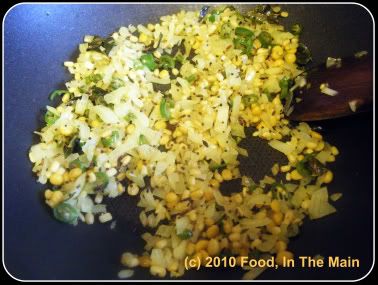
3. Heat 2 tsp oil in a pan and add the asafoetida powder, mustard seeds and green chillies. Cover the pan and let the mustard seeds pop. Add the chana and urad dals (drained), and fry them for 3-4 minutes. Then add the chopped onions and stir-fry till they are soft and cooked.

Photobucket

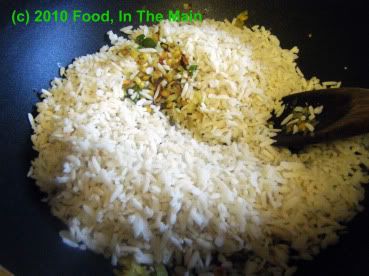
4. Add the soaked softened aval/poha to the pan and stir it in.

Photobucket

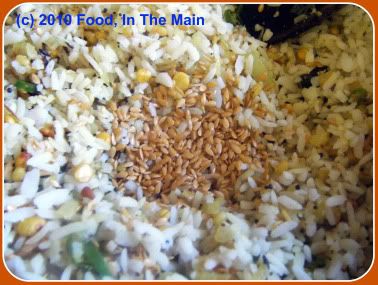
5. Add the dry-roasted linseeds/flaxseeds and mix that in as well, along with salt to taste.

Photobucket

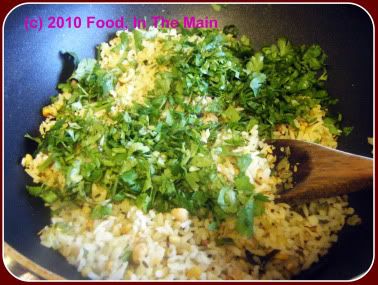
and the chopped coriander. Sprinkle lemon/lime juice to taste and mix it in.

Photobucket

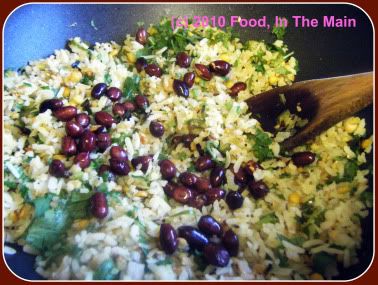
6. Fry the peanuts separately in the remaining tsp oil till they emit a nice aroma and the skin turns a shiny dark red. Scatter them over the poha and serve the finished upma for a snack or a light meal.

Photobucket

Tuesday, December 01, 2009

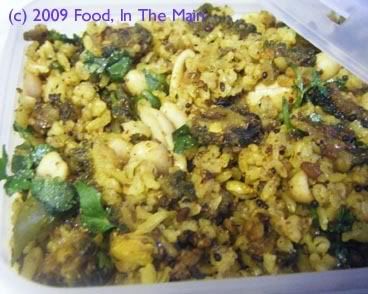
Bitter melon brown rice

I find I'm a bit worried about getting more and more radical with my bitter melon/bitter gourd/karela/pavakkai recipes, in that I’m using this vegetable in a less and less disguised fashion, as it were. I won't hide the fact that I'm feeling kind of - wait for itmeloncholy, the sort that leaves a.... yes, a somewhat bitter taste behind...

Time was when the only way I would even look at this knobbly-looking vegetable was if it was coated in seasoned gram flour and deep fried. And even then it wasn’t exactly welcome on my plate (or on my palate, heh. Tell me you love these punny asides, because I won’t accept a negative answer. What, did you think this was a democratic blog? Tut).

First I made my own
karela chips. Then this. And this. And now, karela masala rice! Where oh where will it all end???

Be warned, readers, this recipe is only for those who love this vegetable. (Although, all evidence to the contrary, I still maintain that I’m not a member of the aforementioned karela-loving group. I mean yeah, I eat it. But would I reach for karela over, say, potatoes? Or green beans? Or plantains? No way, no how.) I used brown basmati instead of white rice, and cooked it with a bit of turmeric powder as per Suganya’s advice on her blog, Tasty Palettes – note that the idea for this recipe, and part of the method, is derived from her own post. I added peanuts for crunch (and some relief from the bitterness) and had a cool cucumber raita on the side, which is also, I think, essential to balance the taste.

Remember that rhetorical question I asked earlier? The one I didn’t answer, because it was rhetorical? (See paragraph 3.) Well, its status has just been downgraded from rhetorical to literal, because I’m answering it.

The karela radicality, my dear friends, does not end with this post. It cannot, because there is more to come, a recipe that is even more uncompromising when it comes to bringing the bitterness to the fore. And no clue, not one, about where that radicalisation will end, or when, or even how...

But for now, here’s the recipe to go with this post.

Recipe for:
Bitter melon brown rice

Photobucket

Ingredients

1-1/2 cups brown basmati rice, soaked in water for 10 minutes
3 cups bitter melon/karela, sliced
3/4 tsp tamarind paste
1/2 tsp turmeric powder
1 tsp urad dal

1 tsp brown mustard seeds
2 tsp oil
a few fresh curry leaves
3-4 tbsp
garlic masala powder (or to taste)
Salt to taste
1/4 cup roasted salted peanuts
chopped coriander leaves for garnish

Method

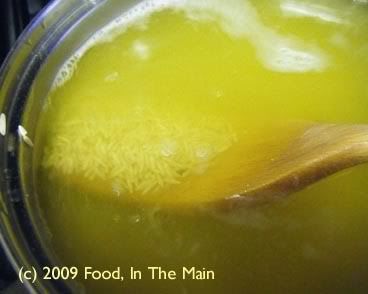
1. Cook the soaked brown basmati rice in plenty of water to which 1 tsp turmeric powder has been added.

Photobucket

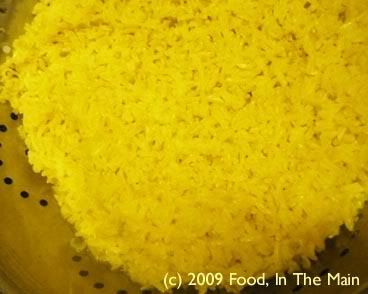
Drain rice and cool when cooked.

Photobucket

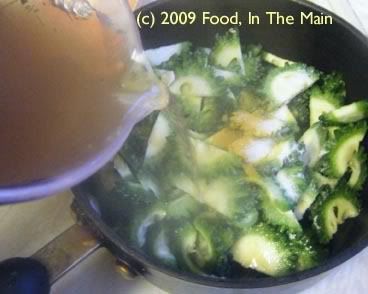
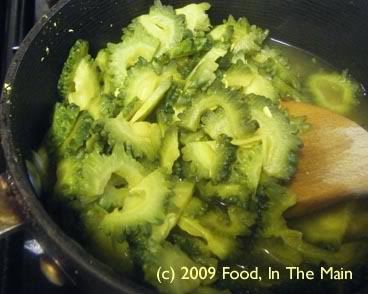
2. Dissolve the tamarind paste in 4 cups water and pour along with sliced karela in a saucepan.

Photobucket

Cook the karela till done, but not mushy. Drain the cooked vegetable and reserve.

Photobucket

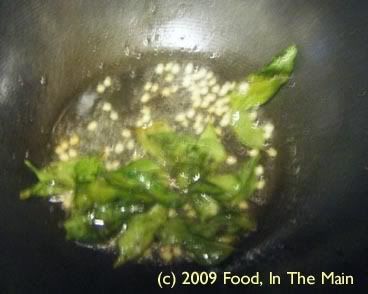
3. In a wide kadai or wok, heat the 2 tsp oil. Add the curry leaves, urad dal and mustard leaves. Cover till the mustard seeds pop, and the urad dal is golden brown.

Photobucket

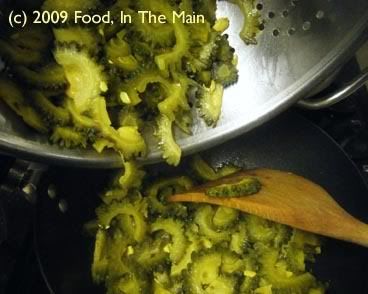
4. Add the cooked karela now and stir till the tempering is evenly distributed.

Photobucket

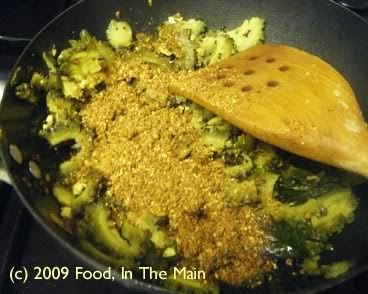
5. Sprinkle 2-3 tbsp of the garlic masala powder and stir it in.

Photobucket

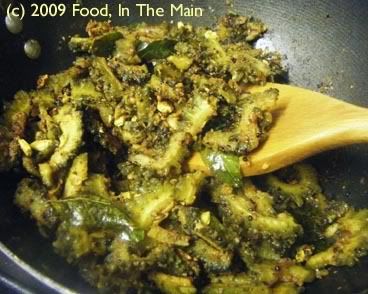
6. Roast the karela over medium heat in the pan, till it starts to crisp up. (You can add 2-3 tsp oil to speed up this process, if you like.)

Photobucket

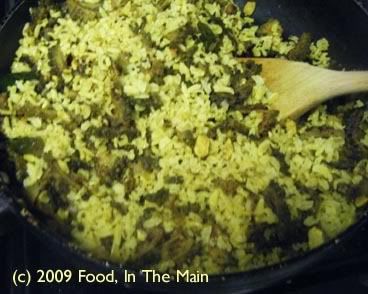
7. Add the cooked rice now, add salt to taste, and mix carefully till the vegetable is evenly distributed.

Photobucket

8. Stir-fry the rice till it's heated through, then add the peanuts and mix in.

Photobucket

9. Sprinkle the chopped coriander over, and serve the rice hot with a cool cucumber raita and crisps or poppadums.