skip to main |
skip to sidebar
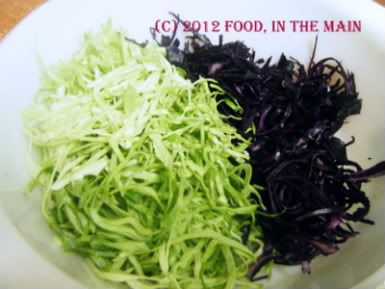
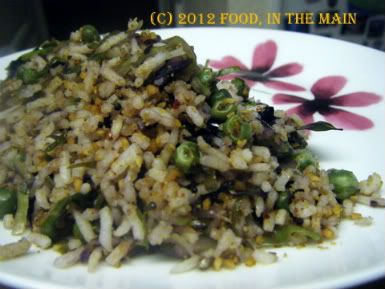 Cabbage is one of my favourite vegetables, pretty much no matter how it’s cooked – as long as that doesn’t mean cooking it to a stinky sulphur-y mush. I don’t care much for white cabbage, because (in my opinion) it’s stinkier and sulphur-ier than green cabbage. (It might not be any more or less smelly, you understand - I’m just quoting the opinion put forward by my nose). Purple cabbage is kinda like white cabbage except purple… and because it’s a pretty colour for cabbage, I don’t shun it.
But the cabbage I use the most is a pointy, tear-drop shaped green cabbage marketed under the name “sweetheart cabbage” in the supermarkets here. That said, I quite like the round green kind too. But sweetheart by name, sweetheart by taste – no, ok, that simile doesn’t work. There’s a good reason I’m not a world-famous writer, I suppose.
Anyway, those are the three types of cabbage available - unless you count the round green cabbage as a different variety from the pointy green one… in which case, the cabbage count goes from three to four. I’m sure that, like potatoes, there are hundreds of different varieties of cabbage, all of which have individual names, again like potatoes. I probably just don’t know about them.
So, coming back to what I do know (a much shorter topic, haha), which is that I love cabbage, what I made with a combination of green and purple cabbage was a luvverly rice dish. With added peas. There's hardly anything that doesn't benefit from the addition of peas, unless it's a cake. Although I bet someone somewhere has tried a green peas cake and written about it on their blog... Ok, I'm off to google for green peas cake now, but you please feel free to read my recipe below and try it out, because it's really, really tasty - especially if you're a cabbage enthusiast like me.
Recipe for: Cabbage and peas rice
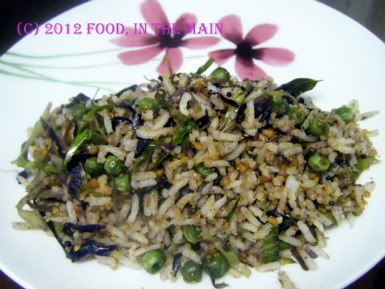 Ingredients:
2 cups cooked basmati rice
3 cups cabbage, finely shredded
 1/2 cup peas (fresh or frozen)
1 tsp oil
2 tsp mustard seeds
1/4 tsp asafoetida powder
a few fresh/frozen curry leaves
Salt to taste
Peanuts and chopped coriander leaves for garnish (optional)
For the masala powder:
1/2 tsp oil
1 htsp urad dal
1 htsp tuvar dal
1 htsp chana dal
1 htsp coriander seeds
4-5 dried red chillies (or to taste)
2 tbsp shredded fresh or dry coconut
Method:
1. Heat 1/2 tsp oil in a large pan. 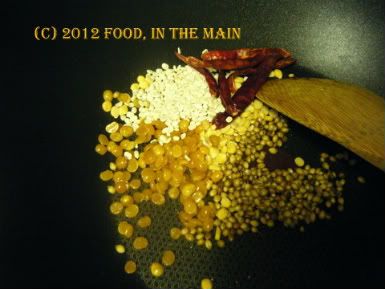 Fry the masala powder ingredients (bar the coconut) over a low flame till the dals turn a pale golden brown, and the chillies are a shiny dark red. Remove to a plate and let cool.
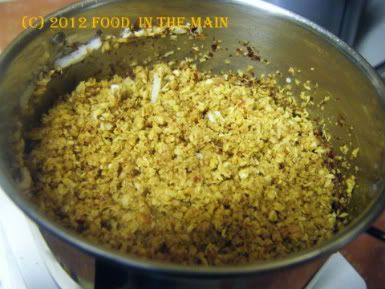
2. Grind the cooled roasted dals along with the coconut to a fairly smooth powder.
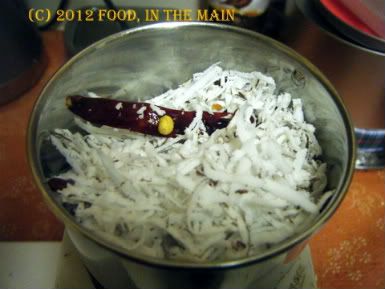 Reserve.
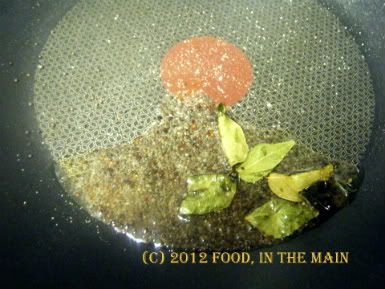
 3. Heat the remaining oil in the same pan and add the asafoetida powder, curry leaves and mustard seeds. Cover the pan and let the seeds pop.
 4. Now add the shredded cabbage and peas and stir well.
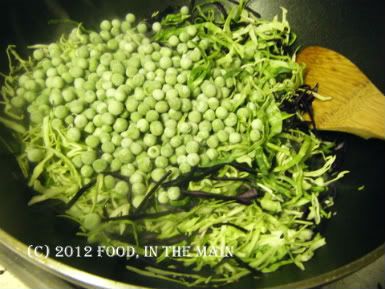
Cover the pan tightly and let the vegetables cook on a very low heat for about 7 minutes, till the cabbage is cooked but still retains some bite.
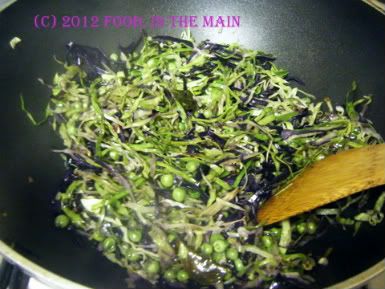 5. Once the cabbage is done, add the ground coconut masala powder and salt to taste, and mix well.
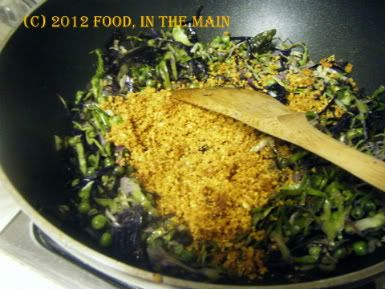
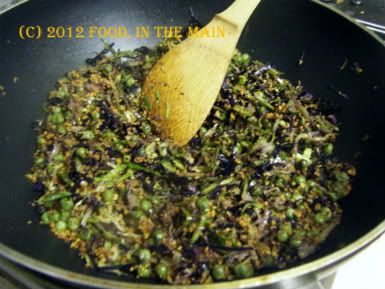 6. Then add the rice and mix it in carefully until it is distributed evenly.
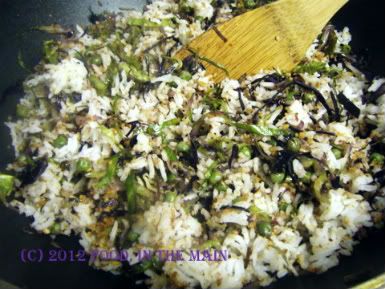
Add the chopped coriander (if using) and scatter the roasted peanuts over. Serve hot with cucumber raita and papad or crisps on the side.
RECIPE: CABBAGE AND PEAS RICE
Ingredients:
2 cups cooked basmati rice
3 cups cabbage, finely shredded
1/2 cup peas (fresh or frozen)
1 tsp oil
2 tsp mustard seeds
1/4 tsp asafoetida powder
a few fresh/frozen curry
Salt to taste
Peanuts and chopped coriander leaves for garnish (optional)
For the masala powder:
1/2 tsp oil
1 htsp urad dal
1 htsp tuvar dal
1 htsp chana dal
1 htsp coriander seeds
4-5 dried red chillies (or to taste)
2 tbsp shredded fresh or dry coconut
Method:
1. Heat 1/2 tsp oil in a large pan and fry the masala powder ingredients (bar the coconut) over a low flame till the dals turn a pale golden brown, and the chillies are a shiny dark red. Remove to a plate and let cool.
2. Grind the cooled roasted dals along with the coconut to a fairly smooth powder. Reserve.
3. Heat the remaining oil in the same pan and add the asafoetida powder, curry leaves and mustard seeds. Cover the pan and let the seeds pop.
4. Now add the shredded cabbage and peas and stir well. Cover the pan tightly and let the vegetables cook on a very low heat for about 7 minutes, till the cabbage is cooked but still retains some bite.
5. Once the cabbage is done, add the ground coconut masala powder and salt to taste, and mix well.
6. Then add the rice and mix it in carefully until it is distributed evenly. Add the chopped coriander (if using) and scatter the roasted peanuts over. Serve hot with cucumber raita.
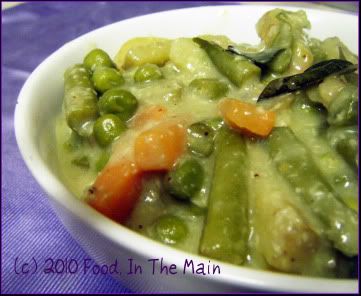
I have a slightly odd love-dislike (not hate, never that) affair with aviyal, that classic Kerala dish of vegetables in coconut gravy. There are specific requirements for both the love and the dislike to happen. I love aviyal when:
a. It is made with thinly cut vegetables (and does not involve aubergines)
b. It uses tamarind for that hint of sourness rather than buttermilk or curds
c. It is eaten fresh and hot
I dislike aviyal when:
a. The vegetables are cut in a fashion that brings to mind large railway sleepers – and about as thick as well!
b. It contains buttermilk or curds (this one pretty obvious, huh?)
c. It’s cold and/or old (as in more than a day old). Reheated aviyal does nothing for me – especially if it was made with buttermilk or curds.
I do realise that probably hundreds of thousands of people do make aviyal with buttermilk (or curds). Small aside: Should I mention both buttermilk and curds every single time, or will just one or the other do? Pls leave your opinion in the comments section, even if it's too late to matter for this post. :) But there will be other posts, after all, and what if this situation occurs again and I am left without a majority opinion to heed? What then, huh? What then?
So, anyway... since my mother has always used tamarind and prefers the taste, I do too. I’ve always considered aviyal a complicated dish, carefully nurturing my ignorance by never even considering it worthwhile to see how it was made. This year, though, when my mother said she’d made aviyal for the Tamil New Year, I felt a slight craving for it. Too bad she lives a few thousand miles away in Seattle... so naturally I was forced to make it myself.
The thing that sealed the deal for me was that I actually had young, fresh, tender green bananas in the house plus some fresh bottlegourd. I had bought them practically wholesale from a quick trip to Birmingham with Pete. He was picking up some speakers that he’d bought, and I tagged along - because I like tagging along in general, and also because of the always-hopeful thought in the back of my mind that I might be able to pick up some Indian vegetables. Well, actually, that thought is always at the forefront of my mind. (Do I HAVE to be 100% honest? Fine, it was the ONLY thought in my mind.)
As I was saying, aviyal was on the cards and I wanted to make it exactly like my mother does. I rang her for the recipe and got instructions that more or less said “cut and cook vegetables, grind coconut with green chillies, add tamarind, mix well, season with coconut oil and curry leaves”.
Was that it, I asked her, a trifle confused. Was she holding back on me? Where were the complicated instructions? That was the entire recipe? That was what I’d considered difficult all this while? How embarrassing!
So I made the aviyal – and believe me, cutting the vegetables was the most complicated part. The aviyal tasted just as it did in the memorybank of tastes that is stored somewhere in my head (or in my tongue?)... and since Pete didn’t want any part of it, there was enough for my meal the next day too. Yeah, I reheated it. AND liked it. Yes, I know what I said earlier. My excuse is that I’ve not had aviyal at all for many years, so I’m allowed to be contradictory of my own self in my own post. So there you have it.
Recipe for: Aviyal
Ingredients:
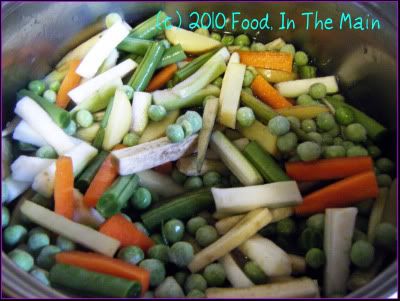
3 cups mixed vegetables, sliced into 1/2-cm thick matchsticks (a combination of carrots, potatoes, green plantains, green beans, bottlegourd/squash/courgettes, peas)
3 tbsp freshly grated coconut
4-5 green chillies (or to taste)
1/2 tsp cumin seeds
2 tbsp coconut oil 1/2 tsp tamarind paste
8-10 fresh curry leaves
salt to taste
Method:
1. Cook all the vegetables till done, but not mushy.
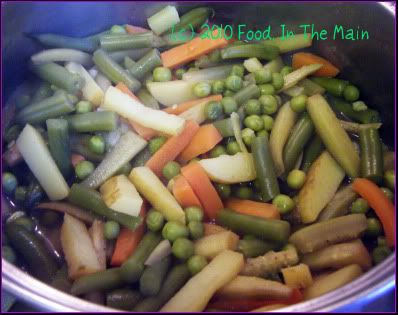
You can do this in a pressure cooker (much quicker than anyhow else) or on the hob, or in the microwave.
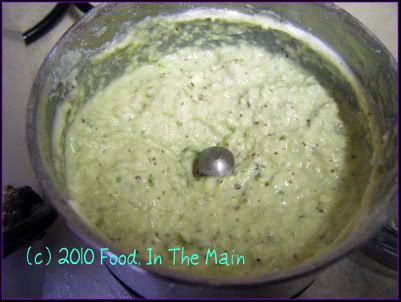
2. Grind together the coconut, cumin seeds and green chillies
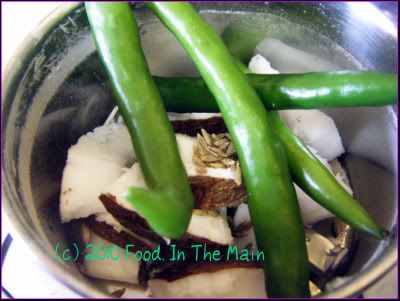
to a smooth paste using warm water.
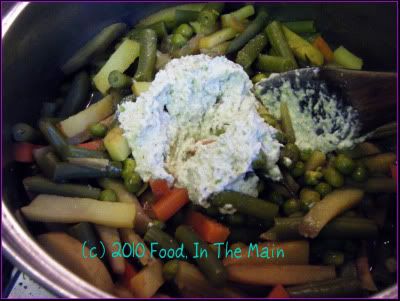
3. Add the coconut paste to the vegetables along with salt to taste, and mix well. Mix tamarind paste with 2-3 tbsp water and add that as well (increase to 1/2 cup water if there isn't enough to make a gravy).
4. Sprinkle the curry leaves over, then pour in the coconut oil and mix again.
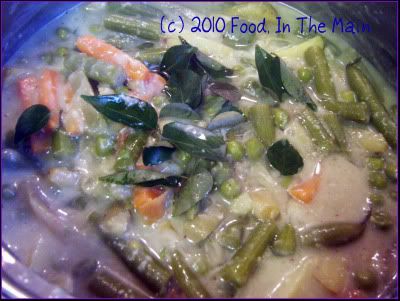
Heat the aviyal thoroughly (careful not to burn it) and serve hot with steamed rice.
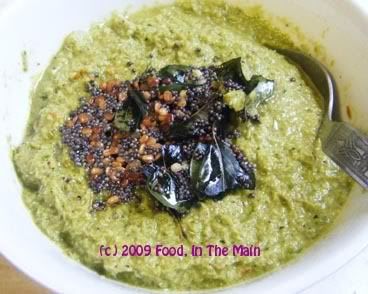
I think the previous post exhausted any reserves I might have had of creative writing (my euphemism for "blagging"), so all I have to say about this recipe is that it’s a variation of tomato chutney - or of coconut chutney, or onion chutney... I leave it to you, dear readers, to decide. I personally don’t bother overmuch about the nomenclature of anything edible, so long as it tastes good.
Recipe for: Tomato shallot coconut chutney
Ingredients:
3-4 shallots
1 tomato
3-4 green chillies (or as per taste)
3-4 tbsp fresh coconut, grated
3-4 tbsp fresh coriander leaves
1-1/2 tsp oil
1/2 tsp mustard seeds
1 tsp urad dal
a few curry leaves
pinch of asafoetida
Salt to taste
1. Chop the shallots, tomato and green chillies into small pieces.
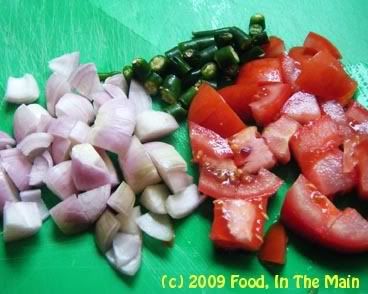
2. Heat the 1 tsp oil in a small pan and add the chopped tomatoes, shallots and chillies.
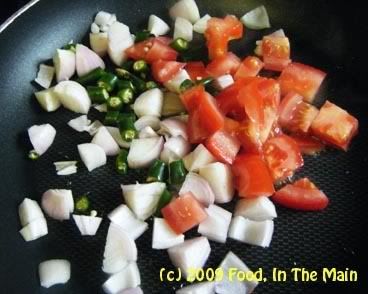
3. Fry on medium high heat till the onions become soft and the tomatoes mushy.
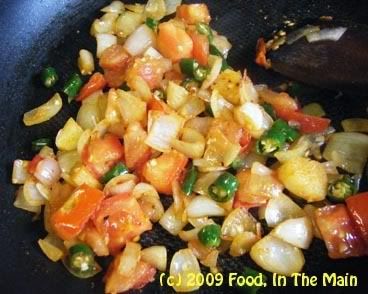
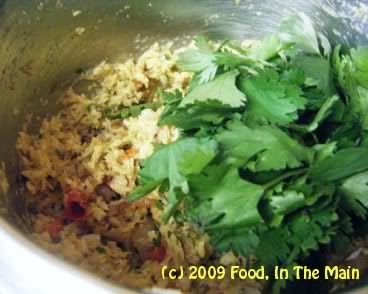
4. Let the cooked vegetables cool, then grind to a smooth paste along with the coconut and coriander leaves, using 3-4 tbsp of water. Remove to a serving bowl and mix in salt to taste.
5. Heat the remaining 1/2 tsp oil, add the mustard seeds, asafoetida powder, curry leaves and urad dal, cover and let the seeds pop and the dal turn golden. Pour this tempering over the chutney, stir it in and serve as an accompaniment with dosas, idlis, rotis, etc.
I’m sure everybody has an inner lazy person, but for most people, they stay firmly anchored on the inside. Whereas, with me, my inner lazy person has always been keen to remain on the outside and experience everything that comes my way. Occasionally my brisk and hard-working persona makes a visit to the outside, but on the whole those are rare occasions and the brisk inner me prefers to remain unseen. Come to think of it, perhaps the brisk inner me is actually the lazy inner me. Intriguing....
Or possibly not.
Anyway, grains and legumes that don’t need pre-soaking before use are excellent for the lazy cook (inner or outer persona, whichever), which is why whole green gram dal is a favourite with me. I feel it’s a homely sort of dal, and I’ve not seen it on many party menus or dinner menus for guests. There’s not much to making this dal, but only if you have a pressure cooker. Then it is a doddle. Since I haven’t bothered to cook whole green gram dal on the hob by boiling, I’ve no idea how long it might take. (I don’t like the idea of wasting fuel cooking most dals, legumes or beans by boiling, when I have a trusty pressure cooker that does the job in a jiffy. The few exceptions are quick-cook dals like split masoor or chana dal when I don’t want them mushy.)
The basic recipe I use for making this dal is just that – basic. Throw a couple of chopped tomatoes, chillies, garlic along with ½ cup green gram dal into a vessel, add water to cover, and pressure-cook for 3-4 whistles. Then it’s just a question of doing the tadka or seasoning, with or without fried onions, and voila! the dish is finished and ready for consumption.
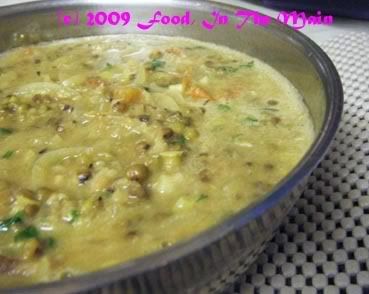
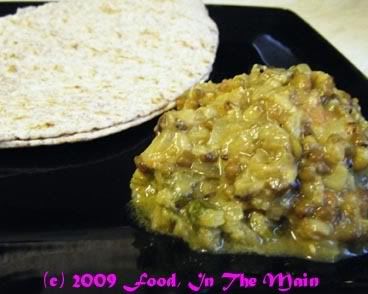
This time too, I used the basic recipe to cook the dal, but upped it a notch by making a wet coconut masala for the seasoning. It tasted just fine... but I still would probably not consider this a dish for special occasions. It’s more an everyday dal with not much exotic about it. For Indians, at any rate.
Click here for another recipe using green gram dal
Recipe for: Green gram dal - 2
Ingredients:
1/2 cup whole green gram dal
2 medium tomatoes, chopped
3-4 green chillies (or to taste), slit
2 cloves garlic, chopped
2 medium onions, sliced thin
2 htbsp fresh coconut, grated
1 tsp coriander seeds
1 tsp cumin seeds
1/2 tsp garam masala
1 tsp oil
Salt to taste
Fresh coriander leaves, chopped, for garnish
1-1/2 cups water
Method:
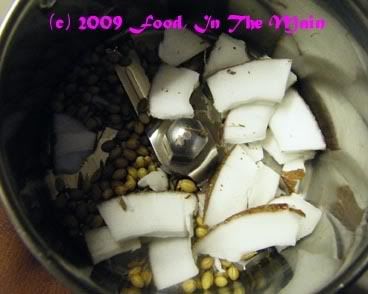
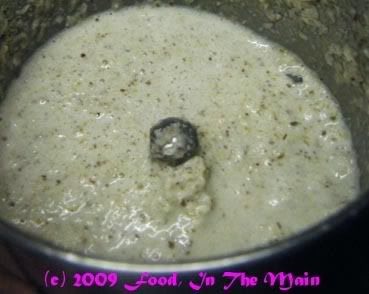
1. Grind the coconut, coriander seeds and cumin seeds to a fine paste using 3-4 tbsp very warm water. Reserve.
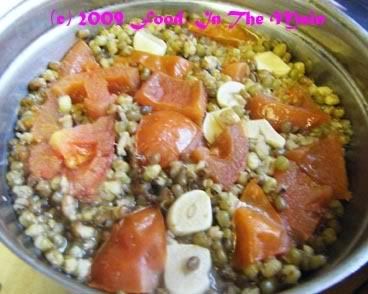
2. Place the uncooked green gram, chopped tomatoes, slit chillies and garlic in a vessel and cook in a pressure cooker for 3 whistles. Remove when pressure drops naturally.
3. Heat the oil in a pan and fry the sliced onions till they turn soft and translucent.
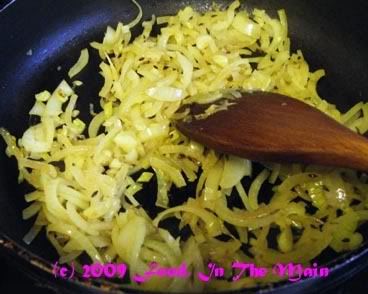
4. Add the cooked green gram dal mixture along with 1/2 cup water (add more if there isnt much moisture in the cooked dal) and stir well. Add salt to taste along with garam masala and bring the mixture to a gentle simmer. Cook for 3-4 minutes.
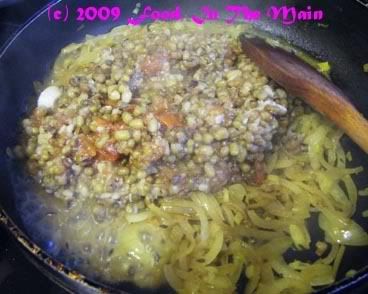
5. Now add the ground coconut masala
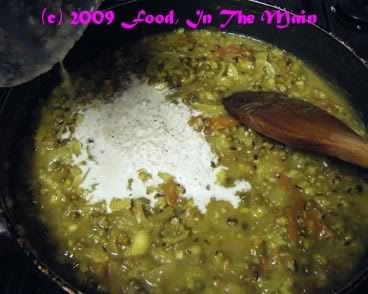
and stir it in.

6. Simmer the dal for 3-4 minutes more (don't boil it), then add the chopped coriander.
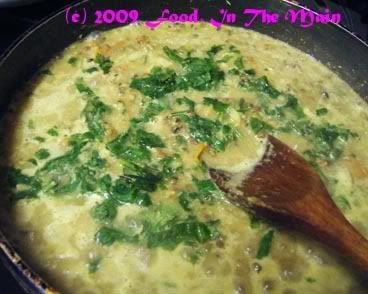
7. Serve hot with chapaties or over plain rice.
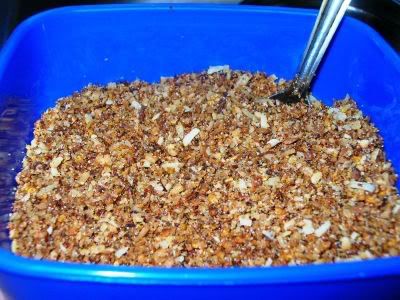
Finally got a chance to make thengai molagapodi - I've been wanting to do so for ages, but couldnt find a suitable coconut. Last week I got lucky - so here's the result.
This is the recipe my mother gave me, and there are no changes at all. No substitutions either, not even wrt the tamarind. I usually use tamarind paste in my recipes, for convenience, but not this time. A large marble-sized piece of dried tamarind fruit, she'd said, so a large marble-sized piece of dried tamarind was what I used - and with the expected excellent result.
Recipe for: Thengai molagapodi
Ingredients:
2 cups fresh grated coconut
2 tbsp chana dal
2 tbsp urad dal
7-8 dried red chillies (or to taste)
1 large marble-sized piece of dried tamarind
Salt to taste
1/4 tsp asafoetida powder (optional)
1 tsp oil
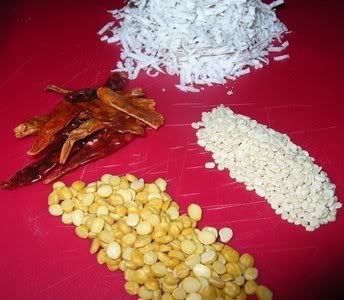
Clockwise from top: Grated coconut, urad dal, chana dal, dried red chillies
Method:
1. Heat the oil in a wide pan. Fry the chana dal, urad dal and red chillies till the dals turn golden brown and the chillies are shiny dark red. Remove from the oil and set aside.

2. In the same pan, roast the grated coconut over medium heat, stirring frequently.

3. Roast the coconut until the gratings are a golden brown and give off a nice roasted aroma. This will take at least 10 minutes - dont rush the process and be careful not to burn the coconut.

4. Let it cool, then dry-grind the chillies, dals and tamarind as finely as possible.
5. Add the toasted coconut and salt to taste, and grind to a slightly coarse texture. It shouldnt be a smooth powder.
This podi is good mixed with rice and ghee, or as a side dish for idli, dosa, etc.
I was planning to make this post about coconut-coriander chutney as an accompaniment for idli - and then decided to post a quick recipe for idli batter as well, encouraged by a specific request for it. (Hey, it's nice to be asked - it's usually me that does the asking of my ever-patient mom!)
Making idli batter is a simple affair nowadays, because I know where to get the ground rice (or idli rava) for it. The traditional way is to make it by soaking a certain kind of rice (puzhungal arisi) in water, but I dont have a proper wet grinder that would make it easy to grind the rice. I use my trusty Sumeet mixie instead, and idli rava is a lot kinder to its motor! (I live in perpetual dread of my mixie breaking down - that would be a catastrophe beyond description!)
Anyway - my recipe for idli batter is 4 cups of idli rava or ground rice (I use the Natco brand)to one cup of de-husked urad dal. (If you use the dal with husk, you get idlis with black spotty bits. Not very nice to look at but just as edible as white idlis. Ask me. I speak from experience.)
I've also tried using basmati rice in place of the puzhungal arisi, but although it works for making dosas, idlis turn out sticky and too doughy for my liking. I dont think using rice flour for the batter would be successful either - the result would be the same as with basmati rice. Ground rice or idli rava is best, as it is somewhat coarser in texture and gives idlis their slightly grainy look.
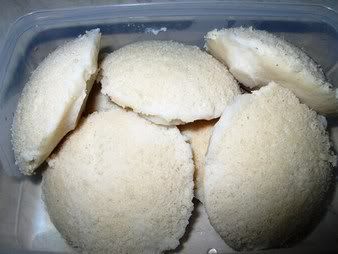
When a South Indian thinks idlis, it's always accompanied by sambar, molagapodi and coconut chutney. These three are a must. Tomato chutney and onion chutney are optional but welcome extras and, outside of a hotel, a total indulgence if made at home at the same time as the other accompaniments!
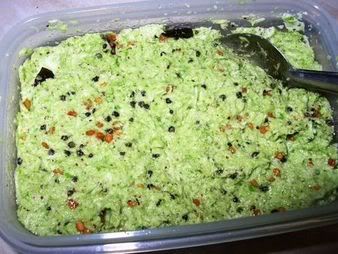
Since I bought a coconut yesterday, I had to use up about half a cup of frozen grated coconut that I was storing. That, along with the remnants of a bunch of coriander, made for a pretty, green chutney that was just right with my idlis. I "seasoned" the chutney with fried mustard seeds, urad dal and curry leaves, so that makes it South Indian style. If I'd added ginger root to the coconut while grinding, and lemon juice after (instead of the seasoning), it would have been a North Indian style chutney. Small and subtle changes in preparation, but BIG change in taste. Hurray for variations!
Recipes for: Coconut-coriander chutney and idli
Ingredients:
1/2 cup fresh grated coconut
4-5 green chillies (or to taste)
2 tbsp fresh coriander leaves, coarsely chopped
Salt to taste
For seasoning:
2 tsp oil
1 tsp urad dal
1 tsp mustard seeds
4-5 curry leaves, torn in half
pinch of asafoetida
Method:
1. Grind the coconut, green chillies, coriander leaves and salt in a spice or coffee grinder to as smooth a paste as possible.
2. Turn the blended coconut into a bowl.
3. Heat the oil in a small pan with a lid. When the oil is hot, put in the mustard seeds, urad dal, curry leaves and asafoetida. Stir and cover.
4. Once the mustard seeds have popped and the urad dal is a reddish gold in colour, pour it on top of the chutney at once. Mix well and serve with hot idlis or dosas.
Idli:
Ingredients:
4 cups idli rava
1 cup urad dal (de-husked)
Salt to taste
Water as required
Method:
1. Grind the urad dal to a smooth paste, using as little water as possible (use cold water). The urad dal should make a thick batter that drips very slowly off a ladle.
2. Make a fairly thick batter of the idli rava and two cups of water. This can be less thick than the urad dal batter, but should not be runny.
3. Mix the two batters together thoroughly in a big bowl, adding salt to taste. The bowl should be only half full, or maximum 2/3 full, to allow for the batter to ferment and rise.
4. Cover and let rise in a warm place for about 8 hours or overnight. If you live in a cold place, this might take as long as 18 hours. I usually heat my oven to 100C first. Then I turn it off, leaving the light on for warmth, and place the bowl of batter in the oven, leaving it to rise.
5. Once the batter is risen, stir it well. If you have an idli stand or mould, grease the cups and pour a ladleful of batter into them. If you dont have a mold, use a flat shallow vessel with a rim and pour the batter into it (the batter should be about 3/4" high in the vessel).
6. Steam it for 12-15 minutes (if using a pressure cooker, DONT use the weight). Let cool for about 5 minutes, then unmold carefully, using a thin-edged spoon to remove the idlis. Serve hot.
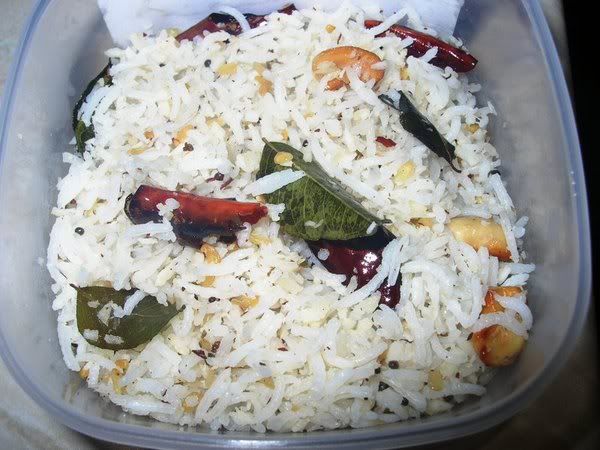
After a long time (four years, I think), I felt the urge to make coconut rice. I dont know why I dont make it more often, because I like it a lot. I guess it's to do with the unreliability of the coconuts I get around here. Goodness knows where they come from or how long ago they were harvested, but there's a 50-50 chance that a coconut bought at Tesco or Asda will be light-years from tender or, if I'm really unlucky, it will be rotting from the inside.
My mother used to tap the "eyes" of the coconut at one end to find out if they were fresh. Another thing she did was to shake them to feel how much water is inside - the more there is sloshing around, the fresher the coconut. Or so I imagined. I still dont know how exactly she determines the tenderness of the coconut, but as far as I'm concerned, I only know that a coconut is rotting when the "eyes" are actually squishy to the touch. Short of that, I havent a clue.
I've also shaken more coconuts than a Santa's helper has shaken an empty donation can (beware, Christmas is on its way...) but none of the shaking or sloshing made it any clearer to me whether the coconut was tender on the inside.
Which, I guess, is why coconut rice hasnt been on my agenda much. Non-tender coconut flesh, when grated or shredded, tastes an awful lot like wood shavings. You can chew and chew and chew until your mouth is dry, but swallowing is not an option because you just KNOW that it will all stick halfway down your gullet if you make the attempt to ingest it. Somehow the prospect of sticking a bottle brush down my throat in an effort to push stubborn lumps of food down into my stomach just doesnt hold much appeal, strange though that may sound...
Anyway, coconut rice is the simplest of recipes to make, if you have cooked rice and freshly grated or shredded coconut at had. I dont think the dry stuff would work well here and I'm not going to attempt it ever. As far as I know, coconut rice is not an everyday dish - it wasnt at home, at any rate. My mother used to make it (along with other "kalanda sadam" - meaning "mixed rice" - like lemon rice and tamarind rice) for a particular religious occasion... which, I'm embarrassed to admit, I cant actually remember. (Update will follow when the information comes in!)
Oh by the way - some people dont bother to toast the shredded coconut at all, but I fry it very lightly so that the aroma and flavour of the coconut flesh are released.
Coconut rice tastes very nice with fried papadoms (poppadums/pappadams/appalam/papadam et al) or even potato crisps.
Recipe for: Coconut rice
Ingredients:
4 cups Basmati rice cooked al dente
1/2 cup fresh shredded coconut
2 tbsp oil
2 tsp urad dal, soaked for 10 minutes in 3-4 tbsp warm water
1/4 cup cashew nuts, broken coarsely
1-1/2 tsp little brown mustard seeds
5-6 fresh curry leaves
3-4 dried red chillies (or to taste), broken in half
Salt to taste
Pinch of asafoetida
Method:
1. Heat the oil in a large wok, drop in the mustard seeds, cover and let the seeds splutter (about 30-40 seconds).
2. Drain the urad dal and add it to the oil along with the next five ingredients.
3. Fry on medium heat until the dal and the nuts are beginning to turn golden brown. Dont turn the heat too high, or the red chillies will burn before the dal and nuts are fried enough.
4. Now add the shredded coconut and stir-fry it for 30 seconds or so, no more. Do not let it brown at all.
5. Then add the rice and salt to taste and mix well. I find that this rice benefits from sitting for about an hour or so, so that the flavours mingle.
6. Re-heat in the microwave oven and serve warm, along with potato crisps or fried poppadams.


