skip to main |
skip to sidebar
My entire family likes this vegetable, but my sister and I, we're "lattoo" (Hindi slang for "crazy") when it comes to vazhakkai. If we were asked to eat it every day for a year, we would probably beg to have it twice a day! The recipe below is how my mother makes it, and I see no reason to mess with something that I think is perfect. The flavour that the coconut oil gives this vegetable is unbelievable. The two just go together, no question.
That said, if when I get my hands on vazhakkai again, I hope to make a recipe that I've had in my folder for literally years, involving fresh mustard paste. You would think I could hold back at least one vazhakkai for the mustardy recipe... but no. I haven't yet made it because each time I end up making this same one. This dry fry with my mother's thengai kuzhambu (South Indian coconut-and-fenugreek-seed gravy)and steamed rice - I couldn't want for more!
Recipe for: Vazhakkai fry
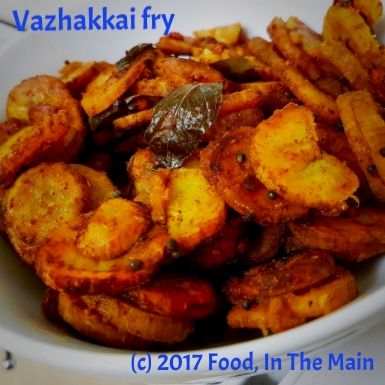
Ingredients:
3 green (raw) bananas
2 tbsp coconut oil
A few fresh/frozen curry leaves (optional)
1/4 tsp turmeric powder
1/8 tsp asafoetida powder (optional)
1/2 tsp urad dal
1 tsp mustard seeds
1/4 tsp black pepper powder
Red chilli powder to taste
Salt to taste
1 tsp tamarind paste
Method:
1. Wear disposable gloves or grease your hands with oil before peeling the bananas as the sap will otherwise stick to your hands. Make sure to get all the thick green skin off the bananas.
2. Slice the bananas into even slices about 1/4cm thick and put them in a saucepan of water. The water should be enough to cover the slices generously. Dissolve the tamarind paste and turmeric powder in the water.
3. Parboil the sliced bananas, then place in a colander to drain off the cooking water. Handle carefully so that the slices don't break up too much.
4. Heat the coconut oil in a wide saucepan, then add the mustard seeds, curry leaves and urad dal. Cover and let the seeds splutter. The urad dal should be golden by now.
5. Now add the chilli powder and black pepper powder, stir it for 20 seconds, then add the parboiled banana slices along with salt to taste. Stir carefully to coat the slices evenly.
6. Cover the pan and let the slices roast for 8-10 minutes on a medium heat, until the slices turn golden and are fully cooked. Turn the slices carefully over and let them roast for about 5 minutes more. Serve hot as a side with rice, rasam or sambar and any South Indian "gravy" like moar kuzhambu, vattha kuzhambu or thengai kuzhambu (recipes for all these are on my blog).
I was inspired to make these baked vadas – or rather, reminded that such a thing existed on my blog – by a new friend based in Australia when she wrote to me saying that she had made the vadas (adding flaxseed as per the original recipe on The Taste Tinkerer’s blog). That’s when I suddenly remembered how LOVELY the baked vadas had tasted and wondered why on earth (and how on earth too) I’d not made them in such a long time!
And naturally I wanted them immediately (or as close to immediately as I could get) – so I ended up soaking the dals at around 10.30 p.m, just as Pete was delicately putting forward a suggestion of retiring to bed. But I wasn’t sleepy – no, the Sandman had been pushed into the background (and was probably sulking at being so rudely dismissed). I wanted to make those vadas there and then. Also, I was thrilled that I had flaxseeds at hand… and when you’re in the grip of a sudden obsession backed by having all the requisite ingredients – well, ya gotta do what ya gotta do, as they say.
By the way, I soaked the dals in very hot water for quick results because of the lateness of the hour, but the preferable method is to soak the dals in water for a few hours so that they rehydrate naturally.
So by 11 p.m, I was doing what I hadda do with the soaked dals, adding finely shredded cabbage as well as onions to make the batter... and 15 minutes later, the Sandman had officially given up on Pete as well, as he (Pete) had been awakened well and truly by the AMAZING aroma of the baking vadas that was wafting around the house.
By 11.40 p.m or so, I was taste-testing very hot baked masala vadas fresh from the oven, while Pete watched me somewhat grumpily – he was left out of the whole vada love-fest because they contained (to him) insane amounts of fresh chillies. Well, how was I to know he’d want some too?
But don’t worry, gentle reader… I satisfied his suddenly-awakened vada craving the next evening by baking some more vadas just for him at a reasonable hour of the evening, to the general satisfaction and happiness of all concerned (the Sandman included).
Recipe for: Baked cabbage-onion masala vada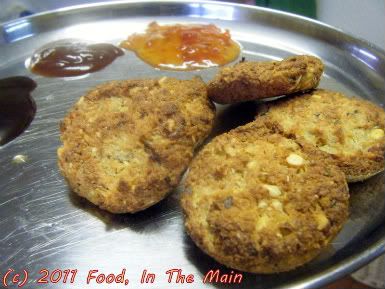
Ingredients:
1/2 cup chana dal
1/2 cup toor dal
1/3 cup flax seeds
1/3 cup red onion, chopped
1/3 cup green cabbage, shredded
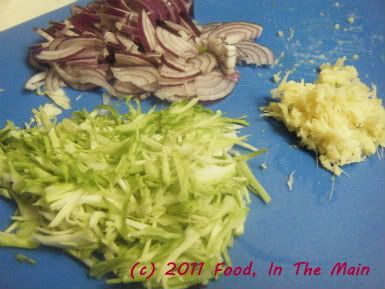
3-5 fresh green/red chillies
3-4 tbsp roasted peanuts, coarsely crushed
1" piece ginger
a few curry leaves, torn up (optional)
1 tsp baking powder
1 tbsp oil
Salt to taste
Oil-spray/Pam
1. Soak the chana dal and toor dal for 3-4 hours.
2. Grind a handful of the dals along with the flax seeds, red chillies and ginger to a smooth paste, adding a little water.
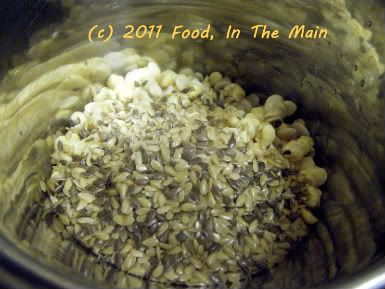
3. Next, add the remaining dal, the red onion and cabbage and grind to a coarse consistency using as little water as possible. The batter must be thick enough to hold its shape when made into patties.
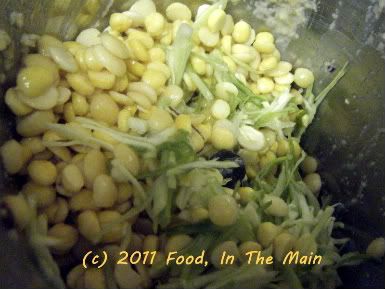
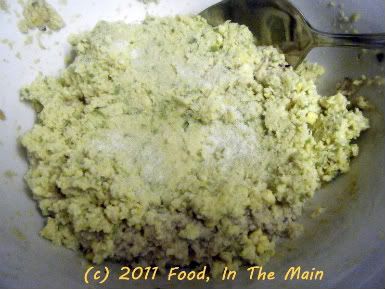
4. Turn the batter out into a bowl and add the 1 tbsp oil, salt to taste, peanuts and 1 tsp baking powder. Stir thoroughly to ensure the ingredients are mixed in evenly.
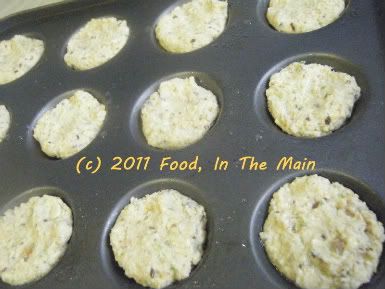
4. Grease a small cupcake or mini-muffin tray, then place lime-sized pieces of the batter in the depressions, patting them level with the top of the tray.
5. Heat the oven to 180C/350F. Spray the tops of the batter with Pam or brush lightly with oil, and bake for 15-20 minutes in the middle of the oven, turning the tray around mid-way. When the vadas are golden brown on top, turn off the heat.
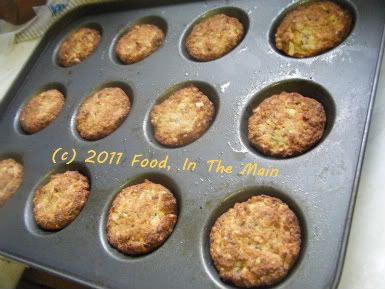
Let the vadas remain in the tray for 5 minutes, then turn them out. Serve hot as a snack with dips or chutney. These are best eaten hot and fresh, as they tend to become somewhat dry the next day and aren't as much fun to eat as a snack.
RECIPE: BAKED CABBAGE-ONION MASALA VADA
Ingredients:
1/2 cup chana dal
1/2 cup toor dal
1/3 cup flax seeds
1/3 cup red onion, chopped
1/3 cup green cabbage, shredded
3-5 fresh green/red chillies
3-4 tbsp roasted peanuts, coarsely crushed
1" piece ginger
a few curry leaves, torn up (optional)
1 tsp baking powder
1 tbsp oil
Salt to taste
Oil-spray/Pam
Method:
1. Soak the chana dal and toor dal for 3-4 hours.
2. Grind a handful of the dals along with the flax seeds, red chillies and ginger to a smooth paste, adding a little water.
3. Next, add the remaining dal, the red onion and cabbage and grind to a coarse consistency using as little water as possible. The batter must be thick enough to hold its shape when made into patties.
4. Turn the batter out into a bowl and add the 1 tbsp oil, salt to taste, peanuts and 1 tsp baking powder. Stir thoroughly to ensure the ingredients are mixed in evenly.
5. Grease a small cupcake or mini-muffin tray, then place lime-sized pieces of the batter in the depressions, patting them level with the top of the tray.
6. Heat the oven to 180C/350F. Spray the tops of the batter with Pam or brush lightly with oil, and bake for 15-20 minutes in the middle of the oven, turning the tray around mid-way. When the vadas are golden brown on top, turn off the heat.
7. Let the vadas remain in the tray for 5 minutes, then turn them out. Serve hot as a snack with dips or chutney. These are best eaten hot and fresh, as they tend to become somewhat dry the next day and aren't as much fun to eat as a snack.
I’ve always found it difficult to force myself to eat something simply because it’s considered healthy. Health-giving properties alone don’t make the cut, as far as my tastebuds are concerned. I accept that it is entirely my loss. But I am trying to trick my tastebuds into accepting non-rice (or non-white-rice) wholegrains as tasty, mainly by disguising them in familiar recipes.
I don’t know if you’ve heard of how shepherds help orphaned newborn lambs survive, by putting them together with ewes whose own lambs died at birth. Basically, they tie the fleece from the dead lambs onto the orphaned ones, and then introduce them to the mama sheep… and the mama sheep, smelling only their own dead lambs’ smell, accept the orphans as their own. Eventually, they get used to the adopted lambs’ own smell and then there is no need for the fleece to do the tricking job.
In other words:
Shyam (me) = mama sheep, who can’t/won’t accept
other lambs = brown rice, millet, broken wheat, quinoa, etc.,
in place of
her own beloved lamb = white rice.
Did y’awl get that awesome symbolism? Good, isn’t it? I’ve been planning my acceptance speech for the Nobel Prize for Literature ever since I’ve been able to put pen to paper. (Please try not to hurt my feelings by saying I’m baaaaaaaaaad (get the pun! get the pun!) at metaphors.)
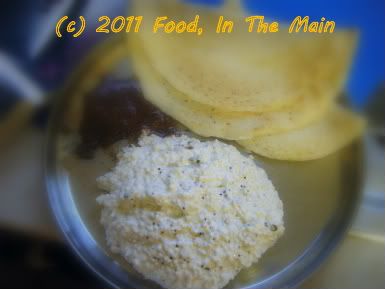
So anyway, I think mama sheep was quite reasonably fooled into accepting the millet “curd rice” lamb as a reasonable substitute for her own white rice baby.
I’ve listed a few optional extras in the recipe below to add to the millet, none of which you will see in my photos – but that is because I didn’t have green grapes or cucumber handy, and couldn’t be fagged to grate any carrots because I was doing other things at the time.
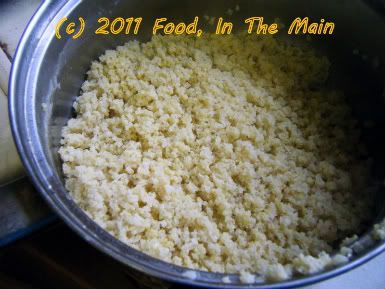
One thing I noticed about the cooked millet – how much it resembled cooked quinoa, but luckily without the distinctive taste. The millet took less getting used to than quinoa. Which is a good reason why it worked so well in this recipe. My dinner was millet "curd rice" with 1-1/2 brown rice dosas and molagapodi. Pretty satisfying, all said.
Recipe for:
Ingredients:
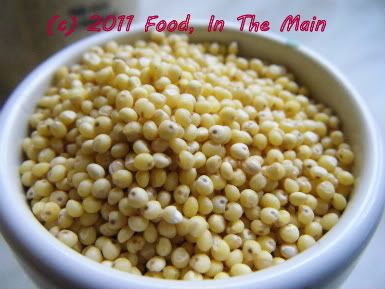
1/2 cup millet
Water as required
Yogurt as required (I used Greek-style yogurt)
1 tsp oil
1 tsp mustard seeds
A few curry leaves, torn up
1/4 tsp asafoetida powder
2-3 green chillies (or to taste), sliced into thin rounds
Optional: 2-3 tbsp cucumber cubed small OR 2-3 tbsp grated carrots OR a few halved green grapes
Method:
1. Cook the millet in plenty of boiling water till soft and cooked (takes about 15 minutes, but keep testing the millet during the cooking period to see if it's done).
2. Drain the water off as well as you can and let the millet sit covered for 10 minutes. Let it cool.
3. Add as much yogurt to the millet as required, mixing gently, until it's of a consistency you like.
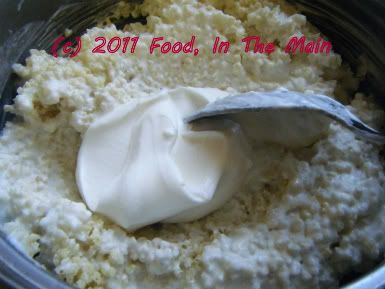
Ideally, it shouldn't be sloppy/runny, and it should also not be thick and dry.
4. For the tempering, heat the oil in a small pan, add the asafoetida powder, green chillies (if using), mustard seeds and curry leaves. Cover the pan and let the mustard seeds pop.
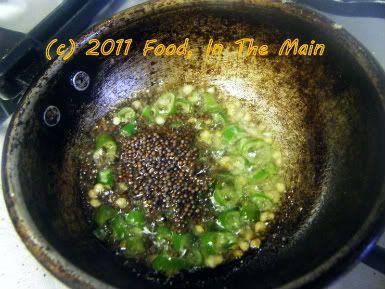
5. Now pour this tempering over the millet and mix it in gently. You can also mix in the cucumber, carrots or grapes at this point.
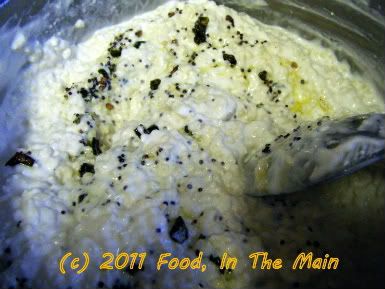
Serve cold or at room temperature.
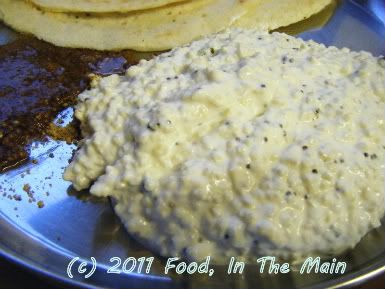
This can be had by itself or with pickles and any vegetable curry.
RECIPE: MILLET "CURD RICE"
Ingredients:
1/2 cup millet
Water as required
Yogurt as required (I used Greek-style yogurt)
1 tsp oil
1 tsp mustard seeds
A few curry leaves, torn up
1/4 tsp asafoetida powder
2-3 green chillies (or to taste), sliced into thin rounds
Optional: 2-3 tbsp cucumber cubed small OR 2-3 tbsp grated carrots OR a few halved green grapes
Method:
1. Cook the millet in plenty of boiling water till soft and cooked (takes about 15 minutes, but keep testing the millet during the cooking period to see if it's done).
2. Drain the water off as well as you can and let the millet sit covered for 10 minutes. Let it cool.
3. Add as much yogurt to the millet as required, mixing gently, until it's of a consistency you like. Ideally, it shouldn't be sloppy/runny, and it should also not be thick and dry.
4. For the tempering, heat the oil in a small pan, add the asafoetida powder, green chillies (if using), mustard seeds and curry leaves. Cover the pan and let the mustard seeds pop.
5. Now pour this tempering over the millet and mix it in gently. You can also mix in the cucumber, carrots or grapes at this point. Serve cold or at room temperature. This can be had by itself or with pickles and any vegetable curry. Millet "curd rice"
One of my favourite aunts is my B mami. Nobody can help liking her, she’s just so kind, good-natured, fun and always good for a laugh. And to top that off, she’s also an absolutely amazing cook. She can make better bhelpuri and pani puri than anyone I know, and the other North Indian dishes she makes are just as awesome. Maybe it’s because she lived for so many years in the North (and north-east), and perhaps learnt them from North Indian friends, but I personally don’t think that’s the real reason. The real reason is that she’s just an awesome cook, full stop.
My visit to their place in Mathura (along with my youngest aunt and her daughter who was maybe three or four years old then) is still vivid in my memory. This was over 15 years ago, but good times leave their imprints on your brain, don’t they? But – and I don’t know just how much I should be embarrassed by this – one of THE most enduring of those memories was the train trip back. What’s embarrassing about a train trip memory, you ask? Well, the answer is that it’s not so much the train trip that was embarrassing, as my memory of WHY that trip was memorable. I might as well spit it out (not literally) – it was the bharwan bhindi (okra stuffed with a mixture of spice powders) that B mami had packed for our train journey, with instructions to eat that first in case it turned bad in the heat.
That was the best bhindi I’d ever had, bar none. I’ve made this before, but not to my mami’s recipe. A few weeks back I emailed her asking for her recipe for bharwa bhindi, which she kindly sent me. I then sat on it for a few weeks more, not because of my usual procrastination but because I just didn’t get a chance to lay my paws on fresh okra. That occasion happened a couple of weeks back and I made B mami’s bharwan bhindi rightaway. (That this recipe didn’t get posted rightaway was due to a combination of procrastination + lack of time + unfamiliarity with online photo editing software).
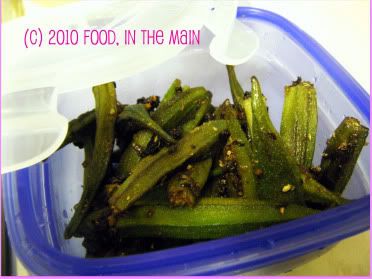
The okra was pretty good – not as good as mami’s (no surprise there) even with the benefit of her recipe – but a creditable effort, nonetheless.
Recipe for: Stuffed bhindi (okra)
Ingredients:
250 gms ladies finger/okra/bhindi
1/2 tsp haldi (turmeric) powder
1 tbsp dhania (coriander) powder
1 tbsp jeera (cumin) powder
1 tsp chilly powder (or to taste)
1 tsp aamchur (dried sour mango) powder - optional
1/4 tsp hing (asafoetida) powder
salt to taste
oil as required (about 2 tbsp)
1 medium onion, grated or very finely minced
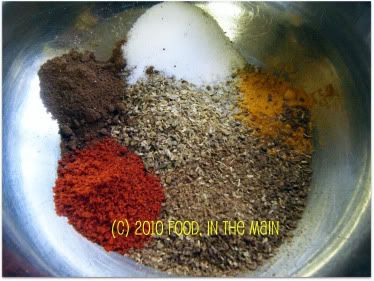
Method:
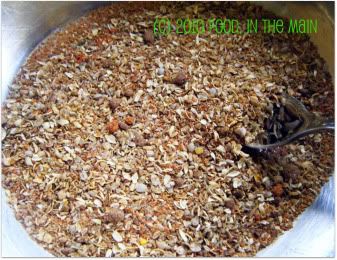
1. Mix the various powders together to make the stuffing masala and check that it tastes okay to you. Reserve.
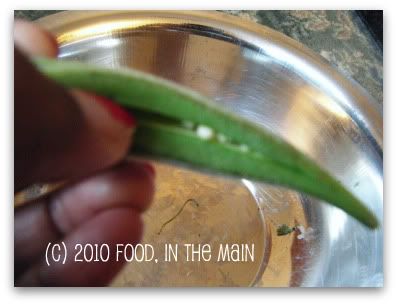
2. Cut the tops off the okra (I leave the tail on but it can also be removed if preferred.) Make vertical slits in each one, taking care not to go right through to the other side.
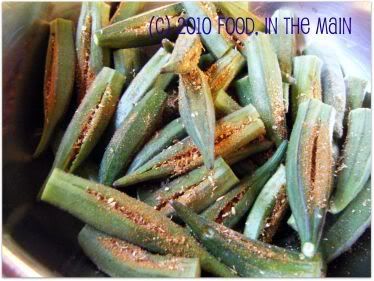
3. Carefully stuff each okra with the masala powder, using a small blunt butter knife
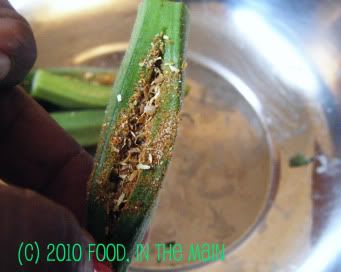
until all the okra is done. You can use any remaining masala on the okra as it cooks, it's up to you.
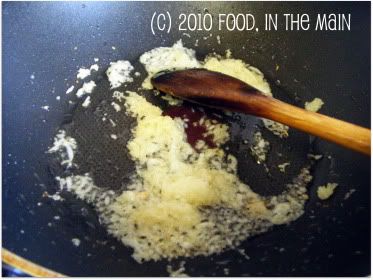
4. Now heat 1 tbsp oil in a non-stick saute pan and add the finely minced/grated onion.
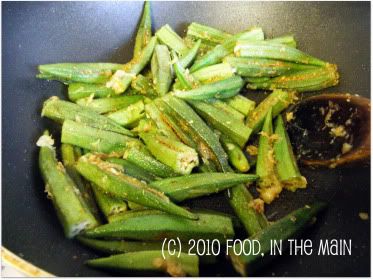
5. When the onion is soft and beginning to turn colour, add the stuffed okra. Carefully turn over the okra so that the onions are distributed more or less evenly.
6. Fry the stuffed bhindi on medium-high, turning them over occasionally. Add more oil as required. Don't cover the pan or the okra will become gooey. Add salt to taste when the okra is cooked and slightly crisp, with brown spots.
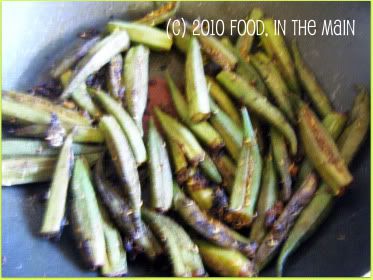
Serve the stuffed bhindi hot with rotis or as a side dish with rice and dal.
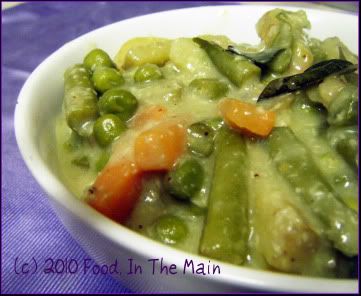
I have a slightly odd love-dislike (not hate, never that) affair with aviyal, that classic Kerala dish of vegetables in coconut gravy. There are specific requirements for both the love and the dislike to happen. I love aviyal when:
a. It is made with thinly cut vegetables (and does not involve aubergines)
b. It uses tamarind for that hint of sourness rather than buttermilk or curds
c. It is eaten fresh and hot
I dislike aviyal when:
a. The vegetables are cut in a fashion that brings to mind large railway sleepers – and about as thick as well!
b. It contains buttermilk or curds (this one pretty obvious, huh?)
c. It’s cold and/or old (as in more than a day old). Reheated aviyal does nothing for me – especially if it was made with buttermilk or curds.
I do realise that probably hundreds of thousands of people do make aviyal with buttermilk (or curds). Small aside: Should I mention both buttermilk and curds every single time, or will just one or the other do? Pls leave your opinion in the comments section, even if it's too late to matter for this post. :) But there will be other posts, after all, and what if this situation occurs again and I am left without a majority opinion to heed? What then, huh? What then?
So, anyway... since my mother has always used tamarind and prefers the taste, I do too. I’ve always considered aviyal a complicated dish, carefully nurturing my ignorance by never even considering it worthwhile to see how it was made. This year, though, when my mother said she’d made aviyal for the Tamil New Year, I felt a slight craving for it. Too bad she lives a few thousand miles away in Seattle... so naturally I was forced to make it myself.
The thing that sealed the deal for me was that I actually had young, fresh, tender green bananas in the house plus some fresh bottlegourd. I had bought them practically wholesale from a quick trip to Birmingham with Pete. He was picking up some speakers that he’d bought, and I tagged along - because I like tagging along in general, and also because of the always-hopeful thought in the back of my mind that I might be able to pick up some Indian vegetables. Well, actually, that thought is always at the forefront of my mind. (Do I HAVE to be 100% honest? Fine, it was the ONLY thought in my mind.)
As I was saying, aviyal was on the cards and I wanted to make it exactly like my mother does. I rang her for the recipe and got instructions that more or less said “cut and cook vegetables, grind coconut with green chillies, add tamarind, mix well, season with coconut oil and curry leaves”.
Was that it, I asked her, a trifle confused. Was she holding back on me? Where were the complicated instructions? That was the entire recipe? That was what I’d considered difficult all this while? How embarrassing!
So I made the aviyal – and believe me, cutting the vegetables was the most complicated part. The aviyal tasted just as it did in the memorybank of tastes that is stored somewhere in my head (or in my tongue?)... and since Pete didn’t want any part of it, there was enough for my meal the next day too. Yeah, I reheated it. AND liked it. Yes, I know what I said earlier. My excuse is that I’ve not had aviyal at all for many years, so I’m allowed to be contradictory of my own self in my own post. So there you have it.
Recipe for: Aviyal
Ingredients:
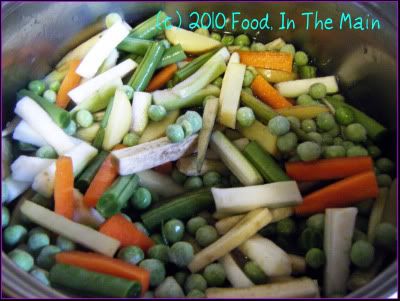
3 cups mixed vegetables, sliced into 1/2-cm thick matchsticks (a combination of carrots, potatoes, green plantains, green beans, bottlegourd/squash/courgettes, peas)
3 tbsp freshly grated coconut
4-5 green chillies (or to taste)
1/2 tsp cumin seeds
2 tbsp coconut oil 1/2 tsp tamarind paste
8-10 fresh curry leaves
salt to taste
Method:
1. Cook all the vegetables till done, but not mushy.
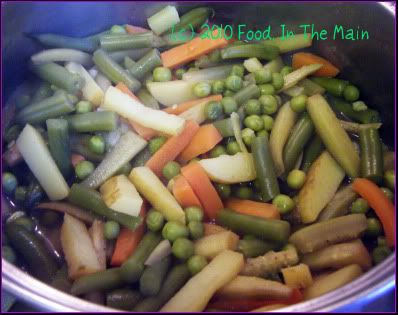
You can do this in a pressure cooker (much quicker than anyhow else) or on the hob, or in the microwave.
2. Grind together the coconut, cumin seeds and green chillies
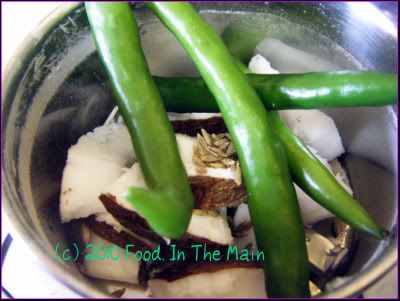
to a smooth paste using warm water.
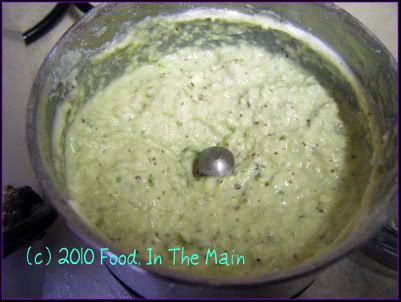
3. Add the coconut paste to the vegetables along with salt to taste, and mix well. Mix tamarind paste with 2-3 tbsp water and add that as well (increase to 1/2 cup water if there isn't enough to make a gravy).
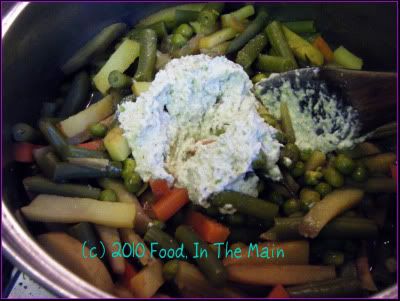
4. Sprinkle the curry leaves over, then pour in the coconut oil and mix again.
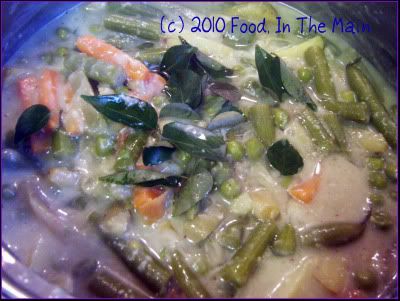
Heat the aviyal thoroughly (careful not to burn it) and serve hot with steamed rice.
Well, when I say "South Indian style", I really mean "my mother's style", but it's not far off the truth as descriptions go - I mean, my mother IS South Indian, and it IS her style. Heh.
I'll also say this - spinach cooked this way is probably an acquired taste unless you REALLY love the taste. I quite like spinach, plus I've acquired the taste, so I face no problems whatsoever!
Ideally, the two ingredients that would make this completely authentic are: 1. mor molagai - green chillies that have been soaked in salt and buttermilk (dont know the recipe myself - and not likely to make it either, because of a lack of strong sunshine in these here parts...) and sundried. These are fried in oil and sometimes used to season certain dishes, but more usually eaten as an accompaniment with yogurt and rice, rather like appalam/poppadum.
2. Karuvadam - these are usually made with pumpkin and spiced up with red chillies. I dont know what else goes into the recipe, but again, they are dried in the sun and stored away. They make their appearance occasionally, fried and added to certain dishes - like keerai. I'm not sure if karuvadam have any equivalent in western cuisine, so I dont have a comparable to explain with. They're very intense in flavour, so a little goes a long way.
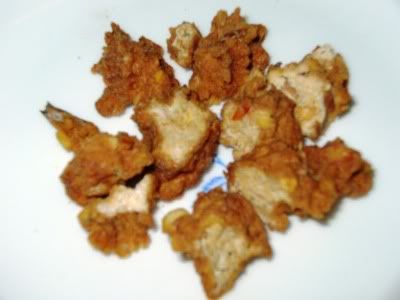
Of the two items, I had the karuvadam - a small stash which I used up boldly in the certain knowledge that I will be replenishing my stock very soon on my India trip!
Keerai made this way is a classic accompaniment for vattha kuzhambu and rice. I had an added extra - simple pan-fried potatoes.
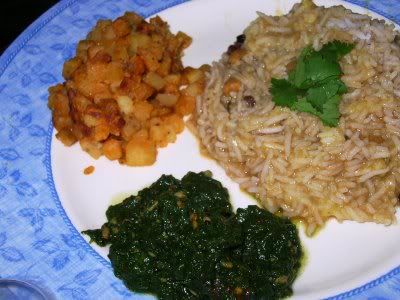
Oh by the way... keerai can be made without the karuvadam, too. They arent essential, just a tasty extra.
Recipe for: Keerai with karuvadam
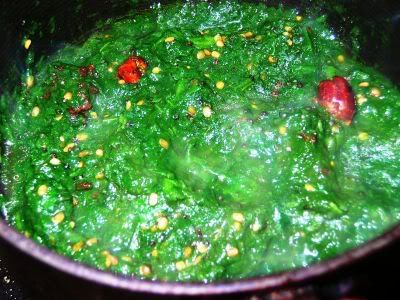
Ingredients:
3 cups spinach, chopped, washed and drained
Karuvadam - about 4-5 pieces
2-3 dry red chillies - or 4-5 mor molagai pieces, if you be so lucky as to have them!
2 tsp urad dal
1 tsp mustard seeds
Salt to taste
Pinch of asafoetida
3-4 tbsp vegetable or sunflower oil to fry the karuvadam and mor molagai
1 tsp coconut oil (Indian brands like Parachute, etc) - optional
Method:
1. Cook the keerai with 3-4 tbsp water in a closed pan till wilted. Let it cool. You can now mash it for a robust texture or run it in the blender a couple of times till it's pureed. I prefer an in-between texture - not too rough but not completely smooth, either.
2. Put the keerai back in the pan along with salt to taste, and let it simmer on low along with 1/3 cup water.
3. Heat the vegetable oil in a small pan and fry the karuvadam and mor molagai (if using). Remove from oil and set aside for the moment.
4. Spoon out most of the remaining oil, leaving about a tsp in the pan. Add the asafoetida, mustard seeds, urad dal and the dry red chillies. Cover the pan and let the seeds splutter and the urad dal turns light brown.
5. Pour this seasoning directly on the keerai and mix well. Add the karuvadam and turn the heat off. Pour the tsp of coconut oil over the keerai and mix again. Serve hot as a side dish with vattha kuzhambu and rice.
I used to think that poli was a South Indian recipe, until I found out that Maharashtrians make it for Makar Sankranti (harvest festival) - which necessitated a change in my world view somewhat, because people from the four Southern Indian States consider Maharashtra and Mumbai-ites to be North Indians... whereas people from the North India consider Maharashtrians to be more South Indian than north.
It doesnt help that Marathi as a language and its script are so much closer to Hindi and its script and not in the least like Tamil, Malayalam, Kannada or Telugu. All very confusing.
But to get back to the delights of poli... I might have mentioned this before, but I like coconut in very, very few sweet dishes. Poli isnt one of them dishes. So when I came across a recipe for poli that seemed different from the norm because of the stuffing ingredients - it contained sesame seeds but very little gram/chickpea flour and not any chana dal at all (cooked chana dal stuffing is what I've had thus far) - I was pleased. I love the taste of sesame in savoury and sweet dishes, so that was another plus.
I have to say that the poli made this way didnt stay soft for long. The traditional ones I've had, with mashed cooked gram dal & jaggery filling, are meltingly soft and delicious, especially with a dollop of ghee on top. The sesame-seed poli I made were delicious too, but - have I said this before? - not soft. Still, that didnt stop me scarfing them down, so I guess it's worth putting up the recipe.
If anybody wants to know how to make them soft... they'll have to look elsewhere for the answer. And if anybody does find the answer, would they be kind enough to pass on the info to me too, pleeeeeeeeeeeeease?
Recipe for: Sesame seed and jaggery poli (slightly adapted from Cuisine Cuisine)
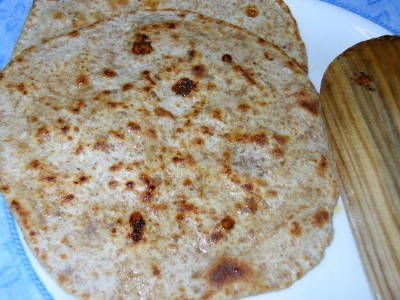
Ingredients:
For the stuffing:
1 cup jaggery, powdered
1 htbsp gram/chickpea flour
1 tsp cooking oil
1 tbsp poppy seeds
2 tbsp white sesame seeds
1/4 tsp cardamom seeds, powdered
For the poli:
2 cups plain flour
1 cup wholewheat flour
1 tbsp warmed oil
1/4 tsp salt
Warm water as required for making the dough
Plain flour for dusting
Ghee for shallow-frying
Method:
1. Make a soft but not sticky dough with the poli ingredients. Let it rest covered for about 30 minutes.
2. Heat 1 tsp oil in a little pan and roast the gram flour, stirring constantly, until the raw smell is gone (about a minute). Be careful not to burn the flour. Set aside to cool.
3. Roast the poppy seeds and sesame seeds on dry heat over medium flame till they start to turn golden. Grind these in a spice of coffee mill, together with the cardamom powder, into a fine powder. Mix with the roasted gram flour and reserve.
4. Put the powdered jaggery in a bowl, sprinkle a tsp of water, and melt in the microwave for a 45 seconds. Take it out and give it a stir. If it needs to melt a bit more - ie, if there are any dry bits - put it back in the microwave for 20 seconds. Dont overcook it by microwaving it for too long.
5. Quickly mix the sesame-poppy seed powder with the jaggery, making sure it's thoroughly mixed. Set aside to cool.
To make the poli:
6. Knead the dough well, then make small balls (slightly smaller than a golf ball).
7. Roll out two balls into palm-sized circles.
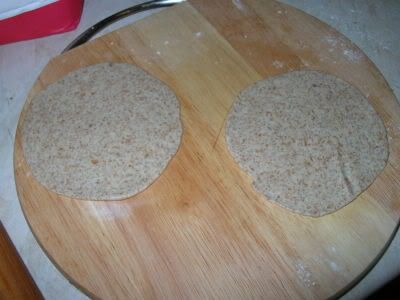
8. Sprinkle some of the filling all over one dough circle (break up any lumps with your fingers), then cover it with the other circle.
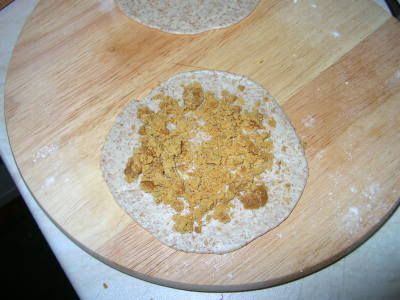
9. Dust the top with flour and gently roll out the dough circle into a slightly larger circle, so that the filling is sandwiched.
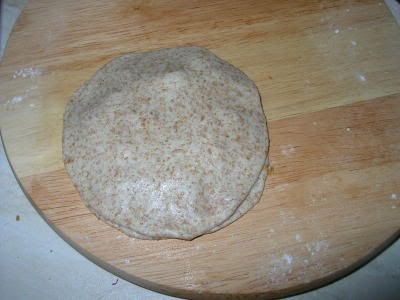
10. Then roll it out some more into a thin round.
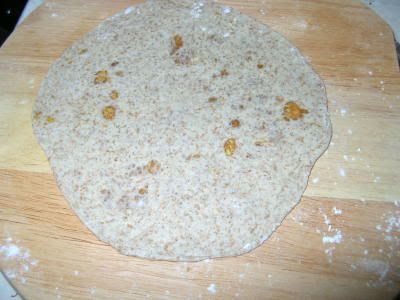
11. Heat a tava or frying pan (keep it on medium heat) and transfer the poli to it. Cook for a few seconds on one side, turn it over and smear that side with ghee. Flip it over once again and smear the other side with ghee as well. Shallow fry until the poli begins to get golden brown spots on both sides. Serve warm.
Note: The jaggery will melt in the heat and might ooze out - in that case keep an eye on it so that it doesnt burn. A little extra direct heat gives a caramelly flavour that is very nice, but burnt jaggery is quite awful to smell and taste.
After a long time (four years, I think), I felt the urge to make coconut rice. I dont know why I dont make it more often, because I like it a lot. I guess it's to do with the unreliability of the coconuts I get around here. Goodness knows where they come from or how long ago they were harvested, but there's a 50-50 chance that a coconut bought at Tesco or Asda will be light-years from tender or, if I'm really unlucky, it will be rotting from the inside.
My mother used to tap the "eyes" of the coconut at one end to find out if they were fresh. Another thing she did was to shake them to feel how much water is inside - the more there is sloshing around, the fresher the coconut. Or so I imagined. I still dont know how exactly she determines the tenderness of the coconut, but as far as I'm concerned, I only know that a coconut is rotting when the "eyes" are actually squishy to the touch. Short of that, I havent a clue.
I've also shaken more coconuts than a Santa's helper has shaken an empty donation can (beware, Christmas is on its way...) but none of the shaking or sloshing made it any clearer to me whether the coconut was tender on the inside.
Which, I guess, is why coconut rice hasnt been on my agenda much. Non-tender coconut flesh, when grated or shredded, tastes an awful lot like wood shavings. You can chew and chew and chew until your mouth is dry, but swallowing is not an option because you just KNOW that it will all stick halfway down your gullet if you make the attempt to ingest it. Somehow the prospect of sticking a bottle brush down my throat in an effort to push stubborn lumps of food down into my stomach just doesnt hold much appeal, strange though that may sound...
Anyway, coconut rice is the simplest of recipes to make, if you have cooked rice and freshly grated or shredded coconut at had. I dont think the dry stuff would work well here and I'm not going to attempt it ever. As far as I know, coconut rice is not an everyday dish - it wasnt at home, at any rate. My mother used to make it (along with other "kalanda sadam" - meaning "mixed rice" - like lemon rice and tamarind rice) for a particular religious occasion... which, I'm embarrassed to admit, I cant actually remember. (Update will follow when the information comes in!)
Oh by the way - some people dont bother to toast the shredded coconut at all, but I fry it very lightly so that the aroma and flavour of the coconut flesh are released.
Coconut rice tastes very nice with fried papadoms (poppadums/pappadams/appalam/papadam et al) or even potato crisps.
Recipe for: Coconut rice
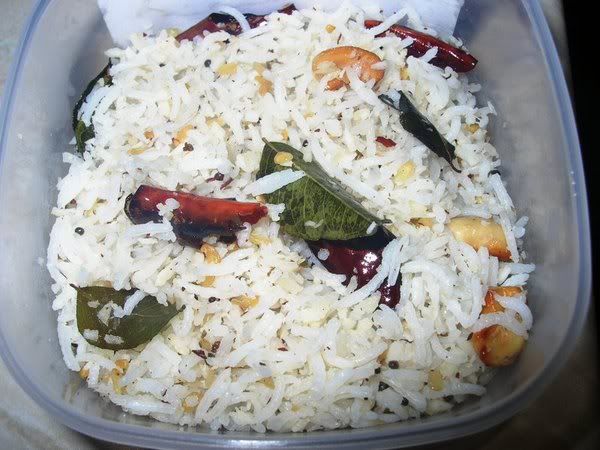
Ingredients:
4 cups Basmati rice cooked al dente
1/2 cup fresh shredded coconut
2 tbsp oil
2 tsp urad dal, soaked for 10 minutes in 3-4 tbsp warm water
1/4 cup cashew nuts, broken coarsely
1-1/2 tsp little brown mustard seeds
5-6 fresh curry leaves
3-4 dried red chillies (or to taste), broken in half
Salt to taste
Pinch of asafoetida
Method:
1. Heat the oil in a large wok, drop in the mustard seeds, cover and let the seeds splutter (about 30-40 seconds).
2. Drain the urad dal and add it to the oil along with the next five ingredients.
3. Fry on medium heat until the dal and the nuts are beginning to turn golden brown. Dont turn the heat too high, or the red chillies will burn before the dal and nuts are fried enough.
4. Now add the shredded coconut and stir-fry it for 30 seconds or so, no more. Do not let it brown at all.
5. Then add the rice and salt to taste and mix well. I find that this rice benefits from sitting for about an hour or so, so that the flavours mingle.
6. Re-heat in the microwave oven and serve warm, along with potato crisps or fried poppadams.
Jamaicans aren't the only people who eat plantains or unripe green bananas... Tamil Nadu State and Kerala - especially Kerala - have a variety of recipes for these starchy vegetables. There's a difference between plantains and green bananas - they're known in Tamil as "nendrankai" and "vazhakkai", respectively. The difference as far as I know is that plantains are very hard when they're green, and are good for making chips, and green bananas are usually not quite so hard - they make good banana chips too, but are easier to cook in general. More tender.
Me and my siblings all love green bananas/plantains cooked any way that my mother makes it. The only way in which I WILL not eat them is boiled and mildly sauteed and then mixed with fresh grated coconut - my grandmother's speciality... bleagh!!! to put it mildly. Not that I dislike the combination of coconut and bananas... it's just that I prefer the coconut ground to a paste and used to make a gravy for the bananas. Vazhakkai kootu, in other words. But that's not what I made today.
Usually I get the hard plantain variety for making "podimas" - they retain their shape better and dont get over-soft when they are pressure-cooked. Makes for much easier grating, although you do have to be careful that it doesnt get too dry after being grated. In that case it might taste like seasoned wood-chips.
Anyway... I didnt have the nendrankai, so I used vazhakkai this time. I was careful not to pressure-cook them for more than 2 whistles, but they were still quite soft. So I let them cool completely before grating them... however, I couldnt quite avoid bits breaking off in lumps. It wasnt a problem of anything but aesthetics, though. Tastes a lot better than it looks!
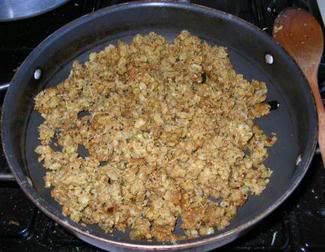
The recipe for the masala powder used to season the cooked, grated bananas is my mother's version. I cant better it, so I'm not even going to try. One of my favourite South Indian-style meal combinations (and I'm sure my sister and brother would agree) is mor kuzhambu (buttermilk-based gravy) and vazhakkai podimas with plain white rice. What I'd call a comforting classic.
Recipe for: Vazhakkai podimas
Ingredients:
1 big green plantain or 3-4 unripe green bananas
2 tsp urad dal (white)
2 tsp black mustard seeds
1/2 tsp turmeric powder
3 tbsp sunflower/vegetable oil
2 tbsp coconut oil (optional)
Salt to taste
a few fresh curry leaves
For the masala powder -
2 tsp chana dal
2 tsp urad dal
2 tsp coriander seeds whole
1/2 tsp black peppercorns
4-5 dried red chillies (more or less according to taste)
a pinch of asafoetida powder (optional)
a few fresh curry leaves
Method:
1. Dry-fry the masala powder ingredients till the the dals turn pale brown/red. Cool and grind to a fairly smooth powder in a spice mill.
2. Cut off about a half-inch from each end of the banana(s) and then cut them in half.
3. Pressure-cook them for 2 whistles (or 5 minutes at full pressure). Cool completely.
4. Peel the skin off the banana pieces - it should come off very easily - and grate the bananas.
5. In a wide-bottomed pan, heat the oil. Add the turmeric powder, mustard seeds, urad dal and curry leaves; cover and let the mustard seeds splutter (about 30-45 seconds) on high heat.
6. Turn down the heat and add the grated bananas. Mix well, taking care not to mash the bananas too much.
7. Now add about 3-4 tsp of the masala powder and salt to taste, and stir well so that it's well mixed with the vegetable.
8. Fry on medium heat for a few minutes, then pour the coconut oil (if using) over as much of the mixture as possible. Mix once more.
9. Cook on medium until crisp golden spots start to appear on the bottom layer. Serve hot with sambar/mor kuzhambu and white rice.
Note: You can double the quantities of the masala powder and store it tightly sealed for future use. It works well even with fried potatoes, Indian style.
There's too much spinach in the house at the moment... I know this is beginning to sound like whatever I cook is because I have too much of it lying around. This largesse of spinach wasn't Pete's fault, though (for a change - heheh). We spent Saturday night in Colchester and on our way back, Pete had the good idea of coming back via Birmingham so that I could pick up some Indian essentials and some fresh veg like okra, yam and green bananas. I also bought two bunches each of fenugreek leaves and coriander leaves, but I left the spinach alone. However, I wasnt destined to escape it, because the shopkeeper threw in two bunches of saag to make up the 6 bunches of greens that were selling for one pound. Bah. (I've just realised that I said "bunches" more times in the last couple of sentencesthan I've said them ever!)
Still, spinach isnt such a bad thing. I rather like it. And since there was lots of cooked rice left over from the previous night, the choice was clear about what to make for dinner - spinach rice. With cabbage, since there was half a cabbage in the fridge. It was a Savoy cabbage, but you can use any cabbage really. I prefer the green variety to the white, though. I dont know what would happen if you used red cabbage - speaking colour-wise, I mean.
With green cabbage and green spinach, the rice ends up almost emerald coloured. And it tastes very nice indeed, especially if you use a lot of cheese. This time I used grated paneer to mix with the rice, and medium-strong cheddar to sprinkle over the top, but I've also made it with just cheddar cheese throughout. It tastes just as nice in a slightly different way if you use only cheddar - the texture of the rice becomes stickier because cheddar melts and paneer doesnt.
I suppose this could be classified as some kind of fusion cooking, but I'm not sure what's fused. It's basically Indian, with some cheese added.
Oh, one thing to look out for - big green-toothed smiles after you finish eating!
PS. I took photos of this, but for some unknown reason they didnt register on my camera chip :( Will add a photo the next time I make this recipe again. I'm really bummed out over this because I dont know what I did wrong with the camera - so there's every chance that it will happen again. Bah.
Recipe for: Spinach rice with green cabbage and cheese
Ingredients:
1 cup basmati rice, cooked al dente and cooled
To puree -
3 cups spinach leaves
3 tbsp coriander leaves (optional)
1" piece ginger root
1 clove garlic
For the masala -
1 cup green cabbage (Savoy is ok), shredded
2 onions, sliced into thin strips
1 tsp cinnamon powder
2 whole cloves (or 1/4 tsp cloves powdered)
1 bay leaf
1 tsp coriander powder
1 tsp cumin seeds 4 tbsp lemon juice
1/2 cup grated medium-strong cheese - cheddar or similar (I used 1/4 cup grated paneer and 1/4 cup cheddar)
1/2 cup milk
3 tbsp oil/butter
Salt to taste
Method:
1. Puree the spinach, coriander, ginger and garlic to a smooth paste, using as little water as possible. Reserve.
2. In a flat-bottomed pan, heat the oil. Add the bay leaf, cloves, cinnamon and cumin seeds and fry briefly, then put in the onions and let them cook till they begin to turn brown.
3. Add the shredded cabbage and stir-fry for a minute or two, until the cabbage starts wilting. Then add the spinach puree.
4. Fry this mixture on high heat for a couple of minutes, stirring constantly. Then add half a cup of water and salt to taste, mix again and turn the heat down low. Cover and let cook for 3 minutes.
5. Stir in the coriander powder and take the masala off the heat, then pour in the lemon juice. At this point you can remove the bay leaf and the whole cloves, if you like.
6. Gently mix half the cheese with the rice, taking care not to mush the rice.
7. When the onion-cabbage masala has cooled, mix it with the rice until it's evenly distributed throughout.
8. Put the rice in an oven-proof casserole with a lid. Smooth the top, pour the milk over evenly and then sprinkle the rest of the cheese. You can add more cheese if you like.
9. Bake in a pre-heated 190C oven (375 F) for 20 minutes or so, until the cheese is melted and the rice is heated through. Serve hot with plain salted potato crisps on the side, or crushed and sprinkled on top. Add a dollop of Greek yogurt too, if you like.
Note: You can add green peas, shredded carrots or any other quick-cooking (or pre-cooked) vegetables you like to the onion-cabbage masala.
For non-Hindi-speaking readers, the title only means "potatoes & peas - and lots of peas (and spinach too)". The Hindi bit is part of an old slogan that I remember from TV advertisements in India... being as I love peas, the ad line stuck in my mind. Because that's how I love my aloo-matar - with bahut saare matar! The spinach was my addition, though.
I sing the ad jingle every time I make this dish, weird as that may seem. Just one of those things it is, as Yoda would very likely say. Or possibly, the workings of the mind strange are. And the advertisement industry sometimes very effective is.
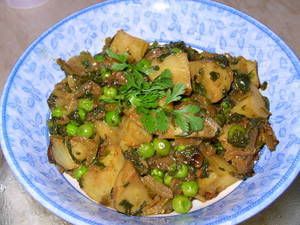
Anyhoo, this is a fairly simple dish to make. I used the microwave to cook the potatoes while the onions browned on the hob, so it was really only a question of assembling the ingredients at the end. I like this stuffed in pita bread, eaten with chapatis or naans, even as a sandwich filling - and Pete prefers it over basmati rice. But then he's not much of a fan of chapatis or parathas.
Aloo-matar-saag bhaji
Ingredients:
10-15 baby potatoes, quartered (or 2 medium potatoes cut into 1/2-inch cubes)
2 medium onions, sliced thin
1 bunch saag or palak (spinach), chopped into strips (about 3 cupfuls)
2 cups fresh or frozen green peas, cooked
1 tsp finely chopped fresh green chillies (optional or to taste)
1/2 tsp red chilli powder (optional)
1 tsp coriander powder
1 tsp cumin seeds
1/4 tsp cinnamon powder
1 tsp ginger root, grated
1/2 tsp garam masala or pav bhaji masala (optional)
1-2 green cardamom pods
2 tbsp oil or butter
Salt to taste
1/2 cup hot water
2 generous tbsp fresh coriander leaves, roughly chopped
Method:
1. Cook the potatoes with 1/4 cup water, covered, in the microwave for about 8 minutes. Then rinse in cold water, drain and keep aside.
2. In a karahi or wok, heat the oil or butter. Add the grated ginger, green chillies, cardamom pods and cumin seeds and fry for 15-20 seconds.
3. Add the sliced onions, the red chilli powder (if using), coriander powder and cinnamon and mix well. Cook the onions till they begin to turn brown.
4. Now add the spinach leaves and a tbsp of the coriander leaves. Mix well. Cover the karahi or wok and turn the heat down low. Let the spinach cook for about 5 minutes, till it's wilted.
5. Add a half cup of water along with the potatoes and peas. Mash a few of the potatoes so that it helps make a thickish gravy.
6. Add salt to taste. Mix again, making sure the onions and spinach cover the potatoes evenly.
7. Sprinkle the garam masala or pav bhaji masala powder over, cover the karahi or wok and let it simmer for 5 minutes or so. Before serving, garnish with the remaining coriander leaves.
Serve hot with rice, chapatis, parathas... or just add a dollop of Greek yoghurt over a serving and eat as a snack.


