I can't seem to get enough of karela or bittergourd nowadays - I really love these ugly knobbly vegetables that look like a bit like rats with a long tail. A couple of days back, I went to my favourite "Indian" shop in Wellington for vegetables, and was beyond thrilled to find small baby karela for sale. I picked out the freshest 10 and came home joyfully, having decided how I was going to cook them. Stuffed, basically. I didn't want the stuffing to be the usual onion masala or potato masala or peanut-based masala - mainly because I didn't want to spend time cooking the stuffing. Bad enough that I would have to wait for the karela itself to cook.
So I just put together a random mixture of flours and spices, toasted the mix in a dry pan until fragrant, then used some oil and water to bind the powdery mix and make it amenable to stuffing, basically.
I admit that this recipe uses more oil than usual, but it's worth it if you love karela and only make it once in a while. It was SO delicious. I had the stuffed karela with lemon masoor dal and rice and a little ghee, and felt like I had gone to heaven without having to die first. Yes, THAT good.
So good that I forgot to take a photo before diving into the karela. Oops...
Recipe for: Stuffed karela
Ingredients:
6-8 small (about 4-5 inches length) tender karela
For the masala paste
1/4 cup soya flour or jowar flour
1/2 cup chickpea flour (besan/kadalai maavu)
1/8 cup rice flour
4 tbsp coriander powder
1 tsp cumin powder
1/2 tsp aniseed powder
1/2 tsp fennel powder
1 tsp garam masala/rasam powder/any other masala you prefer
2 tsp red chilli powder (or to taste)
1/4 tsp asafoetida powder
Salt to taste
4 tbsp oil
Method:
1. Lightly peel the karela so that the ridges no longer stick out. Make a slit in each karela from end to end, being careful not to cut right through to the other side.
2. Use the handle of a small spoon to gouge out the inner seeds and membrane.
3. At this point you can rub salt on the inside and outside of the karela and let it sit for a few hours so that some of the bitter juices are drawn out. If you do this, be sure to squeeze the juices out, then wash the karela well to remove the excess salt. Pat dry with kitchen paper and reserve.
4. Mix together all the ingredients for the masala paste, bar the oil. Heat a pan and dry toast the mixed masala powder, stirring constantly, until the flours start to smell fragrant and savoury. Be careful not to burn it.
5. Once the masala mix is toasted, transfer it to a container. This might be more than you require, but you can always store the excess for another day in an airtight container. I prefer to make extra, because I don't like it when I find out halfway through stuffing that there isn't enough masala paste to fill all the karela. so you can use all of the toasted mix, or just half, depending on how many karela you have and their size.
6. Now add 2 tbsp of the oil to the masala powder and stir it in. The paste needs to come together enough that if you pinch some together, it shouldn't fall apart. You can add a bit more oil to get the powder to that stage, or you can add a little water. Either way, don't make it into a gooey paste.
7. Once the masala mix is ready, use your fingers to stuff it into the karela. Once they are all stuffed, you can use kitchen string to tie the karela so the stuffing doesn't come out (it tends to expand a bit as it cooks), but it's not strictly necessary especially if the karela is small.
8. Heat the remaining 2 tbsp oil in a pan and add 1/4 tsp asafoetida to it. As soon as it sizzles, put the stuffed karela in the pan and stir them gently so they are coated in the oil. Sprinkle 2-3 tbsp water over the karela and close the pan. Cook the karela covered over medium-low heat for 15 minutes or until they soften and turn a paler green. After that take the lid off and turn up the heat a bit more, occasionally turning them over, until they turn brown and crisp on all sides.
Serve hot with dal and rice.
Showing posts with label asafoetida. Show all posts
Showing posts with label asafoetida. Show all posts
Tuesday, January 26, 2016
Wednesday, August 17, 2011
Vengaya vattha kuzhambu (Onion-tamarind gravy)
Every day in every way I’m getting lazier and lazier.
This is not what I want to be confessing, dear reader. Believe me, I’d much rather be declaring the more conventional - and infinitely more impressive – version that goes “Every day in every way I’m getting better and better”.
The truth is that I have, at the very least, half a dozen recent recipes to post about and over a dozen older ones which have been ageing gracefully without seeing the light of publication. It’s so easy to take photos while cooking – that’s become second nature now – but it’s a lot less fun to have to edit them (even the simplest, most basic edit that I do which is basically adding my blog name to the photo). It’s infinitely less appealing still to write up the recipes step by step and match the correct photos every step of the way.
I know, nobody’s forcing me to do the whole step-by-step thing, and there wasn’t a gun held to my head when I began to write up the instructions this way. Call me short-sighted but I didn’t envisage a point where I would find it boring to continue doing it in such a painstakingly detailed way. More fool me, because it’s been ever thus with every single one of my enthusiasms over the years.
Don’t get me wrong, I’m not bored with cooking. I’m not even bored of taking photographs while cooking. (And I’m certainly not bored with eating – no fear.) I enjoy writing the posts too, 98% of the time - probably because I feel no urge to stick to the point and no pressure to be topical or even informative. So it’s just the recipe itself, with the ingredients and instructions.
I guess I could stop the step-by-step routine… but after so many years of my blog, I can’t bring myself to do that. (Apparently I can bring myself to ignore my blog and the recipes that are clamouring for release… apparently that isn’t wrong. But simplifying things so that I can bring myself to post more often – oh golly gee gosh, that would feel so wrong.) Look, I can’t explain why this is so – but that is how it is.
Anyway, I decided to post this fairly standard, easy, everyday recipe that I make often - I haven’t posted about it thus far because, you know, it’s fairly standard, easy… etc etc. However, it struck me recently that it might not be standard to everybody, and not everybody might make it this way. So in the interests of posterity, and so on.
I feel quite noble to be dragging myself out of mylethargy comfort zone just for the sake of posterity. How nice of me to do this.
If you’ve finished acknowledging my nobility and niceness, you may go on to the recipe. Which is actually a fairly standard, easy…
Oh. I’ve said this before.
Recipe for: Vengaya vattha kuzhambu
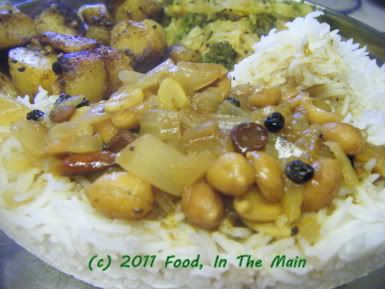
Ingredients:
2 tsp tamarind paste
4-5 cloves garlic, chopped
2 medium onions, chopped
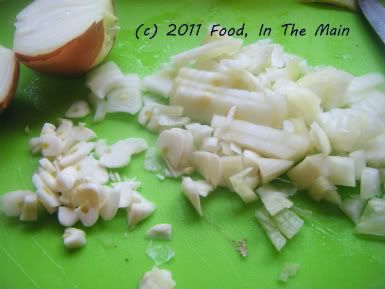
1/4 tsp vendhayam/fenugreek seeds
1 tbsp toor/tuvar dal
1 tbsp manathakkali vatthal
1 tbsp gingelly oil/nallennai
3-4 dried red chillies, broken in half (or to taste)
1 tsp mustard seeds
a few fresh/frozen curry leaves (optional)
1/2 tsp turmeric powder
1/4 tsp asafoetida powder
2-3 tsp sambar powder or vattha kuzhambu powder (if available)
2 tbsp rice flour
1/2 tsp black pepper powder
handful of roasted peanuts (optional)
Method:
1. Dissolve the tamarind paste in 5 cups water. Reserve.
2. Heat the oil and add the manathakkali vatthal, the tur dal, dried red chillies, mustard seeds, fenugreek seeds, curry leaves, asafoetida powder and turmeric powder.
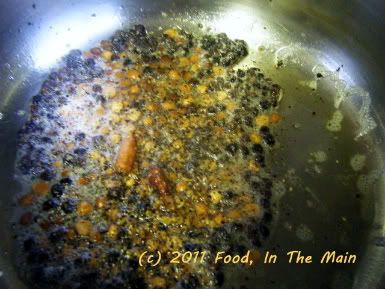
Fry all these for a couple of minutes on high heat, stirring to prevent burning.
3. Next, add the chopped onions and garlic and stir.
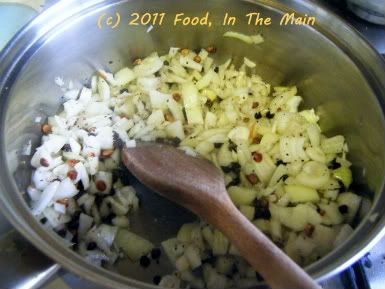
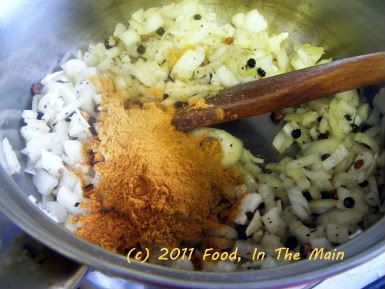
4. When the onions start to soften, add the sambar/vattha kuzhambu powder and stir it in, along with the black pepper powder.
5. Now pour in the tamarind water.
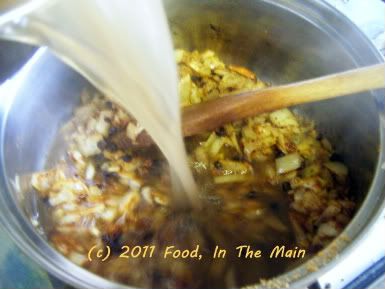
Bring to a boil on high heat, then turn it down to medium-low and let it simmer gently for 10 minutes or so.
6. Whisk together 2 tbsp rice flour with some water to make a thick, pourable paste and stir it into the kuzhambu. Let it boil for another 4-5 minutes until the kuzhambu thickens and becomes less watery.
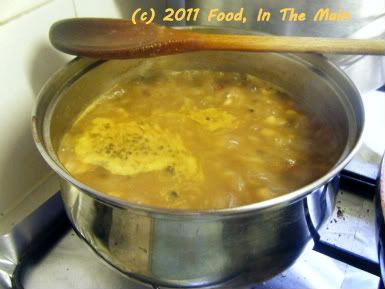
Add salt to taste and throw in the peanuts now, if using. Serve hot with steamed white rice and a dry vegetable curry.
RECIPE: VENGAYA VATTHA KUZHAMBU
Ingredients:
2 tsp tamarind paste
4-5 cloves garlic, chopped
2 medium onions, chopped
1/4 tsp vendhayam/fenugreek seeds
1 tbsp toor/tuvar dal
1 tbsp manathakkali vatthal
1 tbsp gingelly oil/nallennai
3-4 dried red chillies, broken in half (or to taste)
1 tsp mustard seeds
a few fresh/frozen curry leaves (optional)
1/2 tsp turmeric powder
1/4 tsp asafoetida powder
2-3 tsp sambar powder or vattha kuzhambu powder (if available)
2 tbsp rice flour
1/2 tsp black pepper powder
handful of roasted peanuts (optional)
Method:
1. Dissolve the tamarind paste in 5 cups water. Reserve.
2. Heat the oil and add the manathakkali vatthal, the tur dal, dried red chillies, mustard seeds, fenugreek seeds, curry leaves, asafoetida powder and turmeric powder. Fry all these for a couple of minutes on high heat, stirring to prevent burning.
3. Next, add the chopped onions and garlic and stir.
4. When the onions start to soften, add the sambar/vattha kuzhambu powder and stir it in, along with the black pepper powder.
5. Now pour in the tamarind water. Bring to a boil on high heat, then turn it down to medium-low and let it simmer gently for 10 minutes or so.
6. Whisk together 2 tbsp rice flour with some water to make a thick, pourable paste and stir it into the kuzhambu. Let it boil for another 4-5 minutes until the kuzhambu thickens and become less watery. Add salt to taste and throw in the peanuts now, if using. Serve hot with steamed white rice and a dry vegetable curry.
This is not what I want to be confessing, dear reader. Believe me, I’d much rather be declaring the more conventional - and infinitely more impressive – version that goes “Every day in every way I’m getting better and better”.
The truth is that I have, at the very least, half a dozen recent recipes to post about and over a dozen older ones which have been ageing gracefully without seeing the light of publication. It’s so easy to take photos while cooking – that’s become second nature now – but it’s a lot less fun to have to edit them (even the simplest, most basic edit that I do which is basically adding my blog name to the photo). It’s infinitely less appealing still to write up the recipes step by step and match the correct photos every step of the way.
I know, nobody’s forcing me to do the whole step-by-step thing, and there wasn’t a gun held to my head when I began to write up the instructions this way. Call me short-sighted but I didn’t envisage a point where I would find it boring to continue doing it in such a painstakingly detailed way. More fool me, because it’s been ever thus with every single one of my enthusiasms over the years.
Don’t get me wrong, I’m not bored with cooking. I’m not even bored of taking photographs while cooking. (And I’m certainly not bored with eating – no fear.) I enjoy writing the posts too, 98% of the time - probably because I feel no urge to stick to the point and no pressure to be topical or even informative. So it’s just the recipe itself, with the ingredients and instructions.
I guess I could stop the step-by-step routine… but after so many years of my blog, I can’t bring myself to do that. (Apparently I can bring myself to ignore my blog and the recipes that are clamouring for release… apparently that isn’t wrong. But simplifying things so that I can bring myself to post more often – oh golly gee gosh, that would feel so wrong.) Look, I can’t explain why this is so – but that is how it is.
Anyway, I decided to post this fairly standard, easy, everyday recipe that I make often - I haven’t posted about it thus far because, you know, it’s fairly standard, easy… etc etc. However, it struck me recently that it might not be standard to everybody, and not everybody might make it this way. So in the interests of posterity, and so on.
I feel quite noble to be dragging myself out of my
If you’ve finished acknowledging my nobility and niceness, you may go on to the recipe. Which is actually a fairly standard, easy…
Oh. I’ve said this before.
Recipe for: Vengaya vattha kuzhambu

Ingredients:
2 tsp tamarind paste
4-5 cloves garlic, chopped
2 medium onions, chopped

1/4 tsp vendhayam/fenugreek seeds
1 tbsp toor/tuvar dal
1 tbsp manathakkali vatthal
1 tbsp gingelly oil/nallennai
3-4 dried red chillies, broken in half (or to taste)
1 tsp mustard seeds
a few fresh/frozen curry leaves (optional)
1/2 tsp turmeric powder
1/4 tsp asafoetida powder
2-3 tsp sambar powder or vattha kuzhambu powder (if available)
2 tbsp rice flour
1/2 tsp black pepper powder
handful of roasted peanuts (optional)
Method:
1. Dissolve the tamarind paste in 5 cups water. Reserve.
2. Heat the oil and add the manathakkali vatthal, the tur dal, dried red chillies, mustard seeds, fenugreek seeds, curry leaves, asafoetida powder and turmeric powder.

Fry all these for a couple of minutes on high heat, stirring to prevent burning.
3. Next, add the chopped onions and garlic and stir.

4. When the onions start to soften, add the sambar/vattha kuzhambu powder and stir it in, along with the black pepper powder.

5. Now pour in the tamarind water.

Bring to a boil on high heat, then turn it down to medium-low and let it simmer gently for 10 minutes or so.
6. Whisk together 2 tbsp rice flour with some water to make a thick, pourable paste and stir it into the kuzhambu. Let it boil for another 4-5 minutes until the kuzhambu thickens and becomes less watery.

Add salt to taste and throw in the peanuts now, if using. Serve hot with steamed white rice and a dry vegetable curry.
RECIPE: VENGAYA VATTHA KUZHAMBU
Ingredients:
2 tsp tamarind paste
4-5 cloves garlic, chopped
2 medium onions, chopped
1/4 tsp vendhayam/fenugreek seeds
1 tbsp toor/tuvar dal
1 tbsp manathakkali vatthal
1 tbsp gingelly oil/nallennai
3-4 dried red chillies, broken in half (or to taste)
1 tsp mustard seeds
a few fresh/frozen curry leaves (optional)
1/2 tsp turmeric powder
1/4 tsp asafoetida powder
2-3 tsp sambar powder or vattha kuzhambu powder (if available)
2 tbsp rice flour
1/2 tsp black pepper powder
handful of roasted peanuts (optional)
Method:
1. Dissolve the tamarind paste in 5 cups water. Reserve.
2. Heat the oil and add the manathakkali vatthal, the tur dal, dried red chillies, mustard seeds, fenugreek seeds, curry leaves, asafoetida powder and turmeric powder. Fry all these for a couple of minutes on high heat, stirring to prevent burning.
3. Next, add the chopped onions and garlic and stir.
4. When the onions start to soften, add the sambar/vattha kuzhambu powder and stir it in, along with the black pepper powder.
5. Now pour in the tamarind water. Bring to a boil on high heat, then turn it down to medium-low and let it simmer gently for 10 minutes or so.
6. Whisk together 2 tbsp rice flour with some water to make a thick, pourable paste and stir it into the kuzhambu. Let it boil for another 4-5 minutes until the kuzhambu thickens and become less watery. Add salt to taste and throw in the peanuts now, if using. Serve hot with steamed white rice and a dry vegetable curry.
Friday, February 04, 2011
Potato spinach fry
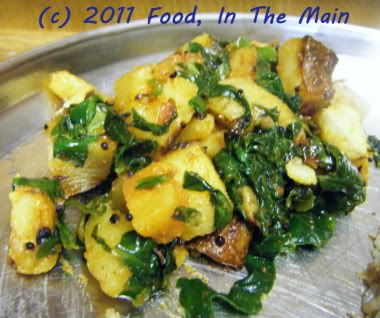
Nothing much to say about this recipe, other than it’s yum. So, all together now...
YUMMMMM!
Recipe for: Potato spinach fry
Ingredients:
4 medium potatoes
1 medium carrot
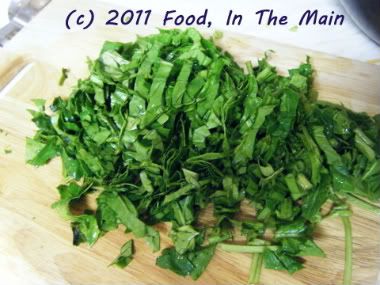
2 cups spinach, chopped
1 tsp cumin seeds
1/2 tsp crushed coriander seeds
1 tsp urad dal
1 tsp mustard seeds
1/4 tsp asafoetida powder/hing/perungayam
1/4 tsp turmeric powder
1 tsp red chilli powder
1-2 tbsp oil
salt to taste
Method:
1. Chop the potatoes and carrot into 1cm cubes and soak in a pan of cold water for 30 minutes. Rinse well in more fresh water, drain and reserve.
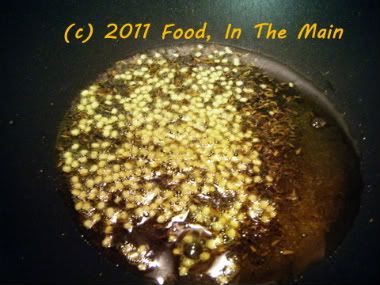
2. Heat the oil in a heavy-bottomed pan or kadai/wok. Add the turmeric powder, asafoetida, cumin seeds, mustard seeds, coriander seeds and urad dal. Let the seeds splutter and turn a darker shade, and the ural dal golden.
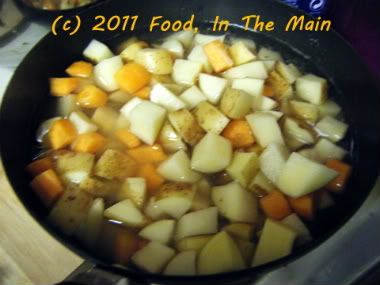
3. Now add the drained potatoes and carrots and stir well.
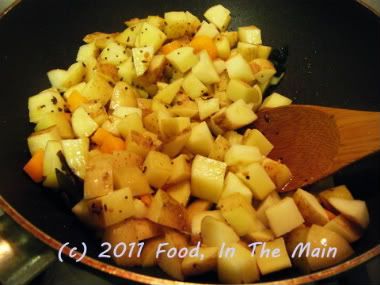
Add 3-4 tbsp water, close the pan and turn the heat down to medium low. Let the vegetables cook for 10-15 minutes, or till done. The potatoes should be turning a crispy brown underneath.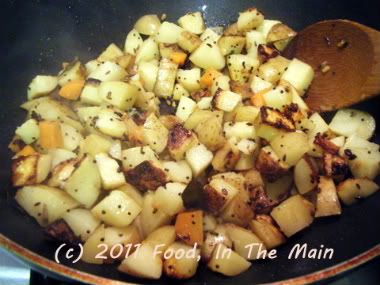
Stir them about and turn the heat up to medium-high.
4. Let the potatoes brown some more, then add the spinach and stir well.
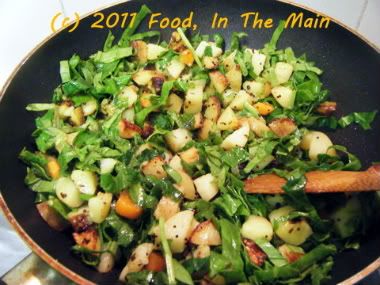
Cover the pan again and leave it for 5 minutes or so, until the spinach is wilted and cooked.
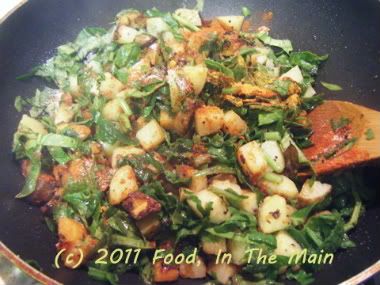
5. Add red chilli powder and salt to taste, and stir well. Leave the pan on the stove for 3-4 minutes more,then take off the heat. Serve hot with chapaties or with rice and dal.
RECIPE: POTATO SPINACH FRY
Ingredients:
4 medium potatoes
1 medium carrot
2 cups spinach, chopped
1 tsp cumin seeds
1/2 tsp crushed coriander seeds
1 tsp urad dal
1 tsp mustard seeds
1/4 tsp asafoetida powder/hing/perungayam
1/4 tsp turmeric powder
1 tsp red chilli powder
1-2 tbsp oil
salt to taste
Method:
1. Chop the potatoes and carrot into 1cm cubes and soak in a pan of cold water for 30 minutes. Drain well and reserve.
2. Heat the oil in a heavy-bottomed pan or kadai/wok. Add the turmeric powder, asafoetida, cumin seeds, mustard seeds, coriander seeds and urad dal. Let the seeds splutter and turn a darker shade, and the ural dal golden.
3. Now add the drained potatoes and carrots and stir well. Add 3-4 tbsp water, close the pan and turn the heat down to medium low. Let the vegetables cook for 10-15 minutes, or till done. The potatoes should be turning a crispy brown underneath. Stir them about and turn the heat up to medium-high.
4. Let the potatoes brown some more, then add the spinach and stir well. Cover the pan again and leave it for 5 minutes or so, until the spinach is wilted and cooked.
5. Add red chilli powder and salt to taste, and stir well. Leave the pan on the stove for 3-4 minutes more,then take off the heat. Serve hot with chapaties or with rice and dal.
YUMMMMM!
Recipe for: Potato spinach fry

Ingredients:
4 medium potatoes
1 medium carrot
2 cups spinach, chopped

1 tsp cumin seeds
1/2 tsp crushed coriander seeds
1 tsp urad dal
1 tsp mustard seeds
1/4 tsp asafoetida powder/hing/perungayam
1/4 tsp turmeric powder
1 tsp red chilli powder
1-2 tbsp oil
salt to taste
Method:
1. Chop the potatoes and carrot into 1cm cubes and soak in a pan of cold water for 30 minutes. Rinse well in more fresh water, drain and reserve.

2. Heat the oil in a heavy-bottomed pan or kadai/wok. Add the turmeric powder, asafoetida, cumin seeds, mustard seeds, coriander seeds and urad dal. Let the seeds splutter and turn a darker shade, and the ural dal golden.

3. Now add the drained potatoes and carrots and stir well.

Add 3-4 tbsp water, close the pan and turn the heat down to medium low. Let the vegetables cook for 10-15 minutes, or till done. The potatoes should be turning a crispy brown underneath.

Stir them about and turn the heat up to medium-high.
4. Let the potatoes brown some more, then add the spinach and stir well.

Cover the pan again and leave it for 5 minutes or so, until the spinach is wilted and cooked.

5. Add red chilli powder and salt to taste, and stir well. Leave the pan on the stove for 3-4 minutes more,then take off the heat. Serve hot with chapaties or with rice and dal.
RECIPE: POTATO SPINACH FRY
Ingredients:
4 medium potatoes
1 medium carrot
2 cups spinach, chopped
1 tsp cumin seeds
1/2 tsp crushed coriander seeds
1 tsp urad dal
1 tsp mustard seeds
1/4 tsp asafoetida powder/hing/perungayam
1/4 tsp turmeric powder
1 tsp red chilli powder
1-2 tbsp oil
salt to taste
Method:
1. Chop the potatoes and carrot into 1cm cubes and soak in a pan of cold water for 30 minutes. Drain well and reserve.
2. Heat the oil in a heavy-bottomed pan or kadai/wok. Add the turmeric powder, asafoetida, cumin seeds, mustard seeds, coriander seeds and urad dal. Let the seeds splutter and turn a darker shade, and the ural dal golden.
3. Now add the drained potatoes and carrots and stir well. Add 3-4 tbsp water, close the pan and turn the heat down to medium low. Let the vegetables cook for 10-15 minutes, or till done. The potatoes should be turning a crispy brown underneath. Stir them about and turn the heat up to medium-high.
4. Let the potatoes brown some more, then add the spinach and stir well. Cover the pan again and leave it for 5 minutes or so, until the spinach is wilted and cooked.
5. Add red chilli powder and salt to taste, and stir well. Leave the pan on the stove for 3-4 minutes more,then take off the heat. Serve hot with chapaties or with rice and dal.
Labels:
asafoetida,
brown mustard seeds,
carrot,
coriander seeds,
cumin seeds,
hing,
perungayam,
potatoes,
spinach,
turmeric,
urad dal
Thursday, January 20, 2011
Sun-dried/oven-dried tomato coconut thogayal
How do you come up with new recipes? Or new variations on old recipes? According to what I’ve read about professional chefs and from what semi-professional food bloggers write on their super-professional looking blogs, they spend hours (days, weeks, years... a lifetime?) experimenting with new flavours and colours and fusions and whatnot. They’re never discouraged by failure, they never tire of trying the same recipe over and over until they get it right, they spend every spare moment away from their actual jobs on perfecting a recipe – and when the dish makes its triumphal entry onto a menu or a blog, it’s to the exciting fanfare of self-blown trumpets ably backed up by the fluting of friends, fans and family.
All very impressive, and all very well... but what I’ve always wanted to know is - who actually eats the end results of those endless experimentations? It’s easy enough with the successful results, but what if the recipe isn’t to anybody’s taste? What about the downright failures? (Ok, the dustbin would be the grateful recipient there, fair enough.) What about the not-so-successful-but-not-dumpworthy-either results? These experimentally creative folk must have mighty accommodating families. Because mine, sadly, isn’t made that way. My family is thrilled to eat the nice things but completely remorseless about shunning the less edible. And if something is not to their taste made one way, there’s no chance that they’d try it made some other way – ESPECIALLY on an experimental basis.
Can’t blame them. I’m that way too. If a recipe is a failure for whatever reason, I never look back. I certainly don’t have the patience or the willingness to try it different ways till I hit upon the right one. There are billions of recipes out there, a few million of which I want to try, so repeatedly trying one recipe just isn’t going to happen. Plus, there’s the question of cost, not to mention food wastage. I’m the first to admit that I could probably do much better in the latter department, so deliberately making something again that wasn’t a success the first time around – nope, not happening.
Now, how I happen upon recipes is through sheer chance - I don't have the imagination or the creativity to actively invent something. My kind of invention is passive. Oh bother, there's that bit of stuff left, I don't want to store it in a teeny box in the fridge... heck, let's see what happens if I just use it in this recipe. And that's how my variations evolve. This one came about because I wanted to finish up the last of the oven-dried tomatoes I'd made two weeks back. So much for experimentation...
Recipe for: Sundried/ovendried tomato coconut thogayal
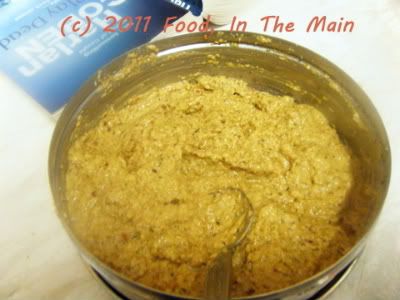
Ingredients:
1/3 cup grated coconut
2 tbsp sundried or oven-dried tomatoes (not the kind packed in oil)
marble sized piece of dried tamarind OR 1/2 tsp tamarind paste
4-8 dried red chillies (or to taste)
2 cloves garlic, sliced
2 tsp urad dal
10-12 curry leaves
1/8 tsp asafoetida powder
2 tsp oil
Salt to taste
4-6 tbsp hot water as required
Method:
1. Rehydrate the sun-dried tomatoes in hot water for 15 minutes. Drain off the water and reserve.
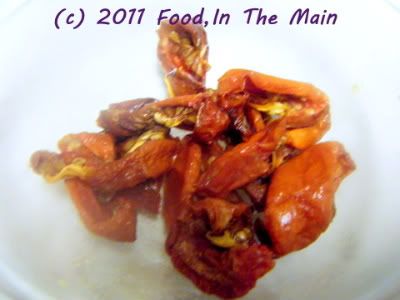
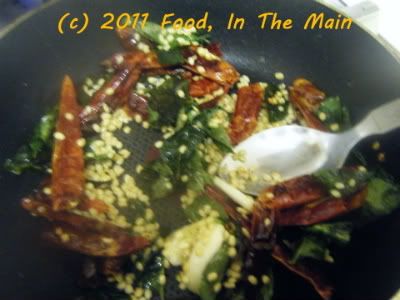
2. Heat the oil in a small pan, then add the asafoetida powder, red chillies, curry leaves, urad dal and garlic, and fry it all on medium heat, stirring, till the dal turns golden brown.
3. Cool, then grind the above (reserving 1/2 tsp of the fried dal) along with 2 tsp coconut and the tamarind to a smooth paste. Then add the rehydrated tomatoes and the rest of the coconut, adding 3-4 tbsp hot water, and grind again to a smooth paste.
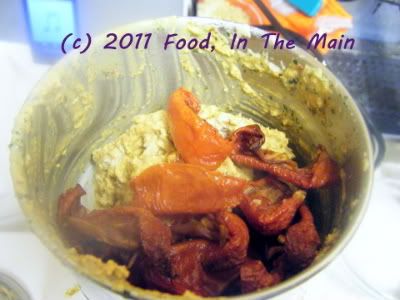
4. Remove to a bowl and add salt to taste and the reserved fried urad dal, mixing well to combine thoroughly.
5. Serve with a dollop of ghee/nallennai (gingelly oil) added to steamed rice, or as a side dish for dosas, chapathis, idlis etc.
RECIPE: SUNDRIED/OVENDRIED TOMATO COCONUT THOGAYAL
Ingredients:
1/3 cup grated coconut
2 tbsp sundried or oven-dried tomatoes (not the kind packed in oil)
marble sized piece of dried tamarind OR 1/2 tsp tamarind paste
4-8 dried red chillies (or to taste)
2 cloves garlic, sliced
2 tsp urad dal
10-12 curry leaves
1/8 tsp asafoetida powder
2 tsp oil
Salt to taste
4-6 tbsp hot water as required
Method:
1. Rehydrate the sun-dried tomatoes in hot water for 15 minutes. Drain off the water and reserve.
2. Heat the oil in a small pan, then add the asafoetida powder, red chillies, curry leaves, urad dal and garlic, and fry it all on medium heat, stirring, till the dal turns golden brown.
3. Cool, then grind the above (reserving 1/2 tsp of the fried dal) along with 2 tbsp coconut and the tamarind to a smooth paste. Then add the rehydrated tomatoes and the rest of the coconut, adding 3-4 tbsp hot water, and grind again to a smooth paste.
4. Remove to a bowl and add salt to taste and the reserved fried urad dal, mixing well to combine thoroughly.
5. Serve with a dollop of ghee/nallennai (gingelly oil) added to steamed rice, or as a side dish for dosas, chapathis, idlis etc.
All very impressive, and all very well... but what I’ve always wanted to know is - who actually eats the end results of those endless experimentations? It’s easy enough with the successful results, but what if the recipe isn’t to anybody’s taste? What about the downright failures? (Ok, the dustbin would be the grateful recipient there, fair enough.) What about the not-so-successful-but-not-dumpworthy-either results? These experimentally creative folk must have mighty accommodating families. Because mine, sadly, isn’t made that way. My family is thrilled to eat the nice things but completely remorseless about shunning the less edible. And if something is not to their taste made one way, there’s no chance that they’d try it made some other way – ESPECIALLY on an experimental basis.
Can’t blame them. I’m that way too. If a recipe is a failure for whatever reason, I never look back. I certainly don’t have the patience or the willingness to try it different ways till I hit upon the right one. There are billions of recipes out there, a few million of which I want to try, so repeatedly trying one recipe just isn’t going to happen. Plus, there’s the question of cost, not to mention food wastage. I’m the first to admit that I could probably do much better in the latter department, so deliberately making something again that wasn’t a success the first time around – nope, not happening.
Now, how I happen upon recipes is through sheer chance - I don't have the imagination or the creativity to actively invent something. My kind of invention is passive. Oh bother, there's that bit of stuff left, I don't want to store it in a teeny box in the fridge... heck, let's see what happens if I just use it in this recipe. And that's how my variations evolve. This one came about because I wanted to finish up the last of the oven-dried tomatoes I'd made two weeks back. So much for experimentation...
Recipe for: Sundried/ovendried tomato coconut thogayal

Ingredients:
1/3 cup grated coconut
2 tbsp sundried or oven-dried tomatoes (not the kind packed in oil)
marble sized piece of dried tamarind OR 1/2 tsp tamarind paste
4-8 dried red chillies (or to taste)
2 cloves garlic, sliced
2 tsp urad dal
10-12 curry leaves
1/8 tsp asafoetida powder
2 tsp oil
Salt to taste
4-6 tbsp hot water as required
Method:
1. Rehydrate the sun-dried tomatoes in hot water for 15 minutes. Drain off the water and reserve.

2. Heat the oil in a small pan, then add the asafoetida powder, red chillies, curry leaves, urad dal and garlic, and fry it all on medium heat, stirring, till the dal turns golden brown.

3. Cool, then grind the above (reserving 1/2 tsp of the fried dal) along with 2 tsp coconut and the tamarind to a smooth paste. Then add the rehydrated tomatoes and the rest of the coconut, adding 3-4 tbsp hot water, and grind again to a smooth paste.

4. Remove to a bowl and add salt to taste and the reserved fried urad dal, mixing well to combine thoroughly.
5. Serve with a dollop of ghee/nallennai (gingelly oil) added to steamed rice, or as a side dish for dosas, chapathis, idlis etc.
RECIPE: SUNDRIED/OVENDRIED TOMATO COCONUT THOGAYAL
Ingredients:
1/3 cup grated coconut
2 tbsp sundried or oven-dried tomatoes (not the kind packed in oil)
marble sized piece of dried tamarind OR 1/2 tsp tamarind paste
4-8 dried red chillies (or to taste)
2 cloves garlic, sliced
2 tsp urad dal
10-12 curry leaves
1/8 tsp asafoetida powder
2 tsp oil
Salt to taste
4-6 tbsp hot water as required
Method:
1. Rehydrate the sun-dried tomatoes in hot water for 15 minutes. Drain off the water and reserve.
2. Heat the oil in a small pan, then add the asafoetida powder, red chillies, curry leaves, urad dal and garlic, and fry it all on medium heat, stirring, till the dal turns golden brown.
3. Cool, then grind the above (reserving 1/2 tsp of the fried dal) along with 2 tbsp coconut and the tamarind to a smooth paste. Then add the rehydrated tomatoes and the rest of the coconut, adding 3-4 tbsp hot water, and grind again to a smooth paste.
4. Remove to a bowl and add salt to taste and the reserved fried urad dal, mixing well to combine thoroughly.
5. Serve with a dollop of ghee/nallennai (gingelly oil) added to steamed rice, or as a side dish for dosas, chapathis, idlis etc.
Monday, October 11, 2010
Spinach-chana dal sabji
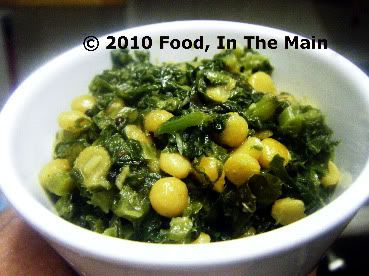
What do you call something that’s not quite a Kerala-style thoran and not quite a Tamil-Nadu-style sundal, something for which you don’t have a South Indian term really? Give it a North Indian name, of course, because the term "curry" isn't the perfect description either. So that’s why this is a spinach-chana dal sabji.
You can cook the chana dal separately in a pressure cooker, in which case you’ll need a couple of steps from the recipe below. That is to say, once you've followed Step 1 and popped the mustard seeds, add the spinach and just 1/4 cup water and let it cook till the spinach is wilted. Then add the pressure-cooked chana dal and go directly to Step 5.
To quote a certain once-cute and now-irritating meerkat – seemples!
Recipe for: Spinach-chana dal sabji
Ingredients:
4 cups spinach, chopped
1/2 cup chana dal
1-1/4 cups water
1 tsp mustard seeds
4-5 fresh curry leaves
1/4 tsp asafoetida powder
2 tsp oil
Grind to a smooth paste:
2 tbsp grated coconut
3-4 green chillies (or to taste
2 shallots
1 cm piece fresh ginger root
Method:
1. Heat the oil, then add asafoetida, curry leaves and mustard seeds and let the seeds pop. Then add the raw chana dal and fry for 3-4 minutes.
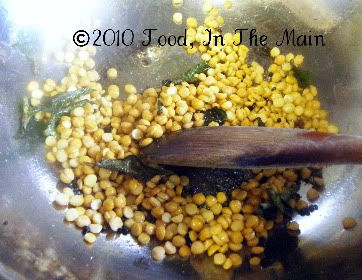
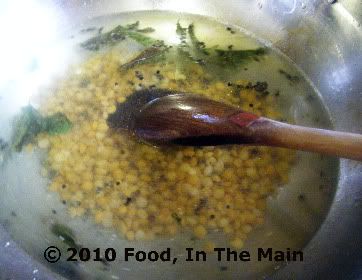
2. Pour in the water and bring it to a brisk boil on high heat. Let it boil for 2 minutes, then turn down the heat and let the dal simmer till it is cooked (10-15 minutes).
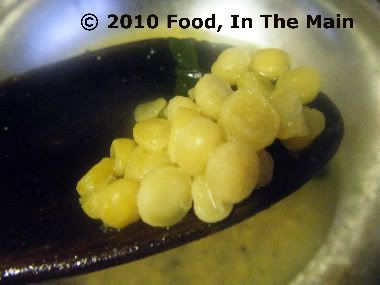
The dal should be translucent - easy to squash between finger and thumb but still retaining its shape.
3. Now add the spinach and stir it well.
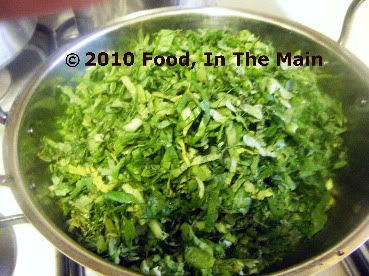
4. Cover the pan and let it cook on low heat for 5 minutes or till the spinach is wilted.
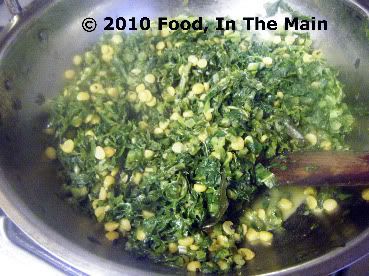
5. Now stir in the ground coconut masala. Make sure it is mixed in well.
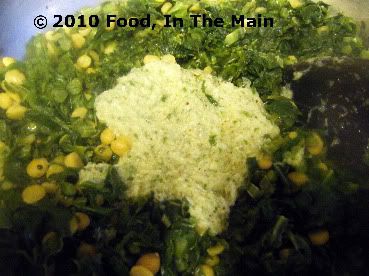
Let the spinach cook for another 2-3 mintes. Serve as a side dish with rotis or chapaties.
RECIPE: SPINACH-CHANA DAL SABJI
Ingredients:
4 cups spinach, chopped
1/2 cup chana dal
1-1/4 cups water
1 tsp mustard seeds
4-5 fresh curry leaves
1/4 tsp asafoetida powder
2 tsp oil
Salt to taste
Grind to a smooth paste:
2 tbsp grated coconut
3-4 green chillies (or to taste
2 shallots
1 cm piece fresh ginger root
Method
1. Heat the oil, then add asafoetida, curry leaves and mustard seeds and let the seeds pop. Then add the raw chana dal and fry for 3-4 minutes.
2. Pour in the water and bring it to a brisk boil on high heat. Let it boil for 2 minutes, then turn down the heat and let the dal simmer till it is cooked (10-15 minutes).
The dal should be translucent - easy to squash between finger and thumb but still retaining its shape
3. Now add the spinach and stir it well.
4. Cover the pan and let it cook on low heat for 5 minutes or till the spinach is wilted.
5. Now stir in the ground coconut masala. Make sure it is mixed in well.
Let the spinach cook for another 2-3 minutes. Serve as a side dish with rotis or chapaties.
You can cook the chana dal separately in a pressure cooker, in which case you’ll need a couple of steps from the recipe below. That is to say, once you've followed Step 1 and popped the mustard seeds, add the spinach and just 1/4 cup water and let it cook till the spinach is wilted. Then add the pressure-cooked chana dal and go directly to Step 5.
To quote a certain once-cute and now-irritating meerkat – seemples!
Recipe for: Spinach-chana dal sabji

Ingredients:
4 cups spinach, chopped
1/2 cup chana dal
1-1/4 cups water
1 tsp mustard seeds
4-5 fresh curry leaves
1/4 tsp asafoetida powder
2 tsp oil
Grind to a smooth paste:
2 tbsp grated coconut
3-4 green chillies (or to taste
2 shallots
1 cm piece fresh ginger root
Method:
1. Heat the oil, then add asafoetida, curry leaves and mustard seeds and let the seeds pop. Then add the raw chana dal and fry for 3-4 minutes.

2. Pour in the water and bring it to a brisk boil on high heat. Let it boil for 2 minutes, then turn down the heat and let the dal simmer till it is cooked (10-15 minutes).

The dal should be translucent - easy to squash between finger and thumb but still retaining its shape.

3. Now add the spinach and stir it well.

4. Cover the pan and let it cook on low heat for 5 minutes or till the spinach is wilted.

5. Now stir in the ground coconut masala. Make sure it is mixed in well.

Let the spinach cook for another 2-3 mintes. Serve as a side dish with rotis or chapaties.
RECIPE: SPINACH-CHANA DAL SABJI
Ingredients:
4 cups spinach, chopped
1/2 cup chana dal
1-1/4 cups water
1 tsp mustard seeds
4-5 fresh curry leaves
1/4 tsp asafoetida powder
2 tsp oil
Salt to taste
Grind to a smooth paste:
2 tbsp grated coconut
3-4 green chillies (or to taste
2 shallots
1 cm piece fresh ginger root
Method
1. Heat the oil, then add asafoetida, curry leaves and mustard seeds and let the seeds pop. Then add the raw chana dal and fry for 3-4 minutes.
2. Pour in the water and bring it to a brisk boil on high heat. Let it boil for 2 minutes, then turn down the heat and let the dal simmer till it is cooked (10-15 minutes).
The dal should be translucent - easy to squash between finger and thumb but still retaining its shape
3. Now add the spinach and stir it well.
4. Cover the pan and let it cook on low heat for 5 minutes or till the spinach is wilted.
5. Now stir in the ground coconut masala. Make sure it is mixed in well.
Let the spinach cook for another 2-3 minutes. Serve as a side dish with rotis or chapaties.
Labels:
asafoetida,
brown mustard seeds,
chana dal,
coconut,
curry leaves,
Ginger,
green chillies,
shallots,
spinach
Wednesday, September 29, 2010
Carrot redcurrant thogayal (chutney)
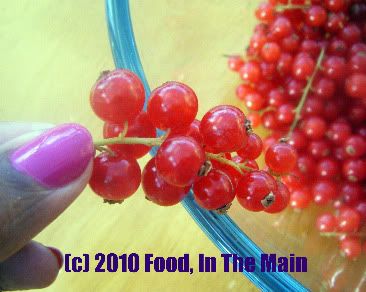
This is the third recipe using redcurrants that I’ve tried. My overwhelming impression of these gloriously pretty little berries is that they’re enamel-shrivellingly sour. Lemons and limes have nothing on them. They don’t appear to have a flavour of their own, except for the sourness – did I say they’re sour? – which I might have mentioned before. A few times, even.
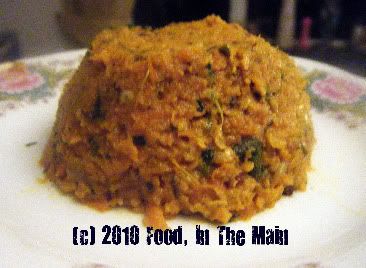
But used in judicious amounts as a souring ingredient, the redcurrant thokku I made as my first redcurrant recipe really came into its own. I’d been wanting to try a carrot thogayal recipe which I’d marked a few months ago, and instead of using tamarind paste, I added two tsp of the redcurrant thokku to, if I may say so myself, brilliant effect. If you don’t have redcurrant thokku, don’t worry – just cook 2 tsp redcurrants until the berries soften and break down, before adding your grated carrot, and all will be fine.
The redcurrant-carrot thogayal stays good for only a couple of days at room temperature. I didn’t refrigerate it, so I don’t know its shelf life when stored in the fridge. But acting on the general rule of thumb for thogayals, which is that refrigeration does not improve the taste any, I’ll go out on a limb and say it’s best to make the thogayal in small amounts and use it up while it’s fresh.
Recipe for: Carrot redcurrant thogayal
Ingredients:
1 cup carrots, grated
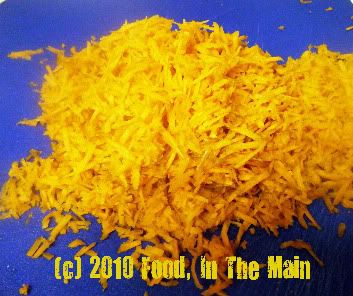
1 small tomato, chopped/2 heaping tbsp roasted tomatoes
2 small onions, sliced thin
2 tbsp redcurrants/2 tsp redcurrant thokku
1 tbsp urad dal
1/4 tsp asafoetida powder
1/4 tsp saunf (fennel) seeds
5-6 dried red chillies - or to taste
2-3 fresh green chillies (optional)
2 cloves garlic, chopped
3 tsp oil
10-12 fresh or frozen curry leaves
a big handful of fresh coriander leaves
Salt to taste
Method:
1. Heat the oil and add the asafoetida powder, turmeric powder, urad dal, red chillies, fennel seeds, garlic and curry leaves.
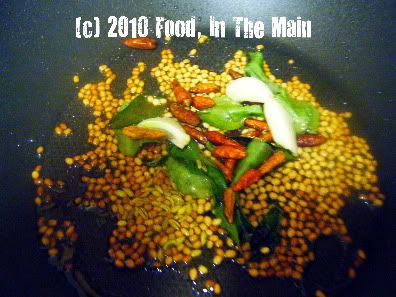
Fry till the dal turns golden and the red chillies are a darker shade of red.
2. If you are using raw redcurrants, add them now and cook them on medium high heat until they break down - about 5-7 minutes.
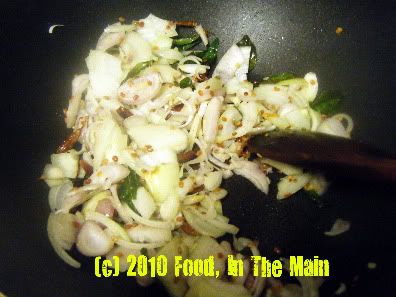
3. Add the sliced onions and fry till they start to become soft and translucent.
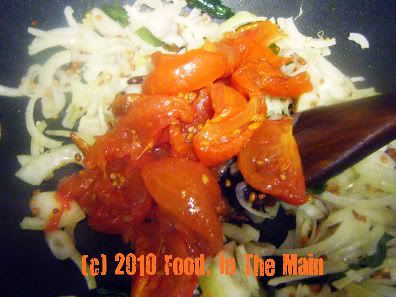
4. Now add the chopped/roasted tomatoes and stir them in, and let cook for 3-4 minutes till they become mushy.
5. Add the grated carrots along with the green chillies and mix well.
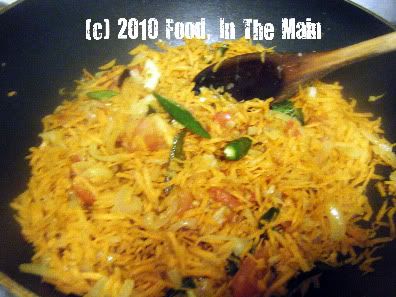
6. If you're using redcurrant thokku, add it now and mix in.
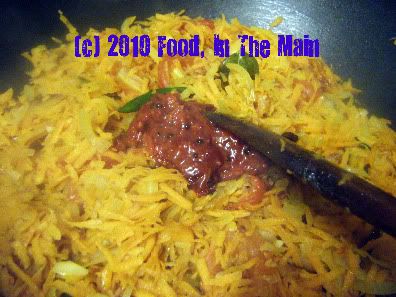
7. Let the carrots cook for 5 minutes or so, until they become soft. Then add the coriander leaves and mix in.
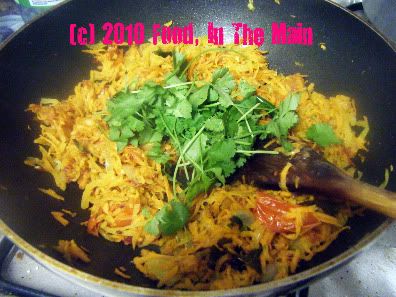
8. Let the cooked mixture cool completely, then grind to a coarse consistency. You will not need any added water. Add salt to taste and mix well. Serve with plain cooked rice, dal and a vegetable curry. Or serve as a side for dosas, idlis and so on, and to make sandwiches.
RECIPE: CARROT REDCURRANT THOGAYAL
Ingredients:
1 cup carrots, grated
1 small tomato, chopped/2 heaping tbsp roasted tomatoes
2 small onions, sliced thin
2 tbsp redcurrants/2 tsp redcurrant thokku
1 tbsp urad dal
1/4 tsp asafoetida powder
1/4 tsp saunf (fennel) seeds
5-6 dried red chillies - or to taste
2-3 fresh green chillies (optional)
2 cloves garlic, chopped
3 tsp oil
10-12 fresh or frozen curry leaves
a big handful of fresh coriander leaves
Salt to taste
Method:
1. Heat the oil and add the asafoetida powder, turmeric powder, urad dal, red chillies, fennel seeds, garlic and curry leaves.
Fry till the dal turns golden and the red chillies are a darker shade of red.
2. If you are using raw redcurrants, add them now and cook them on medium high heat until they break down - about 5-7 minutes.
3. Add the sliced onions and fry till they start to become soft and translucent.
4. Now add the chopped/roasted tomatoes and stir them in, and let cook for 3-4 minutes till they become mushy.
5. Add the grated carrots along with the green chillies and mix well.
6. If you're using redcurrant thokku, add it now and mix in.
7. Let the carrots cook for 5 minutes or so, until they become soft. Then add the coriander leaves and mix in.
8. Let the cooked mixture cool completely, then grind to a coarse consistency. You will not need any added water. Add salt to taste and mix well. Serve with plain cooked rice, dal and a vegetable curry. Or serve as a side for dosas, idlis and so on, and to make sandwiches.
Wednesday, September 22, 2010
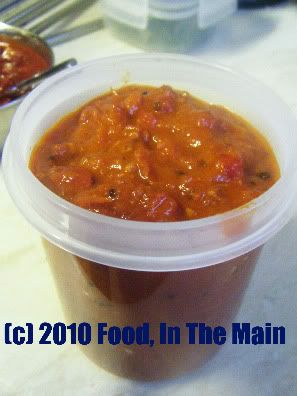
Roasted tomato redcurrant thokku (chutney)
My first ever experiment with cooking with redcurrants was redcurrant thokku. It was, despite my best efforts, still rather too sour to be used as a mix for cooked rice - according to the feedback received from my palate. The best I could do with the thokku was use it – sparingly - as a condiment with (any) dal and rice.
So, with the second of the three batches of redcurrants, as a further experiment, I made thokku with the addition of roasted tomatoes, which I usually have to hand in the fridge because roasted tomatoes make everything taste better. Need I add that “everything” is limited to whatever is made USING the roasted tomatoes? No, I thought not. (But I’ve added it anyway, in case there’s someone whose answer to that question was “Yes”. *heehee*)
This thokku was more readily palatable, with the sourness of the berries tempered by the sweetness of the roasted tomatoes. It’s as nice mixed with plain rice as any regular tomato thokku, and is also a good accompaniment for dosas, idlis and the like. The verdict from my palate, which while admitting that quality-wise this thokku is the much better improved version, also insists that it’s best had in smaller portions than regular tomato thokku. So there you have it – my palate has spoken.
Recipe for: Roasted tomato redcurrant thokku
Ingredients
1-1/4 cups redcurrants, washed and drained
2 cups chopped roasted or regular tomatoes, pureed
2 tbsp oil
2-3 cloves garlic
1 tsp cumin-coriander powder
1 htsp brown/black mustard seeds
5-6 fresh curry leaves
1/4 tsp asafoetida powder
1/4 tsp turmeric powder
1 tsp sambar powder (optional)
1 tsp jaggery
1 tbsp lemon juice
3 tsp red chilli powder (or to taste)
1/4 tsp roasted fenugreek seed powder
salt to taste
Method:
1. Heat the oil, add the garlic, cumin-coriander powder, mustard seeds, curry leaves, asafoetida powder and turmeric powder. Stir for 30 seconds or so.
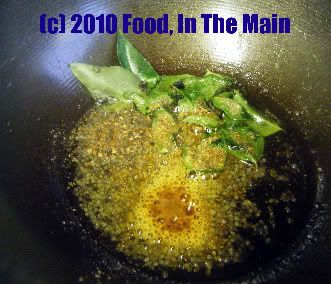
2. Add the redcurrants and red chilli powder. Mix well, cooking the berries on medium low flame until they are soft and squashed.
3. Now pour in the pureed tomatoes and mix again.

4. Bring the mixture to a boil, stirring every so often, then bring down the heat to low and let it bubble gently for 12-15 minutes, till it is thick. Add the sambar powder now, along with the jaggery and salt to taste.
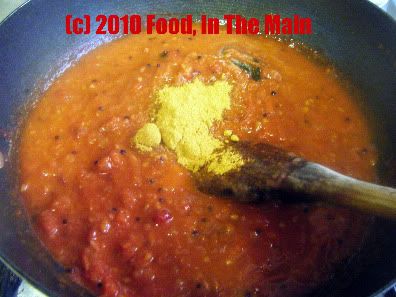
Stir well. If the thokku is a bit watery, let it cook for another 5 minutes on medium heart and leave the thokku on the heat for a couple of minutes longer. There should not be any liquid in the thokku, it should be quite thick. If you like a smooth texture, puree the thokku after it cools down.
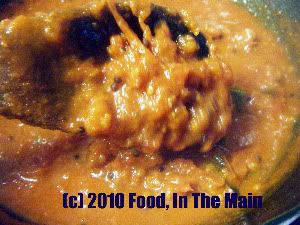
Let the thokku cool down completely before transferring to a clean jar with a tight lid. The thokku stays good for 2-3 days at room temperature. Mix with plain rice to make tomato rice with a difference, or serve as a side dish with dosas, idli etc.
RECIPE: ROASTED TOMATO REDCURRANT THOKKU
Ingredients:
1-1/4 cups redcurrants, washed and drained
2 cups chopped roasted or regular tomatoes, pureed
2 tbsp oil
2-3 cloves garlic
1 tsp cumin-coriander powder
1 htsp brown/black mustard seeds
5-6 fresh curry leaves
1/4 tsp asafoetida powder
1/4 tsp turmeric powder
1 tsp sambar powder (optional)
1 tsp jaggery
1 tbsp lemon juice
3 tsp red chilli powder (or to taste)
1/4 tsp roasted fenugreek seed powder
salt to taste
Method:
1. Heat the oil, add the garlic, cumin-coriander powder, mustard seeds, curry leaves, asafoetida powder and turmeric powder. Stir for 30 seconds or so.
2. Add the redcurrants and red chilli powder. Mix well, cooking the berries on medium low flame until they are soft and squashed.
3. Now pour in the pureed tomatoes and mix again.
4. Bring the mixture to a boil, stirring every so often, then bring down the heat to low and let it bubble gently for 12-15 minutes, till it is thick. Add the sambar powder now, along with the jaggery and salt to taste.
Stir well. If the thokku is a bit watery, let it cook for another 5 minutes on medium heart and leave the thokku on the heat for a couple of minutes longer. There should not be any liquid in the thokku, it should be quite thick. If you like a smoother texture, puree the thokku after it has cooled down.
Let the thokku cool down completely before transferring it to a clean jar with a tight lid. The thokku stays good for 2-3 days at room temperature. Mix with plain rice to make tomato rice with a difference, or serve as a side dish with dosas, idli etc.
So, with the second of the three batches of redcurrants, as a further experiment, I made thokku with the addition of roasted tomatoes, which I usually have to hand in the fridge because roasted tomatoes make everything taste better. Need I add that “everything” is limited to whatever is made USING the roasted tomatoes? No, I thought not. (But I’ve added it anyway, in case there’s someone whose answer to that question was “Yes”. *heehee*)
This thokku was more readily palatable, with the sourness of the berries tempered by the sweetness of the roasted tomatoes. It’s as nice mixed with plain rice as any regular tomato thokku, and is also a good accompaniment for dosas, idlis and the like. The verdict from my palate, which while admitting that quality-wise this thokku is the much better improved version, also insists that it’s best had in smaller portions than regular tomato thokku. So there you have it – my palate has spoken.
Recipe for: Roasted tomato redcurrant thokku

Ingredients
1-1/4 cups redcurrants, washed and drained
2 cups chopped roasted or regular tomatoes, pureed
2 tbsp oil
2-3 cloves garlic
1 tsp cumin-coriander powder
1 htsp brown/black mustard seeds
5-6 fresh curry leaves
1/4 tsp asafoetida powder
1/4 tsp turmeric powder
1 tsp sambar powder (optional)
1 tsp jaggery
1 tbsp lemon juice
3 tsp red chilli powder (or to taste)
1/4 tsp roasted fenugreek seed powder
salt to taste
Method:
1. Heat the oil, add the garlic, cumin-coriander powder, mustard seeds, curry leaves, asafoetida powder and turmeric powder. Stir for 30 seconds or so.

2. Add the redcurrants and red chilli powder. Mix well, cooking the berries on medium low flame until they are soft and squashed.
3. Now pour in the pureed tomatoes and mix again.

4. Bring the mixture to a boil, stirring every so often, then bring down the heat to low and let it bubble gently for 12-15 minutes, till it is thick. Add the sambar powder now, along with the jaggery and salt to taste.

Stir well. If the thokku is a bit watery, let it cook for another 5 minutes on medium heart and leave the thokku on the heat for a couple of minutes longer. There should not be any liquid in the thokku, it should be quite thick. If you like a smooth texture, puree the thokku after it cools down.

Let the thokku cool down completely before transferring to a clean jar with a tight lid. The thokku stays good for 2-3 days at room temperature. Mix with plain rice to make tomato rice with a difference, or serve as a side dish with dosas, idli etc.
RECIPE: ROASTED TOMATO REDCURRANT THOKKU
Ingredients:
1-1/4 cups redcurrants, washed and drained
2 cups chopped roasted or regular tomatoes, pureed
2 tbsp oil
2-3 cloves garlic
1 tsp cumin-coriander powder
1 htsp brown/black mustard seeds
5-6 fresh curry leaves
1/4 tsp asafoetida powder
1/4 tsp turmeric powder
1 tsp sambar powder (optional)
1 tsp jaggery
1 tbsp lemon juice
3 tsp red chilli powder (or to taste)
1/4 tsp roasted fenugreek seed powder
salt to taste
Method:
1. Heat the oil, add the garlic, cumin-coriander powder, mustard seeds, curry leaves, asafoetida powder and turmeric powder. Stir for 30 seconds or so.
2. Add the redcurrants and red chilli powder. Mix well, cooking the berries on medium low flame until they are soft and squashed.
3. Now pour in the pureed tomatoes and mix again.
4. Bring the mixture to a boil, stirring every so often, then bring down the heat to low and let it bubble gently for 12-15 minutes, till it is thick. Add the sambar powder now, along with the jaggery and salt to taste.
Stir well. If the thokku is a bit watery, let it cook for another 5 minutes on medium heart and leave the thokku on the heat for a couple of minutes longer. There should not be any liquid in the thokku, it should be quite thick. If you like a smoother texture, puree the thokku after it has cooled down.
Let the thokku cool down completely before transferring it to a clean jar with a tight lid. The thokku stays good for 2-3 days at room temperature. Mix with plain rice to make tomato rice with a difference, or serve as a side dish with dosas, idli etc.
Tuesday, March 23, 2010
Flax seed paruppu podi
This is the recipe which changed my mind about the tasteworthiness of flaxseeds/linseeds and convinced me that these seeds have a permanent place in my kitchen.
I understand these seeds are chemically stable in seed form and keep well without going rancid, but flaxseed oil goes rancid quickly. What I don't know, however, is how long they keep after being roasted and powdered. But I figure that if you make this podi (powder) in small batches, it should get around any potential problems of rancidity.
Oh, and a cautionary note on the pack of flax seeds I bought: Please ensure that you drink at least 150ml water extra per tbsp of flax seeds you consume, as they can cause constipation (especially if you don't normally drink plenty of water in the course of your day, I guess). I should think, however, that if you use a tbsp - or even two - of the paruppu podi with rice for a single portion, the flax seeds should not interfere with the digestion because of the other ingredients that also go to make up the powder.
Try this podi mixed with hot cooked rice and a dollop of ghee... ahhh, heaven!
Recipe for: Flax seed/linseed paruppu podi
Ingredients:
1/4 cup tur dal
1/8 cup urad dal
1/8 cup chana dal
1/8 cup golden flax seeds
5-6 dried red chillies
3/4 tsp black peppercorns
1/4 tsp cumin seeds
10 fresh or frozen curry leaves
1/4 tsp asafoetida powder
Salt to taste
1. Dry roast the chana dal and tuvar dal together with the dried red chillies till they turn aromatic and pale golden brown and the red chillies are a darker shade.
2. Dry roast the urad dal, golden flax seeds, black pepper corns, curry leaves and cumin seeds till the seeds are golden brown and the curry leaves are crisp
3. Let all the dals and seeds cool completely, then grind to a powder that is the texture of fine sand. Add salt to taste and mix well. Store in a clean dry jar.
Wednesday, April 29, 2009
Posh bread upma
Ready, Steady, Cook used to be one of the cookery-cum-gameshow programmes that I watched with great enthusiasm in those far-off days when I was unemployed (on the insistence of the Home Office in the UK, I should add, and not because I was too lazy to work) and had lots of time on my hands. At that time I was unfamiliar with most British TV productions, actors, celebrities and shows – not to mention, show formats - so it was all new to me.
I still remember how horrified I was by Anne Robinson’s incredible rudeness to the participants on her quiz show, The Weakest Link, the first time I watched it. I couldn’t imagine anyone from other quiz shows I’d seen thus far – say, Mastermind UK, or Mastermind in India (with Siddharth Basu) – being so rude and getting away with it. And there didn’t seem to be any real reason for such personal attacks on what was meant to be a cerebral show. It took a while for me to realise that it was only a gimmick with Anne Robinson (ah, those days of innocence) and she was probably not as evil in real life... but the whole thing still took some getting over. Certainly, there was no way I could have faced that level of nastiness with the equanimity displayed by her victims, had I been a contestant.
Equally, I also still remember how instantly I was drawn to Ainsley Harriot’s goofy good looks, ebullient personality and permanent good cheer on Ready, Steady, Cook. The show format was also something I’d never seen before, and I was totally impressed by the amazing spur-of-the-moment decisions by the chefs on the show to make this recipe or that recipe based on what was in the bags they were given. Oh, for those days of innocence... I didn’t realise that it was all rehearsed and the chefs most likely knew what food items they were going to get from the contestants and, therefore, very likely also knew what they would be making with it.
This I discovered only during the application process for the show, when a very dear friend, Ammani (who’s way more enterprising, energetic, enthusiastic and extroverted than I could ever hope to be) persuaded me to apply to the show as a participant along with her. We had to fill out forms telling them about ourselves, our interests, our achievements thus far, and so on. I guess this was to see if we would be interesting enough for the show (and I really do feel that the reason we didn’t make the show was my exhaustive list of non-achievements. Had Ammani gone for a different partner, it would have been a cinch for them.)
Anyhow, along with our life stories, we also had to list the ingredients that we would be bringing along for the chefs, assuming we met the show’s criteria. A-ha! That was when the penny dropped for me - and that was when all the chefs that I collectively admired so much collectively cracked at their weak point and collectively toppled off their pedestals, leaving behind only their feet of clay. (Most of them eventually clambered back on, but the pedestals were only footstools and their feet remained clayey.)
But like I said, in the beginning it was all new to me, and I watched the chefs with a level of awe that they probably didn’t totally deserve, taken in by what I thought was unrehearsed improvisation, watching the recipes they made – and all in just 20 minutes cooking time! The level of energy was always high, given the time constraints, and Ainsley Harriot's presence made the show all the more lively.
Another thing I came to realise as I watched episode after episode was that the recipes weren’t really new, as such. Perhaps they differed a little in their list of ingredients (compared to the classic originals on which the chefs based their recipes), but that was all, and the differences only arose because of what they were given to work with. There were staple recipes from various cuisines – stir fries, bhajis, curries, casseroles, etc – which featured again and again.
I’m not complaining, really. It was just something that came as a slightly surprised realisation. For instance, the classic fish-and-chips, with salt and vinegar and mushy peas on the side, would be re-marketed by a chef as “posh fish and chips” on the show – maybe the chips would be sprinkled with rosemary, or instead of deep-fried chips they would have pan-fried potatoes, or add herbs to the mushy peas, etc and so on. And definitely the plating would be as showy as possible, to accentuate the difference between the regular stuff dished out by your corner chippie and the chef-cooked posh fish-and-chips.
And thus, gentle reader, I finally, finally come to the point of this post – my recipe today, which is for “posh” bread upma. It’s posh because I didn’t use ordinary bread... instead, I made use of some whole-wheat walnut pave loaf and some stone-baked boule which were left over from the previous day’s meal.
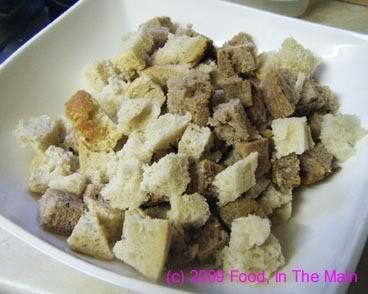
They did make a difference, because using good bread always makes a difference. You can make bread upma with ordinary sliced white bread from your local Tesco, and it will be edible - but as like as not, the bread will not hold its own against the rest of the masala that makes up this dish, simple though the masala is.
I know, I know... you’re probably wondering why this fuss over bread upma, a perfectly common dish that requires no specialty ingredients or cooking process – just stale leftover bread as the base. But bread upma is a really savoury, very delicious quick meal when you’re short of ingredients and time. You can make it as basic as you like or jazz it up – and mine is sort of poshed up. Seriously, though, the bread I used took on the flavour of the masala but didn’t itself turn to mush. It retained some bite and the small pieces of walnut only added to the upma's overall yumminess.
Stale bread is preferable for this dish, because of its firmer texture. But stale good quality bread is best, because it really makes this dish posh. In the style of Ready Steady Cook, anyway.
Recipe for: Posh bread upma
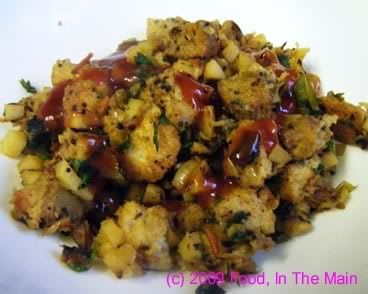
Ingredients:
4 cups stale good quality bread, cut into bite sized cubes (I used walnut bread and stone-baked crusty boule)
5-6 salad potatoes, chopped into small cubes
2 medium tomatoes, chopped
2 onions, chopped
1 small leek, chopped
5-6 fresh green chillies (or to taste), sliced into thin rings
3 tbsp yogurt (I used low-fat Greek yogurt)
1/2 tsp turmeric powder
1/4 tsp asafoetida powder (optional)
1 tsp mustard seeds
1 tsp cumin seeds
a few curry leaves
1 tbsp oil
Salt to taste
3-4 tbsp roughly chopped coriander leaves for garnish
Method:
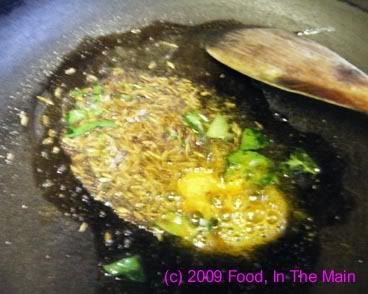
1. Heat the oil in a wide-bottomed pan and add the green chillies, curry leaves, cumin seeds and turmeric powder and asafoetida and mustard seeds. Cover the pan and let the mustard seeds pop.
2. Add the chopped onions and leek next,
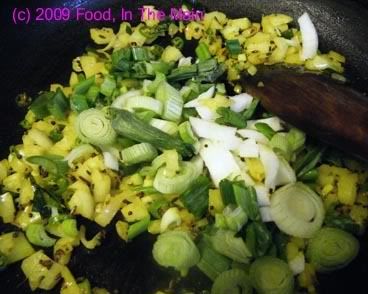
stir well and cook on a medium high flame till the onions soften and turn translucent and the leek has wilted.
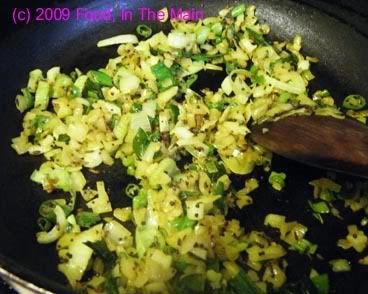
3. Now add the chopped tomatoes and cook till they soften and break down.
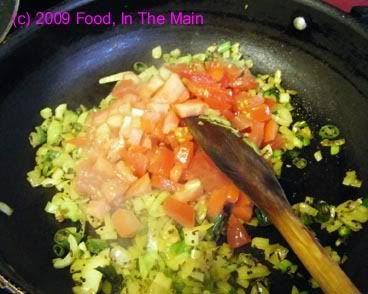
4. Next, add the cubed potatoes, stir well, cover and cook till the potatoes are done. Salad potatoes retain their shape even when cooked, but if you're using floury or mealy potatoes, make sure they dont break down completely.
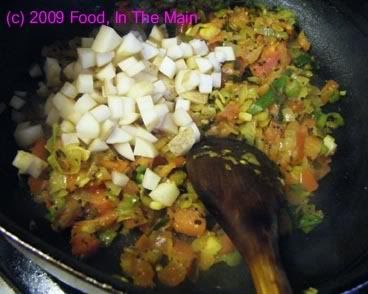
5. When the potatoes are cooked, stir in the yogurt. Turn the heat up and stir-fry for 2 minutes, till the moisture from the yogurt reduces.
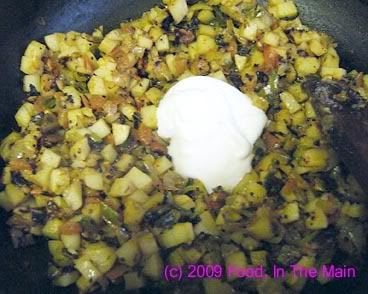
6. Add salt to taste and mix well. (Remember that the bread will have salt in it, so dont over-salt the masala). Add the bread now and mix carefully till the masala coats the bread evenly.
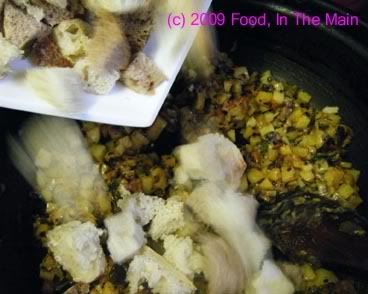
7. Turn the heat to medium-low and fry the bread with the masala till it starts to crisp up a little at the bottom.
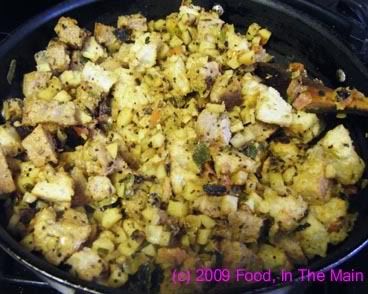
8. Sprinkle the coriander leaves, mix it all with a wide spatula and serve hot with tomato ketchup.
I still remember how horrified I was by Anne Robinson’s incredible rudeness to the participants on her quiz show, The Weakest Link, the first time I watched it. I couldn’t imagine anyone from other quiz shows I’d seen thus far – say, Mastermind UK, or Mastermind in India (with Siddharth Basu) – being so rude and getting away with it. And there didn’t seem to be any real reason for such personal attacks on what was meant to be a cerebral show. It took a while for me to realise that it was only a gimmick with Anne Robinson (ah, those days of innocence) and she was probably not as evil in real life... but the whole thing still took some getting over. Certainly, there was no way I could have faced that level of nastiness with the equanimity displayed by her victims, had I been a contestant.
Equally, I also still remember how instantly I was drawn to Ainsley Harriot’s goofy good looks, ebullient personality and permanent good cheer on Ready, Steady, Cook. The show format was also something I’d never seen before, and I was totally impressed by the amazing spur-of-the-moment decisions by the chefs on the show to make this recipe or that recipe based on what was in the bags they were given. Oh, for those days of innocence... I didn’t realise that it was all rehearsed and the chefs most likely knew what food items they were going to get from the contestants and, therefore, very likely also knew what they would be making with it.
This I discovered only during the application process for the show, when a very dear friend, Ammani (who’s way more enterprising, energetic, enthusiastic and extroverted than I could ever hope to be) persuaded me to apply to the show as a participant along with her. We had to fill out forms telling them about ourselves, our interests, our achievements thus far, and so on. I guess this was to see if we would be interesting enough for the show (and I really do feel that the reason we didn’t make the show was my exhaustive list of non-achievements. Had Ammani gone for a different partner, it would have been a cinch for them.)
Anyhow, along with our life stories, we also had to list the ingredients that we would be bringing along for the chefs, assuming we met the show’s criteria. A-ha! That was when the penny dropped for me - and that was when all the chefs that I collectively admired so much collectively cracked at their weak point and collectively toppled off their pedestals, leaving behind only their feet of clay. (Most of them eventually clambered back on, but the pedestals were only footstools and their feet remained clayey.)
But like I said, in the beginning it was all new to me, and I watched the chefs with a level of awe that they probably didn’t totally deserve, taken in by what I thought was unrehearsed improvisation, watching the recipes they made – and all in just 20 minutes cooking time! The level of energy was always high, given the time constraints, and Ainsley Harriot's presence made the show all the more lively.
Another thing I came to realise as I watched episode after episode was that the recipes weren’t really new, as such. Perhaps they differed a little in their list of ingredients (compared to the classic originals on which the chefs based their recipes), but that was all, and the differences only arose because of what they were given to work with. There were staple recipes from various cuisines – stir fries, bhajis, curries, casseroles, etc – which featured again and again.
I’m not complaining, really. It was just something that came as a slightly surprised realisation. For instance, the classic fish-and-chips, with salt and vinegar and mushy peas on the side, would be re-marketed by a chef as “posh fish and chips” on the show – maybe the chips would be sprinkled with rosemary, or instead of deep-fried chips they would have pan-fried potatoes, or add herbs to the mushy peas, etc and so on. And definitely the plating would be as showy as possible, to accentuate the difference between the regular stuff dished out by your corner chippie and the chef-cooked posh fish-and-chips.
And thus, gentle reader, I finally, finally come to the point of this post – my recipe today, which is for “posh” bread upma. It’s posh because I didn’t use ordinary bread... instead, I made use of some whole-wheat walnut pave loaf and some stone-baked boule which were left over from the previous day’s meal.

They did make a difference, because using good bread always makes a difference. You can make bread upma with ordinary sliced white bread from your local Tesco, and it will be edible - but as like as not, the bread will not hold its own against the rest of the masala that makes up this dish, simple though the masala is.
I know, I know... you’re probably wondering why this fuss over bread upma, a perfectly common dish that requires no specialty ingredients or cooking process – just stale leftover bread as the base. But bread upma is a really savoury, very delicious quick meal when you’re short of ingredients and time. You can make it as basic as you like or jazz it up – and mine is sort of poshed up. Seriously, though, the bread I used took on the flavour of the masala but didn’t itself turn to mush. It retained some bite and the small pieces of walnut only added to the upma's overall yumminess.
Stale bread is preferable for this dish, because of its firmer texture. But stale good quality bread is best, because it really makes this dish posh. In the style of Ready Steady Cook, anyway.
Recipe for: Posh bread upma

Ingredients:
4 cups stale good quality bread, cut into bite sized cubes (I used walnut bread and stone-baked crusty boule)
5-6 salad potatoes, chopped into small cubes
2 medium tomatoes, chopped
2 onions, chopped
1 small leek, chopped
5-6 fresh green chillies (or to taste), sliced into thin rings
3 tbsp yogurt (I used low-fat Greek yogurt)
1/2 tsp turmeric powder
1/4 tsp asafoetida powder (optional)
1 tsp mustard seeds
1 tsp cumin seeds
a few curry leaves
1 tbsp oil
Salt to taste
3-4 tbsp roughly chopped coriander leaves for garnish
Method:
1. Heat the oil in a wide-bottomed pan and add the green chillies, curry leaves, cumin seeds and turmeric powder and asafoetida and mustard seeds. Cover the pan and let the mustard seeds pop.

2. Add the chopped onions and leek next,

stir well and cook on a medium high flame till the onions soften and turn translucent and the leek has wilted.

3. Now add the chopped tomatoes and cook till they soften and break down.

4. Next, add the cubed potatoes, stir well, cover and cook till the potatoes are done. Salad potatoes retain their shape even when cooked, but if you're using floury or mealy potatoes, make sure they dont break down completely.

5. When the potatoes are cooked, stir in the yogurt. Turn the heat up and stir-fry for 2 minutes, till the moisture from the yogurt reduces.

6. Add salt to taste and mix well. (Remember that the bread will have salt in it, so dont over-salt the masala). Add the bread now and mix carefully till the masala coats the bread evenly.

7. Turn the heat to medium-low and fry the bread with the masala till it starts to crisp up a little at the bottom.

8. Sprinkle the coriander leaves, mix it all with a wide spatula and serve hot with tomato ketchup.
Subscribe to:
Posts (Atom)

