skip to main |
skip to sidebar
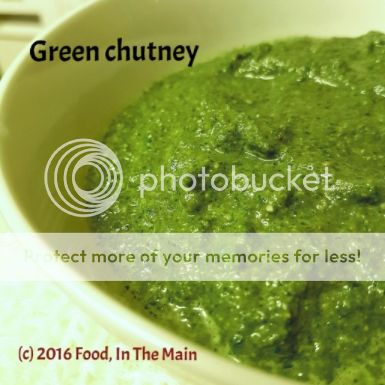
This is such a simple recipe that I'm slightly embarrassed that I'm making it an actual post. However, consider this a record of the ingredients for this chutney. Bear in mind that the ingredients are not set in stone. The coriander and mint are necessary, but the spinach can be omitted, you can use peanuts or walnuts instead of the almonds, add or omit the sunflower seeds or substitute some other seeds... you get the idea.
This chutney can be used as is, as a condiment to go with samosas and other Indian snacks, as a sandwich spread, as a dip mixed into yogurt. It could even be good with pasta, if you consider it as a sort of fat-free Indian "pesto". I haven't tried that, but there's no reason to think it won't be nice. It's versatiie, zingy and easy to make. Last but not the least. this is a healthy chutney -
not in the sense of "I've halved the sugar so I'm calling this healthy" or "I've added spinach to the vegetable pakodas that I deep fried, so I'm calling it healthy" - but actually good for you. That's all.
Oh - one more thing. I had this chutney with khatta dhokla yesterday (made from a packet mix, so sue me). And today, I dolloped a couple of spoonfuls over my bowlful of oven-roasted veggies (Charlotte potatoes, broccoli, cauliflower, red onion) and enjoyed every last bite of my light supper. See what I'm saying about this green chutney being versatile?
Recipe for: Green chutney
Ingredients:
3 cups chopped coriander
1 cup chopped mint
1/2 cup chopped spinach
1-2 green chillies, chopped (or to taste)
10-12 almonds, skinned
2 tbsp mixed seeds (I used sunflower and melon)
1/2 tsp cumin seeds
1/2 tsp sugar
Juice of half a lemon (or to taste)
Salt to taste
Water as required
Method:
1. Grind together all the ingredients (except the salt and lemon juice) to a smooth paste.
2. Mix in the lemon juice and salt to taste. The consistency should be softly runny, not very thick.
3. That's it. It's ready to use.
I can't seem to get enough of karela or bittergourd nowadays - I really love these ugly knobbly vegetables that look like a bit like rats with a long tail. A couple of days back, I went to my favourite "Indian" shop in Wellington for vegetables, and was beyond thrilled to find small baby karela for sale. I picked out the freshest 10 and came home joyfully, having decided how I was going to cook them. Stuffed, basically. I didn't want the stuffing to be the usual onion masala or potato masala or peanut-based masala - mainly because I didn't want to spend time cooking the stuffing. Bad enough that I would have to wait for the karela itself to cook.
So I just put together a random mixture of flours and spices, toasted the mix in a dry pan until fragrant, then used some oil and water to bind the powdery mix and make it amenable to stuffing, basically.
I admit that this recipe uses more oil than usual, but it's worth it if you love karela and only make it once in a while. It was SO delicious. I had the stuffed karela with lemon masoor dal and rice and a little ghee, and felt like I had gone to heaven without having to die first. Yes, THAT good.
So good that I forgot to take a photo before diving into the karela. Oops...
Recipe for: Stuffed karela
Ingredients:
6-8 small (about 4-5 inches length) tender karela
For the masala paste
1/4 cup soya flour or jowar flour
1/2 cup chickpea flour (besan/kadalai maavu)
1/8 cup rice flour
4 tbsp coriander powder
1 tsp cumin powder
1/2 tsp aniseed powder
1/2 tsp fennel powder
1 tsp garam masala/rasam powder/any other masala you prefer
2 tsp red chilli powder (or to taste)
1/4 tsp asafoetida powder
Salt to taste
4 tbsp oil
Method:
1. Lightly peel the karela so that the ridges no longer stick out. Make a slit in each karela from end to end, being careful not to cut right through to the other side.
2. Use the handle of a small spoon to gouge out the inner seeds and membrane.
3. At this point you can rub salt on the inside and outside of the karela and let it sit for a few hours so that some of the bitter juices are drawn out. If you do this, be sure to squeeze the juices out, then wash the karela well to remove the excess salt. Pat dry with kitchen paper and reserve.
4. Mix together all the ingredients for the masala paste, bar the oil. Heat a pan and dry toast the mixed masala powder, stirring constantly, until the flours start to smell fragrant and savoury. Be careful not to burn it.
5. Once the masala mix is toasted, transfer it to a container. This might be more than you require, but you can always store the excess for another day in an airtight container. I prefer to make extra, because I don't like it when I find out halfway through stuffing that there isn't enough masala paste to fill all the karela. so you can use all of the toasted mix, or just half, depending on how many karela you have and their size.
6. Now add 2 tbsp of the oil to the masala powder and stir it in. The paste needs to come together enough that if you pinch some together, it shouldn't fall apart. You can add a bit more oil to get the powder to that stage, or you can add a little water. Either way, don't make it into a gooey paste.
7. Once the masala mix is ready, use your fingers to stuff it into the karela. Once they are all stuffed, you can use kitchen string to tie the karela so the stuffing doesn't come out (it tends to expand a bit as it cooks), but it's not strictly necessary especially if the karela is small.
8. Heat the remaining 2 tbsp oil in a pan and add 1/4 tsp asafoetida to it. As soon as it sizzles, put the stuffed karela in the pan and stir them gently so they are coated in the oil. Sprinkle 2-3 tbsp water over the karela and close the pan. Cook the karela covered over medium-low heat for 15 minutes or until they soften and turn a paler green. After that take the lid off and turn up the heat a bit more, occasionally turning them over, until they turn brown and crisp on all sides.
Serve hot with dal and rice.
While vegetarian food is not hard to find in most pubs, hotels etc, the choice is woefully limited – usually pasta of some kind, vegetarian chili, bean burger, sometimes a vegetable curry or Mediterranean-veg lasagna chock full of gross aubergines/eggplant and zucchini (because, you know, they’re Mediterranean vegetables and apparently no other veggies are known to ever be used in Mediterranean cuisine). Some places offer two vegetarian options, if you’re lucky. But usually it’s just one of the above, and vegetarians have to like it or lump it.
I should be glad that there’s at least SOMETHING non-meaty and non-fishy to eat in Western restaurants, and I suppose I am... but I still can’t help wishing that their chefs would show just a little imagination for vegetarians. Which is why I like a little pub in Wem (Pete’s hometown), called the Old Post Office (Pete’s home-away-from), which is owned and run by Pete’s business partner Guy, and a couple of his friends. The pub is called the Old Post Office because before it was converted to a pub, it used to be the old post office premises before they moved lock stock and barrel to the new post office premises – well, why did you think the pub’s name is what it is?
Anyway, I like the pub for all sorts of reasons – one, the younger crowd (the noisy, binge drinking, annoying kind) stay away because it doesn’t offer them much in the way of a “hep” ambience. Two, the pub plays good music on an excellent sound system (which Pete set up). Three, the décor is homely (I especially love the squashy-soft sofas from whose hug it’s difficult to get out) but with an exotic touch in the way of beautiful sculptures and paintings and wall-hangings which Guy brought back from his trips to Africa. The effect is casual and comfortable.
And now for the fourth and most important reason - the food. The pub offers a carvery every Sunday, with at least two different choices of meat, which Pete loves. The Sunday carvery has had very good reviews in the local newspapers, because the servings and accompaniments are generous – and all freshly cooked that day, nothing from frozen. I would be happy to eat just the accompaniments that are available – roast potatoes, boiled potatoes, cabbage, peas, cauliflower or broccoli cheese, roast parsnips, carrots, leeks, stuffing balls, Yorkshire puddings - a veritable feast!
But I get a special entree just for me as the only vegetarian who goes there for Sunday lunch. The two lady chefs make it a point to try out a new recipe for me, even though – or perhaps especially because – vegetarian food is not their comfort zone. It’s not even as if I’m a guinea pig… apparently they try out their new recipes during the week on the regulars (the pub makes it a point to provide sandwiches and other finger food on the house, in the evening), asking them for feedback. And then, on a Sunday, the recipe makes its formal debut – just for me (or any other vegetarian, assuming any comes along. It hasn’t happened yet, they say.)
Since I know that there won’t be any aubergine in anything (the staff all know of my loathing for this gross slimy-when-cooked vegetable), I’m always delighted to try whatever they've made – and so far, every single thing has been a hit. It's really nice of them to take the trouble to make anything, just for one person, especially when they've got their hands full catering for all the regular guests.
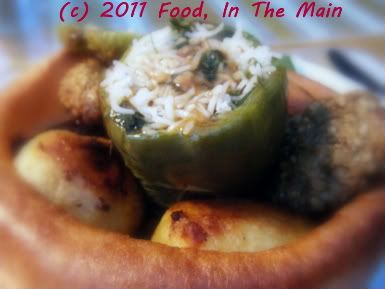
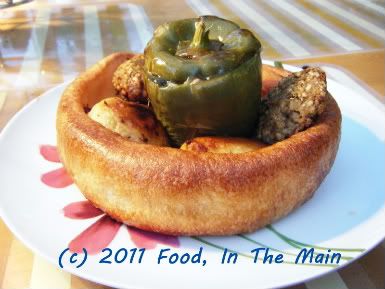
One time it was peppers stuffed with a really nice rice mixture, and since I had peppers at home last Sunday (when Pete and Bex were having a Sunday lunch at home), I decided to make my own main course and share the accompaniments (called “trimmings”) with my husband and stepdaughter for our family meal. Pete served everything in a giant Yorkshire pudding - yummy!
Recipe for: Stuffed green peppers with nutty rice
Ingredients:
2 green peppers (capsicum/bell pepper)
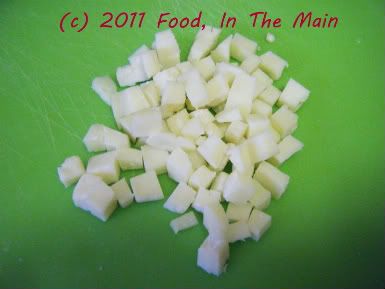
1/4 cup paneer, diced into 1/2 cm cubes
1 cup cooked basmati rice
1 green chilli, sliced into thin rings
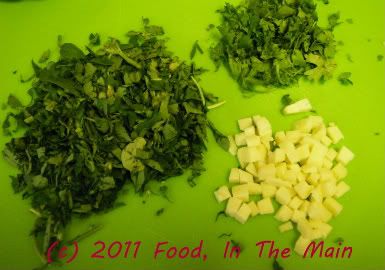
4 tbsp shredded methi leaves (optional)
1/2 cup shredded coriander leaves
1/2 tsp cumin powder
2 tbsp mixed nuts (peanuts, cashewnuts, pecans), chopped
2 tsp raisins or sultanas
1/2 tsp freshly ground black pepper
1/4 tsp garam masala
2 tsp oil
Salt to taste
Method:
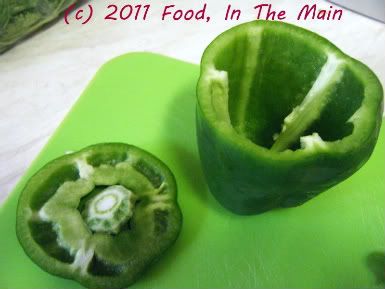
1. Slice off the tops of the peppers and carefully remove the seeds and pith. Make sure the peppers can remain upright; even up the bottoms if required so that they sit flat. Reserve the tops, don't throw them away.
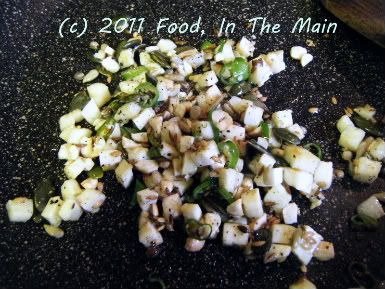
2. Heat the oil in a pan and add the chillies, paneer and chopped nuts. Stir fry till the nuts and the paneer are pale golden brown.
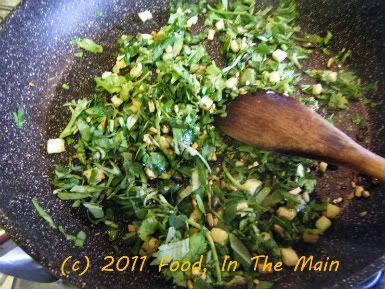
3. Add the coriander and methi leaves and fry till they wilt.
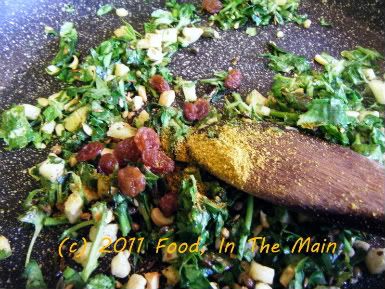
4. Add the sultanas/raisins.
5. Now mix in the rice, garam masala, black pepper powder and salt to taste. Heat this stuffing thoroughly, then turn the heat off and let it cool.
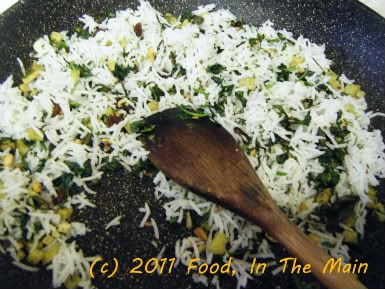
6. Spoon the filling into the prepared peppers, pressing down with the back of the spoon to get as much of the stuffing in as possible,
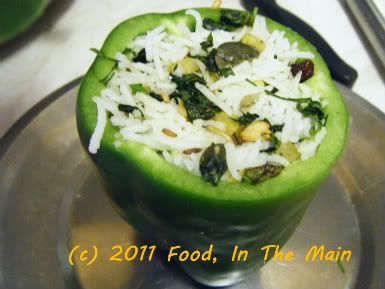
then put the tops of the peppers back on.
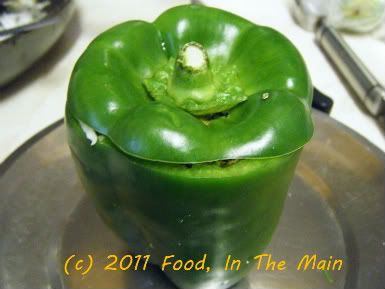
7. Place the stuffed peppers on a baking tray and spray them with Pam on the outside, or brush them with a little oil. Bake in the oven at 200C for 15 minutes or so, or till the peppers are a soft and wrinkled. Don't overcook them.
8. Serve the peppers hot as a main course with a selection of vegetables, and vegetarian gravy.

RECIPE: STUFFED GREEN PEPPERS WITH NUTTY RICE
Ingredients:
2 green peppers (capsicum/bell pepper)
1/4 cup paneer, diced into 1/2 cm cubes
1 cup cooked basmati rice
1 green chilli, sliced into thin rings
4 tbsp shredded methi leaves (optional)
1/2 cup shredded coriander leaves
1/2 tsp cumin powder
2 tbsp mixed nuts (peanuts, cashewnuts, pecans), chopped
2 tsp raisins or sultanas
1/2 tsp freshly ground black pepper
1/4 tsp garam masala
2 tsp oil
Salt to taste
Method:
1. Slice off the tops of the peppers and carefully remove the seeds and pith. Make sure the peppers can remain upright; even up the bottoms if required so that they sit flat. Reserve the tops, don't throw them away.
2. Heat the oil in a pan and add the chillies, paneer and chopped nuts. Stir fry till the nuts and the paneer are pale golden brown.
3. Add the coriander and methi leaves and fry till they wilt.
4. Add the sultanas/raisins.
5. Now mix in the rice, garam masala, black pepper powder and salt to taste. Heat this stuffing thoroughly, then turn the heat off and let it cool.
6. Spoon the filling into the prepared peppers, pressing down with the back of the spoon to get as much of the stuffing in as possible, then put the tops of the peppers back on.
7. Place the stuffed peppers on a baking tray and spray them with Pam on the outside, or brush them with a little oil. Bake in the oven at 200C for 15 minutes or so, or till the peppers are a soft and wrinkled. Don't overcook them.
8. Serve the peppers hot as a main course with a selection of vegetables, and vegetarian gravy.
One of the things I do very well is daydream. The more important it is for me to pay attention, the easier I find it to slip into my own world – not to mention, the daydream is correspondingly detailed. One recurring bare-bones daydream is to have a cook at home. The actual details vary depending on my prevailing mood, but on different occasions I’ve day-dreamed about having a live-in cook (only briefly), someone who would make what I wanted the way I wanted it made, someone who would be a trained nutritionist and make healthy but superbly tasty dishes… the permutations are many and varied.
But the one daydream that keeps occurring with monotonous regularity is the one where I have a cook who does the necessary prepwork and all the other jobs that I find boring – peeling and cutting vegetables, searching out spices, beating eggs, chopping nuts, shallow-frying things on low heat, stirring milk, whatever. After which, he (or she – I’m an equal-opportunity day-dreamer) clears the workspace, throws away the rubbish and gets everything ready for me.
Then, when all is perfectly laid out in the kitchen, I sail in and set about cooking my chosen recipe. And, naturally, when I am done, my cook does the washing up and drying and putting away of all the utensils, leaving my kitchen in perfect order for the next time…
*sighhhhh*
A sous chef is what I need, come to think of it. Someone who will never aspire to chefdom or doing anything more interesting than the prepwork and the donkey work.
*sighhhhhhhhhhhhhhhhhhhhhhhhhhhhh*
Anyway, here’s the recipe for the patties. Believe me when I say that I felt the lack of a sous chef very, very, very deeply indeed… but still, the takes-you-forever-to-cook-and-just-seconds-for-someone-to-eat patties are worth the annoying bitwork. In other words, they taste good enough to eat.
Recipe for: Vegetable chickpea patties
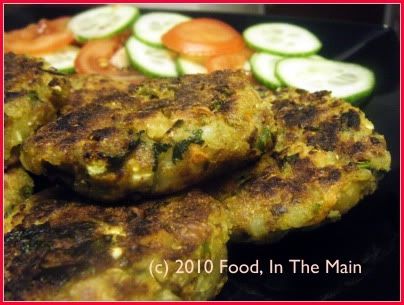 Ingredients:
1/2 cup carrots, grated
1/2 cup potatoes, chopped
1/4 cup green beans, sliced into thin rounds
1/4 cup green pepper (capsicum), chopped
1/4 cup onions, chopped
2 cups cooked potatoes, mashed coarsely
1 tin (1-1/4 cups) cooked chickpeas, rinsed and drained
1 cup wholewheat breadcrumbs
1/4 cup coriander leaves, chopped
1 tsp Kitchen King masala (or garam masala)
1/4 tsp turmeric powder
1 tsp red chilli powder (or to taste)
1 tsp coriander seeds, powdered
1/2 tsp cumin seed powder
salt to taste
2 tbsp oil
Pam spray or more oil to shallow-fry
Method:
1. Place the chopped potatoes, carrots and green beans in a microwave-safe bowl and microwave covered for 5 minutes with 3-4 tbsp water, till half-cooked.
2. Add the mashed potatoes and the spices and mix well.
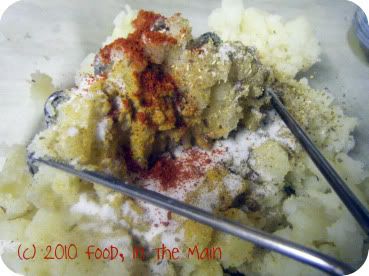 3. Then add the chickpeas and chopped onions.
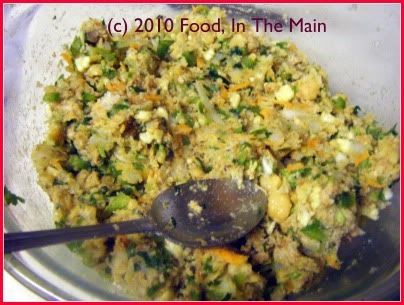
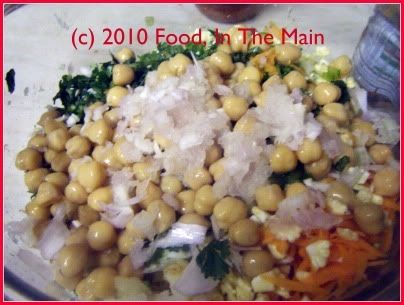 Crush the chickpeas coarsely with a masher or the back of a sturdy spoon.
4. Add the breadcrumbs and mix in.
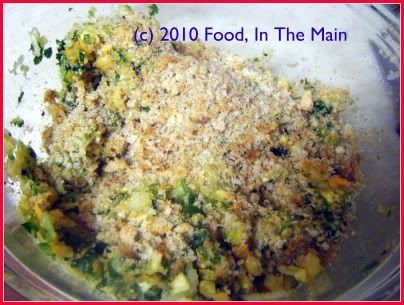 5. Heat the 2 tbsp oil and pour it on the mixture. Add salt to taste along with the coriander leaves, and mix thoroughly.
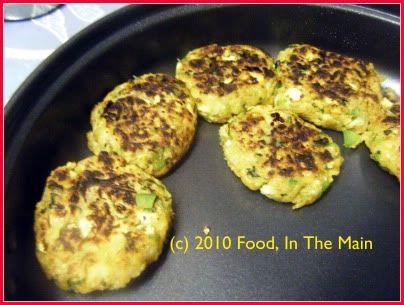
 6. Now form small patties from the mixture and shallow-fry them in a non-stick pan (without crowding them) over medium-high heat.
 7. Brush the top surface of the patties with some oil (or spray some Pam) and turn the patties over carefully when golden brown on the underside.
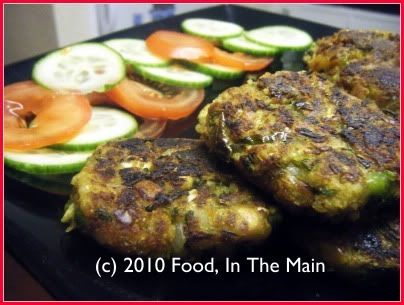
 8. Serve warm with a salad for a light meal, or with ketchup for a snack.
 RECIPE: VEGETABLE CHICKPEA PATTIES
Ingredients:
1/2 cup carrots, grated
1/2 cup potatoes, chopped
1/4 cup green beans, sliced into thin rounds
1/4 cup green pepper (capsicum), chopped
1/4 cup onions, chopped
2 cups cooked potatoes, mashed coarsely
1 tin (1-1/4 cups) cooked chickpeas, rinsed and drained
1 cup wholewheat breadcrumbs
1/4 cup coriander leaves, chopped
1 tsp Kitchen King masala (or garam masala)
1/4 tsp turmeric powder
1 tsp red chilli powder (or to taste)
1 tsp coriander seeds, powdered
1/2 tsp cumin seed powder
salt to taste
2 tbsp oil
Pam spray or more oil to shallow-fry
Method:
1. Place the chopped potatoes, carrots and green beans in a microwave-safe bowl and microwave covered for 5 minutes with 3-4 tbsp water, till half-cooked.
2. Add the mashed potatoes and the spices and mix well.
3. Then add the chickpeas and chopped onions. Crush the chickpeas coarsely with a masher or the back of a sturdy spoon.
4. Add the breadcrumbs and mix in.
5. Heat the 2 tbsp oil and pour it on the mixture. Add salt to taste along with the coriander leaves, and mix thoroughly.
6. Now form small patties from the mixture and shallow-fry them in a non-stick pan (without crowding them) over medium-high heat.
7. Brush the top surface of the patties with some oil (or spray some Pam) and turn the patties over carefully when golden brown on the underside.
8. Serve warm with a salad for a light meal, or with ketchup for a snack.
One of my favourite aunts is my B mami. Nobody can help liking her, she’s just so kind, good-natured, fun and always good for a laugh. And to top that off, she’s also an absolutely amazing cook. She can make better bhelpuri and pani puri than anyone I know, and the other North Indian dishes she makes are just as awesome. Maybe it’s because she lived for so many years in the North (and north-east), and perhaps learnt them from North Indian friends, but I personally don’t think that’s the real reason. The real reason is that she’s just an awesome cook, full stop.
My visit to their place in Mathura (along with my youngest aunt and her daughter who was maybe three or four years old then) is still vivid in my memory. This was over 15 years ago, but good times leave their imprints on your brain, don’t they? But – and I don’t know just how much I should be embarrassed by this – one of THE most enduring of those memories was the train trip back. What’s embarrassing about a train trip memory, you ask? Well, the answer is that it’s not so much the train trip that was embarrassing, as my memory of WHY that trip was memorable. I might as well spit it out (not literally) – it was the bharwan bhindi (okra stuffed with a mixture of spice powders) that B mami had packed for our train journey, with instructions to eat that first in case it turned bad in the heat.
That was the best bhindi I’d ever had, bar none. I’ve made this before, but not to my mami’s recipe. A few weeks back I emailed her asking for her recipe for bharwa bhindi, which she kindly sent me. I then sat on it for a few weeks more, not because of my usual procrastination but because I just didn’t get a chance to lay my paws on fresh okra. That occasion happened a couple of weeks back and I made B mami’s bharwan bhindi rightaway. (That this recipe didn’t get posted rightaway was due to a combination of procrastination + lack of time + unfamiliarity with online photo editing software).
The okra was pretty good – not as good as mami’s (no surprise there) even with the benefit of her recipe – but a creditable effort, nonetheless.
Recipe for: Stuffed bhindi (okra)
Ingredients:
250 gms ladies finger/okra/bhindi
1/2 tsp haldi (turmeric) powder
1 tbsp dhania (coriander) powder
1 tbsp jeera (cumin) powder
1 tsp chilly powder (or to taste)
1 tsp aamchur (dried sour mango) powder - optional
1/4 tsp hing (asafoetida) powder
salt to taste
oil as required (about 2 tbsp)
1 medium onion, grated or very finely minced
Method:
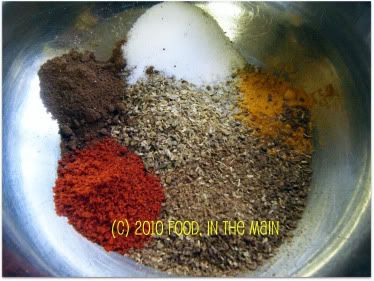
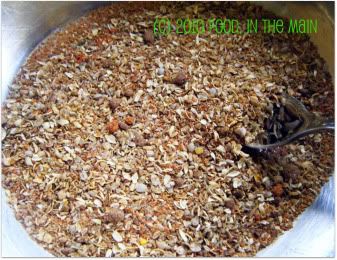
1. Mix the various powders together to make the stuffing masala and check that it tastes okay to you. Reserve.
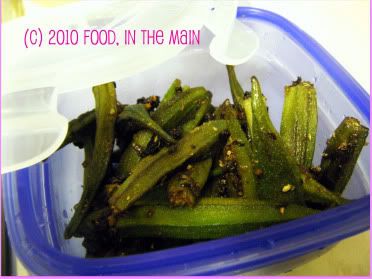
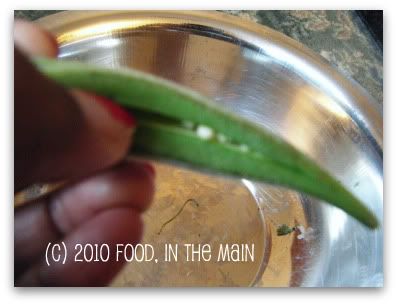
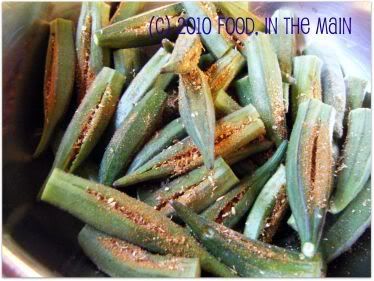
2. Cut the tops off the okra (I leave the tail on but it can also be removed if preferred.) Make vertical slits in each one, taking care not to go right through to the other side.
3. Carefully stuff each okra with the masala powder, using a small blunt butter knife
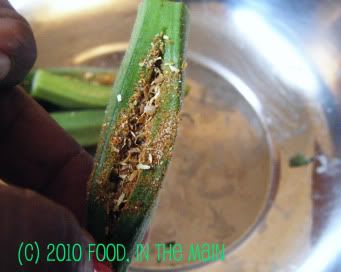
until all the okra is done. You can use any remaining masala on the okra as it cooks, it's up to you.
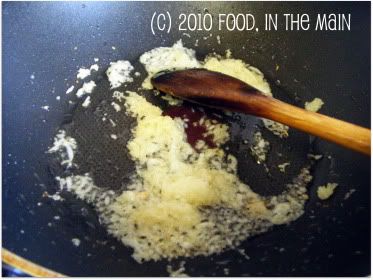
4. Now heat 1 tbsp oil in a non-stick saute pan and add the finely minced/grated onion.
5. When the onion is soft and beginning to turn colour, add the stuffed okra. Carefully turn over the okra so that the onions are distributed more or less evenly.
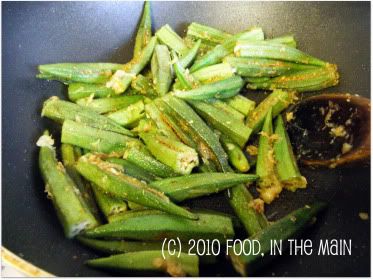
6. Fry the stuffed bhindi on medium-high, turning them over occasionally. Add more oil as required. Don't cover the pan or the okra will become gooey. Add salt to taste when the okra is cooked and slightly crisp, with brown spots.
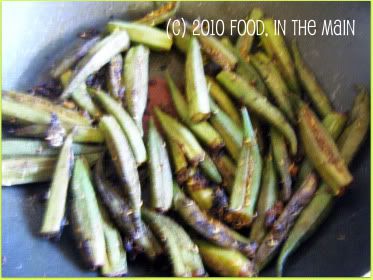
Serve the stuffed bhindi hot with rotis or as a side dish with rice and dal.
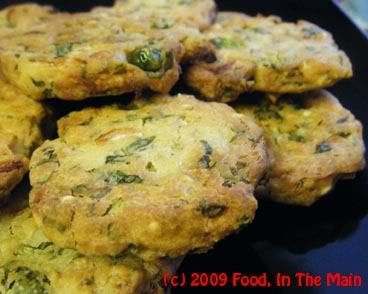
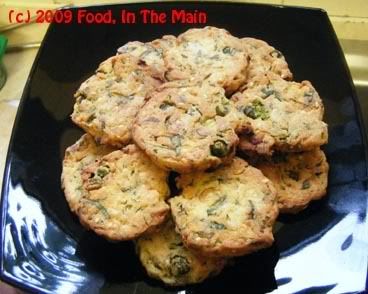
I have a favourite new snack – baked vegetable pakodas (fritters). Granted, they don’t look like traditional pakodas, and possibly they don’t taste traditional either (read “deep-fried”) – but boy, they DO taste really good. Actually you might as well call them savoury cookies because I flattened them for more even baking. Whatever (a rose by any other name and all that...), these are extremely more-ish when fresh, with dips.
These pakodas become kind of chewy and hard the next day, but I liked them that way nevertheless. But then I’m odd like that. So if you're not like me, eat 'em fresh. I dont know if they would soften when re-heated in a microwave, because I didn't try that for myself. (But if you do, let me know what happens, please.)
Recipe for: Baked vegetable pakodas
Ingredients:
1 small potato, boiled and grated
1/2 cup fresh peas
1/2 cup green beans, chopped 1/2cm thick
1/2 cup spinach leaves, sliced
1 medium onion, chopped fine
10 cashew nuts, chopped
1/4 cup chopped coriander leaves
1/4 tsp cumin powder
1 tbsp sesame seeds
1 cup gramflour (besan/chickpea flour/kadala maavu)
1 cup rice flour
1/2 tsp chilli powder or 2-3 fresh green chillies, minced (optional)
Salt to taste
1 tbsp oil
Water as required
Method:
1. Preheat the oven to 180C.
2. Microwave the green beans and peas for 4 minutes on full power with 4 tbsp water.
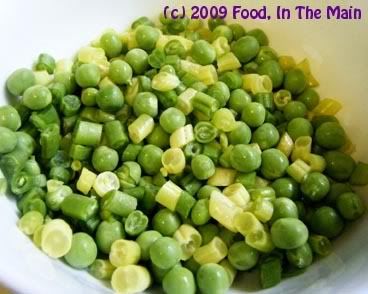
Transfer to a large bowl.
3. Add the grated boiled potato, spinach leaves, chopped onion, cashew nuts, coriander leaves, cumin powder, sesame seeds and mix well.
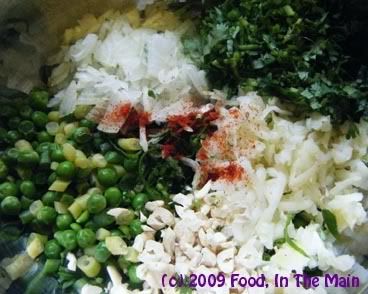
4. Add the rice flour and gram flour along with salt to taste.
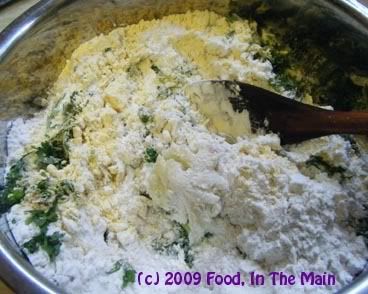
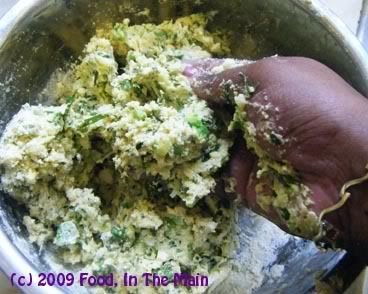
5. Mix with your hand now, adding water little by little until the dough comes together and you can make small balls with it. Do NOT make the dough watery. It should be thick and will be a bit sticky.
6. Heat the oil till it’s smoking, then pour onto the dough.
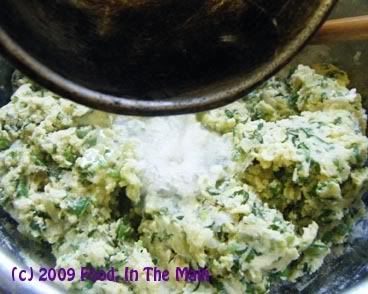
Wait a couple of minutes for it to cool before mixing it into the dough (or use a spatula).
7. Line a couple of baking trays with silicone or non-stick paper and additionally spray it with Pam or similar non-fat spray. Make small balls of the dough, place on the tray and flatten evenly with your fingers. You might need to wipe your fingers clean every so often.
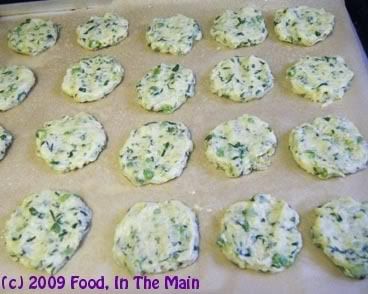
Spray the tops of the pakodas with a spritz of Pam, then bake in a 180C oven for 15 minutes.

After that turn them over, and bake for another 15 minutes or till the pakodas are lightly browned on top.
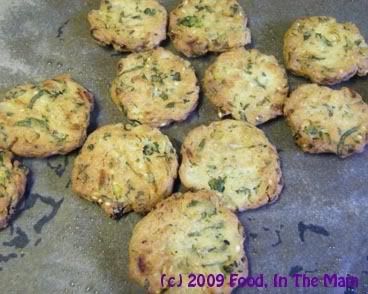
If you like them to be crisp, bake for a few minutes longer (but keep an eye on them).
8.Serve warm, with or without dips, as a snack.
The British love their onion bhajis. This I know because of the number of times that I’ve made bhajis, on specific request, as a starter every time we’ve had friends around for a home-cooked “authentic Indian” (meal, naturally).
This time I decided to vary it just a bit with fresh methi and peanuts, hoping that they wouldn’t be rejected as “not proper bhajis” - and what do you know, the pakodas were such a big hit that the consensus was that I should “always do it this way”. Huh. So much for onion bhaji love – a love about as lasting and sincere as the tears raised by the fumes from the onions! *grin*
I have to say that the bhajis really were exceptional, though – the slight bitterness of the methi, the crunch of the peanuts and the sweetness from the onions… I guess I should not have been surprised that loyalties were transferred from the plain onion bhajis to these!
Recipe for: Methi peanut pakoda
Ingredients:
2 cups fresh methi leaves and tender stems, roughly chopped
1 cup raw red-skinned peanuts
2 medium onions, sliced thin
2 medium potatoes, sliced into thin sticks
3 tbsp rice flour
1 cup besan (gram flour/chickpea flour/kadala maavu) + more as required
1 tsp cumin-coriander powder
1/4 tsp asafoetida powder
2 tsp red chilli powder (or to taste)
Salt to taste
Oil to deep fry
A few tbsp water
Method:
1. Put the vegetables and peanuts into a large bowl and mix well.
2. In another bowl, mix the flours, spices and salt together.
3. Heat enough oil in a kadai or deep fryer. Meanwhile, add the vegetables to the flour and mix together with 3-4 tbsp water. Adjust the gramflour/water combination until the vegetables are just held together with the batter.
It should not be too thick or too watery.
4. Pinch off small pieces of the dough and put in the hot oil a few at a time, taking care not to crowd the surface.
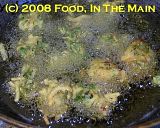
5. Fry on medium high heat, turning the pakodas with a slotted spoon, until they are crisp and golden brown.
6. Drain on kitchen paper and serve hot with any chutney.
I've got a glut of recipes to post, but I've just been unable to make myself do anything to put them on my blog. Especially the ones that need more elaborate instructions than I feel like dealing with at the moment. Obviously I'm a dedicated foodie but my blogging muscle sometimes wilts a bit and doesnt want to hold itself up.
So here's a simple recipe, just to ease myself back into the food blogging world. Didnt help that Pete and I made a quick 6-day trip to Seattle last week... it only served to increase my laziness in the blogging department because I felt so utterly enervated. It wasnt a bad week but boy, the travelling to and fro really sapped my energy!
Anyway, I didnt feel like cooking either, yesterday, and Pete only wanted eggs and chips.

So I made the chips from scratch, based vaguely on Aunt Bessie's lightly battered oven chips (which we get here and which are tastier than regular oven chips - and less healthy, goes without saying). Mine is a much simpler version. Also, I didnt make a wet batter for the potatoes, just shook them up with some seasoned gram flour and baked them till golden and done. Pete dipped his wedges into sunny-side up eggs and I had mine with a yogurt dip - that is, I mixed idli podi with yogurt and used that as a dip. It was yummy!
Recipe for: "Dry batter" oven baked potato wedges

5-6 medium red-skin potatoes, washed and cut into wedges
2 generous tbsp gram/chickpea flour
1 tsp red chilli or cayenne powder (adjust to taste)
1/2 tsp coriander powder
1/2 tsp jeera/cumin powder
1/2 tsp freshly milled black pepper powder
Salt to taste
2 tsp oil
Method:
1. Mix the chickpea flour and the various seasonings (bar the salt) together.
2. Put the wedges in a large ziploc bag (or a large dry bowl), pour in the 2 tsp oil, close the bag and shake the potatoes well. Then add the seasoned chickpea flour and shake it all aain until the potatoes are coated as evenly as possible.

3. Spray a shallow baking sheet with Pam or line with silicone paper. Spread the seasoned wedges in a single layer and bake at 200C for 15 minutes.
4. After 15 minutes, pull the sheet out, sprinkle the wedges with salt, stir the wedges about and put back into the oven until golden brown and done.

5. Serve hot, with dips if preferred.
http://sweetnicks.blogspot.com/2006/02/arf5-day-8-im-baaaack-edition.html
I got this recipe from the Tarla Dalal site a few years back... but although I thought it was an interesting way to use up leftovers, I didnt actually get around to trying it till now.
The thing is, I've tried a few of her recipes before - some of them work out well enough while others did NOT turn out like she said, although I pretty much followed her instructions to the letter. In fact, after 2 or 3 indifferent results, I even wondered if somebody actually tries out the recipes before they're published, or if Ms Dalal's publishers were getting her cookery books out based on her past reputation alone.
So it was with a few reservations that I decided to use up my remaining phulkas from yesterday, in making this recipe. I really didnt know if it would turn out well - but as it happened, it did.
This recipe is a keeper, as far as I'm concerned... you can add whatever vegetables you like to the stuffing (I used green beans, baby corn and carrots along with mashed potatoes and onions), and you end up finishing left-over chapaties or phulkas.
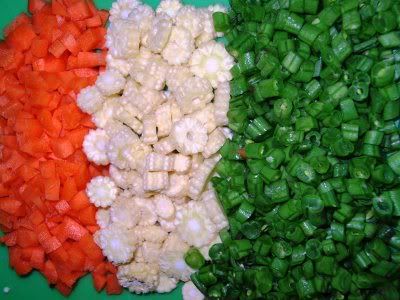
And to cap it off, it's perfect for the ARF/5-a-Day Tuesday event hosted by Sweetnicks who is back this week after some tests, hopefully in the pink of health!
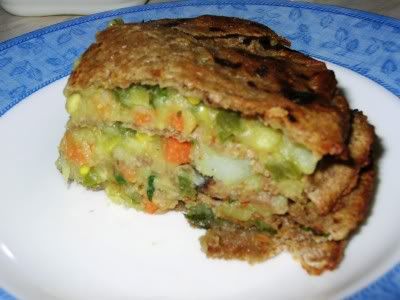
The layered chapati bake turns out a bit like a savoury cake... the inner layers of chapaties/phulkas kind of amalgamate with the filling so that you dont taste them separately. This bake would be great as a light supper and would probably be pretty darn good as a starter, too. It was very nice eaten hot, and surprisingly good even when cold. I know this because I took some to work today for lunch. Yum!
Recipe for: Savoury layered chapati bake
Ingredients:
6 leftover chapaties or phulkas (freshly-made ones would be fine too)
4-5 medium potatoes, boiled peeled and mashed
2 cups finely chopped cooked vegetables (any combination of cauliflower/carrot/cabbage/spinach/green beans etc)
1 medium tomato, chopped
2 medium onions, peeled and chopped fine
3-4 fresh green chillies (or to taste), minced
1/4 cup fresh coriander leaves, chopped
1/2 tsp turmeric powder
1/2 tsp garam masala (optional)
1/2 tsp cumin powder
10 cashewnuts, chopped
2 tsp oil
1 tsp butter
For dipping:
3/4 cup milk mixed with 2 tsp plain flour, in a shallow dish
Method:
1. Heat the oil in a pan and add the turmeric powder, cumin powder and minced green chillies. Fry for 30 seconds. Add the cashewnuts and fry till they turn golden.
2. Add the onions and fry till they soften (I was using baby corn, so I tossed those in at this point), then put in the chopped tomato and cook till it disintegrates.
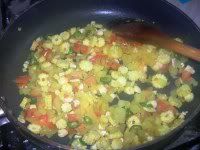
3. Now add the boiled vegetables and mashed potatoes along with the garam masala (if using) and mix them well. Fry for 2-3 minutes, then turn the heat off.
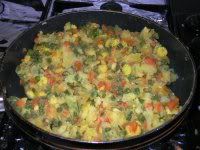
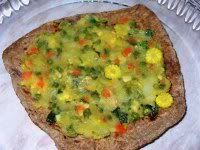
4. Place a chapati on a lightly greased baking dish. Spread with 2 heaped tbsp of stuffing.
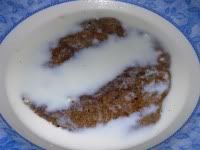
5. Take another chapati and dip it in the dish containing the milk.
Shake off the excess and place it on the chapati already in the baking dish, the spread with more filling.
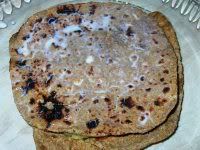
Continue until you have stacked up all the chapaties in this way.
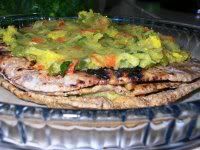
6. Do not put any filling on the top chapati; spread it with the 1 tsp butter instead.
7. Bake in a pre-heated oven (about 180C or 350F) for 15 minutes or until the top is golden brown.
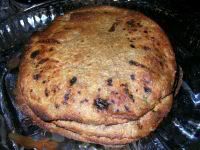
8. Cut into wedges with a sharp knife or slicer.
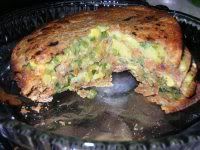
Serve hot with a dollop of Greek yoghurt on the side, as an appetizer or for brunch. This can also be served cold (great for picnics, I bet).


