skip to main |
skip to sidebar
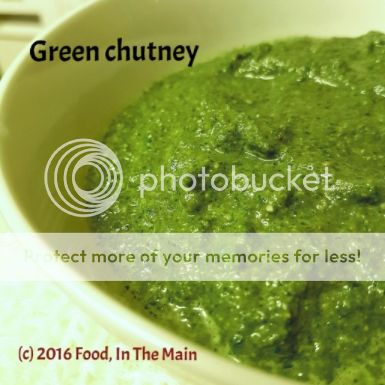
This is such a simple recipe that I'm slightly embarrassed that I'm making it an actual post. However, consider this a record of the ingredients for this chutney. Bear in mind that the ingredients are not set in stone. The coriander and mint are necessary, but the spinach can be omitted, you can use peanuts or walnuts instead of the almonds, add or omit the sunflower seeds or substitute some other seeds... you get the idea.
This chutney can be used as is, as a condiment to go with samosas and other Indian snacks, as a sandwich spread, as a dip mixed into yogurt. It could even be good with pasta, if you consider it as a sort of fat-free Indian "pesto". I haven't tried that, but there's no reason to think it won't be nice. It's versatiie, zingy and easy to make. Last but not the least. this is a healthy chutney -
not in the sense of "I've halved the sugar so I'm calling this healthy" or "I've added spinach to the vegetable pakodas that I deep fried, so I'm calling it healthy" - but actually good for you. That's all.
Oh - one more thing. I had this chutney with khatta dhokla yesterday (made from a packet mix, so sue me). And today, I dolloped a couple of spoonfuls over my bowlful of oven-roasted veggies (Charlotte potatoes, broccoli, cauliflower, red onion) and enjoyed every last bite of my light supper. See what I'm saying about this green chutney being versatile?
Recipe for: Green chutney
Ingredients:
3 cups chopped coriander
1 cup chopped mint
1/2 cup chopped spinach
1-2 green chillies, chopped (or to taste)
10-12 almonds, skinned
2 tbsp mixed seeds (I used sunflower and melon)
1/2 tsp cumin seeds
1/2 tsp sugar
Juice of half a lemon (or to taste)
Salt to taste
Water as required
Method:
1. Grind together all the ingredients (except the salt and lemon juice) to a smooth paste.
2. Mix in the lemon juice and salt to taste. The consistency should be softly runny, not very thick.
3. That's it. It's ready to use.
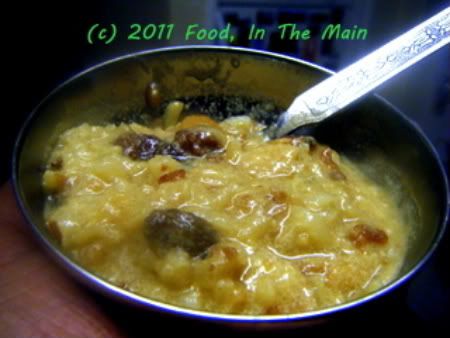
My two pennies on the matter of brown-rice chakkara pongal: It takes longer to cook but tastes chewier and better than regular chakkara pongal.
Other points to note:
1. It might not take YOU as long as it did me to cook the brown rice, even in a pressure cooker, if you know:
a) how long it takes to cook brown rice, and
b) how much liquid to add per measure of brown rice so that it is not just perfectly cooked, but perfectly overcooked (as required for pongal).
2. Following on from 1(b) above - and if 1(a) and (b) don’t apply to you, the way they didn’t to me - your pressure-cooked brown rice+dal might be slightly swimming in milk. This will not matter if:
a) You boil the heck out of the pongal to reduce down the excess milk to the consistency you like, and
b) You like your chakkara pongal to be slightly runny even when cold, rather than so thick that you can slice it.
3. I substituted flaked almonds for the more traditional cashewnuts because I didn’t have the more traditional cashewnuts. You don’t have to do what I did. Especially if you DO have cashewnuts.
With these facts and caveats to hand, you may now go on to the
Recipe for: Brown rice chakkara pongal
 Ingredients:
1 tbsp moong dal
3 tbsp brown basmati rice
1/4 cup jaggery
Seeds from 3 cardamom pods
1-1/2 cups milk
2 tbsp flaked almonds
2 tbsp raisins
1 htsp ghee
About 1/4 cup water
Method:
1. Toast the moong dal in a pan, shaking it frequently so that the dal doesnt burn, until the dal changes to a darker colour.
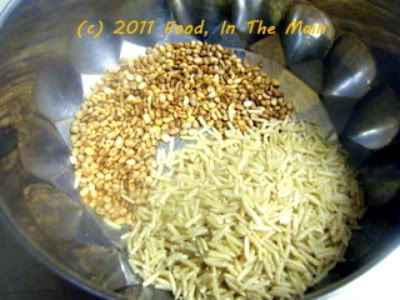 2. Pressure cook the dal, rice and milk for at least 5 whistles, preferably turning down the heat after 3 whistles and letting it simmer for 10 minutes before turning up the heat again.
3. Let the pressure reduce on its own before opening the cooker. Mash the rice and dal a bit - it's ok if there's some milk left in the container.
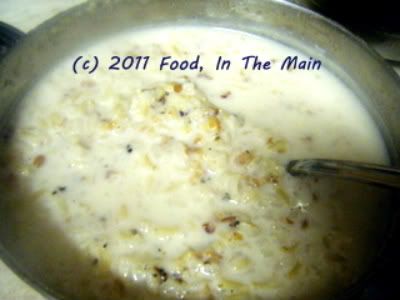 4. Meanwhile, heat the ghee in a pan and fry the raisins and almond flakes until toasted light brown. Remove from the heat and pour onto the milk-dal mixture.
5. Now place the jaggery and water in a pan and let the jaggery dissolve.
 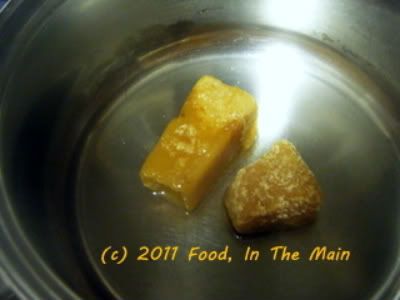 Once it is dissolved and the water is bubbling,
  pour the milk-dal mixture into it and stir well.
 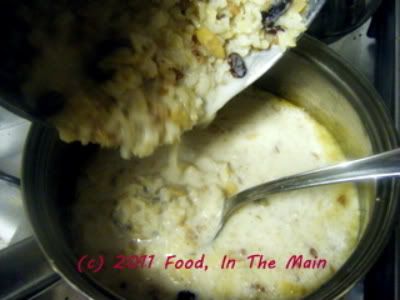 If the chakkara pongal is runny, let it simmer for 5-10 minutes or till the pongal thickens. (It will thicken a bit more on cooling.)
 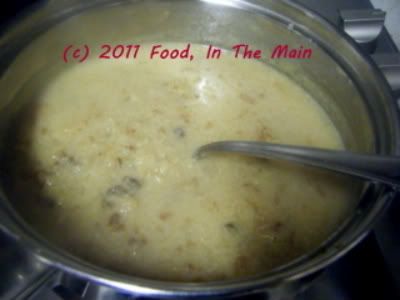 Serve warm.
RECIPE: BROWN RICE CHAKKARA PONGAL
Ingredients:
1 tbsp moong dal
3 tbsp brown basmati rice
1/4 cup jaggery
Seeds from 3 cardamom pods
1-1/2 cups milk
2 tbsp flaked almonds
2 tbsp raisins
1 htsp ghee
About 1/4 cup water
Method:
1. Toast the moong dal in a pan, shaking it frequently so that the dal doesnt burn, until the dal changes to a darker colour.
2. Pressure cook the dal, rice and milk for at least 5 whistles, preferably turning down the heat after 3 whistles and letting it simmer for 10 minutes before turning up the heat again.
3. Let the pressure reduce on its own before opening the cooker. Mash the rice and dal a bit - it's ok if there's some milk left in the container.
4. Meanwhile, heat the ghee in a pan and fry the raisins and almond flakes until toasted light brown. Remove from the heat and pour onto the milk-dal mixture.
5. Now place the jaggery and water in a pan and let the jaggery dissolve. Once it is dissolved and the water is bubbling, pour the milk-dal mixture into it and stir well. If the chakkara pongal is runny, let it simmer for 5-10 minutes or till the pongal thickens. (It will thicken a bit more on cooling.) Serve warm.
My husband loves fruitcake in all forms – heavy and dense, light and fluffy, dry and crumbly, with exotic dried fruit or just with currants, with nuts or without, egg-free or eggful, fancy or homely, buzzing with alcohol or completely teetotal… you name it, he’ll eat it. Of course it goes without saying that he prefers fruitcake that's well-made to one that's second-rate... but in a pinch he'll eat the second-rate one too. In general he can be as nutty as a – pardon me for this – fruitcake when it comes to this variety of cake. Me, on the other hand… I can take fruitcake or leave it. It’s marginally more “take it” if it’s got nuts in it that cut the sweetness of all the dried fruit, so I usually add some to most fruitcakes I make.
And because Pete mostly doesn’t mind how his fruitcake turns out, as long as it’s not turned to coal, I feel free to experiment without worrying about “what ifs” like “what if the cake’s heavy like a brick”, or “what if it’s so crumbly that you choke on fruitcake dust”, and so on. (I’ve even made fruitcake with dark chocolate that needs to see the light of day at some point.)
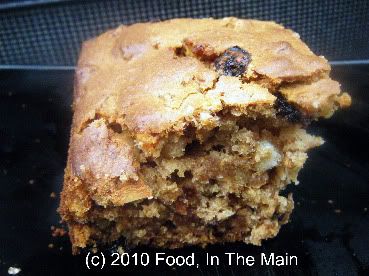
Anyway, this cake combines the best of what Pete likes (dried fruit) with the best of what I like (banana) with some dried sour cherries (bought in the YewYessYay, naturally) thrown in for that “exotic” touch. The addition of mashed overripe bananas was a touch of genius if I do say so myself, because the flavour it gave the fruitcake – helped by the addition of cardamom powder – was luvverly. It was almost like an Indian fruitcake, if there is such a thing. If there isn’t, there is now.
The cake keeps well and stays moist at room temperature (under cover, that is, not left open to the elements) for at least a week that I can vouch for. We both think it tastes gorgeous too – let me put it this way, we’re all three made for each other because if he’s nutty about banana fruitcake, I’m bananas about nutty fruitcake, and the fruitcake is bananas and nuts anyway. See what I mean?
Recipe for: Banana almond fruitcake
 Ingredients:
2 medium overripe bananas, mashed well
1-1/2 cups plain flour or wholewheat cake flour
1/4 tsp salt
1/2 tsp cinnamon powder
1/4 tsp ground cardamom seeds
1/2 cup butter or margarine, softened
1/2 cup Splenda 1/4 cup sugar
2 cups dried fruit (I used currants, dried sour cherries, chopped mixed citrus peel)
1/4 cup almond slivers
1 cup + 2 tbsp milk (or as needed)
1 tsp bicarbonate of soda 1/2 tsp baking powder
Method:
1. Sift the flour and spices together with the Splenda, sugar and salt. 2. Add the dried fruit
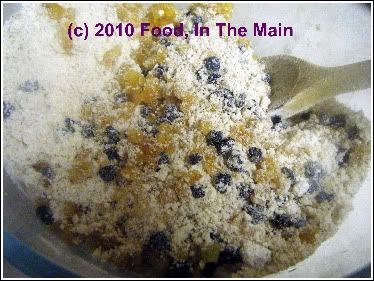 and the dried cherries, mix them into the flour.
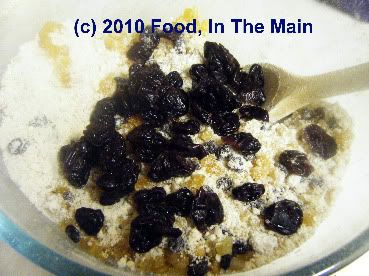 3. Make a well in the flour-fruit mix, then add the almond slivers and the mashed banana.
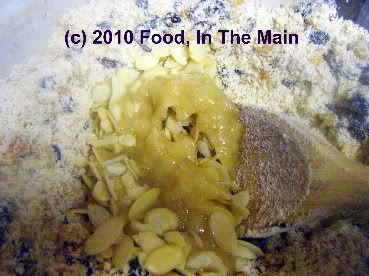 Mix again.
4. Add milk little by little, mixing as you go.
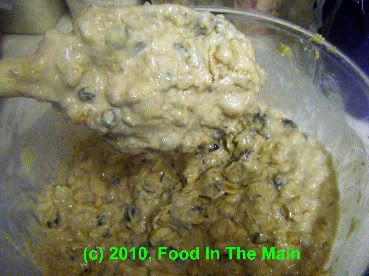
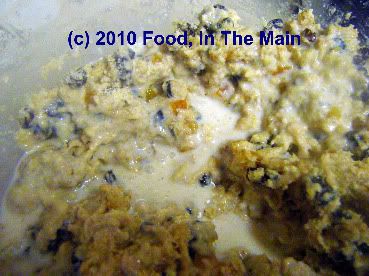 The batter should be thick. It is the correct consistency when it drips slowly off the back of a spoon. Mix in more milk if it's too thick, to get it to the right consistency,
 5. Pour the batter into an 8" square or round pan sprayed with Pam or greased with butter.
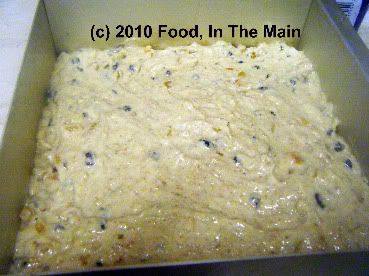 Bake at 180C for about an hour, or till the cake tests done. Start checking at the 45-minute mark as different ovens work differently. 6. Remove the cake tin from the oven, and let the cake sit in the tin for 10 minutes.
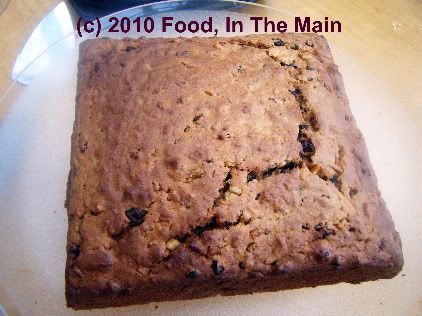 7. Unmould the cake onto a wire cooling rack and let cool completely. This cake stays good at room temperature for a few days.
RECIPE: EGGLESS BANANA ALMOND FRUITCAKE
Ingredients:
2 overripe bananas, mashed
1-1/2 cups plain flour
1/4 tsp salt
1/2 tsp ground cinnamon
1/4 tsp ground cardamom seeds
1/2 cup butter or margarine, softened
1/2 cup Splenda
1/4 cup sugar
2 cups dried fruit (currants, dried sour cherries, chopped mixed citrus peel)
1/4 cup almond slivers
1 cup + 2 tbsp milk (or as needed)
1 tsp bicarbonate of soda
1/2 tsp baking powder
Method:
1. Sift the flour and spices together with the Splenda, sugar and salt.
2. Add the dried fruit and the dried cherries, mix them into the flour.
3. Make a well in the flour-fruit mix, then add the almond slivers and the mashed banana. Mix again.
4. Add milk little by little, mixing as you go. The batter should be thick. It is the correct consistency when it drips slowly off the back of a spoon. Mix in more milk if it's too thick, to get it to the right consistency,
5. Pour the batter into an 8" square or round pan sprayed with Pam or greased well with butter. Bake at 180C for about an hour, or till the cake tests done. Start checking at the 45-minute mark as different ovens work differently.
6. Remove the cake tin from the oven, and let the cake sit in the tin for 10 minutes.
7. Unmould the cake onto a wire cooling rack and let cool completely. This cake stays good at room temperature for a few days.
7. Unmould the cake onto a wire cooling rack and let cool completely. This cake stays good at room temperature for a few days.
RECIPE: EGGLESS BANANA ALMOND FRUITCAKE
Ingredients:
2 overripe bananas, mashed
1-1/2 cups plain flour
1/4 tsp salt
1/2 tsp ground cinnamon
1/4 tsp ground cardamom seeds
1/2 cup butter or margarine, softened
1/2 cup Splenda
1/4 cup sugar
2 cups dried fruit (currants, dried sour cherries, chopped mixed citrus peel)
1/4 cup almond slivers
1 cup + 2 tbsp milk (or as needed)
1 tsp bicarbonate of soda
1/2 tsp baking powder
Method:
1. Sift the flour and spices together with the Splenda, sugar and salt.
2. Add the dried fruit and the dried cherries, mix them into the flour.
3. Make a well in the flour-fruit mix, then add the almond slivers and the mashed banana. Mix again.
4. Add milk little by little, mixing as you go. The batter should be thick. It is the correct consistency when it drips slowly off the back of a spoon. Mix in more milk if it's too thick, to get it to the right consistency,
5. Pour the batter into an 8" square or round pan sprayed with Pam or greased well with butter. Bake at 180C for about an hour, or till the cake tests done. Start checking at the 45-minute mark as different ovens work differently.
6. Remove the cake tin from the oven, and let the cake sit in the tin for 10 minutes.
7. Unmould the cake onto a wire cooling rack and let cool completely. This cake stays good at room temperature for a few days.
Powerhouse muffins - what else could you possibly call muffins that have, as part of the ingredients, peanut butter, mashed banana, fresh pineapple, flaxseed powder, toasted skin-on almonds, raw cauliflower...
Wait, what? Cauliflower? That smelly vegetable? In a sweet muffin? Oh yes, you read that right, people. This muffin recipe actually does have raw cauliflower as an ingredient. If you're like me, you'd be wondering why anybody would want to add cauliflower to a muffin. (If you're not like me and you routinely add inappropriate ingredients to your recipes and make a success of them, what are you doing reading this blog in the first place??? My conservative - in terms of mixing and matching food ingredients - blog will hold no surprises for you!)
But while I might not come up with weird and wonderful food ideas all on my own, I'm still capable of recognising weird and wonderful food ideas when I come across them on other blogs. And, assuming the weirdness and wonderfulness does not seem completely insane to me, I can be intrigued into trying out the weird and the wonderful for myself, just to see if the weird and the wonderful can actually come together and make something edible and tasty.
I really, really didn't think the muffins would turn out well - in the sense that they would appeal to my tastebuds, especially with me knowing about the cauliflower. (I would have preferred to make them without me knowing, to be honest, but I just couldn't bend reality enough. Should have tried harder, maybe...) I was doubtful about the muffins' edibility mainly because I'm not one of those people who eat dreadful-tasting things merely on the dubious grounds that they're "healthy". My healthy has to come strongly disguised as tasty, let me tell you.
Anyway, as I was saying, I was sufficiently taken up with the thought of trying out the muffins on Pete (what, did you think I'D actually eat one first???), so I went ahead and made them, with a couple of minor changes in ingredients and quantities. (The original recipe can be found here.) As it turned out, even if I'd wanted to be the guinea pig, Pete didn't give me the chance. He sneaked one while it was quite hot and still cooling on the countertop, and pronounced them "lovely". To be fair, they smelt really rather nice.
I let him eat the muffin fully and start on another before I said: "The muffins are nice, are they?"
"Oh yeah, really soft and fruity."
"Oh good," I said, happily. "So do you want to know what's in them?"
He regarded me suspiciously, mid-bite. "What? I suppose you're going to say it's something dreadful?"
"Depends on what you'd consider dreadful." I grinned at him. "It's got pureed cauliflower in it!"
He looked at the half-eaten muffin in his hand like it was an apple in which he'd found half a worm.
"Cauliflower?" he repeated in pained disbelief. "What in god's name made you think of making muffins with cauliflower?"
"It was a recipe I saw on a blog," I said. "Obviously it works, because you couldn't taste or smell the cauliflower. Glad you tasted it first, though."
He made a few noises like he was going to be sick, while swallowing the rest of the muffin. "For god's sake, don't sppring this sort of thing on me!" he grumbled.
And then he went back to the kitchen to get himself another muffin.
Recipe for: Powerhouse muffins

Ingredients:
1/2 (heaped) cup light brown sugar
1/4 cup peanut butter (I used chunky, and I'm glad I didnt use 1/2 cup as I found the peanut butter taste far too strong - and sort of overbaked, too, when I tasted a muffin)
1 large banana, mashed with a fork
1/2 cup raw cauliflower puree (leave out the stem, use just the "flowers" in the puree)
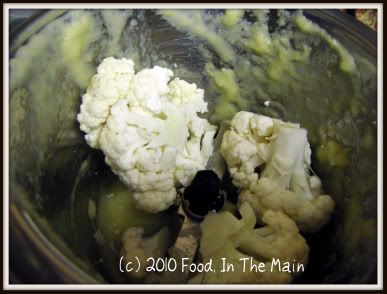
1/4 cup fresh pineapple puree
1 large egg
1 cup whole-wheat self-raising flour
1/4 cup powdered flaxseeds
1/2 tsp baking powder
1/2 tsp baking soda
2 tsp vanilla extract
15-20 skin-on almonds (toasted and chopped)
Method:
1. Heat oven to 180C/350F. Spray 12-cup muffin tray with non-stick spray or use silicone liners (which I sprayed anyway).
2. Mix brown sugar, flaxseed powder,
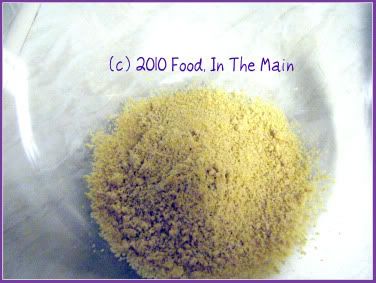
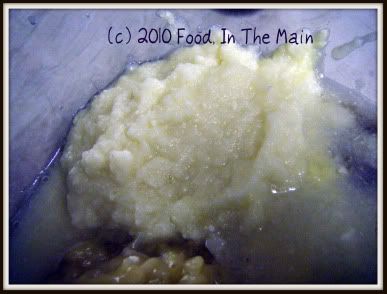
mashed banana, pineapple
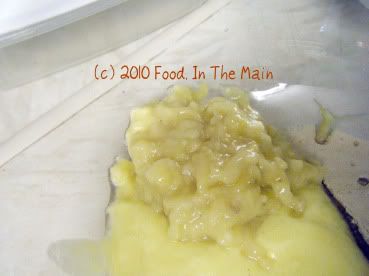
and cauliflower purees,
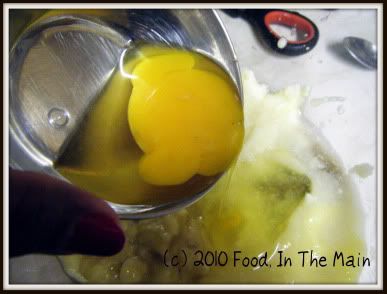
egg,
peanut butter,
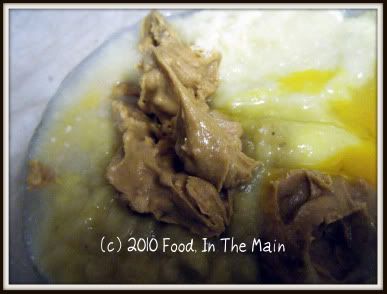
and vanilla extract. Mix well.
3. In a separate bowl, mix flour, baking power and baking soda.
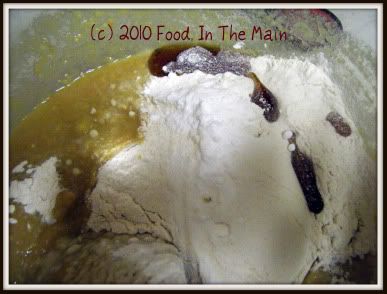
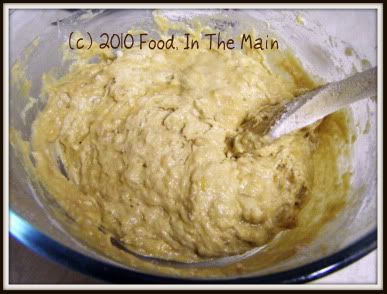
Pour into puree mixture, stirring just until mixed. The batter will be lumpy.
Lightly stir in the chopped toasted almonds.
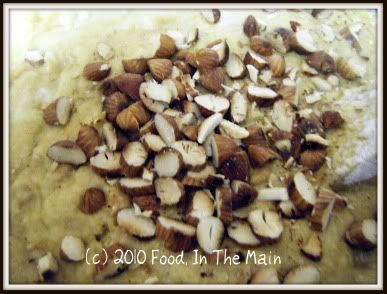
4. Divide batter into muffin cups and bake till the muffins are done (20 minutes or more, depending on your oven).
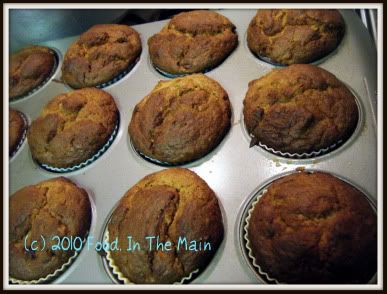
Test with a toothpick to check. Best served warm and fresh, but can be reheated to good effect in a microwave oven.
Hyderabadi mirchi ka saalan is a recipe that I’ve wanted to try, but for one reason or another never got around to making. I’ve never had it anywhere before either. (And on an aside, the next time I’m in Hyderabad, I’m so going to collar a native Hyderabadi and go on a gastronomic tour of the best that this city has to offer. I do understand that it won’t be THE BEST - because I’d really rather not eat non-vegetarian food - and I understand that THE BEST biriyani is definitely not vegetarian. Oh well. I’m sure I’ll be happy with the saalan and other such recipes.)
Anyway, I came across a recipe in Bong Mom’s Cookbook for something approaching saalan without using coconut, and felt very thrilled because I had some jalapeno chillies, once green but now rapidly becoming orange and red - to use up.

The recipe also said to roast the chillies in the oven (which is another thing I’d been meaning to try, and now I have). Of course, I didn’t really notice that Bong Mom’s roasted chillies in her photo were only very mildly brown after 40 minutes. No, all I registered was that the recipe mentioned “30-40 minutes roasting”, and so, blithely blind to any note of caution (such as “these are my toaster oven settings”), I set off to roast the chillies in my regular, fan-driven, electric oven at a blistering 190C.
Boy, was it ever blistering! It very nearly blistered my poor jalapenos to charcoal. Only a serendipitous check at 20-odd minutes saved the chillies from a horrendous death by burning. Perhaps because the chillies had been over-roasted, they felt very insubstantial when I took ‘em off the tray – quite limp to the touch, really, and I wondered if I’d entirely burnt the taste and heat from them as well. (No, I hadn’t, thankfully, as I discovered later. I also discovered that the ideal size – for serving and eating purposes - would have been about 1.5”-2” long, rather than 4” or thereabouts.)
Apart from that, though, the recipe went swimmingly well. I used light soy milk in place of regular milk, and I don’t think it made much difference to the final result... although after I’d poured it in and smelt the milk’s sweetish aroma, I had a few moments of doubt. I needn’t have worried – you couldn’t have said that the dish contained soy milk, once it was finished.
MAN was the curry tasty, though! I had it with plain basmati rice and some sautéed roasted chickpeas. The mild sauce was the perfect foil for the heat from the chillies - but if I was making this dish using bell peppers, I would definitely up the heat quotient for the sauce. It would be too boring for me otherwise... although perhaps chilli-intolerant people would disagree.
Recipe for: Roasted jalapeno curry
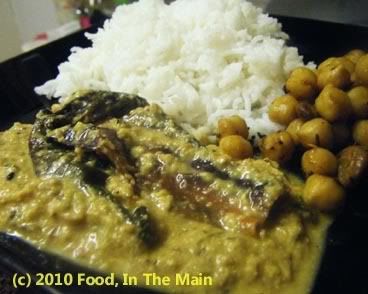
Ingredients:
10 jalapeno peppers (or bell peppers or long "bajji" chillies, cut into 2.5" pieces)
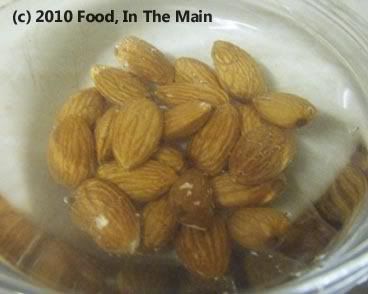
10 almonds (with or without skin, soaked in water for 30 min)
1 medium onion, sliced
2 cloves garlic
1" piece ginger, grated
1 medium tomato, cut into small chunks
1 cup light soya milk (or use regular milk)
1/2 tsp nigella seeds
1 tsp cumin seeds
3 tsp oil
1 tbsp kasoori methi
1/4 tsp turmeric
1/2 tsp sweet paprika Salt to taste
Chopped coriander for garnish
Method:
1. Toss the chillies with 1 tsp oil, salt and pepper and roast in the oven for 20 minutes or so at 180C/350F.
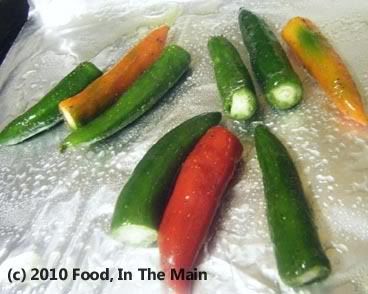
They should have brown spots here and there. (Try not to burn them, which I nearly did.)
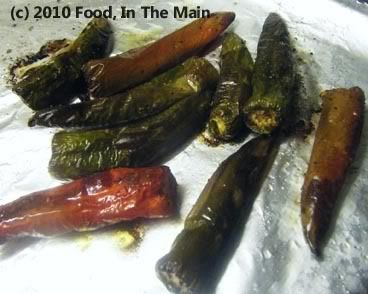
2. While the chillies are roasting, put the almonds in hot water and let soak for 30 minutes or so. Reserve.
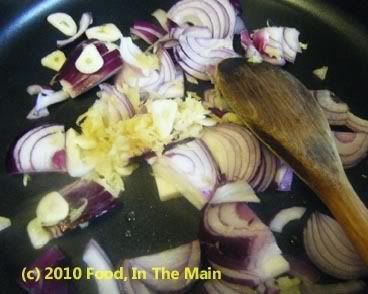
3. Heat 1 tsp oil in a pan and add the onions, garlic and ginger.
4. When the onions begin to soften, toss in the chopped tomatoes.
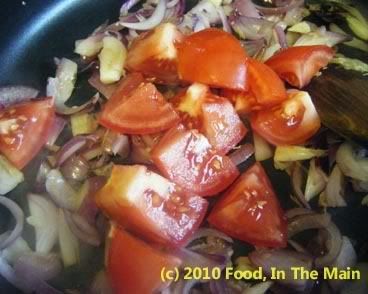
5. Fry for 3-4 minutes till the tomatoes turn soft, then turn off the heat and let the mixture cool.
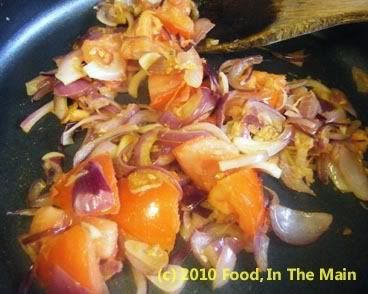
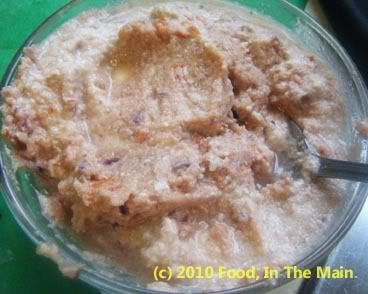
6. Grind the cooled tomato-onion masala along with the almonds (you can remove the skin if you like, but I didn't)
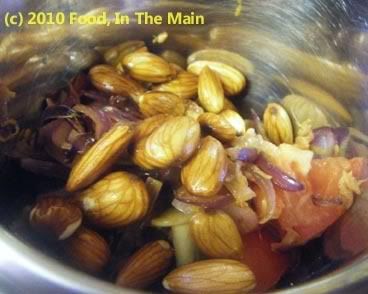
to a fairly smooth paste. Mine is pinkish, probably because of the red onion I used, as well as the almond skins.
7. In a pan, heat the remaining oil, then add the cumin and nigella seeds.
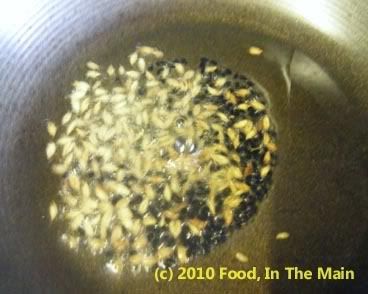
8. Let the seeds fry for 30 seconds, then add the ground paste and mix in well.
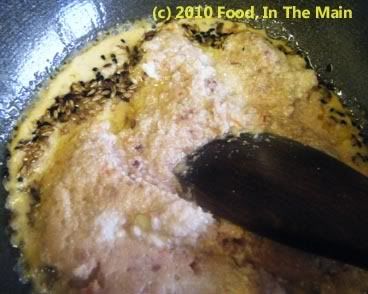
9. Add the paprika (if using), turmeric powder and kasoori methi.
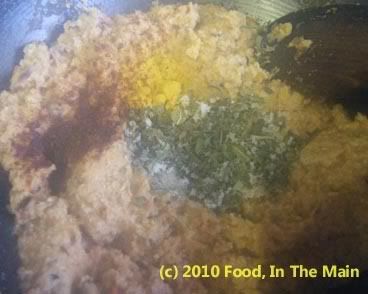
10. Pour in the soya milk, add salt to taste, and stir till the mixture is homogenised.
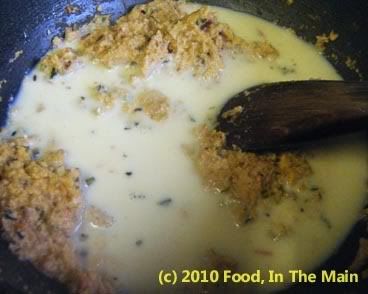
11. Let the sauce come to a gentle boil on medium heat (about 4 minutes), then add the roasted chillies.
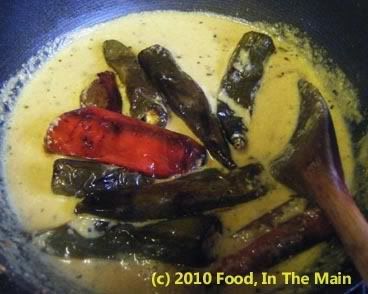
12. Stir it all gently, let it simmer for 3-4 minutes, then add the chopped coriander. Serve hot with plain basmati rice, jeera rice, ghee rice or any mild pulao. Also good with chapaties.

 They say you can’t compare apples and oranges. I guess I can see why. Apples are hard and have thin skins you can usually eat; oranges and soft and you can’t eat the skin (at least not raw). Apples can be red or green or pink, whereas oranges are usually... well, orange. Apples are famously cooked in pies, and as far as I’m aware, I’ve never come across orange pie. (I might be merely ignorant, of course.)
The good thing here is that they – whoever they are – have never said that apples and oranges can’t be used in a recipe together... and I got proof of this from Google, which came up (only eventually) with a recipe for a cake that seemed easy AND doable AND tasty AND good-looking… AND, as it turned out, a blogger’s mum’s recipe. Evidently other people before me have discovered that apples and oranges go rather nicely – in fact quite deliciously - together in some things, like cake.
Boy, was it good. I reduced the quantity of the ingredients and replaced half the sugar with Splenda, and then halved the quantity of the remaining sugar so that I only used 1/4 cup in all.
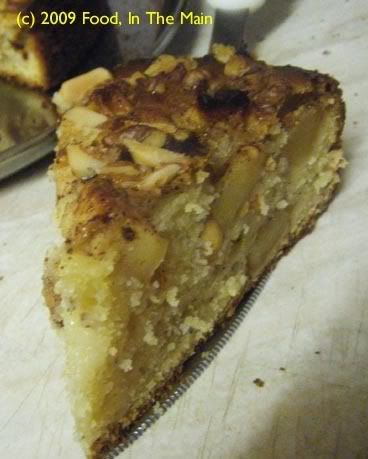
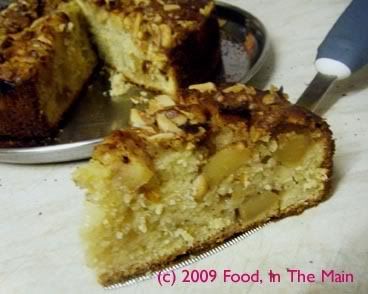
Usually baking with just Splenda makes the cake a bit heavier in texture than otherwise – at least that’s been my experience so far. But this cake, although it seemed a tad sticky/moist at first, sort of fluffed itself out when it cooled, so that the cake part was nice and light and spongy. The apple chunks in it kept the cake moist for three days, and it smelt and tasted just as good as fresh, when it was warmed up in the microwave before serving.
It really was a delicious cake and I managed to use up three apples and four small oranges – which had been my intention in the first place.
Recipe for: Chunky apple and orange cake
Ingredients:
3 medium apples
1 tsp cinnamon
2-1/2 tbsp unrefined demerara sugar
2 tsp orange zest
1-3/4 cups flour, sifted
1/2 tablespoon baking powder
1/2 teaspoon salt
1/2 cup vegetable oil
1/4 cup sugar
1/2 cup Splenda
1/2 cup orange juice (from four small oranges)
1-1/2 teaspoons vanilla
2 large eggs
3 tbsp chopped mixed nuts (I used walnuts and almonds)
Method:
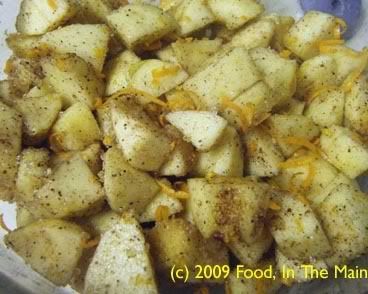
1. Preheat oven to 350F/180C. Grease a round loose-bottomed (or springform) 7" pan. Peel, core and chop apples into chunks. Toss with cinnamon, sugar and orange zest. Set aside for 10 minutes.
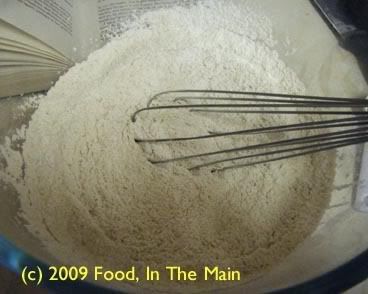
2. Stir together flour, baking powder and salt in a large mixing bowl.
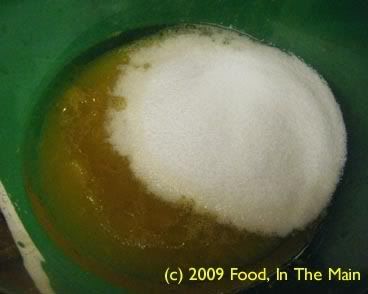
3. In a separate bowl, whisk together oil, orange juice, sugar and vanilla.
4. Mix wet ingredients into the dry ones,
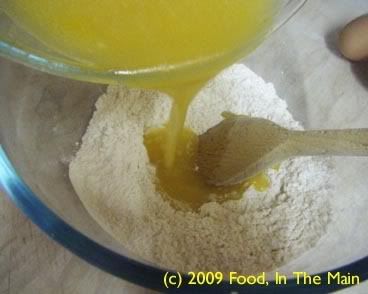
then add eggs, one at a time.
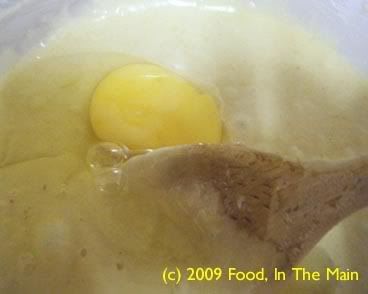
Scrape down the bowl to ensure all ingredients are incorporated.
5. Pour half of batter into prepared pan.
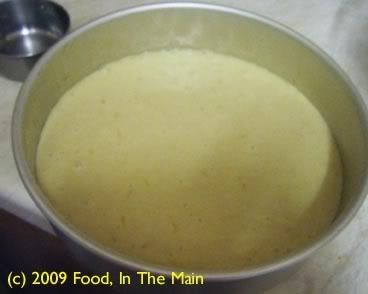
6. Spread half of apples over it.
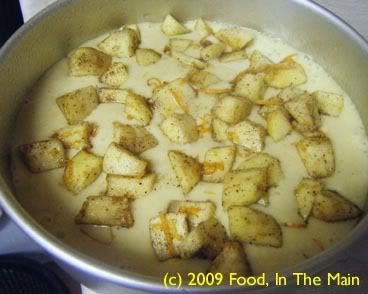
7. Pour the remaining batter over the apples and arrange the remaining apples on top. Sprinkle the nuts around the apple chunks.
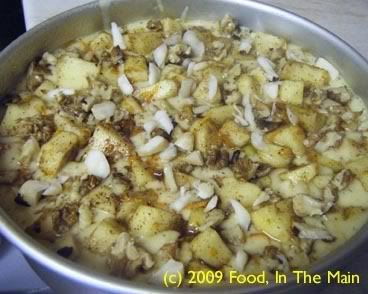
8. Bake for about an hour (check after 45 minutes), or until a tester comes out clean and the cake has pulled away slightly from the pan.
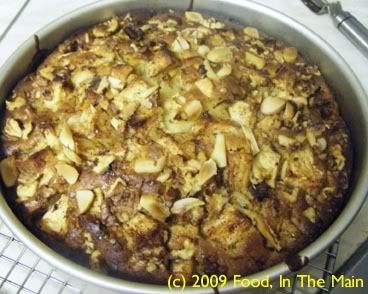
9. Cool the cake in the pan for 10 minutes, then turn out onto a wire rack.
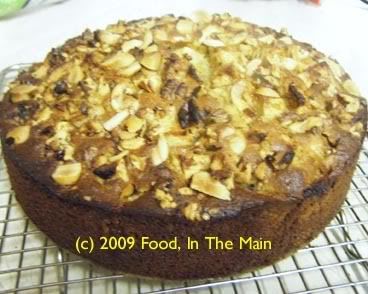
Serve warm.


