skip to main |
skip to sidebar
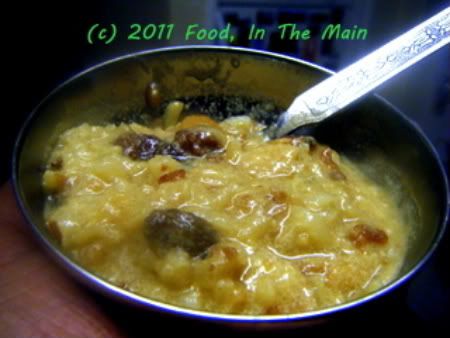
My two pennies on the matter of brown-rice chakkara pongal: It takes longer to cook but tastes chewier and better than regular chakkara pongal.
Other points to note:
1. It might not take YOU as long as it did me to cook the brown rice, even in a pressure cooker, if you know:
a) how long it takes to cook brown rice, and
b) how much liquid to add per measure of brown rice so that it is not just perfectly cooked, but perfectly overcooked (as required for pongal).
2. Following on from 1(b) above - and if 1(a) and (b) don’t apply to you, the way they didn’t to me - your pressure-cooked brown rice+dal might be slightly swimming in milk. This will not matter if:
a) You boil the heck out of the pongal to reduce down the excess milk to the consistency you like, and
b) You like your chakkara pongal to be slightly runny even when cold, rather than so thick that you can slice it.
3. I substituted flaked almonds for the more traditional cashewnuts because I didn’t have the more traditional cashewnuts. You don’t have to do what I did. Especially if you DO have cashewnuts.
With these facts and caveats to hand, you may now go on to the
Recipe for: Brown rice chakkara pongal
 Ingredients:
1 tbsp moong dal
3 tbsp brown basmati rice
1/4 cup jaggery
Seeds from 3 cardamom pods
1-1/2 cups milk
2 tbsp flaked almonds
2 tbsp raisins
1 htsp ghee
About 1/4 cup water
Method:
1. Toast the moong dal in a pan, shaking it frequently so that the dal doesnt burn, until the dal changes to a darker colour.
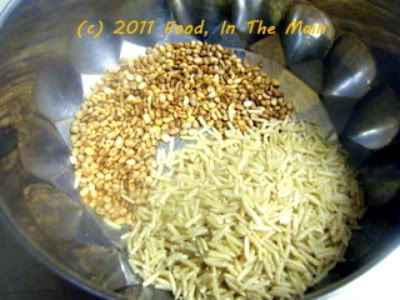 2. Pressure cook the dal, rice and milk for at least 5 whistles, preferably turning down the heat after 3 whistles and letting it simmer for 10 minutes before turning up the heat again.
3. Let the pressure reduce on its own before opening the cooker. Mash the rice and dal a bit - it's ok if there's some milk left in the container.
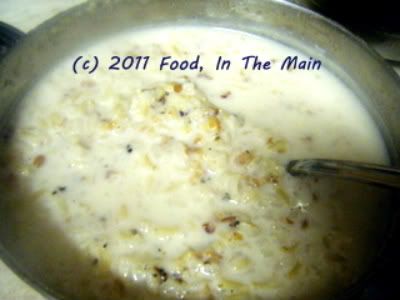 4. Meanwhile, heat the ghee in a pan and fry the raisins and almond flakes until toasted light brown. Remove from the heat and pour onto the milk-dal mixture.
5. Now place the jaggery and water in a pan and let the jaggery dissolve.
 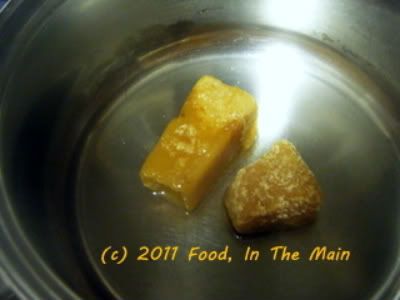 Once it is dissolved and the water is bubbling,
 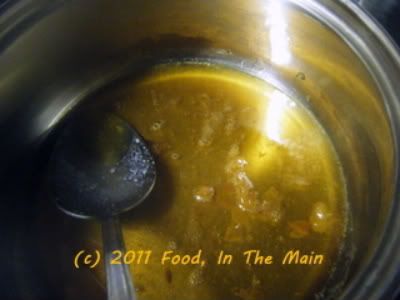 pour the milk-dal mixture into it and stir well.
 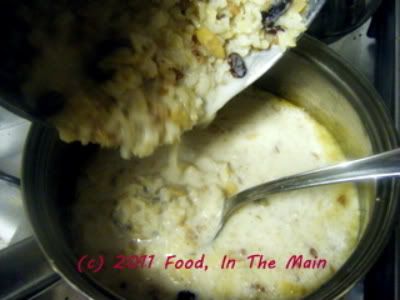 If the chakkara pongal is runny, let it simmer for 5-10 minutes or till the pongal thickens. (It will thicken a bit more on cooling.)
 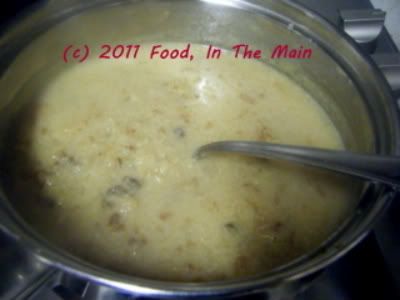 Serve warm.
RECIPE: BROWN RICE CHAKKARA PONGAL
Ingredients:
1 tbsp moong dal
3 tbsp brown basmati rice
1/4 cup jaggery
Seeds from 3 cardamom pods
1-1/2 cups milk
2 tbsp flaked almonds
2 tbsp raisins
1 htsp ghee
About 1/4 cup water
Method:
1. Toast the moong dal in a pan, shaking it frequently so that the dal doesnt burn, until the dal changes to a darker colour.
2. Pressure cook the dal, rice and milk for at least 5 whistles, preferably turning down the heat after 3 whistles and letting it simmer for 10 minutes before turning up the heat again.
3. Let the pressure reduce on its own before opening the cooker. Mash the rice and dal a bit - it's ok if there's some milk left in the container.
4. Meanwhile, heat the ghee in a pan and fry the raisins and almond flakes until toasted light brown. Remove from the heat and pour onto the milk-dal mixture.
5. Now place the jaggery and water in a pan and let the jaggery dissolve. Once it is dissolved and the water is bubbling, pour the milk-dal mixture into it and stir well. If the chakkara pongal is runny, let it simmer for 5-10 minutes or till the pongal thickens. (It will thicken a bit more on cooling.) Serve warm.
Last week was a busy one, socially speaking, and we went out for dinner three times in the week – quite out of the norm for me, because I don’t care to eat out much. Or rather, I get easily bored with restaurant food, no matter what the cuisine, so the occasional meal out is much more to my liking than eating out often.
After having been to two “Indian” (read Bangladeshi) restaurants, and one birthday party with a buffet-style spread, both Pete and I were craving simple comfort food. However, the term "comfort food" represents entirely different things to me and Pete – no surprise considering that I was brought up on standard South (and some North) Indian vegetarian cuisine, and Pete on just as standard English fare.
One of my few talents is that I am capable of is making both kinds of comfort food – which ability my husband doesn’t share. (Just as well, otherwise he’d be perfect, and perfection is a quality that I can’t really come to terms with because to me it denotes “smug and/or boring”.)
What was I saying? Oh yes, comfort food. Pete’s comfort food is shepherds pie, and mine is home-style simple food, preferably based around rice. So I made shepherds pie for Pete, and for myself, dal – a simple, very basic, fuss-free and gentle-on-the-digestion dal, enlivened by the sharp freshness of lemon juice and aromatic with a tempering of ghee-fried cumin seeds. That dal over plain steamed rice was, for that meal, absolutely perfect.
What? I’m not being contrary. I have nothing against perfection in food - in fact, I try actively to achieve it. Perfection in human beings is what I can’t live with. Are we clear now?
Recipe for: Light gingery lemon dal
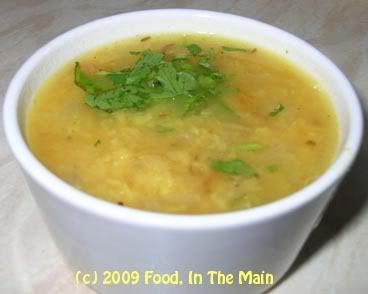
Ingredients:
1 cup yellow moong dal
2 small tomatoes, chopped
1 onion, chopped fine
1 tbsp fresh ginger root, grated
1 fresh green chilli, slit vertically from the tip
1/2 tsp oil
1/2 tsp ghee
1 tsp cumin seeds
1/2 tsp coriander powder
2 tbsp lemon juice (or to taste)
Salt to taste
Chopped coriander leaves for garnish
Method:
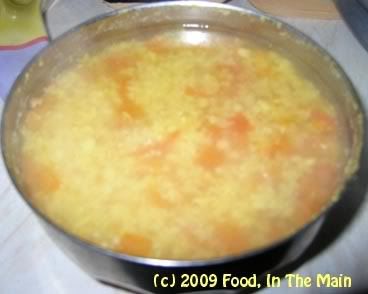
1. Pressure cook the moong dal and chopped tomatoes with 1-1/2 cups water for 3 whistles. Reserve.
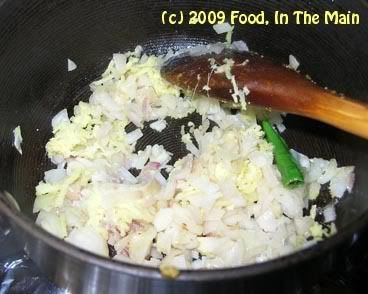
2. Heat 1/2 tsp oil in a pan and add the chopped onions and green chilli. Cook on a low flame till the onions soften. Don't let them brown.
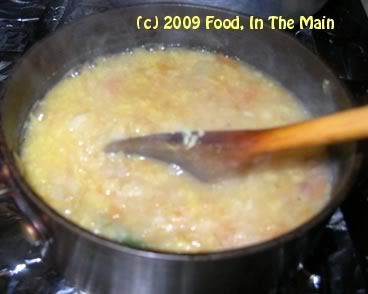
3. When the onions are cooked, add the cooked dal and mix in. On med-high heat, bring the dal to a gentle boil.
4. Meanwhile, heat the 1/2 tsp ghee in a small pan and add the cumin seeds and coriander powder. Let the seeds turn a darker aromatic brown (about 30 seconds).
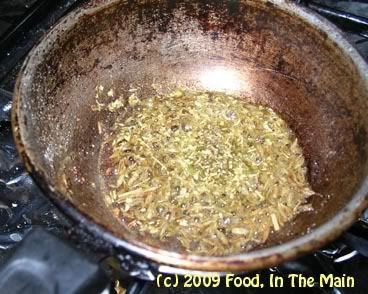
5. Pour this tempering immediately on the bubbling dal and turn off the heat. Add salt to taste and 1 tbsp lemon juice, stir it in and taste for sourness. Add more lemon juice if required.
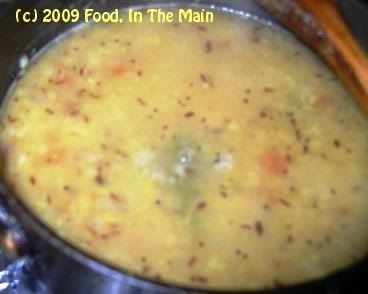
Serve hot over plain boiled rice, with any spicy, dry vegetable preparation.
I'll never make an author, and there's a good reason why. I'm lazy. The more I think about how much there is to do, the less I feel like doing it. I'm ok if I just start writing without any plan in mind - that way I can write a lot... but give me a something specific to write about, and inevitably I end up only thinking about writing it. With that attitude, once I actually finish writing, I dont bother to look at it again. The very thought of having to revise or rewrite is anathema, and has always been that way. (A little revision and rewriting back in school might have paid better dividends... but hey, laziness rules!) Hats off to novelists who revise their manuscripts and rewrite and then perhaps rewrite some more...
So basically that's what happens as far as the food events are concerned... I think "Oh yes, i can make something for that event" - and then I go ahead and think some more, flip through my recipes to see what would be suitable, then decide on a recipe, then think some more about actually making the recipe... and the next thing you know, the time for submission is over, and another event is past.
I've had all November to take part in Suganya's "Vegan Month" event. Plenty of time to think about what to make. I saw myself making at least half a dozen vegan items, but in the event, all I've been able to manage is one recipe, and that very nearly at the last minute. BUT... considering my success rate in events past, I think I'm ahead of the game at this point!
Amiri Khaman is a recipe that appeared in my inbox from Tarla Dalal's website. It seemed different (ish), something I'D never tried before, so I went ahead and made the recipe. Its name is a bit of a puzzle because there's nothing particularly "amiri" (rich?) about it. It's just a fairly easy snack to make and quite nice to eat especially when it's hot. But I suppose that's as good a recommendation for a recipe as any!

This is my very-nearly-last-minute, nearly-missed-it entry for Suganya's Vegan Month. I've pretty much followed Tarla Dalal's recipe except that I used fresh Thai red chillies instead of green. And because I didnt have any fresh lemons or limes (or even lime juice from a lemon-shaped knobbly yellow squeezy plastic bottle), I used sumac in its place. It worked quite well because sumac is a bit sour-tasting - but I would recommend fresh lemon juice as laid out in the original recipe. There's nothing like fresh lemon or lime juice for that juicy sharp sourness.
Recipe for: Amiri Khaman

1 cup split yellow gram (yellow moong dal)
6 fresh green or red chillies (or to taste)
1" piece ginger
1 tsp soda-bi-carb
1/2 tsp turmeric powder
1 tsp caster sugar
Juice of 1 large lemon (or enough sumac to taste)
2 tsp mustard seeds
3-4 cloves garlic, finely chopped
1/4 tsp asafoetida (hing)
2 tbsp oil
salt to taste
For the garnish
2 tbsp chopped coriander
1 cup sev (thin deep-fried gramflour noodles, as required)
Method
1. Soak the dal for at least 6 hours.
2. Leave 4 tablespoons of the dal aside and grind the rest with the chillies and ginger.
3. Add the whole (unground) dal and mix.
4. Add the soda bi-carb, turmeric powder and salt and keep the mixture aside for at least 4 hours.
5. Steam the mixture in a pressure cooker for 12 minutes or till done. I used idli plates, but you can also spread the mixture to 1/2" thickness on a flat greased plate and steam it.

Ready for steaming

Just out of the steamer.

6. Cool and crumble.
7. Add the sugar, sumac/lemon juice and a little salt, and mix well.

8. Heat the oil in vessel and add the mustard seeds. When they crackle, add the chopped garlic and asafoetida and fry again for a few seconds.
9. Pour this mixture on top of the crumbled dhoklas, add the chopped coriander and mix to distribute evenly.


10. Serve garnished with the sev. If you have mint chutney or tamarind chutney, so much the better.
There's a classic accompaniment to vattha kuzhambu that my mother used to make for my dad, years and years ago, when we lived in Tanzania. It's called "paruppu thogayal", a bland (in the sense of no chillies being added) chutney made of roasted tur dal. Since vattha kuzhambu isnt made with the addition of cooked tur dal, this chutney was a way of adding protein to the meal. I dont remember if I loved the chutney as much as my dad, but since my mother hasnt made it in years (since Tanzania, if memory serves me right), we kids cant have been that fond of it.
Anyway, I've never made it before nor seen how it was made, so I didnt quite know the method. I was looking for recipes using tur dal for Linda's JFI Tur Dal event when I came across a "tur dal thuvayal" recipe on the Net - I think it was on the ForumHub site, but for the life of me I cant find that chat link again!
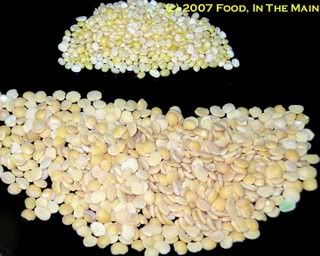
Top: Moong dal; Bottom: Tur Dal
Anyway, apart from the main item, Tur Dal, it called for red chillies, raw garlic and some moong dal - these three ingredients completely threw me off the scent, as it were. I didnt think it was a variation of the paruppu thogayal my mother used to make... until it came to grinding the roasted dal. Then the aroma instantly made itself the familiar yet long-forgotten one of paruppu thogayal.
Since I used raw garlic, red chillies and moong dal to make this chutney, it wasnt quite my mother's version. Call it a grown-up version, if you will. I cant say that I fell in love with this version any more than I did with the original... but it wasnt bad either. It's just that the roasted tur dal flavour is VERY intense. Of course this is only my personal opinion of the chutney... chances are there are people who slaver just at the thought of it! So here it is, my entry for JFI - Tur Dal.
Recipe for: Tur dal chutney
1 tsp payatham paruppu (moong dal)
1/4 cup thuvaram paruppu (tur dal)
5-6 dried red chillies (or to taste)
3 garlic pearls
1/2 tsp oil
salt to taste
Water as required
Method:
1. Heat the oil and fry the dals and red chillies separately over a medium flame, stirring constantly.
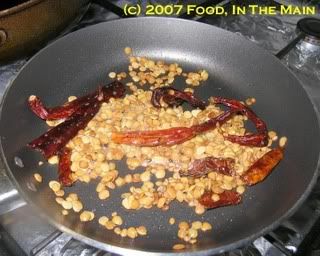
The dals should be golden brown (take care not to burn them) and the red chillies should turn darker in colour. Let cool completely.
2. Grind the fried dals, chillies, garlic with 4-5 tablespoons of water to a smooth paste.

Dont worry about adding more water - the chutney solidifies quite a bit after grinding as it absorbs the water.
3. Add salt to taste and mix well. This can be served with rice and ghee or as a side with dosas or idlis.
To anyone who knows Hindi, I guess the name of this dish would sound somewhat strange, because "dal-chawal" means literally "pulses-rice". In a more figurative sense "dal-chawal" is also used to describe basic everyday necessary food - like the term "daily bread".
I think I'm not getting this across very well, so I'm going to stop trying. Besides, if I havent made myself understood yet, more babble is hardly likely to encourage comprehension.
I call it dal-chawal pulao, however, because I couldnt come up with a better name for it. Besides, the main ingredients are as basic as that - dal (brown lentils in this case) and Basmati chawal. Add to it a cupful of sliced shallots and some spices - and you get a pulao that's extraordinarily tasty. I couldnt believe it myself, really. The aroma and the taste were addictive.
In fact, although Pete had alu-matar with it, I ended up eating just the pulao, spoonful by spoonful. I loved the taste and texture of the brown lentils - they cooked quite quickly but retained their shape beautifully even though technically I overcooked it. Any other dal would have turned to mush, but not my lovely brown lentils.

Um, actually they could be green lentils. I'm not sure what they're called... but you can see from the photo that they're a greyish colour when dry, turn somewhat green when soaked for a couple of hours, and cook to a dark shiny brown. Chameleon lentils, perhaps? :)
Recipe for: Dal-chawal pulao

Ingredients:
1/2 cup green or brown lentils, soaked for 2-3 hours
1 cup good-quality basmati rice, soaked for 15 minutes
1/2 cup shallots, sliced thin
2 bay leaves
1 black cardamom pod, slightly crushed
1" piece cinnamon stick
3-4 fresh green chillies, split lengthwise
1 tsp grated ginger
1 tsp coriander powder
1 tbsp oil (or ghee, for a richer flavour)
Salt to taste
2 cups water
Method:
1. Two-three hours before you make the pulao, soak the lentils in water.
2. Wash the basmati rice 3-4 times, then let it soak for about 15 minutes, while the shallots and dal are spiced.
3. In a wide, heavy-bottomed pan with a lid, heat 1 tbsp oil. Add the cardamom pod, cinnamon stick, bay leaves and slit green chillies and fry for about a minute on high heat, stirring often.
3. Now add the shallots and grated ginger and stir fry on medium heat till the shallots are soft and turning pale brown. Stir in the coriander powder.

4. Drain the brown lentils and add to the shallots, mixing well.

Pour in 1/4 cup water, turn down the heat to medium-low, and cover the pan. Cook the lentils for about 10 minutes.
5. Turn up the heat to high and add the soaked, drained Basmati rice. Stir it all about for a couple of minutes. Add salt to taste and stir again.

6. Pour in 1-3/4 cups water and bring to a rolling boil.

Then turn down the heat to low, cover the pan again and cook for 15 minutes undisturbed.
7. Check the rice now to see if the water has been absorbed. If it has all been absorbed but the rice looks underdone, sprinkle 3-4 tbsp water, cover the pan again and cook for another 5-7 minutes.
8. Turn off the heat and let the pulao sit covered for 10 minutes before fluffing it with a fork. (Remove the whole spices and the bay leaves now, unless you like biting into them!) Serve hot with any curry.
I like this particular cooking event hosted by Sweetnicks, and I'm pleased that I havent missed too many episodes - just the first one entirely. I took part in the second ARF/5-a-day event, but was too late sending my link to Sweetnicks (mainly from sheer ignorance).
The other events hosted by food bloggers are usually out of bounds for me for various reasons - not enough time/inclination/imagination/expertise/take your pick - but since I've been trying to eat more veg and generally be more healthy, this event appeals to me a lot. It isnt difficult either - I mean, vegetables and fruit are everyday items on the menu, so putting up a post is easily accommodated. As an added bonus, I get to feel like I belong with the other food bloggers. It's all good! Yay for Sweetnicks! :)
Anyway, my entry for ARF/5-a-day #3 is poricha kuzhambu - a favourite with all of us when we were growing up and especially so for my mother, because she could use up all the odds and ends of vegetables left at the end of the week. It's my brother's all-tmie favourite, I think - paired with coconut thogayal (a type of chutney) and sutta appalam (poppadums which have been cooked directly on an open flame instead of being deep fried). I like an added extra with that - narthangai, which is a type of green citron (my best guess, since I dont have the English word for this fruit), salted and sun-dried.
My reason for making poricha kuzhambu was pretty much because I had lots of bits of vegetables - carrots, cabbage, green beans, spinach, potatoes, chayote squash. And I added some frozen green peas as well, because I love peas. It's an incredibly healthy recipe, containing all these veggies as well as protein in the form of moong dal. It's also very simple if you use a pressure cooker.

Moong dal
Recipe for: Poricha kuzhambu (South Indian vegetable 'stew')
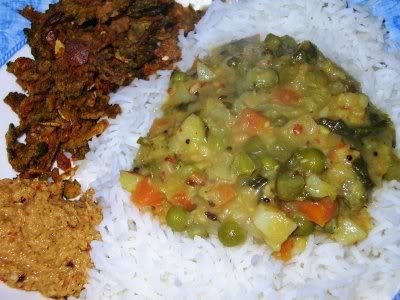
Poricha kuzhambu, served over rice with coconut thogayal and fried bitter-melon crisps (brought over from India!)
Ingredients:
4 cups mixed vegetables, chopped (any combination of carrots, green beans, cabbage, spinach, potatoes, chayote squash, aubergine, peas, etc, but not okra)
1/2 cup moong dal
1/2 tsp turmeric powder
Grind together to a smooth paste, using a few tbsp warm water:
2-3 tbsp grated coconut
1 tsp black peppercorns
3-4 dry red chillies (or to taste)
1 tsp cumin seeds
2 tsp rice flour
For tempering:
1 tsp oil
2 tsp whole cumin seeds
2 tsp mustard seeds
7-8 curry leaves
2 tsp urad dal
pinch of asafoetida powder
Method:
1. Pressure cook the dal and vegetables together with turmeric powder for about 3 whistles. When the cooker can be opened safely, stir the vegetables and dal till mixed.
If not using a pressure cooker, cook the dal separately in plenty of water till soft and mushy. Drain most of the water and mash the dal. Cook the vegetables separately in just enough water to cover, till they are somewhat overdone but not a helpless mush. Mix the two together, add salt to taste, and set aside.
2. In a deep pan, heat the oil. Put in the mustard seeds, cover, and let them pop. Add the rest of the tempering ingredients and stir till the urad dal turns reddish.
3. Now pour in the vegetable-dal mixture. Stir in the coconut masala paste until it is well amalgamated with the vegetables.

4. Add more water if the mix is too thick, and stir. Bring to a boil, then reduce the heat and let it simmer gently for five minutes.
5. Serve hot over steamed rice, or with chapaties.


