skip to main |
skip to sidebar
I'm sure that there are dozens of recipes for green rice Indian-style on the blogosphere, and dozens more if you were to look for "spinach rice" or "spinach pulao" or "spinach masala rice" or for any such combination that you care to come up with... but, like Frank Sinatra (much) before me, I didn't do it in any of those other dozens of ways - instead, I did it "Myyyyyy Waaaaaaayyy". Just be glad that I cooked it Myyyyyy Waaaaaaayyy, instead of singing it - I don't think that my singing would be particularly appreciated, whereas chances of my recipe being appreciated are quite good... or so I like to think. But, more importantly - what do YOU think?
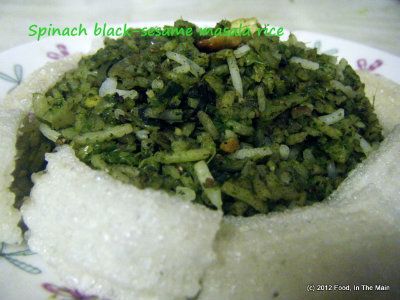
Recipe for: Spinach black-sesame masala rice
Ingredients:
4-5 cups basmati rice, pre-cooked al dente
1 cup shredded green cabbage (I used savoy)
1 large onion, sliced thinly
2 tbsp chopped mint
1 tbsp oil
1/2 tsp cumin seeds, crushed or left whole
1 tsp ghee
10-15 cashewnuts, broken, for garnish
a pinch of soda bicarb
Salt to taste
For the wet masala
1 cup chopped spinach, loosely packed
1 cup chopped coriander leaves, loosely packed
4-5 green chillies (or as per taste)
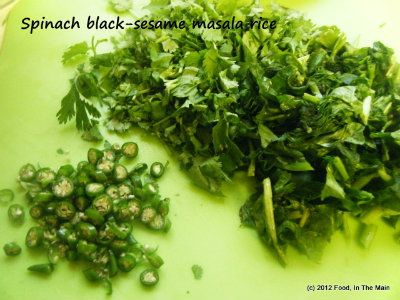
1" piece ginger
For the dry masala
1 tbsp coriander seeds
1 tbsp black sesame seeds
1 tbsp tur dal
2-3 dry red chillies (optional)
Method:
1. Grind all the ingredients for the wet masala to a smooth paste and set aside till required.
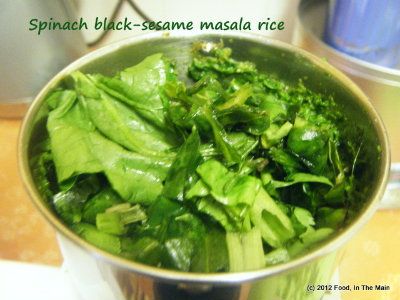
Do not add any extra water while grinding.
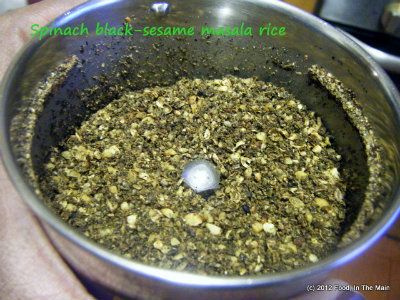
2. Dry-roast the dry masala ingredients in a small pan over medium heat,
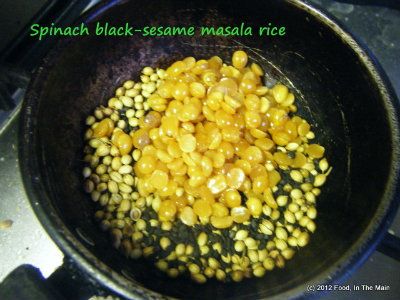
stirring frequently, till they are aromatic and the dal is golden brown. Do not let them burn. When cool, grind them to a powder (doesn't have to be very smooth) and reserve.
3. Heat the ghee in a big kadai or wok and fry the cashew nuts till they are a pale golden brown. Remove from the pan and set aside till required.
4. In the same pan, heat the 1 tbsp oil. Add 1/2 tsp cumin seeds and let them sizzle for 10 seconds, then add the sliced onion.
5. Fry 2-3 till they begin to soften, then add the cabbage.
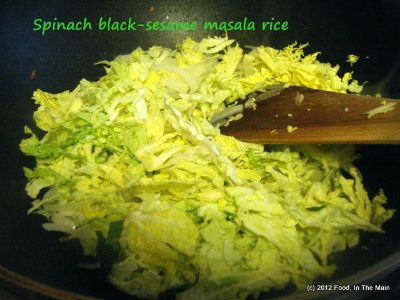
Stir well, then cover the pan tightly and let the cabbage cook till nearly done, about 7 minutes.
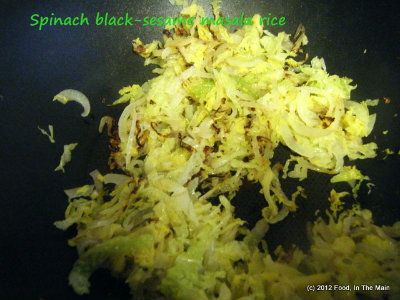
6. Now add the ground spinach masala with a pinch of soda bicarb and fry it for about 5-6 minutes, stirring,
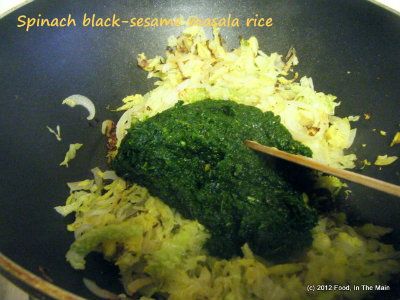
until it loses most of the excess moisture and doesn't smell raw any more.
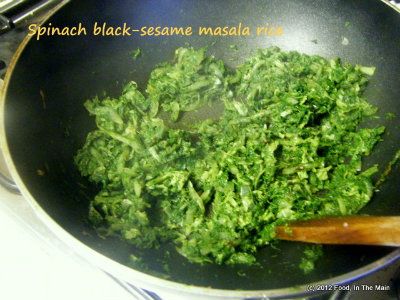
7. Add the cooked rice now, along with salt to taste,
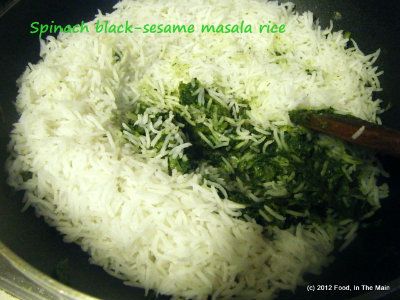
and mix it in carefully with the masala, without mushing up the grains,
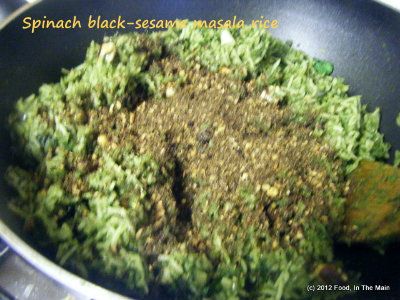
then stir in the dry masala powder.
8. Sprinkle the chopped mint and fried cashewnuts over the rice,
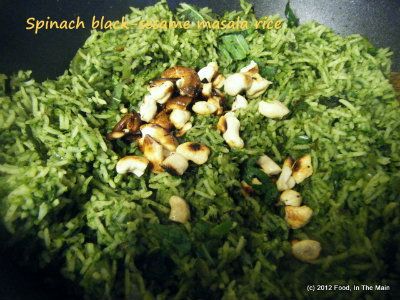
and serve hot along with fried papad/appalam or potato crisps, and onion raita.
RECIPE: SPINACH BLACK-SESAME MASALA RICE
Ingredients:
4-5 cups basmati rice, pre-cooked al dente
1 cup shredded green cabbage (I used savoy)
1 large onion, sliced thinly
2 tbsp chopped mint
1 tbsp oil
1/2 tsp cumin seeds, crushed or left whole
1 tsp ghee
10-15 cashewnuts, broken, for garnish
a pinch of soda bicarb
Salt to taste
For the wet masala
1 cup chopped spinach, loosely packed
1 cup chopped coriander leaves, loosely packed
4-5 green chillies (or as per taste)
1" piece ginger
For the dry masala
1 tbsp coriander seeds
1 tbsp black sesame seeds
1 tbsp tur dal
2-3 dry red chillies (optional)
Method
1. Grind all the ingredients for the wet masala to a smooth paste and set aside till required. Do not add any extra water while grinding.
2. Dry-roast the dry masala ingredients in a small pan over medium heat, stirring frequently, till they are aromatic and the dal is golden brown. Do not let them burn. When cool, grind them to a
powder (doesn't have to be very smooth) and reserve.
3. Heat the ghee in a big kadai or wok and fry the cashew nuts till they are a pale golden brown. Remove from the pan and set aside till required.
4. In the same pan, heat the 1 tbsp oil. Add 1/2 tsp cumin seeds and let them sizzle for 10 seconds, then add the sliced onion.
5. Fry 2-3 till they begin to soften, then add the cabbage. Stir well, then cover the pan tightly and let the cabbage cook till nearly done, about 7 minutes.
6. Now add the ground spinach masala with a pinch of soda bicarb and fry it for about 5-6 minutes, stirring, until it loses most of the excess moisture and doesn't smell raw any more.
7. Add the cooked rice now, along with salt to taste, and mix it in carefully with the masala without mushing up the grains, then stir in the dry masala powder.
8. Sprinkle the chopped mint and fried cashewnuts over the rice, and serve hot along with fried papad/appalam or potato crisps, and onion raita.
So, what’s your take on spinach? Do you like it? You do? Oh good. And green beans? Oh, you like that too? Well, how very curious, they’re both things that I like too! What are the odds???
So, what do you think about spinach and green beans cooked with rice? You think it’s a divine idea too? I AM gratified to hear that, because – wait for it – that’s EXACTLY what I made a little while ago. I mean, really, it’s too good to be true, isn’t it? There you are, dreaming about a flavoured rice that involves spinach and green beans, and here I am, actually making your dream into reality.
I know what you’re thinking. You’re thinking: “There are more things in heaven and earth, Horatio, than are dreamt of in your philosophy.” You are thinking that too, aren’t you? I knew it. Nothing amazing there, given that our thoughts have agreed so awesomely perfectly for the previous couple of paragraphs. There can’t be anything to amaze you after that.
No, wait, I tell a lie. There IS possibly something that you might find amazing, even after all this… and that, dear you, is my gut feeling that if I’d written the dialogues for Hamlet, instead of ol’ Will Shakespeare, I might very possibly – not 100% certain here, to be fair, but very possibly – have written those exact same words that we were thinking of together in the previous paragraph.
Now tell me, is that amazing or is that amazing?
What’s that? Oh, you want the recipe. Well ok, here it is.
Hey, you forgot to tell me if that was amazing or if that was amazing…! Hello...? Are you there?
Recipe for: Spinach and green bean rice
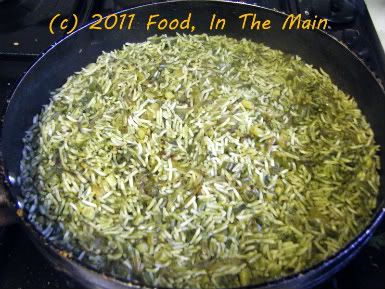 Ingredients:
1 cup basmati rice, soaked for 15-30 minutes
1 cup spinach, chopped
3-4 green chillies or to taste
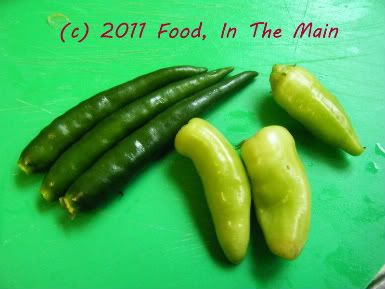 3 cloves of garlic
1" piece ginger
1 cup green beans, chopped fine
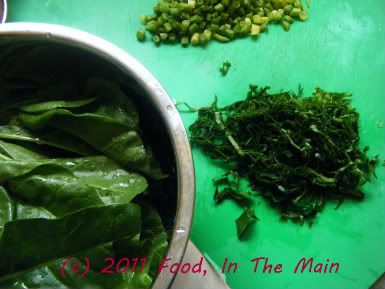 2 onions, sliced thinly
1 tsp cumin seeds
2 cups water
1 tbsp oil
Juice of one lime (optional)
Salt to taste
Method:
1. Grind the spinach, garlic, green chillies and ginger to a fine paste and set aside till required.
2. Heat the oil in a pan and sizzle the cumin seeds, then add the onions and green beans, and fry them till the onions begin to turn soft.
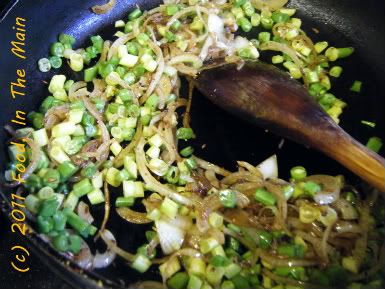 3. Stir in the spinach paste
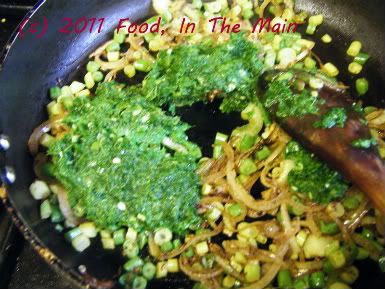 and fry it for 4-5 minutes, till the raw smell goes away.
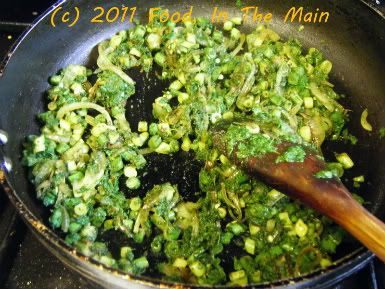 4. Now drain away the soaking water from the rice, and add the rice to the pan.
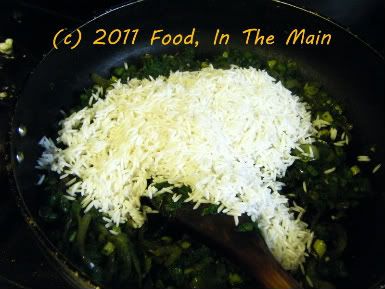 Add salt to taste and the two cups water and mix well.
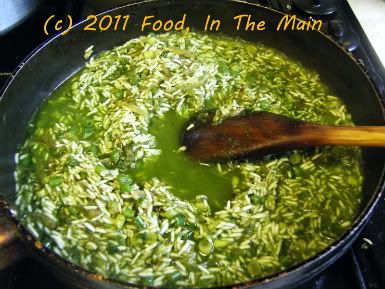 5. Bring the water to a boil, then turn the heat right down. Cover the pan with a tight fitting lid. If you like, you can place a towel over the pan before placing the lid on it, so that the condensation is soaked up by the towel. Let the rice cook for around 17 minutes, covered, until all the liquid has been absorbed. Fluff the rice with a fork and serve it hot, sprinkled with lime juice if you like, accompanied by any raita and potato crisps or papad.
RECIPE: SPINACH AND GREEN BEAN RICE
Ingredients:
1 cup basmati rice, soaked for 15-30 minutes
1 cup spinach, chopped
3-4 green chillies or to taste
3 cloves of garlic
1" piece ginger
1 cup green beans, chopped fine
2 onions, sliced thinly
1 tsp cumin seeds
2 cups water
1 tbsp oil
Juice of one lime (optional)
Salt to taste
Method:
1. Grind the spinach, garlic, green chillies and ginger to a fine paste and set aside till required.
2. Heat the oil in a pan and sizzle the cumin seeds, then add the onions and green beans, and fry them till the onions begin to turn soft.
3. Stir in the spinach paste and fry it for 4-5 minutes, till the raw smell goes away.
4. Now drain away the soaking water from the rice, and add the rice to the pan. Add salt to taste and the two cups water and mix well.
5. Bring the water to a boil, then turn the heat right down. Cover the pan with a tight fitting lid. If you like, you can place a towel over the pan before placing the lid on it, so that the condensation is soaked up by the towel. Let the rice cook for around 17 minutes, covered, until all the liquid has been absorbed. Fluff the rice with a fork and serve it hot, sprinkled with lime juice if you like, accompanied by any raita and potato crisps or papad.
5. Bring the water to a boil, then turn the heat right down. Cover the pan with a tight fitting lid. If you like, you can place a towel over the pan before placing the lid on it, so that the condensation is soaked up by the towel. Let the rice cook for around 17 minutes, covered, until all the liquid has been absorbed. Fluff the rice with a fork and serve it hot, sprinkled with lime juice if you like, accompanied by any raita and potato crisps or papad.
RECIPE: SPINACH AND GREEN BEAN RICE
Ingredients:
1 cup basmati rice, soaked for 15-30 minutes
1 cup spinach, chopped
3-4 green chillies or to taste
3 cloves of garlic
1" piece ginger
1 cup green beans, chopped fine
2 onions, sliced thinly
1 tsp cumin seeds
2 cups water
1 tbsp oil
Juice of one lime (optional)
Salt to taste
Method:
1. Grind the spinach, garlic, green chillies and ginger to a fine paste and set aside till required.
2. Heat the oil in a pan and sizzle the cumin seeds, then add the onions and green beans, and fry them till the onions begin to turn soft.
3. Stir in the spinach paste and fry it for 4-5 minutes, till the raw smell goes away.
4. Now drain away the soaking water from the rice, and add the rice to the pan. Add salt to taste and the two cups water and mix well.
5. Bring the water to a boil, then turn the heat right down. Cover the pan with a tight fitting lid. If you like, you can place a towel over the pan before placing the lid on it, so that the condensation is soaked up by the towel. Let the rice cook for around 17 minutes, covered, until all the liquid has been absorbed. Fluff the rice with a fork and serve it hot, sprinkled with lime juice if you like, accompanied by any raita and potato crisps or papad.
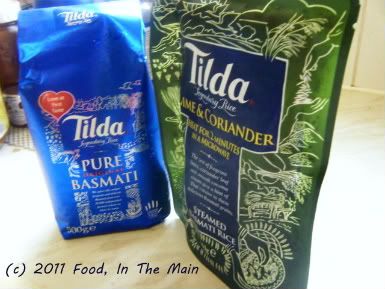 Recently I was sent a few samples of Tilda basmati rice to try. I've always gone for Kohinoor basmati, I guess because that's what I've been using right from my India days. I've NEVER used instant rice or bothered with the ready-cooked stuff available in supermarkets - the "just reheat" type.
So I was kind of meh when I saw that there were two packs of pre-steamed flavoured basmati rice along with the pack of plain uncooked basmati. One was a Sweet Chilli & Lime rice, and the other was Lime & Coriander. They only needed two minutes in the microwave to be ready for consumption.
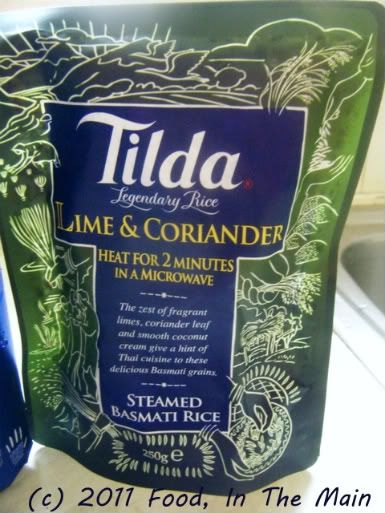 I chose the Sweet Chilli & Lime to try, on the principle that anything with "chilli" in it automatically meant that Pete would not really want to try it! The ricetasted nice, and the grains were cooked through properly and each grain was separate - but somehow they seemed TOO separate. At any rate, I've never been able to get that sort of "each grain separate" effect at home. Oh, and there wasn't nothing "chilli" about it!
Pete tried the Lime & Coriander, and while he liked the taste and texture, he said it still came second-best to freshly cooked rice. Fair enough, I guess... so my verdict is that while the instant rice varieties brought out by Tilda are a good last resort if you're short of time, I would still always go for freshly-cooked basmati as far as possible.
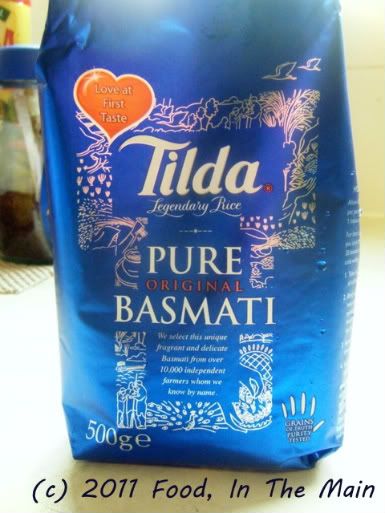 And talking about freshly cooked basmati, the Tilda basmati "dry" (uncooked) rice was fabulous! I soaked the rice for an hour or so before cooking it, and the grains were quite amazingly long, almost as long as giant wild rice (easily 1cm or more). The aroma was lovely, too, and if it turns out that Tilda is cheaper than Kohinoor, I might just switch loyalties - or perhaps divide my loyalties between them... seems like less of a betrayal, wouldn't you say?
There is a slight – very slight – downside to growing your own herbs… the fact that there is so MUCH of them to use up during the growing season. The fact that most herbs are seasonal and die down during the winter is another pinprick to my gardening soul – if only because of the guilt of not using them as much as possible. You know, the sort of guilt generated by an inner voice that goes “You complained about not having your own herbs, now you have them you’re not using them, you’re letting them go waste, use 'em up, use 'em up, use 'em upppp!”).
Much as I love my fresh herbs, coriander is the one that I use the most and can’t grow enough of, especially as it is not the “cut and come again” kind of herb. I do grow maybe a couple of batches of coriander in the summer, but it’s usually quicker and more convenient to just buy a bunch from the supermarket.
Other herbs which I use reasonably frequently are basil, chives and mint. I have three kinds of mint and like I’ve said before, this year they’re growing wild. If they were not container-grown, they would probably have taken over the entire backyard – possibly like triffids, only fresh smelling (and also not poisonously carnivorous, unlike triffids).
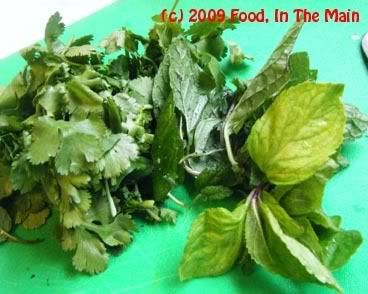
Anyway, I’ve been using up more mint this summer than I ever have before, in an effort to quieten my brain’s guilty yammering and make use of at least some of the bounty – mint chutney, minty rice in several forms, salads, and so on. I made this rice a short while back, using up the last of my own fresh coriander, and some of my golden variegated mint. I didn’t make a paste of the herbs this time, just sliced them into as thin ribbons as possible and used them like that – I suppose it made a difference in that the taste was not so in-your-face-herby as when the mint is ground up. .
PS. I’m not so bothered about my mint plants now, as they have started flowering and there are bees, wasps and assorted other insects gorging themselves on the flowers. (Also, the hovering insects make it a bit dicey for me to pick the mint – I’m not brave or stoic about being stung!)
Recipe for: Herby onion rice with almonds
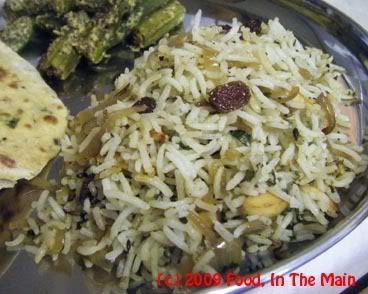
Ingredients:
1 cup basmati rice, soaked for 20 minutes and cooked al dente and cooled2 medium onions + 4 shallots (optional)1/2 cup coriander leaves1/2 cup mint leaves1 tbsp ginger, grated1 tsp cumin seeds2 tbsp skinned slivered almonds 1 tsp coriander powder2 tbsp sultanas
1 tsp oil1 tsp gheeSalt to tasteMethod:
1. Slice and onions and shallots thinly. 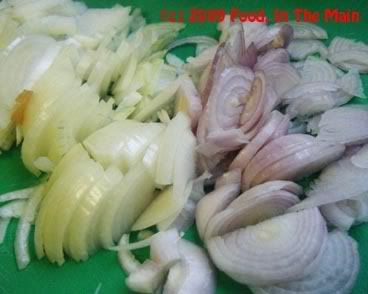
2. In a wide pan, heat 1 tsp oil and add the coriander powder and grated ginger. Fry for 30 seconds or till the ginger goes a darker shade of brown. 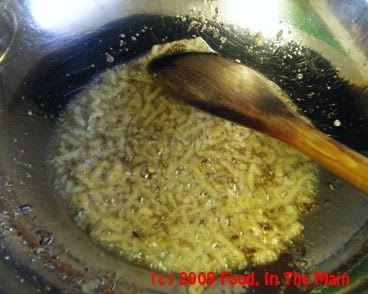
3. Add the sliced onions + shallots and cook them slowly on a medium-low flame with 2 tbsp water,
 till softened and lightly caramelised (about 8 minutes).
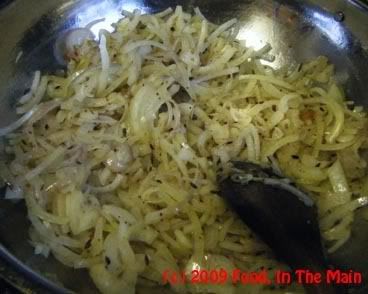
4. Add the chopped herbs along with salt to taste and stir-fry till they wilt. 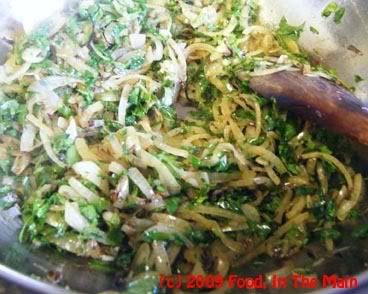
5. Add the cooked rice and gently fold in with a large spatula, taking care not to break or mush up the grains. 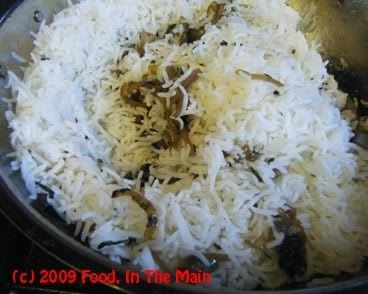
6. In a separate, small pan, heat the tsp of ghee till melted, then add the sultanas and stir till they swell up and go golden brown. Remove from the ghee, squeezing them gently with a spoon against the side of the pan to let the excess ghee drip away. Reserve. 
7. To the ghee remaining in the pan, add the cumin seeds and the slivered almonds,
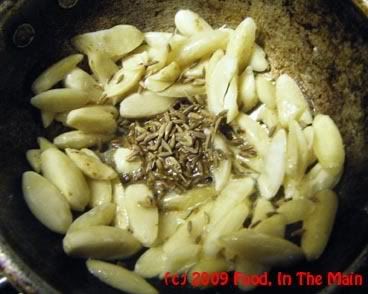
stirring with a spoon till the almonds take on a pale gold colour and the cumin seeds are aromatic. 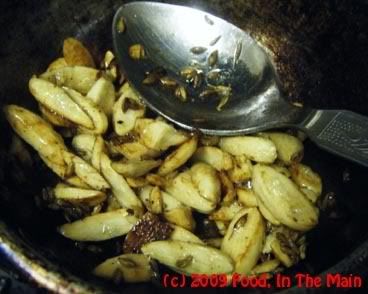
7. Add the almonds and sultanas to the rice and mix in. 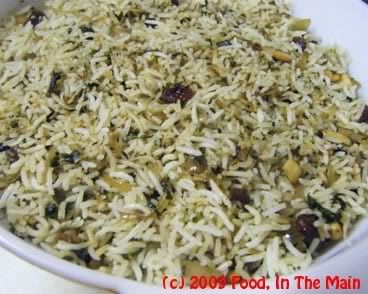 8. Serve hot with a spicy curry.
Readers of this blog (mainly those who, like me, have an unfortunate tendency to remember boring and useless trivia on random topics/people) will probably know that I like the presence of coconut only in certain dishes and then only the way I’m used to it being made at home. Pieces or chunks of coconut in anything are a definite NO, coconut in sweets and cakes is pretty much no-thanks, and the presence of coconut in dishes where I do not like or expect coconut (such as in potato podimas or adai, sprinkled on dhokla or plantain fry, etc) is also not encouraged or particularly welcome in the super-exclusive club that is my mouth (its motto being “All rights of entry reserved. Strictly no admittance to aubergines or dead animal products. All coconut products will be vetted beforehand”).
As far as I’m concerned, coconut has to be finely grated – always, in dry dishes – or ground to a smooth paste, if it’s a gravy dish or thogayal/chutney.
So it shouldn’t come as too much of a surprise, then, that I’m not a fan of coconut milk – or, for that matter, elaneer or tender-coconut water, despite its reported refreshing qualities in the heat of summer and all that. (I’ll take a bottle of cold water any day.) Coconut milk to me is always associated with a sickly-sweet sort of taste. That said, though, I have tried it in Thai dishes (not made by me, though) and even cooked with it myself once or twice. Truth to say, although they would never be my first choice, the dishes did turn out better than average.
This is possibly the third time ever that I’ve used coconut milk, this time to make another version of tomato rice. Since I do like tomato rice, and I didn’t use too much coconut milk (and it was pretty thin coconut milk at that), it turned out better than better-than-average. In fact, I might even go so far as to say that it was pretty darn good. The tomato rice didn’t taste overwhelmingly of coconut milk, and the presence of coconut milk didn’t negate the presence of the spices/seasonings used, which is how I like it.
The rice was rich without being overly unctuous... although I have to admit that when it was cold, it had a greasy sort of mouth-feel (obviously because of the fat in the coconut milk, even watered-down as it was). That was not a pleasant experience for me or my tongue – only by the somewhat dubious virtue of me being me and my tongue being my tongue. When the rice was re-heated though, it wasn’t a problem.
Recipe for: Rich tomato rice
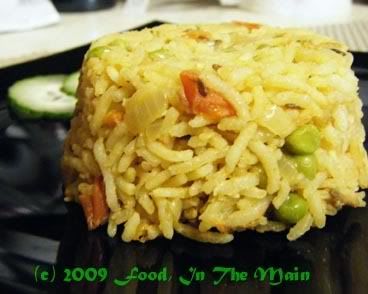
Ingredients:
1 cup basmati rice, washed, soaked in cold water for at least 15 minutes
3-4 fresh green chillies (or to taste), slit
1 tsp ginger, grated
1 tbsp sesame seeds
1 tsp cumin seeds
1/2 tsp turmeric powder
1 medium onion, chopped
3 medium tomatoes, chopped
1/2 cup frozen green peas
1 cup coconut milk (diluted to taste)
1/2 cup water
Salt to taste
1 tsp cooking oil
Method:
1. Heat oil in a pan (which has a tight-fitting lid), and add in order: green chillies if using, cumin seeds, grated ginger. Fry for 30 seconds, then add sesame seeds.
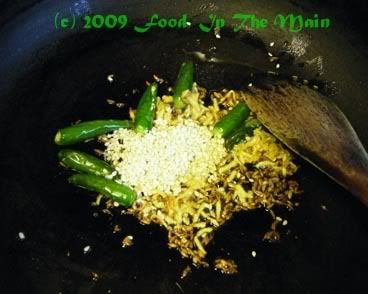
2. Stir for 30 seconds, and once the sesame seeds start popping, add the chopped onion.
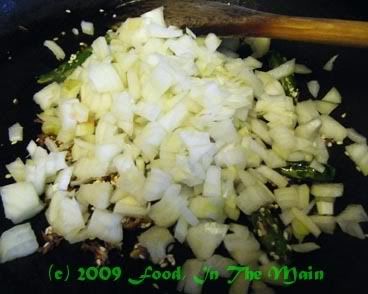
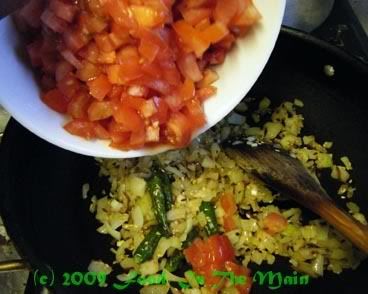
3. Add turmeric powder now, and stir-fry till the onions turn soft and translucent. Then add the chopped tomatoes. Cook on medium heat till the tomatoes start to soften and break down.
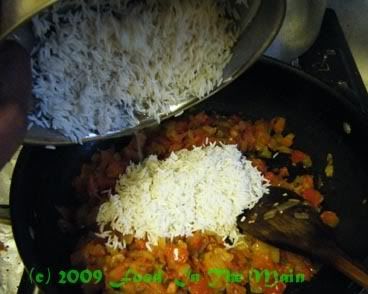
4. Drain the soaked basmati rice and add it to the pan.
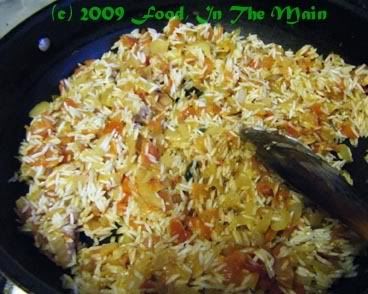
5. Stir well, turning up the heat to high, and keep stirring till any excess water evaporates (3-4 minutes, and the rice will start to clump together.)
6. Add the frozen green peas and stir till mixed with the rice and masala.
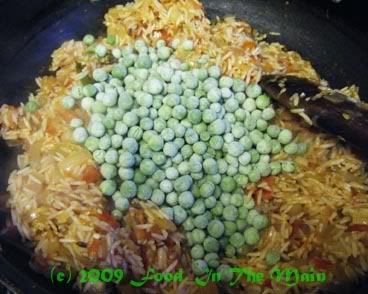
7. Add the coconut milk now, and the 1/2 cup of water.
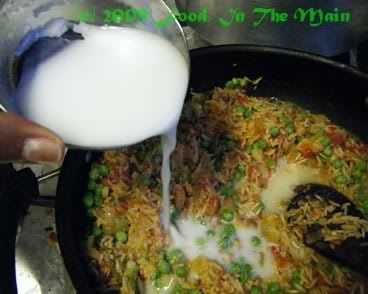
Add salt to taste, then stir well. Bring the liquid to a brisk boil, then cover the pan with a lid (you can put a clean tea towel under the lid to absorb the steam, just make sure that the ends of the cloth don't trail down near the flame!). Turn the heat down and let simmer for 15 minutes. Then turn off the heat and let the rice sit undisturbed for 15 minutes. After that, take off the lid and fluff the rice gently with a fork.
Or if you're using a pressure cooker, let it come up to two whistles after maximum pressure, then turn off the heat. Open when the pressure drops.
Serve hot with a chilled raita.
 "Grow Your Own", they say blithely, as if just anybody could grow stuff. Edible, sustaining stuff, I mean. If the event was "Grow Your Own Weeds", I would have beaten everybody else hands down! If wishes were strong enough to bear fruit (and vegetables), I would be buried under a windfall of produce. Unfortunately, wishing does nothing to grow plants… it simply cannot overcome the multiple disadvantages of terrible weather, lack of space, an abundance of leaf-gobbling insects and things and, not the least, my black-fingered efforts at gardening.
Never let it be said that hope doesn’t triumph in the face of adversity, however. Every year, despite the ample evidence of my gardening inability proven by the desiccated brown carcasses of the previous year’s gardening efforts, I plant things in the hope that they will grow. I’m driven by images of succulent fruit and vegetables and herbs that I see on other blogs; even as I rail at the invisible entities that are eating away my growing plants, leaf by leaf, bite by bloody bite, I see myself going out to the garden to get some tomatoes, green beans, peas and potatoes that I’ve grown all by my own self. Alas, they remain dreams, because the reality is that I mostly manage to grow herbs – for a while, that is, before they inexplicably die. And no, it’s not a natural death from herby old age.
Maybe they perish from loneliness, but they shouldn’t. I talk to my plants every day, although I have to admit not always lovingly – sometimes the frustration of having things slowly NOT growing in pots makes me snap. So instead of friendly greetings like “hello plant, how are you today, did you have a good day, I hope the sun shone sweetly on you”, the trend of remarks occasionally is more on the lines of “You! Yes, YOU! You ‘orrible thing! Grow! Laziness wont be tolerated. Use the sunshine, make chlorophyll, put out a few more leaves, fling off any insects, just GROW dammit!”.
Does talking to them – or yelling at them – work? If you’re a black-fingered plant decimator like me, I’m afraid I cant report on any positive growth – cajole or chide as you will, if a plant doesn’t want to grow, it simply wont. Give it to someone else, however, and it will flourish like … like a blasted nettle. It wont even need feeding, watering or pep talks, in someone else’s hands!
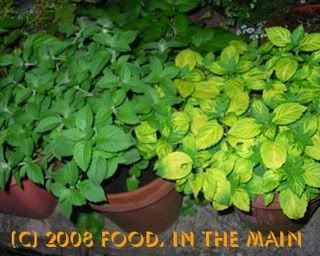
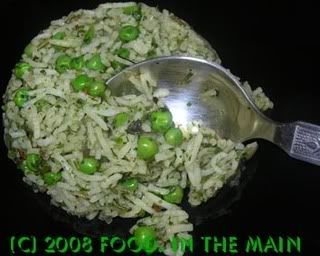
Anyway, since the mint is the only flourishing thing this year (despite being slowly decimated from underneath by greedy things not visible to my eye), I plucked a handful of mint leaves off the top and made minty peas pulao, which is my entry for Jai and Bee’s Grow Your Own event.
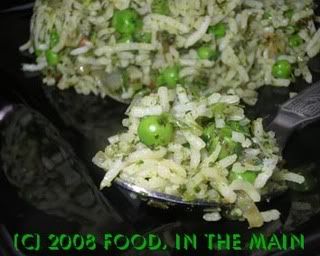
This peas pulao has minimal ingredients, so the fresh taste of the mint and coriander stand out. Damn, but it was nice to be able to go into my garden and just fetch me some mint - AND the coriander, too. Just call me Gardenin' Gal!
Recipe for: Minty peas pulao
Ingredients
4 cups basmati rice, cooked and cooled
1-1/2 cups peas, cooked
1 cup mint leaves, loosely packed
1/2 cup coriander leaves
1 large onion, minced
3-4 green chillies, minced
2 tbsp lemon juice
1 tsp cumin seeds
2 tbsp oil
Salt to taste
Method:
1. Grind the mint and coriander leaves to a fine paste with the lemon juice. Do this just before making this dish, not beforehand.
2. Heat the oil in a large pan, add the cumin seeds and green chillies and let fry for a minute.
3. Add the minced onion and fry till it begins to turn soft and brown.
4. Now add the ground mint-coriander paste and fry for a minute or so, stirring well, then add the peas.
5. Toss in the cooked rice and salt to taste, mix it all carefully with a large spoon, without breaking the rice grains.
6. Stir it about on medium heat till the rice is thoroughly warmed through. Serve hot with any raita.
And by that I mean Nupur's version of Madhur Jaffrey's lubia polo. Ever since I read about the Persian dried limes, my one ambition was to somehow source it so that I could make this dish. I didnt want to use lime juice - how boring! So finally I came across a website that sold ingredients for Iraqi, Iranian, Turkish and other such exotic cuisine, so I lavishly ordered away. And in a few days, a little neatly packed box arrived all the way from - er, Germany, actually. Preserved limes, dried lime, dried lime powder - all of these are now in my possession. I have to tell you, the dried lime smells mouth-watering - like neer elumichangai that has ever so slightly fermented.
Anyway, with the dried lime and the dried lime powder (using which is a lot less finicky work than manually separating the black bits from the whole dried limes, I can tell you), I made lubia polo.

Dried lime tapped open with a hammer
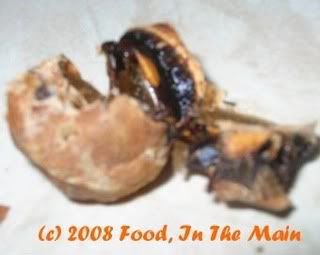
Then pulled apart by hand
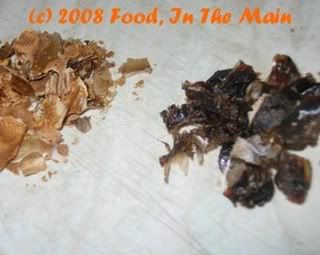
The black interior contents scraped out (on the right) and the discarded lime peel (left)
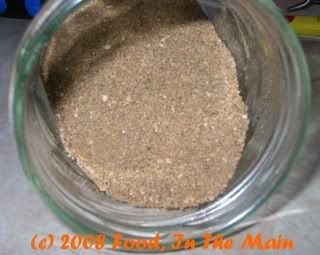
Readymade powdered dried lime - a much simpler option
And then I suddenly realised that the post had been hanging fire for at least 10 days, and it would be perfect for Zlamushka's "Tried and Tasted" event that's currently happening - assuming I'm not too late with my offering.
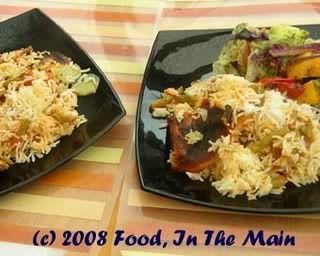
This baked green-bean and potato rice has the least amount of spices and seasoning that I've ever seen... and yet the end result is so INCREDIBLY flavourful! I followed pretty much the same method as Nupur, except that instead of garam masala I used a couple of pinches of my extremely potent, aromatic, home-made dhansak masala!
I have to admit that my lubia polo did not turn out as beautifully shaped as Nupur's, nor did it hold together nicely. But that was because I didnt - dont - have the right-shaped non-stick pan, nor even a heavy-bottomed non-non-stick (how else do you say it?) pan... so I improvised with a shallow vessel I use in the pressure cooker. It was too thin so the potato slices at the bottom got a bit burnt and the rice didnt get a chance to crisp up. But, like I said, it was fantastically tasty, even if not picture-perfect to look at. In any case, if you're looking for picture perfection, the blog to go to is Nupur's! :)
Recipe for: Nupur's lubia polo
Ingredients:
1 cup basmati rice, washed and soaked for 15 minutes
2 cups green beans, halved
1 onion, chopped
1 potato, peeled and sliced thin
1/2 cup tomato puree
1/2 tsp turmeric
1 tbsp olive oil
1 tsp butter
Salt to taste
1 tsp garam masala/pav bhaji masala/dhansak masala
1 htsp powdered dried lime OR 1 tbsp fresh lime juice
Method:
1. Boil the rice in 2 cups of lightly salted water till almost done. Drain well and reserve.
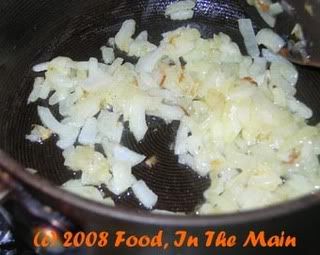
2. Heat the olive oil in a skillet and fry the chopped onion till soft and light brown.
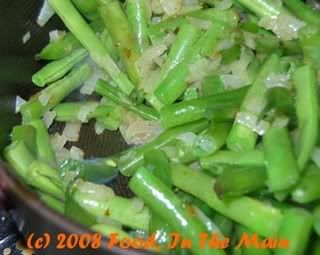
3. Add the green beans and saute for a few minutes,
then add the tomato puree and whichever masala you're using.
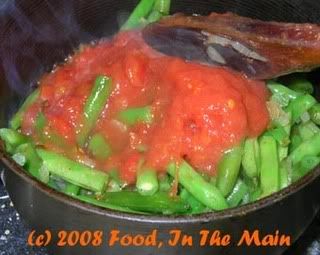
4. Simmer the beans till tender, then add salt to taste. The sauce should be fairly thick now. Add 1 heaped tsp dried lime powder, mix and set aside.
5. In a medium deep non-stick pan, melt 1 tsp butter. Stir in 1/2 tsp turmeric and water. Layer the bottom of the pan with the thinly sliced potato.
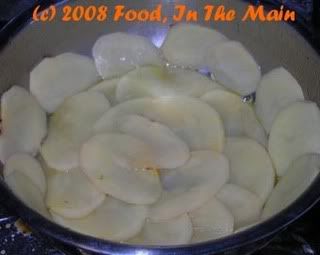
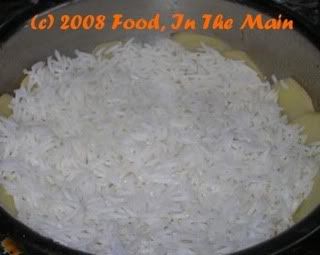
6. Put half the rice over the potatoes,
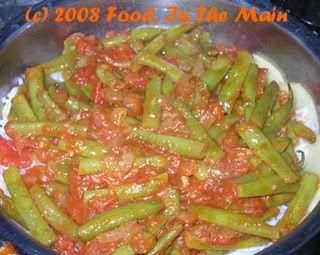
then pour over the green bean mixture,
and finally the rest of the rice.
7. Cover the pan and leave on medium heat for 10 minutes, then lower the heat to its lowest point.
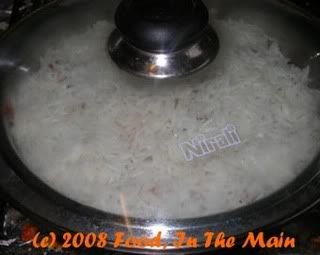
Place a clean dish towel under the lid and fold the hanging edges back on top of the lid.
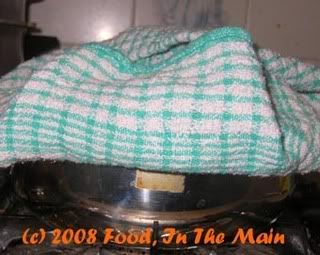
9. Cook on low heat for 20 minutes or so, then let the pilaf rest for 10 minutes.
10. After the resting time, invert the pan onto a serving dish. The pilaf should unmold itself whole - but if it doesnt (like mine) dont worry... it will still taste delicious!


