skip to main |
skip to sidebar
So, what’s your take on spinach? Do you like it? You do? Oh good. And green beans? Oh, you like that too? Well, how very curious, they’re both things that I like too! What are the odds???
So, what do you think about spinach and green beans cooked with rice? You think it’s a divine idea too? I AM gratified to hear that, because – wait for it – that’s EXACTLY what I made a little while ago. I mean, really, it’s too good to be true, isn’t it? There you are, dreaming about a flavoured rice that involves spinach and green beans, and here I am, actually making your dream into reality.
I know what you’re thinking. You’re thinking: “There are more things in heaven and earth, Horatio, than are dreamt of in your philosophy.” You are thinking that too, aren’t you? I knew it. Nothing amazing there, given that our thoughts have agreed so awesomely perfectly for the previous couple of paragraphs. There can’t be anything to amaze you after that.
No, wait, I tell a lie. There IS possibly something that you might find amazing, even after all this… and that, dear you, is my gut feeling that if I’d written the dialogues for Hamlet, instead of ol’ Will Shakespeare, I might very possibly – not 100% certain here, to be fair, but very possibly – have written those exact same words that we were thinking of together in the previous paragraph.
Now tell me, is that amazing or is that amazing?
What’s that? Oh, you want the recipe. Well ok, here it is.
Hey, you forgot to tell me if that was amazing or if that was amazing…! Hello...? Are you there?
Recipe for: Spinach and green bean rice
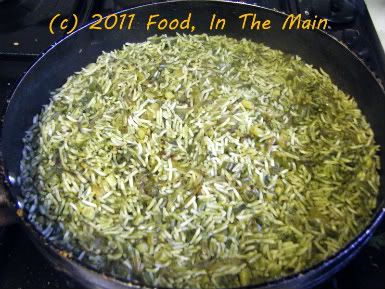 Ingredients:
1 cup basmati rice, soaked for 15-30 minutes
1 cup spinach, chopped
3-4 green chillies or to taste
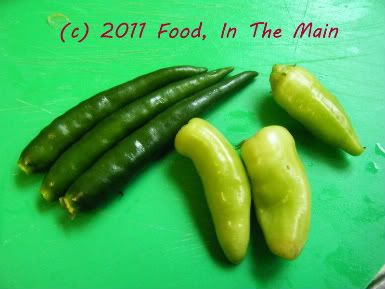 3 cloves of garlic
1" piece ginger
1 cup green beans, chopped fine
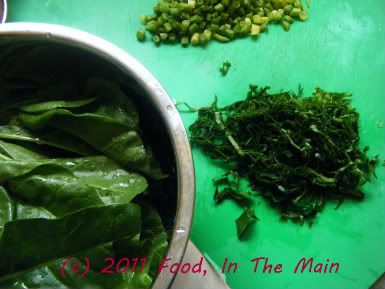 2 onions, sliced thinly
1 tsp cumin seeds
2 cups water
1 tbsp oil
Juice of one lime (optional)
Salt to taste
Method:
1. Grind the spinach, garlic, green chillies and ginger to a fine paste and set aside till required.
2. Heat the oil in a pan and sizzle the cumin seeds, then add the onions and green beans, and fry them till the onions begin to turn soft.
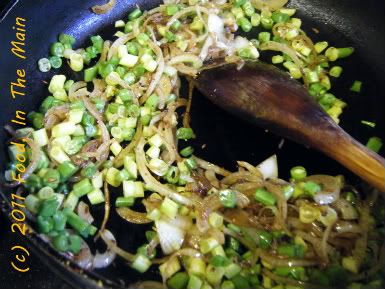 3. Stir in the spinach paste
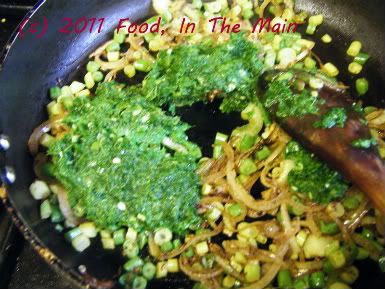 and fry it for 4-5 minutes, till the raw smell goes away.
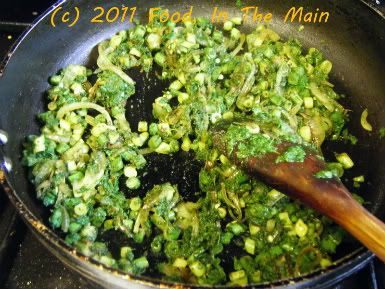 4. Now drain away the soaking water from the rice, and add the rice to the pan.
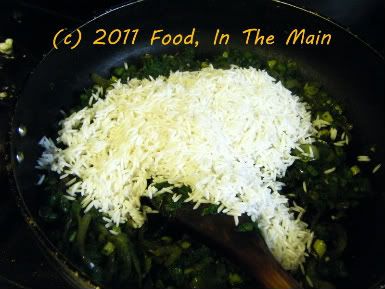 Add salt to taste and the two cups water and mix well.
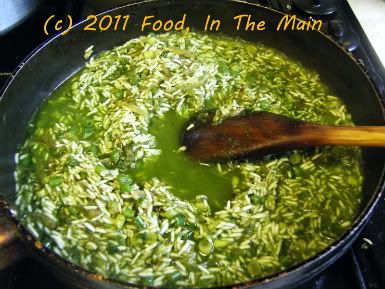 5. Bring the water to a boil, then turn the heat right down. Cover the pan with a tight fitting lid. If you like, you can place a towel over the pan before placing the lid on it, so that the condensation is soaked up by the towel. Let the rice cook for around 17 minutes, covered, until all the liquid has been absorbed. Fluff the rice with a fork and serve it hot, sprinkled with lime juice if you like, accompanied by any raita and potato crisps or papad.
RECIPE: SPINACH AND GREEN BEAN RICE
Ingredients:
1 cup basmati rice, soaked for 15-30 minutes
1 cup spinach, chopped
3-4 green chillies or to taste
3 cloves of garlic
1" piece ginger
1 cup green beans, chopped fine
2 onions, sliced thinly
1 tsp cumin seeds
2 cups water
1 tbsp oil
Juice of one lime (optional)
Salt to taste
Method:
1. Grind the spinach, garlic, green chillies and ginger to a fine paste and set aside till required.
2. Heat the oil in a pan and sizzle the cumin seeds, then add the onions and green beans, and fry them till the onions begin to turn soft.
3. Stir in the spinach paste and fry it for 4-5 minutes, till the raw smell goes away.
4. Now drain away the soaking water from the rice, and add the rice to the pan. Add salt to taste and the two cups water and mix well.
5. Bring the water to a boil, then turn the heat right down. Cover the pan with a tight fitting lid. If you like, you can place a towel over the pan before placing the lid on it, so that the condensation is soaked up by the towel. Let the rice cook for around 17 minutes, covered, until all the liquid has been absorbed. Fluff the rice with a fork and serve it hot, sprinkled with lime juice if you like, accompanied by any raita and potato crisps or papad.
5. Bring the water to a boil, then turn the heat right down. Cover the pan with a tight fitting lid. If you like, you can place a towel over the pan before placing the lid on it, so that the condensation is soaked up by the towel. Let the rice cook for around 17 minutes, covered, until all the liquid has been absorbed. Fluff the rice with a fork and serve it hot, sprinkled with lime juice if you like, accompanied by any raita and potato crisps or papad.
RECIPE: SPINACH AND GREEN BEAN RICE
Ingredients:
1 cup basmati rice, soaked for 15-30 minutes
1 cup spinach, chopped
3-4 green chillies or to taste
3 cloves of garlic
1" piece ginger
1 cup green beans, chopped fine
2 onions, sliced thinly
1 tsp cumin seeds
2 cups water
1 tbsp oil
Juice of one lime (optional)
Salt to taste
Method:
1. Grind the spinach, garlic, green chillies and ginger to a fine paste and set aside till required.
2. Heat the oil in a pan and sizzle the cumin seeds, then add the onions and green beans, and fry them till the onions begin to turn soft.
3. Stir in the spinach paste and fry it for 4-5 minutes, till the raw smell goes away.
4. Now drain away the soaking water from the rice, and add the rice to the pan. Add salt to taste and the two cups water and mix well.
5. Bring the water to a boil, then turn the heat right down. Cover the pan with a tight fitting lid. If you like, you can place a towel over the pan before placing the lid on it, so that the condensation is soaked up by the towel. Let the rice cook for around 17 minutes, covered, until all the liquid has been absorbed. Fluff the rice with a fork and serve it hot, sprinkled with lime juice if you like, accompanied by any raita and potato crisps or papad.
I’m probably going to hurt the sentiments of hardcore Andhra food lovers – lovers of Andhra food as well as Andhra food-lovers – when they read the next paragraph, so before I get brickbatted all over the place, I’d like to pre-qualify my statement by adding that it’s merely my insignificant opinion - not exactly likely to negatively affect the popularity of this item. Also, I would like to add that I adore Andhra food in general – the wonderful podis, the avakkai, the pappus, the gongura pickle, the generally elevated chilli-heat of most items... I could go on and on.
So (*deep breath*) here’s the thing... I’m not very fond of pesarattu. It’s not that I hate it or anything, but given a choice of Indian breakfast/snack food items, the pesarattu – and even more so the pesarattu-upma combination – is not what I would go for first. Or second. Possibly third, provided it comes without the upma. I don’t really care for upma – no matter which State it comes from - and it would probably be last on the list of choice.
To return to the question of the pesarattu, I think the main problem is that I consider the dosa (the regular kind - not rava, godhumai, maida or any other “instant” variation) as the queen of Indian pancakes, followed by adai in second place. Also, green gram dal has a pronounced flavour that’s not easily disguised - which, I suppose, is as much the plus point for people who like pesarattu as it is a negative for those who like it just that bit less.
Still, once in a while I don’t mind eating pesarattu. Of course, since the nearest Andhra hotel is about 5,000 miles away from where I live, I had to make the batter at home. I’ve never had pesarattu in an Andhra hotel or made by a genuine Andhra foodie, so I’m hoping that my recipe is an acceptable variation on the actual recipe. I did use green gram dal, though, so I guess I can’t have sacrificed much authenticity in my version.
Recipe for: Pesarattu
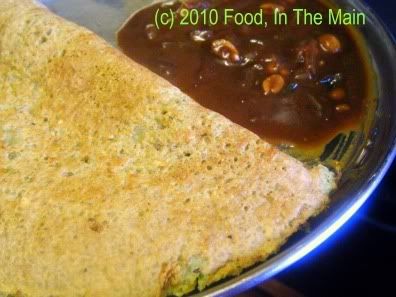 Ingredients:
1 cup green gram dal
1/4 cup chana dal
1/2 cup uncooked rice
1-2 cloves garlic, peeled
1/2"-1" piece ginger root, peeled
2-4 green chillies (or to taste)
Salt to taste
Oil to shallow-fry
Method:
1. Soak the green gram dal, rice and chana dal in cold water for 8-10 hours or overnight.
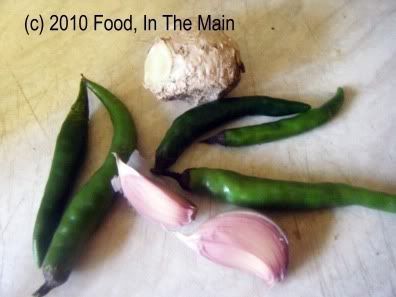
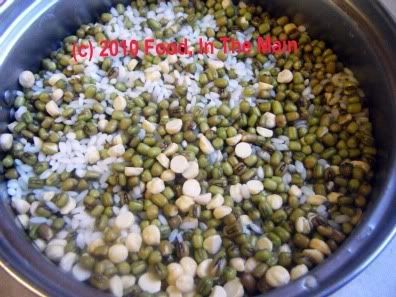 2. Drain the water, then add the soaked dal and rice along with the ginger, garlic and green chillies in a grinder or mixie.
 3. Grind it all into a thickish batter that is fairly smooth. Add salt to taste and mix it in.
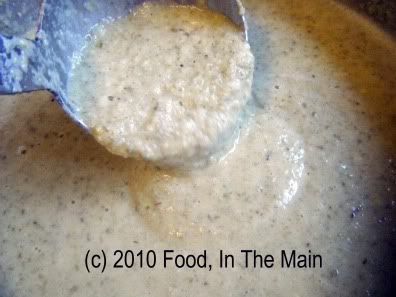 4. Pour a ladleful of the batter in a heated non-stick or well oiled pancake pan, using a circular motion to spread it out evenly into a circle. Add a little oil (preferably gingelly) and turn the heat down to medium and leave it for about a minute to cook on one side.
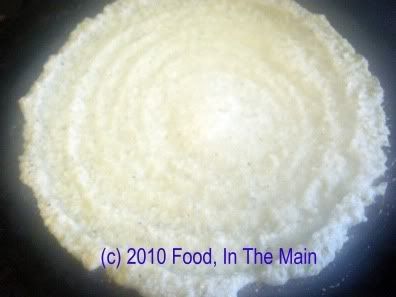 5. Turn the pesarattu over carefully with a spatula and add a little more oil (if you like) to help it become crisp and golden on both sides.
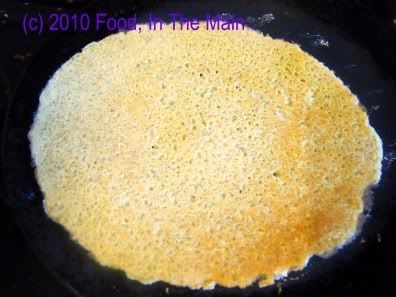 6. Transfer the cooked pesarattu to a plate and use up the remaining batter in a similar manner. Leftover batter can be stored for a couple of days in the fridge, covered tightly.
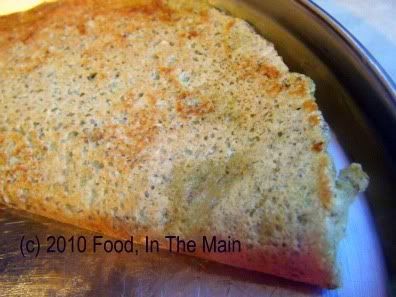 Serve hot with any chutney or podi.
RECIPE: PESARATTU (GREEN GRAM PANCAKES)
Ingredients:
1 cup whole green gram dal
1/4 cup chana dal
1/2 cup uncooked rice (pretty much any kind)
1-2 cloves garlic, peeled
1/2"-1" piece ginger root, peeled
2-4 green chillies (or to taste)
Salt to taste
Oil to shallow-fry
Method:
1. Soak the green gram dal, rice and chana dal in cold water for 8-10 hours or overnight.
2. Drain the water, then add the soaked dal and rice along with the ginger, garlic and green chillies in a grinder or mixie.
3. Grind it all into a thickish batter that is fairly smooth. Add salt to taste and mix it in.
4. Pour a ladleful of the batter in a heated non-stick or well oiled pancake pan, using a circular motion to spread it out evenly into a circle. Add a little oil (preferably gingelly) and turn the heat down to medium and leave it for about a minute to cook on one side.
5. Turn the pesarattu over carefully with a spatula and add a little more oil (if you like) to help it become crisp and golden on both sides.
6. Transfer the cooked pesarattu to a plate and use up the remaining batter in a similar manner. (Leftover batter can be stored for a couple of days in the fridge, covered tightly.) Serve the pesarattu hot with any chutney or podi.
 "Grow Your Own", they say blithely, as if just anybody could grow stuff. Edible, sustaining stuff, I mean. If the event was "Grow Your Own Weeds", I would have beaten everybody else hands down! If wishes were strong enough to bear fruit (and vegetables), I would be buried under a windfall of produce. Unfortunately, wishing does nothing to grow plants… it simply cannot overcome the multiple disadvantages of terrible weather, lack of space, an abundance of leaf-gobbling insects and things and, not the least, my black-fingered efforts at gardening.
Never let it be said that hope doesn’t triumph in the face of adversity, however. Every year, despite the ample evidence of my gardening inability proven by the desiccated brown carcasses of the previous year’s gardening efforts, I plant things in the hope that they will grow. I’m driven by images of succulent fruit and vegetables and herbs that I see on other blogs; even as I rail at the invisible entities that are eating away my growing plants, leaf by leaf, bite by bloody bite, I see myself going out to the garden to get some tomatoes, green beans, peas and potatoes that I’ve grown all by my own self. Alas, they remain dreams, because the reality is that I mostly manage to grow herbs – for a while, that is, before they inexplicably die. And no, it’s not a natural death from herby old age.
Maybe they perish from loneliness, but they shouldn’t. I talk to my plants every day, although I have to admit not always lovingly – sometimes the frustration of having things slowly NOT growing in pots makes me snap. So instead of friendly greetings like “hello plant, how are you today, did you have a good day, I hope the sun shone sweetly on you”, the trend of remarks occasionally is more on the lines of “You! Yes, YOU! You ‘orrible thing! Grow! Laziness wont be tolerated. Use the sunshine, make chlorophyll, put out a few more leaves, fling off any insects, just GROW dammit!”.
Does talking to them – or yelling at them – work? If you’re a black-fingered plant decimator like me, I’m afraid I cant report on any positive growth – cajole or chide as you will, if a plant doesn’t want to grow, it simply wont. Give it to someone else, however, and it will flourish like … like a blasted nettle. It wont even need feeding, watering or pep talks, in someone else’s hands!
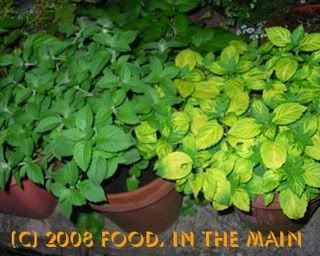
Anyway, since the mint is the only flourishing thing this year (despite being slowly decimated from underneath by greedy things not visible to my eye), I plucked a handful of mint leaves off the top and made minty peas pulao, which is my entry for Jai and Bee’s Grow Your Own event.
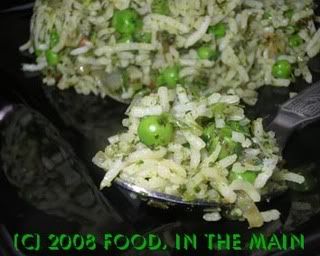
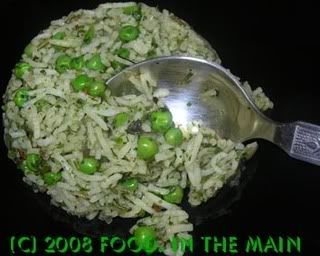
This peas pulao has minimal ingredients, so the fresh taste of the mint and coriander stand out. Damn, but it was nice to be able to go into my garden and just fetch me some mint - AND the coriander, too. Just call me Gardenin' Gal!
Recipe for: Minty peas pulao
Ingredients
4 cups basmati rice, cooked and cooled
1-1/2 cups peas, cooked
1 cup mint leaves, loosely packed
1/2 cup coriander leaves
1 large onion, minced
3-4 green chillies, minced
2 tbsp lemon juice
1 tsp cumin seeds
2 tbsp oil
Salt to taste
Method:
1. Grind the mint and coriander leaves to a fine paste with the lemon juice. Do this just before making this dish, not beforehand.
2. Heat the oil in a large pan, add the cumin seeds and green chillies and let fry for a minute.
3. Add the minced onion and fry till it begins to turn soft and brown.
4. Now add the ground mint-coriander paste and fry for a minute or so, stirring well, then add the peas.
5. Toss in the cooked rice and salt to taste, mix it all carefully with a large spoon, without breaking the rice grains.
6. Stir it about on medium heat till the rice is thoroughly warmed through. Serve hot with any raita.
I bought a kilo of this rice last year from a Sri Lankan shop, thinking it would be an interesting variation to try out. Of course, me being me, the bag of muthu samba rice sat in a box from the moment it arrived home. I didnt get around to cooking it until today when I thought I’d try something different.
Oh boy, did I ever get something different!
I cooked one cup of muthu samba rice with two cups of water. I didnt smell the uncooked rice - why would I? As far as I'm concerned, other than basmati, no other rice smells mouthwatering in its uncooked state. (If I'm wrong, educate me, people!) Anyway, when I opened the cooker and took the lid off the container in which I'd cooked the rice, I got a whiff of something really unpleasant. I didnt for one moment think that it was from the container itself, until I bent over it and took a deep breath of the cooked rice.
YEUGH!
It smelt awful. Like something gone bad, actually. I couldn’t believe that rice could stink like that, and I could see no reason why it should. Dry uncooked rice cant go bad, right? It’s not something that would decay like organic matter. Sure, rice acquires weevils and worms in humid climates, but even then the rice doesn’t actually stink, does it?
I couldn’t figure out why it smelt so bad. I thought the reek would diminish if the rice cooled a little, but it didn’t. I even tried eating a little mixed with sambar, so see if it would mask the smell – but my sambar proved ineffective. The rice tasted as horrible as it smelt. (In case you’re wondering, it was vendakkai (okra) sambar. Not a flavour you can overpower easily in the normal course of events.)
I really don’t know why this should be so. I’m reluctant to try cooking it again the way I did. I certainly dont want to try making idlis or dosas with it. Two cups of water for one cup of rice proved too much, by the way – the rice was swimming after being cooked! What I’d like to know – and if anybody out there has any information, I’d be really grateful – is:
- How do you cook this rice? Does it need soaking beforehand?
- Is it MEANT to smell like that? Is it a Sri Lankan speciality that I’m ignorant of and unaccustomed to? Is it unpleasant only to my nose or something?
- If it’s not meant to be smelly when cooked, how do you cook it so that the smell is removed?
I don’t want to throw away the remaining rice if I can help it – I hate the idea of wasting rice. (I had to throw away the cooked rice, albeit with a heavy heart.)
So, any ideas, anybody?
I've never been to the Deep South, but just mention the word "jambalaya" to me, and my imagination immediately finds itself in deepest darkest Louisiana - or as deep and dark as Gonzales is, that is. I dont know what it's like, you see, because while my imagination has set foot in the Jambalaya Capital of the World, my foot has not.
Actually, if ever I DO manage to be there (in person, that is) for the Jambalaya Festival, it would be the most pointless exercise in terms of my ability - or rather, inability - to eat this renowned Creole/Cajun dish... the reason being that I'm 99.99% vegetarian and prefer my food not to have been sentient at any point in its lifetime. I guess I could always savour the experience, if not the food...
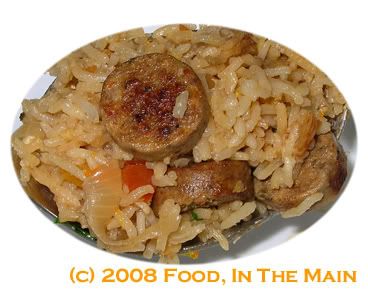
Anyway, I decided to make jambalaya at home, as the first dish made on the first day of the new year. I had some vegetarian sausages (made of soya) that Pete had kindly bought for me on an impromptu shopping trip. While on the subject of vegetarian sausages and other meat-replacement attempts, do you know just how difficult it is for non-vegetarians to understand that genuine Indian veggies like me do NOT crave for meat substitutes, whether in texture OR taste? The mock-meats and soya/tofu products are all for former carnivores who miss their carne. It's by turns tiring or boring - sometimes both - trying to explain, and even in these enlightened days, I get the occasional baffled "But what do you eat?" question.
Digression aside, the jambalaya recipe that served as the basis of my inspiration was Jag's, posted on his blog, Route 79. Jag's recipes are painstakingly photographed and captioned and believe me, I go there sometimes just to read his recipes and drool a little. (Ok, drool a lot. Dammit, this honesty thing is overrated.) As far as I'm concerned, everything vegetarian he has on his blog is on the list of "my favourite foods", all of them crowding for first position.
I say that Jag's recipe is the basis of mine because I had to make some substitutions and omissions for the usual reasons. For instance, I didnt have celery (mainly because I dont like it!), so I used a little 21-seasoning mix that's strong on celery seed, as a substitute. I didnt use chicken or prawns or chorizo sausage either. What I followed were the actual cooking instructions from Jag's recipe. A good thing too, because the rice was cooked to perfection. Not dry, not mushy, not clumpy - just perfect.
Recipe for: Jambalaya
Ingredients:
1 cup vegetarian sausages cut into 1-cm rounds
2 medium onions, sliced into long thin pieces
1 large green (or any other colour) bell pepper, sliced long and thin
1/2 tsp celery seed (or use 1 celery stick, sliced thin)
1" piece ginger, grated
3 cloves of garlic, chopped or grated
1 chicken or vegetable stock cube
2 medium tomatoes, finely chopped
2 tbsp periperi, tabasco, habanero or any other spicy sauce (or as per taste)
2 cups basmati rice, washed and drained
4 cups boiling water
2 tbsp oil
2 bay leaves
1 tbsp chopped flat-leaf parsley
2 tbsp chopped spring onions for garnish
Method:
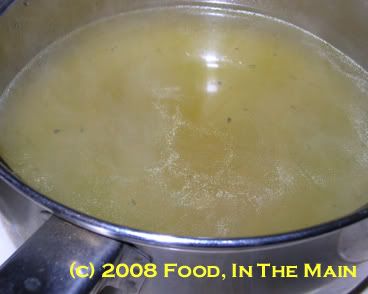
1. Prepare the stock using the stock cube and the 4 cups of boiling water. Stir in whichever spicy sauce you're using. Reserve.
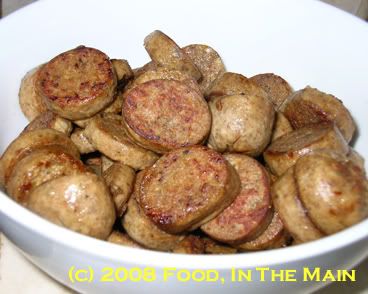
2. Pour 1 tsp oil in a large pan (make sure it's one with a lid that fits correctly) and fry the "sausage" pieces, stirring often, till golden.
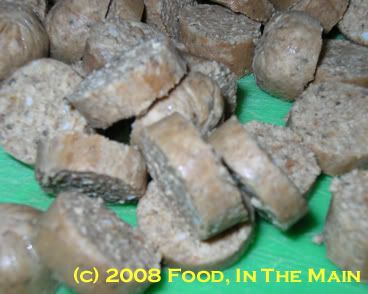
Remove from the pan and reserve.
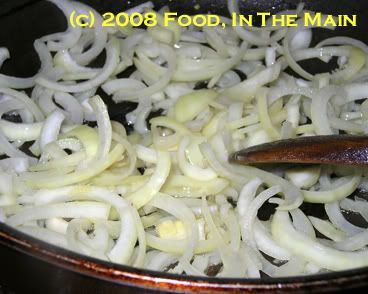
3. Now pour the remaining oil into the pan and add the onions.
4. When they start softening slightly, add the sliced bell peppers.
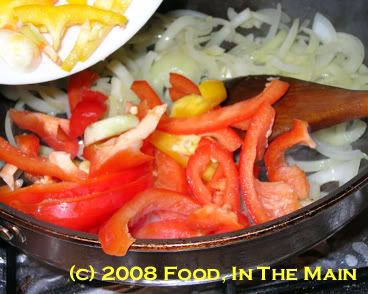
5. Turn the heat up to high and stir fry till the onions and peppers begin to acquire brown edges.
6. Now add the chopped garlic and ginger and stir fry for a minute or so.
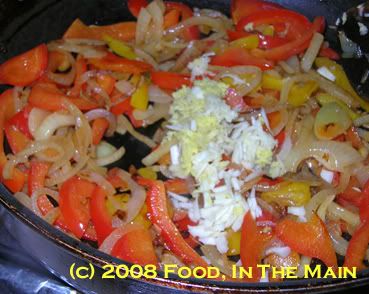
If you're using celery, add it now and stir it all around for a couple of minutes more.
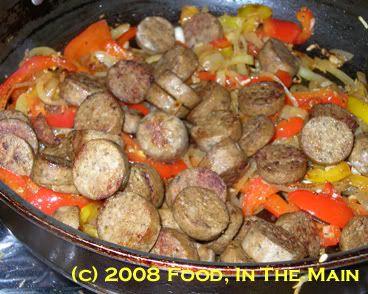
7. Toss in the fried "sausage" pieces and stir it in, making sure the pieces are coated with whatever oil is left in the pan.
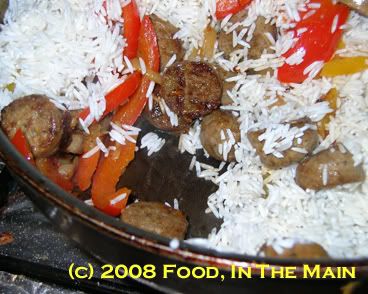
8. Then add the drained soaked rice, stirring it in till well distributed.
Pour in the prepared stock and stir, letting the liquid come to a bubbling boil.
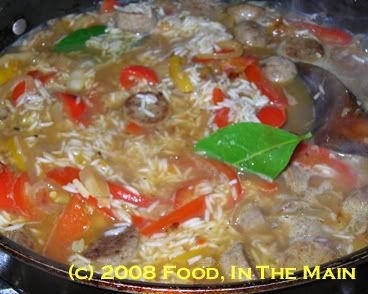
9. When the stock is bubbling, add the bay leaves and the chopped tomatoes. Stir them in.
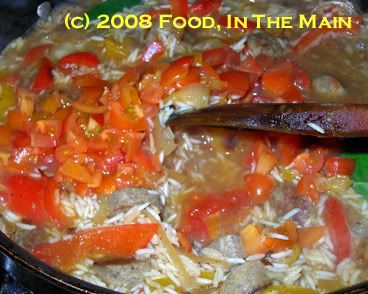
10. Cover the pot and turn the heat down as low as possible. Leave the rice to cook covered and undisturbed for 20 minutes. Do NOT lift the lid or you will lose precious steam and the rice will not cook well.
11. After 20 minutes, turn off the gas and let the jambalaya sit covered for 10 minutes in the pan. Then take off the lid (ahhhh the aroma!),
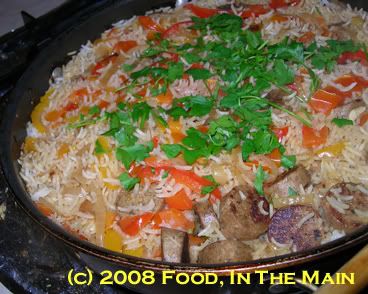
sprinkle the chopped parsley and spring onions over, and serve the jambalaya hot.
There are days when trying to get some inspiration can be as elusive and exasperating an exercise as trying to grab a handful of water. The harder you try to grab it, the less there is in hand. Since my previous post, I seem to have developed the written equivalent of speechlessness. A blank page reflects a blank mind... or is it the other way around? Whatever, I decided that I would write at least one paragraph before posting a recipe (and yes, there are recipes waiting to see the light of publication, as it were) - and never mind if it has nothing to do with food or food writing.
So that was the paragraph.
And here's the recipe.
Recipe for: Tomato-vegetable rice

Ingredients:
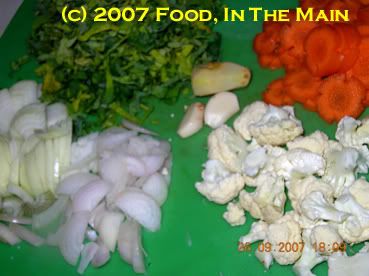
2 cups vegetables of choice, chopped (I used cauliflower, spinach and carrots)
1 large onion + 5 shallots, sliced thin (or use two onions)
1 tsp ginger-garlic paste
3 tomatoes + 1 tomato, chopped
½ cup frozen peas
1 cup loosely packed fresh coriander leaves
4-5 green chillies, slit (or as per taste)
1-1/4 cups uncooked basmati rice, soaked for 20 minutes
1 tsp coriander powder
½ tsp cumin powder
2 tsp oil
Salt to taste
A few fresh curry leaves
Water as required
Method:
1. Grind 3 tomatoes and the coriander leaves to a smooth paste. Reserve.

2. Heat the oil in a wide pan and add the green chillies, coriander and cumin powder and curry leaves. Fry for 30 seconds or so on high heat.

3. Add the sliced onions and stir, frying till the onions begin to turn translucent and pale brown.

Then add the remaining chopped tomato and let it cook till it starts to mush down.

4. Add the remaining vegetables and mix well, letting them cook on medium heat for about 4 minutes, until the spinach wilts.

5. Then add the rice (after draining all the water) to the pan

and stir on high heat till it is well mixed in.

6. Add the frozen peas now and stir them in.

7. Now measure out the ground tomato-coriander paste in a cup and pour it in. Add as much water as required to make a total of 2-1/4 cups liquid. Add salt to taste and stir it all in.

8. Let the water-tomato paste mixture come to a bubbling boil, then turn down the heat, smoothen the top and cover tightly with a lid.

9. After 20 minutes, turn off the heat. Let the pan stay covered for another 10 minutes. Then uncover, gently stir the rice mixture, and serve hot with poppadoms and raita.
There's a classic accompaniment to vattha kuzhambu that my mother used to make for my dad, years and years ago, when we lived in Tanzania. It's called "paruppu thogayal", a bland (in the sense of no chillies being added) chutney made of roasted tur dal. Since vattha kuzhambu isnt made with the addition of cooked tur dal, this chutney was a way of adding protein to the meal. I dont remember if I loved the chutney as much as my dad, but since my mother hasnt made it in years (since Tanzania, if memory serves me right), we kids cant have been that fond of it.
Anyway, I've never made it before nor seen how it was made, so I didnt quite know the method. I was looking for recipes using tur dal for Linda's JFI Tur Dal event when I came across a "tur dal thuvayal" recipe on the Net - I think it was on the ForumHub site, but for the life of me I cant find that chat link again!
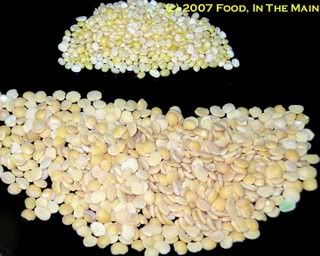
Top: Moong dal; Bottom: Tur Dal
Anyway, apart from the main item, Tur Dal, it called for red chillies, raw garlic and some moong dal - these three ingredients completely threw me off the scent, as it were. I didnt think it was a variation of the paruppu thogayal my mother used to make... until it came to grinding the roasted dal. Then the aroma instantly made itself the familiar yet long-forgotten one of paruppu thogayal.
Since I used raw garlic, red chillies and moong dal to make this chutney, it wasnt quite my mother's version. Call it a grown-up version, if you will. I cant say that I fell in love with this version any more than I did with the original... but it wasnt bad either. It's just that the roasted tur dal flavour is VERY intense. Of course this is only my personal opinion of the chutney... chances are there are people who slaver just at the thought of it! So here it is, my entry for JFI - Tur Dal.
Recipe for: Tur dal chutney
1 tsp payatham paruppu (moong dal)
1/4 cup thuvaram paruppu (tur dal)
5-6 dried red chillies (or to taste)
3 garlic pearls
1/2 tsp oil
salt to taste
Water as required
Method:
1. Heat the oil and fry the dals and red chillies separately over a medium flame, stirring constantly.
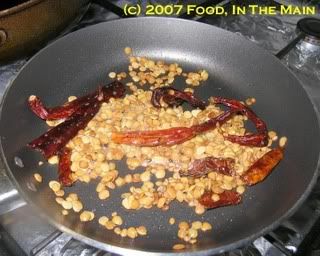
The dals should be golden brown (take care not to burn them) and the red chillies should turn darker in colour. Let cool completely.
2. Grind the fried dals, chillies, garlic with 4-5 tablespoons of water to a smooth paste.

Dont worry about adding more water - the chutney solidifies quite a bit after grinding as it absorbs the water.
3. Add salt to taste and mix well. This can be served with rice and ghee or as a side with dosas or idlis.
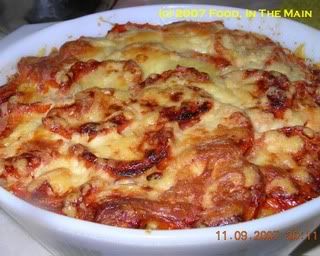
A few days ago, when I went through this recipe in my inbox, my first thought was that the dish when finished would look about as unappetising as a train wreck. But I went ahead and tried it anyway, because it was a TNT (Tried 'N' Tested) recipe... which meant that the person who sent it to the food group must have tried it and liked it. The second reason was that I wasnt in the mood to make anything elaborate and this one-pot dish was just a god-send.
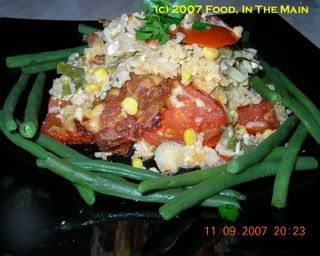
I'm glad I did try it, because it tasted wonderful - the top layers of cheese and ripe red tomatoes was like pizza... but then the rice layer came into its own, luscious with vegetables and loaded with flavours! The one change I would make the next time I make this, is to substitute flavoured cream cheese (garlic-chive, most probably) for the cottage cheese as originally specified in the recipe. It tasted fine, but I have to say the cottage cheese didnt look very nice because of its lumpy character. I ended up with little bumpy white flecks all over and I have to say that it was not what anybody would call "eye candy".
But the savoury bake tasted fantastic - and when you can get your carbs, veggies and proteins all from one easy dish, I for one wont be complaining! Along with its simplicity, the versatility of this dish is also something I like - you can add pretty much any vegetables you like as long as you make it two cupfuls. If you need to feed more than 3 people, just scale up the recipe as you feel fit, add an extra egg or two, and so on. The possibilities are many!
Recipe for: Savoury rice bake
Ingredients:
2 cups cooked or leftover rice
1 egg, beaten
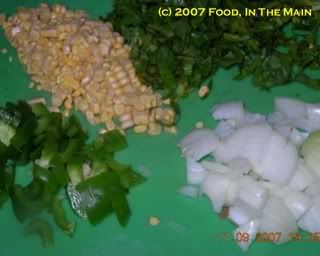
2 cups mixed chopped vegetables (I used onions, bell peppers, spinach and fresh corn)
2-3 ripe red tomatoes, sliced 1/2cm thick
3/4 cup cottage cheese (or use cream cheese if preferred)
1/3 cup + 2 tbsp low-fat cheddar cheese, grated
3 tbsp sharp parmesan cheese
1 tsp smoked paprika powder
1 tsp black peppercorns, powdered
2 green chillies, minced (optional)
2 tbp fresh herbs to taste, minced (oregano, basil, parsley, etc)
Salt to taste
Method:
1. Heat the oven to 180C.
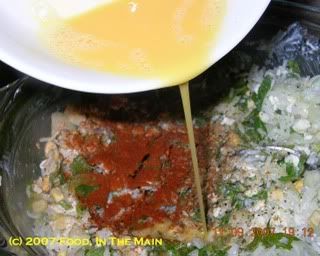
2. In a lightly greased casserole dish, put in the rice, vegetables, cottage/cream cheese, 2 tbsp cheddar, 2 tbsp parmesan, the smoked paprika, black pepper, green chillies (if using), the fresh herbs and salt to taste, and mix well.
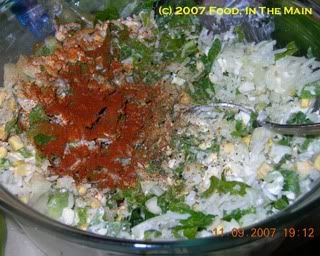
3. Check seasoning and adjust to taste, then pour in the beaten egg and mix again.
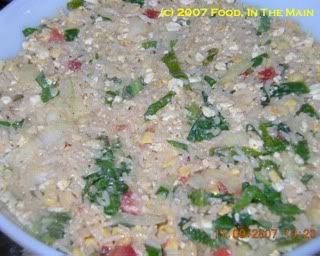
4. Smooth the top of the rice mix.
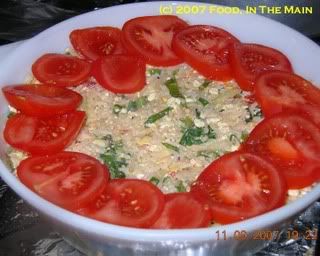
5. Now layer the sliced tomatoes in overlapping circles to cover the top of the casserole.
6. Sprinkle over the 1/3 cup cheddar cheese and the remaining 1 tbsp parmesan cheese.
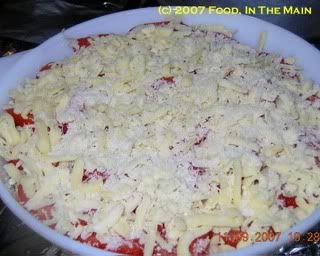
7. Bake at 180C for about 45 minutes or till the cheese is bubbling and golden.
Allow the casserole to rest for 5 minutes, then serve hot along with steamed vegetables.


