Showing posts with label garlic. Show all posts

Tuesday, February 28, 2017

Bittergourd / parakkai / karela podi

I may have mentioned once or twice or a few dozen times that, or the first 30 or so years of my life, I hated parakkai (also known as pavakkai, karela, bittermelon or bittergourd - or, if you're my husband, as "green rats"). If you're a karela lover, today's recipe will be right up your street. If you're not a karela lover, this recipe will still be quite a way up your street because you will not taste the bitterness from the vegetable at all.

If you know your karela at all, you would think it's hard to mask the bitterness, but because everything is roasted and there are lots of other ingredients, the resultant powder has no discernible bitterness. At least, none that I could taste. And I didn't even peel the skin or discard the seeds (although if they're red and hard, DO scoop them out and discard) or salt the cut bittergourd to reduce the bitterness. Because I'm lazy and that's the way I roll, baby.
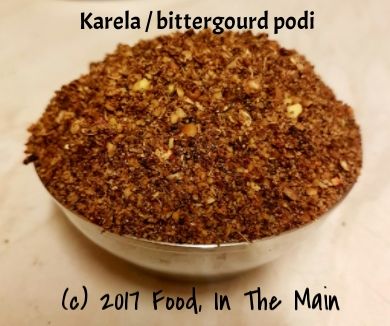
 photo 0700d77a-a039-46ac-a322-f247abb1621b_zpspafquavv.jpg

I ate this mixed with rice and ghee, I ate it sprinkled over roasted vegetables, I ate it as a side with kootu and roti, I ate it mixed with yogurt both as a dip and as a salad dressing - it's my most favourite thing at the moment, and it seems to work with everything.

Best of all, since the karela is oven roasted with only a mimimal amount of oil, it's a healthy podi. There are versions where the vegetable is deep fried until crisp, but - while I love deep fried foods with a deep and abiding love - I see no need to load this podi with unnecessary calories.

Recipe for: Bittergourd / pavakkai / karela podi

Ingredients:
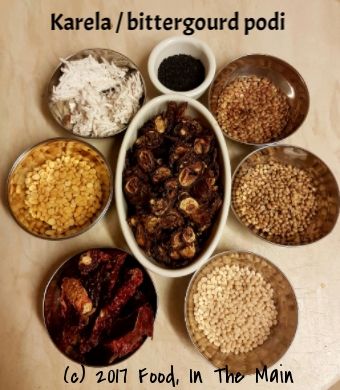
 photo a6b15ceb-f168-450a-a923-5e8d387f9c2b_zpsshqtqozs.jpg

3-4 medium size tender karela
10 dried red Kashmiri chillies
2 tbsp coriander seeds
2 tbsp whole urad dal
2 tbsp chana dal
2 tbsp kollu or horsegram
2 tbsp fresh or frozen grated unsweetened coconut
1 tbsp black sesame seeds (regular will probably also do)
Handful of curry leaves (fresh or frozen)
2-3 cloves of garlic, halved
1 small gooseberry sized ball of tamarind (seeds and strings removed if any)
1/2 tsp asafoetida powder
1/2 tsp + 1 tbsp oil
Salt to taste (or about 1.5 tsp)

Method:

1. Thinly slice the karela, mix with 1 tbsp oil and roast in a 180C/350F oven until the slices are brown with very little green showing. This should take about 30 minutes, but be sure to stir them around every 10 minutes so that they crisp evenly. Let them cool completely.

2. Heat the oil in a wok and add the red chillies. Roast on a medium-low flame, stirring often until the chillies turn a darker shade, about 5 minutes. Be careful not to burn them or you'll regret the fumes! Remove to a plate and cool.

3. Add the coriander seeds, the sesame seeds and all the dals. Dry roast them, stirring often, until they are toasted and fragrant, and turn a darker shade. Again, don't burn them or the podi will taste bitter. Add to the roasted chillies and let cool.

4. Finally, add the coconut, curry leaves, garlic and tamarind and toast in the pan, stirring frequently, until the coconut has turned golden brown and has no more moisture in it - yet again, be careful not to burn it.

5. Once all the ingredients are cool, grind them into a slightly coarse powder. Add salt and asafoetida powder and mix well. Store in an airtight container.

Friday, November 11, 2016

Mixed vegetable pakoda v2

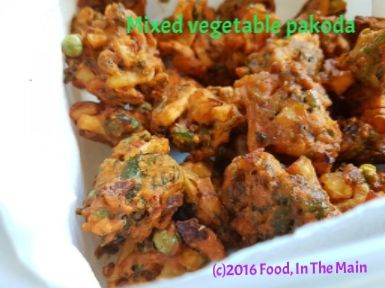
I've posted a pakoda recipe before, but I thought I'd do a post on this version because, for one, it IS slightly different and for another, I really REALLY like my photo and think it deserves to be enshrined on my blog for posterity to view over and over.
HAHAHAHA!

My mother's version (which is the only one I've used all these years) for vegetable pakoda does not involve ginger-garlic paste. This time I decided to add it, and gosh, what a difference it made to the taste! The mint also added a refreshing note. I recommend it. 


Oh, and while you're considering my recommendation, make sure you guys admire my beautiful photo of the pakodas. I recommend that too.

Recipe for:
Mixed vegetable pakoda

 photo 9d02ee62-6afc-47c2-8255-d76b419ef479_zpsbsmepbnl.jpg

Ingredients:
1 medium potato
10-12 green beans
1/5 small cauliflower
1 medium carrot
1 cup spinach
1/4 cup green peas
1 medium onion
1 tbsp ginger-garlic paste
2 tbsp finely chopped mint

1 tsp omam/ajwain/oregano seeds
1 tsp red chilli powder
1 tsp coriander powder
1.5 - 2 cups chickpea flour
2 tbsp rava/semolina
Salt to taste
Oil for deep frying

Method:

1. Peel the carrot. Chop all the vegetables into thin 1/2-inch long strips.

2. Heat the oil in a deep wok. While the oil is heating, in a large mixing bowl, mix together all the chopped vegetables, spice powders, grated ginger and garlic, the semolina and the chickpea flour. Mix well, then add salt to taste and mix again. Add 1/4 cup water and mix with your hands to a thick dough. It should not be runny at all, because the vegetables will exude water. And once the dough is mixed, use it straightaway.
3. Drop a small piece of dough in the oil - if it floats to the top rightaway, the oil is ready. Drop the mixture carefully into the oil by the tablespoonful. Don't crowd the oil or the pakodas will not be crisp and soak up the oil. Once they are an even golden brown, remove from the oil and drain onto kitchen paper.

4. Serve warm. Great with drinks.

Thursday, November 03, 2016

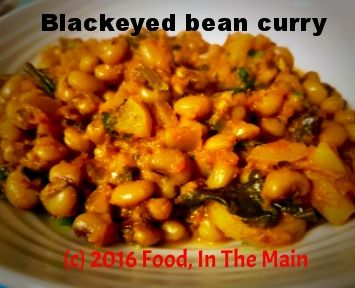
Blackeyed bean curry

I love my local "Indian" shop in Wellington. Del, the owner, is a really nice man with a great sense of humour and enough knowledge of rugby to engage with Pete. Plus, he keeps adding new products, especially in the fresh frozen section. I might not get a wide variety of fresh and exotic vegetables there, although most of the Indian staples are easily available, but there's plenty in the frozen section to keep me happy.

Like the fresh frozen black eyed beans that I bought the other day. (I also bought a couple of bags of some type of mystery greens, but that's another story.) I guess my foodie friends will understand when I say that my cup of happiness ranneth (new word!) over when I saw the fresh beans and green chickpeas in the freezer section. 

I made a curry the same evening with the black eyed beans - really tasty it was, too. I won't say that it will rock your world, although it should. (Mine wobbled a bit on its axis.)

Recipe for: Blackeyed bean curry
  
 photo 3c815a01-06df-43e4-b706-5b7b4fe807a1_zpsxbpircn9.jpg

Ingredients:

2 tsp oil
2 cups fresh frozen blackeyed beans
1 medium potato, sliced into strips
3 large tomatoes, chopped fine
1 large onion, chopped fine
3-4 green chillies, minced (or to taste)
1" piece ginger, grated
2 cloves garlic, minced
1/2 tsp coriander powder
1/2 tsp cumin powder
1 tsp Kitchen King masala (or garam masala)
1-2 cups water
1/4 cup yogurt
Salt to taste
Juice of half a lime
Coriander leaves for garnish

Method:

1. Heat the oil in a saucepan and add the onion, green chillies, ginger and garlic along with the coriander and cumin powder. Mix well and fry on medium heat for 2-3 minutes, stirring frequently, until the onion starts to soften.

2. Now add the chopped tomatoes and sliced potatoes and stir-fry for 4-5 minutes. Add the frozen blackeyed beans, pour in a cupful of water and bring the mixture to a boil. Then cover the pan, turn down the heat and let the beans cook for 10 minutes. Stir once in a while so that the masala does not burn. Add a little more water if required.

3. Once the potatoes and beans are cooked, and the sauce is thick, stir in the yogurt over medium heat. Do not let it boil after adding the yogurt. Add salt to taste and mix it in, then the lime juice. Turn off the heat, sprinkle the beans with the chopped coriander and serve hot with rice or chapaties. 

Saturday, May 30, 2015

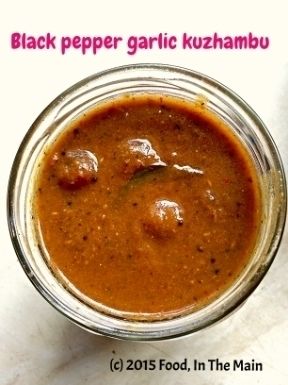
Black pepper garlic kuzhambu

I simply had to post this kuzhambu recipe, because it is just literally so lip-smackingly good - thick, tangy, hot, spicy, a tiny bit sweet and entirely irresistible! The recipe is from a foodie group on Facebook of which I am a member, and I can't seem to find it again on FB (which I wanted to do for crediting purposes on my blog). I am SO pleased that I wrote it down on a piece of paper when I saw it on FB (not having had access to a printer or my own computer at that point). I state freely that this is not my own recipe, and I do really wish I knew whose it was. All I DO know for certain that it is comfort food whose ingredients are good for health.

I made the kuzhambu and refrigerated it just before going on a week-long trip on a narrowboat with my husband. It was a lovely, relaxing, stressfree holiday, with the most gorgeous, eye-poppingly pretty scenery... but that's only by the way. The main thing is, I knew that the food I would be eating on the boat (and off it, at the various canal-side pubs that we stopped at) would not be spicy enough for me, and I would be dying for something to tickle my palate when we got back.

And so it turned out.

I certainly enjoyed the food en route, but I couldn't wait to get stuck into hot and spicy comfort food when we got home - and this kuzhambu was absolutely just the thing. I could not have asked for anything better. All I had to do was make some rice - and because it was too late to make any vegetable side-dish to accompany it (and because I was much too hungry), I just microwaved a couple of poppadoms and ladled the kuzhambu on the rice. It tasted like heaven - but there was rather too much of the kuzhambu on the rice, because it was so full-on hot and peppery. It's really meant to be mixed with rice in small amounts, not in quantities like regular sambar or rasam. I had to tone the spice quotient down somewhat with a large dollop of Greek yogurt on the side of my plate, but that was a wonderful combination anyway.

Oh, and if you're wondering why I didn't mention the taste of the large amounts of garlic that went into the kuzhambu, it's because it doesn't come across as overly garlicky. So don't worry about it, and don't skimp on the garlic; in fact, next time I will probably add even more garlic. It's good for you, anyway, so no harm done.

One other thing - the correct amount of salt is essential, otherwise the kuzhambu tends to be on the sweetish side. I'm used to making do with less salt in my cooking than (after all, you can always add more, but you can't really undo oversalting disasters!) but in this case I did have to add some more. So, it would probably be best to start by adding 3/4 tsp salt, then taste-testing to see if your palate requires more. Let your tongue and palate be the judge.

Happy eating!


Recipe for: Black pepper garlic kuzhambu

 photo Pepper20garlic20kuzhambu_zpsa6inuc2n.jpg

Ingredients:

1/4 cup baby shallots/sambar onions
1 tbsp tamarind paste, dissolved in 1/2 cup water
1/2 tsp turmeric powder
1 tsp jaggery (raw palm sugar) (optional)
1 tbsp neutral oil
Salt to taste

To grind:

1-2 tsp black peppercorns (more if you love your black pepper)
6-8 dried red chillies
1 whole head of garlic (about 1/8 cup garlic cloves, peeled and chopped into chunks if very large)
2 tsp cumin seeds
1 medium onion
1 medium tomato
3 sprigs curry leaves

To temper:

1 tbsp nallennai (unrefined sesame oil)
1/2 tsp vendhayam (methi/fenugreek seeds)
2 tsp mustard seeds
10 curry leaves

Method:

1. Heat 1/2 tbsp oil in a small pan and add the first four items on the "To grind" list. Saute for 2-3 minutes on med-high, stirring, until the chillies turn a darker shade of red and the garlic is starting to turn colour. Then add the remaining ingredients and fry until the garlic is golden. Allow to cool, then grind to a smooth paste. Set aside till required.

2. Heat the remaining neutral oil, add the small onions and fry till golden (approx 3-4 minutes). Add the tamarind water, salt to taste, turmeric and jaggery. Bring it to a boil and let it bubble for 2 minutes.

3. Now add the ground paste and 2 cups water and mix well. Bring to a boil again and let it simmer for 10 minutes, or until it is thick enough to coat the back of a spoon.

4. As a final touch, heat the nallennai in a small pan, then add the mustard seeds and curry leaves. Cover and let the mustard seeds pop. Now tip in the fenugreek seeds and fry for 30 seconds or until the seeds turn a darker shade of brown. Be careful not to burn the seeds or they will be horribly bitter. Pour the tempering over the kuzhambu and stir it in. Let it simmer for another 3 minutes, then take the pan off the heat.

Serve sparingly over steamed white rice with a dollop of ghee, any dry vegetable curry and microwaved poppadoms.

Tuesday, February 10, 2015

Egg salad with creamy salad dressing

I'm BAAAAAAAAAAACK! At least for today. This recipe is more for the salad dressing than the salad itself. You can use whatever salad vegetables you like, that you would eat raw. Mine had shredded carrots and beetroot, rocket (arugula), baby spinach, some lettuce of the red-veined variety (who knows what it's called!), tomato wedges, cucumber slices and of course boiled eggs.

Oh, and please ignore the rather gruesome grey-green ring around the yolks. I'm usually pretty deft at getting a perfectly yellow-yolk in my boiled egg, but it so happened that I completely forgot that I had eggs simmering away on the hob. I was distracted by a Facebook status and got sucked in, as you do. I don't know about you, but I blame Mark Zuckerberg. I was loath to throw the eggs away for this blemish and, besides, the green-ringed yolks aren't harmful to eat. So there you have it. By the way, the dressing works rather well with the eggs. I wouldn't have thought it, to be fair.

 photo Egg20salad_zpsblatmllv.jpg

Recipe for:
Egg salad with creamy salad dressing
Ingredients

For the salad dressing:

1 tbsp low-fat mayonnaise
4 tbsp Greek or natural yogurt (not sour)
1 htbsp grated parmesan cheese
1.5 tsp Worcestershire sauce
1 tsp lime juice
1 small garlic clove, grated
Freshly ground pepper
pinch of salt
pinch of smoked paprika

For the salad:
1 cup shredded carrots
1/2 cup shredded beetroot
2 medium tomatoes, quartered OR 10-15 cherry tomatoes, halved
1/2 cup cucumber slices
Generous mixture of salad leaves as desired
4 boiled eggs, peeled and quartered

Method:

1. Whisk all the ingredients for the dressing in a bowl. Thin it with a little water, whisking it in, until the dressing is thick but pourable. Adjust the ingredients as required till it tastes good to you. Chill the dressing until required.

2. Put all the salad ingredients in a large bowl and toss them together until evenly distributed. Just before serving, divide the contents between two bowls and dollop most of the dressing over. Mix it into the salad lightly and carefully with your hands fingers or using salad "hands". Place the quartered eggs on top, dab with the remaining dressing and serve at once.

Sunday, September 29, 2013

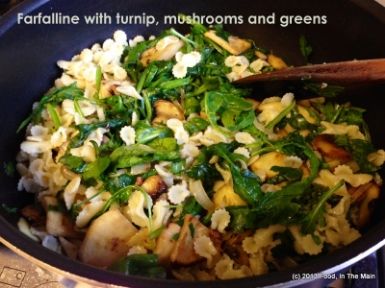
Farfalline with turnip, mushrooms and greens

This post is dedicated to a dear blogger whose every post reflects her sincerity and sweetness - Linda OutOfTheGarden(AndLatelyByTheLake). If it hadn't been for her timely rant, you wouldn't be reading this - because there wouldn't have been anything to read. Oh by the way, do read her rant - you'd be hard pressed to find a gentler, sweeter one! When I rant, I rant; when Linda rants... well, she's as likable as ever!
About this recipe, it was meant to be mild and mostly monochrome (white turnip, white pasta, white onion, white mushrooms) but I decided to greenify it a bit by adding spinach and rocket (love the stuff) and a tiny touch of red and heat by way of a fresh red chilli - and then some crunch in the form of pine nuts... and pretty soon it wasn't the original recipe any more. It was better (she said humbly). 

Recipe for: Farfalline with turnip, mushrooms and greens
 photo 6eac00eb-16a2-42c7-9c87-a1f3f081c277_zps3c975f68.jpg
Ingredients:

1/2 cup farfalline or orzo pasta
1 medium turnip, peeled and sliced about 1/4 cm thick and each slice quartered
1 small onion or 2 banana shallots, chopped fine
1/3 cup chestnut mushrooms, sliced
Good handful of spinach leaves, torn
Good handful of rocket leaves
1 red chilli, minced very fine (optional)
1 fat clove garlic, sliced
1 tsp butter
2 tsp olive oil
Salt and pepper to taste
2 tbsp basil and parsley, sliced

1 tbsp toasted pine nuts, for garnish

Method:

1. Cook the orzo/farfalline according to directions in plenty of boiling salted water. Drain, toss with a little olive oil and set aside.

2. Heat 1 tsp oil in a pan and add the garlic, chillies and shallots and stir. Cook over medium heat until the shallots are soft and light brown. Remove from the pan and set aside.

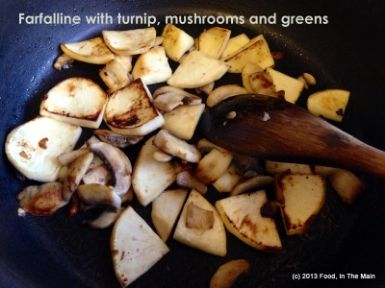
3. In the same pan, heat the remaining oil and butter, add the sliced turnip and mushrooms. Fry until they're golden brown, about 7-8 minutes.
 photo d03aa369-8184-4696-8c6e-81dd911e4ba0_zpsd0aea3d6.jpg
4. Add the cooked shallots to the pan and mix them in. Toss in the spinach and rocket, then stir in the cooked pasta. Add salt and pepper to taste. Stir in the basil and parsley, scatter over the pine nuts, and serve hot or at room temperature.

Thursday, June 13, 2013

Sundried tomato and roasted garlic bread

Tell you what, I'm really enjoying baking bread. I can say quite definitively that I'm no longer afraid of working with yeast - instant or fresh. I've actually got into the rhythm of baking two loaves of bread (sometimes three) pretty much every other Saturday. They're mostly a mix of white and wholewheat bread for everyday use, and sometimes I bake a third loaf which might be a flavoured one, to go with soups and suchlike.

The bread loaves get sliced - and I'm getting pretty good at cutting even, thin slices, even if I do say so myself - divided into half-loaves and fed to the freezer, stored in bags labelled with the date of baking. That way I get to rotate recycle use up the bread, oldest ones first. Yep, I'm THAT organised. It's kind of disconcerting, even to me. Or especially to me, because only I know just how alien this behaviour is to me.

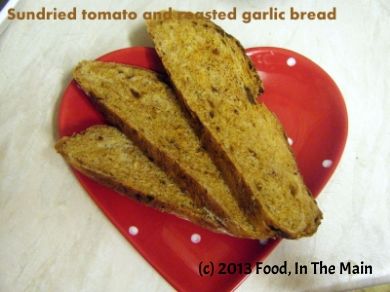
Now that you've all been made aware of my weekend baking activities and the resulting follow-ons - which information I'm sure has been of great interest, by the way - let's get to the sundried tomato and roasted garlic bread that is today's recipe. By rights it should have been posted two months back, because that's about when I made it... but never mind that. The bread is really nice with soup, but I was happy to eat it by itself, with no adornments, because it was that tasty. Can't say better than that, can I? 


By the way, if you don't like a strong garlic flavour, use less of the roasted garlic paste... and if your thing is to wilt every living thing within a 10-metre radius with your breath, by all means use MORE garlic paste, as much as you want. At least Dracula won't get you.

Recipe for:
Sundried tomato and roasted garlic bread
 photo DSCF8667_zps01c43660.jpg
Ingredients:

3-1/2 cups (15 oz) strong white bread flour
2-3 tbsp olive or other oil of choice
2 tbsp double concentrated tomato paste
1 tbsp roasted garlic, roughly mashed
1/4 cup chopped sundried tomatoes in oil (but leave out the oil)
1 htsp salt
About 300 ml warm water
1/2 tbsp instant yeast

Method:

1. Place the flour in a deep bowl and mix in the instant yeast and salt.
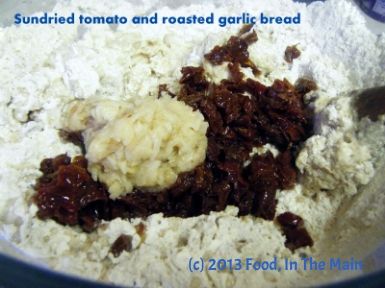
2. Then add the roasted garlic, tomato paste, and chopped sundried tomatoes
 photo DSCF8657_zps3d02237c.jpg
along with 250 ml of the warm water and mix together till the flour begins to form a rough dough. Cover and let it rest for 10 minutes to absorb the water.
3. Now knead again, adding as much of the remaining 50ml water as required, to make a dough that is not exactly sloppy but also not hard or dry either.
4. Pour 1 tbsp olive oil on your worktop (make sure your worktop is clean first!) or kneading board and spread it around a bit. Turn the dough out onto the oil and start kneading, pushing the dough away from you with the heel of your hand, turning it a quarter, then repeating the pushing/turning movement. Add more oil to the worktop if the dough starts sticking again, and continue kneading. Occasionally scrape your hand clean of dough.
5. After about 8-10 minutes, the dough should be elastic and only a little tacky. Now grease a large bowl (I use Pam spray, but you can use more oil if you like) and place the dough in it, turning it around to completely coat it in the oil. Cover the bowl and place in a warm place for the dough to rise and more or less double in volume. This can take between 1-2 hours, or even longer - there's no way to accurately predict how long it might take, so I can't give you a precise time.
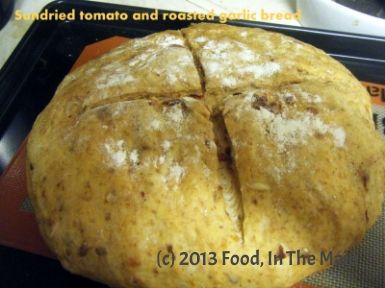
6. Once the dough is risen, punch it back down. Sprinkle a couple of tbsp extra flour on your workspace and put the dough on it. Shape it into a round ball, place on a baking tray (flour the top of the dough lightly if you like) and cover with a clean tea-towel. Let the dough rise again for 45 min to an hour. Use a sharp knife to slash a 1-cm deep cross into the top.
 photo DSCF8662_zpscf38ed70.jpg
7. Preheat your oven to 180C/350F and put the dough in to bake. Let it bake for 25-30 minutes - the top should be a nice golden brown and the bottom should sound hollow when tapped.
 photo DSCF8665_zps8bb4f59c.jpg
Remove the loaf to a wire cooling rack and let cool completely. Serve sliced, with soup.

Monday, February 11, 2013

Chana dal-vegetable masala rice

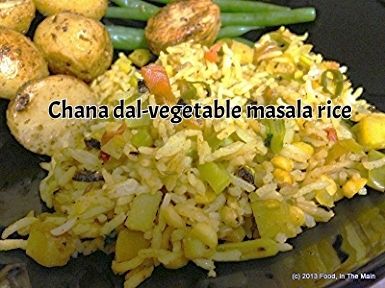
Chana dal sundal (cooked chana dal stir fried in spiced oil with mustard seeds) is one of my favourite things to eat as a side dish with rice and mor kuzhambu. I like to mix the rice and sundal together (as weird as that may sound), which is why I thought that this recipe would work. There's no mor kuzhambu involved this time, though. Just the rice and chana dal. Oh, and some vegetables.

If you think about it, recipes that combine protein, carbs and vegetables in a tasty package have to be top of the list for those occasions where you don't want to spend ages in the kitchen but also don't want to be tempted to order a takeaway. This recipe takes about 30 minutes from start to finish, especially if you prep and cook the vegetables while the rice is cooking. If you have leftover rice, this recipe is even quicker to make. And it tastes lovely.

A word of warning with regard to the chana dal - because it's easy to cook it to mush, I don't add any extra water while cooking it with the rice. I like my chana dal very slightly undercooked so that it still has a gentle bite. If you prefer it well soft, feel free to add another 1/8 cup of water while cooking the rice & dal.

Recipe for:
Chana dal-vegetable masala rice
 photo 7b81c35a-33ef-46bf-b3b9-f2df9e246734_zps64dc98d1.jpg
Ingredients:

1 cup basmati rice
1/4 cup chana dal
1 medium potato, chopped into small cubes
1/4 cup sliced runner beans (or green beans)
1 medium tomato, chopped
1 fat clove garlic, sliced
2 medium onions, sliced thin
1 tbsp oil
3-4 green chillies, sliced (to taste)
1 tsp chana masala/garam masala/curry powder
1 tsp cumin seeds
Salt to taste
Chopped coriander leaves for garnish
Roasted peanuts, for garnish (optional)

Method:

1. Wash and soak the basmati rice and chana dal together for 15 minutes. Then place in a saucepan along with 2 cups water over high heat. When the water begins to bubble and holes appear in the rice, stir the rice, turn down the heat to the lowest setting, and cover the pan with a lid placed over a clean tea towel (the towel will absorb the steam). Let it be for about 8-10 minutes, then turn off the heat. Let the rice stay undisturbed for 10 minutes so that it can absorb the moisture, then fluff it up.

2. While the rice is cooking, heat the oil in a saute pan until it shimmers, add the cumin seeds and fry them for 10 seconds, then add the green chillies and garlic and stir-fry for 30 seconds or so. Stir in the onions and cook them till they turn soft.

3. Now add the chopped tomato, potato and runner beans/green beans and stir well. Cover the pan and cook on simmer for 10-15 minutes, till the vegetables are done. Stir in the chana masala/garam masala/curry powder and salt to taste.

4. Finally, add the rice-chana dal and mix it in gently but thoroughly with the vegetable masala. Sprinkle with coriander leaves and peanuts, and serve hot with any raita.

Tuesday, January 29, 2013

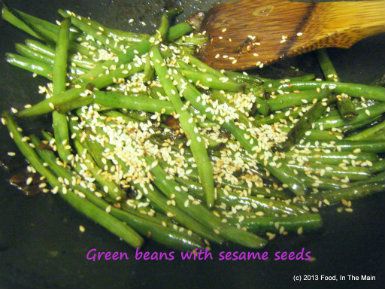
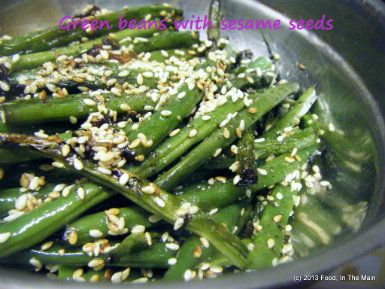
Green beans with sesame seeds


grb1 photo grb1_zps92e4a686.jpg

This is a wonderful recipe for green beans. I made it for Pete with the idea that it would make a nice side dish to go with his prawn stir-fry (that I cooked, but the recipe for that doesn't feature here because this is a vegetarian - well, eggitarian - blog), but in the event, he only got the smallest taste of it, because I scarfed most of it myself. 

I may have mentioned in previous posts about my love for tender fresh green beans. For someone who can eat a large bowl of plain boiled green beans, sometimes lightly salted, sometimes tossed with good olive oil and sea salt, or in any number of gorgeous Indian ways... this recipe, with its salty umami sesame seed-y garlicky flavours, was just too good to resist. Pete's not crazy about green beans (they're GREEN, man, they're VEGETABLE-Y!) but he made a pretty good effort at taking them away from me. Too bad for him that nobody - nobody! - gets between me and my green beans. Not even Pete. Try this and see if you don't feel the same way about them.  

Recipe for: Green beans with sesame seeds
grb photo grb_zps154f6b8c.jpg

Ingredients:
1/4 kg (250gm) green beans, topped and tailed
1 tsp peanut/vegetable oil
1 tbsp sesame oil
1-2 tbsp soy sauce
1 fat clove garlic, thinly sliced
1 tablespoon sesame seeds

Method:
1. Place the green beans in a saucepan and pour boiling water over to cover, then continue to cook them over high heat for 3-4 minutes till parboiled. Drain the water and reserve the green beans (you can use the cooking water for making soup with, or to make chapati dough).
2. Toast the sesame seeds in a little pan until they puff up and start turning colour. They may pop all over the place while toasting, so if you have a splatter shield, use it. Reserve the toasted seeds.
3. Heat a large pan or wok over medium heat. Pour in the peanut/vegetable oil and add the sliced garlic, cook for about a minute on medium heat, but don't let it brown.
4. Toss in the parboiled green beans and sesame oil. Stir the beans to coat with oil.
5. Cook for about 5 minutes, then add soy sauce and stir frequently on high heat for about 5 minutes. 

6. Stir in toasted sesame seeds and serve immediately. This is very good as a side with Chinese-style meals. Or just eat as a snack.

Sunday, January 20, 2013

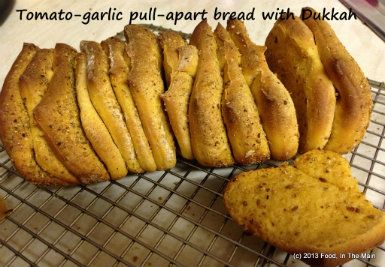
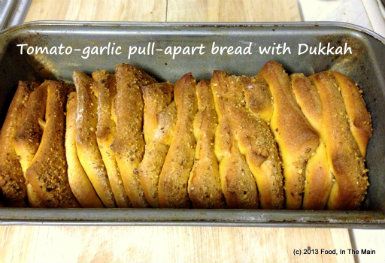
Tomato-garlic pull-apart bread with dukkah

I just wanted to try the pull-apart recipe again, to see if I could manage the miraculous "second rising" of the bread dough. I started this before I checked to see if I had any cheese - and sure enough, when I did get around to checking the fridge, there was no cheese - no, not even a bog-standard Cheddar *sigh*. I couldn't go out to get cheese because of all the snow (it's been snowing all day) and because I didn't want to venture out into the freezing cold. 

This should have been a CHEESY bread... ideally I was hoping to use feta, as a Mediterranean cheese to go with the somewhat Mediterraneanish Dukkah (Sainsbury's finest version, I'll have you know). 

(Ok, yeah, I know Dukkah is Egyptian, but it's kinda sorta close to Mediterranean cuisine, no? Work with me here, people... I suppose you could say that Dukkah and feta are about as compatible as Dukkah and cheddar - but that's for YOU to say. I say different.) 

Anyway... I halved the quantity of ingredients in the original recipe because I'm back home and there are fewer than half the people that were there when I made my first attempt in Seattle earlier this month. I'm glad to say that, on the plus side, the second rising in my second attempt was successful. Unfortunately, while I turned the former negative into a present positive, a couple of other negatives arose in the present version - one being, as mentioned earlier, a lack of cheese; the second being that the tomato flavour was at best only mild. I guess 1 tbsp of concentrated tomato paste was not enough even though the ingredients were halved. Next time I'd probably double the amount of paste and use finely chopped sun-dried tomatoes in oil too.

Oh well, live and learn. 

The bread, by the way, was good, but it would have been better with cheese (a friend of mine at work insists that most things are better with cheese). 

Recipe for
: Tomato-garlic pull-apart bread with dukkah

Tom-garlicdukkahbread_zpscba4c302 photo Tom-garlicdukkahbread_zpscba4c302-1_zps030d9c4e.jpg
Ingredients:
For the Dough
1/4 cup warm milk
1/2 tsp sugar
1 tsp active dry yeast
1.5 cups bread flour (+ a couple of tbsp more for dusting if necessary)
1/2 tsp salt
1 tbsp butter, soft at room temperature
1 tbsp concentrated tomato paste
2 fat cloves garlic, grated (use only 1 clove or 1/2 tsp garlic paste if you want a milder flavour)
1/3 cup milk
1 tbsp milk for brushing
For the Filling
1 tbsp melted butter
2 tsp Dukkah (I pounded it with a mortar and pestle to make it more uniformly sized)

Method:
1. In a small bowl, dissolve the sugar and the yeast in the 1/4 cup of warm milk. Keep aside for about 5 minutes till the yeast mixture bubbles up.

2. Put 1.5 cup of flour, salt, softened butter, and grated garlic in a large bowl and mix. Then add the yeast mixture and most of the 1/3 cup of milk and mix together. If there is more than a tbsp of flour that keeps dropping off from the dough (i.e, it isn't coming together) and the dough itself seems dry, add the remainder of the milk and knead it in. 


Transfer the dough to a non-stick mat (lightly flour your kneading area if it is not non-stick) and knead away till you have a soft, smooth and elastic/ pliable dough which is not sticky (about 10 minutes of energetic kneading). Add a little extra flour if your dough is sticking, but only just as much as is necessary.

3. Shape the dough into a ball and place it in a well-oiled bowl, turning the dough to coat it completely with oil. Cover and let it rise for about 1 to 1 1/2 hours or until almost doubled in volume.

4. Dust your work surface lightly with flour. Deflate the dough, shape it into a square and roll the dough out into a square that is about 8" by 8". Brush the surface of the square with the melted butter.

5. Evenly sprinkle the Dukkah mix. Use a rolling pin to very lightly press the topping into the dough to ensure the topping doesn’t fall off when you are stacking the strips.

6. Using a pizza cutter, slice the dough from top to bottom into 4 long and even strips – they do not have to be perfect. Lay each strip on top of the next, with the topping facing upwards, until you have a stack of the strips. You can put the 2 strips cut from the sides in the middle of the stack so it looks neater. Using a pastry scraper or a sharp knife, cut straight down through the stack dividing it into 3 or 4 equal pieces.

7. Grease and lightly flour a small loaf tin that will fit the pieces comfortably (or any other baking container you like). Layer the slices, cut sides down into the loaf tin. Cover the loaf tin dough with a towel and allow the dough to rise for an hour. Lightly brush some milk over the top of the loaf.

8. Bake the dough at 180C (350F) for about 25-30 minutes (but check from 25 minutes, as every oven differs in its performance) until it is done and the top is golden brown, and the bread sounds hollow when tapped on the bottom.
Tom-garlicdukkahbread1_zps503a6d82 photo Tom-garlicdukkahbread1_zps503a6d82-1_zpsaa02b5bb.jpg
9. Serve hot with soup.

Saturday, January 19, 2013

Herby cheese pull-apart bread - Bread #1, January 2013

pull2_zpsfb6ba548 photo pull2_zpsfb6ba548.jpg
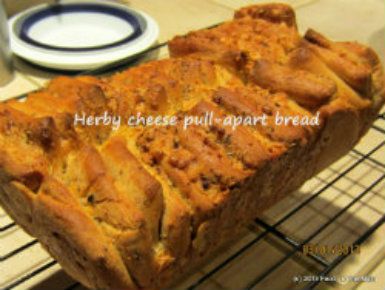
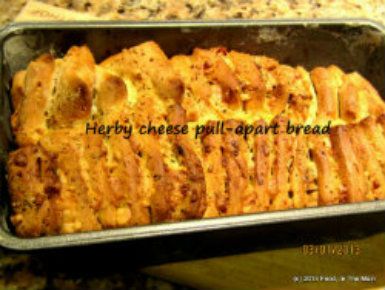
This is the first challenge of the monthly baking event started by Aparna Balasubramaniam of My Diverse Kitchen - she of the gorgeous photos and amazing baking ability in particular and lovely recipes in general. When I signed up to join the group, I happened to be in the States, visiting my family in Seattle. It was the perfect opportunity to try the recipe for pull-apart bread, especially as I'd kinda sorta earmarked it for making (at some unspecified point) when I'd seen the original photo on the Huffington Post's selection of photos of pull-apart breads.

The other point was, of course, that there were lots of people at home who would help demolish the bread... whereas at home in Shrewsbury, there's usually just me and Pete. It's difficult to invite people over when you can't be sure that you can provide something edible - I'm a million miles from being the world's best baker, that's the problem.


Happily, family don't fall into the worrisome category, so I was quite pleased to make them my guinea pigs as far as this bread was concerned. As it happened, the dough didn't rise as much as it should have, or as evenly. And since the oven was unfamiliar to me, I didn't really know anything thing about its particular quirks - its hot spots, or cold spots, etc.


But - and this is important - the bread turned out beautifully golden and really tasty with the mushroom-vegetable soup that I'd made.

pull1_zps6d40efe9 photo pull1_zps6d40efe9.jpg

The aroma as it was baking nearly drove us mad, and there was nothing to do but tear into it the moment it came out of the oven! Granted, the texture of the bread was a bit dense, but I don't think anybody cared.


I changed the original recipe just a tad - I used Pepperjack cheese on request from my sister, instead of cheddar, and I used an Italian herb mix, because that's what I had. I hope to make this bread again, with slightly different toppings. If I do, I'll definitely post it here. But for now, here's my tear-and-share bread.

Recipe for:
Herby cheese pull-apart bread

Ingredients:
For the Dough
1/2 cup warm milk
1 tsp sugar
2 tsp active dry yeast
2-3/4 - 3 cups all-purpose flour
1 tsp salt
25gm butter, soft at room temperature
3/4 to 1 tsp garlic paste
3/4 cup milk (+ a couple of tbsp to brush over the bread)
For the Filling:
15 to 20gm melted butter
2 tsp dried Italian-style herb mix
1 tsp crushed cumin seeds
1/2 cup grated Pepperjack cheese

Method:
1. In a small bowl, dissolve the sugar and the yeast in the 1/2 cup of warm milk. Keep aside for about 5 minutes till the yeast mixture bubbles up.


2. Put 2 3/4 cup of flour, salt, softened butter, and garlic paste in a large bowl and mix. Then add the yeast mixture and the 3/4 cup of milk and knead till you have a soft, smooth and elastic/ pliable dough which is not sticky. Add a little extra flour if your dough is sticking, but only just as much as is necessary.


3. Shape the dough into a ball and place it in a well-oiled bowl, turning the dough to coat it completely with oil. Cover and let it rise for about 1 to 1 1/2 hours or until almost doubled in volume.


4. Dust your work surface lightly with flour. Deflate the dough, shape it into a square and roll the dough out into a larger square that is about 12’ by 12”. Brush the surface of the square with the melted butter.


5. Evenly sprinkle the herbs and the cumin seeds and then the grated cheese. Use a rolling pin to very lightly press the topping into the dough to ensure the topping doesn’t fall off when you are stacking the strips.


6. Using a pizza cutter, slice the dough from top to bottom into 6 long and even strips – they do not have to be perfect. Lay each strip on top of the next, with the topping facing upwards, until you have a stack of the strips. You can put the 2 strips cut from the sides in the middle of the stack so it looks neater. Using a pastry scraper or a sharp knife, cut straight down through the stack dividing it into 6 equal pieces (6 square stacks).


7. Grease and lightly flour a 9” by 4” (or 5”) loaf tin. Layer the square slices, cut sides down into the loaf tin. Cover the loaf tin dough with a towel and allow the dough to rise for an hour. Lightly brush some milk over the top of the loaf.


8. Bake the dough at 180C (350F) for about 30 to 40 minutes until it is done and the top is golden brown.


pull3_zps8450eb20 photo pull3_zps8450eb20.jpg
This recipe bakes one 9” by 5” loaf.


9. Serve hot with any soup.

Friday, August 24, 2012

Spinach-onion-cabbage chutney

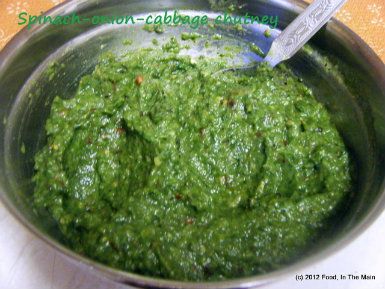
This gorgeous emerald coloured chutney is many kinds of pretty - pretty beautiful, pretty tasty, pretty versatile, pretty healthy, pretty easy to make...

So go and make it. Pretty please.

Recipe for:
Spinach-onion-cabbage chutney
DSCF8331a
Ingredients:
1 cup spinach leaves
1/2 cup cabbage, sliced
1 medium onion, sliced
A good handful of chives
2 cloves garlic, sliced
1 tbsp oil
2 tsp urad dal
1 tsp tamarind paste or a gooseberry sized piece of tamarind
5-6 dried red chillies (or to taste)
1/4 tsp asafoetida powder (optional)
2 tsp mustard seeds
4-5 fresh or frozen curry leaves
Salt to taste

Method:
1. Heat the oil and when it shimmers, add the mustard seeds and cover the pan till they finish popping.
2. Now add the urad dal, red chillies, curry leaves and asafoetida powder. Stir-fry till the urad dal turns a pale golden brown and the red chillies are a shiny darker shade.
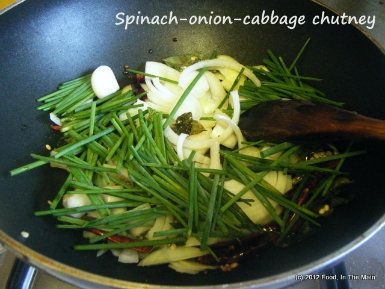
3. Add the garlic, chives and onion and stir-fry till the onions start to soften and turn translucent.
DSCF8326a
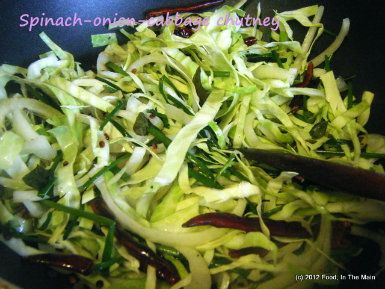
4. Add the cabbage and fry it till it wilts,
DSCF8327a
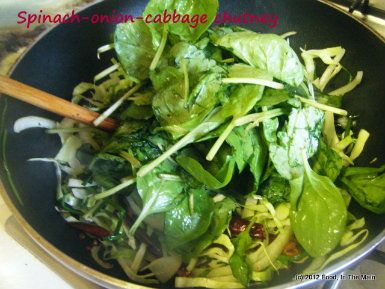
then the spinach until it wilts too.
DSCF8328a
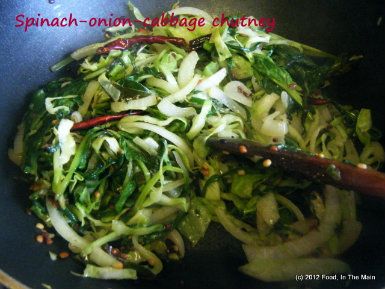
Let this mixture cool.
DSCF8329a
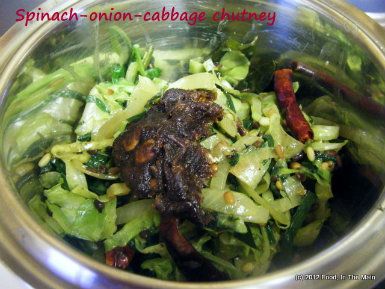
5. Pick out the red chillies and grind them to a smooth paste with the tamarind and a couple of spoonfuls of the vegetable mixture.
6. Now add the rest of the cabbage-onion-spinach mix
DSCF8330a
and grind it to a fairly smooth consistency - but not to a puree. It should be a little bit coarse.
7. Remove the chutney to a bowl, add salt to taste and mix well. This can be mixed with rice or eaten as a side dish/dip with chapaties, dosas, idlis etc.


RECIPE: SPINACH-ONION-CABBAGE CHUTNEY
 Ingredients:
1 cup spinach leaves
1/2 cup cabbage, sliced
1 medium onion, sliced
A good handful of chives
2 cloves garlic, sliced
1 tbsp oil
2 tsp urad dal
1 tsp tamarind paste or a gooseberry sized piece of tamarind
5-6 dried red chillies (or to taste)
1/4 tsp asafoetida powder (optional)
2 tsp mustard seeds
4-5 fresh or frozen curry leaves
Salt to taste

Method:
1. Heat the oil and when it shimmers, add the mustard seeds and cover the pan till they finish popping.
2. Now add the urad dal, red chillies, curry leaves and asafoetida powder. Stir-fry till the urad dal turns a pale golden brown and the red chillies are a shiny darker shade.
3. Add the garlic, chive and onion and stir-fry till the onions start to soften and turn translucent.
4. Add the cabbage and fry it till it wilts, then the spinach until it wilts too. Let this mixture cool.
5. Pick out the red chillies and grind them to a smooth paste with the tamarind and a couple of spoonfuls of the vegetable mixture..
6. Now add the rest of the cabbage-onion-spinach mix and grind it to a fairly smooth consistency - but not to a puree. It should be a little bit coarse.
7. Remove the chutney to a bowl, add salt to taste and mix well. This can be mixed with rice or eaten as a side dish/dip with chapaties, dosas, idlis etc.

Monday, August 06, 2012

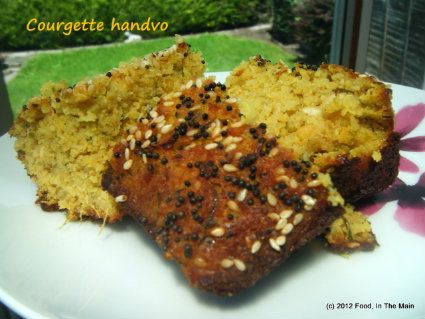
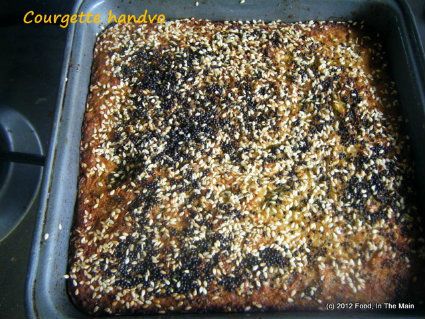
Courgette/zucchini handvoh

Well, here I am after an unscheduled break from my food blog. It’s not that I haven’t wanted to, bla bla bla, it’s just that I’ve not had much free time, hey nonny no, and what little free time I’ve had in the evenings I’ve spent reading, yada yada yada. So, in short – same ol’ same ol’.

I’ve made handvoh before, years and years and YEARS back when I was living in Madras. It was probably one of the first “exotic” recipes that I tried from a recipe printed in *ugh* Women’s Era *cringe*. However, as much as I hate the thought of that awful magazine now, I remember the recipe worked beautifully - the batter behaved itself faultlessly, fermenting in the heat as stated in the recipe, and then steam-cooking in the ilupachatti (kadai/wok) that I used. It was all the more thrilling because the handvoh tasted great and it was not something that had ever been made by my mother, to my recollection. It wasn’t a family staple, let’s say. Just think - I'd actually made something entirely new to me from a magazine recipe - and it turned out well!

That said, this recipe, that I cobbled together after reading a few others on the Internet did not seem at all familiar or bring to mind my original handvoh experience. The only common factor was that this tasted great, too. Can’t complain about that, can you?

Recipe for: Courgette/zucchini handvohDSCF8388-1
Ingredients:

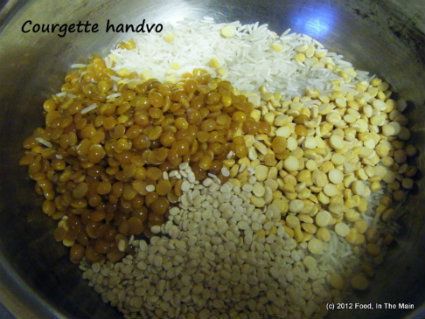
1 cup long grain rice
1/4 cup chana dal
1/4 cup tur/toor/tuvar dal
1/4 cup urad dal
DSCF8362-1
1 cup yogurt
2 tbsp ginger-garlic-green chilli paste - (1.5" piece ginger + 4-5 garlic cloves + 6-8 green chillies (reduce chillies as per taste))
1.5 packed cups grated courgette/zucchini
salt to taste
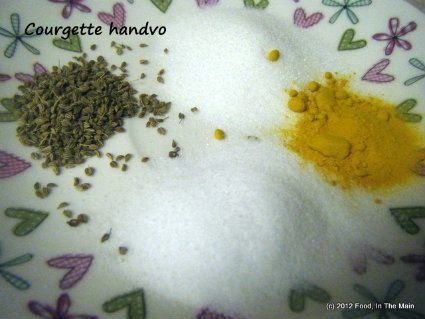
1/2 tsp ajwain/omam
2 tsp sugar
1/2 tsp turmeric powder
3/4 tsp baking powder
1/2 tsp baking soda
2 tbsp sesame seeds
DSCF8365-1
3 tbsp oil
2 tsp mustard seeds
1/4 tsp asafoetida powder
1/2 tsp red chilli powder
a few curry leaves

Method:
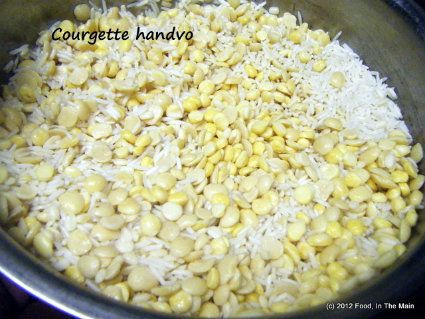
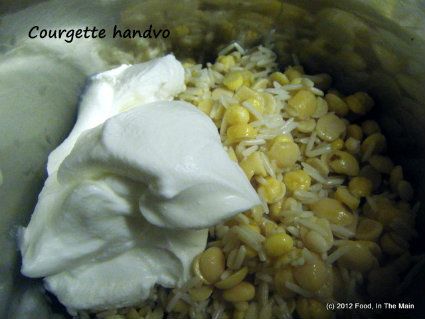
1. Wash the rice and dals and soak them in water for 6 hours.
DSCF8366-1
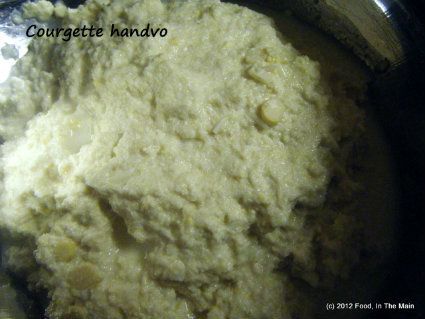
Then drain and grind along with the yogurt to a paste - it should be fairly coarse, not smooth.
DSCF8367-1
Try to add as little water as possible while grinding.
DSCF8369-1
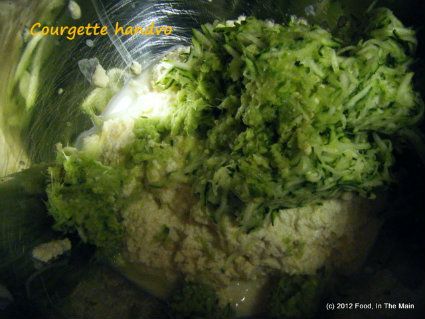
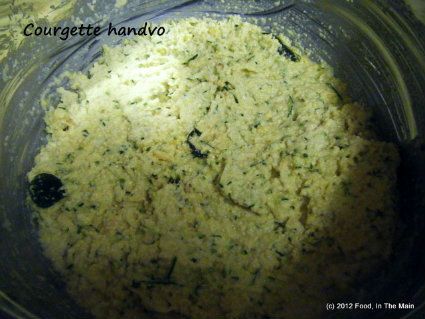
2. Put the batter in a medium bowl and add the ginger-garlic-green chilli, grated courgette/zucchini
DSCF8371-1
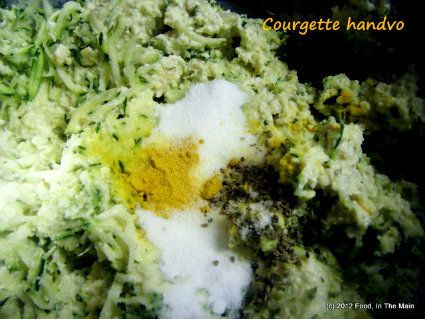
salt, sugar, ajwain/omam and turmeric.
DSCF8373-1
Mix well.
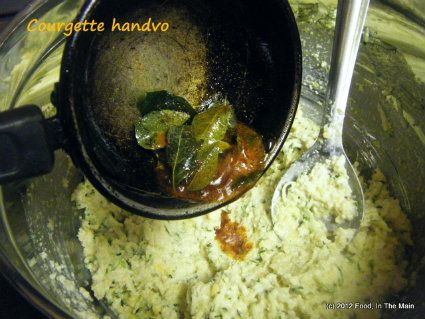
4. Heat 1 tbsp oil and fry the curry leaves for 15-20 seconds, then add the red chilli powder and turn the heat off. Pour this mixture into the batter and mix again.
DSCF8374-1
Let the batter rest covered at room temperature overnight, or for 7-8 hours.
5. Cover and let this batter rest for 6-7 hours or overnight (no need to refrigerate).
DSCF8375-1
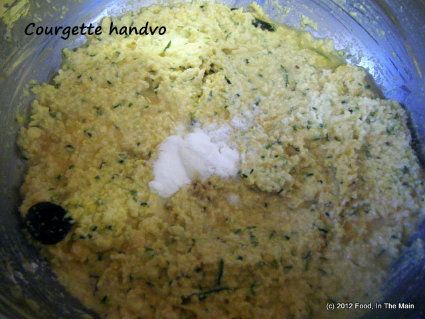
6. In the morning (or after 6-7 hours), add the baking powder and baking soda and mix thoroughly.
DSCF8376-1
7. Line an 8" cake pan (round or square, doesnt matter) with non-stick paper/foil and spoon the batter into the pan.
DSCF8377-1
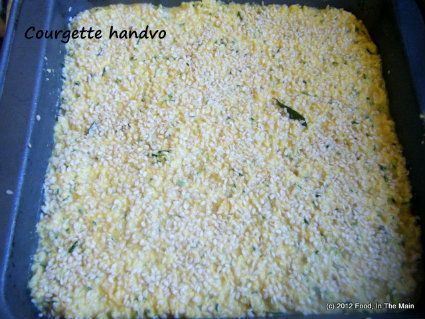
8. Sprinkle the sesame seeds evenly on top of the batter.
9. Heat the remaining oil in a small skillet and add the mustard seeds. Cover and let the seeds pop (about 30 seconds), then add the asafoetida powder and turn the heat off.
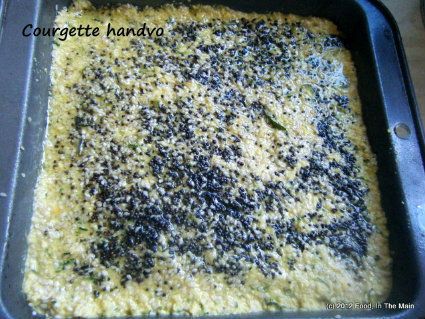
10. Drizzle this seasoning over the sesame seeds on top of the batter.
DSCF8379-1
11. Cover the pan with aluminium foil and bake at 180C/350F for 40 minutes or so, or till a cake tester comes out clean. (Remember that the size of the pan you use will determine the amount of time that the handvoh takes to cook.)
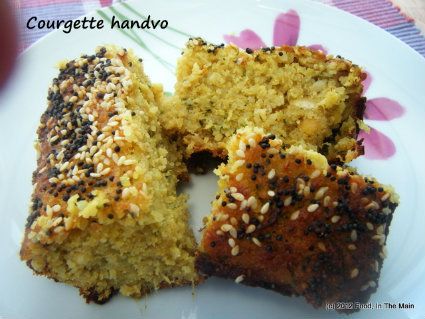
12. Uncover the pan and broil the handvoh until the top turns golden brown.
DSCF8386-1
Let it rest in the pan for 10 minutes before cutting.
DSCF8387-1
Serve warm with any chutney or even tomato ketchup.

RECIPE: COURGETTE/ZUCCHINI HANDVOH
Ingredients:
1 cup long grain rice
1/4 cup chana dal
1/4 cup tur/toor/tuvar dal
1/4 cup urad dal
1 cup yogurt
2 tbsp ginger-garlic-green chilli paste - (1.5" piece ginger + 4-5 garlic cloves + 6-8 green chillies (reduce chillies as per taste))
1.5 packed cups grated courgette/zucchini
salt to taste
1/2 tsp ajwain/omam
2 tsp sugar
1/2 tsp turmeric powder
3/4 tsp baking powder
1/2 tsp baking soda
2 tbsp sesame seeds
3 tbsp oil
2 tsp mustard seeds
1/4 tsp asafoetida powder
1/2 tsp red chilli powder
a few curry leaves

Method:
1. Wash the rice and dals and soak them in water for 6 hours. Then drain and grind along with the yogurt to a paste - it should be fairly coarse, not smooth.Try to add as little water as possible while grinding.
2. Put the batter in a medium bowl and add the ginger-garlic-green chilli, grated courgette/zucchini, salt, sugar, ajwani/omam and turmeric. Mix well.
4. Heat 1 tbsp oil and fry the curry leaves for 15-20 seconds, then add the red chilli powder and turn the heat off. Pour this mixture into the batter and mix again. Let the batter rest covered at room temperature overnight, or for 7-8 hours.
5. Cover and let this batter rest for 6-7 hours or overnight (no need to refrigerate).
6. In the morning (or after 6-7 hours), add the baking powder and baking soda and mix thoroughly.
7. Line an 8" cake pan (round or square, doesnt matter) with non-stick paper/foil and spoon the batter into the pan.
8. Sprinkle the sesame seeds evenly on top of the batter.
9. Heat the remaining oil in a small skillet and add the mustard seeds. Cover and let the seeds pop (about 30 seconds), then add the asafoetida powder and turn the heat off.
10. Drizzle this seasoning over the sesame seeds on top of the batter.
11. Cover the pan with aluminium foil and bake at 180C/350F for 40 minutes or so, or till a cake tester comes out clean. (Remember that the size of the pan you use will determine the amount of time that the handvoh takes to cook.)
12. Uncover the pan and broil the handvoh until the top turns golden brown. Let it rest in the pan for 10 minutes before cutting. Serve warm with any chutney or even tomato ketchup.

Tuesday, June 19, 2012

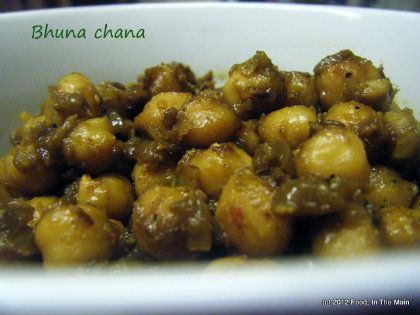
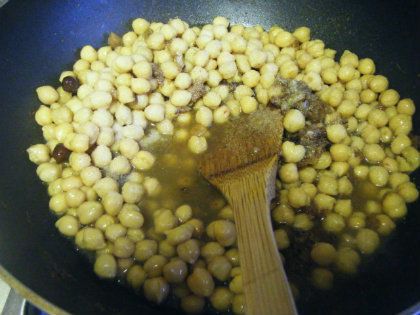
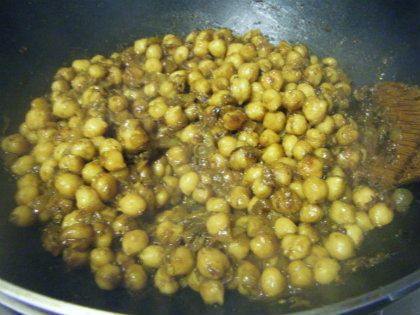
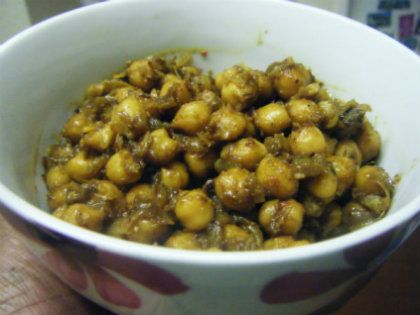
Chana (chickpeas) bhuna

I think I may have found the most PERFECT masala recipe I've ever tried, and all thanks to Sangeeta of Banaras ka Khana blog. Her blog is one of my favourites, because she has North Indian recipes which are not so well known (at least to me) as the usual things you get endlessly everywhere. I like reading about typical everyday recipes which are still not common outside of individual homes, and Sangeeta's blog is the perfect place to find these.

I tried this masala with cooked chickpeas because I had some, and loved the result so much that I've made it (with different dals) four times in the last 10 days... although not (yet) with the original split chickpeas (or chana dal) that Sangeetha used. I've tried it both as a thick sauce and as a runnier one, and it makes not a whit of difference - other than the clingy sauce is better with whole chickpeas.

I reduced the peppercorns to 1/2 tsp because I can't take the heat from them (but chilli-heat is more than bearable, go figure), but otherwise the recipe is no different - well, apart from having used chickpeas, that is. Do try it - it's pretty quick to make, too, especially if you use canned chickpeas.

Recipe for:
Chana bhuna
DSCF8296
Ingredients:3-4 cups cooked chickpeas (or two cans' worth)
1 large onion, chopped fine
1 tbsp ghee or oil (I used oil)
1 tsp cumin seeds
Salt to taste

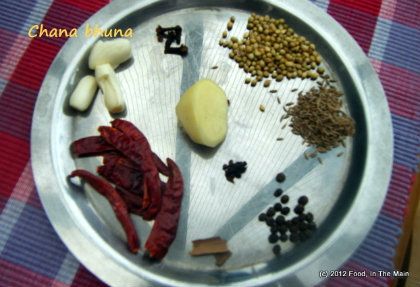
For grinding:
DSCF8268-1
1/2" piece cinnamon stick
1 small black cardamom (seeds only)
1 htsp coriander seeds
1 htsp cumin seeds
2 cloves
4-5 dried red chillies (or to taste)
3 garlic cloves
1" ginger root
1/2 tsp black peppercorns
1/2 tsp turmeric powder
1/2 tsp amchoor (dried raw mango) powder - optional
3-4 tbsp water

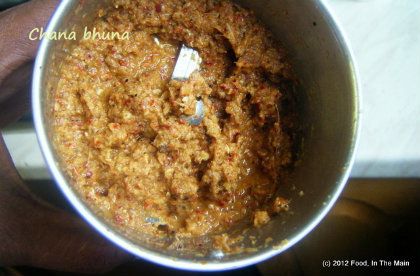
Method:1. Grind all the ingredients for the masala into a smooth, fairly thick paste. Use only as much water as required to make it smooth.
DSCF8270-1
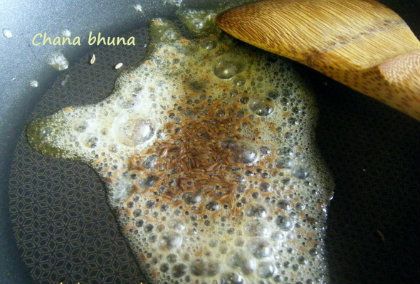
2. Heat the oil/ghee in a pan, then add the cumin seeds.
DSCF8271-1
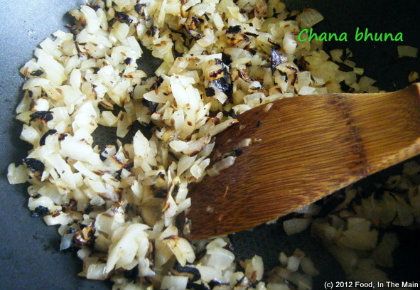
3. Once the seeds sizzle, add the chopped onion and stir.
DSCF8274-1
Let it cook on low heat for 15 minutes or so, till it becomes soft and pinkish.
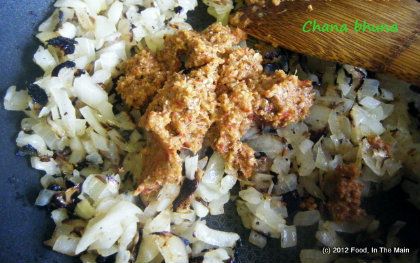
4. Now add the ground masala paste to the cooked onion
DSCF8275-1
and stir it in.
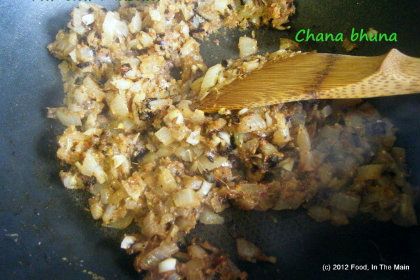
DSCF8276-1
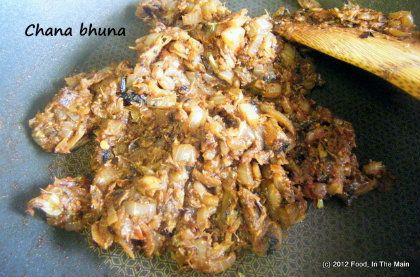
5. Fry it (bhuno) on low heat for 5-7 minutes, stirring frequently, till the paste is well amalgamated, thick and intensely aromatic. Any excess water should have evaporated.
DSCF8279-1
6. Now add the chickpeas along with salt to taste
DSCF8288-1
and stir till it is all well mixed.
DSCF8291-1
7. Let it cook for 2-3 minutes more (longer if it is watery), then take it off the heat.
DSCF8292-1
Serve hot with chapaties or puris.
Note: The curry tastes best when the masala coats the chickpeas thickly, so make sure the masala is not runny.


RECIPE: CHANA BHUNA
Ingredients:
3-4 cups cooked chickpeas (or two cans' worth)
1 large onion, chopped fine
1 tbsp ghee or oil
1 tsp cumin seeds
Salt to taste
For grinding:
1/2" piece cinnamon stick
1 small black cardamom (seeds only)
1 htsp coriander seeds
1 htsp cumin seeds
2 cloves
4-5 dried red chillies (or to taste)
3 garlic cloves
1" ginger root
1/2 tsp black peppercorns
1/2 tsp turmeric powder
1/2 tsp amchoor (dried raw mango) powder - optional
3-4 tbsp water
Method:
1. Grind all the ingredients for the masala into a smooth, fairly thick paste. Use only as much water as required to make it smooth.
2. Heat the oil in a pan, then add the cumin seeds.
3. Once the seeds sizzle, add the chopped onion and stir. Let it cook on low heat for 15 minutes or so, till it becomes soft and pinkish.
4. Now add the ground masala paste to the cooked onion and stir it in.
5. Fry it (bhuno) on low heat for 5-7 minutes, stirring frequently, till the paste is well amalgamated, thick and intensely aromatic. Any excess water should have evaporated.
6. Now add the chickpeas along with salt to taste and stir till it is all well mixed.
7. Let it cook for 2-3 minutes more, then take it off the heat. Serve hot with chapaties or puris.
Note: The curry tastes best when the masala coats the chickpeas thickly, so make sure the masala is not runny.