Showing posts with label fenugreek seeds. Show all posts

Saturday, May 30, 2015

Black pepper garlic kuzhambu

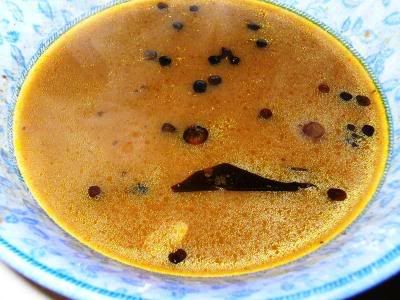
I simply had to post this kuzhambu recipe, because it is just literally so lip-smackingly good - thick, tangy, hot, spicy, a tiny bit sweet and entirely irresistible! The recipe is from a foodie group on Facebook of which I am a member, and I can't seem to find it again on FB (which I wanted to do for crediting purposes on my blog). I am SO pleased that I wrote it down on a piece of paper when I saw it on FB (not having had access to a printer or my own computer at that point). I state freely that this is not my own recipe, and I do really wish I knew whose it was. All I DO know for certain that it is comfort food whose ingredients are good for health.

I made the kuzhambu and refrigerated it just before going on a week-long trip on a narrowboat with my husband. It was a lovely, relaxing, stressfree holiday, with the most gorgeous, eye-poppingly pretty scenery... but that's only by the way. The main thing is, I knew that the food I would be eating on the boat (and off it, at the various canal-side pubs that we stopped at) would not be spicy enough for me, and I would be dying for something to tickle my palate when we got back.

And so it turned out.

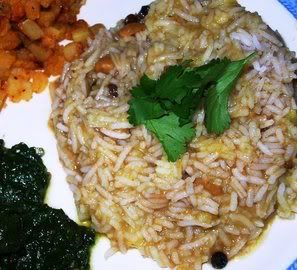
I certainly enjoyed the food en route, but I couldn't wait to get stuck into hot and spicy comfort food when we got home - and this kuzhambu was absolutely just the thing. I could not have asked for anything better. All I had to do was make some rice - and because it was too late to make any vegetable side-dish to accompany it (and because I was much too hungry), I just microwaved a couple of poppadoms and ladled the kuzhambu on the rice. It tasted like heaven - but there was rather too much of the kuzhambu on the rice, because it was so full-on hot and peppery. It's really meant to be mixed with rice in small amounts, not in quantities like regular sambar or rasam. I had to tone the spice quotient down somewhat with a large dollop of Greek yogurt on the side of my plate, but that was a wonderful combination anyway.

Oh, and if you're wondering why I didn't mention the taste of the large amounts of garlic that went into the kuzhambu, it's because it doesn't come across as overly garlicky. So don't worry about it, and don't skimp on the garlic; in fact, next time I will probably add even more garlic. It's good for you, anyway, so no harm done.

One other thing - the correct amount of salt is essential, otherwise the kuzhambu tends to be on the sweetish side. I'm used to making do with less salt in my cooking than (after all, you can always add more, but you can't really undo oversalting disasters!) but in this case I did have to add some more. So, it would probably be best to start by adding 3/4 tsp salt, then taste-testing to see if your palate requires more. Let your tongue and palate be the judge.

Happy eating!


Recipe for: Black pepper garlic kuzhambu
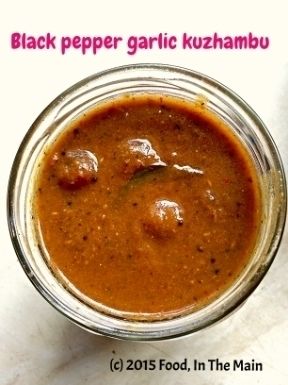
 photo Pepper20garlic20kuzhambu_zpsa6inuc2n.jpg

Ingredients:

1/4 cup baby shallots/sambar onions
1 tbsp tamarind paste, dissolved in 1/2 cup water
1/2 tsp turmeric powder
1 tsp jaggery (raw palm sugar) (optional)
1 tbsp neutral oil
Salt to taste

To grind:

1-2 tsp black peppercorns (more if you love your black pepper)
6-8 dried red chillies
1 whole head of garlic (about 1/8 cup garlic cloves, peeled and chopped into chunks if very large)
2 tsp cumin seeds
1 medium onion
1 medium tomato
3 sprigs curry leaves

To temper:

1 tbsp nallennai (unrefined sesame oil)
1/2 tsp vendhayam (methi/fenugreek seeds)
2 tsp mustard seeds
10 curry leaves

Method:

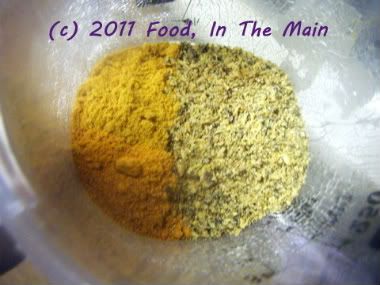
1. Heat 1/2 tbsp oil in a small pan and add the first four items on the "To grind" list. Saute for 2-3 minutes on med-high, stirring, until the chillies turn a darker shade of red and the garlic is starting to turn colour. Then add the remaining ingredients and fry until the garlic is golden. Allow to cool, then grind to a smooth paste. Set aside till required.

2. Heat the remaining neutral oil, add the small onions and fry till golden (approx 3-4 minutes). Add the tamarind water, salt to taste, turmeric and jaggery. Bring it to a boil and let it bubble for 2 minutes.

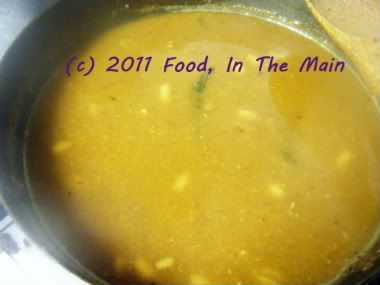
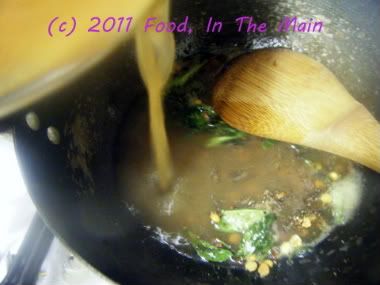
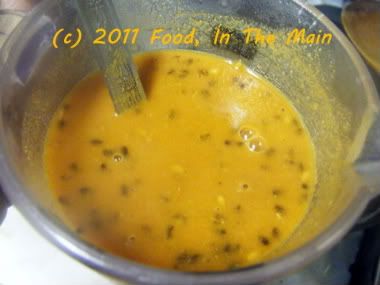
3. Now add the ground paste and 2 cups water and mix well. Bring to a boil again and let it simmer for 10 minutes, or until it is thick enough to coat the back of a spoon.

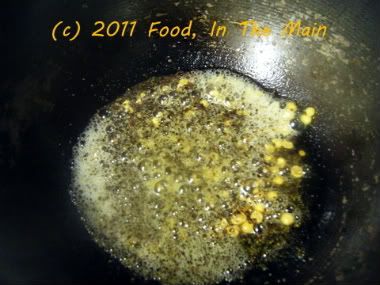
4. As a final touch, heat the nallennai in a small pan, then add the mustard seeds and curry leaves. Cover and let the mustard seeds pop. Now tip in the fenugreek seeds and fry for 30 seconds or until the seeds turn a darker shade of brown. Be careful not to burn the seeds or they will be horribly bitter. Pour the tempering over the kuzhambu and stir it in. Let it simmer for another 3 minutes, then take the pan off the heat.

Serve sparingly over steamed white rice with a dollop of ghee, any dry vegetable curry and microwaved poppadoms.

Saturday, April 28, 2012

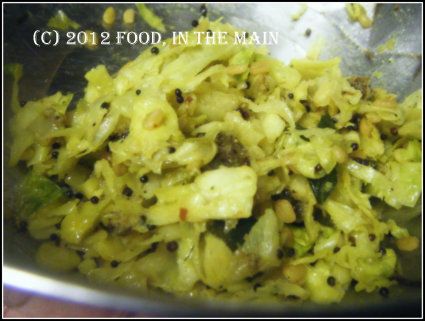
Brussels sprouts and cabbage with sesame masala

Cabbage and brussels sprouts are not most people's favourite vegetables, but I love them. I made this recently for the first time when a friend came to dinner. It went down very well with rice and sambar, but it would also be just as good with rotis. Cabbage love is such a heartwarming thing when it happens naturally... Please don't ask me what that means, because I don't know. The sentence/sentiment just popped into my head and out through my fingers. Anyway, I'm sure you'll enjoy this dish, readers mine, so do try it.
Recipe for: Brussels sprouts and cabbage with sesame masala
DSCF8088
Ingredients:
2 cups cabbage, shredded
1/2 cup brussels sprouts, shredded
2 tsp oil
1/8 tsp asafoetida powder
1 tsp mustard seeds
3 dry red chillies, broken into 1" pieces (or to taste)
2 tbsp sesame seeds
1 tsp coriander seeds
1/2 tsp cumin seeds
3-4 fenugreek seeds
10 curry leaves (optional)
Salt to taste
Method:
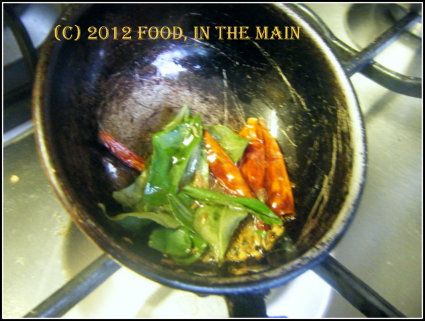
1. Dry roast the chillies, coriander seeds, cumin seeds, fenugreek seeds and curry leaves in a small pan on medium heat, stirring constantly, until the seeds and chillies turn aromatic and a little darker in colour (about a minute).
DSCF8086
Remove from the heat and set aside.

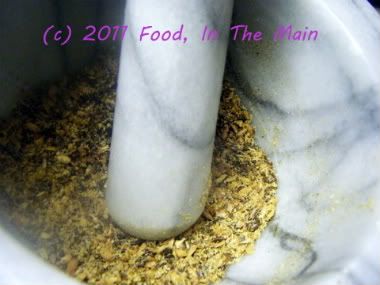
2. Now dry roast the sesame seeds separately until they turn a shade darker and start to sputter a little. Let it cool down, then grind the sesame seeds along with the rest of the roasted seeds into a fine powder.
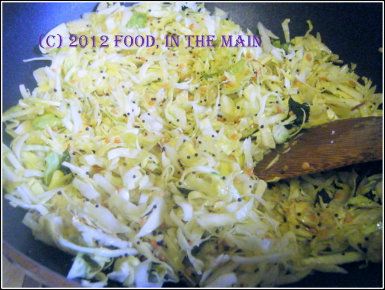
3. Heat the oil in a pan and add the mustard seeds and asafoetida powder. When the seeds stop spluttering, add the shredded cabbage and sprouts. Cook over medium heat, stirring occasionally, until the cabbage is cooked but not mushy.
DSCF8085
4. Sprinkle the sesame seed powder over the cooked cabbage and mix it in. Serve hot as a side with rice and sambar, or with chapaties.

RECIPE: BRUSSELS SPROUTS AND CABBAGE WITH SESAME MASALA
Ingredients:
2 cups cabbage, shredded
1/2 cup brussels sprouts, shredded
2 tsp oil
1/8 tsp asafoetida powder
1 tsp mustard seeds
3 dry red chillies, broken into 1" pieces (or to taste)
2 tbsp sesame seeds
1 tsp coriander seeds
1/2 tsp cumin seeds
3-4 fenugreek seeds
10 curry leaves (optional)
Salt to taste
Method:
1. Dry roast the chillies, coriander seeds, cumin seeds, fenugreek seeds and curry leaves in a small pan on medium heat, stirring constantly, until the seeds and chillies turn aromatic and a little darker in colour (about a minute). Remove from the heat and set aside.
2. Now dry roast the sesame seeds separately until they turn a shade darker and start to sputter a little. Let it cool down, then grind the sesame seeds along with the rest of the roasted seeds into a fine powder.
3. Heat the oil in a pan and add the mustard seeds and asafoetida powder. When the seeds stop spluttering, add the shredded cabbage and sprouts. Cook over medium heat, stirring occasionally, until the cabbage is cooked but not mushy.
4. Sprinkle the sesame seed powder over the cooked cabbage and mix it in. Serve hot as a side with rice and sambar, or with chapaties.

Friday, January 21, 2011

Flaxseed peanut puli kuzhambu (tamarind gravy)

I guess I could have called this a vattha kuzhambu except for the fact that I carefully refrained from using manthakkali or chundakkai vatthal (dried berries). This puli kuzhambu tastes very nice, if you ask me. If, however, you DON'T want to ask me, I guess you'll have to make it and discover this fact for yourself, won't you?

Recipe for: Flaxseed puli kuzhambu (tamarind gravy)

Photobucket

Ingredients:

2 tbsp dry-roasted flaxseeds
1 htbsp sambar powder
2 tsp rice flour
1/4 cup roasted peanuts
Lime-sized amount of tamarind/2 tsp tamarind paste
2 tsp tuvar dal
1 tsp mustard seeds
1/2 tsp vendhayam/fenugreek seeds
5-6 fresh/frozen curry leaves
1 tbsp gingelly oil/nallennai
Salt to taste
4-5 cups water

Method:

1. Pound or grind the flaxseeds to a fine powder.
Photobucket

2. Dissolve the tamarind in 4 cups water (or extract the pulp from the dry tamarind). Reserve.

3. Heat the oil in a pan, add the asafoetida powder, tuvar dal, fenugreek seeds, curry leaves, and mustard seeds. Cover and let the seeds pop, let the dal turn golden brown,
Photobucket
then pour in the tamarind water.
Photobucket
Let this come to a brisk boil.

4. While it is coming up to the boil, mix together the flaxseed powder, sambar powder and rice flour,
Photobucket
add 1/4 cup water and whisk to a pourable mixture without lumps.
Photobucket

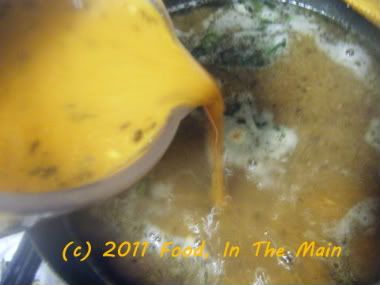
5. Now pour this into the tamarind water and stir it in, along with salt to taste.
Photobucket

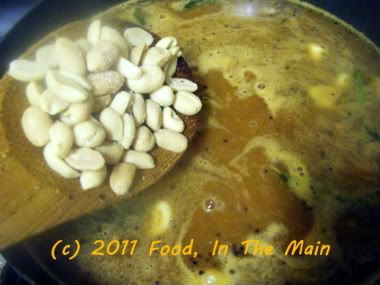
6. Keep the heat on medium and let the kuzhambu simmer for 10 minutes to let the flavours come together, and for it to thicken. Then add the peanuts and allow the kuzhambu to boil for 5 minutes more.
Photobucket

7. The longer the kuzhambu sits, the better it will taste. Reheat before serving, along with steamed rice and any kootu or vegetable curry.

RECIPE: FLAXSEED PEANUT PULI KUZHAMBU (TAMARIND GRAVY)

Ingredients:

2 tbsp dry-roasted flaxseeds
1 htbsp sambar powder
2 tsp rice flour
1/4 cup roasted peanuts
Lime-sized amount of tamarind/2 tsp tamarind paste
2 tsp tuvar dal
1 tsp mustard seeds
1/2 tsp vendhayam/fenugreek seeds
5-6 fresh/frozen curry leaves
1 tbsp gingelly oil/nallennai
Salt to taste
4-5 cups water

Method:

1. Pound or grind the flaxseeds to a fine powder.
2. Dissolve the tamarind in 4 cups water (or extract the pulp from the dry tamarind). Reserve.
3. Heat the oil in a pan, add the asafoetida powder, tuvar dal, fenugreek seeds, curry leaves, and mustard seeds. Cover and let the seeds pop, let the dal turn golden brown, then pour in the tamarind water. Let this come to a brisk boil.
4. While it is coming up to the boil, mix together the flaxseed powder, sambar powder and rice flour, add 1/4 cup water and whisk to a pourable mixture without lumps.
5. Now pour this into the tamarind water and stir it in, along with salt to taste.
6. Keep the heat on medium and let the kuzhambu simmer for 10 minutes to let the flavours come together, and for it to thicken. Then add the peanuts and allow the kuzhambu to boil for 5 minutes more.
7. The longer the kuzhambu sits, the better it will taste. Reheat before serving, along with steamed rice and any kootu or vegetable curry.

Thursday, October 22, 2009

Black beans and rice, South Indian style

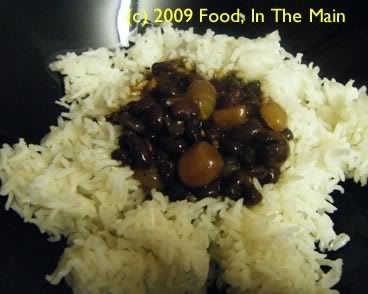
I may have said this before, but I don’t think there exists a bean that I would not like. I’d never tasted black beans before, so when I saw a small bag of black beans in my local supermarket, I couldn’t resist buying it. I fully intended to make “black beans and rice”, a dish I’d come across enough times that the two main ingredients – black beans and rice (duh) – had paired almost inseparably in my mind, like other famous duos. Torville and Dean. Fred and Ginger. Savitri and Satyavan. Tom and Jerry. Peaches and cream. Black beans and rice. (You must have got the idea by now - but feel free to add other famous duos to the list if you think they pair up better.)

Anyway, by the time I’d soaked the beans overnight and cooked them in the pressure cooker, inexplicably I didn’t feel like making the classic Caribbean-style black beans and rice. Pete was away and there was only me for dinner, and I felt very much in the mood for comfort food. And that to me is Indian food. Actually, getting more precise, South Indian food. But because that phrase “black beans and rice” was still jingling about in my head, refusing to be split apart, I decided to make a lateral move and South Indianise the black-beans-and-rice, keeping the pairing but changing it to my taste. Hey, Torville and Dean giving a Bharatanatyam performance on ice are still Torville and Dean, right?

Actually, I’d rather nobody answered that question. Just make the black-beans-and-rice South-Indian-style and we’ll say no more about any of it, okay?

Recipe for:
Black beans and rice, South Indian style

Photobucket

Ingredients

1 cup black beans, soaked overnight
1 tsp tamarind paste
1/2 cup tiny pearl onions (or use regular onions chopped fine)
2 green chillies, slit vertically halfway (optional)
1 tsp sambar powder
1/2 tsp Kitchen King masala powder (or use garam masala)
1/2 tsp fenugreek seeds
1 tsp coriander powder
2 tsp oil
1 tsp mustard seeds
½ tsp turmeric powder
¼ tsp asafetida powder
1 tbsp rice flour
Salt to taste
Water as required

Method:

1. Pressure-cook the soaked black beans with 1.5 cups water till soft. Reserve along with the cooking liquid.

2. In a pan, heat the oil and add the fenugreek seeds, mustard seeds, asafetida powder, coriander powder and turmeric.

3. Cover the pan and let the seeds pop (about 30 seconds), then add the slit green chillies and the onions.

4. Mix well and let the onions cook for 3 minutes, then add the cooked black beans, the sambar powder and the Kitchen King/garam masala powder.

5. Dissolve the tamarind paste and rice flour in 1.5 cups water and add this to the pan. Let the mixture come to a boil, then turn down the heat and let it simmer for 15 minutes.

Photobucket

6. Add salt to taste. The gravy should not be runny, but should be fairly thick. If it’s runny, let it boil for a few minutes longer; if too thick, thin with a little water. Serve hot over cooked white rice.

Monday, March 31, 2008

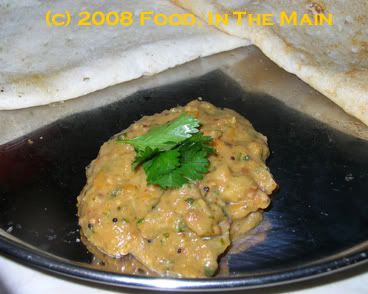
Chettinadu tomato chutney

I've had my eye on a tomato chutney recipe that Hema of Vegetarian Concoctions posted on her blog back in February. I’m assuming it was a variation on her own Chettinadu tomato chutney, but really it’s her friend Ranjini’s recipe. (Thanks, ladies!)

I’ve been meaning to make it ever since (how many times do you think I might have said this over the years?) – and now, only a couple of months later, here I am, posting about my attempt at making the chutney!

The ingredients are pretty much the same, only the proportions are somewhat different, because I made a larger quantity than specified in the recipe (me being forced to use up some tomatoes that were getting suspiciously soft – and how many times have you heard THAT from me about some vegetable or other?). Oh okay, I also substituted a couple of ingredients…

It’s a pretty good chutney and keeps well for a day or so. Probably would live a bit longer in the fridge, but I didn’t bother with that.

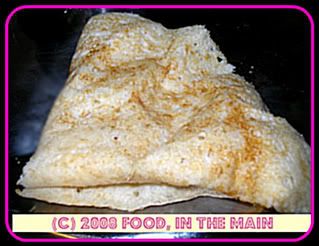
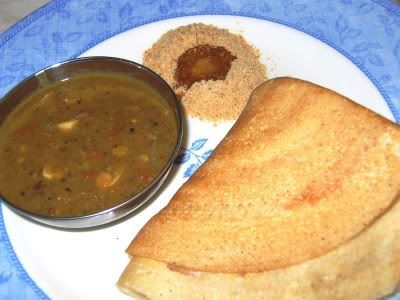
I had it with dosas made with the muthu samba rice that I nearly threw out...


but I’m glad I didn’t, because now I can send this post off to
Srivalli’s Dosa Mela in the happy aftermath of my samba experiment!

Recipe for:
Chettinadu tomato chutney


Ingredients:

2 medium onions, chopped
5-6 small tomatoes, chopped
½” piece ginger, chopped or sliced
2 tbsp chana dal
1 tbsp urad dal
¼ tsp fenugreek seeds
Turmeric – a pinch
1 tbsp chopped coriander
1 tbsp mint leaves, chopped
4 dried red chillies (or to taste)
Pinch of asafoetida powder (optional)
1 tbsp and 1 tsp oil
Salt to taste
1 tsp mustard seeds
A few fresh curry leaves, torn in half

Method:

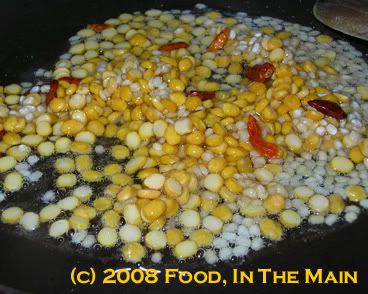
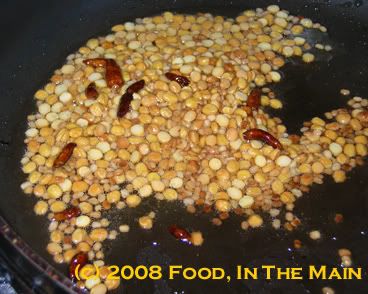
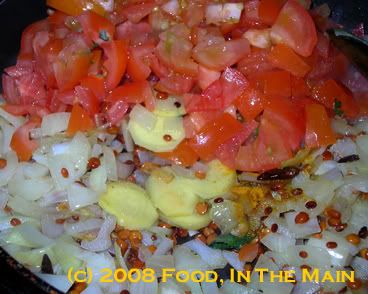
1. Heat 1 tbsp of oil, and red chillies, urad dal, chana dal, fenugreek seeds and asafoetida powder.


2. Stir till the dals turn golden brown,


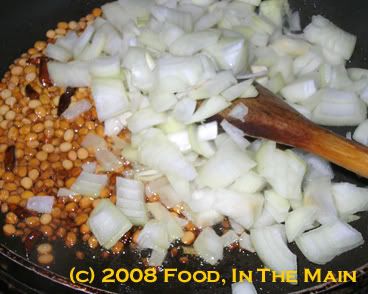
then add onion and cook till soft and translucent.


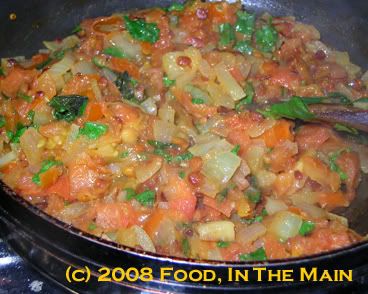
3. Then add the chopped tomatoes, ginger and turmeric powder and cook till the tomatoes turn mushy.


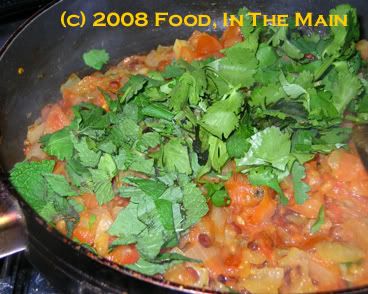
4. Add the mint and coriander leaves and stir them in.


Cook for a minute or two, then turn the heat off.


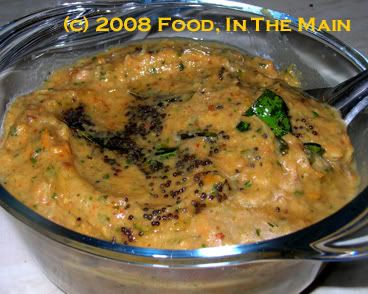
5. Once the mixture is cool, grind it to a fairly smooth paste (with maybe 2-3 tbsp of water if required) and mix in salt to taste.

6. Heat the remaining tsp of oil in a small pan. Put in the mustard seeds and curry leaves, cover and let the seeds pop.


7. Pour this tempering over the tomato chutney and serve with dosa, idli, chapati, etc.

Monday, February 18, 2008

Attack of the dry red chillies - and Sra's Sambar Kaaram

This isnt so much about a recipe as about an experience - one that I never, ever, EVER want to undergo again. As far as I'm concerned, it was more traumatic than any other disaster I've had in the kitchen. Yeah, it even beat cakes that wouldnt rise, cakes that looked and tasted like sweetened Fevicol, muffins that refused to part from their cases, rice that congealed into a lump, dosa batter that over-fermented and bubbled over spectacularly all over the kitchen counter and thence to the floor with a smell reminiscent of damp rotting garbage... and so on. Those disasters, difficult as they were to deal with, were restricted to me and my ego - they didn’t affect anyone else. Especially physically.

But the occasion I'm talking about very nearly forced us to evacuate the house, it was that bad. Let me start at the beginning, though. Ever since I saw Sra’s
sambar kaaram post on her blog When My Soup Came Alive, I’d been wanting to make it. It sounded like just the thing – versatile enough to be used as molagapodi or as emergency seasoning/added flavour for vegetables and so on.

The first item on her list of ingredients was dry red chillies. Now I only had fiery little red chillies, not the long, less hot ones that are more commonly used in Indian kitchens. I’d been looking for the latter, but for some reason they’re not available on the online grocery shop I use or in the Indian shop in Telford. The only other place I knew of was Birmingham, and it certainly wasn’t worth the trip there for just one item.

Anyway, the chillies I had were termed “extra hot chillies” – but they didn’t have a more specific name. I suspect they were birds eye chillies, because they were less than an inch long. I wasn’t going to make sambar kaaram in the quantities specified by Sra, so I scaled down the recipe to more manageable proportions – and cut down on the little red devils even more, knowing how potent they were.

Dry-roast the ingredients separately, the instructions said. The first item was the chillies. At this point, I should have foreseen what would happen – and if any of you would have realised it, if you were in my position, hats off to you. I guess I didn’t have my thinking cap on that day. So what I did was throw about 1/8 cup of the little dry red chillies in my hot pan and start dry-roasting them.

I had taken the precaution of shutting the doors and windows and turning on the extractor fan, so I wasn’t too worried about any fumes affecting Pete. I expected some fumes, because dry-roasting red chillies always releases fumes, but I was confident of being able to handle it without much trouble.

Within a few moments, though, it felt like the air in the kitchen had been replaced with some toxic gas. The fumes from the chillies were extremely potent – I could hear Pete coughing in the next room. I didn’t want to open the kitchen door to go out because I knew the fumes would escape out there, making it even worse for Pete. So I turned off the heat, hoping that the air would soon clear. But it just seemed to get worse, and every breath I took felt like I was drawing fire into my lungs. I was coughing so hard that I couldn’t breathe, and my eyes were stinging. I opened the window to let in fresh air, but that didn’t help either. I had panicky thoughts of the fumes getting into my neighbour’s garage and affecting them as well, imagining that they would alert the police about poison gas and I'd be arrested as a terrorist for attempted biological warfare or for disturbing the peace or poisoning the neighbours or something. I know it sounds ridiculous and exaggerated, but those fumes were no joke, believe me.

Eventually I had to get out of the kitchen, and it DID affect the other rooms when I opened the door to get out – but it wasn’t as strong out there as it was inside. Besides, we fled upstairs after opening the doors to the conservatory and the back garden. Still, it took a couple of hours before I could muster up the courage to re-enter the kitchen and even then the residual fumes started me coughing again.

I’m not kidding when I say that chemical warfare had nothing on those red chillies – they would be a cheap, deadly and most effective way to incapacitate any enemy… as long as you could ensure that the fumes didn’t get back to you!

That was a lesson learnt the hard way… but those are the lessons that you never forget, right? I treat those little red bombs with the greatest respect now.

So did I throw them away? Not on your Nellie, not after all the trouble I’d gone through! I made the sambar kaaram, and it was as tasty as I’d imagined it on reading Sra’s recipe. Of course it was hideously hot despite my having reduced the amount of chillies when I scaled down the ingredients... so I had to repair it by adding more of the other items on the list.

Oh, other than reducing the quantities used, I haven’t changed Sra’s recipe or instructions.

Recipe for:
Sambar kaaram

Dry red chillies: 50 gm
Coriander seeds: 25 gm
Fenugreek/Methi seeds: 5 gm
Cumin/jeera seeds: 5 gm
Black gram/urad dal: 10 gm
Salt, to taste
Garlic cloves: to taste (I used 10 fat cloves for a very garlicky taste)

Method:

1. Dry roast the first five ingredients separately.

2. Let cool and grind to a powder, then add salt.

3. Crush garlic roughly, add to the powder and run it in the grinder again.

4. Store in an airtight container.

Wednesday, March 08, 2006

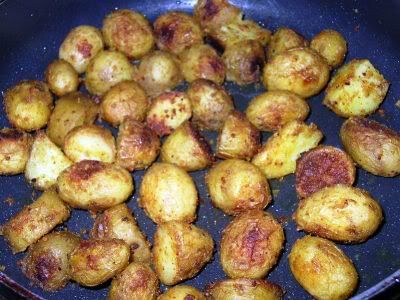
Pan-roasted baby potatoes

I love miniature potatoes - especially pan-roasted. They were not always available at the local market when we were kids, so it was good fun when they were being sold. I would help pick out the roundest, smoothest potatoes, trying to keep them as much of a size as possible. Once they were washed and scrubbed of all dirt, my mother would roast them in a big wok with the skins on. As far as I was concerned, the skins were very nearly the best part of the potatoes - slightly crisp, spicy and sort of tight, resisting being bitten into for just a fraction of a second before giving way.

Cooking baby potatoes this way means that the usual tempering of mustard seeds and urad dal would not "stick" but just rattle around at the bottom of the wok, getting burnt - so I evolved my own tempering powder. This time I was a bit lazy (and short of time) so I used the
molagapodi I'd made earlier, but usually I make the tempering powder separately. It's worth it.

Recipe for:
Pan-roasted baby potatoes


Ingredients:

1/2 kilo baby potatoes, skin on
Salt to taste
2 tbsp oil

For the tempering powder:
1 tsp chana dal
1 tsp urad dal
1/4 tsp fenugreek seeds
1/2 tsp black peppercorns
1/4 tsp fennel seeds
1/2 tsp mustard seeds
2-3 red dry red chillies (optional)

1 tsp gram flour
1 tsp rice flour

1. Roast all the tempering ingredients (other than the gram flour and rice flour) until the chana and urad dals are a light golden brown. Set aside to cool.

2. When cool, grind them all to a powder that is the texture of coarse sand. Mix with the gram flour and rice flour.

3. In a wide pan, heat 1 tbsp oil. Add the potatoes and stir to coat. Cover and let cook for 10 minutes on low, or until the potatoes are just done.

4. Take off the lid, sprinkle on the prepared tempering powder and salt to taste, and mix well. Turn up the heat to medium-high and pour over the remaining tbsp of oil.

5. Let the potatoes roast, stirring occasionally to ensure they crisp evenly and dont burn.

6. Serve hot as a side with rice and any sambar/kuzhambu.

Tuesday, January 31, 2006

ARF/5-a-day Tuesday #5 - Tomato thokku (chutney)

Sweetnicks: ARF/5-A-Day Tuesday #5#links

A pretty simple entry for this week's ARF/5-a-day event. Since Pete insisted on cooking dinner for us, I dont have any photographs of the yummy mixed vegetable stir fry he made. He's the sort of person who doesnt want anybody in the kitchen while he's cooking up his magic. This arrangement always works out fine for both of us, and this time I watched Malcolm in the Middle in happy contentment.

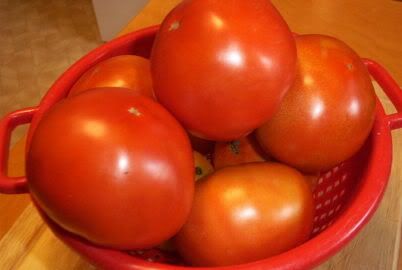
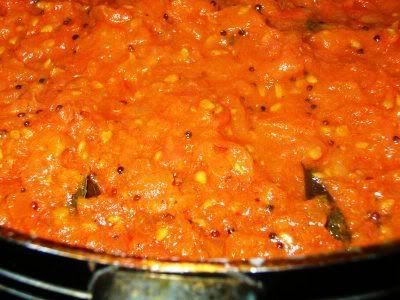
But to show willing for ARF/5-a-day, and because I had a surfeit of tomatoes, I made a savoury chutney (thokku, in Tamil). This is dead easy to make and keeps for a week, refrigerated. It's a versatile item, this thokku. I use it as a spread for savoury sandwiches, as a side-dish with idlis or dosas or even chapatis, as a spicy accompaniment for curd rice, and as the base for making tomato rice. (I even use it as a dip for breadsticks, but that's probably just me.)


The taste of this thokku can be varied by adding different spices or herbs... green chillies, red chilli powder, a handful of coriander leaves, garlic, cumin seeds, coriander powder, even 1/2 tsp of toasted powdered fenugreek seeds - all these make for appreciable changes in taste. I wouldnt really advocate using them all at the same time, though.

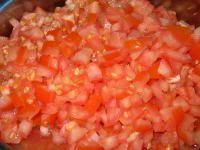
The texture of this thokku can also be a matter of personal taste. You can blitz the tomatoes (before cooking) in a blender for a smooth puree, or chop them up finely and cook them for a more chunky texture.


Since I had nothing to do but watch TV, I opted to chop the tomatoes this time - besides, I like my thokku chunky.

Recipe for:
Tomato thokku (chutney)


Ingredients:

8-10 ripe medium tomatoes, chopped or pureed
2 tsp mustard seeds
2 tsp red chilli powder (or to taste)
1/2 tsp asafoetida powder
1/4 tsp fenugreek seeds, powdered (optional)
1/2 tsp turmeric powder
1 tsp coriander seeds, powdered
5-6 curry leaves
Salt to taste
2 tbsp oil

Method:

1. Heat the oil in a wide pan. Add the mustard seeds, cover, and let them pop - then put in the various powders, curry leaves and fry for 15-20 seconds on high.

2. Lower the heat and add the chopped/pureed tomatoes. Stir well to mix.

3. Bring the heat up to medium-high and cover the pan. Let the tomatoes cook in their own juices till they soften and break down.

4. Once the tomatoes are soft, take the lid off and let it cook, stirring occasionally, till the liquid evaporates and the sauce reduces to a thick paste.

5. Let the thokku cool, then store in a clean airtight jar in the refrigerator.

Saturday, December 10, 2005

Vattha kuzhambu (tamarind-based gravy for rice)

I believe there is vattha kuzhambu powder available for purchase in some places... and I know that some people have a recipe for it. I'm not one of them. I make vattha kuzhambu like my mother does - with good old sambar powder. One thing to note - the sambar powder I use is the original stuff that I get from India, ground to a fine powder in a proper mill. I havent tried making vattha kuzhambu using MTR or GITS or any of those other ready-made varieties of sambar powder.

Anyway, in my opinion, you gotta add two kinds of dried berries to make an authentic vattha kuzhambu - marathakkalikai and chundakkai.


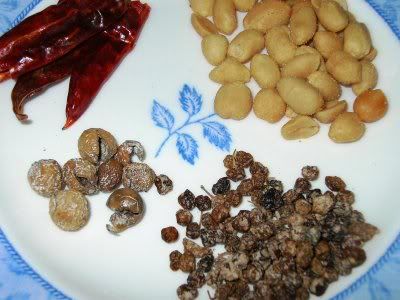
Clockwise from bottom right: Marathakkali, chundakkai, dried red chillies, roasted peanuts

Again, these are most likely acquired tastes. Chundakkai, especially, are really bitter if you bite into them... but I do like the overall aroma and the flavour they impart to the kuzhambu. Marathakali are much more my favourite - fried and mixed with ghee and rice, they're really rather yummy. Better yet, they're also supposed to be good for you. For cleansing the blood, or something like that. Okay, I really need to find out more about them. Watch this space.

Because vattha kuzhambu is not made with any significant amount of dal, South Indians get their protein by pairing it with paruppu thogayal - somewhat like hummous, but made with tuvar dal and bengal gram dal, rather than cooked chickpeas. It's usually bland. I havent had it or made it in years, to tell the truth, because I personally prefer to make
beans or cabbage paruppu usili as an accompaniment. Keerai (spinach) is another good side-dish for this kuzhambu.

Recipe for:
Vattha kuzhambu


Ingredients:

1 tsp tamarind paste, dissolved in 4 cups warm water
2 tsp sambar powder
1 tsp tuvar dal
1-2 tsp dried marathakkali berries
4-5 dried chundakkai

10-12 fenugreek seeds
1 tsp mustard seeds
2 dried red chillies, broken in half
1/2 tsp red chilli powder (optional)
3/4 tsp freshly ground black pepper
2-3 tsp oil
4-5 curry leaves
pinch of asafoetida
2 tbsp roasted de-skinned peanuts
1 tbsp rice flour or cornflour (for thickening the gravy if required)
Salt to taste

Method:

1. Heat the oil in a pan and fry the dried berries for 30 seconds or so.

2. Add the asafoetida, dry red chillies, curry leaves, mustard seeds, fenugreek seeds and tuvar dal to the oil and stir. Fry till the mustard seeds pop and the tuvar dal turns golden brown. The berries should be dark brown now, but be careful that they dont burn.

3. Add the sambar powder, ground black pepper and red chilli powder (if using) and stir. Then pour in the tamarind water.

4. If you are using the peanuts, drop those in as well and let the tamarind water boil for 15-20 minutes or until it has reduced by a third.

5. Mix the cornflour/rice flour with some water to make a pourable paste, and stir it into the kuzhambu. Add salt to taste.

6. Boil it for another 5 minutes, until it is the consistency you like.


7. Serve hot with steamed rice, keerai and paruppu usili or - for an extra special touch - pan-fried potatoes Indian style.


Friday, November 25, 2005

Pulikachal (spicy sauce/chutney for making tamarind rice)

I know, it's a clunky title. But I couldnt come up with a better description in English for pulikachal, which would translate from the Tamil literally into "tamarind (puli) boil-up (kachal)" - descriptive enough but not particularly useful informative.


I dont make pulikachal very often because there's always the impression at the back of my mind that it takes too long to make, and now that I'm working full-time, there doesnt seem to be enough free time to do all the things I want, let alone spend lots of time on just cooking. But the impression is not quite right, because once the masala has been made for it, pulikachal kind of cooks itself. It doesnt need looking after every single minute.

The best pulikachal I've ever had was when I was an apprentice sub-editor at the Indian Express, my very first job. My boss (and mentor) there was a wonderful old gentleman called C P Seshadri, fondly and universally known as "Master". He was a very knowledgeable person, a living bit of history - a contemporary of Mahatma Gandhi, Pandit Nehru and all the other stalwarts of the Indian freedom movement... and what is more, he was personally acquainted with them.

Anyhow, long story short, Master was very affectionate and kindly, more grandfatherly to me than my own grandpa! When he discovered that I didnt bother to bring lunch from home but sometimes ate junk food at the little stalls outside the office gates, he insisted on me sharing the hot lunch that was delivered to him from his home, waving aside my embarrassed protestations. (But the food... oh the food! - embarrassment quickly took a back seat!)

His wife (Mrs Master to me) was a very dignified, stern looking lady - but in reality very kind. Not to mention, a SUPERB cook. Everything she made was wonderful, but her tamarind rice was out-of-this-world good. Iyengars are traditionally considered to make the best pulikachal and I have to say that Mrs Master was living proof of that. I wish I'd been interested enough in cooking then to ask her for the recipe.

That said, though, I've evolved a pretty good recipe for pulikachal, based - but of course - on my mother's. My version has coconut in it (and yes, I do realise that for someone who doesnt like coconut in a lot of things, I seem to be using the stuff rather a lot!).

Anyway, while trawling through the Net a couple of years back, I came across a comment in some food-chat board that said the writer added toasted grated coconut to the masala for pulikachal. After a lot of thought - and a great deal of hesitation - I decided to follow that tip. And what a surprise to find that the coconut adds texture but doesnt register on the palate... and you cant smell it either. JUST the ticket.

No more babbling for now - here's my recipe!

Recipe for:
Pulikachal (spicy sauce/chutney for making tamarind rice)


Ingredients:

1 tbsp tamarind paste (Tamicon) dissolved in 6 cups warm water
or
1 lemon-sized ball of tamarind, soaked and pulped to make 6 cups of tamarind water

For the masala:

1 tsp oil
2 tbsp coriander seeds
1/2 tbsp chana dal
1/2 tbsp mustard seeds
1/2 tbsp cumin seeds
1 tbsp sesame seeds
1 tbsp urad dal
1 tbsp black peppercorns
1 tbsp peanuts
1/2 tsp fenugreek seeds
8 dried red chillies
10-15 curry leaves
1/4 packed cup grated coconut


For the tempering:

3 tsp oil
2 tsp mustard seeds
2 dried red chillies, broken in half
1 tsp urad dal
2 tsp chana dal
4 tsp roasted peanuts
2 tsp sesame seeds
5-6 curry leaves

Method:

1. Roast all the masala ingredients (except the coconut) in one tsp of oil till the seeds pop and the dals become a lovely golden brown. Set aside to cool.

2. Roast the grated coconut separately, turning it over frequently, till it turns golden brown. Let it cool as well.


3. In a coffee grinder or spice grinder, grind the roasted masala ingredients and the coconut to as smooth a paste as possible. This might be easier done a little at a time, because the resulting paste is very thick. Dissolve the paste in a cupful of water and set aside.

4. In a wide but deep vessel, heat 3 tsp oil. Add a pinch of asafoetida (optional), then all the tempering ingredients and cover till the seeds finish popping.

5. Pour in the 6 cups of tamarind water and stir. Let the water come to a rolling boil, then stir in the ground masala paste, mixing till well incorporated.

6. Leave the heat on high and cook the mixture till it reduces to a third and starts thickening. Add salt to taste now. (The reduction could easily take 20 minutes or more, depending on the depth and width of the pan. Basically, the deeper the pan, the longer the time).

7. When the pulikachal is thick (the consistency of honey, more or less), turn the heat off. It will become thicker still as it cools.

Pulikachal can be used to make tamarind rice - about a tbsp mixed with a cupful of cooked rice, but you can add more or less depending on taste. This recipe makes quite spicy pulikachal.

Sunday, November 13, 2005

Kara sambar with shallots and garlic

I was planning to make kara kuzhambu (a spicy-hot gravy for rice) but ended up with kara sambar using cooked thuvar dal. I must have cooked the thuvar dal with the intention of making something using it, forgot about it and decided to make kara kuzhambu instead. Then when the kuzhambu was almost ready, I (re)discovered the cooked thuvar dal. Since I didnt want to freeze it to use another day, I decided to dump it in the kara kuzhambu - and thus kara sambar came about. It made for great sambar with a somewhat different taste than when I make sambar the regular way.


I had the kara sambar with dosa and molagapodi made
Indira's way, and enjoyed every last bit of it! I will probably end up making this kara sambar more often... out of choice, not by accident.

Recipe for:
Kara sambar


Ingredients:

For the sambar:

1 cup cooked and mashed tuvar dal
1 cup shallots, chopped into thirds (If you dont have shallots, onions are ok to use)
1/2 cup garlic, chopped into chunks
2 cups tomatoes, chopped fine
1 tsp tamarind paste, dissolved in 4 cups water
1 tsp red chilli powder
1/2 tsp turmeric powder
1 tsp mustard seeds
1/4 tst each of urad dal, fenugreek seeds and cumin seeds
3-4 tbsp oil
1 tbsp fresh chopped coriander leaves for garnishing
4-5 curry leaves (optional)
Salt to taste

For the dry masala powder:

1 tbsp coriander seeds
1 tsp black peppercorns
1 tsp cumin seeds
1 tsp channa dal
1 tsp urad dal
5-6 dry red chillies
1/2 tsp fenugreek seeds

Dry-roast these without oil and grind to a fine powder. Reserve.

Method:

1. Heat the oil in a pan and add the mustard, cumin, urad dal and fenugreek seeds and the curry leaves, if using.

2. Cover the pan and let the seeds pop (about 30 seconds).

3. Add the chopped shallots and garlic and fry for a few minutes till they turn soft.

4. Then put in the chopped tomatoes and cook till the tomatoes are soft and mushy.

5. Mix in the chilli powder and turmeric, then add the tamarind water and stir.

6. Bring the mixture to a boil and let it bubble briskly for about 7 minutes, then add the dry masala powder and mix.

7. Let this simmer for five minutes before stirring in the cooked thuvar dal and salt to taste.

8. Boil for 3-4 minutes, turn off the heat. The mixture should be quite thick, but still pourable. If not, thicken it with a little cornflour and boil for another minute or so. Garnish with coriander leaves.

9. Serve over rice or as an accompaniment with dosa or idli.

Wednesday, June 08, 2005

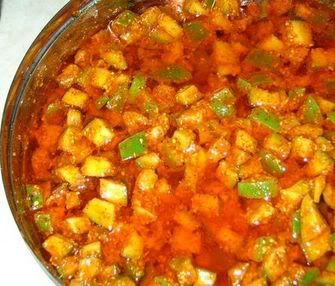
Quick mango avakkai (spicy mango pickle)

Image hosted by Photobucket.com

Unripe mangoes are difficult to come by in my local Tesco or Asda - well, let's say, those that are deliberately unripe, that is. I've had a couple of mangoes from there which were supposed to be sweet but weren't - but that's another story.

I love pickles - or oorugai - as they are known in Tamil. "Pickle" doesnt quite convey the correct meaning in English, because pickles as they are known in the western world are never chilli-hot... they're usually vinegary. Oorugai arent exactly relish, either, because relish is usually sweet-sour and, again, fairly vinegary. There isn't an exact translation from the Tamil to English. Or, for that matter, from the Hindi achaar either.

Oh well.

Anyway, pickle-making in India can be a long-drawn-out, complicated affair. Especially if you're from Andhra Pradesh, which makes the most wicked ones imaginable. If you know a good Andhra cook who makes authentic avakkai and is willing to share the finished product with you... consider yourself blessed.


Almost any vegetable can be made into pickle, Indian-style, but mango pickle is my personal favourite. I love it any way - grated and cooked into a gooey mess with red chilli powder and various spices (thokku); cut into small pieces with skin on, tossed with chilli powder and salt (molaga mangai) for instant gratification; salted, sun-dried, mixed with a fantastic combination of powdered spices and condiments, Andhra-style (avakkai); shredded and made into a sweet-sour relish that's heavenly with parathas (Chhundoo) North Indian style - I'll eat it all.

But since I dont have the patience nor do I get the strong sunshine necessary for sun-curing pickle, I made up my own recipe for instant "avakkai", a sort of amalgamation of various recipes I've read or been told about. It's beautifully simple, and it only needs an hour or so before it's ready to eat. Actually I didnt bother waiting the hour and it tasted just as yummy anyway.

Recipe for: Quick mango avakkai

Ingredients:

Unripe green mangoes, seed discarded and cut into small pieces - 2 cups
1 tbsp fenugreek seeds
3 tbsp black mustard seeds
2 tsp salt (or to taste)
4 tsp red chilli powder (or to taste)
1-1/4 cups cooking oil

Method:

1. Mix the cut mango pieces with the salt and red chilli powder, and set aside for about 10 minutes. Use a heat-proof bowl for this.

2. Blend the fenugreek seeds and mustard seeds together into a fine powder. Use a spice grinder or coffee grinder for maximum effect. Mix the powder with the mangoes.

3. Heat the oil until a droplet of water flicked into it splutters. Pour the oil over the mango-spice mixture and stir until well-blended.

This pickle is ready to eat at once but it will taste better for sitting a couple of hours to let the spices mellow a little. Stir well everytime, before eating.

This should keep well for about a week without refrigeration, as long as you dont use a wet spoon to stir it.