skip to main |
skip to sidebar
Until yesterday, I'd only ever seen nankhatai in photos on various blogs (most of them very, very beautifully shot photos, I might add). Never seen them in real life, never eaten any (not that I know of and not by that name), never baked any. Since Diwali is next week, and because I'd just bought a lovely big bag of pistachios recently, and also because our friends were going to drop by and I wanted to bake something for them with an Indian touch, I decided to make nankhatai with the pistachios and the last of my stash of saffron. The recipe I followed is on Nandita's Saffron Trail blog. My only two additions were pistachio nuts in the dough itself, and extra milk as the ghee alone was nowhere near enough to bind the mixture together to make a dough.
And what a good decision it was. I love saffron - although I don't use it often because it's expensive - and I love pistachios, and I know they're a flavour match made in heaven (fictitious place, obvs, but the match is very real and the flavours are very lovely!). These cookies are very moreish - they're not too sweet, the saffron flavour is awesome, the pistachios are delicious and the semolina gives the nankhatai a lovely crunch. Be sure to use fine semolina, though, otherwise, the nankhatai might have a sandy mouthfeel rather than crispness. Happy eating, people!
Recipe for: Kesar pista nankhatai (saffron pistachio cookies)
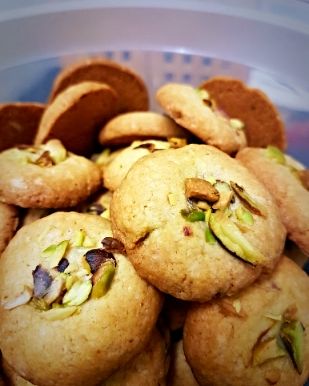
Ingredients:
1.5 cups plain flour
2.5 tbsp chickpea flour
1/2 tbsp fine sooji (semolina)
1/2 tsp baking soda
1/4 cup slivered pistachio nuts
2 tbsp finely chopped pistachios (optional)
1/2 cup powdered sugar
1/2 cup melted ghee (clarified butter)
1/4 tsp saffron strands, crushed in a small mortar-pestle
Milk as required
Method:
1. Preheat the oven to 180C/350F.
2. Sift together the flours, semolina and baking soda in a medium bowl. Mix in the slivered pistachio nuts and set aside. Warm 2 tbsp of the milk and let the saffron steep in it for 5 minutes.
3. In a large bowl, mix together the ghee, powdered sugar and saffron-milk until smooth, then add the flour mixture. Add extra milk a tablespoon at a time until you can form a soft dough. Be careful not to add too much liquid.
4. Roll the dough into balls the size of large marbles and place on a cookie sheet lined with non-stick paper or foil, leaving a gap of about 1.5 inches. At this point, if you wish, you can make a dimple in the centre of each cookie with your thumb and sprinkle a pinch of the chopped pistachios. If not, just flatten each ball slightly and place in the preheated oven.
5. Bake for 15-18 minutes or until the cookies are a pale brown, switching the tray around after 10 minutes so that they brown evenly.
6. Remove to a wire cooling rack. The cookies will crisp up as they cool.
7. Try not to eat all the nankhatai yourself.
I've always thought that puris referred to only one thing - small, airy, puffed up fry-breads made with plain or wholewheat flour. When I came across a recipe for "besan ki puri" on The Veggie Hut, I fully expected it to be a deep-fried recipe, differing from a regular "atte ki puri" (wheatflour puris) by the addition of besan or chickpea/gram flour. I was quite surprised to find that these besan ki puri were merely shallow-fried, and they looked like regular chapaties or parathas. So perhaps besan ki puri is a regional or colloquial name for this type of stuffed paratha/chapati, although I'm not sure where this recipe originated or which State it's from.
The recipe was interesting, though - I'd never come across a seasoned chickpea flour filling for chapaties, nor even heard of such. The filling was simple enough to make, and certainly I found it a lot easier to handle while rolling out the chapaties. (Wetter fillings have been known to squirt out annoyingly no matter how gently I wielded the belan (rolling pin).)
Until now I've only had the western-type pastry rolling pin, very large and very heavy and the same width from end to end, compared to the Indian ones which are far lighter and tapered towards the ends. I've recently acquired one of the latter kind, so yaaay! I'll have to see if they make a difference while rolling out chapaties. It could well be that my faulty technique, and not the rolling pin, is the factor that brings the filling leaping so joyfully and messily out of the chapati dough...
Anyway, what I discovered while rolling out these chickpea-flour-filled chapaties is that I got a few air pockets at the start... but some light pressure while rolling them out ensured that the air leaked away gently instead of literally tearing its way out of the dough. That's my kitchen tip for the day.
PS. The term "kitchen tip" does NOT imply that my kitchen is a rubbish area. Just so you're aware.
Recipe for: Chapaties with gram flour filling
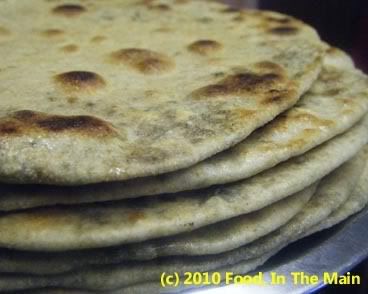
Ingredients:
3 cups wheat flour
Salt to taste
water as required
For the filling:
1 cup chickpea/gram flour
5-6 green chillies, chopped finely
1 tbsp coriander powder
1/2 tsp cumin powder
2 tbsp dried fenugreek leaves (kasoori methi)
1 tsp red chilli powder
3-4 tbsp water 1 tbsp oil
Salt to taste
Pam or other non-stick spray (or oil for cooking)
Method:
1. Put the flour into a deep mixing bowl, add a little salt and knead to a smooth pliable dough using as much water as required. Cover the dough and let it rest for 15-20 minutes. 2. Heat the oil in a frying pan and add the green chillies, coriander powder, cumin powder and kasoori methi.
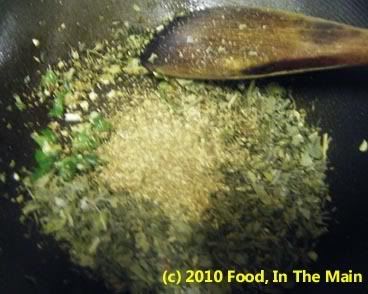
3. Stir-fry them for 30 seconds on high heat.
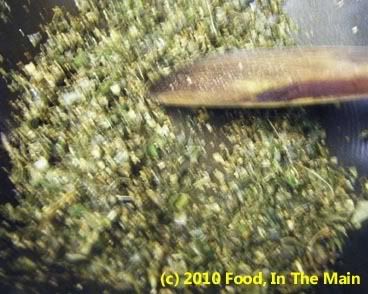 4. Add the besan (gramflour/chickpea flour), stir till the ingredients are well mixed.
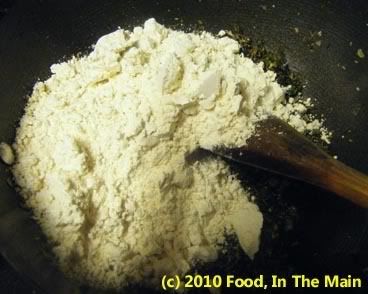
5. Continue stir-frying on medium heat, till the flour turns a darker shade and emits a roasted aroma. Be careful not to burn the flour. 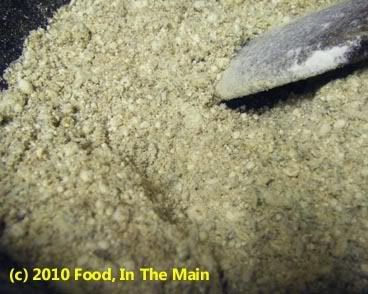
6. Add the turmeric powder, red chilli powder and salt to taste, and mix well. 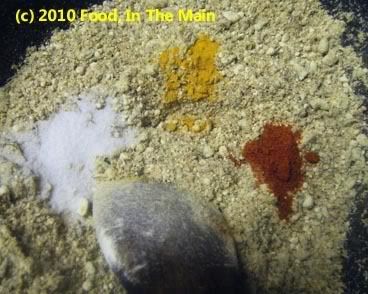
7. Now add water, tbsp by tbsp, stirring between each addition, 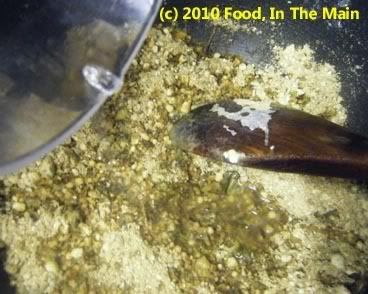 until the roasted flour begins to come together in clumps.
  Only add enough water to lightly moisten all the flour, but it's better to stop while the flour is still a bit dry than to add too much and make it sticky wet. If that happens, the best thing to do is start over. Let the filling cool completely once it has become moist.
8. To make the chapaties, pinch off a ping-pong ball sized piece of dough. Flatten it in a saucer of dry flour, shake off the excess flour, then roll the dough out into a 4" circle. Place 2 tbsp of the filling in the centre. 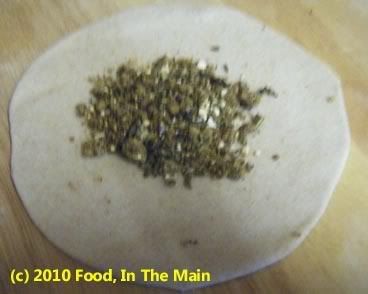
Bring the edges of the chapati together to enclose the filling completely. 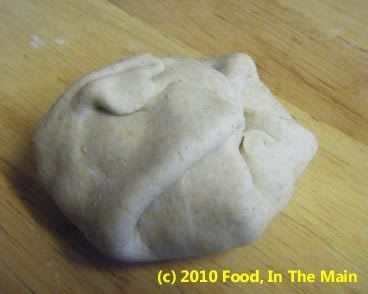
Turn it over so that it lies seam-side down, then start rolling it out again. If any air pockets are visible (the puffed up area), continue rolling but do it more gently, so as to get rid of the air. 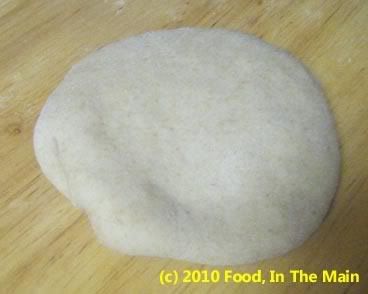
Continue rolling out the chapati till it is evenly thin all over. 
9. Heat a tava or frying pan on medium heat, then place a chapati on the tava for 10-15 seconds, or till small brown spots appear. 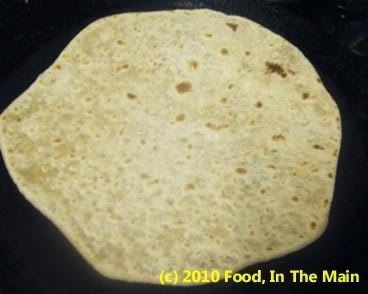
Turn it over and spray the partially cooked side with Pam, then flip it over again to spray that side as well. 10. Cook on medium heat for about 2 minutes for each side, pressing down with a spatula to let the chapati cook evenly all over. Keep the cooked chapaties covered and warm in a clean cloth-lined plate while you make the rest of the chapaties the same way. They can be cooked till very crisp (which will take longer), almost like a cracker, if you like. 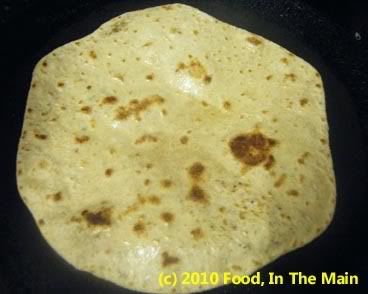
11. Serve hot with a curry, or with pickles and yogurt.
This recipe is from Sunil Vijaykar's "Fresh Indian" cookery book. There are over 80 recipes, mixing both South and North Indian, but they're slightly more non-vegetarian oriented than not. This chapati seemed an interesting prospect from the breads section, but I have to admit that the picture of the finished dish in the book was a LOT more appetising looking than mine turned out. Maybe the chapatis in the book were cooked with a lot more oil than I did. That's my objective, unbiased, balanced explanation for it, anyway! Recipe for: Gram-flour chapaties with red onion and nigella seeds
Ingredients:
1-1/2 cups wholewheat chapati flour
1-1/2 cups gram flour
1 medium red onion, minced fine
2 green chillies, de-seeded if liked, minced fine
1 tsp nigella (kalonji) seeds
1 tsp cumin seeds
3 tbsp chopped coriander leaves
Salt to taste
Warm water for dough as required
Method:
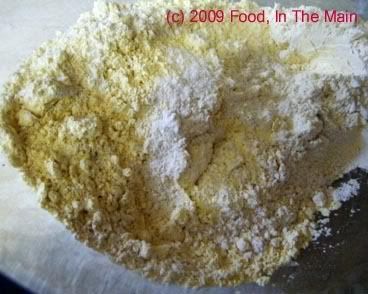
1. Take equal measures of gram flour and whole wheat flour (I used 1-1/2 cups of each) in a big bowl.
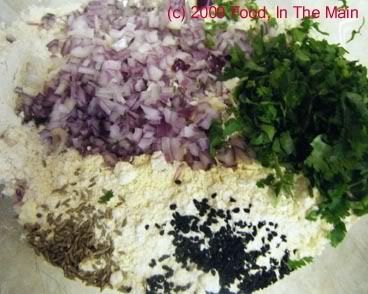
2. Add the minced red onion, minced green chilli, 1 tsp nigella (kalonji) seeds, 1 tsp cumin seeds, chopped coriander leaves and salt to taste.
3. Use enough warm water to make a soft dough. It shouldnt be sticky.
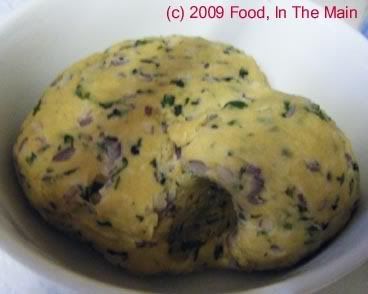
4. Knead for 5 minutes and let the dough rest for 10 minutes.
5. Pinch off a small lemon sized piece of dough and, using extra flour for dusting, roll it into a thin chapati.

6. Place on a heated tawa and cook for 30 seconds, then flip the chapati over and brush on some oil or melted ghee (I used a mixture of both).
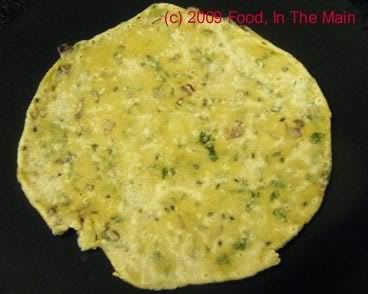
7. Turn the chapati over again and brush some oil on this side as well.
8. Use a flat spatula to press down gently on the oiled chapati so that it becomes evenly golden,

then do the same to the other side.
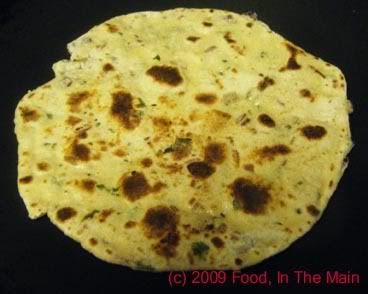
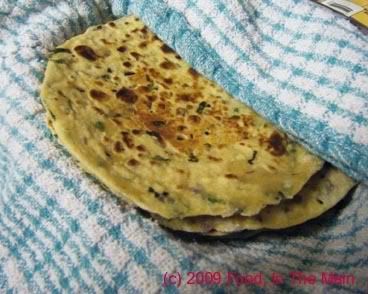
9. Keep the cooked chapaties warm in a clean tea towel while you make the rest of the chapaties.
These chapaties are best eaten warm and fresh. They get somewhat hard when cold. To re-heat, place the cloth-enfolded chapaties on a microwave safe plate and heat on high for 1 minute.
I've got a glut of recipes to post, but I've just been unable to make myself do anything to put them on my blog. Especially the ones that need more elaborate instructions than I feel like dealing with at the moment. Obviously I'm a dedicated foodie but my blogging muscle sometimes wilts a bit and doesnt want to hold itself up.
So here's a simple recipe, just to ease myself back into the food blogging world. Didnt help that Pete and I made a quick 6-day trip to Seattle last week... it only served to increase my laziness in the blogging department because I felt so utterly enervated. It wasnt a bad week but boy, the travelling to and fro really sapped my energy!
Anyway, I didnt feel like cooking either, yesterday, and Pete only wanted eggs and chips.

So I made the chips from scratch, based vaguely on Aunt Bessie's lightly battered oven chips (which we get here and which are tastier than regular oven chips - and less healthy, goes without saying). Mine is a much simpler version. Also, I didnt make a wet batter for the potatoes, just shook them up with some seasoned gram flour and baked them till golden and done. Pete dipped his wedges into sunny-side up eggs and I had mine with a yogurt dip - that is, I mixed idli podi with yogurt and used that as a dip. It was yummy!
Recipe for: "Dry batter" oven baked potato wedges

5-6 medium red-skin potatoes, washed and cut into wedges
2 generous tbsp gram/chickpea flour
1 tsp red chilli or cayenne powder (adjust to taste)
1/2 tsp coriander powder
1/2 tsp jeera/cumin powder
1/2 tsp freshly milled black pepper powder
Salt to taste
2 tsp oil
Method:
1. Mix the chickpea flour and the various seasonings (bar the salt) together.
2. Put the wedges in a large ziploc bag (or a large dry bowl), pour in the 2 tsp oil, close the bag and shake the potatoes well. Then add the seasoned chickpea flour and shake it all aain until the potatoes are coated as evenly as possible.

3. Spray a shallow baking sheet with Pam or line with silicone paper. Spread the seasoned wedges in a single layer and bake at 200C for 15 minutes.
4. After 15 minutes, pull the sheet out, sprinkle the wedges with salt, stir the wedges about and put back into the oven until golden brown and done.

5. Serve hot, with dips if preferred.
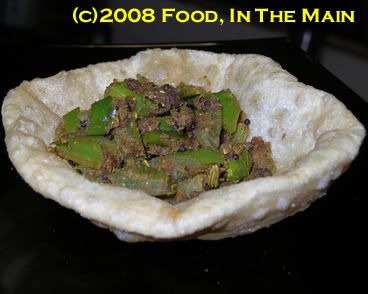
I came across the recipe for taporia/besan mirch on Vyanjanaa by chance, fairly recently, and was hooked. For once I didnt just mark the recipe and sit on it for a few months waiting for my cooking instinct to grow up and become an adult - I acted pretty much rightaway.
G of Vyanjanaa says to use chillies that arent very hot, but I didnt have any such beasties - my choices were fiery long green chillies or the completely gentle bell peppers. Being too chicken to use just the green chillies for this recipe, I decided to use a combination of the chillies and a green bell pepper which, if I may say so myself, was a Very Good Idea.
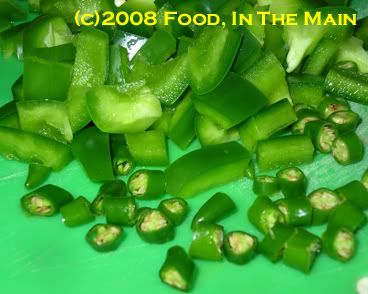
For those who are TOTAL wimps, omitting the chillies entirely and using just a green bell pepper will give you at least an idea of the taste of this really simple, quick recipe from Rajasthan.
Other than some more changes to the ingredients - omission of saunf (fennel seed) powder, increasing the quantity of besan, omission of red chilli powder as I know from experience that the green chillies I used are VERY hot - I followed G's cooking instructions to the letter. I have to agree with what she said in her post about this recipe: "simple ingredients, short cooking time and immense flavor and heat". I couldnt have put it better.
PS. G was going to get married in November 2007. Wherever you are, G, congrats and here's hoping that you have a long, happy and successful married life! I hope you'll come back to your food blog at some point.
Recipe for: Taporia with bell pepper
Ingredients:
3 tbsp besan/chickpea flour
5 hot green chillies, chopped into 1/2-cm thick chunks
1 large green bell pepper, de-seeded and cut into 1-cm pieces (about 1 cupful)
2 tbsp oil
1 tsp mustard seeds
1 tsp cumin seeds
1 tsp whole saunf (fennel) seeds
1/4 tsp heeng/asafoetida powder
1 tsp fennel powder
2 tsp coriander powder
2 tsp amchur (dried raw mango) powder
1/2 tsp turmeric powder
Salt to taste
3-4 tbsp water
Method:
1. Dry-roast the gram flour in a heavy-bottomed pan for 4-5 minutes on medium-low heat, stirring it all the while. You'll be looking for the flour to turn slightly darker in colour - it will also smell nice.
 |  |
(Be very careful while roasting because the flour burns VERY quickly. Stir it thoroughly all the time.) Take the pan off the heat when the flour is done, and tip the flour onto a plate to cool.
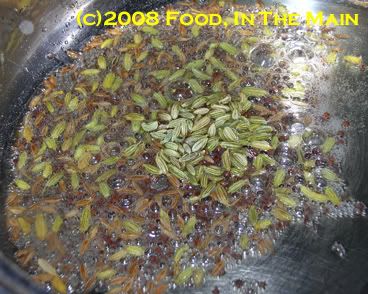
2. In the same pan, heat the oil. Add the mustard seeds, cover, and let the seeds splutter. Then add the cumin and fennel seeds and let them fry for 20 seconds in the hot oil.
3. Add the chopped chillies and bell pepper and stir till the ingredients are well mixed.
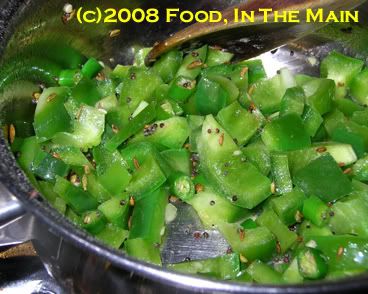
4. Now add 2-3 tbsp water,
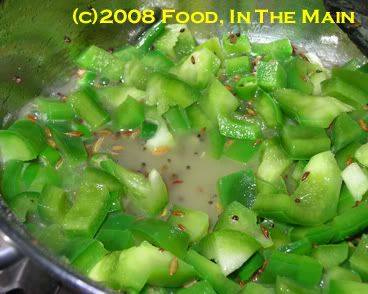
cover the pan, turn the heat back down to medium-low and let the peppers cook for 4-5 minutes.
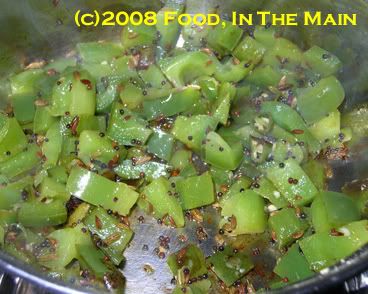
5. Remove the lid and add the various powders now, along with salt to taste. Stir till they are well incorporated with the peppers. (Add another tsp water now if the vegetable looks very dry.)
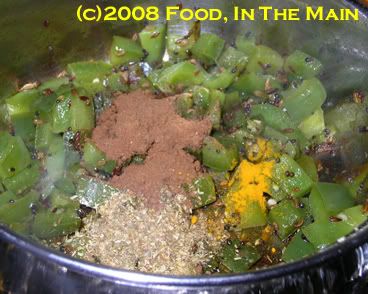
6. After 3 minutes, add the roasted gram flour and stir it in.
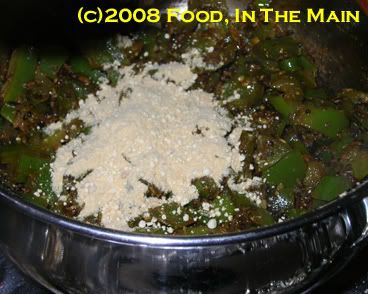
It will absorb any excess water in the pan. Keep scraping the bottom of the pan while stirring to dislodge any gram flour that is sticking to it.
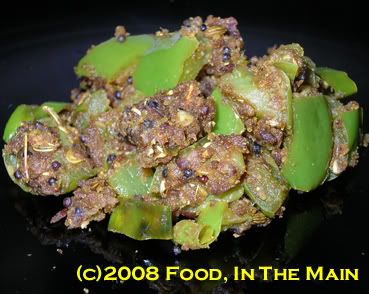
7. After a couple of minutes stirring, serve the taporia hot with chapaties or puris.
The word "muLlu" translates into "thorn" in Tamil - and it's an apt description for this savoury crunchy snack, because it DOES have little "thorns". That's because the plate with the star-shaped hole is used in the "murukku press".
I made this for post-Christmas holiday snacking since I was not enamoured of all the strangely potato flavoured crisps that appeared during that time. If you went by just the names alone, you'd think that nobody needed to cook a turkey or goose or anything else for Christmas. Why bother when you could get an entire Christmas feast of potato crisps, like "turkey with cranberry sauce", "roast lamb and mint sauce", "honey baked ham with onions". Right?
Wrongo.
We didnt buy a single pack of those ambitiously stupid Christmas crisps. We made do with some home-made snacks and salted nuts.
Actually I almost didnt make these mullu thenkuzhal when I discovered that the recipe called for moong dal flour. I didnt have any such thing. But then I decided to make the extra effort (Christmas, after all) and ground moong dal to as fine a powder as possible in my little coffee grinder. It took a lot sifting and grinding, and even more patience, but I persevered. And finally I had the 1/2 cup of very fine moong dal flour required for the recipe.
Next time I make this it will be a LOT simpler, because I'm asking my mother to bring some moong dal and urad dal flour from India when she comes in end-Feb. Cant wait for these and other goodies to arrive with her but I'll be patient till then. Or burst trying.
Recipe for: MuLlu thenkuzhal
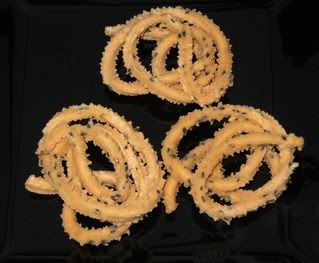
Ingredients:
Rice flour - 2-1/2 cups
Gram flour (besan) - 1/2 cup
Moong dal flour - 1/2 cup
Urad dal flour - 1/8 cup
Salt to taste
1/4 tsp asafoetida powder
2 tsp red chilli powder (or to taste)
2 tbsp sesame seeds (I used black for contrast)
1 tbsp butter
Water as required
Oil for deep frying
Method:
1. Mix all the ingredients in a large bowl.
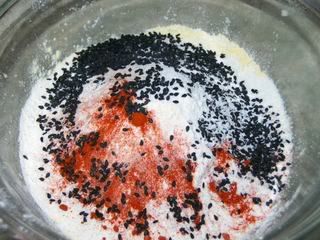
Make a fairly stiff dough, using only as much water as required - the dough should be pliable but not anywhere near runny. Keep covered with a damp cloth.
2. Heat the oil on high. When a small piece of dough dropped in rises to the top immediately, the oil is at the right temperature.
3. Pinch off a portion of dough to fit into the press (use wet fingers to push the dough in, if it's turned out too stiff) and quickly make squiggly round shapes - 3 or 4 at a time, or one large one, as you like.
4. After a minute or so, turn the heat down to medium high and fry the thenkuzhal, turning occasionally, till it is golden brown and crisp. Drain on absorbent paper and store in airtight tins. This keeps fresh for 3-4 weeks - assuming it doesnt get polished off in the first two days!
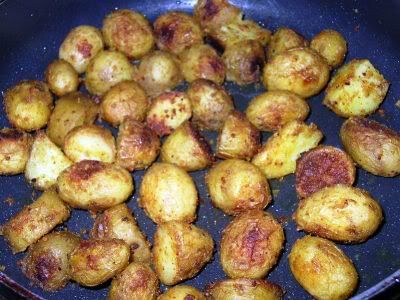
I love miniature potatoes - especially pan-roasted. They were not always available at the local market when we were kids, so it was good fun when they were being sold. I would help pick out the roundest, smoothest potatoes, trying to keep them as much of a size as possible. Once they were washed and scrubbed of all dirt, my mother would roast them in a big wok with the skins on. As far as I was concerned, the skins were very nearly the best part of the potatoes - slightly crisp, spicy and sort of tight, resisting being bitten into for just a fraction of a second before giving way.
Cooking baby potatoes this way means that the usual tempering of mustard seeds and urad dal would not "stick" but just rattle around at the bottom of the wok, getting burnt - so I evolved my own tempering powder. This time I was a bit lazy (and short of time) so I used the molagapodi I'd made earlier, but usually I make the tempering powder separately. It's worth it.
Recipe for: Pan-roasted baby potatoes
Ingredients:
1/2 kilo baby potatoes, skin on
Salt to taste
2 tbsp oil
For the tempering powder:
1 tsp chana dal
1 tsp urad dal
1/4 tsp fenugreek seeds
1/2 tsp black peppercorns
1/4 tsp fennel seeds
1/2 tsp mustard seeds
2-3 red dry red chillies (optional)
1 tsp gram flour
1 tsp rice flour
1. Roast all the tempering ingredients (other than the gram flour and rice flour) until the chana and urad dals are a light golden brown. Set aside to cool.
2. When cool, grind them all to a powder that is the texture of coarse sand. Mix with the gram flour and rice flour.
3. In a wide pan, heat 1 tbsp oil. Add the potatoes and stir to coat. Cover and let cook for 10 minutes on low, or until the potatoes are just done.
4. Take off the lid, sprinkle on the prepared tempering powder and salt to taste, and mix well. Turn up the heat to medium-high and pour over the remaining tbsp of oil.
5. Let the potatoes roast, stirring occasionally to ensure they crisp evenly and dont burn.
6. Serve hot as a side with rice and any sambar/kuzhambu.
Onion bhajis - onion pakoda to you and me - is probably the UK's most favourite starter before any British-Indian meal, as much as chicken tikka masala is its most favourite "Indian" dish. Serve this up to any normal British person who likes Indian food, and you will be instantly elevated to the status of "fantastic cook". I say this as a person who has earned the title from her friends and from her husband's friends and really anybody who's had onion bhajis at my place :)
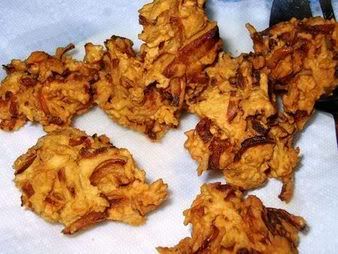
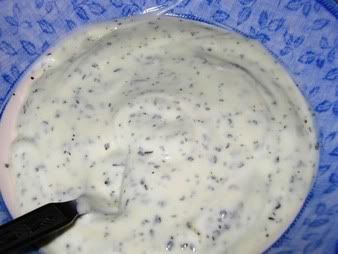
After eating the much-touted bhaji from an "Indian" takeaway restaurant here for the first time, it wasnt exactly rocket science to figure out what went in it - basically gram flour, some crushed coriander seeds, some chilli powder and salt added to sliced onions and deep-fried. Served with the ubiquitous "mint raita dipping sauce" - which was a spoonful of ready-made mint sauce mixed with a cupful of yogurt. That was it. And honestly speaking, that IS it even when I make bhajis at home. Nothing more, nothing less. Make no mistake, though... the things are tasty and extremely more-ish!
When I duplicated the recipe at home for Pete's friends one evening, though, I was completely taken aback by how much they raved about it. I tried telling them that it wasnt difficult to make, far from it... but they just wouldnt have it. Faced with so much insistent praise, I decided to accept the inevitable and gracefully let myself be crowned the Queen of Bhajis. Okay, so it's a dubious title, but mine own!
Just dont forget to address me as Your Royal Bhajiness.
Recipe for: Onion bhaji - UK-style
Ingredients:
3-4 medium sized onions, sliced thinly
About 1-1/2 cups gram flour/chickpea flour
1 tsp red chilli powder (more or less acc to taste)
1 htsp crushed or powdered coriander seeds
Salt to taste
3/4 cup water, more or less, as required
Oil to deep fry
Method:
1. Put the sliced onions in a big bowl and add the chilli powder, coriander powder and salt. Mix with a big flat spoon till evenly distributed.
2. Add the chickpea flour a little at a time, stirring again to coat the onions.
3. Now sprinkle water all over this, adding just enough to make the flour moist and stick to the onions - and it WILL be sticky.
4. Heat the oil - it's ready when a bit of bread sizzles immediately. Drop in the bhajis by the table spoon or by hand in bite-sized lumps. Fry on medium-high until golden brown and crisp on the outside. The inside should be soft but not raw.
5. Serve hot with instant mint raita as a dip. These are also nice with tomato ketchup or other condiments.
Recipe for instant mint raita:
1 tsp ready-prepared mint sauce or mint jelly
1 cup yogurt, beaten lightly
1/4 tsp salt
Mix the ingredients well and serve with the bhajis.
I used to think that poli was a South Indian recipe, until I found out that Maharashtrians make it for Makar Sankranti (harvest festival) - which necessitated a change in my world view somewhat, because people from the four Southern Indian States consider Maharashtra and Mumbai-ites to be North Indians... whereas people from the North India consider Maharashtrians to be more South Indian than north.
It doesnt help that Marathi as a language and its script are so much closer to Hindi and its script and not in the least like Tamil, Malayalam, Kannada or Telugu. All very confusing.
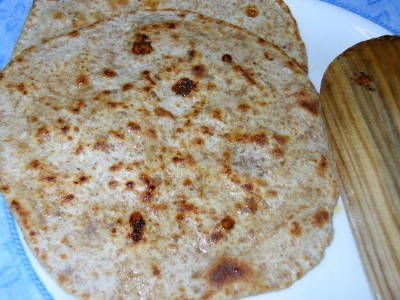
But to get back to the delights of poli... I might have mentioned this before, but I like coconut in very, very few sweet dishes. Poli isnt one of them dishes. So when I came across a recipe for poli that seemed different from the norm because of the stuffing ingredients - it contained sesame seeds but very little gram/chickpea flour and not any chana dal at all (cooked chana dal stuffing is what I've had thus far) - I was pleased. I love the taste of sesame in savoury and sweet dishes, so that was another plus.
I have to say that the poli made this way didnt stay soft for long. The traditional ones I've had, with mashed cooked gram dal & jaggery filling, are meltingly soft and delicious, especially with a dollop of ghee on top. The sesame-seed poli I made were delicious too, but - have I said this before? - not soft. Still, that didnt stop me scarfing them down, so I guess it's worth putting up the recipe.
If anybody wants to know how to make them soft... they'll have to look elsewhere for the answer. And if anybody does find the answer, would they be kind enough to pass on the info to me too, pleeeeeeeeeeeeease?
Recipe for: Sesame seed and jaggery poli (slightly adapted from Cuisine Cuisine)
Ingredients:
For the stuffing:
1 cup jaggery, powdered
1 htbsp gram/chickpea flour
1 tsp cooking oil
1 tbsp poppy seeds
2 tbsp white sesame seeds
1/4 tsp cardamom seeds, powdered
For the poli:
2 cups plain flour
1 cup wholewheat flour
1 tbsp warmed oil
1/4 tsp salt
Warm water as required for making the dough
Plain flour for dusting
Ghee for shallow-frying
Method:
1. Make a soft but not sticky dough with the poli ingredients. Let it rest covered for about 30 minutes.
2. Heat 1 tsp oil in a little pan and roast the gram flour, stirring constantly, until the raw smell is gone (about a minute). Be careful not to burn the flour. Set aside to cool.
3. Roast the poppy seeds and sesame seeds on dry heat over medium flame till they start to turn golden. Grind these in a spice of coffee mill, together with the cardamom powder, into a fine powder. Mix with the roasted gram flour and reserve.
4. Put the powdered jaggery in a bowl, sprinkle a tsp of water, and melt in the microwave for a 45 seconds. Take it out and give it a stir. If it needs to melt a bit more - ie, if there are any dry bits - put it back in the microwave for 20 seconds. Dont overcook it by microwaving it for too long.
5. Quickly mix the sesame-poppy seed powder with the jaggery, making sure it's thoroughly mixed. Set aside to cool.
To make the poli:
6. Knead the dough well, then make small balls (slightly smaller than a golf ball).
7. Roll out two balls into palm-sized circles.
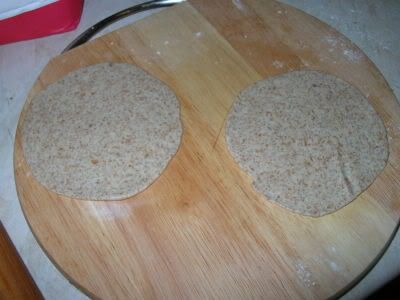
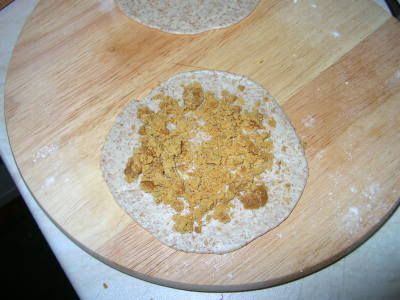
8. Sprinkle some of the filling all over one dough circle (break up any lumps with your fingers), then cover it with the other circle.
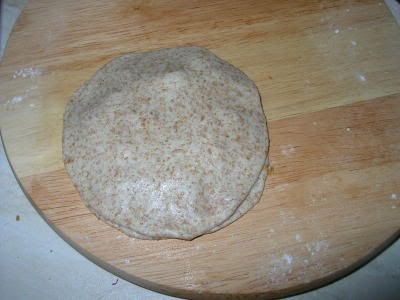
9. Dust the top with flour and gently roll out the dough circle into a slightly larger circle, so that the filling is sandwiched.
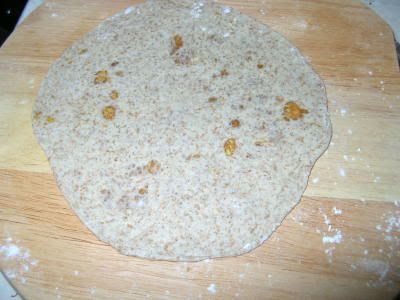
10. Then roll it out some more into a thin round.
11. Heat a tava or frying pan (keep it on medium heat) and transfer the poli to it. Cook for a few seconds on one side, turn it over and smear that side with ghee. Flip it over once again and smear the other side with ghee as well. Shallow fry until the poli begins to get golden brown spots on both sides. Serve warm.
Note: The jaggery will melt in the heat and might ooze out - in that case keep an eye on it so that it doesnt burn. A little extra direct heat gives a caramelly flavour that is very nice, but burnt jaggery is quite awful to smell and taste.
I guess nada pakoda is one of those things that can only be made by using a traditional "press" that's ubiquitous in any South Indian household. If there's another way of doing it, I'm not aware of it. I suppose it might be possible to roll the dough out and cut into thin strips, but I dont think it would be worth the trouble.
However, with the use of a press, it's really easy and the end result extremely more-ish. Addictively more-ish, actually. The nada-maker is atriumph of simplicity. It's basically two cylinders with handles at the top, one cylinder hollow and the other slightly smaller (and not hollow) to fit inside the hollow one - as seen in the photos below. There are usually 3 or four plates with holes or slits of varying sizes (to make different kinds of savouries), which go inside the hollow cylinder - not all at the same time, though!
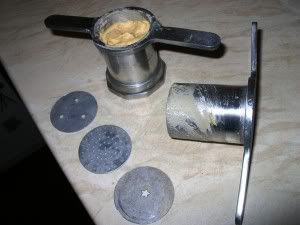
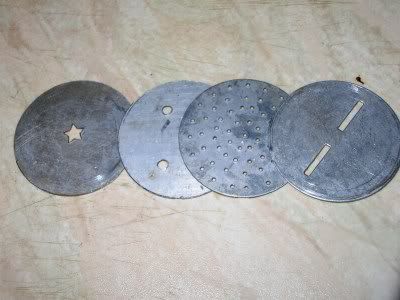
The dough is put inside the hollow cylinder with the appropriate plate inserted at the bottom, and the sealed cylinder is placed on top. Then using both sets of handles, the top cylinder is pushed into the bottom one, which forces the dough out in the desired shape - flat and ribbon-like, long and round like spaghetti, thin vermicelli-like, etc. The ribbon pakoda plate is the one on the far right.
What I made was the basic version but to vary the taste, a tbsp of garlic or onion paste can be added to the dough
Recipe for: Nada (ribbon) pakoda
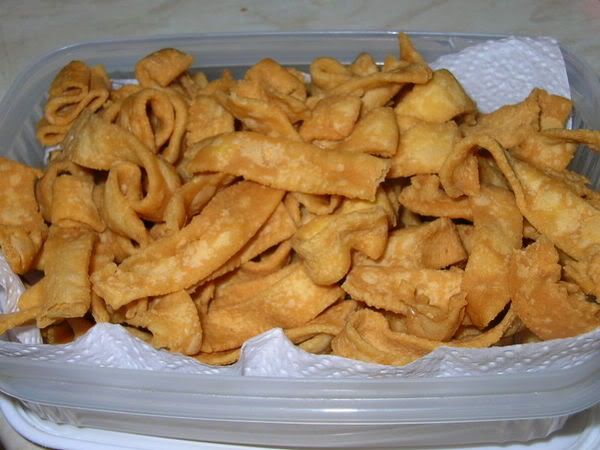
Ingredients:
2 cups rice flour
1 cup gram/chickpea flour
1 tsp red chilli powder
pinch of asafoetida
1 tbsp butter
1 generous tbsp white sesame seeds
OR
1 tbsp cumin powder
Salt to taste
Water as required to make dough
Oil for deep frying
Method:
1. Make a fairly stiff dough with all the ingredients - not TOO stiff, or it will be very difficult to press it through the mould, and not too "loose" or the dough will absorb too much oil and fall apart in the oil itself.
2. Heat the oil in a wok. If a piece of bread rises instantly to the top when dropped in, the oil is at the right temperature.
3. Break off a piece of the dough, roll it gently in your hand so that it fits into the hollow cylinder. (Leave a 1/2 cm gap at the top so that the dough doesnt come out messily at the top while being pressed.)
4. Use the press directly over the hot oil and squeeze out the dough in a circular motion. You can make 2-3 little portions or one big one which can be broken up later.
5. Fry the pakoda on medium heat till golden brown on both sides. Drain and place on absorbent kitchen paper. Store in an airtight tin when cool.


