Showing posts with label milk. Show all posts

Saturday, October 22, 2016

Kesar pista nankhatai (Saffron-pistachio cookies)


Until yesterday, I'd only ever seen nankhatai in photos on various blogs (most of them very, very beautifully shot photos, I might add). Never seen them in real life, never eaten any (not that I know of and not by that name), never baked any. Since Diwali is next week, and because I'd just bought a lovely big bag of pistachios recently, and also because our friends were going to drop by and I wanted to bake something for them with an Indian touch, I decided to make nankhatai with the pistachios and the last of my stash of saffron. The recipe I followed is on Nandita's Saffron Trail blog. My only two additions were pistachio nuts in the dough itself, and extra milk as the ghee alone was nowhere near enough to bind the mixture together to make a dough. 


And what a good decision it was. I love saffron - although I don't use it often because it's expensive - and I love pistachios, and I know they're a flavour match made in heaven (fictitious place, obvs, but the match is very real and the flavours are very lovely!). These cookies are very moreish - they're not too sweet, the saffron flavour is awesome, the pistachios are delicious and the semolina gives the nankhatai a lovely crunch. Be sure to use fine semolina, though, otherwise, the nankhatai might have a sandy mouthfeel rather than crispness. Happy eating, people!

Recipe for:
Kesar pista nankhatai (saffron pistachio cookies)


 photo f5710913-d2ea-438a-900c-989e2ced8eb0_zps6y1brntg.jpg

Ingredients:

1.5 cups plain flour

2.5 tbsp chickpea flour
1/2 tbsp fine sooji (semolina)
1/2 tsp baking soda
1/4 cup slivered pistachio nuts
2 tbsp finely chopped pistachios (optional)
1/2 cup powdered sugar
1/2 cup melted ghee (clarified butter)
1/4 tsp saffron strands, crushed in a small mortar-pestle
Milk as required

Method:


1. Preheat the oven to 180C/350F.


2. Sift together the flours, semolina and baking soda in a medium bowl. Mix in the slivered pistachio nuts and set aside. Warm 2 tbsp of the milk and let the saffron steep in it for 5 minutes.


3. In a large bowl, mix together the ghee, powdered sugar and saffron-milk until smooth, then add the flour mixture. Add extra milk a tablespoon at a time until you can form a soft dough. Be careful not to add too much liquid.


4. Roll the dough into balls the size of large marbles and place on a cookie sheet lined with non-stick paper or foil, leaving a gap of about 1.5 inches. At this point, if you wish, you can make a dimple in the centre of each cookie with your thumb and sprinkle a pinch of the chopped pistachios. If not, just flatten each ball slightly and place in the preheated oven.


5. Bake for 15-18 minutes or until the cookies are a pale brown, switching the tray around after 10 minutes so that they brown evenly.


6. Remove to a wire cooling rack. The cookies will crisp up as they cool.


7. Try not to eat all the nankhatai yourself.

Saturday, March 23, 2013

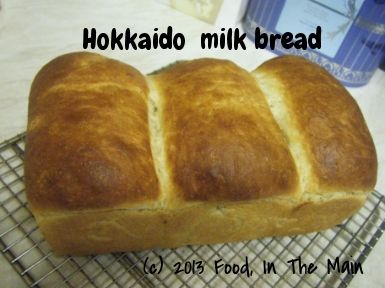
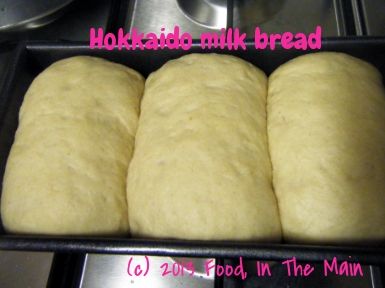
We Knead to Bake #3 - Hokkaido Milk Bread

 photo 0eb68333-7485-4f50-9e2e-bf9572af6399_zps87ad1e05.jpg

 photo d0af005b-9053-45f3-ab27-adb7cfa86d49_zps13b8df7e.jpg

Last month's baking challenge saw me at my whiny worst, because the croissants that we were supposed to make nearly got the better of me. But I persevered, rather to my surprise, and at least I can say "I tried it". This month's challenge was much more in keeping with my ability and my interest, because I can make bread. I can knead dough. I've been experimenting with different types of bread, with different proportions of strong white, wholewheat, wholemeal spelt and wholemeal rye flours. Mostly they've been successful bakes. 

That is why this Hokkaido bread didn't faze me. Yes, the dough was irritatingly sticky. Yes, I kneaded the dough by hand, because I don't have a machine to do the job... but to be fair, I didn't put my entire being into the kneading. That's because of the technique recommended by Dan Lepard of the Guardian newspaper (jeez, the number of times I've mentioned this man in my posts, he should be paying me a commission!). 

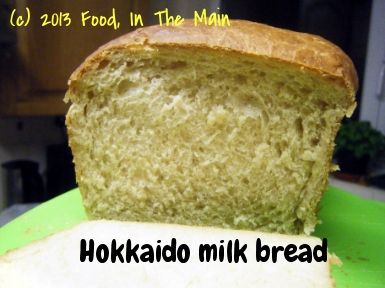
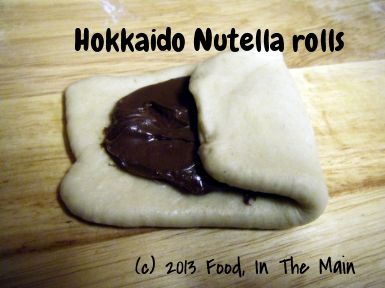
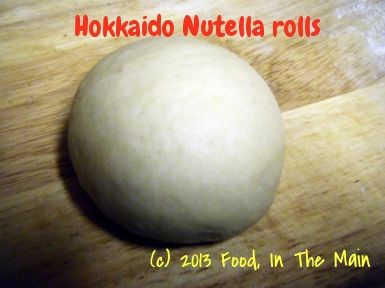
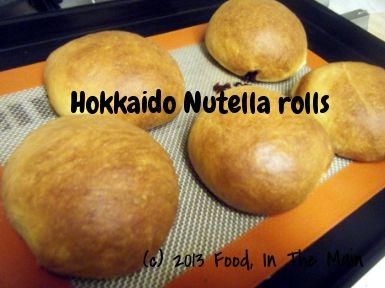
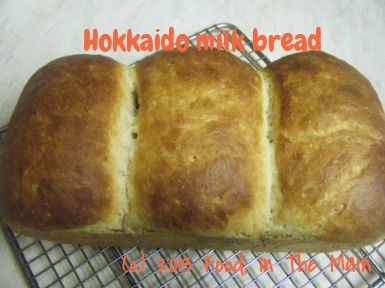
Anyway, I didn't do a 10-second knead with this dough, but I certainly didn't knead for 15 minutes at a time either. It turned out so soft and buttery, it was unbelievable. I made one big loaf, and some Nutella rolls and some with a spicy potato filling. They all turned out incredibly moreish. I'm planning to use the tangzhong technique with regular baking flours rather than just all-purpose. The tangzhong will continue to be made with AP flour, though. However, that's for another post. In the meantime, thank you once again, Aparna Balasubramanian, for introducing me to this bread technique that was completely new to me. 

Recipe for: Hokkaido milk bread
 photo b4229644-0f25-4796-95c3-4a83929b70b9_zpscb27837d.jpg
(Original Recipe from 65 Degrees Tangzhong “65C Bread Doctor” by Yvonne Chen, and adapted from Kirbie’s Cravings)
http://kirbiecravings.com/2011/05/hokkaido-milk-toast.html

Ingredients:
For The Tangzhong (Flour-Water Roux)
1/3 cup all-purpose flour
1/2 cup water
1/2 cup milk


For The Dough:
2 1/2 cups all-purpose flour
3 tbsp sugar
1tsp salt
2 tbsp powdered milk
2 tsp instant dried yeast
1/2 cup milk (and a little more if needed)
1/8 cup cream (25% fat)
1/3 cup tangzhong (use HALF of the tangzhong from above)
1/4 tsp salt
25gm unsalted butter (cut into small pieces, softened at room temperature)
1/2 to 3/4 cup mini chocolate chips if making the rolls

Method:
The Tangzhong (Flour-Water Roux):
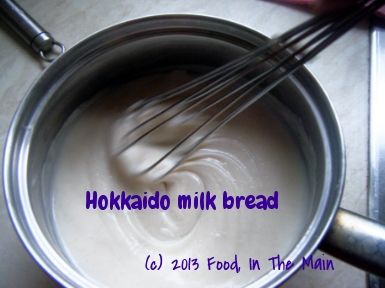
Whisk together lightly the flour, water and milk in a saucepan until smooth and there are no lumps. Place the saucepan on the stove, and over medium heat, let the roux cook till it starts thickening. Keep stirring/ whisking constantly so no lumps form and the roux is smooth.

If you have a thermometer, cook the roux/ tangzhong till it reaches 65C (150F) and take it off the heat. If like me, you don’t have a thermometer, then watch the roux/ tangzhong until you start seeing “lines” forming in the roux/ tangzhong as you whisk/ stir it. Take the pan off the heat at this point.
 photo 9478cba3-9d49-4ce1-adcc-1bd93af88891_zpse02e385d.jpg
Let the roux/ tangzhong cool completely and rest for about 2 to 3 hours at least. It will have the consistency of a soft and creamy crème patisserie. If not using immediately, transfer the roux to a bowl and cover using plastic wrap. It can be stored in the fridge for about a day. Discard the tangzhong after that.

The Bread Dough:
I made this bread by hand. This dough dough is a bit sticky and can take some time and effort to knead by hand. If you have some sort of machine which will do the kneading for you, use it. Don’t punish yourself. And do not add more flour to make it less sticky either!
Put the flour, salt, sugar, powdered milk and instant yeast in a large bowl and pulse a couple of times to mix. In another small bowl mix the milk, cream and Tangzhong till smooth and add to the bowl. Mix with a wooden spoon until the dough comes together. Now add the butter and knead till you have a smooth and elastic dough which is just short of sticky.

The dough will start out sticky but kneading will make it smooth. If the dough feels firm and not soft to touch, add a couple of tsps of milk till it becomes soft and elastic. When the dough is done, you should be able to stretch the dough without it breaking right away. When it does break, the break should be form a circle.

Form the dough into a ball and place it in a well-oiled bowl turning it so it is well coated. Cover with a towel, and let the dough rise for about 45 minutes or till almost double in volume.

Place the dough on your working surface. You don’t need flour to work or shape this dough. This recipe makes enough dough to make one loaf (9” by 5” tin), 2 small loaves (6” by 4” tins) or 1 small loaf (6” by 4”) and 6 small rolls (muffin tins). Depending on what you are making, divide your dough. If you are making 1 loaf, divide your dough in 3 equal pieces. If you are making two smaller loaves, divide your dough into 6 equal pieces.

The shaping of the portions, whether for the loaf or the rolls, is the same.

Roll out each portion of the dough with a rolling pin into an oval shape, about 1/8” thick. If you are using a filling, spread it on the dough now, before shaping it into a ball with your hands, bringing the edges to cover the filling.

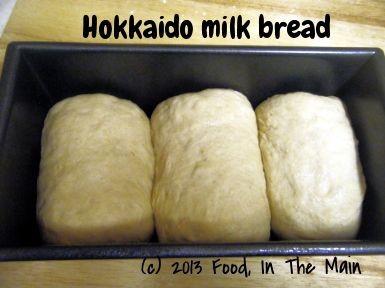
Roll this folded dough with the rolling pin so the unfolded edges are stretched out to form a rectangle. Roll the rectangle from one short edge to the other, pinching the edges to seal well. Do this with each of the three larger pieces and place them, sealed edges down, in a well-oiled loaf tin.
 photo c757d852-82e8-461c-951a-b4a20a658d37_zpsdbcdcab3.jpg
Cover with a towel and leave the dough to rise for about 45 minutes.
 photo e8dd20bc-4e92-4e03-9217-95b71b07cd5d_zps6ca12d99.jpg
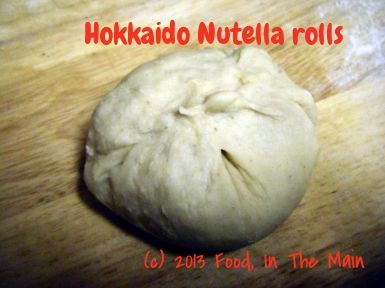
To make the rolls fold them in the same manner described above, but before rolling them up, put in the filling.
 photo 65884c2f-336b-42c7-9421-f042fd27a4ff_zps9f964e3a.jpg
 photo ecb61269-f3ea-400a-8c53-5ebfbcea2332_zps91f0ecbb.jpg
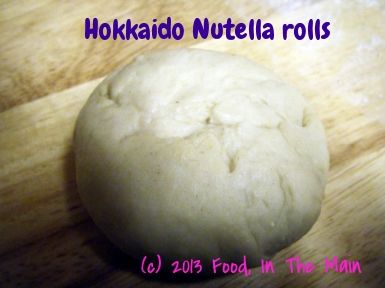
Turn the roll over so the seam side is down, and shape it with both hands, sort of cupping it so that the top is smooth and tight, and the underside is sealed.
 photo 1fae9820-872d-40f4-b118-03419a36c62c_zpsd898dbce.jpg
 photo 86f4b90c-d533-42da-85e0-5498c7ed74e3_zps4f39ef68.jpg

Carefully brush the tops of the rolls and the loaf with milk (or cream) and bake them at 170C (325F) for about 20 to 30 minutes till they are done (if you tap them they’ll sound hollow) and beautifully browned on top.
 photo 22b009b7-4f7b-4c30-8b96-2ffccd986d86_zpsb0e3ee51.jpg
Let them cool on the tray for about 5 minutes and then transfer to a rack till slightly warm or cool.
 photo 038a10f0-7791-4350-8687-bd31fc937235_zpscea6043b.jpg
 photo ec5dc6b1-9eaa-4837-a5ca-20e687caac69_zps244cfff3.jpg
Serve or else store in a bread bin. This bread stays soft and delicious even the next day. This recipe makes enough dough to make one loaf (9” by 5” tin), 2 small loaves (6” by 4” tins) or 1 small loaf (6” by 4”) and 6 small rolls (muffin tins).

Sunday, February 24, 2013

We Knead to Bake # 2 - Classic croissants

 photo 596730c7-f2a9-422c-afa7-6ae90f0bc3e3_zpsa17df698.jpg

Original version of the recipe on Fine Cooking

Aparna's post on her blog My Diverse Kitchen

Let's get one thing clear from the start - making croissants was not my first choice, nor even my hundredth choice. In fact, it didn't even figure as a fleeting choice on my "would like to try" list. But I made them. I made them because it was the recipe for February in the "We Knead to Bake" challenge. There is no way that I would have tried this otherwise, none. I cannot stress that enough. I wish I could say that I enjoyed the three-day process so much that I wanted to do it all over gain... I COULD say it, but it would be a big fat lie.

Do you think this might be a bit of a negativity overkill?

Ok, to be fair, I'm glad I tried the recipe. Glad that Aparna made me go way outside my comfort zone (it took me a week to make my way back - ha ha). Glad that I know how much hard work goes into making the flaky, buttery, delicious croissants that I love. Glad that there are bakeries and cafes where I can walk in and simply buy a croissant. And, most of all, glad that faced up to my croissant demon... and if I didn't quite vanquish it, at least I can say truthfully that I didn't just give up.

My croissants were reasonably good, more than edible (jeez, all that butter - why WOULDN'T they be tasty!), and the ones with chopped chocolate filling were actually extremely moreish. I only did a few of those, though, perhaps about 4. The rest were plain croissants. While Pete liked them, and so did I, I just felt that the end result was not good enough for the effort that went into making them. I guess I'm just being picky, and I guess that's because I do love a well-made, fresh, flaky croissant.

I think I need a tame croissant baker who would be at my beck and call for baked goods. Any takers?


 photo f2f168bd-2598-4ee7-86fe-5681113c6a1d_zps5af51b4b.jpg

Recipe for: Classic croissants

Ingredients:


For the dough:
2 cups all-purpose flour, and a little more for dusting/ rolling out dough
1/4 cup plus 1 tbsp cold water
1/4 cup plus 1 tbsp cold milk (I used 2%)
1/8 cup granulated sugar
20gm soft unsalted butter (1.5 tbsp)
1/2 tbsp plus scant 1/4 tsp instant yeast
1 tsp salt

For the butter layer:
125 gm cold unsalted butter
Or 1 egg for egg wash
Finely chopped dark or plain chocolate for filling (optional)


Method:

Day 1 - Make the dough (and refrigerate overnight)
Combine all the ingredients for the dough in the bowl of a stand mixer fitted with the dough hook. You can also use a food processor with the plastic blade, or do this by hand.
Mix everything on low speed for 3 minutes, scraping the sides of the mixing bowl once if necessary. Then mix further on medium speed for 3 minutes. Lightly flour a 10-inch pie pan or a dinner plate. And place the ball of dough on this.
Gently shape the dough into a flat ball by pressing it down before storing it in the fridge, this makes rolling out next morning easier. Making a tight ball will strengthen the gluten which you do not need. Lightly dust the top of the dough with flour and wrap well with plastic so it doesn’t dry out. Refrigerate overnight.

Day 2 - Make the butter layer
The next day, cut out 2 pieces of parchment or waxed paper into 10” squares each. Cut the cold butter into 1/2-inch-thick slabs. Place these pieces on one piece of parchment/ waxed paper so they form a 5- to 6-inch square. Cut the butter further into pieces as required to fit the square. Top with the other piece of parchment/ waxed paper.
Using a rolling pin, pound the butter with light, even strokes. As the pieces begin to stick together, use more force. Pound the butter until it flattens out evenly into a square that’s approximately 7-1/2”. Trim the edges of the butter to make a neat square. Put the trimmings on top of the square and pound them in lightly with the rolling pin. Refrigerate this while you roll out the dough.

Laminate the dough
Unwrap and lay the dough on a lightly floured work surface. Roll it out to a 10-1/2-inch square, and brush off the excess flour. Take the butter out from the refrigerator —it should be cold but pliable. If it isn’t refrigerate it till it is. This so that when you roll out the dough with the butter in ti, neither should it be soft enough to melt, or hard enough to break. Unwrap the butter and place it on the square of dough in the centre, so that it forms a “diamond” shape on the dough.
Fold one flap of dough over the butter toward you, stretching it slightly so that the point just reaches the middle of the butter square. Bring the opposite flap to the middle, slightly overlapping the previous one. Similarly repeat with the other two so that the dough forms an envelope around the butter. Lightly press the edges together to completely seal the butter inside the dough to ensure the butter doesn’t escape when you roll out the dough later.
Lightly flour the top and bottom of the dough. With the rolling pin, firmly press along the dough uniformly to elongate it slightly. Now begin rolling instead of pressing, focusing on lengthening rather than widening the dough and keeping the edges straight.
Roll the dough into an 8” by 24” rectangle. If the ends lose their square shape, gently reshape the corners with your hands. Brush off the excess flour. Mark the dough lightly equally into three along the long side. Using this as a guideline, pick up one short end of the dough and fold 1/3rd of it back over the dough, so that 1/3rd of the other end of dough is exposed. Now fold the 1/3rd exposed dough over the folded side. Basically, the dough is folded like 3-fold letter before it goes into an envelope (letter fold). Put the folded dough on a floured baking sheet, cover with plastic wrap, and freeze for 15 to 20 minutes to relax and chill the dough.
Repeat the rolling and folding, this time rolling in the direction of the two open ends (from the shorter sides to lengthen the longer sides) until the dough is about 8” by 24”. Once again fold the dough in thirds, brushing off excess flour and turning under any rounded edges or short ends with exposed or smeared layers. Cover once again with plastic wrap and freeze for another 15 to 20 minutes.
Roll and fold the dough exactly in the same way for the third time and put it baking sheet. Cover with plastic wrap, tucking the plastic under all four sides and refrigerate overnight.

Day 3 - Divide the dough
The next day, unwrap and lightly flour the top and bottom of the dough. Cut the dough along the longer side into halves. Cover one half with plastic wrap and refrigerate it while working on the other half.
“Wake up the dough up” by pressing firmly along its length with the rolling pin. Don’t widen the dough but simply begin to lengthen it with these first strokes. Slowly roll the dough into a long and narrow strip, approximately 8” by 22”. If the dough sticks as you roll, sprinkle with flour.
Once the dough is about half to two-thirds of its final length, it may start to resist rolling and even shrink back. If this happens, fold the dough in thirds, cover, and refrigerate for about 10 minutes; then unfold the dough and finish rolling.
Lift the dough an inch or so off the table at its midpoint and allow it to shrink from both sides and prevent the dough from shrinking when it’s cut. Check that there’s enough excess dough on either end so that when you trim the edges to straighten them, you have a strip of dough that is 20’ inches long. Now trim the edges so they’re straight. Cut the dough into equal sized triangles, marking them off first if you prefer, before cutting.

Shape the croissants
Now work with one piece of triangular dough at a time. Using your rolling pin, very lightly roll (do not make it thin but only stretch it slightly) the triangle to stretch it a little, until it is about 6” long. This will give your croissants height and layers. You can stretch it by hand too, but if you don’t have the practise, your stretching could be uneven.
Using a sharp small knife, make a 1/2- to 3/4-inch-long notch in the centre of the short side of each triangle. The notch helps the rolled croissant curl into a crescent.
Place the triangle on the work surface with the notched side closest to you. This is the time to add your filling, if you're using any. With one hand on each side of the notch, begin to roll the dough away from you, towards the pointed end.
Flare your hands outward as you roll so that the notched “legs” become longer. Roll the triangle tight enough but not too tight to compress it, until you reach the “pointy” end which should be under the croissant.
Now bend the two legs towards you to form a tight crescent shape and gently press the tips of the legs together (they’ll come apart while proofing but keep their crescent shape).
Shape all the triangles like this into croissants and place them on a greased or parchment lined baking sheet leaving as much space between them as they will rise quite a bit.

Proof the croissants
Brush the croissants with milk (or a mix of milk and cream). If you use eggs, make an egg wash by whisking one egg with 1 tsp water in a small bowl until very smooth. Lightly brush this on each croissant.
Refrigerate the remaining milk/ milk+cream (or egg wash) for brushing the croissants again later. Place the croissants in a cool and draft-free place (the butter should not melt) for proofing/ rising for about 1 1/2 to 2 hours. They might need longer than 2 hours to proof, maybe as much as 3 hours, so make sure to let croissants take the time to proof. The croissants will be distinctly larger but not doubled in size. They’re ready if you can see the layers of dough from the side, and if you lightly shake the sheets, the croissants will wiggle.
Bake the croissants
Just before the croissants are fully proofed, pre-heat your oven to 200C (400F) in a convection oven or 220C (425F) in a regular oven. Brush the croissants with milk/ milk+cream (or egg wash) a second time, and place your baking sheets on the top and lower thirds of your oven (if regular) or bake one tray at a time in the convection oven.
Bake them for about 15 to 20 minutes till they’re done and golden brown on top and just beginning to brown at the sides. In a regular oven, remember to turn your baking sheets halfway through. If they seem to be darkening too quickly during baking, lower the oven temperature by 10C (25F). Cool the croissants on the baking sheets on racks.
Serve warm. This recipe makes 10 mini croissants.

Sunday, January 20, 2013

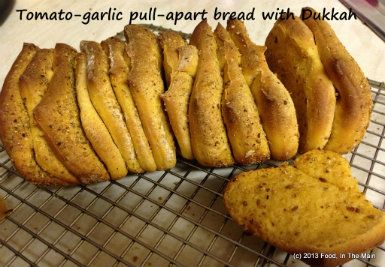
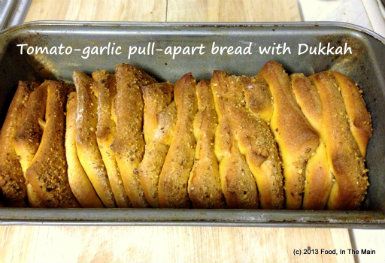
Tomato-garlic pull-apart bread with dukkah

I just wanted to try the pull-apart recipe again, to see if I could manage the miraculous "second rising" of the bread dough. I started this before I checked to see if I had any cheese - and sure enough, when I did get around to checking the fridge, there was no cheese - no, not even a bog-standard Cheddar *sigh*. I couldn't go out to get cheese because of all the snow (it's been snowing all day) and because I didn't want to venture out into the freezing cold. 

This should have been a CHEESY bread... ideally I was hoping to use feta, as a Mediterranean cheese to go with the somewhat Mediterraneanish Dukkah (Sainsbury's finest version, I'll have you know). 

(Ok, yeah, I know Dukkah is Egyptian, but it's kinda sorta close to Mediterranean cuisine, no? Work with me here, people... I suppose you could say that Dukkah and feta are about as compatible as Dukkah and cheddar - but that's for YOU to say. I say different.) 

Anyway... I halved the quantity of ingredients in the original recipe because I'm back home and there are fewer than half the people that were there when I made my first attempt in Seattle earlier this month. I'm glad to say that, on the plus side, the second rising in my second attempt was successful. Unfortunately, while I turned the former negative into a present positive, a couple of other negatives arose in the present version - one being, as mentioned earlier, a lack of cheese; the second being that the tomato flavour was at best only mild. I guess 1 tbsp of concentrated tomato paste was not enough even though the ingredients were halved. Next time I'd probably double the amount of paste and use finely chopped sun-dried tomatoes in oil too.

Oh well, live and learn. 

The bread, by the way, was good, but it would have been better with cheese (a friend of mine at work insists that most things are better with cheese). 

Recipe for
: Tomato-garlic pull-apart bread with dukkah

Tom-garlicdukkahbread_zpscba4c302 photo Tom-garlicdukkahbread_zpscba4c302-1_zps030d9c4e.jpg
Ingredients:
For the Dough
1/4 cup warm milk
1/2 tsp sugar
1 tsp active dry yeast
1.5 cups bread flour (+ a couple of tbsp more for dusting if necessary)
1/2 tsp salt
1 tbsp butter, soft at room temperature
1 tbsp concentrated tomato paste
2 fat cloves garlic, grated (use only 1 clove or 1/2 tsp garlic paste if you want a milder flavour)
1/3 cup milk
1 tbsp milk for brushing
For the Filling
1 tbsp melted butter
2 tsp Dukkah (I pounded it with a mortar and pestle to make it more uniformly sized)

Method:
1. In a small bowl, dissolve the sugar and the yeast in the 1/4 cup of warm milk. Keep aside for about 5 minutes till the yeast mixture bubbles up.

2. Put 1.5 cup of flour, salt, softened butter, and grated garlic in a large bowl and mix. Then add the yeast mixture and most of the 1/3 cup of milk and mix together. If there is more than a tbsp of flour that keeps dropping off from the dough (i.e, it isn't coming together) and the dough itself seems dry, add the remainder of the milk and knead it in. 


Transfer the dough to a non-stick mat (lightly flour your kneading area if it is not non-stick) and knead away till you have a soft, smooth and elastic/ pliable dough which is not sticky (about 10 minutes of energetic kneading). Add a little extra flour if your dough is sticking, but only just as much as is necessary.

3. Shape the dough into a ball and place it in a well-oiled bowl, turning the dough to coat it completely with oil. Cover and let it rise for about 1 to 1 1/2 hours or until almost doubled in volume.

4. Dust your work surface lightly with flour. Deflate the dough, shape it into a square and roll the dough out into a square that is about 8" by 8". Brush the surface of the square with the melted butter.

5. Evenly sprinkle the Dukkah mix. Use a rolling pin to very lightly press the topping into the dough to ensure the topping doesn’t fall off when you are stacking the strips.

6. Using a pizza cutter, slice the dough from top to bottom into 4 long and even strips – they do not have to be perfect. Lay each strip on top of the next, with the topping facing upwards, until you have a stack of the strips. You can put the 2 strips cut from the sides in the middle of the stack so it looks neater. Using a pastry scraper or a sharp knife, cut straight down through the stack dividing it into 3 or 4 equal pieces.

7. Grease and lightly flour a small loaf tin that will fit the pieces comfortably (or any other baking container you like). Layer the slices, cut sides down into the loaf tin. Cover the loaf tin dough with a towel and allow the dough to rise for an hour. Lightly brush some milk over the top of the loaf.

8. Bake the dough at 180C (350F) for about 25-30 minutes (but check from 25 minutes, as every oven differs in its performance) until it is done and the top is golden brown, and the bread sounds hollow when tapped on the bottom.
Tom-garlicdukkahbread1_zps503a6d82 photo Tom-garlicdukkahbread1_zps503a6d82-1_zpsaa02b5bb.jpg
9. Serve hot with soup.

Saturday, January 19, 2013

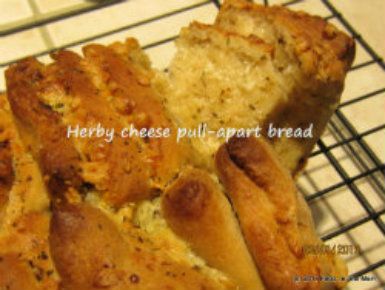
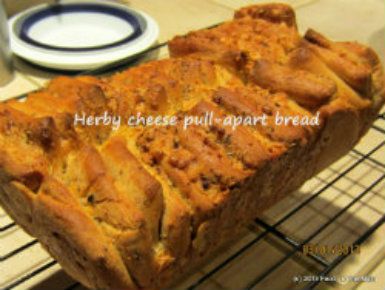
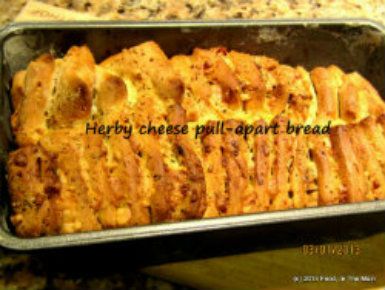
Herby cheese pull-apart bread - Bread #1, January 2013

pull2_zpsfb6ba548 photo pull2_zpsfb6ba548.jpg
This is the first challenge of the monthly baking event started by Aparna Balasubramaniam of My Diverse Kitchen - she of the gorgeous photos and amazing baking ability in particular and lovely recipes in general. When I signed up to join the group, I happened to be in the States, visiting my family in Seattle. It was the perfect opportunity to try the recipe for pull-apart bread, especially as I'd kinda sorta earmarked it for making (at some unspecified point) when I'd seen the original photo on the Huffington Post's selection of photos of pull-apart breads.

The other point was, of course, that there were lots of people at home who would help demolish the bread... whereas at home in Shrewsbury, there's usually just me and Pete. It's difficult to invite people over when you can't be sure that you can provide something edible - I'm a million miles from being the world's best baker, that's the problem.


Happily, family don't fall into the worrisome category, so I was quite pleased to make them my guinea pigs as far as this bread was concerned. As it happened, the dough didn't rise as much as it should have, or as evenly. And since the oven was unfamiliar to me, I didn't really know anything thing about its particular quirks - its hot spots, or cold spots, etc.


But - and this is important - the bread turned out beautifully golden and really tasty with the mushroom-vegetable soup that I'd made.

pull1_zps6d40efe9 photo pull1_zps6d40efe9.jpg

The aroma as it was baking nearly drove us mad, and there was nothing to do but tear into it the moment it came out of the oven! Granted, the texture of the bread was a bit dense, but I don't think anybody cared.


I changed the original recipe just a tad - I used Pepperjack cheese on request from my sister, instead of cheddar, and I used an Italian herb mix, because that's what I had. I hope to make this bread again, with slightly different toppings. If I do, I'll definitely post it here. But for now, here's my tear-and-share bread.

Recipe for:
Herby cheese pull-apart bread

Ingredients:
For the Dough
1/2 cup warm milk
1 tsp sugar
2 tsp active dry yeast
2-3/4 - 3 cups all-purpose flour
1 tsp salt
25gm butter, soft at room temperature
3/4 to 1 tsp garlic paste
3/4 cup milk (+ a couple of tbsp to brush over the bread)
For the Filling:
15 to 20gm melted butter
2 tsp dried Italian-style herb mix
1 tsp crushed cumin seeds
1/2 cup grated Pepperjack cheese

Method:
1. In a small bowl, dissolve the sugar and the yeast in the 1/2 cup of warm milk. Keep aside for about 5 minutes till the yeast mixture bubbles up.


2. Put 2 3/4 cup of flour, salt, softened butter, and garlic paste in a large bowl and mix. Then add the yeast mixture and the 3/4 cup of milk and knead till you have a soft, smooth and elastic/ pliable dough which is not sticky. Add a little extra flour if your dough is sticking, but only just as much as is necessary.


3. Shape the dough into a ball and place it in a well-oiled bowl, turning the dough to coat it completely with oil. Cover and let it rise for about 1 to 1 1/2 hours or until almost doubled in volume.


4. Dust your work surface lightly with flour. Deflate the dough, shape it into a square and roll the dough out into a larger square that is about 12’ by 12”. Brush the surface of the square with the melted butter.


5. Evenly sprinkle the herbs and the cumin seeds and then the grated cheese. Use a rolling pin to very lightly press the topping into the dough to ensure the topping doesn’t fall off when you are stacking the strips.


6. Using a pizza cutter, slice the dough from top to bottom into 6 long and even strips – they do not have to be perfect. Lay each strip on top of the next, with the topping facing upwards, until you have a stack of the strips. You can put the 2 strips cut from the sides in the middle of the stack so it looks neater. Using a pastry scraper or a sharp knife, cut straight down through the stack dividing it into 6 equal pieces (6 square stacks).


7. Grease and lightly flour a 9” by 4” (or 5”) loaf tin. Layer the square slices, cut sides down into the loaf tin. Cover the loaf tin dough with a towel and allow the dough to rise for an hour. Lightly brush some milk over the top of the loaf.


8. Bake the dough at 180C (350F) for about 30 to 40 minutes until it is done and the top is golden brown.


pull3_zps8450eb20 photo pull3_zps8450eb20.jpg
This recipe bakes one 9” by 5” loaf.


9. Serve hot with any soup.

Monday, May 21, 2012

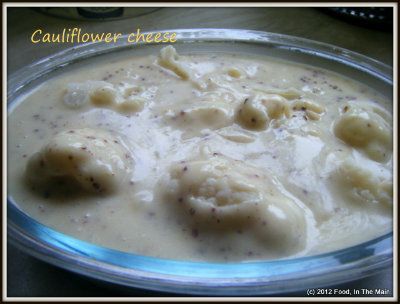
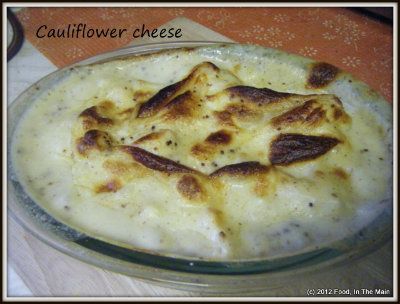
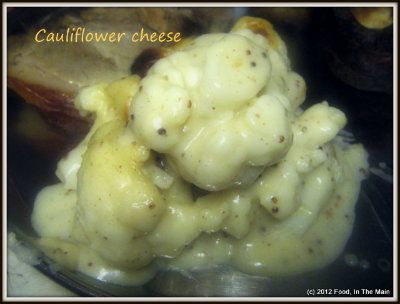
Cauliflower cheese

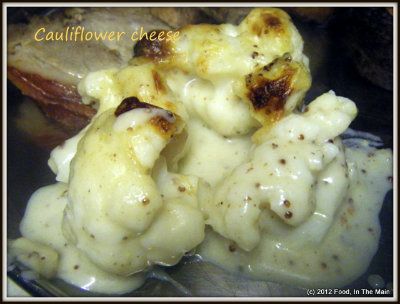
While I could probably eat my weight in green cabbage and would do so willingly, cauliflower isn't as welcome on my plate. While there are a couple of ways of making cauliflower that can be snuck past my fussy tastebuds (think oven-roasted cauliflower or cauliflower usili), there is literally only one way that Pete can be persuaded to eat this vegetable - and that is if it's hidden under a layer of cheese and white sauce. Yesterday turned out to be the day that I made this for my husband for the first time, because there was just too much cauliflower for one person to finish off especially when that person is not particularly fond of this smelly vegetable (but ask her to eat potatoes and see what happens - just stay a safe distance away while you watch!).
Oh, do you remember me saying that mustard just loves cheese? I proved it for the umptieth time with this recipe.
Recipe for:
Cauliflower cheese
DSCF8258a
Ingredients:

1/2 small cauliflower, separated into more or less evenly sized florets
1/2 cup + 2 cups milk + more as required
1/2 cup Cheddar cheese, grated
2 tbsp butter
2 tbsp plain flour
1 tbsp wholegrain prepared mustard
freshly ground black pepper, to taste
sea salt, to taste

Method:
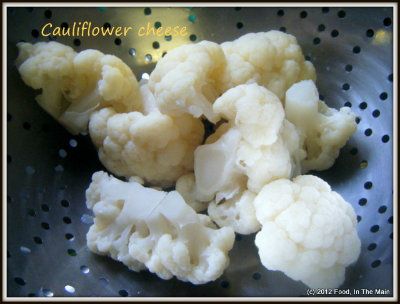
1. Cook the cauliflower with 1/2 cup milk and enough water to cover the florets, until done but not overcooked. (It is cooked when a skewer goes through the thickest part of the floret without too much resistance.
DSCF8248a
Drain and place in an oven-safe casserole dish.
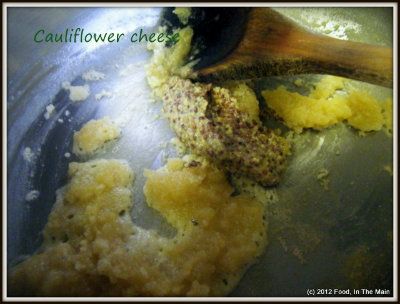
2. Heat a heavy-based saucepan and put the flour and butter in.
DSCF8249a
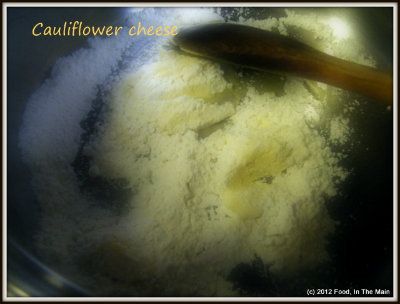
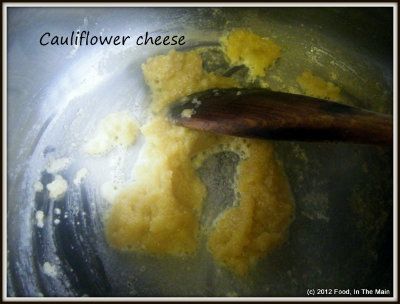
Cook it on medium heat, stirring continuously until the butter and flour are well incorporated and the flour smells good (3-4 minutes).
DSCF8250a
3. Stir in the mustard,
DSCF8251a
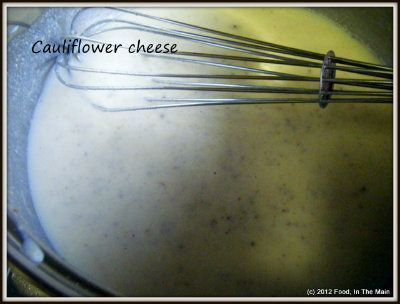
then add the remaining 2 cups milk all at once and whisk the mixture well so that there are no lumps.
DSCF8252a
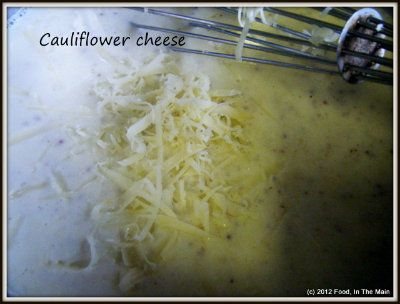
Add the cheese and stir till it melts in.
DSCF8253a
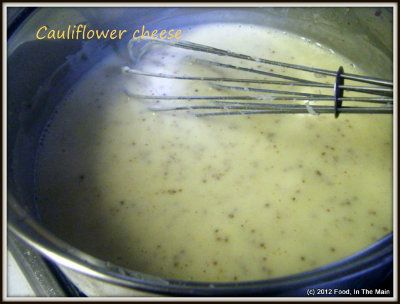
5. Cook the sauce till it thickens and becomes glossy (about 5 minutes on medium-low heat), stirring it to stop it catching on the bottom.
DSCF8254a
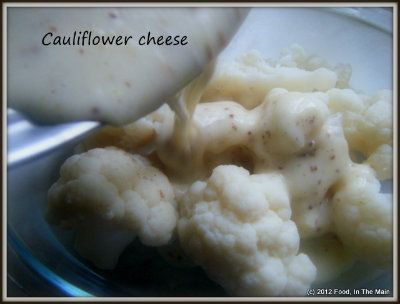
6. Add salt and pepper to taste. Pour the sauce over the cooked florets.
DSCF8255a
You can sprinkle on some more cheese now if you like.
DSCF8256a
7. Cook it at 180C/350F for 15-20 minutes until the sauce is bubbling and the top is golden brown.
DSCF8257a
Let the cauliflower cheese rest for 2-3 minutes before serving it up.
DSCF8259a


RECIPE: CAULIFLOWER CHEESE
Ingredients:

1/2 small cauliflower, separated into more or less evenly sized florets
1/2 cup + 2 cups milk + more as required
1/2 cup Cheddar cheese, grated
2 tbsp butter
2 tbsp plain flour
1 tbsp wholegrain mustard
freshly ground black pepper, to taste
sea salt, to taste

Method:
1. Cook the cauliflower with 1/2 cup milk and enough water to cover the florets, until done but not overcooked. The cauliflower is cooked when a skewer goes through the thickest part of the floret without too much resistance. Drain and place in an oven-safe casserole dish.
2. Heat a heavy-based saucepan and put the flour and butter in. Cook it on medium heat, stirring continuously until the butter and flour are well incorporated and the flour smells good (3-4 minutes).
3. Stir in the mustard, then add the remaining 2 cups milk all at once and whisk the mixture well so that there are no lumps. Add the cheese and stir till it melts in.
5. Cook the sauce till it thickens and becomes glossy (about 5 minutes on medium-low heat), stirring it to stop it catching on the bottom.
6. Add salt and pepper to taste. Pour the sauce over the cooked florets. You can sprinkle on some more cheese now if you like.
7. Cook it at 180C/350F for 15-20 minutes until the sauce is bubbling and the top is golden brown. Let the cauliflower cheese rest for 2-3 minutes before serving it up.

Saturday, May 12, 2012

Baked jalapeno poppers

The first time I ate these little things was at a work party in Singapore and they were the frozen store-bought type - but they were so delicious that I made a pig out of myself over them. I don't remember eating anything else that evening, actually. It could have just been the relief of finding something to eat that was vegetarian (our office parties had plenty of delicious looking things to eat, 98% of them barred to me), but that was not the real reason I monopolised the poppers - the real reason was a sort of disbelieving greed that something could be so darn good. I didn't imagine that replicating them at home was possible, so I didn't bother. I didn't even know what they were called, other than the generic "stuffed pepper".

Eventually, though, years later and thanks to the Internet and food websites, I discovered that the peppers were called jalapenos, and that the stuffed ones had a name - poppers. Going by my own experience, I imagined that was because you couldn't stop popping them into your mouth. Pop pop pop...

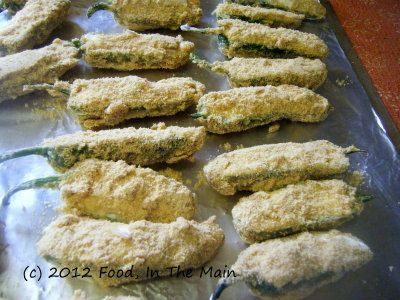
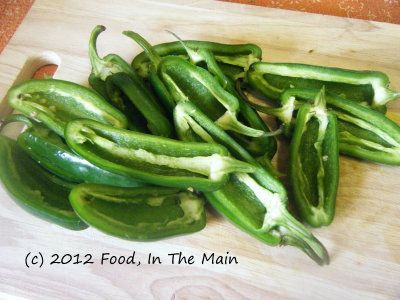
Anyway, if I was making these just for myself, I would not have bothered to remove the innards from the jalapenos. But as there were other less chilli-tolerant people who would be trying out the poppers, I removed every last vestige of seeds and pith that I could manage. So, stuffed with cheese as they were, the poppers didnt quite give me that hit of heat I would've ideally liked. That said, they were still quite, quite delicious. One of the few things, in my opinion, that are just as gorgeous baked as deep-fried. 

Don't get me wrong, just because they are baked doesn't mean these jalapenos are low in fat or can be classified as health food (oh how I wish...!) - far from it. But they're that much less fattier than deep-fried, that's all. They're best had fresh and warm - I don't think I would recommend eating them oven-hot, because the cheese would probably strip the lining from your cheeks. Eat them warm, though, and tell me these poppers aren't the scrummiest thing you've ever tasted...

Recipe for: Baked jalapeno poppers
DSCF8181a
Ingredients:
10 jalapenos, all of a size
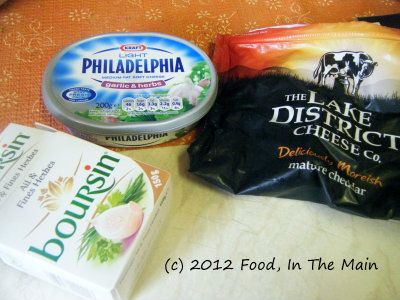
1/3 cup garlic-herb cream cheese
1/3 cup Boursin cheese
1/3 cup grated mature Cheddar cheese
DSCF8164a
2 tsp milk
1/2 tsp ground pepper
1/2 cup plain flour
1/2 tsp garlic powder
1 egg + 1 egg white
Breadcrumbs as required (1 generous cup)
Water


Method:
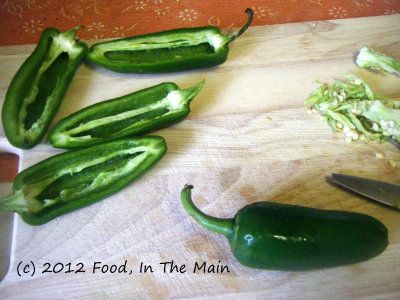
1. Halve the jalapenos lengthwise and carefully remove the seeds and pith without cutting through the flesh.
DSCF8158a
DSCF8159a
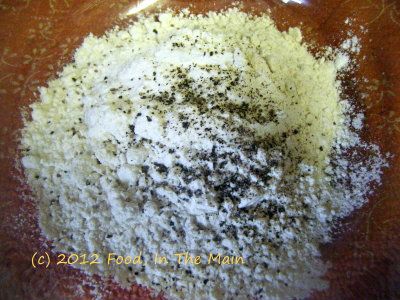
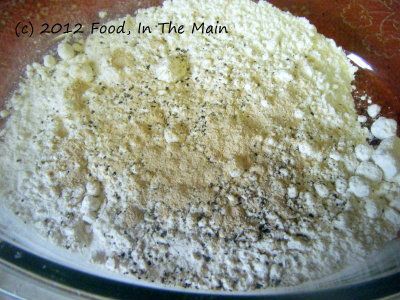
2. Mix the flour, pepper and garlic powder in a shallow, wide bowl.
DSCF8160a
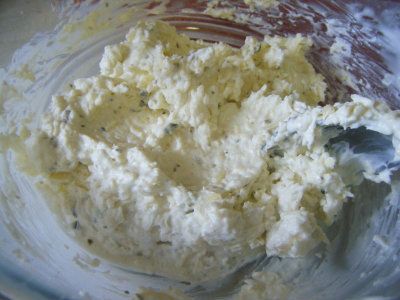
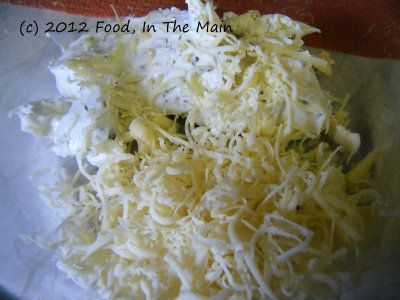
3. Put the cream cheese, Boursin and cheddar in a bowl and mix together well.
DSCF8165a
Dribble in the milk and blend again.
DSCF8167a
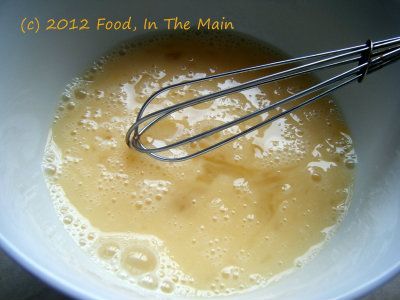
4. Whisk the egg and egg white till well blended but not foamy.
DSCF8162a
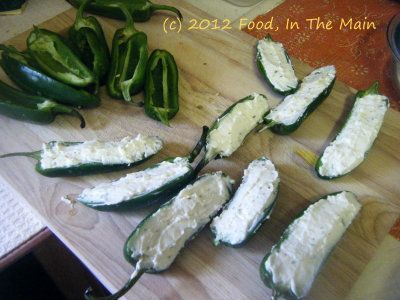
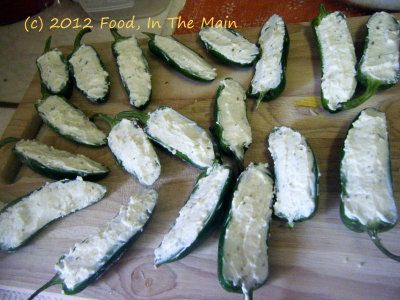
5. Fill the jalapeno halves with the cream cheese mixture.
DSCF8169a
DSCF8170a
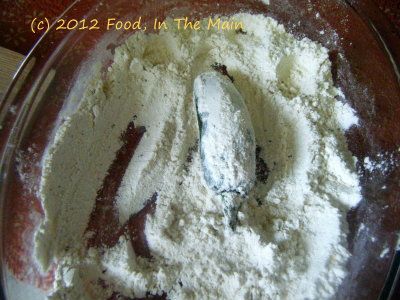
6. Put some plain water in a shallow bowl. Dip each filled jalapeno first in the water, then in the flour so that both sides are well covered,
DSCF8177a
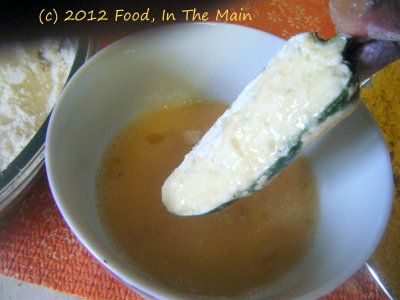
then in the beaten egg,
DSCF8174a
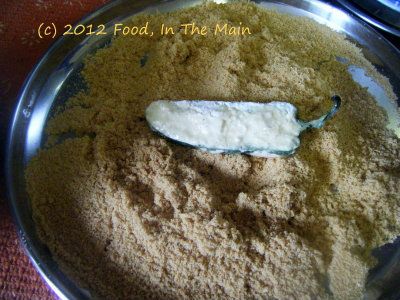
and finally in the breadcrumbs.
DSCF8175a
Place on a non-stick foil-covered baking tray.
DSCF8179a
7. Heat the oven to 180C/350F and bake the jalapenos for about 30-40 minutes - it took 30  minutes in my fan-assisted oven.
DSCF8180a
8. Serve warm or at room temperature.

RECIPE: BAKED JALAPENO POPPERS
Ingredients:
10 jalapenos, all of a size
1/3 cup garlic-herb cream cheese
1/3 cup Boursin cheese
1/3 cup grated mature Cheddar cheese
2 tsp milk
1/2 tsp ground pepper
1/2 cup plain flour
1/2 tsp garlic powder
1 egg + 1 egg white
Breadcrumbs as required (1 generous cup)
Water
Method:
1. Halve the jalapenos lengthwise and carefully remove the seeds and pith without cutting through the flesh. 
2. Mix the flour, pepper and garlic powder in a shallow, wide bowl.
3. Put the cream cheese, Boursin and cheddar in a bowl and mix together well. Dribble in the milk and blend again. 
4. Whisk the egg and egg white till well blended but not foamy. 
5. Fill the jalapeno halves with the cream cheese mixture. 
6. Put some plain water in a shallow bowl. Dip each filled jalapeno first in the water, then in the flour so that both sides are well covered, then in the beaten egg, and finally in the breadcrumbs. Place on a non-stick foil-covered baking tray. 
7. Heat the oven to 180C/350F and bake the jalapenos for about 30-40 minutes - it took 30  minutes in my fan-assisted oven.
8. Serve warm or at room temperature. 

Sunday, May 06, 2012

Easy peasy Yorkshire puddings

If you're unfamiliar with British cuisine, you'll probably be expecting a recipe for a dessert of some sort - but this is no dessert, even though they're termed "puddings". They're savoury, airy puffs of pure carb and, filled with gravy, they're an indispensable part of "Sunday lunch" along with the roast potatoes, parsnips, carrots and other vegetables that accompany the roast chicken or beef.

I'd never made them before, and while it's not a complicated recipe, the recipes on BBC Food asked for the ingredients to be precisely measured. I was leery of doing this - I hate having to weigh things carefully; the detail work just doesn't appeal to my slapdash nature.

Then I came across a ridiculously simple recipe, and I really doubt this can be made any easier. It's just brilliant! I added some herbs to the batter, but otherwise there's no change to the recipe. Eggs, flour, milk, seasoning. That's it.

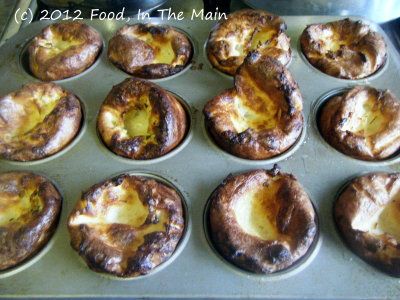
If you don't have proper Yorkshire pudding pans, you can make them just as well in muffin pans, like I did. Be warned, these puddings puff up quite a lot. Mine turned out all sizes and shapes because my oven doesn't heat evenly... but the puddings tasted great. They were, if anything, slightly burnt on top, but that was deliberate because that's how Pete likes them.
DSCF8193a
Pete (actually, his hand) trying to sneak a Yorkie from the tin even as I was taking a photograph!

And unless you're competing in Masterchef, the weird sizes and shapes don't matter one bit. Taste is king.

Recipe for: Easy peasy Yorkshire puddings
DSCF8195a

Ingredients:
2 large eggs
Plain flour, equal in volume to the eggs
Milk, equal in volume to the eggs
Salt to taste
Freshly ground pepper to taste
1/2 tsp minced fresh thyme
1/4 tsp dried rosemary
Oil for cooking

Method:
1. Preheat the oven to 220C/425F.
2. Place three glasses of equal size and shape side by side. Break the eggs into one glass. Pour milk in the next glass to come up to the same level as the eggs. In the third glass, put in enough flour to come up to the same level as the eggs/milk.
3. Now put the flour in a medium mixing bowl and add the salt, pepper and herbs. Stir together.
DSCF8183a
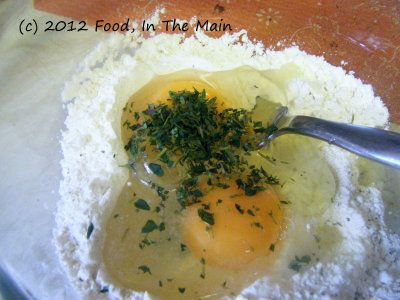
4. Make a well in the centre of the flour and pour in the eggs.
DSCF8186a
Beat with a fork till the eggs and flour are well mixed.
DSCF8187a
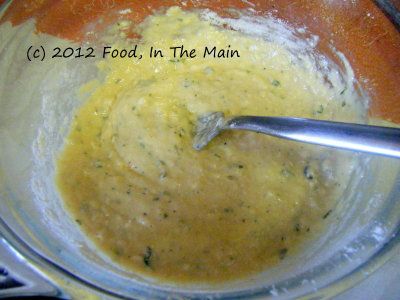
5. Now pour the milk in a steady, thin stream while whisking the mixture constantly to make a smooth batter.
DSCF8188a
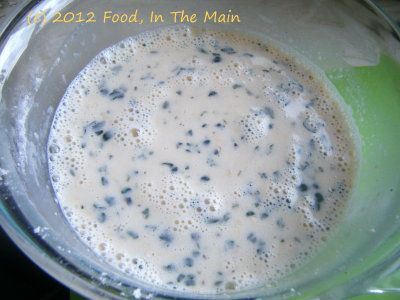
Rest the batter for at least 10 minutes. (According to other recipes I've read, the batter can be stored covered in the fridge for up to 12 hours before baking - but I haven't tried this out and don't know what difference it will make to the puddings.)
6. Take a 12-tray muffin pan. Pour a tsp of oil into each cup to cover the bottom, and grease the sides as well. Heat the muffin pan in the hot oven for 5-6 minutes or till the oil is smoking hot.
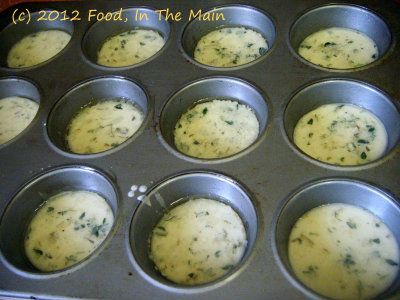
7. Pour a small ladleful of the batter into each cup as quickly as possible(fill it no more than half-way),
DSCF8192a
then return the tray to the oven immediately. Let the puddings bake for 10-15 minutes (do not open the oven for the first 10 minutes) or until they are golden brown.
DSCF8194a
Remove and serve immediately.
DSCF8196a
They can also be frozen after they're completely cool.


RECIPE: EASY PEASY YORKSHIRE PUDDINGS
Ingredients:
2 large eggs
Plain flour, equal in volume to the eggs
Milk, equal in volume to the eggs
Salt to taste
Freshly ground pepper to taste
1/2 tsp minced fresh thyme
1/4 tsp dried rosemary
Oil for cooking


Method:
1. Preheat the oven to 220C/425F.
2. Place three glasses of equal size and shape side by side. Break the eggs into one glass. Pour milk in the next glass to come up to the same level as the eggs. In the third glass, put in enough flour to come up to the same level as the eggs and milk. 
3. Now put the flour in a medium mixing bowl and add the salt, pepper and herbs. Stir together. 
4. Make a well in the centre of the flour and pour in the eggs. Beat with a fork till the eggs and flour are well mixed. 
5. Now pour the milk in a steady, thin stream, whisking the mixture constantly until a smooth batter is formed. Rest the batter for at least 10 minutes. (According to other recipes I've read, the batter can be stored covered in the fridge for up to 12 hours before baking - but I haven't tried this out and don't know what difference it will make to the puddings.) 
6. Take a 12-tray muffin pan. Pour a tsp of oil into each cup to cover the bottom, and grease the sides as well. Heat the muffin pan in the hot oven for 5-6 minutes or till the oil is smoking hot. 
7. Pour a small ladleful of the batter into each cup as quickly as possible (fill it no more than half-way), then return the tray to the oven. Let the puddings bake for 10-15 minutes (do not open the oven for the first 10 minutes) or until they are golden brown. Remove and serve immediately. They can also be frozen after they're completely cool.