skip to main |
skip to sidebar
I recently read a book called "The Secret Supper Club" by Dana Bate, which was about this woman who worked as a research assistant, but whose dream was to become a cook - or chef, I suppose (which is really just a posh word for "cook"). It was a good if light read, just what I'd wanted at that point.

I'm not really going to do a book review, but I had to mention the book because there were a few recipes at the end, of things that she'd made for her secret supper club guests, and the first of them was a recipe for deviled eggs. The rest of the recipes I was not interested in because they were rather too elaborately non-vegetarian. But this one seemed doable, so I did.
I made a couple of minor changes, but mostly this recipe is as the book had it. The filling turned out to be much more lemon-sharp than I'd anticipated, and I think it's because I used perhaps a tablespoon's worth of lemon juice rather than the 1/2 tsp called for. It wasn't really a huge mistake for us, in any case, because Pete and I both love the sourness.
Recipe for:
Curried devils (deviled eggs)

Ingredients:
8 large eggs
1/4 cup mayonnaise
1 tsp Dijon mustard
1/2 tsp medium or mild curry powder (or use 1/4 tsp garam masala)
1/2 tsp lemon juice
1 tbsp finely chopped fresh chives
1/4 tsp smoked hot paprika/cayenne pepper
Kosher salt & freshly milled black pepper, to taste
1/2 tsp sweet paprika for garnish
Method:
1. Place the eggs carefully in a large saucepan and fill with cold water to come up to 1" above the eggs.
2. Bring to a bubbling boil, then turn the heat off, cover the pan and leave for exactly 14 minutes.
3. Then drain off the water and fill the pan again with very cold water, to stop the eggs cooking any further. Set aside for 10 minutes, then peel the eggs and slice them in half vertically.
4. Remove the yolks to a small bowl. Mash them smooth with a fork, then add the mayonnaise, Dijon mustard, curry powder/garam masala, lemon juice, chives and hot paprika and mix thoroughly. Taste the mixture, adding a bit more of whatever you feel is lacking. Add salt (careful with this as the mayonnaise will already have salt) and pepper to taste and mix one final time.
5. Spoon the egg yolk mixture into a sealable sandwich bag or Ziploc bag (or use a disposable pastry bag) piling the filling as far as possible into one corner. Snip off the corner of the bag with scissors, then pipe the mixture into the egg whites. Sprinkle with a little sweet paprika to garnish, and serve at room temperature or cold.
Note: If you have any mixture left over (and going by my experience, you will), use it in a sandwich, or as a spread on toast. You can store the unused mixture in a sealed container in the refrigerator for a day.
I think I may have found the most PERFECT masala recipe I've ever tried, and all thanks to Sangeeta of Banaras ka Khana blog. Her blog is one of my favourites, because she has North Indian recipes which are not so well known (at least to me) as the usual things you get endlessly everywhere. I like reading about typical everyday recipes which are still not common outside of individual homes, and Sangeeta's blog is the perfect place to find these.
I tried this masala with cooked chickpeas because I had some, and loved the result so much that I've made it (with different dals) four times in the last 10 days... although not (yet) with the original split chickpeas (or chana dal) that Sangeetha used. I've tried it both as a thick sauce and as a runnier one, and it makes not a whit of difference - other than the clingy sauce is better with whole chickpeas.
I reduced the peppercorns to 1/2 tsp because I can't take the heat from them (but chilli-heat is more than bearable, go figure), but otherwise the recipe is no different - well, apart from having used chickpeas, that is. Do try it - it's pretty quick to make, too, especially if you use canned chickpeas.
Recipe for: Chana bhuna
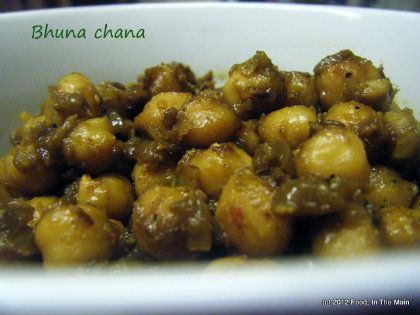
Ingredients:3-4 cups cooked chickpeas (or two cans' worth)
1 large onion, chopped fine
1 tbsp ghee or oil (I used oil)
1 tsp cumin seeds
Salt to taste
For grinding:
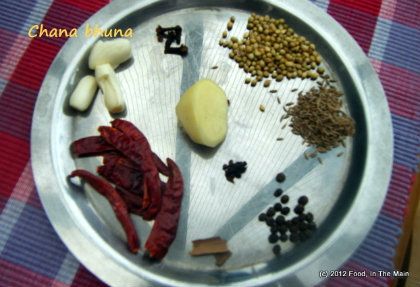
1/2" piece cinnamon stick
1 small black cardamom (seeds only)
1 htsp coriander seeds
1 htsp cumin seeds
2 cloves
4-5 dried red chillies (or to taste)
3 garlic cloves
1" ginger root
1/2 tsp black peppercorns
1/2 tsp turmeric powder
1/2 tsp amchoor (dried raw mango) powder - optional
3-4 tbsp water
Method:1. Grind all the ingredients for the masala into a smooth, fairly thick paste. Use only as much water as required to make it smooth.
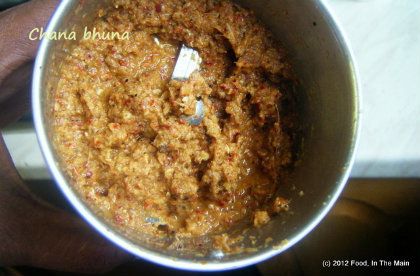
2. Heat the oil/ghee in a pan, then add the cumin seeds.
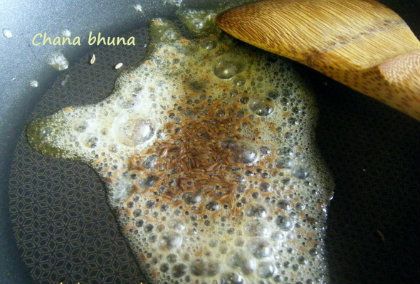
3. Once the seeds sizzle, add the chopped onion and stir.
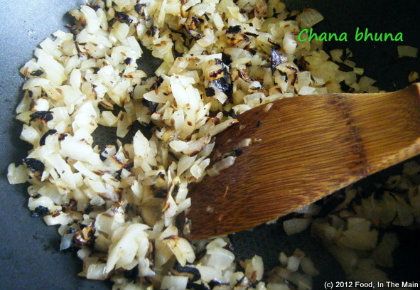
Let it cook on low heat for 15 minutes or so, till it becomes soft and pinkish.
4. Now add the ground masala paste to the cooked onion
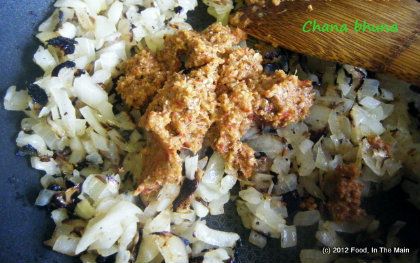
and stir it in.
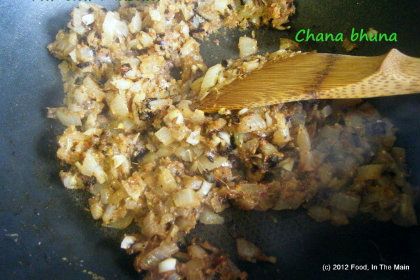
5. Fry it (bhuno) on low heat for 5-7 minutes, stirring frequently, till the paste is well amalgamated, thick and intensely aromatic. Any excess water should have evaporated.
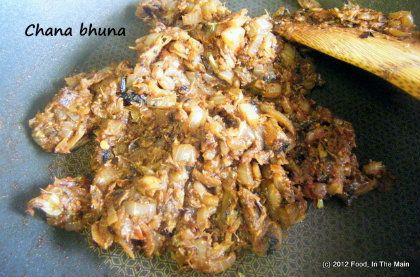
6. Now add the chickpeas along with salt to taste
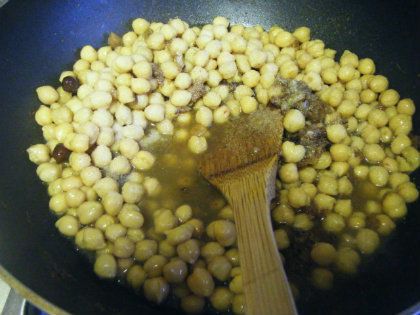
and stir till it is all well mixed.
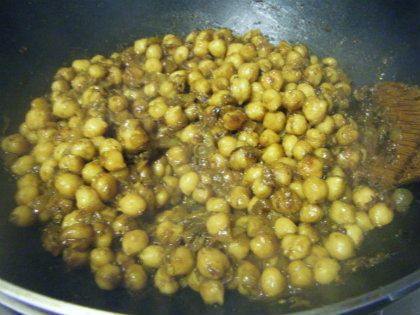
7. Let it cook for 2-3 minutes more (longer if it is watery), then take it off the heat.
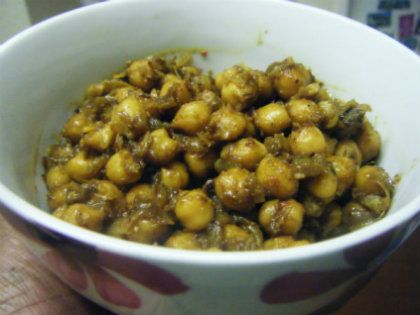
Serve hot with chapaties or puris.
Note: The curry tastes best when the masala coats the chickpeas thickly, so make sure the masala is not runny.
RECIPE: CHANA BHUNA
Ingredients:
3-4 cups cooked chickpeas (or two cans' worth)
1 large onion, chopped fine
1 tbsp ghee or oil
1 tsp cumin seeds
Salt to taste
For grinding:
1/2" piece cinnamon stick
1 small black cardamom (seeds only)
1 htsp coriander seeds
1 htsp cumin seeds
2 cloves
4-5 dried red chillies (or to taste)
3 garlic cloves
1" ginger root
1/2 tsp black peppercorns
1/2 tsp turmeric powder
1/2 tsp amchoor (dried raw mango) powder - optional
3-4 tbsp water
Method:
1. Grind all the ingredients for the masala into a smooth, fairly thick paste. Use only as much water as required to make it smooth.
2. Heat the oil in a pan, then add the cumin seeds.
3. Once the seeds sizzle, add the chopped onion and stir. Let it cook on low heat for 15 minutes or so, till it becomes soft and pinkish.
4. Now add the ground masala paste to the cooked onion and stir it in.
5. Fry it (bhuno) on low heat for 5-7 minutes, stirring frequently, till the paste is well amalgamated, thick and intensely aromatic. Any excess water should have evaporated.
6. Now add the chickpeas along with salt to taste and stir till it is all well mixed.
7. Let it cook for 2-3 minutes more, then take it off the heat. Serve hot with chapaties or puris.
Note: The curry tastes best when the masala coats the chickpeas thickly, so make sure the masala is not runny.
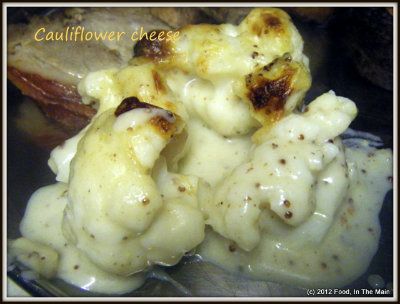
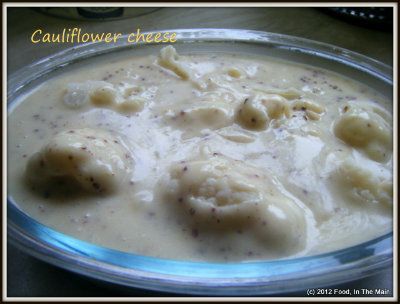
While I could probably eat my weight in green cabbage and would do so willingly, cauliflower isn't as welcome on my plate. While there are a couple of ways of making cauliflower that can be snuck past my fussy tastebuds (think oven-roasted cauliflower or cauliflower usili), there is literally only one way that Pete can be persuaded to eat this vegetable - and that is if it's hidden under a layer of cheese and white sauce. Yesterday turned out to be the day that I made this for my husband for the first time, because there was just too much cauliflower for one person to finish off especially when that person is not particularly fond of this smelly vegetable (but ask her to eat potatoes and see what happens - just stay a safe distance away while you watch!).
Oh, do you remember me saying that mustard just loves cheese? I proved it for the umptieth time with this recipe.
Recipe for: Cauliflower cheese
Ingredients:
1/2 small cauliflower, separated into more or less evenly sized florets
1/2 cup + 2 cups milk + more as required
1/2 cup Cheddar cheese, grated
2 tbsp butter
2 tbsp plain flour
1 tbsp wholegrain prepared mustard
freshly ground black pepper, to taste
sea salt, to taste
Method:
1. Cook the cauliflower with 1/2 cup milk and enough water to cover the florets, until done but not overcooked. (It is cooked when a skewer goes through the thickest part of the floret without too much resistance.
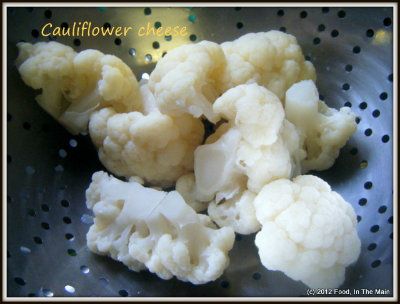
Drain and place in an oven-safe casserole dish.
2. Heat a heavy-based saucepan and put the flour and butter in.
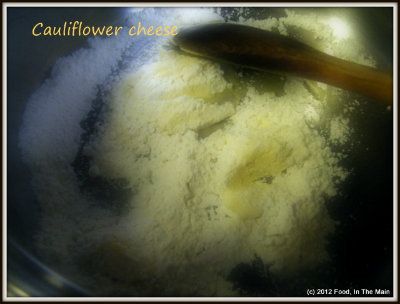
Cook it on medium heat, stirring continuously until the butter and flour are well incorporated and the flour smells good (3-4 minutes).
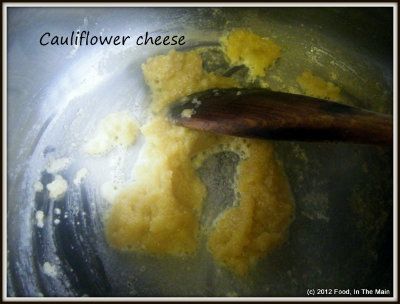
3. Stir in the mustard,
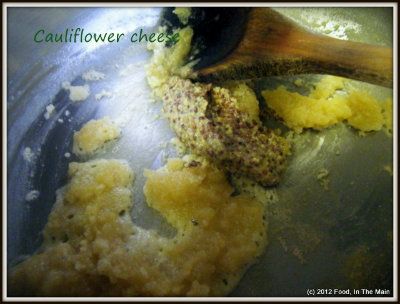
then add the remaining 2 cups milk all at once and whisk the mixture well so that there are no lumps.
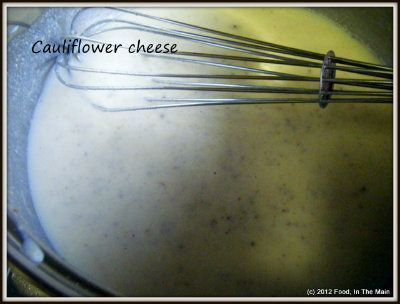
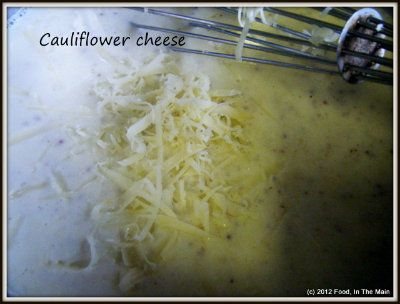
Add the cheese and stir till it melts in.
5. Cook the sauce till it thickens and becomes glossy (about 5 minutes on medium-low heat), stirring it to stop it catching on the bottom.
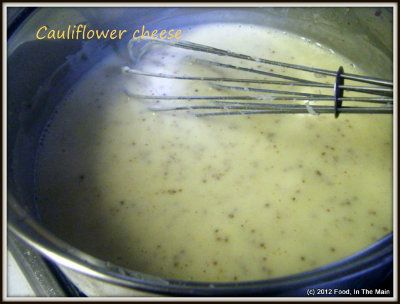
6. Add salt and pepper to taste. Pour the sauce over the cooked florets.
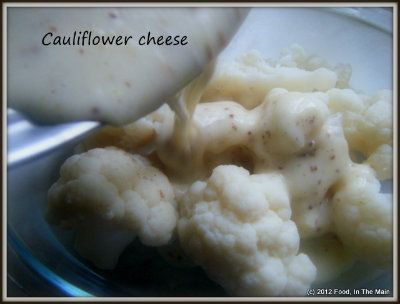
You can sprinkle on some more cheese now if you like.
7. Cook it at 180C/350F for 15-20 minutes until the sauce is bubbling and the top is golden brown.
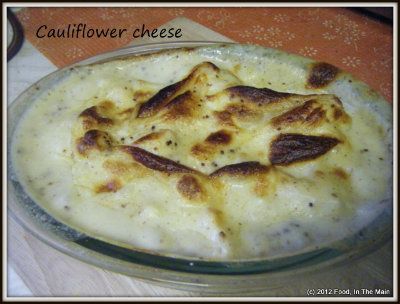
Let the cauliflower cheese rest for 2-3 minutes before serving it up.
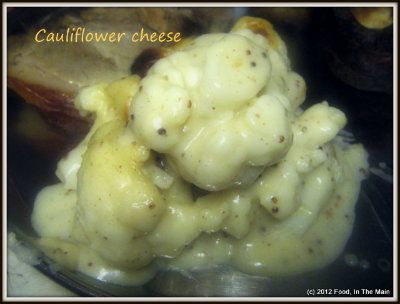 RECIPE: CAULIFLOWER CHEESE
Ingredients:
1/2 small cauliflower, separated into more or less evenly sized florets
1/2 cup + 2 cups milk + more as required
1/2 cup Cheddar cheese, grated
2 tbsp butter
2 tbsp plain flour
1 tbsp wholegrain mustard
freshly ground black pepper, to taste
sea salt, to taste
Method:
1. Cook the cauliflower with 1/2 cup milk and enough water to cover the florets, until done but not overcooked. The cauliflower is cooked when a skewer goes through the thickest part of the floret without too much resistance. Drain and place in an oven-safe casserole dish.
2. Heat a heavy-based saucepan and put the flour and butter in. Cook it on medium heat, stirring continuously until the butter and flour are well incorporated and the flour smells good (3-4 minutes).
3. Stir in the mustard, then add the remaining 2 cups milk all at once and whisk the mixture well so that there are no lumps. Add the cheese and stir till it melts in.
5. Cook the sauce till it thickens and becomes glossy (about 5 minutes on medium-low heat), stirring it to stop it catching on the bottom.
6. Add salt and pepper to taste. Pour the sauce over the cooked florets. You can sprinkle on some more cheese now if you like.
7. Cook it at 180C/350F for 15-20 minutes until the sauce is bubbling and the top is golden brown. Let the cauliflower cheese rest for 2-3 minutes before serving it up.
Every day in every way I’m getting lazier and lazier.
This is not what I want to be confessing, dear reader. Believe me, I’d much rather be declaring the more conventional - and infinitely more impressive – version that goes “Every day in every way I’m getting better and better”.
The truth is that I have, at the very least, half a dozen recent recipes to post about and over a dozen older ones which have been ageing gracefully without seeing the light of publication. It’s so easy to take photos while cooking – that’s become second nature now – but it’s a lot less fun to have to edit them (even the simplest, most basic edit that I do which is basically adding my blog name to the photo). It’s infinitely less appealing still to write up the recipes step by step and match the correct photos every step of the way.
I know, nobody’s forcing me to do the whole step-by-step thing, and there wasn’t a gun held to my head when I began to write up the instructions this way. Call me short-sighted but I didn’t envisage a point where I would find it boring to continue doing it in such a painstakingly detailed way. More fool me, because it’s been ever thus with every single one of my enthusiasms over the years.
Don’t get me wrong, I’m not bored with cooking. I’m not even bored of taking photographs while cooking. (And I’m certainly not bored with eating – no fear.) I enjoy writing the posts too, 98% of the time - probably because I feel no urge to stick to the point and no pressure to be topical or even informative. So it’s just the recipe itself, with the ingredients and instructions.
I guess I could stop the step-by-step routine… but after so many years of my blog, I can’t bring myself to do that. (Apparently I can bring myself to ignore my blog and the recipes that are clamouring for release… apparently that isn’t wrong. But simplifying things so that I can bring myself to post more often – oh golly gee gosh, that would feel so wrong.) Look, I can’t explain why this is so – but that is how it is.
Anyway, I decided to post this fairly standard, easy, everyday recipe that I make often - I haven’t posted about it thus far because, you know, it’s fairly standard, easy… etc etc. However, it struck me recently that it might not be standard to everybody, and not everybody might make it this way. So in the interests of posterity, and so on.
I feel quite noble to be dragging myself out of my lethargy comfort zone just for the sake of posterity. How nice of me to do this.
If you’ve finished acknowledging my nobility and niceness, you may go on to the recipe. Which is actually a fairly standard, easy…
Oh. I’ve said this before.
Recipe for: Vengaya vattha kuzhambu
 Ingredients:
2 tsp tamarind paste
4-5 cloves garlic, chopped
2 medium onions, chopped
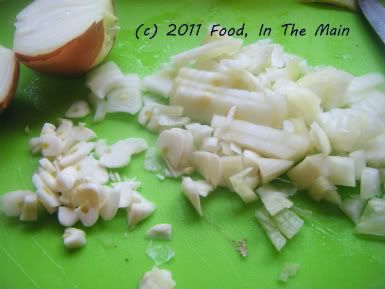 1/4 tsp vendhayam/fenugreek seeds
1 tbsp toor/tuvar dal
1 tbsp manathakkali vatthal
1 tbsp gingelly oil/nallennai
3-4 dried red chillies, broken in half (or to taste)
1 tsp mustard seeds
a few fresh/frozen curry leaves (optional)
1/2 tsp turmeric powder
1/4 tsp asafoetida powder
2-3 tsp sambar powder or vattha kuzhambu powder (if available)
2 tbsp rice flour
1/2 tsp black pepper powder
handful of roasted peanuts (optional)
Method:
1. Dissolve the tamarind paste in 5 cups water. Reserve.
2. Heat the oil and add the manathakkali vatthal, the tur dal, dried red chillies, mustard seeds, fenugreek seeds, curry leaves, asafoetida powder and turmeric powder.
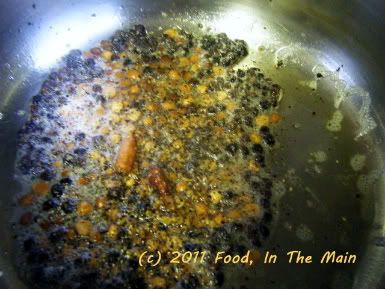 Fry all these for a couple of minutes on high heat, stirring to prevent burning.
3. Next, add the chopped onions and garlic and stir.
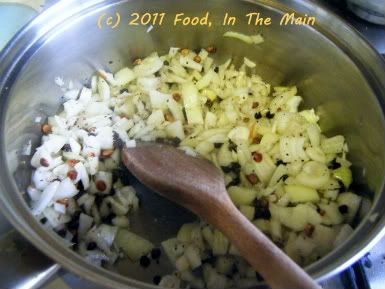 4. When the onions start to soften, add the sambar/vattha kuzhambu powder and stir it in, along with the black pepper powder.
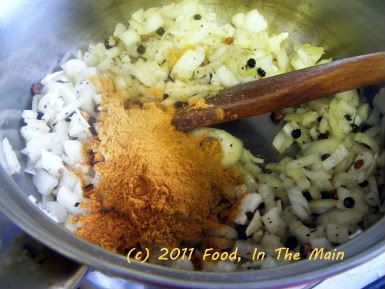 5. Now pour in the tamarind water.
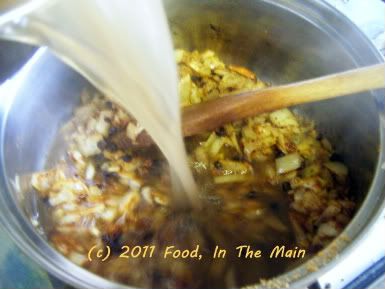 Bring to a boil on high heat, then turn it down to medium-low and let it simmer gently for 10 minutes or so.
6. Whisk together 2 tbsp rice flour with some water to make a thick, pourable paste and stir it into the kuzhambu. Let it boil for another 4-5 minutes until the kuzhambu thickens and becomes less watery.
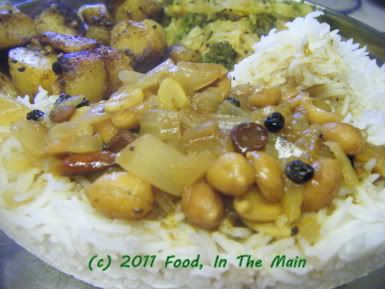
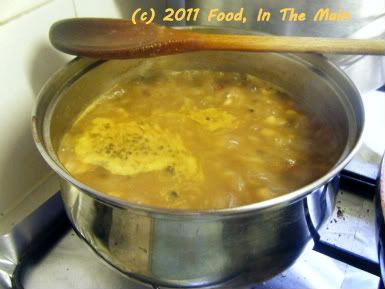 Add salt to taste and throw in the peanuts now, if using. Serve hot with steamed white rice and a dry vegetable curry.
RECIPE: VENGAYA VATTHA KUZHAMBU
Ingredients:
2 tsp tamarind paste
4-5 cloves garlic, chopped
2 medium onions, chopped
1/4 tsp vendhayam/fenugreek seeds
1 tbsp toor/tuvar dal
1 tbsp manathakkali vatthal
1 tbsp gingelly oil/nallennai
3-4 dried red chillies, broken in half (or to taste)
1 tsp mustard seeds
a few fresh/frozen curry leaves (optional)
1/2 tsp turmeric powder
1/4 tsp asafoetida powder
2-3 tsp sambar powder or vattha kuzhambu powder (if available)
2 tbsp rice flour
1/2 tsp black pepper powder
handful of roasted peanuts (optional)
Method:
1. Dissolve the tamarind paste in 5 cups water. Reserve.
2. Heat the oil and add the manathakkali vatthal, the tur dal, dried red chillies, mustard seeds, fenugreek seeds, curry leaves, asafoetida powder and turmeric powder. Fry all these for a couple of minutes on high heat, stirring to prevent burning.
3. Next, add the chopped onions and garlic and stir.
4. When the onions start to soften, add the sambar/vattha kuzhambu powder and stir it in, along with the black pepper powder.
5. Now pour in the tamarind water. Bring to a boil on high heat, then turn it down to medium-low and let it simmer gently for 10 minutes or so.
6. Whisk together 2 tbsp rice flour with some water to make a thick, pourable paste and stir it into the kuzhambu. Let it boil for another 4-5 minutes until the kuzhambu thickens and become less watery. Add salt to taste and throw in the peanuts now, if using. Serve hot with steamed white rice and a dry vegetable curry.
This variation on the classic arachuvitta vengaya sambar, that I posted way back when, came about thanks indirectly to my cousin Chitra, who is not only a fun person but also a really good cook. She’s in Seattle now on holiday and I deeply regret that I did not get the opportunity to invite myself over for a meal at her daughter’s place while I was there – mainly because I had to leave pretty much as she arrived, and there was no time.
I still vividly remember the chole she had made when we were in Madras – this is going back well over 10 years – which was hands down the best I’ve ever had, EVER. I haven’t had the opportunity of pigging out on her food in years now, and she can only have got better and better.
Anyway, the other day when I was Skyping with my mother, she mentioned Chitra's variation on arachuvitta sambar, so of course I had to try it out rightaway. It came out absolutely spectacular, and I kid you not, I was more than happy to eat it morning noon and night – with plain rice, with curd rice, with dosas, with idlis, with Greek yogurt... it was the star turn every single time. Needless to say, the sambar didn’t even last three days – and I was the only one eating it! If there was anybody else to share it with, I’d have had to make TWO bucketsful!
Note: If you can get the little Indian sambar onions or shallots, use those. I think they’re far more flavourful than regular onions – especially if you’re going to the trouble of making this arachuvitta sambar.
And for my fellow Tamils... this literally IS "arachuvitta vengaya sambar" :-)
Recipe for: Arachuvitta vengaya sambar - Version 2
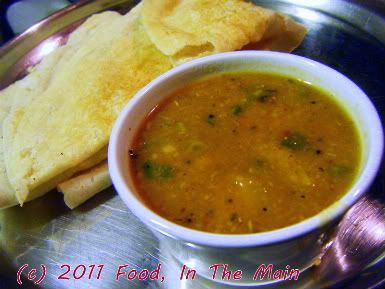 Ingredients:
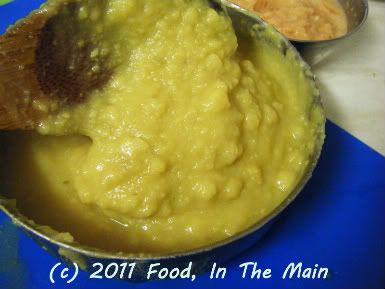
1 cup tuvar/toor dal/thuvaram paruppu, to make 2 cups well cooked and mashed dal
 2 tsp tamarind paste dissolved in 5-6 cups water OR lime-sized ball of tamarind, pulp extracted to make 5-6 cups tamarind water
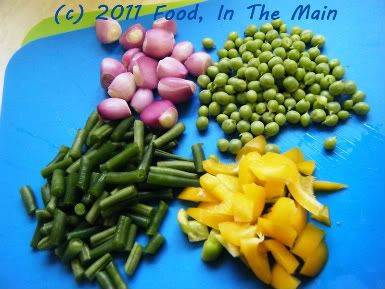 1/4 cup green beans sliced
1/4 cup fresh peas
10-12 sambar onions or 1 medium onion sliced
1/4 cup capsicum, cut in 1/2" pieces
Ground masala 1
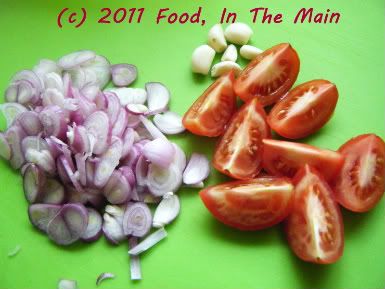 1 tsp oil
5-6 cloves garlic
10-15 sambar onions (preferably), to make 1/4 cup sliced
2 small tomatoes, cut into pieces
Ground masala 2
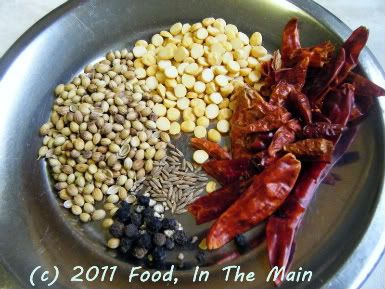 1 tsp oil
2 tsp coriander seeds
2 tsp kadala paruppu/chana dal
5-6 dried red chillies (or to taste)
1/2 tsp cumin seeds
1/2 tsp black peppercorns
3-4 tbsp fresh coconut (pieces or grated)
For tempering
1 tsp oil
1 htsp mustard seeds
a few fresh or frozen curry leaves
1/2 tsp turmeric powder
1/4 tsp asafoetida powder
3-4 tbsp coriander leaves chopped, for garnish
Method:
1. Heat 1 tsp oil and add the mustard seeds, curry leaves, turmeric powder and asafoetida powder.
1 tsp oil
2 tsp coriander seeds
2 tsp kadala paruppu/chana dal
5-6 dried red chillies (or to taste)
1/2 tsp cumin seeds
1/2 tsp black peppercorns
3-4 tbsp fresh coconut (pieces or grated)
For tempering
1 tsp oil
1 htsp mustard seeds
a few fresh or frozen curry leaves
1/2 tsp turmeric powder
1/4 tsp asafoetida powder
3-4 tbsp coriander leaves chopped, for garnish
Method:
1. Heat 1 tsp oil and add the mustard seeds, curry leaves, turmeric powder and asafoetida powder.
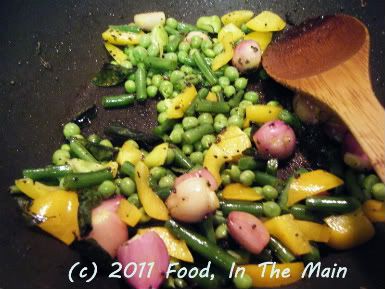
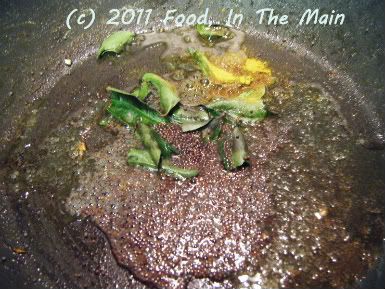 Let the mustard seeds pop, then add the green beans, peas, sambar onions and capsicum, sauteing for 3-4 minutes.
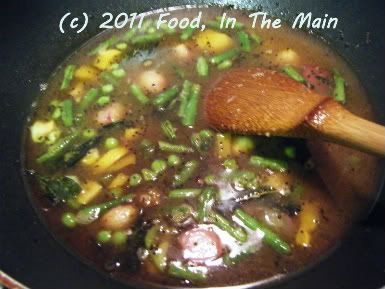
 Pour in the tamarind water and bring to a boil, then turn down the heat to a gentle simmer till the vegetables are cooked - 10 minutes or so.
 2. While the vegetables are cooking, make the tempering. Heat 1 tsp oil in a small pan and add the garlic, sliced onions and tomatoes.
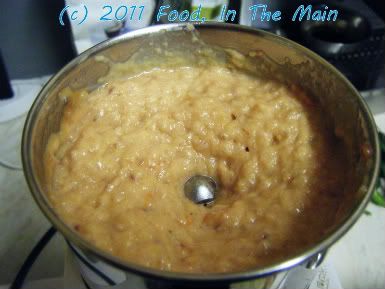
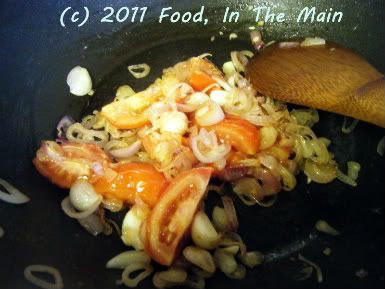 Cook till the onions are soft and the tomatoes are breaking down. Remove from the heat. Once they are cool, grind them to a smooth paste. Reserve.
 3. To make Ground Masala 2, heat a tsp of oil and add the ingredients, stir frying till the red chillies turn a darker shade and the dal and coriander seeds are aromatic and turn colour. If you are using pieces of coconut rather than grated, fry them for a little bit longer, but make sure not to burn any of the ingredients.
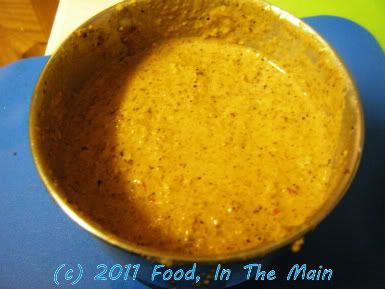
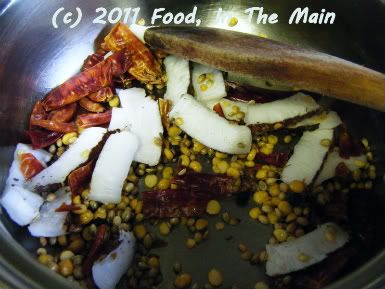 Remove from the heat and let cool, then grind to a smooth paste using a few tbsp of warm water as required. Reserve.
 4. Once the vegetables are cooked, stir the tomato-onion paste into the tamarind water and let it boil for 2 minutes.
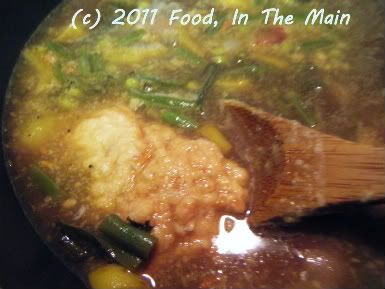 5. Now stir in the mashed cooked dal, making sure there are no lumps.
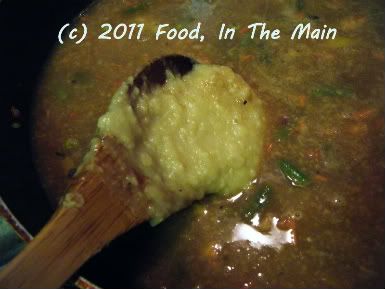 6. After a couple more minutes, add the ground coconut masala
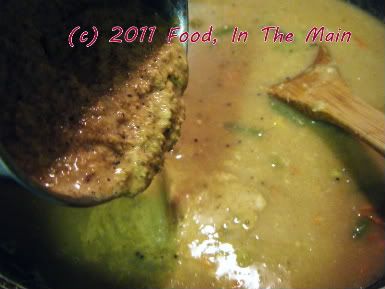 and salt to taste, then bring the sambar back to a gentle simmer. Let it cook for 4-5 minutes longer, till the contents are well homogenised.
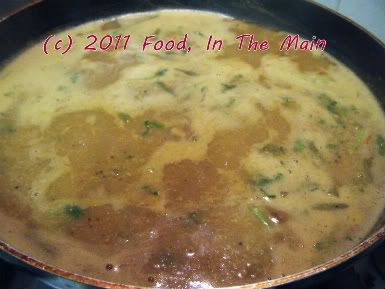
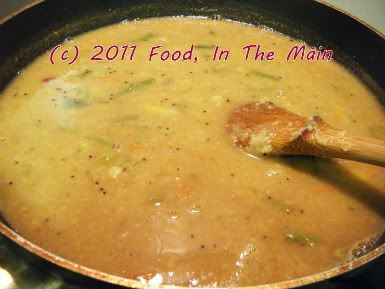 7. Garnish with the chopped coriander and serve hot with rice and any dry vegetable curry, or with dosas and idlis for an extra-special meal.
 RECIPE: ARACHUVITTA VENGAYA SAMBAR - VERSION 2
Ingredients:
1 cup tuvar/toor dal/thuvaram paruppu, to make 2 cups well cooked and mashed dal
2 tsp tamarind paste dissolved in 5-6 cups water OR lime-sized ball of tamarind, pulp extracted to make 5-6 cups tamarind water
1/4 cup green beans sliced into 1" lengths
1/4 cup fresh peas
10-12 sambar onions or 1 medium onion sliced
1/4 cup capsicum, cut in 1/2" pieces
Ground masala 1
1 tsp oil
5-6 cloves garlic
10-15 sambar onions (preferably), to make 1/4 cup sliced
2 small tomatoes, cut into pieces
Ground masala 2
1 tsp oil
2 tsp coriander seeds
2 tsp kadala paruppu/chana dal
5-6 dried red chillies (or to taste)
1/2 tsp cumin seeds
1/2 tsp black peppercorns
3-4 tbsp fresh coconut (pieces or grated)
For tempering
1 tsp oil
1 htsp mustard seeds
a few fresh or frozen curry leaves
1/2 tsp turmeric powder
1/4 tsp asafoetida powder
3-4 tbsp coriander leaves chopped, for garnish
Method:
1. Heat 1 tsp oil and add the mustard seeds, curry leaves, turmeric powder and asafoetida powder. Let the mustard seeds pop, then add the green beans, peas, sambar onions and capsicum, sauteing for 3-4 minutes. Pour in the tamarind water and bring to a boil, then turn down the heat to a gentle simmer till the vegetables are cooked - 10 minutes or so.
2. While the vegetables are cooking, make the tempering. Heat 1 tsp oil in a small pan and add the garlic, sliced onions and tomatoes. Cook till the onions are soft and the tomatoes are breaking down. Remove from the heat. Once they are cool, grind them to a smooth paste. Reserve.
3. To make Ground Masala 2, heat a tsp of oil and add the ingredients, stir frying till the red chillies turn a darker shade and the dal and coriander seeds are aromatic and turn colour. If you are using pieces of coconut rather than grated, fry them for a little bit longer, but make sure not to burn any of the ingredients. Remove from the heat and let cool, then grind to a smooth paste using a few tbsp of warm water as required. Reserve.
4. Once the vegetables are cooked, stir the tomato-onion paste into the tamarind water and let it boil for 2 minutes.
5. Now stir in the mashed cooked dal, making sure there are no lumps.
6. After a couple more minutes, add the ground coconut masala and salt to taste, then bring the sambar back to a gentle simmer. Let it cook for 4-5 minutes longer, till the contents are well homogenised.
7. Garnish with the chopped coriander and serve hot with rice and any dry vegetable curry, or with dosas and idlis for an extra-special meal.
This is the recipe which changed my mind about the tasteworthiness of flaxseeds/linseeds and convinced me that these seeds have a permanent place in my kitchen.
I understand these seeds are chemically stable in seed form and keep well without going rancid, but flaxseed oil goes rancid quickly. What I don't know, however, is how long they keep after being roasted and powdered. But I figure that if you make this podi (powder) in small batches, it should get around any potential problems of rancidity.
Oh, and a cautionary note on the pack of flax seeds I bought: Please ensure that you drink at least 150ml water extra per tbsp of flax seeds you consume, as they can cause constipation (especially if you don't normally drink plenty of water in the course of your day, I guess). I should think, however, that if you use a tbsp - or even two - of the paruppu podi with rice for a single portion, the flax seeds should not interfere with the digestion because of the other ingredients that also go to make up the powder.
Try this podi mixed with hot cooked rice and a dollop of ghee... ahhh, heaven!
Recipe for: Flax seed/linseed paruppu podi
Ingredients:
1/4 cup tur dal
1/8 cup urad dal
1/8 cup chana dal
1/8 cup golden flax seeds
5-6 dried red chillies
3/4 tsp black peppercorns
1/4 tsp cumin seeds
10 fresh or frozen curry leaves
1/4 tsp asafoetida powder
Salt to taste
1. Dry roast the chana dal and tuvar dal together with the dried red chillies till they turn aromatic and pale golden brown and the red chillies are a darker shade.
2. Dry roast the urad dal, golden flax seeds, black pepper corns, curry leaves and cumin seeds till the seeds are golden brown and the curry leaves are crisp
3. Let all the dals and seeds cool completely, then grind to a powder that is the texture of fine sand. Add salt to taste and mix well. Store in a clean dry jar.


