Showing posts with label eggs. Show all posts

Wednesday, September 21, 2016

Orgasmic cocoa walnut brownies

Brownies are my nemesis. I don't make them particularly often, and pretty much every past effort has ended up overbaked, dry and crumbly - not exactly ideal, when I like them chewy on the outside and fudgy in the centre. And with nuts in, to cut through the sweetness. 

Two weeks back I baked brownies again, using fancy dark chocolate, because I wanted to take them to a friend's new apartment where we had been invited for dinner. While those brownies were not too bad, they were still drier than I wanted. Sort of dusty tasting. This was disappointing and annoying, especially because I'd used expensive chocolate to make it. Nobody else seemed to mind and the brownies were gobbled down, but I was still not really happy with the result.

I nearly decided not to bother making them again, but those darned brownies kept bobbing about in the back of my mind, never quite going away. (Well, obviously not the ACTUAL brownies, but the thought of them.) Yesterday around midnight I finally gave in to the compulsion and decided to make them with cocoa powder (and the remainder of the dark chocolate from last time). Just regular cocoa powder (actually Tesco's own brand, so the very opposite of posh!) which had been lurking in the back of the cupboard for ages.

I made the brownies with hope, but no expectation that it would be what I wanted. For once, I managed to ignore my inner voice which was as usual screaming "but it's not FULLY baked yet!" and removed the brownies from the oven when the centre was still slightly shiny. A toothpick inserted into the centre went in with just a little resistance and came out mostly clean - perfect! The brownies were absolutely sensational - orgasmic, even. Just goes to show that expensive ingredients do not necessarily transform into fabulous baked goods. If you have not come across this tattuvam (truth, in Tamil) anywhere else before, or realised it for yourself during your own cooking experiments, then this is where you heard it first. Credit where it's due, after all, haha!

Here's another truth - underbaking a brownie is preferable to overbaking it. If, like me, you've baked cakes but are not particularly experienced with brownies, your instinct will be to ensure that the toothpick comes out clean. This is a good instinct when it comes to cakes, where underbaking would be disastrous, but it does not apply to brownies. Keep that in mind, and you'll be fine! More importantly, so will your brownies.
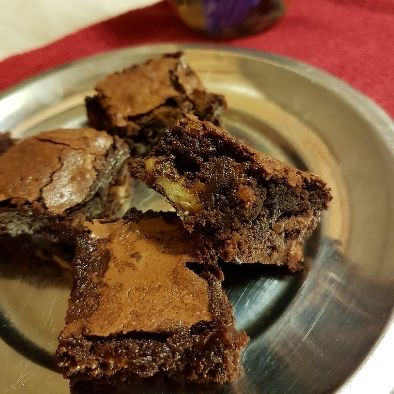
 photo d52aa14a-96c6-4a36-be57-028dff9eed1f_zpsytmsaois.jpg

Recipe for: Orgasmic walnut cocoa brownies

Ingredients:

140gm unsalted butter, cut into cubes
230gm granulated sugar
50gm unsweetened cocoa powder
30gm dark chocolate
1 htsp instant coffee granules
1/4 tsp kosher salt (or regular if you don't have kosher)
1 tsp pure vanilla extract
2 large eggs
65gm all-purpose flour
1/3 cup nuts of choice (I used walnuts), broken into small pieces

Method:

1. Preheat your oven to 170C. Line an 8"square tin with nonstick aluminium foil such that there is an overhang on all sides. This will make removing the brownies from the pan way easy!

2. Put the butter, sugar, salt, coffee granules and chocolate in a microwave safe bowl and heat it on high for 30 seconds, then stir with a wooden spoon. Repeat until the butter and chocolate are completely melted and smooth.

3. Tip in the cocoa powder and vanilla and stir until fully incorporated.

4. Add the eggs one at a time, stirring well. Then the flour, first mixing it in, then beating the mixture vigorously until it is thick and shiny. Stir in the nuts, if using.

5. Pour/scrape the mixture into the prepared tin - it will be quite thick - and level it. Bake for 20 minutes, or until the top of the mixture loses its shine. This may take a little more time in your oven, but after 20 minutes keep a very sharp watch on the brownies. Underbaking is always preferable to overbaking! A toothpick inserted into the center of the mix should come out mostly clean.

Remove the tin from the oven and let the brownies cool completely before cutting. If you can resist temptation, after the brownies are cool, put them in the fridge for 30 minutes. When cutting them, dip your knife in water every so often, to get clean cuts. Or, if you're like me, never mind refrigerating, just dive in!

Monday, January 25, 2016

Pineapple upside down cake

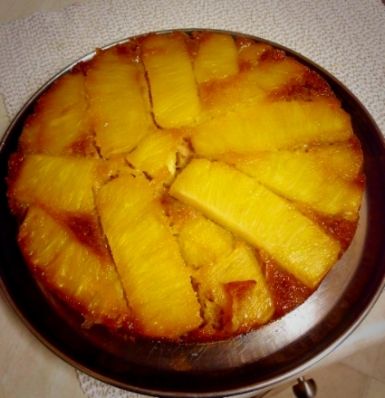
All these years of blogging, all these cakes I've made... and I've never posted a pineapple upside down cake recipe! It's kinda retro and old fashioned, apparently, but I've never understood how anything can be "in fashion" or "outdated" when it comes to food - especially if it's a tasty, delicious recipe. Who cares if it's from the '70s or the '50s or the '80s? For heaven's sake, it's FOOD, not fashion. It annoys me tremendously when some idiot foodista or television chef somewhere labels a particular greens or grain or fruit as "fashionable" or "healthy" or "THE must-have item", and the entire bleddy food blog world immediately features it, so that there is a landslide of samey same posts. I dislike food fads with a passion! Okay, my soapbox rant is over for today. 
So, pineapple cake. I only made it because Pete bought a bag of fresh pineapple "fingers" that was so acidic and sharp, it could have stripped the enamel from your teeth no problem. He then had the brainwave of making pineapple upside down cake. Or rather, getting me to make it. Since I had a simple, one-bowl sort of recipe (based on a BBC Good Food recipe) for this cake, I acceded to his request. 

While the recipe called for pineapple syrup and vanilla extract to flavour the cake, I didn't have either ingredient, my pineapple being fresh rather than canned. But there was enough pineapple juice at the bottom of the bag, which I substituted for the syrup. And then simply ignored the fact that there was no vanilla extract in my store cupboard. It didn't matter, anyway. The cake smelt amazing as it baked, so fragrant and pineappley, and it tasted as beautiful as it smelt. I love this cake - I just can't understand why it took me so long to post the recipe!
Recipe for: Pineapple upside down cake
 photo 2d2ece7f-b3c8-47c1-b7db-79daeb003197_zps6kmbngue.jpg

Ingredients: 

For the topping

50 gm softened butter
50 gm soft light brown sugar
Fresh pineapple fingers or tinned pineapple slices

For the cake

100 gm softened butter
100 gm soft light brown sugar
125 gm plain flour
1 tsp baking powder
1/2 tsp baking soda
2 large eggs
2 tbsp pineapple juice
1 tsp vanilla extract (if you have it)

Method:

1. Preheat the oven to 180C/350F. 

2. Beat the butter and sugar for the topping until soft and creamy. Spread this as best as possible around the bottom and halfway up the sides of a 7" round cake pan. 

3. Arrange the pineapple slices and cherries (if using) over this such that the entire bottom of the tin is covered with as few spaces as possible. 

4. In a big bowl, add all the cake ingredients and beat until the batter is soft and smooth, and the ingredients well mixed. 

5. Drop the batter by spoonfuls over the pineapple rings and spread evenly to cover.

6. Bake for 30-45 minutes until a tester inserted in the cake comes out clean. The cake could take longer than 45 minutes, or be done in less. Test at 35 minutes, then every 5-7 minutes until it is cooked. 

7. Let it sit in the pan for 10 minutes, then turn it out onto a serving plate. Eat warm, with or without vanilla ice cream.

Tuesday, February 10, 2015

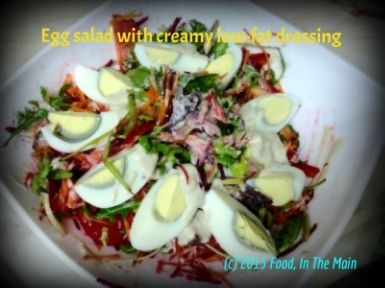
Egg salad with creamy salad dressing

I'm BAAAAAAAAAAACK! At least for today. This recipe is more for the salad dressing than the salad itself. You can use whatever salad vegetables you like, that you would eat raw. Mine had shredded carrots and beetroot, rocket (arugula), baby spinach, some lettuce of the red-veined variety (who knows what it's called!), tomato wedges, cucumber slices and of course boiled eggs.

Oh, and please ignore the rather gruesome grey-green ring around the yolks. I'm usually pretty deft at getting a perfectly yellow-yolk in my boiled egg, but it so happened that I completely forgot that I had eggs simmering away on the hob. I was distracted by a Facebook status and got sucked in, as you do. I don't know about you, but I blame Mark Zuckerberg. I was loath to throw the eggs away for this blemish and, besides, the green-ringed yolks aren't harmful to eat. So there you have it. By the way, the dressing works rather well with the eggs. I wouldn't have thought it, to be fair.

 photo Egg20salad_zpsblatmllv.jpg

Recipe for:
Egg salad with creamy salad dressing
Ingredients

For the salad dressing:

1 tbsp low-fat mayonnaise
4 tbsp Greek or natural yogurt (not sour)
1 htbsp grated parmesan cheese
1.5 tsp Worcestershire sauce
1 tsp lime juice
1 small garlic clove, grated
Freshly ground pepper
pinch of salt
pinch of smoked paprika

For the salad:
1 cup shredded carrots
1/2 cup shredded beetroot
2 medium tomatoes, quartered OR 10-15 cherry tomatoes, halved
1/2 cup cucumber slices
Generous mixture of salad leaves as desired
4 boiled eggs, peeled and quartered

Method:

1. Whisk all the ingredients for the dressing in a bowl. Thin it with a little water, whisking it in, until the dressing is thick but pourable. Adjust the ingredients as required till it tastes good to you. Chill the dressing until required.

2. Put all the salad ingredients in a large bowl and toss them together until evenly distributed. Just before serving, divide the contents between two bowls and dollop most of the dressing over. Mix it into the salad lightly and carefully with your hands fingers or using salad "hands". Place the quartered eggs on top, dab with the remaining dressing and serve at once.

Saturday, March 22, 2014

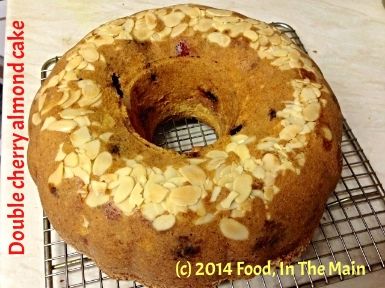
Double cherry almond cake

Can you believe it's over 6 months since I last posted anything on this blog? It's amazing how quickly times flies - the truth is that while I've kind of missed posting new recipes, I've also felt some relief to be able to ignore the tyranny of the blog itself. (Kind of. Obviously, since I'm posting a recipe now, I've not exactly totally escaped the tyrant!) Anyway, my husband keeps saying that it would be a shame to shut down this blog, considering how many years I've been keeping it going. I guess that's true, too. 

So, I made this cake because Pete loves maraschino cherries. I'd bought a big bag of these in the run-up to Christmas 2013, and while I did use some in fruit cake and Christmas cake, I've also been half toying with the idea of throwing the remainder of the cherries away. It's their sticky sweetness that puts me off. 


Pete would have been happy if I'd used just those cherries in a cake, but that really did not appear to me one bit. So I compromised by using the maraschinos, but also added Kirsch-soaked Morello cherries (I thought I had some dried sour cherries, but turns out not) that were lurking in my dried fruits container. Again left over from last Christmas, but no complaints there. 


For some crunch, and because I like nuts in my cakes to cut through the sweetness, I used flaked almonds both in the cake batter and in the topping. Of course, since this was baked in a Bundt pan, the "topping" is really the "bottoming", to coin a phrase. Doesn't sound particularly graceful, but that's how it hangs, my friends. In other words, you sprinkle the almonds in the pan, pour the batter on top, bake the cake, invert the baked cake - and voila, the bottoming is now the much nicer topping!


 photo photo12_zps6f5b8a10.jpg

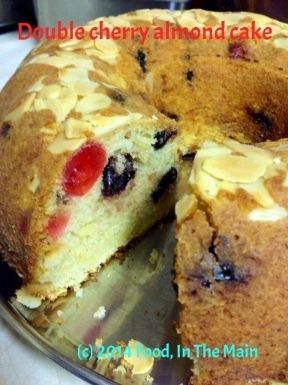
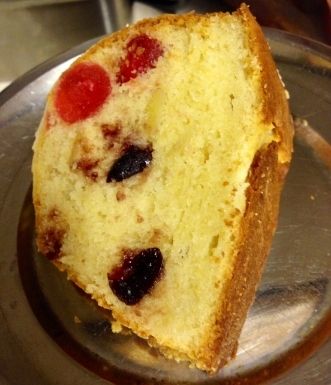
This cake smelt to me like a combination of sweet bread and cake all at once, while baking. No idea why, but it was lovely. The texture of the cake is moist and moreish, and the combination of the dark Morello cherries and the jewel-coloured maraschinos in every slice made the cake look beautiful!


 photo cd891771-ea36-45f7-94c7-ef490bbeb344_zps61502db4.jpg
 
Recipe for: Double cherry almond cake


 photo photo14_zpsb8695ea0.jpg

Ingredients:

1-1/2 cups all-purpose flour
1/2 cup ground almonds
1 cup butter at room temperature
1 cup Quark (you can use cream cheese)
1 cup white sugar
1/2 cup maraschino cherries
1/2 cup kirsch-soaked Morello cherries (or plain dried Bing cherries)
4 eggs
3 tsp baking powder
1/2 tsp salt
2 tsp vanilla extract
1 tsp almond extract
1/3 cup + 2 tbsp flaked almonds

Method:

1. Butter and flour an 8" Bundt pan and knock off the excess flour. Sprinkle the 2 tbsp flaked almonds evenly on the bottom of the cake pan. Preheat the oven to 165 degrees C. 

2. Mix together the flour, salt and baking powder, and set aside.

3. Beat the butter and sugar together until fluffy and light, then beat in the Quark and flavourings. 

4. Beat in the eggs one at a time, then mix in the flour until just combined. Stir in the maraschino and Morello cherries as well as the flaked almonds. 

5. Dollop the cake batter into the prepared Bundt pan. Tie or pin a wet towel around the cake pan. This helps the cake to rise evenly and not "dome" too quickly or crack. 

6. Bake the cake for about 70 minutes, testing with a skewer to see if it is done. If the top of the cake browns too quickly, cover it with a piece of foil. The cake is done when a tester or skewer poked into it comes out clean. 

Leave the cake in the pan for 5 minutes, then turn it out onto a cooling rack. Let ir cool for 15 minutes or so, then slice and serve.

Sunday, January 27, 2013

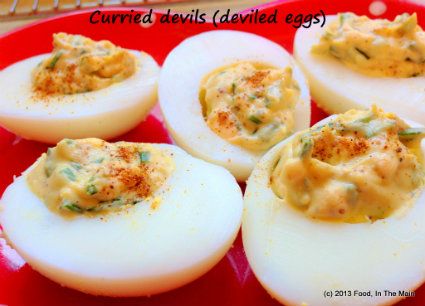
Curried devils (deviled eggs)

I recently read a book called "The Secret Supper Club" by Dana Bate, which was about this woman who worked as a research assistant, but whose dream was to become a cook - or chef, I suppose (which is really just a posh word for "cook"). It was a good if light read, just what I'd wanted at that point. 
currieddevil1_zps3757ac92 photo currieddevil1_zps3757ac92-1_zps4f045cec.jpg

I'm not really going to do a book review, but I had to mention the book because there were a few recipes at the end, of things that she'd made for her secret supper club guests, and the first of them was a recipe for deviled eggs. The rest of the recipes I was not interested in because they were rather too elaborately non-vegetarian. But this one seemed doable, so I did. 

I made a couple of minor changes, but mostly this recipe is as the book had it. The filling turned out to be much more lemon-sharp than I'd anticipated, and I think it's because I used perhaps a tablespoon's worth of lemon juice rather than the 1/2 tsp called for. It wasn't really a huge mistake for us, in any case, because Pete and I both love the sourness.

Recipe for: Curried devils (deviled eggs)
currieddevil_zpsb0e41ab3 photo currieddevil_zpsb0e41ab3-1_zps754e8507.jpg
Ingredients:

8 large eggs
1/4 cup mayonnaise
1 tsp Dijon mustard
1/2 tsp medium or mild curry powder (or use 1/4 tsp garam masala)
1/2 tsp lemon juice
1 tbsp finely chopped fresh chives
1/4 tsp smoked hot paprika/cayenne pepper
Kosher salt & freshly milled black pepper, to taste
1/2 tsp sweet paprika for garnish

Method:
1. Place the eggs carefully in a large saucepan and fill with cold water to come up to 1" above the eggs.
2. Bring to a bubbling boil, then turn the heat off, cover the pan and leave for exactly 14 minutes.
3. Then drain off the water and fill the pan again with very cold water, to stop the eggs cooking any further. Set aside for 10 minutes, then peel the eggs and slice them in half vertically.
4. Remove the yolks to a small bowl. Mash them smooth with a fork, then add the mayonnaise, Dijon mustard, curry powder/garam masala, lemon juice, chives and hot paprika and mix thoroughly. Taste the mixture, adding a bit more of whatever you feel is lacking. Add salt (careful with this as the mayonnaise will already have salt) and pepper to taste and mix one final time.
5. Spoon the egg yolk mixture into a sealable sandwich bag or Ziploc bag (or use a disposable pastry bag) piling the filling as far as possible into one corner. Snip off the corner of the bag with scissors, then pipe the mixture into the egg whites. Sprinkle with a little sweet paprika to garnish, and serve at room temperature or cold.
Note: If you have any mixture left over (and going by my experience, you will), use it in a sandwich, or as a spread on toast. You can store the unused mixture in a sealed container in the refrigerator for a day.

Saturday, May 12, 2012

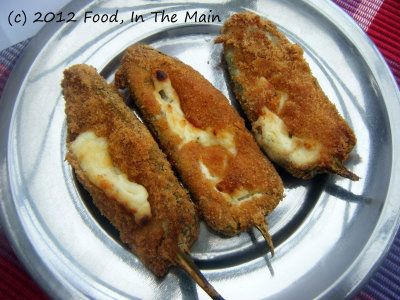
Baked jalapeno poppers

The first time I ate these little things was at a work party in Singapore and they were the frozen store-bought type - but they were so delicious that I made a pig out of myself over them. I don't remember eating anything else that evening, actually. It could have just been the relief of finding something to eat that was vegetarian (our office parties had plenty of delicious looking things to eat, 98% of them barred to me), but that was not the real reason I monopolised the poppers - the real reason was a sort of disbelieving greed that something could be so darn good. I didn't imagine that replicating them at home was possible, so I didn't bother. I didn't even know what they were called, other than the generic "stuffed pepper".

Eventually, though, years later and thanks to the Internet and food websites, I discovered that the peppers were called jalapenos, and that the stuffed ones had a name - poppers. Going by my own experience, I imagined that was because you couldn't stop popping them into your mouth. Pop pop pop...

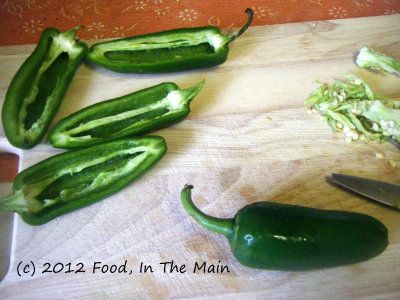
Anyway, if I was making these just for myself, I would not have bothered to remove the innards from the jalapenos. But as there were other less chilli-tolerant people who would be trying out the poppers, I removed every last vestige of seeds and pith that I could manage. So, stuffed with cheese as they were, the poppers didnt quite give me that hit of heat I would've ideally liked. That said, they were still quite, quite delicious. One of the few things, in my opinion, that are just as gorgeous baked as deep-fried. 

Don't get me wrong, just because they are baked doesn't mean these jalapenos are low in fat or can be classified as health food (oh how I wish...!) - far from it. But they're that much less fattier than deep-fried, that's all. They're best had fresh and warm - I don't think I would recommend eating them oven-hot, because the cheese would probably strip the lining from your cheeks. Eat them warm, though, and tell me these poppers aren't the scrummiest thing you've ever tasted...

Recipe for: Baked jalapeno poppers
DSCF8181a
Ingredients:
10 jalapenos, all of a size
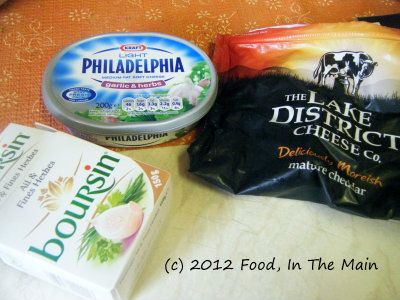
1/3 cup garlic-herb cream cheese
1/3 cup Boursin cheese
1/3 cup grated mature Cheddar cheese
DSCF8164a
2 tsp milk
1/2 tsp ground pepper
1/2 cup plain flour
1/2 tsp garlic powder
1 egg + 1 egg white
Breadcrumbs as required (1 generous cup)
Water


Method:
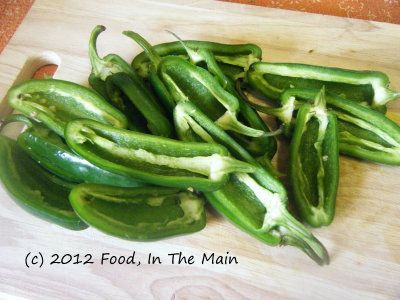
1. Halve the jalapenos lengthwise and carefully remove the seeds and pith without cutting through the flesh.
DSCF8158a
DSCF8159a
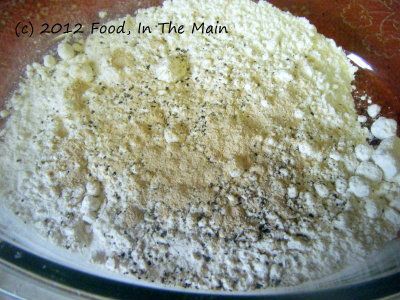
2. Mix the flour, pepper and garlic powder in a shallow, wide bowl.
DSCF8160a
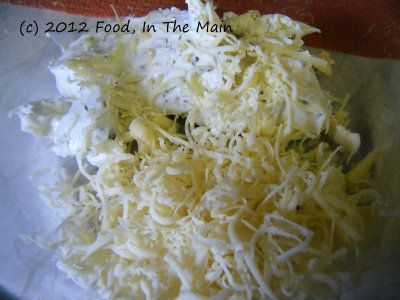
3. Put the cream cheese, Boursin and cheddar in a bowl and mix together well.
DSCF8165a
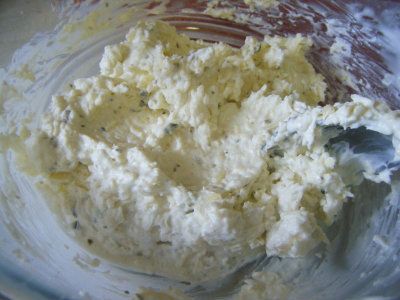
Dribble in the milk and blend again.
DSCF8167a
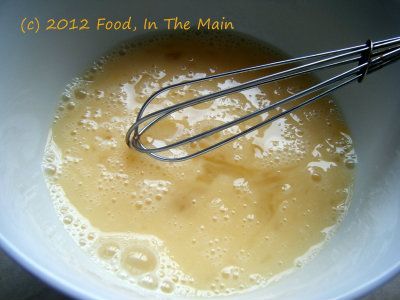
4. Whisk the egg and egg white till well blended but not foamy.
DSCF8162a
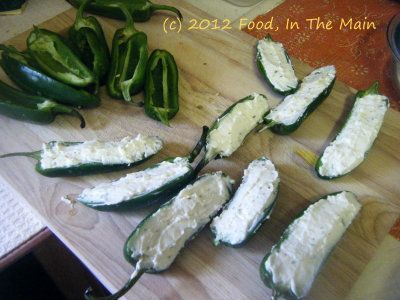
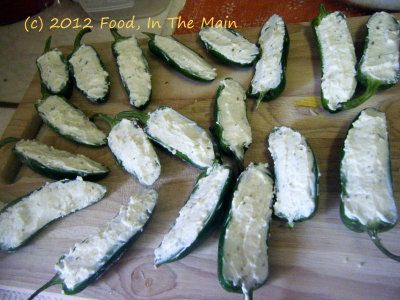
5. Fill the jalapeno halves with the cream cheese mixture.
DSCF8169a
DSCF8170a
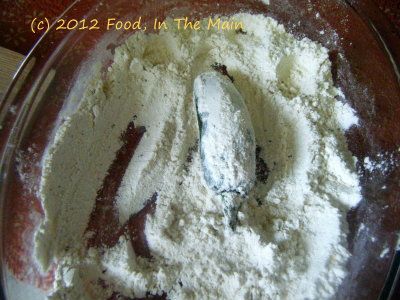
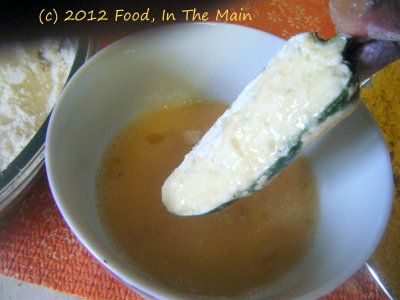
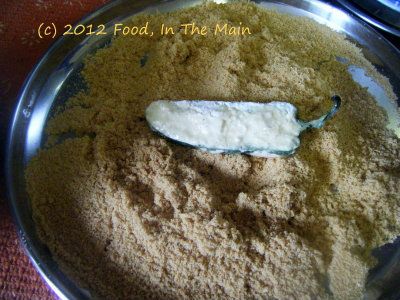
6. Put some plain water in a shallow bowl. Dip each filled jalapeno first in the water, then in the flour so that both sides are well covered,
DSCF8177a
then in the beaten egg,
DSCF8174a
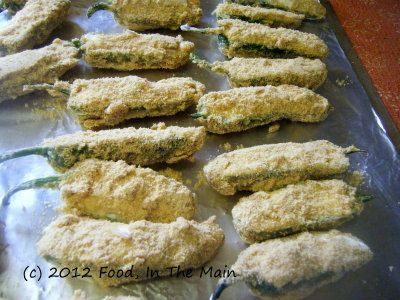
and finally in the breadcrumbs.
DSCF8175a
Place on a non-stick foil-covered baking tray.
DSCF8179a
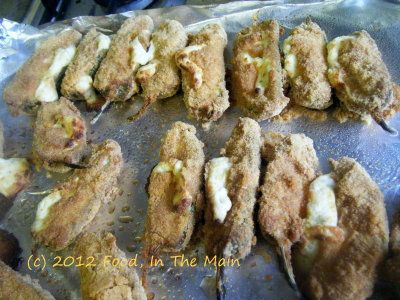
7. Heat the oven to 180C/350F and bake the jalapenos for about 30-40 minutes - it took 30  minutes in my fan-assisted oven.
DSCF8180a
8. Serve warm or at room temperature.

RECIPE: BAKED JALAPENO POPPERS
Ingredients:
10 jalapenos, all of a size
1/3 cup garlic-herb cream cheese
1/3 cup Boursin cheese
1/3 cup grated mature Cheddar cheese
2 tsp milk
1/2 tsp ground pepper
1/2 cup plain flour
1/2 tsp garlic powder
1 egg + 1 egg white
Breadcrumbs as required (1 generous cup)
Water
Method:
1. Halve the jalapenos lengthwise and carefully remove the seeds and pith without cutting through the flesh. 
2. Mix the flour, pepper and garlic powder in a shallow, wide bowl.
3. Put the cream cheese, Boursin and cheddar in a bowl and mix together well. Dribble in the milk and blend again. 
4. Whisk the egg and egg white till well blended but not foamy. 
5. Fill the jalapeno halves with the cream cheese mixture. 
6. Put some plain water in a shallow bowl. Dip each filled jalapeno first in the water, then in the flour so that both sides are well covered, then in the beaten egg, and finally in the breadcrumbs. Place on a non-stick foil-covered baking tray. 
7. Heat the oven to 180C/350F and bake the jalapenos for about 30-40 minutes - it took 30  minutes in my fan-assisted oven.
8. Serve warm or at room temperature. 

Sunday, May 06, 2012

Easy peasy Yorkshire puddings

If you're unfamiliar with British cuisine, you'll probably be expecting a recipe for a dessert of some sort - but this is no dessert, even though they're termed "puddings". They're savoury, airy puffs of pure carb and, filled with gravy, they're an indispensable part of "Sunday lunch" along with the roast potatoes, parsnips, carrots and other vegetables that accompany the roast chicken or beef.

I'd never made them before, and while it's not a complicated recipe, the recipes on BBC Food asked for the ingredients to be precisely measured. I was leery of doing this - I hate having to weigh things carefully; the detail work just doesn't appeal to my slapdash nature.

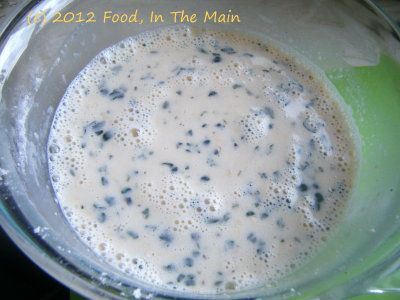
Then I came across a ridiculously simple recipe, and I really doubt this can be made any easier. It's just brilliant! I added some herbs to the batter, but otherwise there's no change to the recipe. Eggs, flour, milk, seasoning. That's it.

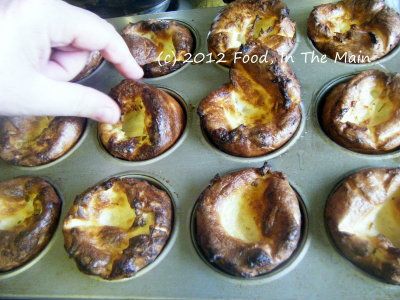
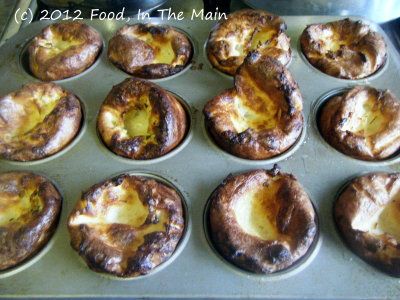
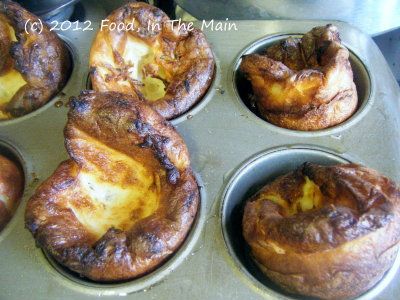
If you don't have proper Yorkshire pudding pans, you can make them just as well in muffin pans, like I did. Be warned, these puddings puff up quite a lot. Mine turned out all sizes and shapes because my oven doesn't heat evenly... but the puddings tasted great. They were, if anything, slightly burnt on top, but that was deliberate because that's how Pete likes them.
DSCF8193a
Pete (actually, his hand) trying to sneak a Yorkie from the tin even as I was taking a photograph!

And unless you're competing in Masterchef, the weird sizes and shapes don't matter one bit. Taste is king.

Recipe for: Easy peasy Yorkshire puddings
DSCF8195a

Ingredients:
2 large eggs
Plain flour, equal in volume to the eggs
Milk, equal in volume to the eggs
Salt to taste
Freshly ground pepper to taste
1/2 tsp minced fresh thyme
1/4 tsp dried rosemary
Oil for cooking

Method:
1. Preheat the oven to 220C/425F.
2. Place three glasses of equal size and shape side by side. Break the eggs into one glass. Pour milk in the next glass to come up to the same level as the eggs. In the third glass, put in enough flour to come up to the same level as the eggs/milk.
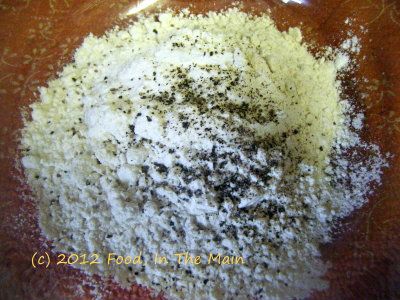
3. Now put the flour in a medium mixing bowl and add the salt, pepper and herbs. Stir together.
DSCF8183a
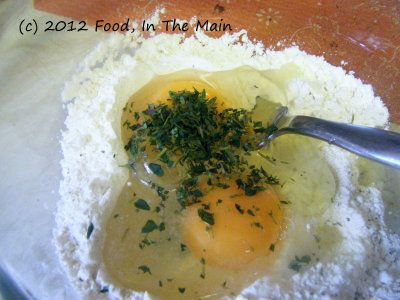
4. Make a well in the centre of the flour and pour in the eggs.
DSCF8186a
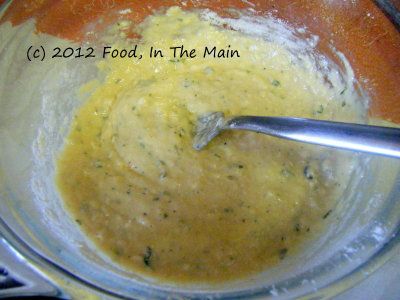
Beat with a fork till the eggs and flour are well mixed.
DSCF8187a
5. Now pour the milk in a steady, thin stream while whisking the mixture constantly to make a smooth batter.
DSCF8188a
Rest the batter for at least 10 minutes. (According to other recipes I've read, the batter can be stored covered in the fridge for up to 12 hours before baking - but I haven't tried this out and don't know what difference it will make to the puddings.)
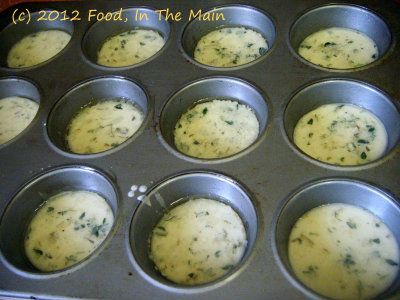
6. Take a 12-tray muffin pan. Pour a tsp of oil into each cup to cover the bottom, and grease the sides as well. Heat the muffin pan in the hot oven for 5-6 minutes or till the oil is smoking hot.
7. Pour a small ladleful of the batter into each cup as quickly as possible(fill it no more than half-way),
DSCF8192a
then return the tray to the oven immediately. Let the puddings bake for 10-15 minutes (do not open the oven for the first 10 minutes) or until they are golden brown.
DSCF8194a
Remove and serve immediately.
DSCF8196a
They can also be frozen after they're completely cool.


RECIPE: EASY PEASY YORKSHIRE PUDDINGS
Ingredients:
2 large eggs
Plain flour, equal in volume to the eggs
Milk, equal in volume to the eggs
Salt to taste
Freshly ground pepper to taste
1/2 tsp minced fresh thyme
1/4 tsp dried rosemary
Oil for cooking


Method:
1. Preheat the oven to 220C/425F.
2. Place three glasses of equal size and shape side by side. Break the eggs into one glass. Pour milk in the next glass to come up to the same level as the eggs. In the third glass, put in enough flour to come up to the same level as the eggs and milk. 
3. Now put the flour in a medium mixing bowl and add the salt, pepper and herbs. Stir together. 
4. Make a well in the centre of the flour and pour in the eggs. Beat with a fork till the eggs and flour are well mixed. 
5. Now pour the milk in a steady, thin stream, whisking the mixture constantly until a smooth batter is formed. Rest the batter for at least 10 minutes. (According to other recipes I've read, the batter can be stored covered in the fridge for up to 12 hours before baking - but I haven't tried this out and don't know what difference it will make to the puddings.) 
6. Take a 12-tray muffin pan. Pour a tsp of oil into each cup to cover the bottom, and grease the sides as well. Heat the muffin pan in the hot oven for 5-6 minutes or till the oil is smoking hot. 
7. Pour a small ladleful of the batter into each cup as quickly as possible (fill it no more than half-way), then return the tray to the oven. Let the puddings bake for 10-15 minutes (do not open the oven for the first 10 minutes) or until they are golden brown. Remove and serve immediately. They can also be frozen after they're completely cool. 

Sunday, April 29, 2012

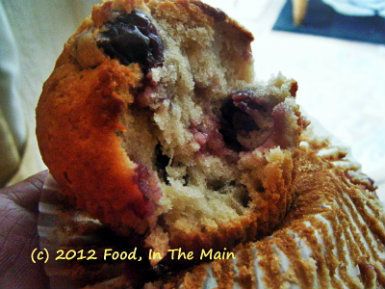
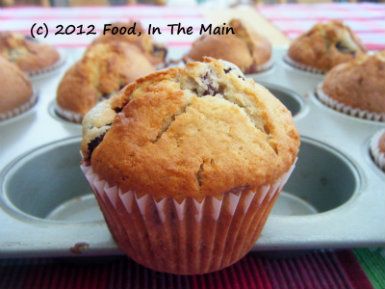
Cherry muffins

DSCF8097
This is a simple muffin recipe - not that muffins are overly complicated things to make, but there are recipes which do turn them into a full-scale production. For this one, however, you mix the dry and the wet separately, then introduce the wet to the dry to make the batter, fold the cherries in briefly and voila! Bob's your uncle and the muffin batter is all ready to go in the muffin pans. (If, by the way, Bob IS your uncle, do say hello from me. I don't have an uncle Bob in my life.)
Recipe for: Cherry muffins
DSCF8096

Ingredients:
2 cups sour cherries (I used canned cherries, drained)
2-3/4 cups all-purpose flour
2/3 cup sugar
2 tsp baking powder
2 tsp vanilla extract
4 tbsp butter, melted
2 large eggs
1 cup milk

Method:
1. Mix together the flour, baking powder and sugar in a large bowl.
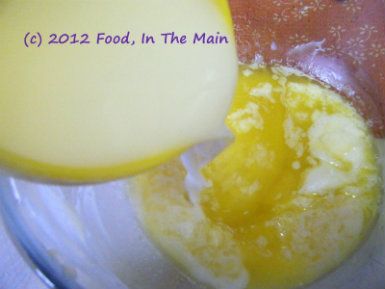
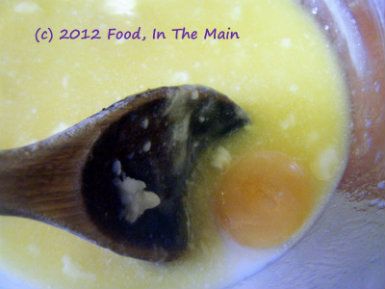
2. In a smaller bowl, mix the melted butter,
DSCF8091
milk,
DSCF8091
eggs and vanilla
DSCF8092
and stir till well combined.

3. Make a well in the flour, then pour in the wet milk mixture and stir together lightly until the flour is just combined.
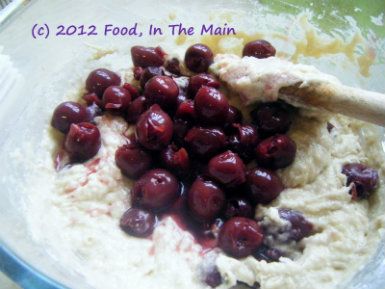
4. Stir in the cherries,
DSCF8093
 then spoon the batter into a muffin pan lined with paper cases. Bake at 180C for about 30 minutes, till the muffins are golden brown on top.
DSCF8094
Remove from the oven and let the muffins cool in the pan for 10 minutes.
DSCF8095
Serve warm.


RECIPE: CHERRY MUFFINS

Ingredients:
2 cups sour cherries (I used canned cherries, drained)
2-3/4 cups all-purpose flour
2/3 cup sugar
2 tsp baking powder
2 tsp vanilla extract
4 tbsp butter, melted
2 large eggs
1 cup milk

Method:
1. Mix together the flour, baking powder and sugar in a large bowl.
2. In a smaller bowl, mix the melted butter, milk, eggs and vanilla and stir till well combined.
3. Make a well in the flour, then pour in the wet milk mixture and stir together lightly until the flour is just combined.
4. Stir in the cherries, then spoon the batter into a muffin pan lined with paper cases. Bake at 180C for about 30 minutes, till the muffins are golden brown on top. Remove from the oven and let the muffins cool in the pan for 10 minutes. Serve warm.

Monday, May 09, 2011

Spinach potato frittata

It feels like a really long time since I’ve written anything, and I’m finding it a bit difficult to get started. You’re not likely to know, unless I specifically mention it here, that I’ve deleted half-a-dozen different starting lines and spent over a quarter of an hour staring at a blank page between deletions. Yes, I have specifically mentioned it here so that you’d all know. I’m determined to continue with this opening paragraph no matter where it goes – no more deletions!

Isn’t the ability to compose and instantly delete a total godsend? That, or it has a lot to answer for - depending on how you look at it. I’m sure that if I was writing this long-hand, I would think harder, write more carefully and delete a lot less – and I’d also write a lot, lot less! (I’m firmly on the side of “godsend”, just so you know. Three cheers for computers and instant deletions - and the instant “undo delete” facility, too).

It doesn’t help that I’ve just come back from a trip to Seattle and I’m still missing my family – specifically, my little 9-month-old niece. Although I took my laptop with me, I literally didn’t even take it out of my suitcase for the 2 weeks that I was in the States. And since I didn't cook anything except a particularly bad cake, it certainly wasn’t worth the time and effort that would’ve been required to blog about, and so my laptop stayed in its case. Add that to the general lethargy I was feeling before the trip, and it explains the long silence on this blog.

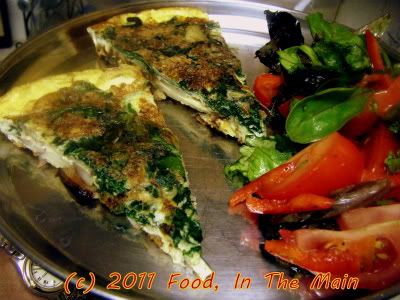
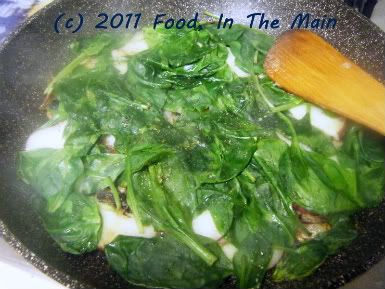
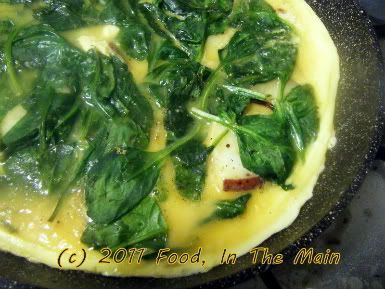
That’s not to say that I didn’t have any good intentions – I did take photos while making this frittata, just a day before we left for Seattle when we had my mother-in-law staying with us. There’s a glut of spinach (in the frittata AND in the side salad) because I was doing my best to finish what I could of it along with the eggs.

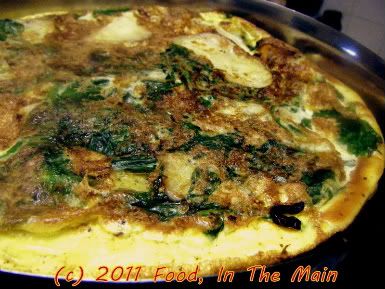
For a last-minute effort, this was an absolutely delicious frittata. Granted, it’s pretty hard to make a bad-tasting frittata. The most difficult part here was sliding the frittata from the frying pan onto a large plate, prior to flipping it back into the pan again… but if you have a cast-iron frying pan that can go directly into the oven, there’s no dicey sliding or flipping involved in browning the top of the frittata – it can be grilled as it is.

(Note to self: MUST get large cast-iron frying pan. Wonder if I can float a loan to buy a top-of-the-range pre-seasoned cast-iron pan...) 
Recipe for: Spinach potato frittata
Photobucket
Ingredients:

6 large eggs
2 medium onions, thinly sliced
2 cups spinach
2 medium potatoes, thinly sliced
2 tbsp olive oil
4 tbsp milk or cream
3/4 tsp dried herbs (I used an Italian mix), optional
3 tbsp chopped mixed herbs to taste (I used sage, basil, lemon thyme and a bit of rosemary)
Salt and pepper to taste

Method:

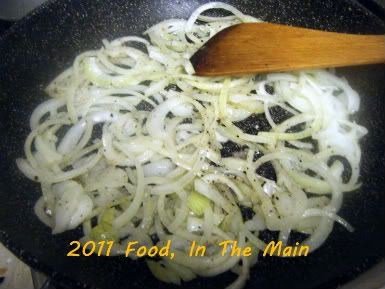
1. Heat the olive oil in a large frying pan and saute the onions till they're soft and just turning pale brown.
Photobucket
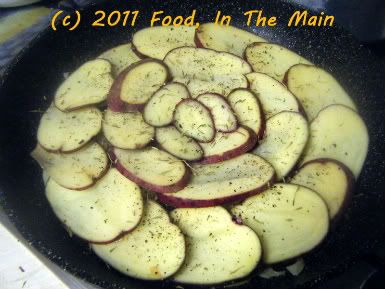
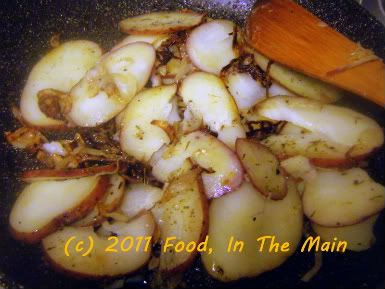
2. Arrange the sliced potatoes over the onions. Add the dried herbs if using and cover the pan till the potatoes are cooked.
Photobucket
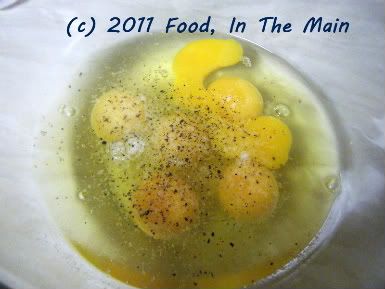
3. In the meantime, break the eggs into a large bowl and add pepper to taste.
Photobucket
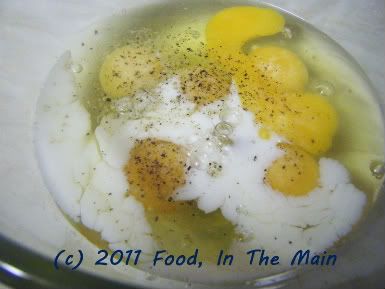
4. Then add the milk or cream
Photobucket
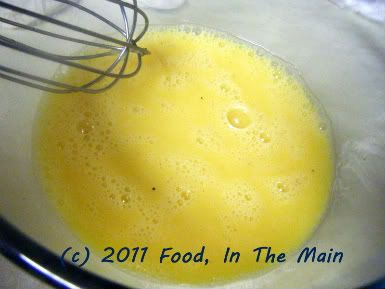
and beat the eggs till lightly frothy.
Photobucket
5. Stir the cooked potatoes gently, turning them over if desired.
Photobucket
6. Add the spinach and cover the pan for 2-3 minutes, till the spinach starts to wilt.Photobucket
7. Add salt to taste and the chopped fresh herbs to the beaten eggs and pour it over the vegetables.
Photobucket
8. Cook over medium-low heat with the pan covered, till the frittata is mostly set - it should jiggle a bit in the centre, but the eggs should not be runny. Loosen the frittata carefully around the edges and slide it gently onto a large plate (ideally it should be bigger than the frying pan). Place the hot pan over the frittata on the plate, and carefully flip the plate so that the top part of the frittata becomes the bottom. (The frittata should now be a lovely golden brown to look at.) Put the frying pan back on the heat and cook the frittata for 2-3 minutes longer to brown the bottom.
Photobucket
Serve the frittata cold or hot.

RECIPE: SPINACH POTATO FRITTATA

Ingredients:
6 large eggs
2 medium onions, thinly sliced
2 cups spinach
2 medium potatoes, thinly sliced
2 tbsp olive oil
4 tbsp milk or cream
3/4 tsp dried herbs (I used an Italian mix), optional
3 tbsp chopped mixed herbs to taste (I used sage, basil, lemon thyme and a bit of rosemary)
Salt and pepper to taste

Method:
1. Heat the olive oil in a large frying pan and saute the onions till they're soft and just turning pale brown.
2. Arrange the sliced potatoes over the onions. Add the dried herbs if using and cover the pan till the potatoes are cooked.
3. In the meantime, break the eggs into a large bowl and add pepper to taste.
4. Then add the milk or cream and beat the eggs till lightly frothy.
5. Stir the cooked potatoes gently, turning them over if desired.
6. Add the spinach and cover the pan for 2-3 minutes, till the spinach starts to wilt.
7. Add salt to taste and the chopped fresh herbs to the beaten eggs and pour it over the vegetables.
8. Cook over medium-low heat with the pan covered, till the frittata is mostly set - it should jiggle a bit in the centre, but the eggs should not be runny. Loosen the frittata carefully around the edges and slide it gently onto a large plate (ideally it should be bigger than the frying pan).
Place the pan over the frittata on the plate, and carefully flip the plate so that the frittata falls back into the pan; the top part becomes the bottom. The frittata should  be a lovely golden brown to look at. Put the frying pan back on the heat and cook the frittata for 2-3 minutes longer to brown the bottom. Serve the frittata cold or hot.