skip to main |
skip to sidebar
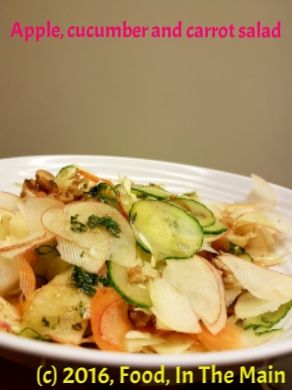
Salads aren't my most favourite food, if I am to be honest. Seeing a recipe for salad on anyone's blog doesn't usually float my boat. So I don't expect this simple recipe to turn the Internet's head and send millions of unique visitors my way. But it really was a refreshing salad when I ate it yesterday, and I thought it worthwhile to make a post of it. The best part was that the apples were from my own little container tree, which has done rather well this year. i think I got about 20 apples from it, all told. It's only got two branches!
I had picked a couple of apples to see if they were edible or whether I would have to make an apple crisp or cake, because last month when I tried one, it was much too sour to make pleasant eating. (I made a cake with the apples then). They are meant to be eating apples, you see. But this time they were perfect, beautifully juicy and sweet with the right amount of tartness. Really lovely. Why I fancied a salad using the apples, I have no idea. I don't usually want a salad for dinner. But I had also picked some mint too, and I wanted to use that. So here it is. I can assure you that the salad is refreshing and I really enjoyed it. It is not any more exciting than that, unfortunately.
No wait, that's not quite true. There was SOME excitement while I was slicing the vegetables - I used a mandoline to make wafer-thin slices, and it was so viciously sharp and efficient at its job that I found I had sliced a bit off the side of my forefinger before I knew it. I cursed a bit and ran cold water over my finger, then went back to the mandoline. And it happened AGAIN, this time to my thumb. It was painful, but at least I can claim that I put myself into my salad. You don't have to do the same, though. I'm sure the salad would taste just as nice without the blood, sweat (metaphorically speaking) and tears.
Recipe for: Apple, cucumber and carrot salad
Ingredients:
2 medium eating apples
1 small cucumber
1 medium carrot
2 tbsp walnuts
handful of Chinese cabbage or lettuce, shredded very fine
For the dressing:
1 tbsp lime juice
1 tbsp olive oil
1 tbsp very finely chopped mint
1 tbsp honey
1 tsp apple balsamic vinegar
Salt to taste
1. Slice the cucumber, apples and carrot very thinly (I used a mandoline).
2. Whisk together the ingredients for the dressing. Adjust the taste to your requirement.
3. Mix the salad vegetables together, then add the dressing a little at a time - you may not require all of it, so go easy. Sprinkle the walnuts on top and eat immediately.
This post is dedicated to a dear blogger whose every post reflects her sincerity and sweetness - Linda OutOfTheGarden(AndLatelyByTheLake). If it hadn't been for her timely rant, you wouldn't be reading this - because there wouldn't have been anything to read. Oh by the way, do read her rant - you'd be hard pressed to find a gentler, sweeter one! When I rant, I rant; when Linda rants... well, she's as likable as ever!
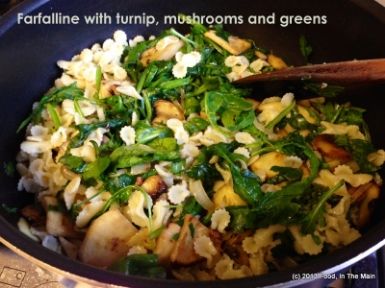
About this recipe, it was meant to be mild and mostly monochrome (white turnip, white pasta, white onion, white mushrooms) but I decided to greenify it a bit by adding spinach and rocket (love the stuff) and a tiny touch of red and heat by way of a fresh red chilli - and then some crunch in the form of pine nuts... and pretty soon it wasn't the original recipe any more. It was better (she said humbly).
Recipe for: Farfalline with turnip, mushrooms and greens
Ingredients:
1/2 cup farfalline or orzo pasta
1 medium turnip, peeled and sliced about 1/4 cm thick and each slice quartered
1 small onion or 2 banana shallots, chopped fine
1/3 cup chestnut mushrooms, sliced
Good handful of spinach leaves, torn
Good handful of rocket leaves
1 red chilli, minced very fine (optional)
1 fat clove garlic, sliced
1 tsp butter
2 tsp olive oil
Salt and pepper to taste
2 tbsp basil and parsley, sliced
1 tbsp toasted pine nuts, for garnish
Method:
1. Cook the orzo/farfalline according to directions in plenty of boiling salted water. Drain, toss with a little olive oil and set aside.
2. Heat 1 tsp oil in a pan and add the garlic, chillies and shallots and stir. Cook over medium heat until the shallots are soft and light brown. Remove from the pan and set aside.
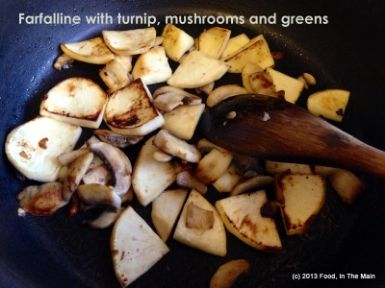
3. In the same pan, heat the remaining oil and butter, add the sliced turnip and mushrooms. Fry until they're golden brown, about 7-8 minutes.
4. Add the cooked shallots to the pan and mix them in. Toss in the spinach and rocket, then stir in the cooked pasta. Add salt and pepper to taste. Stir in the basil and parsley, scatter over the pine nuts, and serve hot or at room temperature.
Tell you what, I'm really enjoying baking bread. I can say quite definitively that I'm no longer afraid of working with yeast - instant or fresh. I've actually got into the rhythm of baking two loaves of bread (sometimes three) pretty much every other Saturday. They're mostly a mix of white and wholewheat bread for everyday use, and sometimes I bake a third loaf which might be a flavoured one, to go with soups and suchlike.
The bread loaves get sliced - and I'm getting pretty good at cutting even, thin slices, even if I do say so myself - divided into half-loaves and fed to the freezer, stored in bags labelled with the date of baking. That way I get to rotate recycle use up the bread, oldest ones first. Yep, I'm THAT organised. It's kind of disconcerting, even to me. Or especially to me, because only I know just how alien this behaviour is to me.
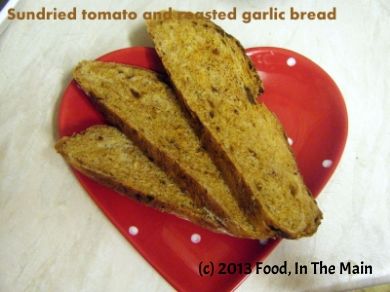
Now that you've all been made aware of my weekend baking activities and the resulting follow-ons - which information I'm sure has been of great interest, by the way - let's get to the sundried tomato and roasted garlic bread that is today's recipe. By rights it should have been posted two months back, because that's about when I made it... but never mind that. The bread is really nice with soup, but I was happy to eat it by itself, with no adornments, because it was that tasty. Can't say better than that, can I?
By the way, if you don't like a strong garlic flavour, use less of the roasted garlic paste... and if your thing is to wilt every living thing within a 10-metre radius with your breath, by all means use MORE garlic paste, as much as you want. At least Dracula won't get you.
Recipe for: Sundried tomato and roasted garlic bread
Ingredients:
3-1/2 cups (15 oz) strong white bread flour
2-3 tbsp olive or other oil of choice
2 tbsp double concentrated tomato paste
1 tbsp roasted garlic, roughly mashed
1/4 cup chopped sundried tomatoes in oil (but leave out the oil)
1 htsp salt
About 300 ml warm water
1/2 tbsp instant yeast
Method:
1. Place the flour in a deep bowl and mix in the instant yeast and salt.
2. Then add the roasted garlic, tomato paste, and chopped sundried tomatoes
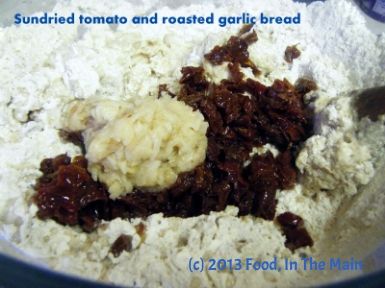
along with 250 ml of the warm water and mix together till the flour begins to form a rough dough. Cover and let it rest for 10 minutes to absorb the water.
3. Now knead again, adding as much of the remaining 50ml water as required, to make a dough that is not exactly sloppy but also not hard or dry either.
4. Pour 1 tbsp olive oil on your worktop (make sure your worktop is clean first!) or kneading board and spread it around a bit. Turn the dough out onto the oil and start kneading, pushing the dough away from you with the heel of your hand, turning it a quarter, then repeating the pushing/turning movement. Add more oil to the worktop if the dough starts sticking again, and continue kneading. Occasionally scrape your hand clean of dough.
5. After about 8-10 minutes, the dough should be elastic and only a little tacky. Now grease a large bowl (I use Pam spray, but you can use more oil if you like) and place the dough in it, turning it around to completely coat it in the oil. Cover the bowl and place in a warm place for the dough to rise and more or less double in volume. This can take between 1-2 hours, or even longer - there's no way to accurately predict how long it might take, so I can't give you a precise time.
6. Once the dough is risen, punch it back down. Sprinkle a couple of tbsp extra flour on your workspace and put the dough on it. Shape it into a round ball, place on a baking tray (flour the top of the dough lightly if you like) and cover with a clean tea-towel. Let the dough rise again for 45 min to an hour. Use a sharp knife to slash a 1-cm deep cross into the top.
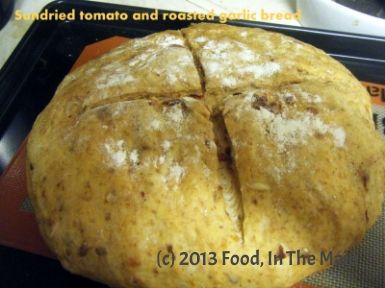
7. Preheat your oven to 180C/350F and put the dough in to bake. Let it bake for 25-30 minutes - the top should be a nice golden brown and the bottom should sound hollow when tapped.
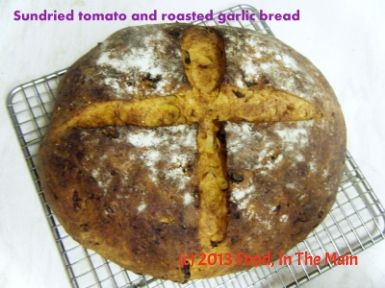
Remove the loaf to a wire cooling rack and let cool completely. Serve sliced, with soup.
I keep hearing things about roasted garlic... good things, like how lovely and mellow it tastes, and how it's perfect as a spread straight onto fresh French bread, etc etc. It's not a new thing, obviously. I must confess that this is not the first time that I've roasted garlic bulbs whole. It's actually the second time. And the reason that there's been a gap of a few years between the first attempt and this one is that I sodhapufied (ruined, in Tamil slang) it big time. The garlic was absolutely disgusting, bitter to the core. After that I was too nervous to try again, although I thought about it every so often.
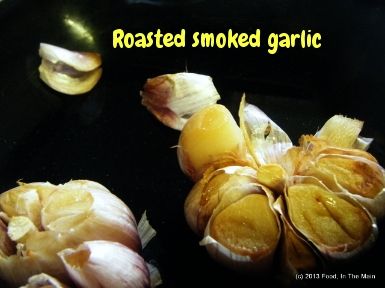
Then I bought 3 bulbs of smoked garlic on an impulse, with no real idea of what to do with them... until it struck me that I could roast them. This time, I was careful to cover the garlic with foil and to roast the heads at 180C for about 30 minutes. This time, probably because I was careful, the roasted garlic was just wonderful - it slipped out of its papery skin without a problem, it smelt gorgeous, and I must have eaten a full head by myself without really realising it, it was that good. The rest of the bulb I used to make a garlic and tomato bread... but that's for another post.
PS. You don't have to use smoked garlic; regular garlic will do just as well.
Recipe for: Roasted smoked garlic
Ingredients:
3 heads of smoked garlic
3 tsp olive oil
Method:
1. Peel the garlic until you're down to the single skin covering the bulbs. Slice off the top of the bulbs to expose the white flesh within.
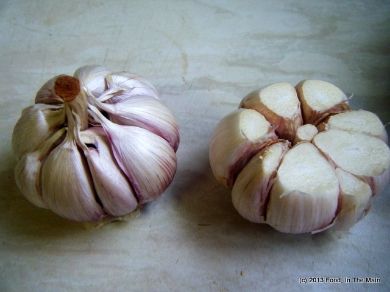
2. Drizzle one tsp olive oil over each cut head of garlic. Place in a small baking tray and cover the top tightly with foil.
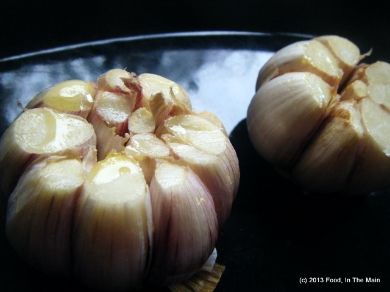
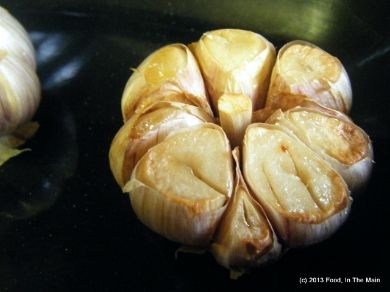
3. Bake at 180C (350F) for 20-30 minutes, or till a knife inserted into a garlic pearl goes in easily. Remove from the oven and let cool slightly before squeezing the inner flesh from the papery skin (carefully, as it can still be very hot). Use the roasted garlic in cooking, or just smear it on a baguette with a little salt.
This recipe is from... but I bet you already KNOW where it's from and whose it is. You won't even have to guess. Thaaaaat's right. Dan Lepard, the latest man in my life. He's only lately been in my life, though. Until a couple of weeks back, my No. 1 baking man was Hollywood. Paul Hollywood.
I don't know about you folks outside the UK, but in the UK, The Great British Bake-Off is one of the most watched baking shows. And with good reason... one of the judges, the man with ice-blue eyes, Paul Hollywood, is most watchable. Eminently watchable. Even more than the show, much as I love it. So, carried along by the rush of my crush, I bought his book "How To Bake".
It's a good book, don't get me wrong - it's got good photos of him and his breads, and there are recipes I want to try. But a lot of them require a Kitchen Aid-type of food processor (if that's what they're called), with a dough hook. I don't have a dough hook, much less a Kitchen Aid. In my kitchen, my arms are my aid. So until I get one of them Aids (erk... not meant the way that sounds!), or figure out how to get around not having a hook (being fairly sure that Abu Hamza al-Masri would not be amenable to helping me out), I'll just have to stick with recipes that require arm-power, not hook-power.
Which brings me back to Dan Lepard who, going by his photo in The Guardian, is not an ice-blue-eyed killer-smiled baking heart-throb... but - and this is a BIG but - his baking recipes are doable. As eminently doable as Paul Hollywood is eminently watchable. For the time being, doability trumps watchability. And that, my friends, is saying a LOT!
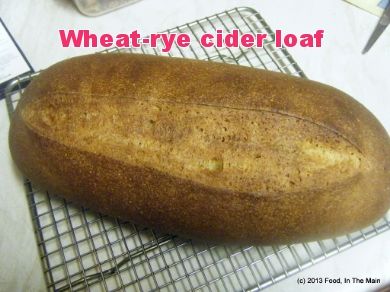
 Recipe for: Wheat-rye cider loaf
Ingredients:
1 tsp fast action yeast
1 tbsp agave nectar or honey
150 ml warm water
175 ml dry cider
375 gm (2-3/4 cups) strong white bread flour
75 gm wholegrain rye flour (just over 1/2 cup)
50 gm olive oil
1.5 tsp salt
a little oil for kneading (if required)
Method:
1. Mix the water and cider in a big bowl, then stir in the yeast and syrup till dissolved.
2. Add the olive oil, bread flour and rye flour to the bowl, and finally the salt. Stir quickly and evenly until mixed, and the dough comes together into a rough ball. Cover the bowl and leave it for 10 minutes.
3. Now lightly oil your worktop or kneading board, and scrape the dough onto the board. Knead lightly for 10 seconds, then return the dough to the bowl. leaving it to rest for 10 minutes. Repeat the kneading/resting procedure two more times.
4. After the third time, put the dough back into the bowl and let it rise undisturbed until it's puffy and looks like it has more or less doubled in size. Lightly flour the worktop/board. Punch the dough down and put it on the floured board. Pat it or use a rolling pin to shape it into a rough rectangle with the long side facing you.
5. Now roll up the flattened dough from the far end towards you, as tightly as you can manage it. Place it seam-side down on a tray lined with nonstick baking paper. Cover with a clean cloth and let it rise for 1-2 hours or till it has risen again.
6. Heat the oven to 220C (200C/425F in a fan-assisted oven). Cut a 1-cm deep slash down the centre of the loaf and bake it in the hot oven for about 40 minutes or till golden brown on top and hollow-sounding when tapped on the bottom.
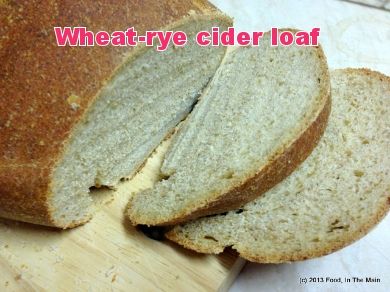
Let cool before slicing.
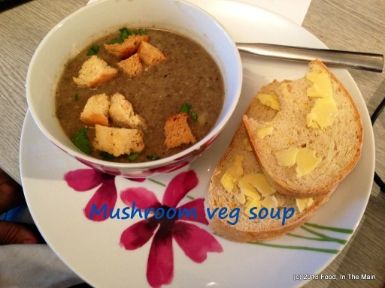
I made a version of this soup last month when I was with my family in Seattle, to go with the herby cheese pull-apart bread that was our first baking challenge set by Aparna Balasubramaniam. The soup is not exactly as I made it the first time, because mixed vegetable soup can be whatever you make of it.
If you're a wannabe Masterchef contestant or judge, or have more money than sense, you can use expensively exotic ingredients - mushrooms that have been grown in soil imported from a remote corner of the Brazilian rain forest and watered with dew gathered in moonlight on a full moon night in June; the rarest blue-spotted heirloom potatoes from Venezuela that have been hand picked by an endangered tribe (gotta support them, don't y'know); cream from milk where the cattle were exclusively hand fed on the finest grass prepared by Cordon Bleu chefs while classical music was played by the London Philharmonic live in their air-conditioned, state-of-the-art barn (the cows' barn, I mean, not the London Philharmonic's. The London Philharmonic wouldn't be allowed to live in the same building as these super-exclusive posh cows!)... you get the idea.
OR, you could just use whatever vegetables you have in your refrigerator that need using up, and standard chestnut or white mushrooms (or whatever you can get), to make this soup. It's a guide more than a recipe, anyway.
That said, though, I bought the mushrooms specifically to make this soup. But because I have more sense than I have money, I bought them from the "reduced for quick sale" section. Yay me!
Recipe for:
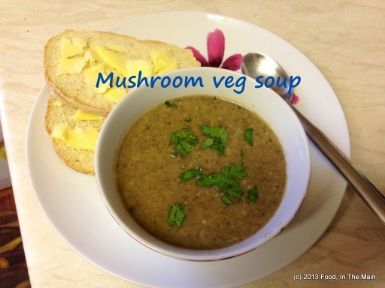
Vegetable-mushroom soup
Ingredients:
4 small onions, sliced thinly
2 baby leeks (green and white parts), sliced thinly
4 cups mixed mushrooms (I used portobello/cremini, shiitake and oyster), sliced
1 medium potato, chopped (skin on)
1 medium carrot, chopped
1 litre (4-5 cups) vegetable stock/broth
1 tsp dried thyme or Italian herb mix
1 bay leaf
4 sprigs fresh thyme
1 tbsp olive oil + 1 tbsp butter
2 tbsp sour cream/Greek yogurt or full fat milk (optional)
Salt and pepper to taste
2 tbsp parsley for garnish
Method:
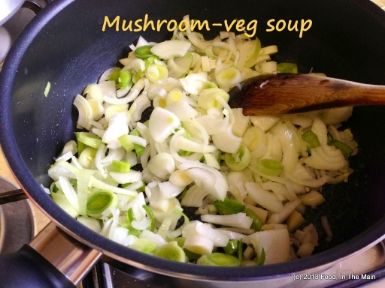
1. Heat the oil and butter in a large pan, add the onions and leeks and cook over medium heat till they begin to soften (about 5 minutes), stirring frequently.
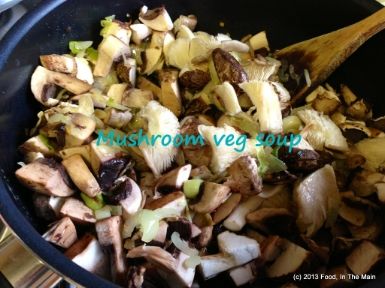
2. Add the mushrooms and cook for 2-3 minutes or till they start to reduce.
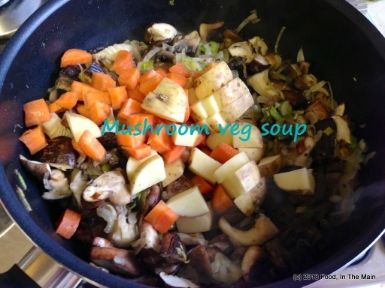
3. Add the potatoes and carrots along with the dried herbs and bay leaf. Stir for a couple of minutes.
4. Then add the stock and the fresh thyme sprigs.
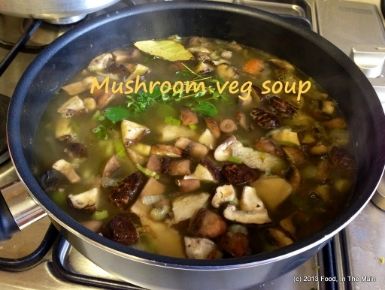
Bring this to a boil, cover the pan and let the stock simmer for 10-15 minutes or till the carrots and potatoes are soft and cooked.
5. Fish out the fresh thyme sprigs and bay leaf, then turn off the heat. Let the soup cool, then blend it to a smooth consistency.
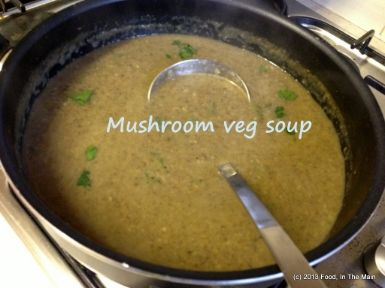
If you would like a bit more texture to the soup, blend only about 3/4 of the soup smooth, then add it to the remaining unblended soup in the pan. Add the milk or sour cream/yogurt, if using, and stir it in. Add salt and pepper to taste. Reheat on low heat till thoroughly warmed, but do not let it boil. Serve with parsley sprinkled on top, and croutons if you like, and crunchy buttered toast on the side.
I kind of gave myself a rather big shock yesterday. Like 9.8 on the Richter scale level of shock.
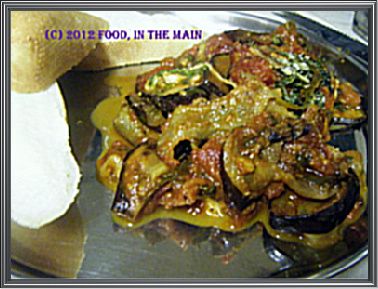
Determined to use an aubergine which I'd bought with the intention of making something for Pete (my dislike of this vegetable in ANY form is well documented, so I won't harp on it), I'd settled on aubergine parmigiana (actually called melanzane parmigiana on the BBC website where I saw this recipe). I'd done the prepping and pan-fried the sliced aubergine and made the tomato sauce and had even finished placing the aubergine-tomato sauce-mozzarella layers in the baking dish, ready for baking, when I realised something.
Well, two things, actually.
One, it was a vegetarian recipe, therefore fit to appear on my blog (never mind that nothing short of prolonged starvation would make me eat the stuff!).
Two, I'd not taken any photographs!!!
I think it was realisation No 2 that really gave me a jolt. I mean, for the last few years my camera has been as much part of my kitchen equipment as anything else... it's been splashed with sauces and dunked into flour and put away with the fruit (note that none of these and other such incidents were on purpose) and generally suffered for my "step-by-step" photos of recipes being made. I've been pretty consistent - and a tad obsessive - about taking those photos... and yet there I was, food blog forgotten and with no idea of the whereabouts of my poor abused camera.
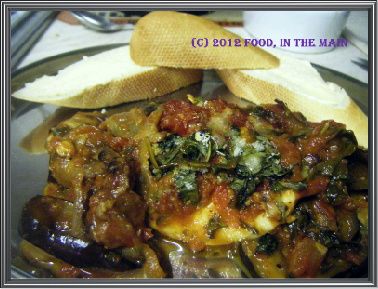
Yep, 9.8 on the Richter scale, folks. Anyway, that's the reason for the very few photos in this post.
And yeah, I've made a mental note to neglect my food blog a little less... it's been around a while, possibly the longest I've kept something going, and with some luck and effort on my part, and plenty of encouraging visits from all you lovely foodies out there (hint, hint), this blog will keep going for a while longer yet!
As regards this particular recipe, I've no idea how it tastes. My husband was reasonably encouraging, merely remarking that perhaps the addition of some sliced portabello mushrooms layered with the aubergine would have imparted their umami flavour and made it taste less "vegetable-y" (and there speaks the carnivore!). But he liked it as it was, and said he would eat it if I made it again. That'll do me. The mushroom addition experiment will have to wait till the next time I make this.
Recipe for: Aubergine parmigiana
 Ingredients:
1 medium aubergine/eggplant/kathirikkai
1-1/2 cups chopped ripe tomatoes
2 tbsp sliced black olives (I used canned)
150 gm mozzarella, sliced
1/2 cup fresh basil, shredded
1 tbsp olive oil plus more for brushing
1/2 tsp cinnamon powder
2-3 cloves garlic, sliced thin
salt and pepper to taste
2-3 tbsp parmesan
Method:
1. Slice the aubergine vertically into 1/2 cm slices. (You can sale them, place them in the colander with a heavy weight on top to let the bitterness out, but I didn't bother with this step.)
2. Brush both sides of each slice with some oil.
3. Heat 1 tbsp oil in a pan and add the garlic, frying on medium heat until they are soft and fragrant. Then add the tomatoes, olives and cinnamon. Let the sauce simmer for 10-15 minutes, giving it a stir now and then, until the tomatoes are soft and mushy.
4. While the sauce is cooking away, heat a large frying pan or griddle. Fry the oiled aubergine slices in batches, without crowding, on both sides till they are light brown and soft.
5. When the aubergine slices are cooked, place a layer of the prepared tomato sauce in a small oven-proof casserole dish.
6. Now place a layer of aubergine on top of the sauce, then a layer of mozzarella slices and a sprinkling of shredded basil. Season the layer with freshly ground pepper and salt.
7. Continue the layers in the same order, topping it off with a layer of tomato sauce and another sprinkling of basil.
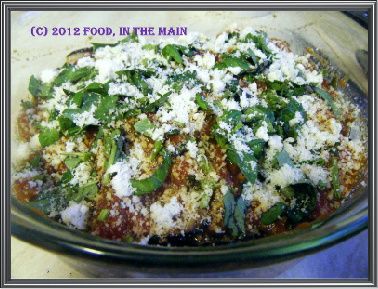 8. Sprinkle the parmesan cheese over the top
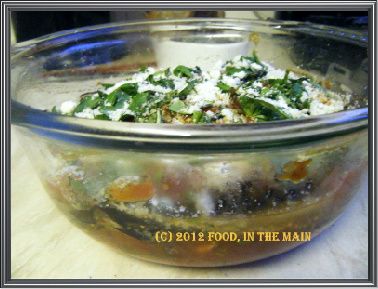 and bake at 160C for 30-40 minutes, till the sauce is bubbly and the top is golden brown.
9. Let the dish rest for 5 minutes or so, then serve up the aubergine parmigiana with crusty buttered bread and a green salad.
 RECIPE: AUBERGINE PARMIGIANA
Ingredients:
1 medium aubergine/eggplant/kathirikkai
1-1/2 cups chopped tomatoes
2 tbsp sliced black olives (I used canned)
150 gm mozzarella, sliced
1/2 cup fresh basil, shredded
1 tbsp olive oil plus more for brushing
1/2 tsp cinnamon powder
2-3 cloves garlic, sliced thin
salt and pepper to taste
2-3 tbsp parmesan
Method:
1. Slice the aubergine vertically into 1/2 cm slices. (You can sale them, place them in the colander with a heavy weight on top to let the bitterness out, but I didn't bother with this step.)
2. Brush both sides of each slice with some oil.
3. Heat 1 tbsp oil in a pan and add the garlic, frying on medium heat until they are soft and fragrant. Then add the tomatoes, olives and cinnamon. Let the sauce simmer for 10-15 minutes, giving it a stir now and then, until the tomatoes are soft and mushy.
4. While the sauce is cooking away, heat a large frying pan or griddle. Fry the oiled aubergine slices in batches, without crowding, on both sides till they are light brown and soft.
5. When the aubergine slices are cooked, place a layer of the prepared tomato sauce in a small oven-proof casserole dish.
6. Now place a layer of aubergine on top of the sauce, then a layer of mozzarella slices and a sprinkling of shredded basil. Season the layer with freshly ground pepper and salt.
7. Continue the layers in the same order, topping it off with a layer of tomato sauce and another sprinkling of basil.
8. Sprinkle the parmesan cheese over the top and bake at 160C for 30-40 minutes, till the sauce is bubbly and the top is golden brown.
9. Let the dish rest for 5 minutes or so, then serve up the aubergine parmigiana with crusty buttered bread and a green salad.
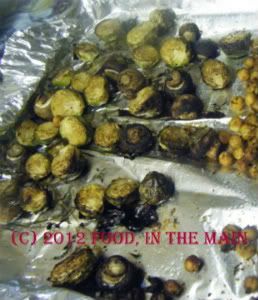
So here I am with the first offering (luckily not burnt) of the year - roasted brussels sprouts, which I simply adore. The recipe is simpler than simple and I've been eating this for four days straight - although not JUST this, of course, otherwise I'd be my own jet-pack being propelled around by - er, you know, natural gas. (Not petroleum - respect for the earth's resources and all that).
I love the flavour of balsamic vinegar and it goes beautifully well with the sprouts. It doesn't hurt the mushrooms either, although you don't HAVE to use mushrooms at all if you don't want to.
Do try this, if you're a brussels sprouts fan like me.
Recipe for: Balsamic roasted brussels sprouts and mushrooms
 Ingredients:
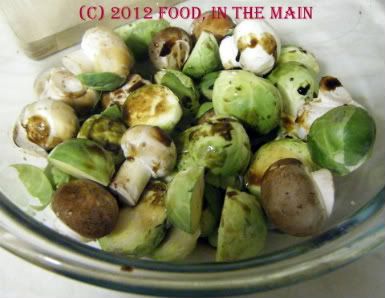 12-15 medium sized brussels sprouts, trimmed and sliced vertically in half
10 baby chestnut mushrooms, wiped clean
1-2 tbsp good quality balsamic vinegar
1 tbsp Worcestershire sauce
1 tsp olive oil or 2-3 sprays of Pam
1/2 tsp dried thyme or a few sprigs of fresh (I used lemon thyme)
Salt and freshly-milled pepper to taste
Method:
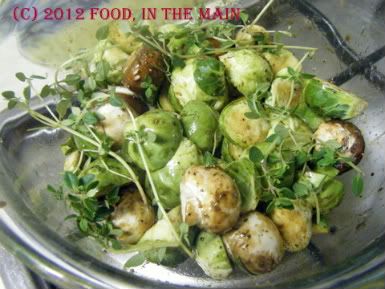 Toss all the ingredients together well, and roast in the oven for 20-25 minutes at 200C (about 390F), until the sprouts are caramelised and cooked. Check on them after 20 minutes, and do not let them get mushy. Serve warm as a side dish. I like it as a snack too.
BALSAMIC ROASTED BRUSSELS SPROUTS AND MUSHROOMS
Ingredients:
12-15 medium sized brussels sprouts, trimmed and sliced vertically in half
10 baby chestnut mushrooms, wiped clean
1 tbsp good quality balsamic vinegar
1 tbsp Worcestershire sauce
1 tsp olive oil or 2-3 sprays of Pam
1/2 tsp dried thyme or a few sprigs of fresh (I used lemon thyme)
Salt and freshly-milled pepper to taste
Method:
Toss all the ingredients together well, and roast in the oven for 20-25 minutes at 200C (about 390F), until the sprouts are caramelised and cooked. Check on them after 20 minutes, and do not let them get mushy. Serve warm as a side dish. I like it as a snack too.
Toss all the ingredients together well, and roast in the oven for 20-25 minutes at 200C (about 390F), until the sprouts are caramelised and cooked. Check on them after 20 minutes, and do not let them get mushy. Serve warm as a side dish. I like it as a snack too.
BALSAMIC ROASTED BRUSSELS SPROUTS AND MUSHROOMS
Ingredients:
12-15 medium sized brussels sprouts, trimmed and sliced vertically in half
10 baby chestnut mushrooms, wiped clean
1 tbsp good quality balsamic vinegar
1 tbsp Worcestershire sauce
1 tsp olive oil or 2-3 sprays of Pam
1/2 tsp dried thyme or a few sprigs of fresh (I used lemon thyme)
Salt and freshly-milled pepper to taste
Method:
Toss all the ingredients together well, and roast in the oven for 20-25 minutes at 200C (about 390F), until the sprouts are caramelised and cooked. Check on them after 20 minutes, and do not let them get mushy. Serve warm as a side dish. I like it as a snack too.
It feels like a really long time since I’ve written anything, and I’m finding it a bit difficult to get started. You’re not likely to know, unless I specifically mention it here, that I’ve deleted half-a-dozen different starting lines and spent over a quarter of an hour staring at a blank page between deletions. Yes, I have specifically mentioned it here so that you’d all know. I’m determined to continue with this opening paragraph no matter where it goes – no more deletions!
Isn’t the ability to compose and instantly delete a total godsend? That, or it has a lot to answer for - depending on how you look at it. I’m sure that if I was writing this long-hand, I would think harder, write more carefully and delete a lot less – and I’d also write a lot, lot less! (I’m firmly on the side of “godsend”, just so you know. Three cheers for computers and instant deletions - and the instant “undo delete” facility, too).
It doesn’t help that I’ve just come back from a trip to Seattle and I’m still missing my family – specifically, my little 9-month-old niece. Although I took my laptop with me, I literally didn’t even take it out of my suitcase for the 2 weeks that I was in the States. And since I didn't cook anything except a particularly bad cake, it certainly wasn’t worth the time and effort that would’ve been required to blog about, and so my laptop stayed in its case. Add that to the general lethargy I was feeling before the trip, and it explains the long silence on this blog.
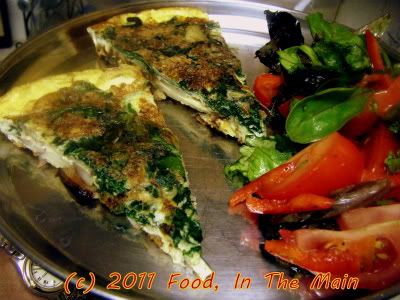
That’s not to say that I didn’t have any good intentions – I did take photos while making this frittata, just a day before we left for Seattle when we had my mother-in-law staying with us. There’s a glut of spinach (in the frittata AND in the side salad) because I was doing my best to finish what I could of it along with the eggs.
For a last-minute effort, this was an absolutely delicious frittata. Granted, it’s pretty hard to make a bad-tasting frittata. The most difficult part here was sliding the frittata from the frying pan onto a large plate, prior to flipping it back into the pan again… but if you have a cast-iron frying pan that can go directly into the oven, there’s no dicey sliding or flipping involved in browning the top of the frittata – it can be grilled as it is.
(Note to self: MUST get large cast-iron frying pan. Wonder if I can float a loan to buy a top-of-the-range pre-seasoned cast-iron pan...)
Recipe for: Spinach potato frittata
Ingredients:
6 large eggs
2 medium onions, thinly sliced
2 cups spinach
2 medium potatoes, thinly sliced
2 tbsp olive oil
4 tbsp milk or cream
3/4 tsp dried herbs (I used an Italian mix), optional
3 tbsp chopped mixed herbs to taste (I used sage, basil, lemon thyme and a bit of rosemary)
Salt and pepper to taste
Method:
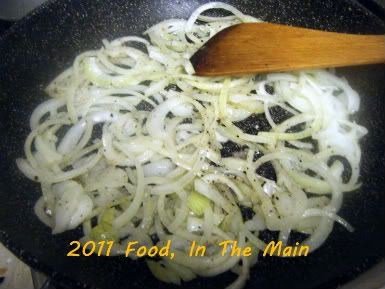
1. Heat the olive oil in a large frying pan and saute the onions till they're soft and just turning pale brown.
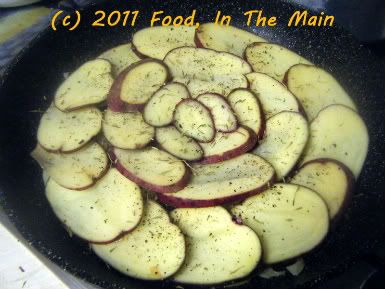
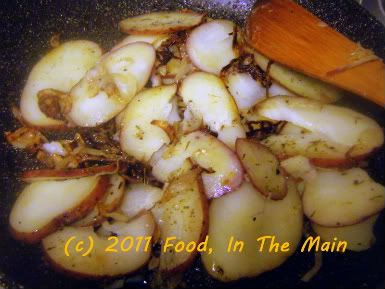
2. Arrange the sliced potatoes over the onions. Add the dried herbs if using and cover the pan till the potatoes are cooked.
3. In the meantime, break the eggs into a large bowl and add pepper to taste.
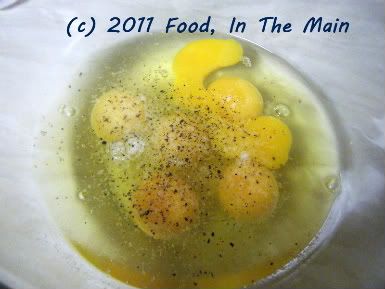
4. Then add the milk or cream
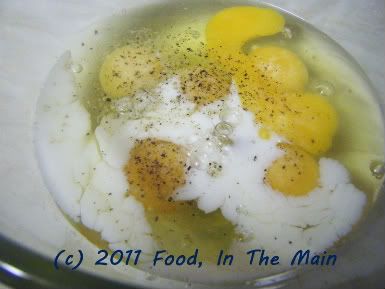
and beat the eggs till lightly frothy.
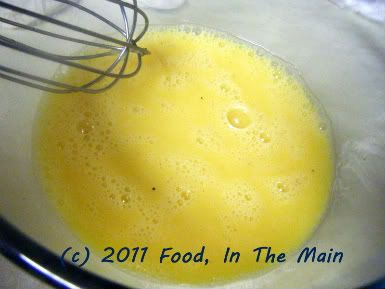
5. Stir the cooked potatoes gently, turning them over if desired.
6. Add the spinach and cover the pan for 2-3 minutes, till the spinach starts to wilt.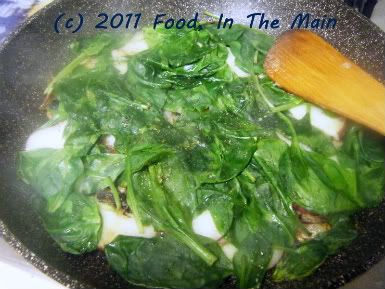
7. Add salt to taste and the chopped fresh herbs to the beaten eggs and pour it over the vegetables.
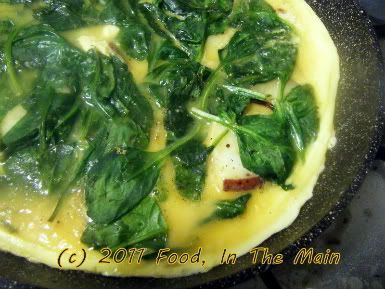
8. Cook over medium-low heat with the pan covered, till the frittata is mostly set - it should jiggle a bit in the centre, but the eggs should not be runny. Loosen the frittata carefully around the edges and slide it gently onto a large plate (ideally it should be bigger than the frying pan). Place the hot pan over the frittata on the plate, and carefully flip the plate so that the top part of the frittata becomes the bottom. (The frittata should now be a lovely golden brown to look at.) Put the frying pan back on the heat and cook the frittata for 2-3 minutes longer to brown the bottom.
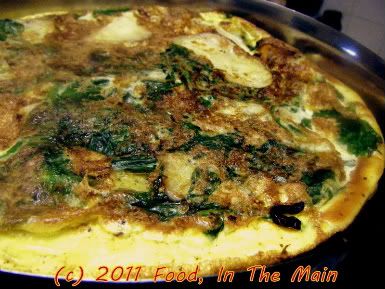
Serve the frittata cold or hot.
RECIPE: SPINACH POTATO FRITTATA
Ingredients:
6 large eggs
2 medium onions, thinly sliced
2 cups spinach
2 medium potatoes, thinly sliced
2 tbsp olive oil
4 tbsp milk or cream
3/4 tsp dried herbs (I used an Italian mix), optional
3 tbsp chopped mixed herbs to taste (I used sage, basil, lemon thyme and a bit of rosemary)
Salt and pepper to taste
Method:
1. Heat the olive oil in a large frying pan and saute the onions till they're soft and just turning pale brown.
2. Arrange the sliced potatoes over the onions. Add the dried herbs if using and cover the pan till the potatoes are cooked.
3. In the meantime, break the eggs into a large bowl and add pepper to taste.
4. Then add the milk or cream and beat the eggs till lightly frothy.
5. Stir the cooked potatoes gently, turning them over if desired.
6. Add the spinach and cover the pan for 2-3 minutes, till the spinach starts to wilt.
7. Add salt to taste and the chopped fresh herbs to the beaten eggs and pour it over the vegetables.
8. Cook over medium-low heat with the pan covered, till the frittata is mostly set - it should jiggle a bit in the centre, but the eggs should not be runny. Loosen the frittata carefully around the edges and slide it gently onto a large plate (ideally it should be bigger than the frying pan).
Place the pan over the frittata on the plate, and carefully flip the plate so that the frittata falls back into the pan; the top part becomes the bottom. The frittata should be a lovely golden brown to look at. Put the frying pan back on the heat and cook the frittata for 2-3 minutes longer to brown the bottom. Serve the frittata cold or hot.
Squashes and pumpkins - especially the yellow kind - are usually prized by people who love them for their sweetish taste. Me, I'm kind of meh about them for precisely that reason... they're not quite sweet and not quite savoury either, and when you roast them they turn squidgy. (Parsnips, which are also kind of sweetish, at least have the decency to turn crisp on the outside when oven-roasted, so I tend to like those. But squashes... they just squash.)
Anyway, I've bought butternut squashes before and let them sit around till even they were too awful to be used (and believe me, they take a very very long time to get that way because of their incredibly hard outer skin or shell), and then thrown them away. This time I was determined to use the squash, so after 15 minutes of determined - and sometimes downright dangerous - sawing, I had the squash halved vertically, to see its innards for the first time ever with my own two eyes (four if you count my contact lenses).
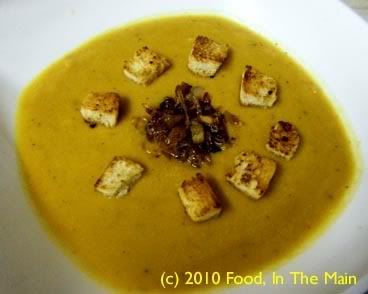
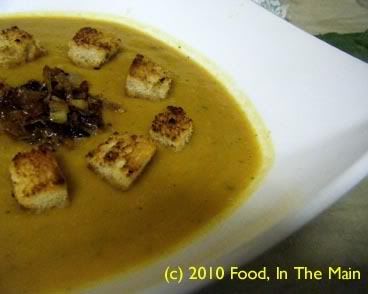
Once the thing was peeled, it was a doddle. It roasted without any trouble and I made the soup without any trouble either. I cooked up some masoor dal for protein and pureed that with the roasted squash as well. Pete liked the soup quite a lot, although I was a bit ambivalent about its taste, myself. It was, as I had known it would be, a bit too sweet for me even with the addition of plenty of ground pepper. But even Pete had to admit that the caramelised onions and croutons were what raised the stakes in the soup arena. Without those savoury garnishes the butternut squash soup would have been just too... yup, you guessed it, sweet.
Recipe for: Roasted butternut squash soup with caramelised onions
Ingredients:
1 medium butternut squash
3 cups vegetable stock
1 medium onion, chopped
1/3 cup evaporated skim milk
1/4 tsp cinnamon
1 tsp black peppercorns, freshly ground to powder
2 cloves garlic
1/4 cup masoor dal
2 tbsp olive oil
a few toasted herbed croutons for garnish (NOT optional)
salt to taste
For caramelised onions:
1 small onion, very thinly sliced
1 tsp butter
2 tsp sugar
Method:
1. Preheat the oven to 350F/180C.
2. Cut the butternut squash in half lengthwise and scoop out the seeds and stringy bits with a spoon.
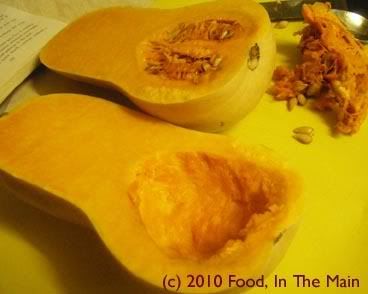
Peel the squash and chop it into 2" chunks.
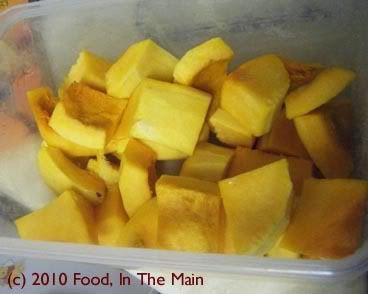
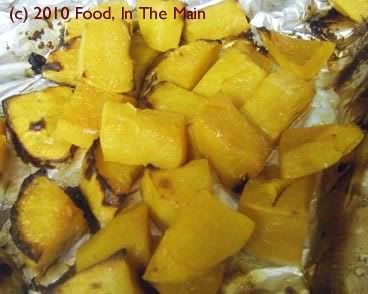
Roast, uncovered, until the squash is soft - about 45 minutes, but check to see.
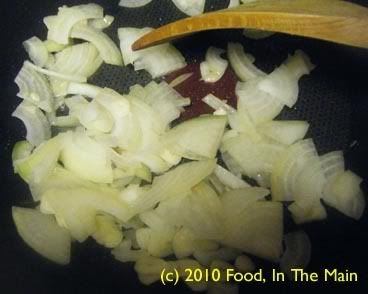
3. Heat 1 tbsp olive oil in a pan and sweat the garlic and chopped onion until slightly translucent.
4. Add the stock and masoor dal along with the cinnamon.

5. Let this bubble gently on medium high heat until the lentils are nearly transparent and soft.
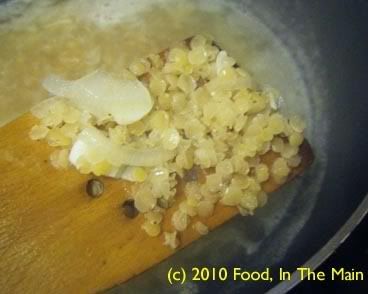
Set aside to cool.
6. In the meantime, heat the butter in a small pan.
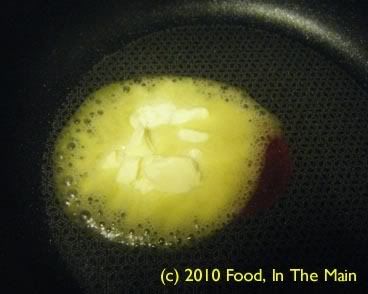
Let it melt and turn golden brown (be careful not to burn it), then add the sliced onion.
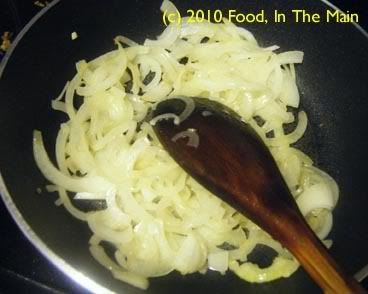
Turn down the heat and let the onions soften slowly, stirring now and then, till they're soft and caramelised to a golden brown. This should take about 10 minutes or so.
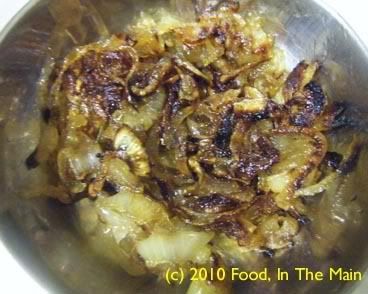
Reserve the caramelised onions for garnish.
7. Now scoop out the cooked lentils along with half the cooking liquid,
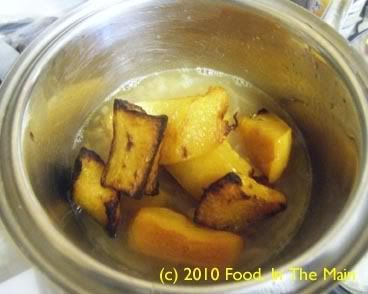
and blend to a puree along with the roasted squash.
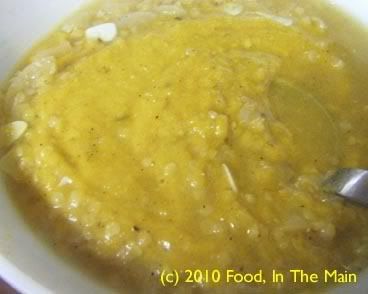
8. Return the blended vegetables to the pan containing the remaining cooking water and stir it all till well mixed.
9. Pour in the evaporated milk and stir it in.
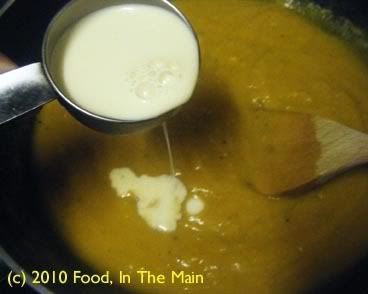
Bring to a gentle simmer,
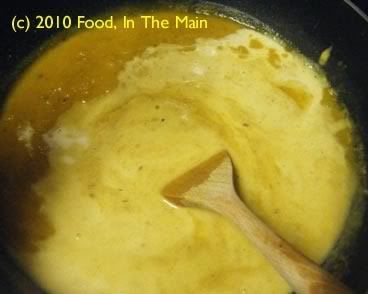
then add the freshly ground black pepper and salt to taste. Stir it in. Let the soup simmer for 2-3 minutes longer, then switch off the heat.
10. Serve the soup in warmed bowls topped with some caramelised onions and the croutons.
