skip to main |
skip to sidebar
Tell you what, I'm really enjoying baking bread. I can say quite definitively that I'm no longer afraid of working with yeast - instant or fresh. I've actually got into the rhythm of baking two loaves of bread (sometimes three) pretty much every other Saturday. They're mostly a mix of white and wholewheat bread for everyday use, and sometimes I bake a third loaf which might be a flavoured one, to go with soups and suchlike.
The bread loaves get sliced - and I'm getting pretty good at cutting even, thin slices, even if I do say so myself - divided into half-loaves and fed to the freezer, stored in bags labelled with the date of baking. That way I get to rotate recycle use up the bread, oldest ones first. Yep, I'm THAT organised. It's kind of disconcerting, even to me. Or especially to me, because only I know just how alien this behaviour is to me.
Now that you've all been made aware of my weekend baking activities and the resulting follow-ons - which information I'm sure has been of great interest, by the way - let's get to the sundried tomato and roasted garlic bread that is today's recipe. By rights it should have been posted two months back, because that's about when I made it... but never mind that. The bread is really nice with soup, but I was happy to eat it by itself, with no adornments, because it was that tasty. Can't say better than that, can I?
By the way, if you don't like a strong garlic flavour, use less of the roasted garlic paste... and if your thing is to wilt every living thing within a 10-metre radius with your breath, by all means use MORE garlic paste, as much as you want. At least Dracula won't get you.
Recipe for: Sundried tomato and roasted garlic bread
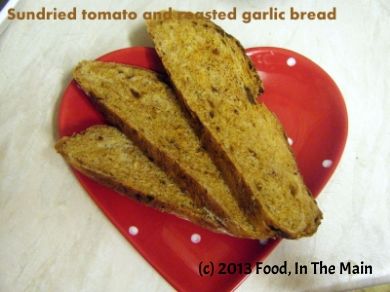
Ingredients:
3-1/2 cups (15 oz) strong white bread flour
2-3 tbsp olive or other oil of choice
2 tbsp double concentrated tomato paste
1 tbsp roasted garlic, roughly mashed
1/4 cup chopped sundried tomatoes in oil (but leave out the oil)
1 htsp salt
About 300 ml warm water
1/2 tbsp instant yeast
Method:
1. Place the flour in a deep bowl and mix in the instant yeast and salt.
2. Then add the roasted garlic, tomato paste, and chopped sundried tomatoes
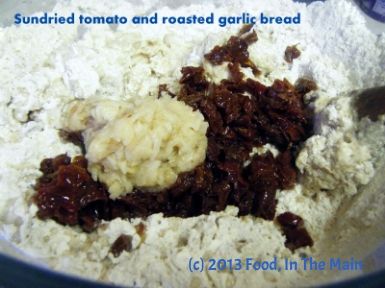
along with 250 ml of the warm water and mix together till the flour begins to form a rough dough. Cover and let it rest for 10 minutes to absorb the water.
3. Now knead again, adding as much of the remaining 50ml water as required, to make a dough that is not exactly sloppy but also not hard or dry either.
4. Pour 1 tbsp olive oil on your worktop (make sure your worktop is clean first!) or kneading board and spread it around a bit. Turn the dough out onto the oil and start kneading, pushing the dough away from you with the heel of your hand, turning it a quarter, then repeating the pushing/turning movement. Add more oil to the worktop if the dough starts sticking again, and continue kneading. Occasionally scrape your hand clean of dough.
5. After about 8-10 minutes, the dough should be elastic and only a little tacky. Now grease a large bowl (I use Pam spray, but you can use more oil if you like) and place the dough in it, turning it around to completely coat it in the oil. Cover the bowl and place in a warm place for the dough to rise and more or less double in volume. This can take between 1-2 hours, or even longer - there's no way to accurately predict how long it might take, so I can't give you a precise time.
6. Once the dough is risen, punch it back down. Sprinkle a couple of tbsp extra flour on your workspace and put the dough on it. Shape it into a round ball, place on a baking tray (flour the top of the dough lightly if you like) and cover with a clean tea-towel. Let the dough rise again for 45 min to an hour. Use a sharp knife to slash a 1-cm deep cross into the top.
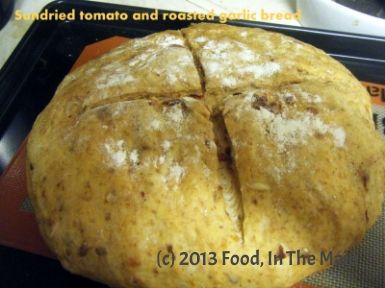
7. Preheat your oven to 180C/350F and put the dough in to bake. Let it bake for 25-30 minutes - the top should be a nice golden brown and the bottom should sound hollow when tapped.
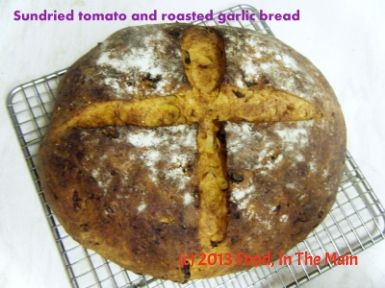
Remove the loaf to a wire cooling rack and let cool completely. Serve sliced, with soup.
Man, I have to say I'm beginning to find it really difficult to come up with something to say for every post. Usually when I stop thinking too hard about what to write, I tend to unblock the stoppage, as it were... but this is beginning to work less and less often.
I've actually thought about not writing anything at all, just posting the recipe and a couple of photos, but I don't know how well that would work.
I mean, when I go to a food blog and find nothing there but the recipe, I get annoyed, even if the recipe is fantastic. I need at least one photo. If there is a photo or two, or even many photos, but no write-up to go with the recipe, that makes me feel annoyed too.
So you'd imagine that when there is a recipe, a photo or two (or even many photos) and a write-up to boot, I'd be a happy camper? Reasonable assumption, right?
Nope.
You see, I'm unreasonable in my wants. I'm not content with just a recipe, a photo or two (or even many photos), and a write-up. No, I want that write-up to be funny and warm and honest and interesting and readable and at the very least I want the recipe to be fabulous - in other words, pretty much like any post you'd care to choose from the lovely Nupur's wonderful blog One Hot Stove.
Unfortunately it is not given to many of us to successfully combine humour and warmth and honesty and readability and foster a loyal readership of our blog... so we just have to struggle on. And if for some people it's a struggle to write a decent post, it's a struggle for others to read a dull one - even if they know how hard it is to actually write a post, never mind pleasing anyone with it!
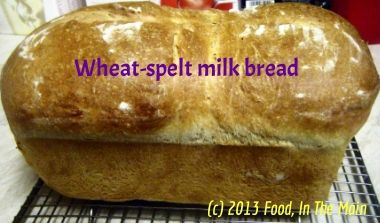
And on that philosophical note, I guess I will say a few words about this recipe before I close. You will know some of the words, like "variation of Dan Lepard recipe", "The Guardian newspaper", "minimal kneading" and "tasty", so I'll just say the ones that you may NOT know, which is "tighter crumb because I added spelt flour".
Recipe for: Wheat-spelt milk bread
Ingredients:
2-1/4 cups strong white bread flour
1/4 cup very strong wholewheat bread flour
1/2 cup wholemeal spelt flour
100 ml warm water
200 ml warm whole milk
1 tsp quick-rise yeast
1-1/4 tsp salt
Oil for kneading
Flour for sprinkling
Butter for greasing 7" x 5" loaf pan
Method:
1. Mix together the flours in a big bowl and whisk in the salt and yeast. Then make a hole in the centre and pour in the yeast and warm milk-water mixture. Mix together with a wooden spoon until the dough comes together in a rough ball. Cover the bowl and let the dough rest for 10 minutes.
3. Lightly oil your work area/kneading board and scrape the dough onto it. It will be quite sticky. Knead lightly for 10 seconds. Then put the dough back in the bowl, cover it and let rest for 10 minutes. Repeat this cycle twice more, oiling the work area lightly each time, if required.
4. After the fourth 10-second knead, the dough should be elastic and not very sticky. This time, let the dough rise in the covered bowl for 40 minutes to an hour, or till doubled.
5. Now punch the dough down gently. Lightly flour the work area and pat the dough into an oblong, then roll it up and place it in your buttered 7" x 5" loaf pan. Flour the top of the dough, cover with a clean tea towel and let the dough rise in a warm draught-free area for 45 minutes to an hour - it should be at least 1" over the rim of the loaf pan.
6, Preheat the oven to 200C/450F and place a dish of boiling water on the floor of the oven. Bake for 30-40 minutes, or till the loaf is golden brown on top and sounds hollow when tapped on the bottom. Let cool before slicing.
This recipe is from... but I bet you already KNOW where it's from and whose it is. You won't even have to guess. Thaaaaat's right. Dan Lepard, the latest man in my life. He's only lately been in my life, though. Until a couple of weeks back, my No. 1 baking man was Hollywood. Paul Hollywood.
I don't know about you folks outside the UK, but in the UK, The Great British Bake-Off is one of the most watched baking shows. And with good reason... one of the judges, the man with ice-blue eyes, Paul Hollywood, is most watchable. Eminently watchable. Even more than the show, much as I love it. So, carried along by the rush of my crush, I bought his book "How To Bake".
It's a good book, don't get me wrong - it's got good photos of him and his breads, and there are recipes I want to try. But a lot of them require a Kitchen Aid-type of food processor (if that's what they're called), with a dough hook. I don't have a dough hook, much less a Kitchen Aid. In my kitchen, my arms are my aid. So until I get one of them Aids (erk... not meant the way that sounds!), or figure out how to get around not having a hook (being fairly sure that Abu Hamza al-Masri would not be amenable to helping me out), I'll just have to stick with recipes that require arm-power, not hook-power.
Which brings me back to Dan Lepard who, going by his photo in The Guardian, is not an ice-blue-eyed killer-smiled baking heart-throb... but - and this is a BIG but - his baking recipes are doable. As eminently doable as Paul Hollywood is eminently watchable. For the time being, doability trumps watchability. And that, my friends, is saying a LOT!
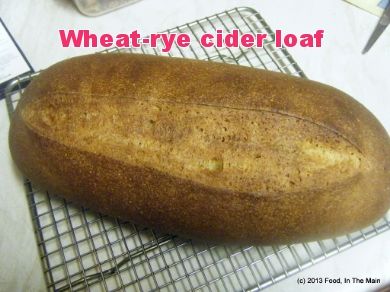
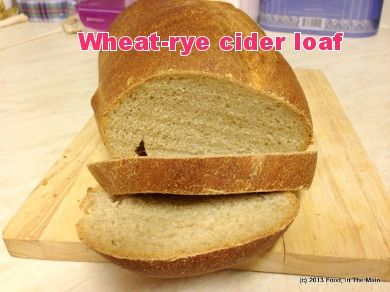 Recipe for: Wheat-rye cider loaf
Ingredients:
1 tsp fast action yeast
1 tbsp agave nectar or honey
150 ml warm water
175 ml dry cider
375 gm (2-3/4 cups) strong white bread flour
75 gm wholegrain rye flour (just over 1/2 cup)
50 gm olive oil
1.5 tsp salt
a little oil for kneading (if required)
Method:
1. Mix the water and cider in a big bowl, then stir in the yeast and syrup till dissolved.
2. Add the olive oil, bread flour and rye flour to the bowl, and finally the salt. Stir quickly and evenly until mixed, and the dough comes together into a rough ball. Cover the bowl and leave it for 10 minutes.
3. Now lightly oil your worktop or kneading board, and scrape the dough onto the board. Knead lightly for 10 seconds, then return the dough to the bowl. leaving it to rest for 10 minutes. Repeat the kneading/resting procedure two more times.
4. After the third time, put the dough back into the bowl and let it rise undisturbed until it's puffy and looks like it has more or less doubled in size. Lightly flour the worktop/board. Punch the dough down and put it on the floured board. Pat it or use a rolling pin to shape it into a rough rectangle with the long side facing you.
5. Now roll up the flattened dough from the far end towards you, as tightly as you can manage it. Place it seam-side down on a tray lined with nonstick baking paper. Cover with a clean cloth and let it rise for 1-2 hours or till it has risen again.
6. Heat the oven to 220C (200C/425F in a fan-assisted oven). Cut a 1-cm deep slash down the centre of the loaf and bake it in the hot oven for about 40 minutes or till golden brown on top and hollow-sounding when tapped on the bottom.
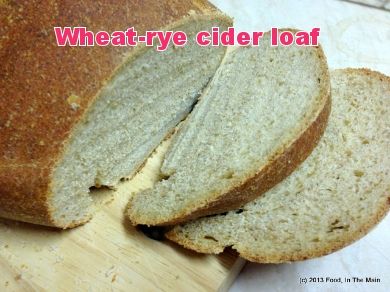
Let cool before slicing.
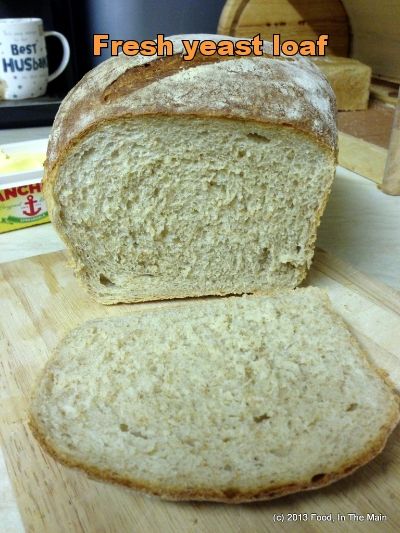
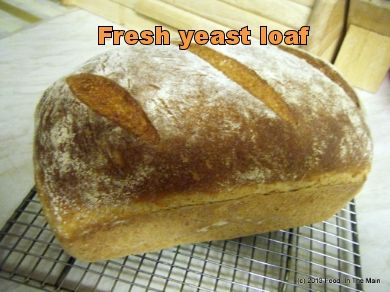
This is yet another Dan Lepard recipe, kind of - that is, I took his basic never-fail white loaf recipe, substituted quick-rise with fresh yeast, changed the flour content to 2:1 white to wholewheat, substituted 1 cup water with 50ml Greek yogurt thinned with 50ml water and, as a final touch, added 1 tbsp vinegar because I'd read somewhere that it helped keep the loaf soft for longer.
Perhaps I should have made one substitution at a time per loaf, rather than all the substitutions in one loaf - because I can't say for sure if it was the yogurt or the vinegar or the combination that actually made the loaf come out so well! What I CAN say for certain is that this was a lovely, lovely loaf - rose well, baked well, sliced well, toasted well...
I might be blowing my own trumpet here a wee bit, but... it might just be that I've got my bread baking mojo back!
Recipe for: Fresh yeast white-wholewheat loaf
Ingredients:
2-1/2 cups strong white white flour + 1 cup strong wholewheat flour
30gm fresh yeast OR 1 tsp dry instant/quick-rise yeast
1 tsp sugar
1-1/2 tsp salt
200 ml warm (NOT hot) water
50 ml Greek yogurt + 50 ml water
1 tbsp vinegar (I used apple cider vinegar)
a little oil for kneading
Method:
1. Check that the yeast is alive by crumbling it into the warm water along with 1 tsp sugar, and whisking it. Leave it for 15 minutes. If it's starting to bubble, it's alive and can be used successfully. (If you're using instant yeast, skip this step and go straight to step 2, adding the instant yeast to the flour.)
2. Put the flours in a bowl and whisk in the salt. Make a well in the middle and pour in the yeast starter along with the yogurt and vinegar. Mix to form a rough dough. Cover and let it be for minutes.
3. Now oil your worktop or kneading board lightly, and scrape the dough onto it. Knead lightly for 10 seconds, then let it rest for 10 minutes. Do the kneading/resting procedure twice more, for a total of three times, oiling the board and/or your hands as required.
4. After the fourth 10-second knead, put the dough back in the bowl, cover it, and let it rise for 45 minutes to an hour, or until it has doubled.
5. Lightly flour the kneading board. Punch down the dough and return it to the kneading board, rolling it gently or patting it into a rough oblong. Now roll it up tightly along the long side, and place it seam-side down on a floured tray. You can also place it in a lightly greased 7" x 5" loaf tin. Either way, flour the top of the loaf, cover it with a clean tea towel and leave it to rise for another hour or so. When the dough looks like it has more or less doubled, or when it is about 2 inches above the rim of the tin, make a 1cm deep cut down the middle with a sharp knife, or three diagonal slashes - whichever way you prefer it.
6. Preheat the oven to 200C/425F. Just before putting the bread in to bake, place a tray of boiling water on the oven floor. The steam will help the crust become a rich colour. Bake the bread for about 35-40 minutes. The bread is done when the top turns golden brown and the bottom sounds hollow when it is tapped. Let cool before slicing.
I've been on a baking binge over the last 2 weeks - only on the weekends, though, because weekdays are just not long enough for baking bread if you're not demonically organised, which I am not.
Ever since I discovered Dan Lepard's recipes in The Guardian, I've gone through some 300-odd recipes in his column published over the past so many years, and scouted out all the bread recipes that seemed interesting and easy. And printed them. And now I'm trying to bake them all, one by one.
The saffron bloomer got made twice. Then this one, which is really good. There's also a wheat & rye cider loaf, and a loaf made with fresh yeast... but I'm getting ahead of myself. Those recipes will follow in due course.
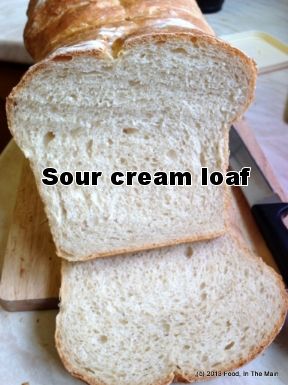
For this loaf, it was serendipitous that I had half a carton of sour cream in the fridge. It may have been just a teensy bit past its use-by date, but I didn't say that and you didn't read it. Besides, we're both alive, so there was no harm done.
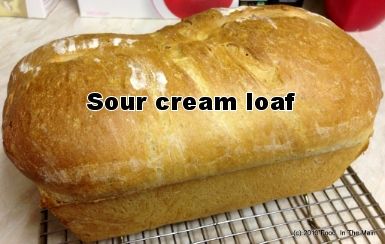
I've never been so pleased with bread I've baked - this loaf could have come from a proper bakery, I kid you not. I SO like Dan Lepard, because he says there's no need to knead like a maniac to get good bread, and believe me, that man speaks true. I'm all for an easier life, and he does make it easier. I may have said that before, but it remains true nevertheless.
Recipe for: Sour cream loaf
Ingredients:
125g (4 oz or 1/2 cup) cold sour cream
1.5 tsp salt
2 tsp caster sugar
1 sachet (7g) fast action yeast
550g (1 lb 4 oz) strong white bread flour, plus more for shaping
Oil, for kneading
Method:
1. In a large bowl, mix the sour cream with 150ml cold water and 100ml boiling water.
2. Add the sugar and yeast and whisk it together, then mix in the flour and salt until it forms a rough ball. It will be quite sticky. Cover the bowl and leave the dough to sit for 10 minutes.
3. Lightly oil your working area (worktop or kneading board) and gently knead the dough on it for 10 seconds. Put the dough back in the bowl and let it rest covered for 10 minutes.
4. Repeat the 10-second-kneading/10-minute-resting procedure twice more, oiling the worktop again if required to stop the dough from sticking too much. After that, leave the dough covered in its bowl for an hour or so, until it has doubled in size.
5. Butter the base and sides of a large, deep, 8" (19cm) loaf tin. Line the base with non-stick baking paper.
6. Lightly flour the kneading board now and place the punched-down dough on it. Pat or roll it out into 1 2-cm thick rectangle that's the length of the loaf tin, then roll the dough up towards you as well as you can. Place it seam-side down in the loaf tin, flour the top lightly, cover with a towel and let it rise for 60-90 minutes until it is doubled again.
7. Bake at 200C (180C/350C for fan-assisted or convection ovens) for about 45 minutes till it is golden brown on top and sounds hollow when you tap the loaf on the bottom (you gotta remove it from the baking tin for this, so definitely use oven gloves!).
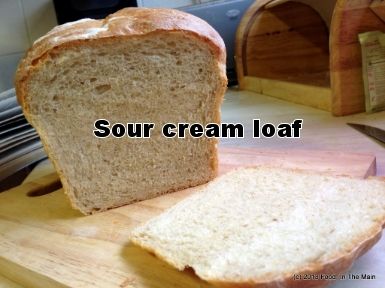
Let cool before slicing.
This recipe is pretty much exactly as detailed by Dan Lepard in The Guardian newspaper. It just seemed like a simple thing to make, and it pretty much was. While I like kneading bread, it's also a nice change to NOT have to knead bread. This bread doesn't need much effort, just 30 seconds of light kneading in total, 10 minutes apart. What's not to like?
The saffron taste and aroma was gentle but there, and the bread was just lovely. The most it takes up is time, and I watched two movies while waiting for the dough to prove. They were "Premonition", starring Sandra Bullock, and "One Small Hitch", starring an actor called Shane McRae. The first was a sort of paranormal suspense move, and the second a light comedy. While I really like Sandra Bullock, the movie itself was pretty much a clunker - I don't like unhappy endings, so that just made it worse. Shane McRae was pretty cute, though. I thought "One Small Hitch" was a good timepass movie.
And now, because this is meant to be a food blog, I will stop here and dream about Shane McRae in private. Do try this lovely bread, though. I'll be making it again for sure.
P.S. It makes fantastic toast! Try it with marmalade and peanut butter (or ok, maybe that's just me).
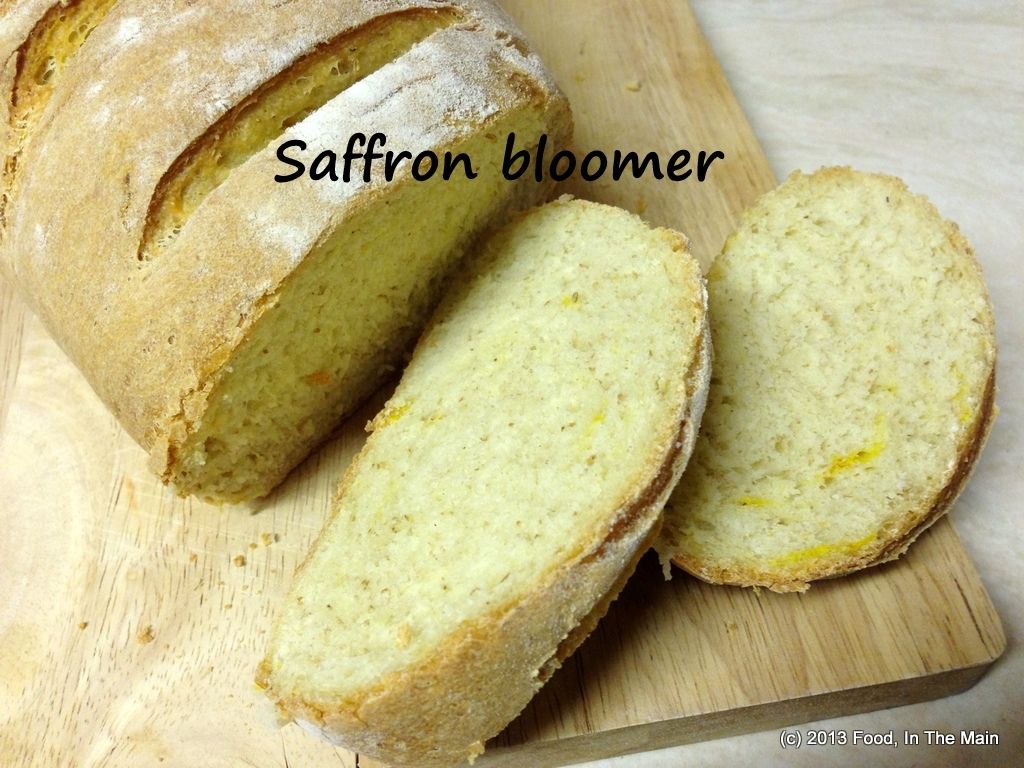 Recipe for: Saffron bloomer loaf
Ingredients:
A good pinch or two of saffron
150ml boiling water
150ml cold water
1 tsp fast-action yeast
100g ricotta
500g (4 cups) strong white bread flour, plus extra for shaping
50g (1/2 cup) wholemeal flour
2 tsp fine salt
Oil, for kneading
Method:
1. Put the saffron in a large mixing bowl, pour on the boiling water and leave for 10 minutes. Then add the cold water and yeast, stir well to dissolve the yeast, crumble in the ricotta and mix well.
2. Add the flours and salt, mix everything to a smooth dough, then cover and leave for 10 minutes.
3. Now lightly oil a kneading board or your kitchen worktop, and knead the dough lightly for 10 seconds. Return the dough to the bowl, leave for 10 minutes, then repeat this light knead twice more at 10-minute intervals, before leaving the dough, covered, for about an hour.
4. Lightly flour the worktop, pat the dough into a rectangle and roll up very tightly. Place the dough seam-side down on a tray lined with nonstick paper, lightly flour the top, cover with a cloth and leave for an hour until it nearly doubles.
5. Slash the risen dough three or four times with a sharp knife along the top,
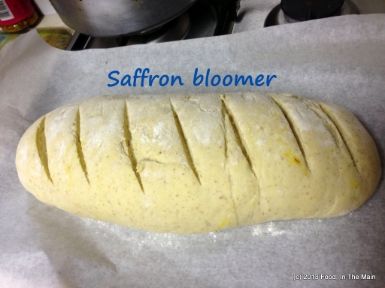
and bake at 220C (200C fan-assisted)/425F/gas mark 7) for about 40 minutes.
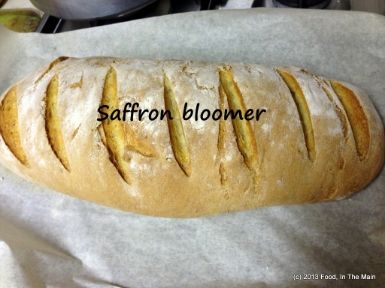
Tip: Fill a metal dish with boiling water and place on the lowest shelf of the oven, before putting the dough in to bake, to help give the your loaf's crust a golden colour.
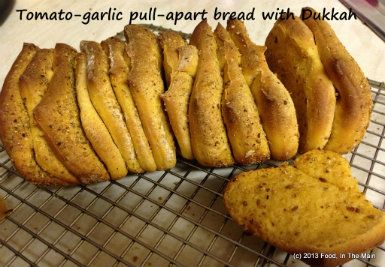
I just wanted to try the pull-apart recipe again, to see if I could manage the miraculous "second rising" of the bread dough. I started this before I checked to see if I had any cheese - and sure enough, when I did get around to checking the fridge, there was no cheese - no, not even a bog-standard Cheddar *sigh*. I couldn't go out to get cheese because of all the snow (it's been snowing all day) and because I didn't want to venture out into the freezing cold.
This should have been a CHEESY bread... ideally I was hoping to use feta, as a Mediterranean cheese to go with the somewhat Mediterraneanish Dukkah (Sainsbury's finest version, I'll have you know).
(Ok, yeah, I know Dukkah is Egyptian, but it's kinda sorta close to Mediterranean cuisine, no? Work with me here, people... I suppose you could say that Dukkah and feta are about as compatible as Dukkah and cheddar - but that's for YOU to say. I say different.)
Anyway... I halved the quantity of ingredients in the original recipe because I'm back home and there are fewer than half the people that were there when I made my first attempt in Seattle earlier this month. I'm glad to say that, on the plus side, the second rising in my second attempt was successful. Unfortunately, while I turned the former negative into a present positive, a couple of other negatives arose in the present version - one being, as mentioned earlier, a lack of cheese; the second being that the tomato flavour was at best only mild. I guess 1 tbsp of concentrated tomato paste was not enough even though the ingredients were halved. Next time I'd probably double the amount of paste and use finely chopped sun-dried tomatoes in oil too.
Oh well, live and learn.
The bread, by the way, was good, but it would have been better with cheese (a friend of mine at work insists that most things are better with cheese).
Recipe for: Tomato-garlic pull-apart bread with dukkah
 Ingredients:
For the Dough
1/4 cup warm milk
1/2 tsp sugar
1 tsp active dry yeast
1.5 cups bread flour (+ a couple of tbsp more for dusting if necessary)
1/2 tsp salt
1 tbsp butter, soft at room temperature
1 tbsp concentrated tomato paste
2 fat cloves garlic, grated (use only 1 clove or 1/2 tsp garlic paste if you want a milder flavour)1/3 cup milk
1 tbsp milk for brushing
For the Filling
1 tbsp melted butter
2 tsp Dukkah (I pounded it with a mortar and pestle to make it more uniformly sized)
Method:
1. In a small bowl, dissolve the sugar and the yeast in the 1/4 cup of warm milk. Keep aside for about 5 minutes till the yeast mixture bubbles up.
2. Put 1.5 cup of flour, salt, softened butter, and grated garlic in a large bowl and mix. Then add the yeast mixture and most of the 1/3 cup of milk and mix together. If there is more than a tbsp of flour that keeps dropping off from the dough (i.e, it isn't coming together) and the dough itself seems dry, add the remainder of the milk and knead it in.
Transfer the dough to a non-stick mat (lightly flour your kneading area if it is not non-stick) and knead away till you have a soft, smooth and elastic/ pliable dough which is not sticky (about 10 minutes of energetic kneading). Add a little extra flour if your dough is sticking, but only just as much as is necessary.
3. Shape the dough into a ball and place it in a well-oiled bowl, turning the dough to coat it completely with oil. Cover and let it rise for about 1 to 1 1/2 hours or until almost doubled in volume.
4. Dust your work surface lightly with flour. Deflate the dough, shape it into a square and roll the dough out into a square that is about 8" by 8". Brush the surface of the square with the melted butter.
5. Evenly sprinkle the Dukkah mix. Use a rolling pin to very lightly press the topping into the dough to ensure the topping doesn’t fall off when you are stacking the strips.
6. Using a pizza cutter, slice the dough from top to bottom into 4 long and even strips – they do not have to be perfect. Lay each strip on top of the next, with the topping facing upwards, until you have a stack of the strips. You can put the 2 strips cut from the sides in the middle of the stack so it looks neater. Using a pastry scraper or a sharp knife, cut straight down through the stack dividing it into 3 or 4 equal pieces.
7. Grease and lightly flour a small loaf tin that will fit the pieces comfortably (or any other baking container you like). Layer the slices, cut sides down into the loaf tin. Cover the loaf tin dough with a towel and allow the dough to rise for an hour. Lightly brush some milk over the top of the loaf.
8. Bake the dough at 180C (350F) for about 25-30 minutes (but check from 25 minutes, as every oven differs in its performance) until it is done and the top is golden brown, and the bread sounds hollow when tapped on the bottom.
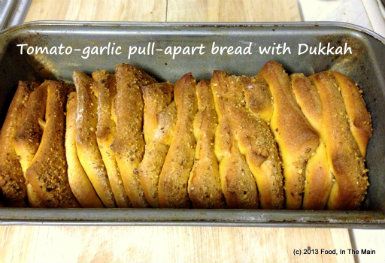
9. Serve hot with soup.
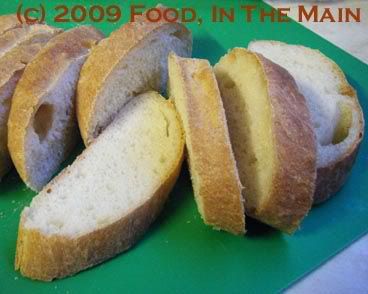
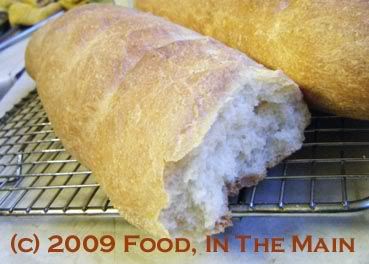
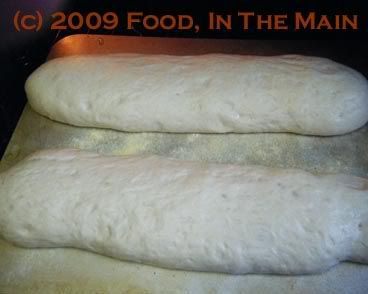
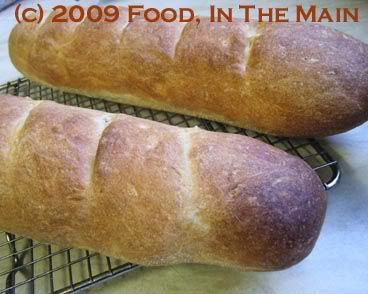
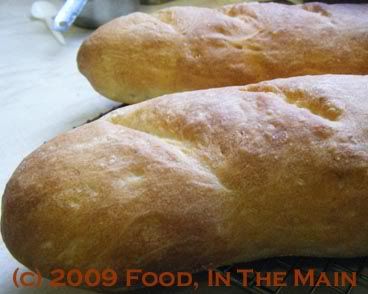
My version of it, anyway. I wonder how the bakeries manage to get that lovely baton shape... perhaps they have special baton-shaped bread tins? My French bread flattened itself almost like a ciabatta loaf, so perhaps the dough was looser than it ought to have been, making it lose its baton(ish) shape once the final proofing was finished with. I don't know. Perhaps I never WILL know (although I'm hoping that won't be the case... after all, there are thousands of bakers out there, and perhaps one of them will kindly enlighten me. I live in hope).
But the thing is - even if no kindly baker happens along to throw light on the subject, I won't mind. The truth is I don't really care that my batons could more accurately have been called 'flat'ons. Because, people, my flat French bread tasted FABUTASTIC! I've no idea if I can repeat the feat. I honestly don't know how it managed to be so good. I'm half afraid to try again, in case it doesn't turn out as well as this, my first attempt - the crust so crackly to the bite yet not rock hard, the inside so soft and white, and the whole loaf smelling of yeasty warmth... slathered with butter for the first bite - mmmm!
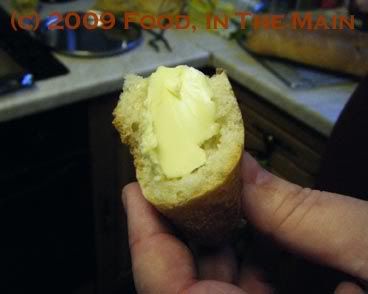
I do not exaggerate when I say that this bread disappeared quicker than anything I've ever made. While the loaves were cooling (and while I fended the ravening hordes off to take a couple of photographs), Pete heated up some soup, and by the time the bread had cooled down enough to be sliced, the soup had been served up in bowls and the kids (the big one included) were standing there holding out the bowls like three Oliver Twists, waiting for the bread.
Oh, the French bread was such a success, and I felt so very, very thrilled... (the original recipe was from here)
Recipe for: French bread
Ingredients:
2-1/2 tsp dried yeast, for hand baking (the kind that has to be reconstituted in water before use, not instant yeast)
1-1/4 cups warm water (slightly more than hand-warm, about 40C)
1/2 tsp. sugar
3 cups strong bread flour
1-1/2 tsp salt
Ingredients:
1. Place water in a large bowl and sprinkle with yeast and sugar. Swirl to help dissolve yeast.
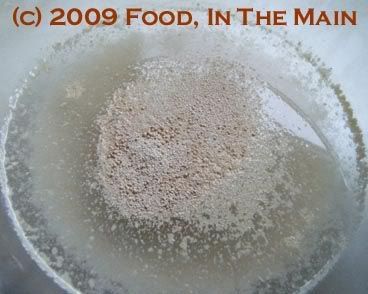
Let it stand for 5-10 minutes, or until the yeast dissolves and starts to bubble.
2. Stir in 1 cup flour. Cover and let rise for 1/2 hour till bubbly.
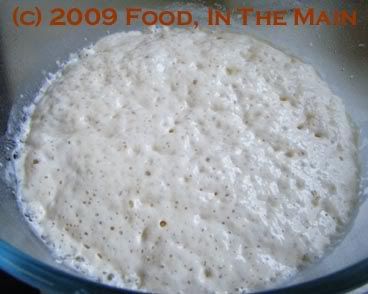
3. Then gradually stir in the remaining flour and salt
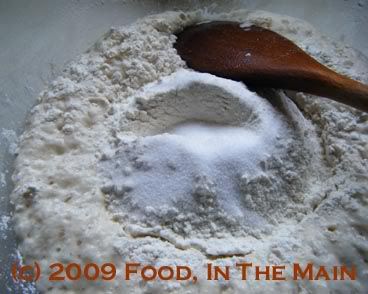
to make a soft dough.
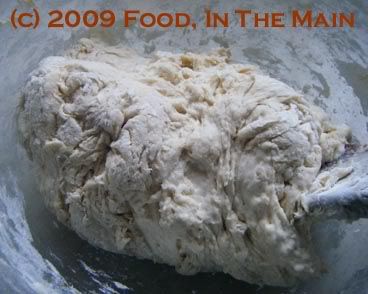
5. Turn the dough out onto a floured surface and knead for 10 minutes.
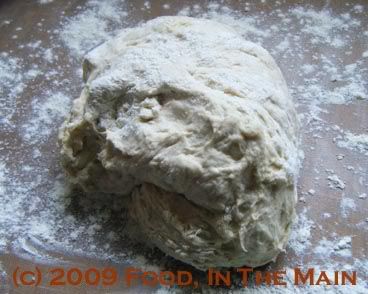
6. Grease a large mixing bowl with 1 tsp oil, and place the dough in the bowl. Turn it in the bowl so the dough is greased.
7. Cover the dough and let rise in a warm place for about 2-1/2 hours, until double in volume.
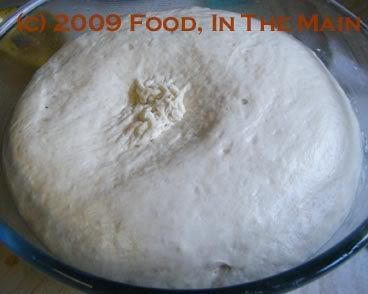
8. Now punch down the dough,
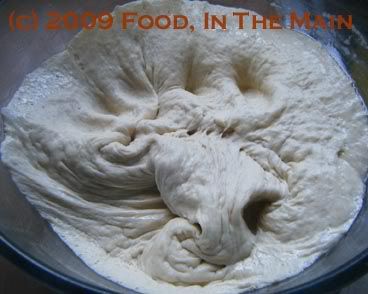
divide in half and place one half on a lightly floured surface.
9. Form it into a cylinder shape and roll it back and forth until it becomes about a foot long or so, tapered a bit at the ends to make French bread shape.
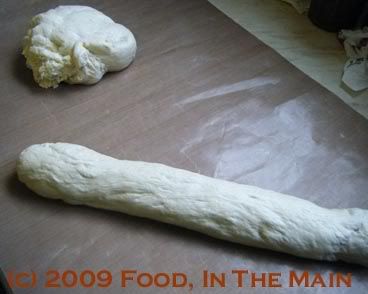
Do the same with the other half of the dough.
10. Grease a baking tray and sprinkle with cornmeal.
11. Quickly transfer the dough on to the prepared sheet.
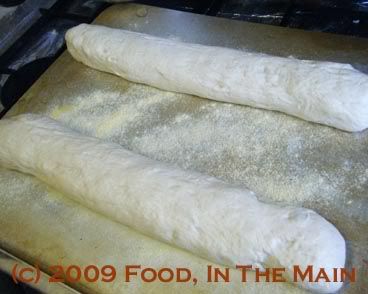
Cover with greased cling film and let rise at room temperature until doubled, up to about 1-1/2 hours.
12. Preheat the oven to 220C. Make 3-4 slashes across the top of each loaf.
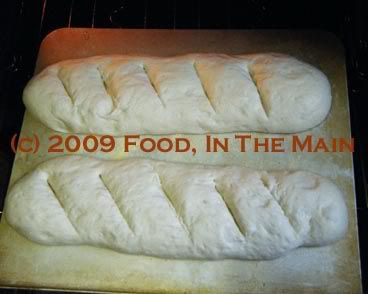
Bake the loaves for 20-25 minutes or until they are golden brown. (Tap the bottom - if the loaves sound hollow, they're done.)
13. Remove from tray and let cool on wire rack.
This bread baking bug seems to have taken me over big-time.
It’s one thing for a newbie baker to be well-informed about the recipe and what the yeast should or shouldn’t be doing – but when the yeast too appears to have read and digested the same recipe (so to speak) as its user, and knows its role in the whole process and, what’s more, executes that role perfectly... well, the satisfaction felt by the baker just about defies description. But if you want an inkling of how it feels, just think of an artist with his or her masterpiece, an author with his or her completed novel, a parent with a perfect child... it’s like that, only the process is easier, and better still, the satisfaction goes just as deep. (It does with me, at any rate.)
I made pav buns fairly recently (yes, still mentioning it, thanks) with great success. The same recipe, doubled to make a (very) large loaf, didn’t stay soft. It made fantastic toast for 3-4 days, but was too dry for sandwiches.
When I tried it with one cup whole-wheat flour and 2 cups of strong white bread flour, it made a reasonable loaf, but I found it rather heavy. I have to admit that I really don’t care for (health-freaks please stop reading here and move on to next para) whole-wheat bread much. I quite like bread with seeds in, and I love German rye bread... but whole wheat bread especially with oats in really doesn’t do anything to endear itself to my taste buds.
So I decided to try and work through a few recipes for white bread (which I will try one by one over the next few weeks or so), using unbleached enriched strong white bread flour, to see which one proved (baking pun there, ahaha, yes I had to point it out in case it was missed due to its feebleness) to be the best in terms of taste and texture.
The first recipe from my collection turned out to have an egg among its ingredients. An egg! For plain white bread! I’d never heard of an egg used in baking regular bread, although I do know that special breads like brioche and challah require eggs. Still, I thought I would give it a go and see how the bread turned out.
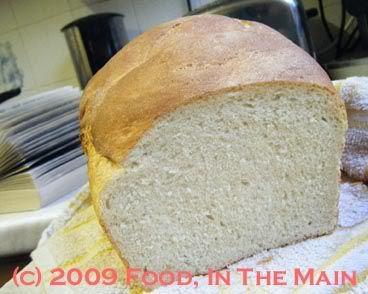
The loaf was quite good, actually – there was no eggy aftertaste, although the inside seemed ever so slightly yellow... but I put that down to the fact that the egg I used had a remarkably yellow yolk, thanks to the corn-fed hen (one of many many) raised by a friend on his smallholding.
The texture of the bread was a bit heavy, I thought, but not unduly so. It wasn’t airy and light, certainly, but perhaps I’ve been used to store-bought bread which certainly has no weight to it. (That fluffy weightlessness is one of the reasons why I’ve preferred to buy bread from a proper, stand-alone, independent bakery whenever possible. Bread isn’t meant to be feather-light, I don’t think.)
Anyway, you certainly wouldn’t have wanted to use the loaf I baked as a brick. It sliced simply beautifully and also made quite good toast. It didn’t dry out quickly either. All in all, not a bad start to my bread baking... but this recipe is also not The Ultimate White Bread recipe for me. I still can't really get my head around the fact that regular bread needs eggs in the ingredients... so on to Trial 2 next week!
Recipe for: White bread (Trial 1)
Ingredients:
4-3/4 cups very strong white bread flour
1-1/2 tsp salt
1-1/2 tbsp sugar
2 tsp yeast
1 large egg, slightly beaten so that the egg yolk amalgamates with the egg white
2-1/2 tbsp butter/margarine/oil
1-3/4 cups buttermilk (I mixed 3/4 cup non-fat Greek yogurt with 3/4 cup water and 1 tbsp vinegar because I didnt have buttermilk)
Method:
1. Mix flour, salt, sugar and yeast in a large bowl.

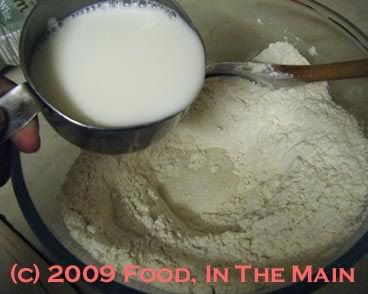
2. Make a well in the centre and pour in the buttermilk
beaten egg
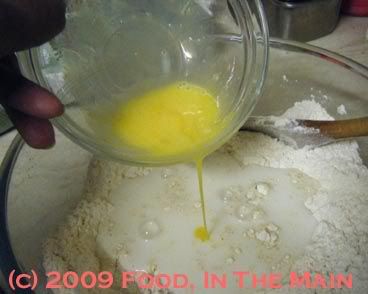
butter/margarine/oil (if using butter or margarine, melt it and cool it a little)
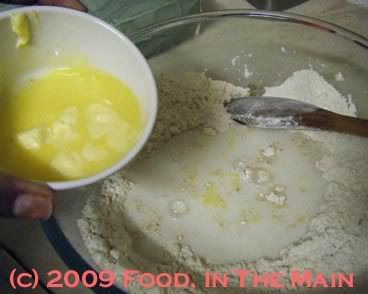
and stir with a wooden spoon
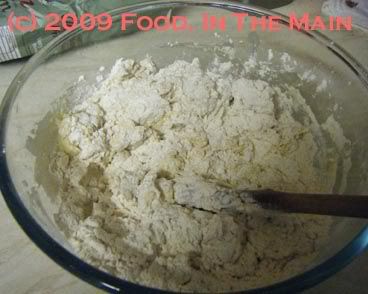
to bring the dough together.
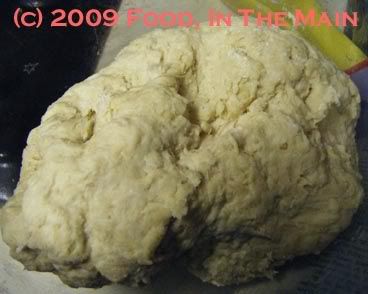
3. Turn the dough out onto a lightly floured worktop and knead for 6-8 minutes till it becomes smooth and soft. It's ok if it's slightly sticky, but it shouldn't be too dry.
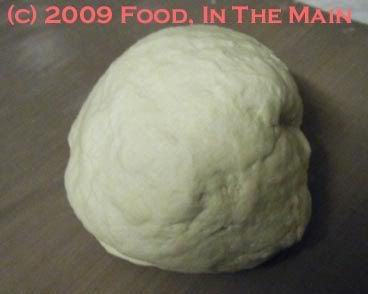
4. Place the dough in a large, lightly oiled bowl and turn it over once or twice to coat it. Cover the bowl with clingwrap
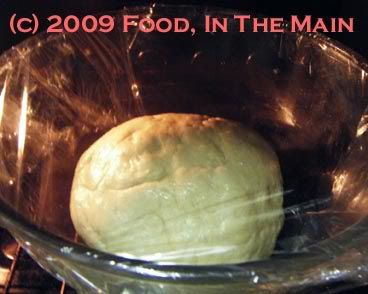
and place in a warm draught-free place (mine was in the oven with the light on) till the dough is doubled in volume. (About 2 hours or so)
5. Now punch the dough down gently and knead lightly for a minute, shaping it to fit in a lightly greased loaf pan that can take a 2-pound loaf of bread.
6. Spray the top of the loaf lightly with non-stick spray and cover loosely with clingwrap. Let the dough rise again (30-45 minutes) till it rises above the rim of the pan.
7. Bake in a 180C oven for 30-40 minutes or till the loaf is golden on top.
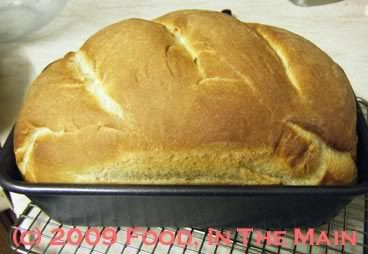
The bread can be considered to be done if it sounds hollow when tapped on the bottom (you'll have to remove it from the pan first!).
8. Let cool for a few minutes in the pan,
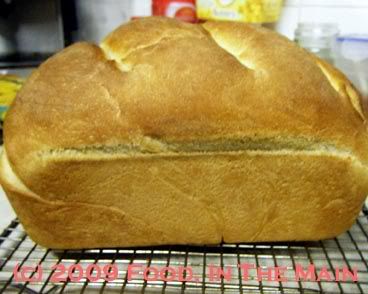
then remove and wrap the loaf in a clean tea towel till required.

Slice when cool.
This recipe is actually for the pav buns/dinner rolls that I made a few days back. And yes, before you ask, I am not yet tired of mentioning the fact that I baked them myself! (Twice!) The photos were taken the second time I made the same recipe, but I decided to shape the buns like sandwich baps (English term for a flattish soft flour-topped sandwich roll) - which is why the finished-product photo doesn’t show pav bun-shaped bread. It's the same recipe as in the earlier post, though.
The post is basically a pictorial, so for a change I’ll let the photos do the talking. One photo equals a thousand words, to quote an oft-repeated phrase, so … er (hoping my maths skills are up to the task) ... I guess that means I’ve written some 18,000 words, not counting the words in this paragraph. A pretty good effort, all said, wouldn’t you agree?
In pictures, then:

The bubbly result of one cup of flour, one cup of warm water and 2.5 tsp yeast, mixed well and left to ferment in the oven for about an hour with the pilot light turned on.
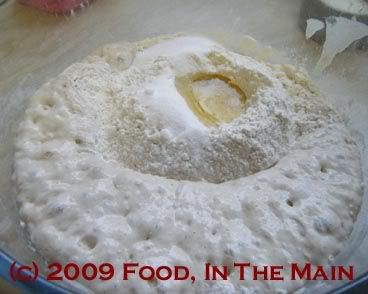
Adding the remaining 2 cups flour, 1 tbsp melted butter, salt and sugar.
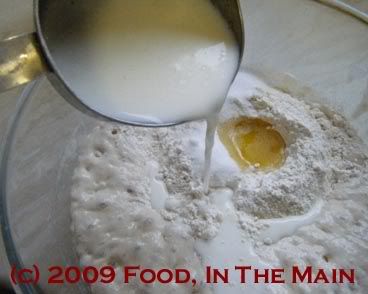
1/2 cup buttermilk going into the bowl now...
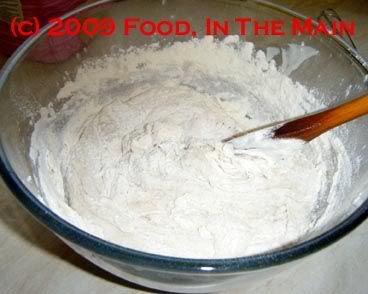
Stirring the whole thing with a wooden spoon to bring the ingredients into a rough dough.
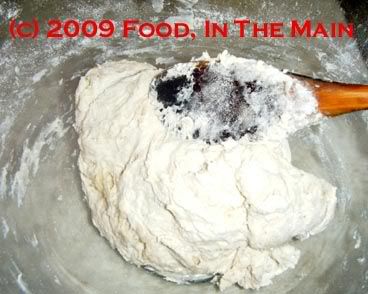
Now that the dough has come together reasonably well, time for some kneading.
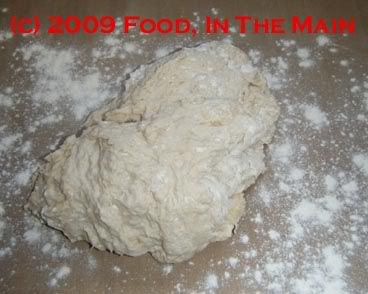
Remove the dough to a lightly floured surface.
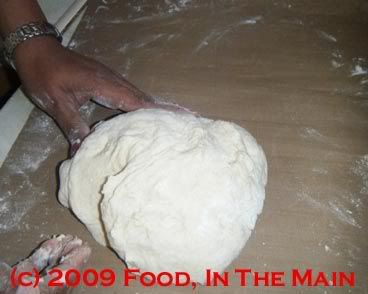
This is hungry dough - it's taken up the extra flour from the kneading surface.
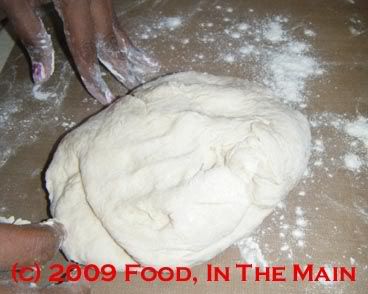
Don't be afraid to scatter more flour on the surface - like so - while kneading.
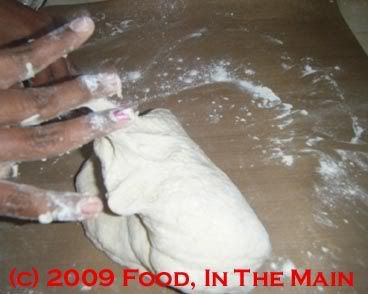
Fold the dough towards you while kneading
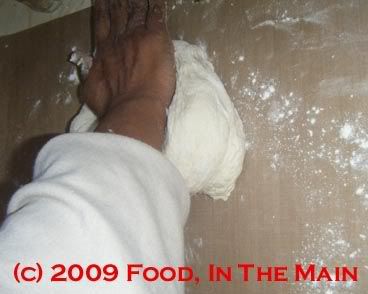
Then push it away from you with the heel of your hand. Turn the dough a quarter circle, then repeat the folding-pushing maneouvre for 6-8 minutes.
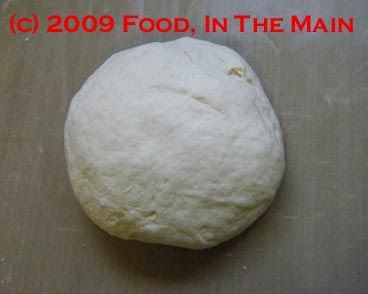
At last - the dough is now elastic and smooth, ready for the next step.
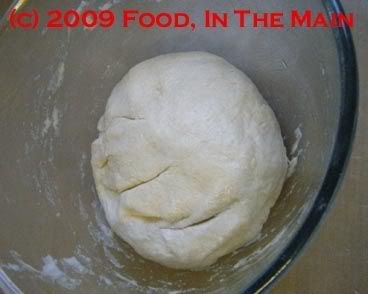
The dough now back in the greased bowl, covered with cling film, for 1-1/2 to 2 hours in the pilot-light-lit oven.
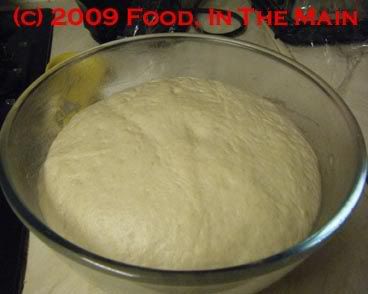
After about 1 hour 45 minutes - the dough has risen nicely to double the original volume.
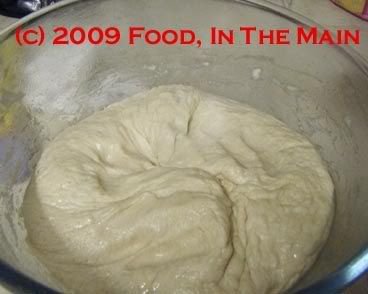
Punch it down gently.

Put the dough back on the kneading surface to be pinched off and rolled into bun shapes, ready for the second rising. (Nothing to do with religion!)
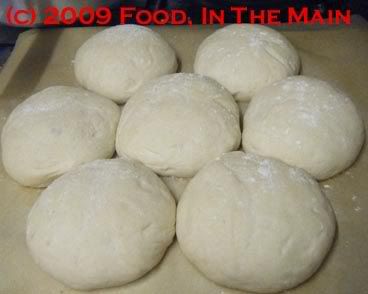
After 45 minutes in the oven, the bun-shaped dough balls have risen again and filled the gaps to stick together. Sprinkle extra flour on them before baking.
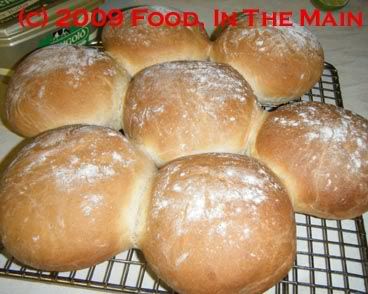
Golden-brown sandwich baps, fresh from the oven. These took about 30 minutes to bake at 180C.
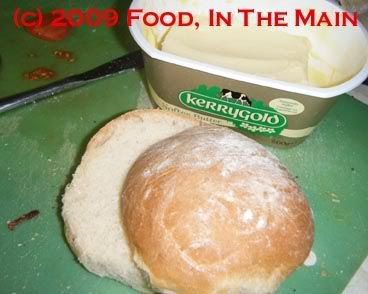
Sliced and ready to become a sandwich - use a filling of your choice, and enjoy the soft, yeastily aromatic bread baked by your own hands!


