Showing posts with label caster sugar. Show all posts

Saturday, August 20, 2016

Lime-vanilla sugar cookies

The basic sugar cookie recipe was from a colleague who made hers first from a recipe on the back of some cookie mix or other. She brought some leftover cookies to work just before Christmas break last year, and they were SO delicious that I asked her for the recipe. I'm not really a cookie person - either eating or making - but her cookies really were incredibly moreish. 

The first time I made the plain sugar cookies was last Saturday - they turned out really well, and Pete loved them. He insisted that we should take some to a friend's barbeque party. She had two types of desserts for the guests but her daughter decided that she was going to make herself a dessert with my cookies, layering them with strawberries that been macerated with sugar, and clotted cream (like an ersatz strawberry shortcake) and declared it a superhit. 

In the meantime, my friend's husband was quietly putting away cookie after cookie, looking sheepish when he was rumbled, but not letting it stop him from taking a couple more. There must have been at least 40 cookies in the container, but by the end of the party they were all gone to the last crumb. That was definitely a pleasing result in my eyes, both because the cookies came out so well and because everyone liked them, from the 7-year-old granddaughter to the 70-year old neighbour!

All week since, Pete had been begging me to make some more. Yesterday I chose to make them but give it a citrusy twist, because I love citrus-flavoured things. Lime was my flavouring of choice. Again, the cookies turned out really well - which I guess convinced me that it wasn't a fluke the first time around (really, I'm not famous for baking cookies). 

I liked these lime-flavoured cookies quite a lot myself, and so did Pete. And so did Pete's son and his girlfriend who dropped by. Like me, Andy is not really a cookie person, but he said "these are the best cookies I've ever eaten" and went on to prove it by eating half a dozen in quick succession. As for his girlfriend, she scarfed down a few, and then took charge of the bag containing the 2-3 dozen that I packed for them to take away. I'm not sure Andy will be seeing very much of them, unless he is V E R Y nice to her... 

By the way, I got about 60 cookies from the amount of dough that this recipe makes - but mine were small, about the diameter of an Oreo. If you make bigger cookies, you will get fewer (yes, well, duh). I also toyed with the idea of icing them with a simple lemon icing (lemon juice + icing sugar mixed to a spreadable consistency) but laziness got the better of me. Besides, I didn't really think the icing was essential. 

One last tip - the dough is best worked with when chilled.  

Recipe for: Lime-vanilla sugar cookies


 photo 20e51a30-6f41-48d7-b81b-2b913b8d297b_zpsxsjczgof.jpg

Ingredients:

150gm softened unsalted butter
150gm caster (superfine) sugar
300gm plain (AP) flour
1.5 tsp best-quality vanilla extract
1/2 tsp pure lime oil (optional)
Zest of one lime
1 medium egg, beaten

Method:

1. Cream butter and sugar using a wooden spoon in a large mixing until light and fluffy (I did this by hand, takes about 7-8 minutes).

2. Add the beaten egg, the lime zest, lime oil and vanilla extract and beat it in. 

3. Add the flour in 4-5 installments, mixing just until incorporated. When it comes together into a rough dough, dust your hands with some flour and form the dough into a ball. Place the ball on some clingfilm or a sheet of non-stick foil and flatten it evenly till about 1/2 inch thick. Cover completely and place in the refrigerator to chill for about an hour. 

4. Scatter some flour on your working space. Turn out the chilled dough onto the floured space and gently roll the dough out until it is evenly 3-4mm thick. You may need to dip the rolling pin into flour now and then to stop the dough sticking. You can divide the dough into two before rolling out, to make it easier. Keep the other half chilled in the meantime. 

5. Using a cookie cutter of choice, stamp out the cookies, dipping the cutter into flour each time. Re-roll the remaining dough and cut out until the dough is used up. 

6. Transfer the cookies onto a sheet lined with non-stick foil or baking paper, leaving about an inch in between them as they will spread a little. Place the cookie sheet in the fridge again to chill for 15 minutes. 

7. Preheat your oven to 180C/350F (mine is a fan-assisted oven) and bake the cookies for 10-11 minutes or until they are a pale golden brown. You can turn the sheet around after 5-6 minutes to let them brown evenly, if you like. 

8. Let them cool on the sheet for a couple of minutes, then transfer carefully to a cooling rack until completely cool. Store in an airtight jar. 

Sunday, April 24, 2016

Eggless orange almond cookies

My little niece, who is nearly 6 years old, has been allergic to eggs since she was a baby. If she eats anything with even a trace of eggs, within about 15 minutes of ingesting it, she gets very uneasy and then invariably throws up. Once she's evacuated the contents of her little tummy, she's right back to normal, bouncy and happy while people around her deal with the aftermath. 

Obviously an allergy to eggs, while not as terrible as various other food-related allergies that children can have, does mean that she has to be very careful when she eats away from home - especially when it's a kiddie birthday party and there are tempting cakes and cookies on offer. Also because no party-organising parent really wants to have to deal with a kid who's having an allergic reaction that could escalate to life-endangering! However, touch wood, my niece is not fatally allergic to eggs, so her allergy is probably one of the easier types of problems to deal with. After all, it's easy enough to make egg-free food, especially cakes, cookies and ice creams. This holds true especially for home bakers. 


I made these orange almond cookies last week as a trial, to see how they would turn out prior to making them for my sister to take back for my niece when she returns to Seattle next week. The cookies turned out incredibly crisp and orangey and really tasty, and they disappeared really rather quickly. So I'm making a double batch today, because there would be a one-man mutiny if I didn't keep a few cookies back for home consumption. And here's the recipe so YOU can make it too. 

Oh by the way, I've taken to weighing out my ingredients for baking - I have the most basic of Salter kitchen scales that can weigh up to 500gms or 1/2 kilo. What's more, it can be tucked away neatly in its weighing bowl with its own plastic lid. Don't ask what's the big deal here, if you're the kind that weighs things automatically - until now I've not been the sort of person who bothered with all that "fussiness" (as I considered it). I'm not yet 100% on the side of weighing every single time...but I'm far more likely to do it than not. I consider myself to be the new improved version of me. 

Recipe for: Eggless orange almond cookies

Ingredients:

115 gms unsalted butter, softened
100 gms caster or granulated) sugar (I've tried it with both and it doesn't seem to have made any difference to the end result)
155 gms plain flour
1 tbsp orange juice
1/2 tsp pure orange oil (optional)
3-4 drops of orange food colouring (optional)
Zest of one orange
1 tsp vanilla extract (or 1/2 tsp cardamom seed powder if you prefer)
1/4 cup slivered or sliced almonds

Method:

1. Beat the butter and sugar in a large bowl until light and fluffy. By hand will do - I used a wooden spoon.

2. Add the rest of the ingredients apart from the sliced/slivered almonds and mix together until fully incorporated. Place the almonds on a plate. 

3. Chill the dough in the refrigerator for an hour for it to firm up. Line a flat baking sheet with a Silpat mat or with nonstick baking paper. 

4. Break off pieces of dough (about the size of a large marble), roll them into a ball and press them into the almonds. 

5. Place the cookie dough balls on the lined tray (almond side up) and flatten each one slightly. (You may need to wash and dry your hands every so often to stop the dough sticking as it starts to warm up). Leave 2 inches space between cookies as they will spread. Put the remaining dough back in the fridge if you can't use it all in one batch. 

6. Bake the cookies in a 180C oven for 9-12 minutes (or until the edges turn golden brown). Leave the cookies on the sheet for a minute, then transfer carefully with a spatula on to wire cooling racks. They will crisp up as they cool. 

Saturday, February 16, 2013

Sour cream loaf

I've been on a baking binge over the last 2 weeks - only on the weekends, though, because weekdays are just not long enough for baking bread if you're not demonically organised, which I am not.

Ever since I discovered Dan Lepard's recipes in The Guardian, I've gone through some 300-odd recipes in his column published over the past so many years, and scouted out all the bread recipes that seemed interesting and easy. And printed them. And now I'm trying to bake them all, one by one.

The saffron bloomer got made twice. Then this one, which is really good. There's also a wheat & rye cider loaf, and a loaf made with fresh yeast... but I'm getting ahead of myself. Those recipes will follow in due course.

For this loaf, it was serendipitous that I had half a carton of sour cream in the fridge. It may have been just a teensy bit past its use-by date, but I didn't say that and you didn't read it. Besides, we're both alive, so there was no harm done.

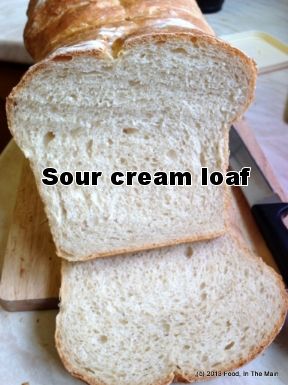
 photo d81e0b62-e58e-40b9-9b1c-bdc68ea143f2_zps8d86aede.jpg

I've never been so pleased with bread I've baked - this loaf could have come from a proper bakery, I kid you not. I SO like Dan Lepard, because he says there's no need to knead like a maniac to get good bread, and believe me, that man speaks true. I'm all for an easier life, and he does make it easier. I may have said that before, but it remains true nevertheless.

 photo 7d440bc7-9961-431d-8a17-01665b0c46d6_zps4421d3a3.jpg

Recipe for:
Sour cream loaf

Ingredients:

125g (4 oz or 1/2 cup) cold sour cream
1.5 tsp salt
2 tsp caster sugar
1 sachet (7g) fast action yeast
550g (1 lb 4 oz) strong white bread flour, plus more for shaping
Oil, for kneading

Method:

1. In a large bowl, mix the sour cream with 150ml cold water and 100ml boiling water.

2. Add the sugar and yeast and whisk it together, then mix in the flour and salt until it forms a rough ball. It will be quite sticky. Cover the bowl and leave the dough to sit for 10 minutes.

3. Lightly oil your working area (worktop or kneading board) and gently knead the dough on it for 10 seconds. Put the dough back in the bowl and let it rest covered for 10 minutes.

4. Repeat the 10-second-kneading/10-minute-resting procedure twice more, oiling the worktop again if required to stop the dough from sticking too much. After that, leave the dough covered in its bowl for an hour or so, until it has doubled in size.

5. Butter the base and sides of a large, deep, 8" (19cm) loaf tin. Line the base with non-stick baking paper.

6. Lightly flour the kneading board now and place the punched-down dough on it. Pat or roll it out into 1 2-cm thick rectangle that's the length of the loaf tin, then roll the dough up towards you as well as you can. Place it seam-side down in the loaf tin, flour the top lightly, cover with a towel and let it rise for 60-90 minutes until it is doubled again.

7. Bake at 200C (180C/350C for fan-assisted or convection ovens) for about 45 minutes till it is golden brown on top and sounds hollow when you tap the loaf on the bottom (you gotta remove it from the baking tin for this, so definitely use oven gloves!).

 photo 7bbff741-2558-4411-90e4-a4eadf29fa8d_zpsdef26323.jpg

Let cool before slicing.

Thursday, February 24, 2011

Mediterranean-style aubergine

I think this is the second recipe on my blog that involves aubergines. In five years plus of blogging, only the second recipe. There is a very good reason for this – I hate aubergines. Pete likes them, though, and occasionally guilt overcomes loathing and I make something specially for him, with the purple horrors as the star ingredient. (The guilt has to build up slowly over the years, as there is an awful lot of loathing to overcome.)

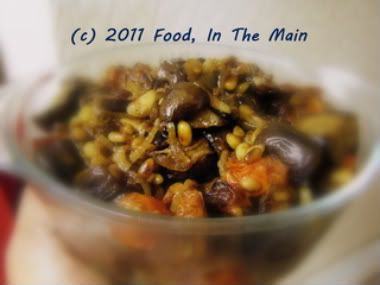
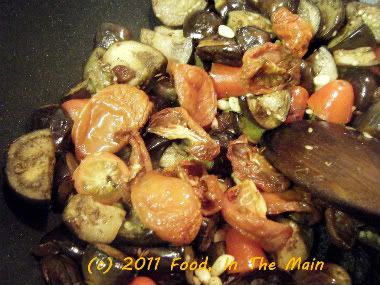
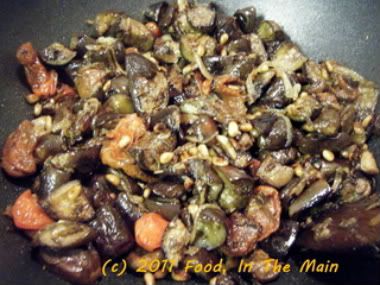
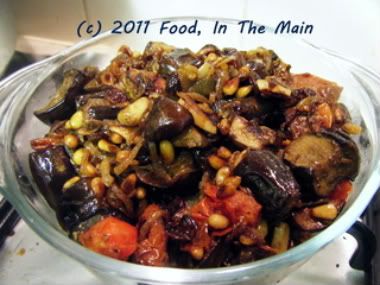
Anyway, this is very definitely an aubergine lover’s dream dish. It’s supposed to be served as a side with grilled lamb chops, but if you’re vegetarian, feel free to dive right in. It’s a pretty dry dish – it might even do well as part of a tapas spread, come to think of it. The onion base tastes absolutely delicious with the garlic and balsamic vinegar and pine nuts, and I am going to make the dish again, at some point, with bell peppers - although I’d probably leave out the raisins. Should do very nicely over spiced couscous, methinks...

Recipe for: Mediterranean-style aubergine
Photobucket
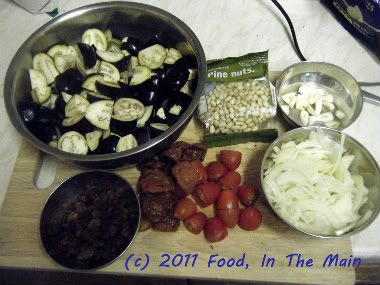
Ingredients:
Photobucket
4 cups baby aubergines, quartered
4 cloves garlic, thickly sliced
2 small onions, sliced very fine
2 tbsp extra virgin olive oil
8-10 baby plum tomatoes, cut in half
3 tbsp sundried tomatoes
1 tsp cumin seeds
1/2 tsp cinnamon powder
2 tbsp pine nuts
2 tbsp raisins
2 tsp caster sugar
1 tbsp balsamic vinegar
2 tbsp red wine vinegar
Salt to taste

Method:

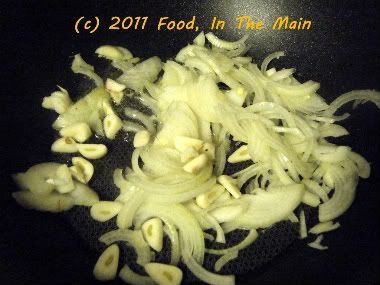
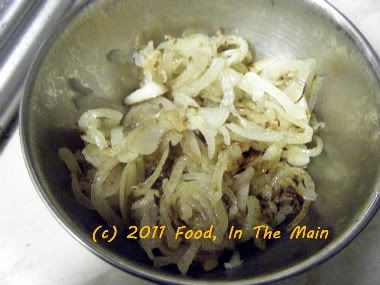
1. Heat 1 tbsp extra-virgin olive oil in a large pan and add the garlic and onion.
Photobucket
2. Cook for about 5 minutes over a medium heat, until soft and just starting to brown. Remove from the pan and reserve.
Photobucket
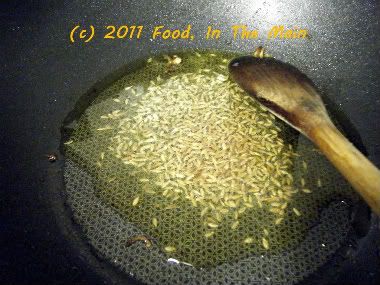
3. Turn up the heat a bit, add the remaining olive oil to the pan. Add the cumin seeds.
Photobucket
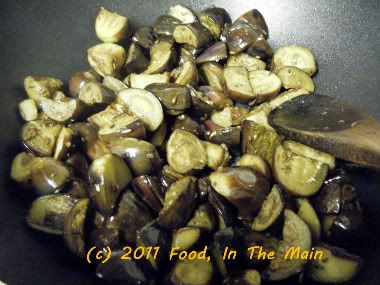
4. Now add the aubergine and fry it, stirring often, for 7-8 minutes, until the aubergine is soft and starting to brown.
Photobucket
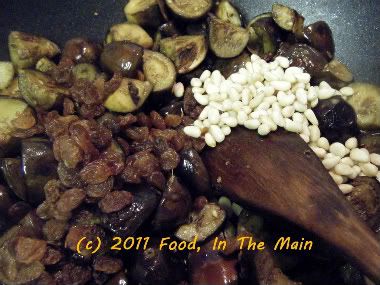
5. Sprinkle in the raisins and pine nuts and stir it all together.
Photobucket
6. Throw in the reserved onion and garlic,
Photobucket
plus the halved plum tomatoes and the ovendried/sundried tomatoes.
Photobucket
7. Cook for 3-4 minutes, stirring occasionally, until the tomatoes begin to soften.
8. Sprinkle 2 tsp caster sugar and 1 tbsp balsamic vinegar, 2 tbsp white wine vinegar over the aubergine. Stir together until well combined. Add salt to taste, check for seasoning, then remove from the heat.
Photobucket
9. Serve warm with couscous, or at room temperature as a snack.Photobucket
Garnish with a few mint leaves sliced into strips.

RECIPE: MEDITERRANEAN-STYLE AUBERGINE

Ingredients:
4 cups baby aubergines, quartered
4 cloves garlic, thickly sliced
2 small onions, sliced very fine
2 tbsp extra virgin olive oil
8-10 baby plum tomatoes, cut in half
3 tbsp sundried tomatoes
1 tsp cumin seeds
1/2 tsp cinnamon powder
2 tbsp pine nuts
2 tbsp raisins
2 tsp caster sugar
1 tbsp balsamic vinegar
2 tbsp red wine vinegar
Salt to taste

Method:

1. Heat 1 tbsp extra-virgin olive oil in a large pan and add the garlic and onion.
2. Cook for about 5 minutes over a medium heat, until soft and just starting to brown. Remove from the pan and reserve.
3. Turn up the heat a bit, add the remaining olive oil to the pan. Add the cumin seeds.
4. Now add the aubergine and fry it, stirring often, for 7-8 minutes, until the aubergine is soft and starting to brown.
5. Sprinkle in the raisins and pine nuts and stir it all together.
6. Throw in the reserved onion and garlic, plus the halved plum tomatoes and the ovendried/sundried tomatoes.
7. Cook for 3-4 minutes, stirring occasionally, until the tomatoes begin to soften.
8. Sprinkle 2 tsp caster sugar and 1 tbsp balsamic vinegar, 2 tbsp white wine vinegar over the aubergine. Stir together until well combined. Add salt to taste, check for seasoning, then remove from the heat.
9. Serve warm, stirred into couscous, or at room temperature as a salad. Garnish with a few mint leaves sliced into strips.

Monday, February 07, 2011

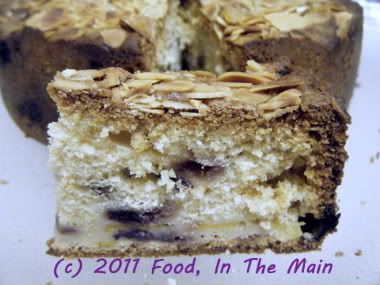
Blueberry nectarine cake

Perfectly ripe nectarines – ready to eat now” is what the label on the package said. HA! The nectarines were anything but perfectly ripe… and unless you like your tongue twisting itself into a knot while your eyes do the Lalita Pawar squint, they most certainly were NOT ready to eat “now” or any time in the near future. Man, were they sour or what!

So there were these four nectarines taking up valuable fridge space and not getting any riper for being in there… and I had to do something with them before I forgot about them. Naturally, the first thing that came to mind was “CAKE”. To my husband’s mind, that is, not mine.

To add to the nutrition quota of fresh fruit cake (and thereby pay lip service to the "healthy" aspect), I threw in a cupful of blueberries left over from a previous muffin making day.

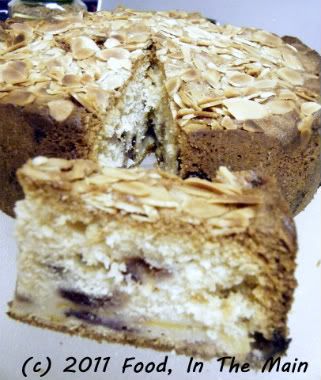
I have only one thing to say about the cake – actually, it’s Pete’s thing I’m going to say because I don’t want to sound like I’m praising my own effort – “It’s sensational”.

I think that about covers my opinion, too.

Recipe for: Blueberry nectarine cake
Photobucket
Ingredients:
1 cup butter/margarine, softened
1 cup sugar
3 large eggs
1/3 cup cream/milk
1-1/2 tsp vanilla extract
2 cups all-purpose flour
4 tbsp flaked almonds
1-1/2 tsp baking powder
1/4 tsp salt
1 cup fresh blueberries
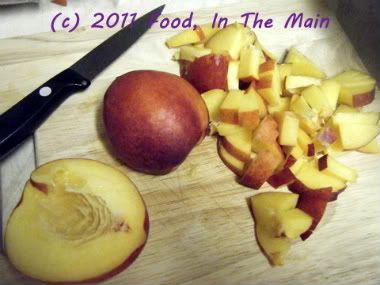
2 large nectarines, chopped
Photobucket
Method:
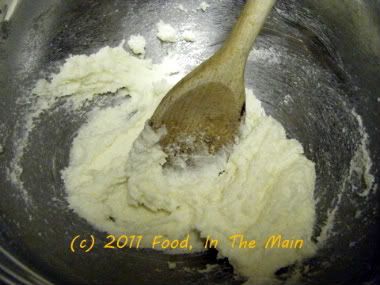
1. Beat butter/margarine until creamy. Gradually add sugar, beating until light and fluffy.
Photobucket
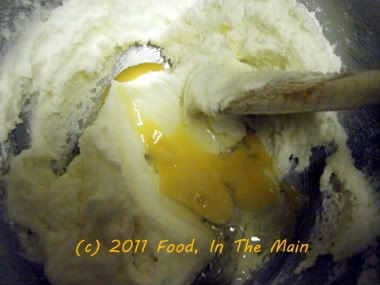
2. Add eggs, one at a time, beating just until the yolk disappears.
Photobucket
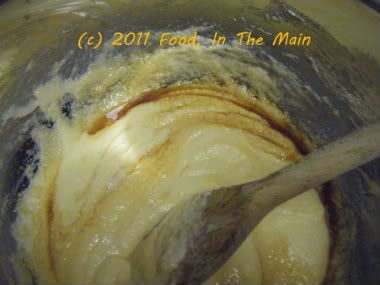
3. Add vanilla, beating just until blended.
Photobucket
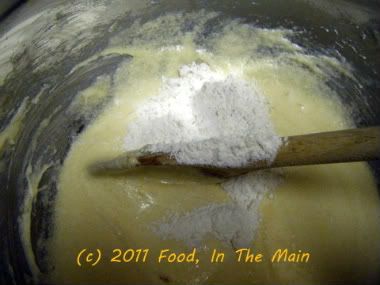
4. Sift together flour, baking powder, and salt. Gradually add flour mixture to butter mixture, stirring well.
Photobucket
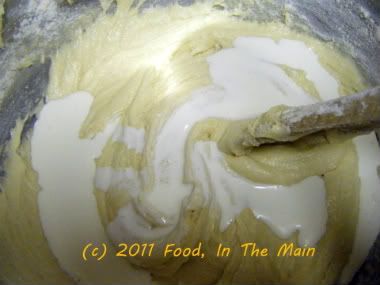
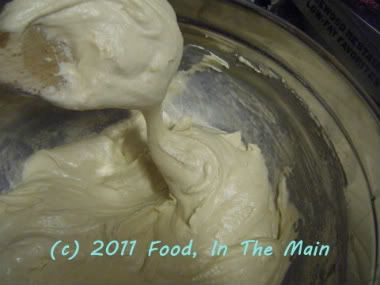
5. Add cream/milk and stir it in, then beat the batter fo 2 minutes till well blended.
Photobucket
The batter will be fairly thick.
Photobucket
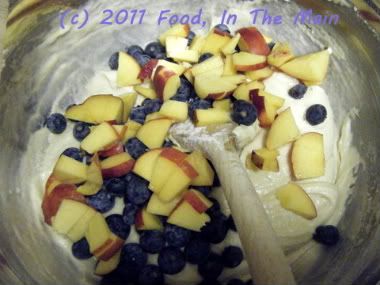
6. Gently fold in nectarines and blueberries. Pour batter into a deep 8" round cake pan.
Photobucket
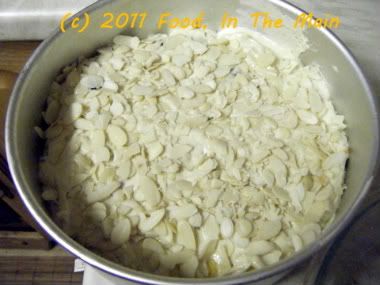
7. Sprinkle the flaked almonds evenly over the top, then press them in lightly. Not ALL the way in, but just enough that the batter rises over the edges when the cake is in the oven.
Photobucket
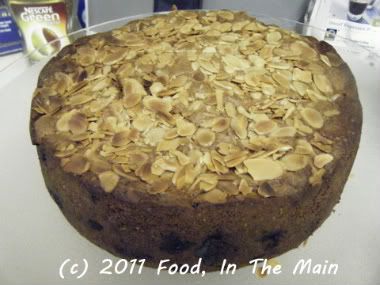
8. Bake at 180°C for 40 minutes or so, until a wooden pick inserted in centre comes out clean. Cool the cake in the pan for 10 minutes, then turn it out onto a wire rack.
Photobucket
Serve warm. For a decadent option, serve warm with vanilla-flavoured double cream.
Photobucket
Note: For the best taste, warm every subsequent cake slice for 20-30 seconds in the microwave before serving.

RECIPE: BLUEBERRY NECTARINE CAKE

Ingredients:
1 cup butter/margarine, softened
1 cup sugar
3 large eggs
1/3 cup cream/milk
1-1/2 tsp vanilla extract
2 cups all-purpose flour
4 tbsp flaked almonds
1-1/2 tsp baking powder
1/4 tsp salt
2 large nectarines, chopped
1 cup fresh blueberries


Method:
1. Beat butter/margarine until creamy. Gradually add sugar, beating until light and fluffy.
2. Add eggs, one at a time, beating just until the yolk disappears.
3. Add vanilla, beating just until blended.
4. Sift together flour, baking powder, and salt. Gradually add flour mixture to butter mixture, stirring well.
5. Add cream/milk and stir it in, then beat the batter fo 2 minutes till well blended. The batter will be fairly thick.
6. Gently fold in nectarines and blueberries. Pour batter into a deep 8" round cake pan.
7. Sprinkle the flaked almonds evenly over the top, then press them in lightly. Not ALL the way in, but just enough that the batter rises over the edges when the cake is in the oven.
8. Bake at 180°C for 40 minutes or so, until a wooden pick inserted in centre comes out clean. Cool the cake in the pan for 10 minutes, then turn it out onto a wire rack. For a decadent option, serve warm with vanilla-flavoured double cream.
Note: For the best taste, warm every cake slice for 20-30 seconds in the microwave before serving.

Monday, January 31, 2011

Apple pie muffins

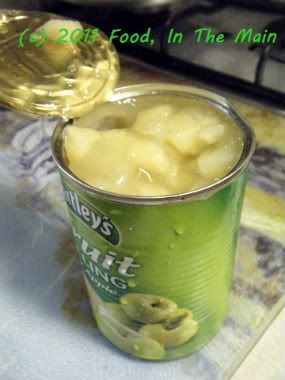
I call these “apple pie muffins” not because they use cinnamon or smell of apple pie – okay, they DO smell of apple pie because of the spices but that’s beside the point – but because they literally have apple pie filling in them. Bramley apple pie filling from a tin, to be precise. Pete had been asking me to make these muffins, but I’d been stalling as I didn’t think his suggestion would work out.
Photobucket
Wet apple pie filling in the middle of a muffin, I thought, would make them soggy after baking, so I offered to make apple muffins using chopped-up apples in the batter. But no, he didn’t want chopped-up-apple muffins, although (he hastened to add) those were pretty good the last time I’d made them. He wanted apple-pie filling IN the muffins, as filling.

So, since I could see no graceful way out of it, I made the muffins as specified, with apple pie filling plopped into the centre (and topped with a little more batter - my idea).

To my genuine surprise, the apple pie filling didn’t make the muffins soggy in the centre. The idea actually worked out really well, although next time I will add some cinnamon powder to the apple pie filling to freshen its rather bland taste. Well, it was tinned filling after all, not fresh.

The bottomline, though, is that Pete’s idea was a yummilicious success – and for that, hats off to him.

Recipe for: Apple pie muffins
Photobucket

Ingredients:

1/2 cup butter/margarine
1/3 cup sugar
4 tbsp cream
2 eggs
1 cup self-raising flour
1/2 tsp baking powder
1 tsp cinnamon/mixed spice
2 tsp vanilla extract
1/2 tin ready-made Bramley apple pie filling

Method:

1. In a large bowl, cream the butter and sugar till fluffy.

2. Beat in the cream.
Photobucket

3. Beat in the eggs one at a time.
Photobucket

4. Lightly fold in the flour and baking powder.
Photobucket

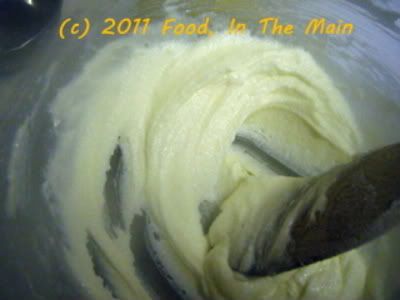
5. Add the mixed spice/cinnamon and vanilla and stir till the wet and dry ingredients are just mixed. The batter should be thick.
Photobucket

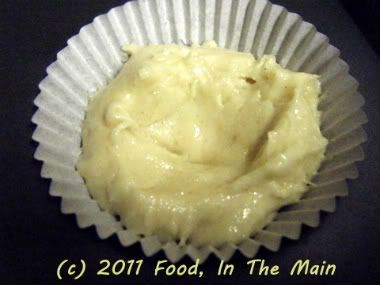
6. Place paper muffin cases in a muffin pan, and add the dough into each case by the rounded tablespoonful. Take a small spoon and make a dip in the middle of the dough.
Photobucket

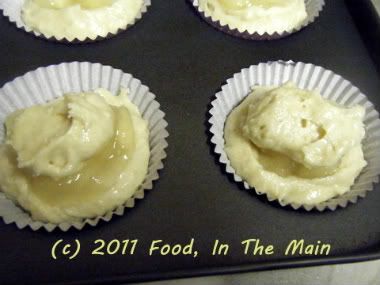
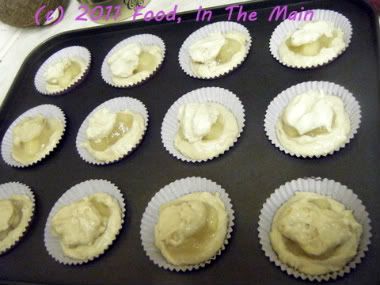
7. Now place a teaspoonful of the apple filling in the dip, then a tsp of the dough on top of the filling.
Photobucket
Continue till all the cases are filled.
Photobucket

8. Bake the muffins at 180C for 20-25 minutes, testing after 20 minutes to see if they are cooked. The muffins should be golden on top.
Photobucket

9. Remove the tray from the oven and let the muffins cool. Serve warm.
Photobucket

RECIPE: APPLE PIE MUFFINS

Ingredients:

1/2 cup butter/margarine
1/3 cup sugar
4 tbsp cream
2 eggs
1 cup self-raising flour
1/2 tsp baking powder
1 tsp cinnamon/mixed spice
2 tsp vanilla extract
1/2 tin ready-made Bramley apple pie filling

Method:

1. In a large bowl, cream the butter and sugar till fluffy.
2. Beat in the cream.
3. Beat in the eggs one at a time.
4. Lightly fold in the flour and baking powder.
5. Add the mixed spice/cinnamon and vanilla and stir till the wet and dry ingredients are just mixed. The batter should be thick.
6. Place paper muffin cases in a muffin pan, and add the dough into each case by the rounded tablespoonful. Take a small spoon and make a dip in the middle of the dough.
7. Now place a teaspoonful of the apple filling in the dip, then a tsp of the dough on top of the filling. Continue till all the cases are filled.
8. Bake the muffins at 180C for 20-25 minutes, testing after 20 minutes to see if they are cooked. The muffins should be golden on top.
9. Remove the tray from the oven and let the muffins cool. Serve warm.

Wednesday, January 19, 2011

Overnight blueberry muffins

I first heard of Paul Hollywood, the chef, when I watched a recent TV show/competition to determine Britain’s best amateur baker. The contestants were amazing, their skills superb – they were absolutely NOT amateurs. I mean, if at all they were “amateurs” it was only in that they were not famous “professional” chefs, running restaurants or publishing cookbooks. Otherwise, in terms of skills, talent and imagination, I’m pretty certain they would have given any “professional chefs” a run for their money if they (the professionals) were in the competition rather than merely judging it!

Anyway, Paul Hollywood is an expert on baking, and I came across his recipe for blueberry muffins on the BBC Food website. According to him, they were the best muffins ever. I would probably have just glanced at the recipe and continued browsing, had it not been for a couple of things – the minimal number of ingredients and the simple instructions and, more intriguingly, his advice to refrigerate the batter, preferably overnight, before baking the muffins.

Refrigerate? OVERNIGHT? And here I’d been under the impression, courtesy the gazillion muffin recipes on the Net, that the biggest selling point of this particular type of baked goody was that it was practically instantaneous – basically, make the batter (don’t even stop to break up the lumps) and bake the muffins.

He said his recipe would make 12 muffins. I thought that the batter wouldn’t stretch to 6 muffins never mind 12, there was so little of it. But it did, just... although the 12 muffins were the size of small cupcakes. (I never like to specify the number of muffins, in any case. It’s such a subjective thing, depending very much on how small or how large you wish to make them.)

I made only one change to Mr Hollywood’s recipe – I added some vanilla extract because I love it, because I simply can’t help myself, and because I’m not entirely sure that I would ever love just nutmeg as a flavouring.

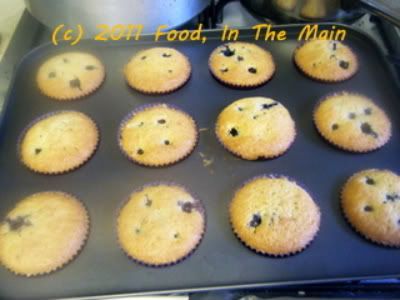
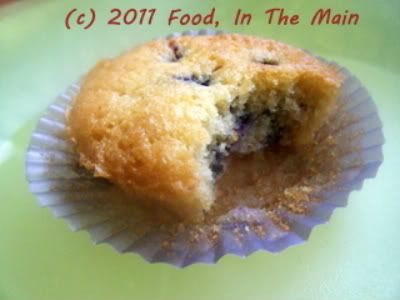
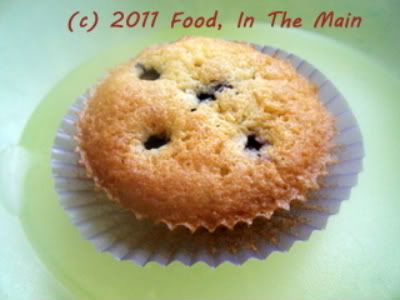
And so to the muffins... Oh. My. God. They were not so much muffins as fairy cakes, so light and lovely that I was quite happy there were others in the house to eat ‘em, or I would have demolished them all myself. They were THAT good. I dunno if it was the overnight resting, or the butter in the recipe (it’s been a while since I used butter in a muffin recipe) but the muffins were sensational!

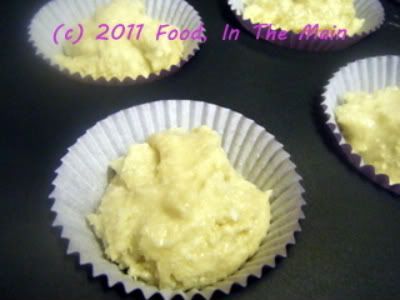
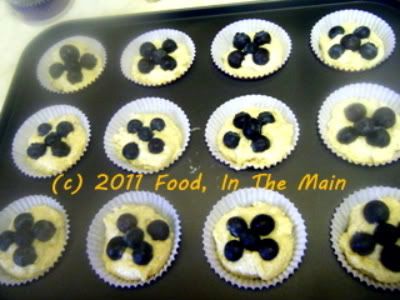
I try to learn a new technique or ingredient from every recipe I try, familar or unfamiliar. The abiding lesson from this recipe was: Always stud the batter with blueberries after putting the batter into the cake cases (this goes for any berry or soft fruit), rather than mix them in with the batter and THEN fill the cases. That way you can control where the berries go so they don’t burst messily against the side of the cases while cooking; they stay in the centre, where they were placed, making for a neat result. This really is a brilliant tip, one to always remember. I don’t know why I couldn’t have come up with the idea myself, it's so simple. But sadly I didn't, and a vote of thanks is definitely due Mr Hollywood!


Recipe for:
Overnight blueberry muffins

Photobucket

Ingredients:

1/2 cup plain flour
1/2 cup butter
1/4 cup caster sugar
2 free-range eggs
1-1/2 tsp baking powder
1/2 cup fresh blueberries
pinch nutmeg
1 tsp good quality vanilla extract

Method:

1. Cream the butter and sugar together till fluffy.
Photobucket

2. Then add the eggs one by one.

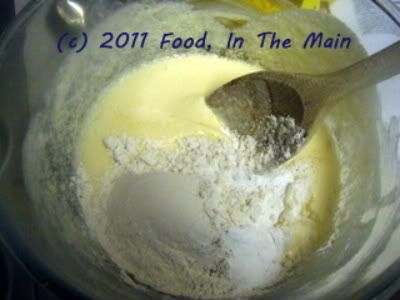
3. Mix for three minutes. Then add the flour, baking powder and nutmegPhotobucket,
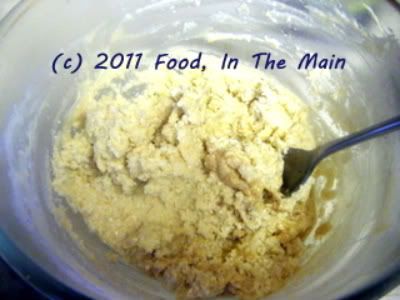
stir to combine into a thick batter. Do not beat.
Photobucket

4. Refrigerate the batter for at least an hour, preferably overnight. Just before baking, stir in the vanilla.

5. Place paper cases in a muffin pan. Place a spoonful of muffin mixture into each muffin case, filling each to just over half way.
Photobucket

6. Stud each muffin with 5-8 blueberries, pushing them very lightly into the batter.
Photobucket

7. Bake in an oven set at 200C/400F for 20 minutes, or until golden on top.
Photobucket
Serve warm.
Photobucket

RECIPE: OVERNIGHT BLUEBERRY MUFFINS

Ingredients:

1/2 cup plain flour
1/2 cup butter
1/4 cup caster sugar
2 free-range eggs
1-1/2 tsp baking powder
1/2 cup fresh blueberries
pinch nutmeg
1 tsp good quality vanilla extract

Method:

1. Cream the butter and sugar together till fluffy.
2. Then add the eggs one by one.
3. Mix for three minutes. Then add the flour, baking powder and nutmeg, stir to combine. Do not beat.
4. Refrigerate for at least an hour, preferably overnight.
5. Place paper cases in a muffin pan. Place a spoonful of muffin mixture into each muffin case, filling each to just over half way.
6. Stud each muffin with about five blueberries.
7. Bake in an oven set at 200C/400F for 20 minutes, or until golden on top. Serve warm.

Wednesday, December 01, 2010

Lemon yogurt cake

I saw this recipe by Rachel Allen on one of her shows – I like her because she’s lovely and because she’s Irish and because of the way she talks with a gentle Irish accent (rather than a strongly incomprehensible – but still lovely - accent), and because those of her recipes that I’ve tried have worked well - according to my husband. I can’t personally attest to this because while I may cook non-vegetarian dishes for him, I don’t taste them at any point during the process.
Cooking on this basis, coupled with the fact that I’m not experienced in non-veg cookery, is very much a case of “man, I hope this doesn’t kill Pete or my guests”. I’m a bit more confident with cooking chicken now, but I’m not entirely sure about pork/beef unless I’ve pressure-cooked it, and I’m frankly absolutely terrified of fish.
So the one thing that I can happily try, and which usually work, are cakes – and as always, the easier the recipe, the happier it makes me.
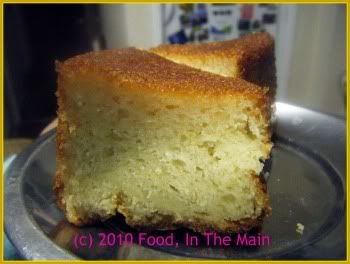
This cake, sharp and lemony and sweet and moist, with a very slightly grainy crumb because of the ground almonds, was so gorgeous that I’m tempted to experiment with making it again but this time without eggs, so that the non-egg eaters among my readers and family can also ooh and aah over it.
It’s easy enough to make, if slightly more time-consuming than my favourite put-all-the-ingredients-in-a-bowl-and-stir type of recipes. But the few extra minutes are SO worth it for this citrusy cake. The rosewater flavour in the soaking syrup is mild, though, even though I used rosehip syrup to try and boost the rose aroma and taste.
Oh well... at least I tried.
Recipe for: Lemon yogurt cake
Photobucket
Ingredients:

1-1/2 cups self-raising flour
1 tsp baking powder
1/2 cup ground almonds
3/4 cup caster sugar (I used Tate & Lyle's)
1/4 tsp salt
2 large eggs
1 tbsp honey
1-1/4 cup lightly stirred Greek yogurt (I used Total brand)
Zest of one large lemon
3/4 cup oil

For the syrup
3/4 cup sugar
1/2 cup water
Juice of one lemon (Use the one you zested)
10 drops rosehip syrup
1 tbsp rosewater (use 2 tbsp if you dont have rosehip syrup)

Tip: Make the syrup while the cake is cooking.

Method:


1. Sift together the self-raising flour and baking powder.
Photobucket

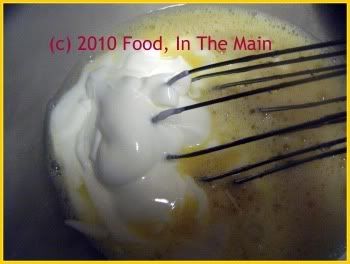
3. Whisk the eggs, add the honey
Photobucket

then add the yogurt,
Photobucket

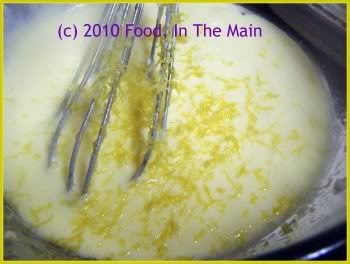
lime zest
Photobucket

and oil.
Photobucket

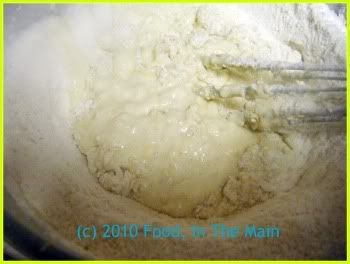
4. Add the dry ingredients to the wet and fold in till combined.

Photobucket

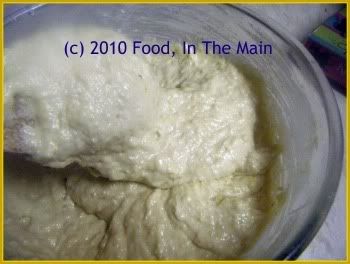
Do not beat. The batter will be quite thick.
Photobucket

5. Grease an 8” round baking tin with butter, or spray with Pam or other non-stick spray.

6. Pour the batter into the pan and smooth the top, occasionally dipping the spatula in warm water to make the smoothing process easier. Bake in a 180C/350F preheated oven till the cake is cooked (about 30 minutes, but check with a tester.) It should have pulled away slightly from the sides of the pan.

7. Let the cake rest in the tin for 5 minutes, then turn it out onto a wire tray placed over a plate.
Photobucket

8. Cool the cake for a bit, then while it’s still warm, poke holes all over it with a skewer, including the edges of the cake.
Photobucket

9. Spoon the lemon-rosewater syrup little by little evenly over the cake, waiting till it’s absorbed before adding more. Continue till the syrup is used up. Allow the cake to sit for 30 minutes before cutting.
Photobucket

Serve the cake at room temperature.
Photobucket

To make the syrup:

Place the sugar and water in a saucepan and heat till the sugar dissolves. Bring the sugar-water to a boil and let it bubble on medium-high for 7 minutes. Add the lemon juice, boil for 2 more minutes, then turn the heat off and let the syrup cool. When the syrup is cool, stir in the rosewater and rosehip syrup. Reserve till required.

RECIPE: LEMON YOGURT CAKE

Ingredients:
1-1/2 cups self-raising flour
1 tsp baking powder
1/2 cup ground almonds
3/4 cup caster sugar
1/4 tsp salt
2 large eggs
1 tbsp honey
1-1/4 cup lightly stirred Greek yogurt (I used Total brand)
Zest of one large lemon
3/4 cup oil

For the syrup:

3/4 cup sugar
1/2 cup water
Juice of one lemon (Use the one you zested)
10 drops rosehip syrup
1 tbsp rosewater (use 2 tbsp if you dont have rosehip syrup)

Tip: Make the syrup while the cake is cooking.

Method:

1. Sift together the self-raising flour and baking powder.
2. Stir in the ground almonds, caster sugar and salt.
3. Whisk the eggs, then whisk in the honey, yogurt, lime zest and oil.
4. Add the dry ingredients to the wet and fold in till combined. Do not beat. The batter will be quite thick.
5. Grease an 8” round baking tin with butter or spray Pam or other non-stick spray.
6. Pour the batter into the pan and smooth the top, occasionally dipping the spatula in warm water to  make the smoothing process easier. Bake in a 180C/350F preheated oven till the cake is cooked (about 30 minutes, but check with a tester.) It should have pulled away slightly from the sides of the pan.
7. Let the cake rest in the tin for 5 minutes, then turn it out onto a wire tray placed over a plate.
8. Cool the cake for a bit, then while it’s still warm, poke holes all over it with a skewer, including the edges of the cake.
9. Spoon the lemon-rosewater syrup little by little evenly over the cake, waiting till it’s absorbed before adding more. Continue till the syrup is used up. Allow the cake to sit for 30 minutes before cutting. Serve the cake at room temperature.

To make the syrup:


Place the sugar and water in a saucepan and heat till the sugar dissolves. Bring the sugar-water to a boil and let it bubble on medium-high for 7 minutes. Add the lemon juice, boil for 2 more minutes, then turn the heat off and let the syrup cool. When the syrup is cool, stir in the rosewater and rosehip syrup. Reserve till required.