skip to main |
skip to sidebar
I unearthed this cake recipe from a binder of printed-off recipes from long ago (over 7 years) which I rediscovered last week. The recipe was from the New Yorker.
I know why I’d printed it off (because, intriguingly, olive oil is one of the ingredients in the cake) and I also know why I didn’t end up making it right away – because blood oranges are also among the ingredients. I didn’t have a clue what blood oranges were, at that point, and didn’t know where I could source them either.
I didn’t think about substituting regular oranges (duh) – because I didn’t have much experience baking, and I didn’t know if the recipe would work without the blood oranges that were called for.
Lastly, but not leastly (Why can’t it be said that way? Well, I have now, and it’s here to stay. More fun than “last but not least”, isn’t it?) I literally had no idea what “supreming an orange” was. I mean, I could safely assume that “blood orange” was a variety of orange. But “supreme of orange” could have been, for all I knew, really bad English to mean that blood oranges were supreme among oranges. Well, how was I to know any different?
It’s only fairly recently that I learnt what it is to “supreme an orange” – basically, a flashy, “cheffy” way of using a paring knife to peel an orange, cut out the segments and remove the seeds and as much of the white pith as possible, retaining only the juicy inner bits.
Phooey. We’ve been doing it in India forever, mainly to feed the orange to toddlers. Of course ours is a hands-on technique, literally – and yeah, the end result isn’t as pretty as when an orange is “supremed” with a knife. But it is also an unfussy way of doing a simple job. Ah well... I guess Western chefs didn’t invent the technique with the intention of feeding toddlers; their orange supremes are usually to garnish fancy desserts.
Each technique obviously has its plus points. But for the purposes of THIS recipe, fancy supreming was really not required, as the slices would neither be retained whole, nor used as a garnish. And had I known this 7 years ago, I might have tried the cake 7 years ago.
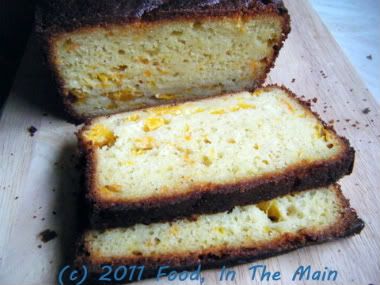
However, that’s neither here nor there (just don’t ask me where, please). This is my first olive oil cake, and I admit I was wondering if the oil would taste nice in a sweet citrus-flavoured cake. I was very relieved not to be able to taste it at all, when I sampled the cake later. The cake is not very sweet, because I misread the instructions and ended up with a very liquidy batter necessitating the addition of more flour... but I didn't add any extra sugar.
The recipe below shows the adjusted quantities. However, it still takes a LONG time to bake – I had to leave mine shortly after I’d put the batter in the oven, to drop off my stepson and his girlfriend at their respective homes. What with having to drive to two destinations 12 miles apart (more or less) through a HORRIBLY thick fog late at night on narrow country roads, it took me a good hour and a half to return.
My husband, deep in work mode, had not even realised there was a cake slowly charring in the oven, so by the time I dashed in to the rescue, the cake was PRETTY brown and rather crisper on top than I would have liked. However, much to my surprise, it was not crisp and overdone all the way through – in fact, it was perfectly done on the inside. So obviously it had needed the long cooking period. If I’d been in the house, I would probably have sheltered the cake with aluminium foil after an hour or so, to prevent it from over-browning.
So, as I was saying, the cake may not be very sweet even with the adjusted sugar quantity. I like it that way but if you have a sweeter tooth, I’d suggest you make a simple icing with orange juice and icing sugar and pour it (or spread it – whichever your preference) over the top of the cake after it has cooled.
Recipe for: Citrus olive oil cake
 Ingredients:
3 medium oranges
1 small lemon
1-1/4 cup sugar
Buttermilk or plain yogurt
3 large eggs
2 cups all-purpose flour
1 1/2 teaspoons baking powder
1/2 teaspoon baking soda
1/4 teaspoon salt
2 tsp vanilla extract
2/3 cup extra virgin olive oil
Method:
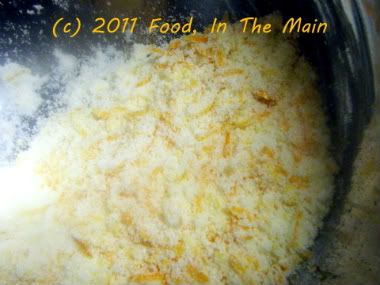
1. Preheat oven to 350 degrees. Grease a 9-by-5-inch loaf pan really well. Grate zest from 2 oranges and the lemon, and place in a bowl with sugar. Using your fingers, rub ingredients together until the zest is evenly distributed in the sugar.
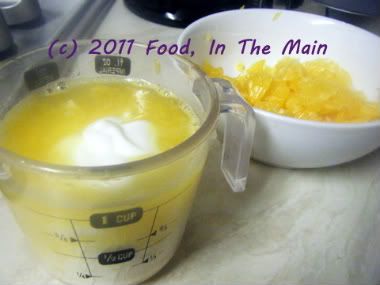
 2. Cut the zested oranges in half and remove the segments. Remove as much of the white pith as possible, retaining the inner pulp. Do this over a bowl so that you don't waste the juice or any pulp. Keep the pulp in small chunks as much as possible, rather than disintegrate it.
 3. Cut the remaining orange in half and squeeze the juice into a measuring cup. Do the same with the zested lemon.
4. Add enough buttermilk or yogurt to the juice to make 2/3 cup liquid.
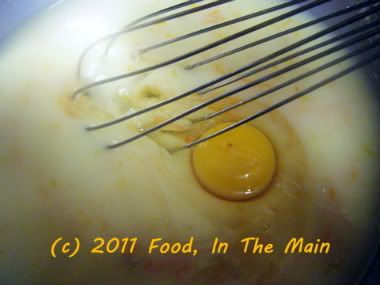
 5. Pour the mixture into the bowl with sugar and whisk well,
 then whisk in the eggs one by one.
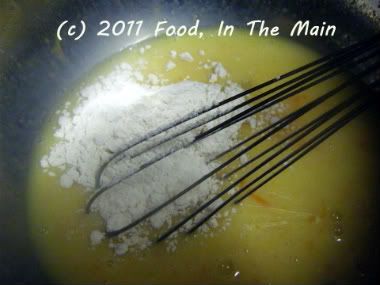
 6. In another bowl, whisk together flour, baking powder, baking soda and salt. Gently whisk dry ingredients into the wet ones.
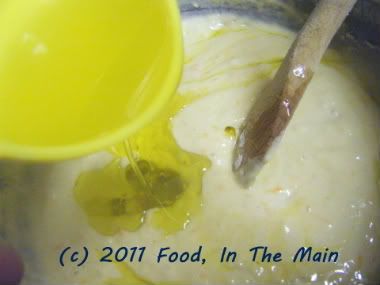
 7. Now, using a spatula, fold in the oil a little at a time.
 8. Fold in the pieces of orange segments.
 Pour the batter into the prepared pan and smooth the top.
 9. Bake the cake for at least 55 minutes (cover the top with foil if it looks like browning too quickly), or until it is golden and a tester inserted in the cake comes out clean.
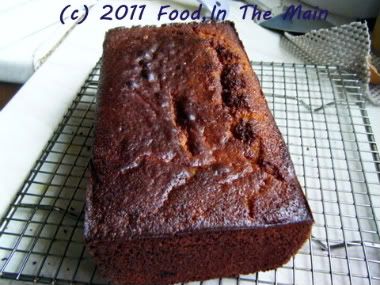 Cool on a rack for 5 minutes, then unmould carefully and cool to room temperature right-side up.
You can make a simple icing for the top, if you have a strong sweet tooth.
(Caveat: Ovens differ in temperature, so don't put your trust totally in the baking time given. Check the cake after about 45 minutes and keep checking every so often till it is cooked.)
RECIPE: CITRUS OLIVE OIL CAKE
Ingredients:
3 medium oranges
1 small lemon
1-1/4 cups sugar
Buttermilk or plain yogurt
3 large eggs
2 cups all-purpose flour
1 1/2 teaspoons baking powder
1/2 teaspoon baking soda
1/4 teaspoon salt
2/3 cup extra virgin olive oil
Method:
1.Preheat oven to 350 degrees. Grease a 9-by-5-inch loaf pan really well. Grate zest from 2 oranges and the lemon, and place in a bowl with sugar. Using your fingers, rub ingredients together until the zest is evenly distributed in the sugar.
2. Cut the zested oranges in half and remove the segments. Remove as much of the white pith as possible, retaining the inner pulp. Do this over a bowl so that you don't waste the juice or any pulp. Keep the pulp in small chunks as much as possible, rather than disintegrate it.
3. Cut the remaining orange in half and squeeze the juice into a measuring cup.
4. Add enough buttermilk or yogurt to the juice to make 2/3 cup liquid.
5. Pour the mixture into the bowl with sugar and whisk well, then whisk in the eggs one by one.
6. In another bowl, whisk together flour, baking powder, baking soda and salt. Gently whisk dry ingredients into the wet ones.
7. Now, using a spatula, fold in the oil a little at a time.
8. Fold in the pieces of orange segments. Scrape the batter into the prepared pan and smooth the top.
9. Bake the cake for at least 55 minutes (cover the top with foil if it looks like browning too quickly), or until it is golden and a tester inserted in the cake comes out clean. Cool on a rack for 5 minutes, then unmould and cool to room temperature right-side up. You can make a simple icing for the top, if you have a strong sweet tooth.
I don’t particularly like ready-made curry pastes, so I very rarely buy them and even more rarely use them. But recently, when we had guests over for dinner, my husband bought a small bottle of mild tandoori paste to make a side-dish of oven-roasted tandoori turkey chunks, with leftover turkey. (It was a hit, incidentally.)
However, there was still a half-bottle of paste left. I didn’t really know what to do with the paste – Perhaps make something else for Pete with it? ... but he didn’t really fancy that. Throw it away? ... but I didn’t really want to do that. Make something for myself with it? ... hmm, maybe, but what?
For a couple of days the bottle sat in the fridge while I debated what to do with its contents. I knew that if I didn’t decide to make SOMEthing with it soon, the question would become moot as it would have to be dumped - like it or not – because the use-by time of the opened jar was three days.
I even considered praying for a miracle from heaven, specifically from the god in charge of the Food Wastage (Prevention & Control) Department. I was all set to do so, but then the thought struck me that merely hoping for a miracle could be considered as good as a prayer, given that the hope was in a good cause i.e, non-wastage of food.
Still, Food Wastage (Prevention) Dept gods presumably follow the example set by their Big Boss in helping only those who help themselves - so I didn’t give up racking my brains for some idea of what to make, even while awaiting the miracle. For the umpteenth time I opened the fridge door, hoping for a) inspiration, or b) a miracle... but no, the jar hadn't helpfully and miraculously disappeared, it was still there on the shelf along with its contents.
Disappointed, I was about to shut the door again when I noticed some decaying leaves in the vegetable section and suddenly realised that they belonged to a head of cauliflower I had bought a few days ago. (I often have a cauliflower slowly withering in the fridge, although it is always bought with the virtuous intention of using it “to make something healthy” – a perverse virtue and intention, if anything, because I’m not crazy about cauliflower. So why do I buy it, you ask? Because I like the virtuous feeling I get when I decide to cook a vegetable I don’t like very much.) Anyway... aha! Inspiration had arrived and it looked very much like a cauliflower.
(I wasn't particularly surprised that the miracle hadn't happened - I probably didn't believe in it enough. Please let's not confuse the issue by suggesting that the inspiration WAS the miracle! Let's be very clear that they are two separate and very different things. Inspiration = my work. Miracle = godly work in the form of disappearing half-bottle of tandoori paste. Which didn't happen.)
So that's what I made - oven-roasted tandoori cauliflower. I didn't parboil the cauliflower (although I should have) because it felt like too much work. I just trimmed the hard stem underneath and cut the head into quarters (again, I should have broken them into florets, but laziness struck again). Then I spread the tandoori paste over the quarters and made a foil packet in which to steam-cook the pieces in the oven. It took blinkin' AGES before the cauliflower pieces were even part-cooked, so I would definitely recommend parboiling the cauliflower. The recipe below reflects this rather than the method I followed.
Oh, and the baby brussels sprouts you see in the photo? They have nothing to do with the recipe so feel free to ignore them. There were fewer than a dozen and I threw them in with the cauliflower because I didn't want to save them for another occasion.
Recipe for: Oven roasted tandoori cauliflower
 Ingredients:
1 medium cauliflower
4-5 tbsp tandoori paste (readymade)
1/2 tsp freshly ground black pepper
1 tbsp oil
2-3 slices of lime or lemon
Method:
1. Cut the cauliflower into large florets.
 2. Dunk the florets in a pan of boiling water for 3-4 minutes, or until they are partly cooked. Then drain and pat dry. Mix the oil and tandoori paste together, then smear the paste evenly over the florets.
 At this point you can let them marinate for an hour or so, before baking.
3. Place the cauliflower florets on a tray covered with foil which has been greased with oil or sprayed with a non-stick spray.
 Bake the florets at 200C for 15-20 minutes, carefully turning them over after 10 minutes or so. The florets should be cooked and beginning to lightly char, but not so soft that they fall apart when touched.
 4. Serve hot with a squeeze of lemon over.
RECIPE: OVEN ROASTED TANDOORI CAULIFLOWER
Ingredients:
1 medium cauliflower
4-5 tbsp tandoori paste/marinade (readymade)
1/2 tsp freshly ground black pepper
1 tbsp oil
2-3 slices of lime or lemon
Method:
1. Cut the cauliflower into large florets.
2. Dunk the florets in a pan of boiling water for 3-4 minutes, or until they are partly cooked. Then drain and pat dry. Mix the oil and tandoori paste together, then smear the paste evenly over the florets. At this point you can let them marinate for an hour or so, before baking.
3. Place the cauliflower florets on a tray covered with foil which has been greased with oil or sprayed with a non-stick spray. Bake the florets at 200C for 15-20 minutes, carefully turning them over after 10 minutes or so. The florets should be cooked and beginning to lightly char, but not so soft that they fall apart when touched.
4. Serve hot with a squeeze of lemon over.
4. Serve hot with a squeeze of lemon over.
RECIPE: OVEN ROASTED TANDOORI CAULIFLOWER
Ingredients:
1 medium cauliflower
4-5 tbsp tandoori paste/marinade (readymade)
1/2 tsp freshly ground black pepper
1 tbsp oil
2-3 slices of lime or lemon
Method:
1. Cut the cauliflower into large florets.
2. Dunk the florets in a pan of boiling water for 3-4 minutes, or until they are partly cooked. Then drain and pat dry. Mix the oil and tandoori paste together, then smear the paste evenly over the florets. At this point you can let them marinate for an hour or so, before baking.
3. Place the cauliflower florets on a tray covered with foil which has been greased with oil or sprayed with a non-stick spray. Bake the florets at 200C for 15-20 minutes, carefully turning them over after 10 minutes or so. The florets should be cooked and beginning to lightly char, but not so soft that they fall apart when touched.
4. Serve hot with a squeeze of lemon over.
I saw this recipe by Rachel Allen on one of her shows – I like her because she’s lovely and because she’s Irish and because of the way she talks with a gentle Irish accent (rather than a strongly incomprehensible – but still lovely - accent), and because those of her recipes that I’ve tried have worked well - according to my husband. I can’t personally attest to this because while I may cook non-vegetarian dishes for him, I don’t taste them at any point during the process.
Cooking on this basis, coupled with the fact that I’m not experienced in non-veg cookery, is very much a case of “man, I hope this doesn’t kill Pete or my guests”. I’m a bit more confident with cooking chicken now, but I’m not entirely sure about pork/beef unless I’ve pressure-cooked it, and I’m frankly absolutely terrified of fish.
So the one thing that I can happily try, and which usually work, are cakes – and as always, the easier the recipe, the happier it makes me.
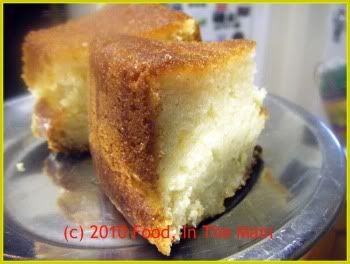
This cake, sharp and lemony and sweet and moist, with a very slightly grainy crumb because of the ground almonds, was so gorgeous that I’m tempted to experiment with making it again but this time without eggs, so that the non-egg eaters among my readers and family can also ooh and aah over it.
It’s easy enough to make, if slightly more time-consuming than my favourite put-all-the-ingredients-in-a-bowl-and-stir type of recipes. But the few extra minutes are SO worth it for this citrusy cake. The rosewater flavour in the soaking syrup is mild, though, even though I used rosehip syrup to try and boost the rose aroma and taste.
Oh well... at least I tried.
Recipe for: Lemon yogurt cake
 Ingredients:
1-1/2 cups self-raising flour
1 tsp baking powder
1/2 cup ground almonds
3/4 cup caster sugar (I used Tate & Lyle's)
1/4 tsp salt
2 large eggs
1 tbsp honey
1-1/4 cup lightly stirred Greek yogurt (I used Total brand)
Zest of one large lemon
3/4 cup oil
For the syrup
3/4 cup sugar
1/2 cup water
Juice of one lemon (Use the one you zested)
10 drops rosehip syrup
1 tbsp rosewater (use 2 tbsp if you dont have rosehip syrup)
Tip: Make the syrup while the cake is cooking.
Method:
1. Sift together the self-raising flour and baking powder.
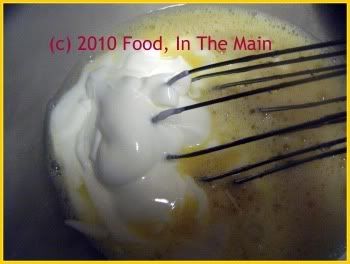
 3. Whisk the eggs, add the honey
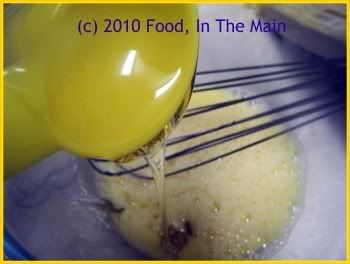 then add the yogurt,
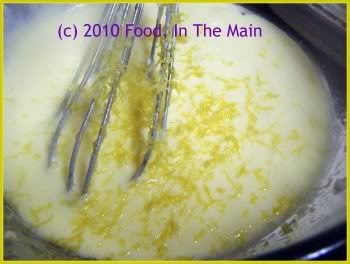
 lime zest
 and oil.
 4. Add the dry ingredients to the wet and fold in till combined.
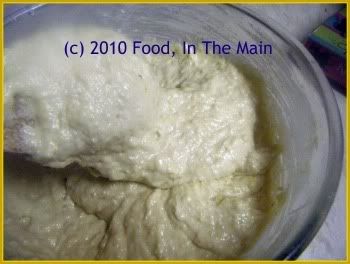
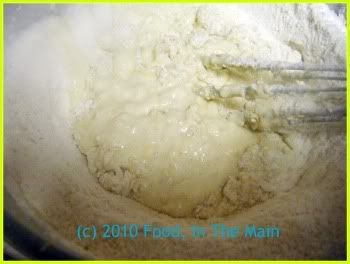 Do not beat. The batter will be quite thick.
 5. Grease an 8” round baking tin with butter, or spray with Pam or other non-stick spray.
6. Pour the batter into the pan and smooth the top, occasionally dipping the spatula in warm water to make the smoothing process easier. Bake in a 180C/350F preheated oven till the cake is cooked (about 30 minutes, but check with a tester.) It should have pulled away slightly from the sides of the pan.
7. Let the cake rest in the tin for 5 minutes, then turn it out onto a wire tray placed over a plate.
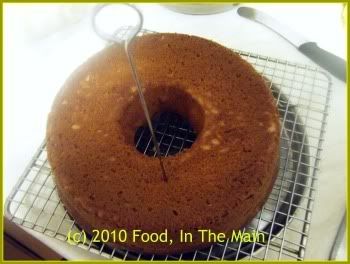
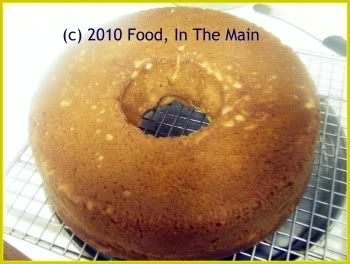 8. Cool the cake for a bit, then while it’s still warm, poke holes all over it with a skewer, including the edges of the cake.
 9. Spoon the lemon-rosewater syrup little by little evenly over the cake, waiting till it’s absorbed before adding more. Continue till the syrup is used up. Allow the cake to sit for 30 minutes before cutting.
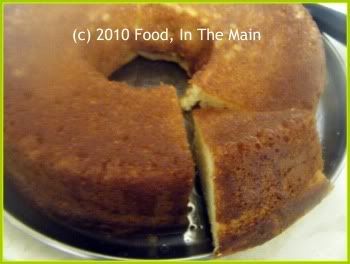 Serve the cake at room temperature.
 To make the syrup:
Place the sugar and water in a saucepan and heat till the sugar dissolves. Bring the sugar-water to a boil and let it bubble on medium-high for 7 minutes. Add the lemon juice, boil for 2 more minutes, then turn the heat off and let the syrup cool. When the syrup is cool, stir in the rosewater and rosehip syrup. Reserve till required.
RECIPE: LEMON YOGURT CAKE
Ingredients:
1-1/2 cups self-raising flour
1 tsp baking powder
1/2 cup ground almonds
3/4 cup caster sugar
1/4 tsp salt
2 large eggs
1 tbsp honey
1-1/4 cup lightly stirred Greek yogurt (I used Total brand)
Zest of one large lemon
3/4 cup oil
For the syrup:
3/4 cup sugar
1/2 cup water
Juice of one lemon (Use the one you zested)
10 drops rosehip syrup
1 tbsp rosewater (use 2 tbsp if you dont have rosehip syrup)
Tip: Make the syrup while the cake is cooking.
Method:
1. Sift together the self-raising flour and baking powder.
2. Stir in the ground almonds, caster sugar and salt.
3. Whisk the eggs, then whisk in the honey, yogurt, lime zest and oil.
4. Add the dry ingredients to the wet and fold in till combined. Do not beat. The batter will be quite thick.
5. Grease an 8” round baking tin with butter or spray Pam or other non-stick spray.
6. Pour the batter into the pan and smooth the top, occasionally dipping the spatula in warm water to make the smoothing process easier. Bake in a 180C/350F preheated oven till the cake is cooked (about 30 minutes, but check with a tester.) It should have pulled away slightly from the sides of the pan.
7. Let the cake rest in the tin for 5 minutes, then turn it out onto a wire tray placed over a plate.
8. Cool the cake for a bit, then while it’s still warm, poke holes all over it with a skewer, including the edges of the cake.
9. Spoon the lemon-rosewater syrup little by little evenly over the cake, waiting till it’s absorbed before adding more. Continue till the syrup is used up. Allow the cake to sit for 30 minutes before cutting. Serve the cake at room temperature.
To make the syrup:
Place the sugar and water in a saucepan and heat till the sugar dissolves. Bring the sugar-water to a boil and let it bubble on medium-high for 7 minutes. Add the lemon juice, boil for 2 more minutes, then turn the heat off and let the syrup cool. When the syrup is cool, stir in the rosewater and rosehip syrup. Reserve till required.
RECIPE: LEMON YOGURT CAKE
Ingredients:
1-1/2 cups self-raising flour
1 tsp baking powder
1/2 cup ground almonds
3/4 cup caster sugar
1/4 tsp salt
2 large eggs
1 tbsp honey
1-1/4 cup lightly stirred Greek yogurt (I used Total brand)
Zest of one large lemon
3/4 cup oil
For the syrup:
3/4 cup sugar
1/2 cup water
Juice of one lemon (Use the one you zested)
10 drops rosehip syrup
1 tbsp rosewater (use 2 tbsp if you dont have rosehip syrup)
Tip: Make the syrup while the cake is cooking.
Method:
1. Sift together the self-raising flour and baking powder.
2. Stir in the ground almonds, caster sugar and salt.
3. Whisk the eggs, then whisk in the honey, yogurt, lime zest and oil.
4. Add the dry ingredients to the wet and fold in till combined. Do not beat. The batter will be quite thick.
5. Grease an 8” round baking tin with butter or spray Pam or other non-stick spray.
6. Pour the batter into the pan and smooth the top, occasionally dipping the spatula in warm water to make the smoothing process easier. Bake in a 180C/350F preheated oven till the cake is cooked (about 30 minutes, but check with a tester.) It should have pulled away slightly from the sides of the pan.
7. Let the cake rest in the tin for 5 minutes, then turn it out onto a wire tray placed over a plate.
8. Cool the cake for a bit, then while it’s still warm, poke holes all over it with a skewer, including the edges of the cake.
9. Spoon the lemon-rosewater syrup little by little evenly over the cake, waiting till it’s absorbed before adding more. Continue till the syrup is used up. Allow the cake to sit for 30 minutes before cutting. Serve the cake at room temperature.
To make the syrup:
Place the sugar and water in a saucepan and heat till the sugar dissolves. Bring the sugar-water to a boil and let it bubble on medium-high for 7 minutes. Add the lemon juice, boil for 2 more minutes, then turn the heat off and let the syrup cool. When the syrup is cool, stir in the rosewater and rosehip syrup. Reserve till required.
 Ever heard of this cake? No? Really? All you fantastic cooks out there, you’ve never made this cake? Not even heard of it? Really? How very strange…
Ok, not so strange. Because I made it up The cake is just a pound cake with the ingredients halved because I could not bring myself to use four eggs in one cake. Plus the cake would have been wayyyy too large, even with the kids at home. So, I reduced all the ingredients by half – basically making a half-pound cake.
Then where did the “10 shilling” tag come from, you ask? Aha. Therein lies a very sad little play on words – mmmm... shall we say that I coined it? Ahahahaha!
Ok, here it comes. I’m guessing most of you know that before British pound went decimal in 1971, it was divided into twenty shillings and each shilling was divided into twelve pennies or pence. Although those divisions may seem odd, in fact having a pound divided into 240 equal parts does mean it can be exactly divided into halves, thirds, quarters, fifths, sixths, eighths, tenths, twelfths, fifteenths, sixteenths, twentieths, twenty-fourths, thirtieths, fortieths, forty-eightieths, sixtieths, eightieths, and one-hundred-and-twentieths. A decimal system allows precise division only into halves, quarters, fifths, tenths, twentieths, twenty-fifths, and fiftieths.
(If you math buffs want more of this sort of drivel, you can find the rest of it here.)
Guesses about the origin of the coined title, anybody? No? (I'm assuming no. I Want To Explain. I Have To Explain. How Else Could Anybody Appreciate This Exquisite Sense of Humour and Play on Words?) Ok, here's the explanation. A pound is 20 shillings, or used to be. Half of a pound is 10 shillings. Half of a pound cake, therefore, becomes...? Yes! A 10-shilling cake! Ta-DAAAA!
This 10-shilling cake was lucky to have come out as lovely as it did because in a fit of absentmindedness, instead of adding the butter to the bowl containing sugar (prior to beating the two till light and creamy), I plopped the butter into the bowl in which the egss were waiting to be beaten. Oooops!

Well, in for a penny, in for a pound (or a half-pound, or even 10 shillings! ahahahaha!), so I just tipped the sugar into the egg-butter mixture and beat the resulting mixture to within an inch of its life. It must have learnt its lesson, because the cake was light and crumby and delightfully lemony. Sometimes mistakes CAN be sammaLichufied (Tanglish - Tamil English - for "managed" or "made good").
Recipe for: Lemon 10-shilling cake

Ingredients:
1/2 cup butter, softened
1 cup sugar
2 eggs
1 tsp vanilla
1-1/2cups sifted flour
1/4 tsp. baking powder
1/4 tsp. baking soda
1/8 tsp. salt
1/2 cup buttermilk
Juice of one lemon
Icing:
1 cup icing sugar
Enough lemon juice to make thick or runny icing as per taste
Method:
1. Preheat oven to 170C. Spray a small (6") bundt pan with Pam, wipe off the excess, and set aside.
2. In large mixing bowl, beat butter with sugar and eggs vigorously, until the batter is light and frothy.

3. Sift together flour, baking powder, soda, and salt.
4. Add to butter mixture alternately with buttermilk and lemon juice, beginning and ending with flour.
5. Spoon batter into prepared pan and bake at 170C for 55-65 minutes until cake is lightly browned, set, and a toothpick inserted in the centre comes out clean.

6. Cool 5 minutes in pan, then invert onto serving plate and cool completely.
7. Mix icing sugar with lemon juice, then drizzle over the warm cake.

Let cool to set.
Yeah, I suppose I could have used my loaf to come up with a catchier title for this really rather yummy cake-bread. ("Used my loaf" - get it? This is where y'all chuckle, smile, roll your eyes, make a face, groan, whatever. Any of those or all of them, in any order preferred. Just acknowledge the stomach-churning brilliance of the pun!)
But I didnt come up with a snappier title, and neither loaf helped the process in the least - one sat there looking inscrutable (YOU try anthropomorphising or analysing baked goods!) and the other sat there lacking brain cells. End result: to describe this cake to anyone, you'll need a very deep breath to recite "Lemony tea loaf with dry fruits, berries and sliced almonds?" all at one go.
Right. Now that's clear.
This is an eggfree recipe from - yes, you guessed it! - Cintia Stammers' book . I'm afraid I took the basic recipe and ran with it somewhat, because after the last eggfree baking disaster, I wasnt about to keep the recipe as simple as the book would have it.
So I added some vanilla extract and a large handful of mixed dry fruits, berries and sliced almonds - and, because I had a little bit of Sprite (I was drinking it because the evening was so VERY hot) left over in the can, and because it would have overfilled my glass, I added that as well to the batter, as an afterthought. No point wasting stuff, is there?
In retrospect, perhaps I should not have added the 3 tbsp-odd of Sprite. Not in addition to the baking powder and soda, anyway.
Bet you thought this was the prelude to yet another but entertainingly different baking experience from which I come out with egg all over my face. Right? Hah. You were wrong! WRONG! The yolk, my friends, is on you! This time, I couldnt have come out with egg on my face because - wait for it - I didnt use eggs in this recipe. Devilishly devious, that's me.
So, anybody still hanging around in the hope of reading about the loaf-cake? Your patience is going to be rewarded now.
The reason I've come to the conclusion that adding the Sprite was not the best idea is because the loaf crust came over all crisp and crumbly. Like bread. Which is good for bread, but I was going for a more cakey texture in loaf shape. My mother suggested that perhaps there was too much soda - hence I decided that the Sprite was the culprite. I mean culprit.
The cake tasted very nice and sweetly lemony, with the occasional bite of sliced almond and chewy dried fruits. The only way it failed my expectation was, as mentioned, in the crust area, which made it difficut to make neat slices.
Oh, the batter made one 750gm loaf and three bitty little loaves, which I didnt weigh.

But if you want to make this loaf-cake and you possess a 2-pound loaf pan, that's what you should use. The recipe said so.
Recipe for: Lemony tea loaf with dry fruits, berries and sliced almonds

Ingredients:
1-3/4 cup all-purpose flour
4 tbsp butter or margarine
3/4 to 1 cup caster sugar (depending on your sweet tolerance - I used 3/4)
2 tsp vanilla extract
1/2 cup mixed dry fruits and sliced or chopped nuts
3/4 cup milk
Juice of 1-1/2 lemons
1-1/2 tbsp finely grated lemon zest
1/2 tsp soda bicarb
1 htsp baking powder
Method:
1. First, put the milk in a small bowl, add the lemon juice and let the milk curdle.

Preheat the oven to 180C and lightly grease a 2-pound loaf pan.
2. In a medium bowl, beat the butter and sugar till it is fluffy and light. Add the lemon zest and mix in

then add the dry fruits and nuts.

3. In another bowl, sift together the flour, soda bicarb and baking soda.
4. Add the curdled milk and the sifted flour by turns to the butter mixture, beating well between additions. Continue till the milk and flour are used up. The batter will be quite thick.
5. Mix in the vanilla extract and transfer the batter to the prepared loaf pan.
6. Bake the loaf for about 45 minutes or till a tester inserted in the centre comes out clean.
7. Remove the loaf pan from the oven but let the cake remain in the pan for 10 minutes. Then gently remove it from the pan and let cool completely on a wire rack.

Tip: Drizzle or pour lemon icing thinly over the top of the loaf for an even lemonier flavour. (I wish I'd remembered to do this before I cut the cake-loaf!)
One of my favourite recipes, because it's so tasty and easy to make. It is predominantly a South Indian dish, usually comprising part of several other rice recipes that are made for weddings or festivals. But I have found that it makes a great side dish for mexican recipes or as an accompaniment for North Indian-style gravy curries. It looks pretty too - depending on the amount of turmeric powder used, it could be anything from a pale lemony yellow to a warm golden yellow. (I like to stop with the lemony colour.)

From left, going clockwise: Cashew nuts, urad dal, chana dal, mustard seeds, cumin seeds. Centre: Turmeric powder
I guess this can be jazzed up with finely cut, cooked vegetables like green peas, green beans, bell peppers, even corn - but what I made today is the basic version. I dont think my mother used to add the cumin seeds in her version, but I like them as they add to the flavour of the rice.
Recipe for: Lemon rice

Ingredients:
4 cups basmati rice cooked al dente
1 tsp turmeric powder
1 tsp urad dal
1 tsp chana dal
1 tsp black mustard seeds
1 tsp cumin seeds
4-5 fresh curry leaves
2-3 green chillies, chopped very fine (more or less acc. to taste)
2-3 dry red chillies (optional)
Juice of one lime/lemon (4-5 tbsp, or as required)
2 tbsp oil
Salt to taste
10-12 cashew nuts, roasted in a little oil to a golden brown
2 tbsp fresh coriander leaves, roughly chopped
Method:
1. Heat the oil in a large wok. Add the curry leaves, the dals, mustard seeds, cumin seeds, the chopped green chillies and the dry red chillies (if using). Fry on high, covered, until the mustard seeds stop popping and the dals have turned reddish brown.
2. Add the turmeric powder and mix. Then put in the rice and salt to taste, and mix well, being careful not to break the grains.
3. Heat the rice thoroughly, then turn off the heat and pour the lemon juice evenly over the top of the rice. Stir again so that the juice is distributed throughout. Taste and add more lemon juice, if required.
4. Serve hot, garnished with the cashewnuts and coriander leaves.
Note: You can use roasted peanuts instead of cashewnuts.


