skip to main |
skip to sidebar
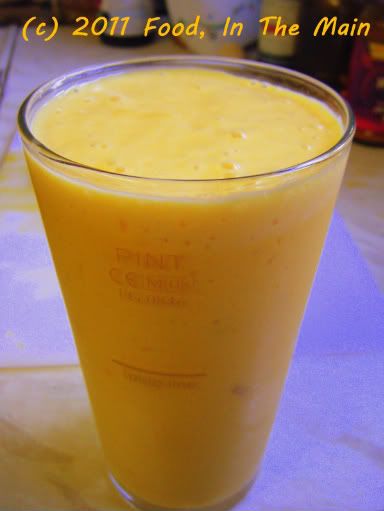
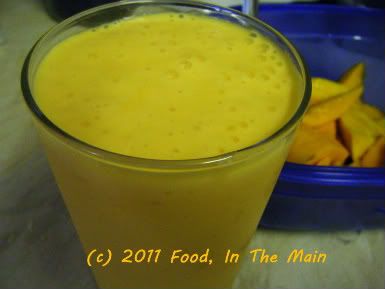
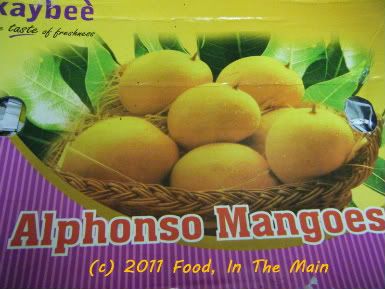 Ok, I’m just boasting because I had Alphonso mangoes to spare (because they were too squishily ripe to eat, really, by the time I got to the last two or three.) If you don’t have Alphonsos, don’t fret, you can still make this recipe. Just use any really ripe mangoes, although preferably the kind that aren’t stringy. Meanwhile, I’m going to continue calling this recipe “Alphonso mango milkshake”, because yeah, I’m still boasting. Those Alphonso mangoes are just SO gorgeous!
Anyway, I like my home-made mango milkshakes (or smoothies – what’s the difference, if any?), Alphonso or otherwise, to be on the liquidy side rather than thick; or if not, I like them to be whizzed with plenty of ice, like frappes.
Sometimes I combine the two styles. I don’t have a name for this hybrid, mainly because I haven’t found a way to combine “frappe” and “shake” to make anything meaningful or catchy, no matter which way around I try it. Could “shakeapp” mean anything to you, apart from sounding vaguely like something that might be downloaded onto your iPhone or Android?
Okay - remember, if you come across the term on either appliance, the copyright belongs to ME and if I’m not acknowledged as the creator, I shall sue for millions! Yes, MILLIONS (of £££s)! You heard it here first, Steve Jobs.
Yeah, that threat should really “shake” ol’ Steve “app”.
HAHAHAHAHA.
*koff koff*
Recipe for: Alphonso mango milkshake
 Ingredients:
2 ripe alphonso mangoes, peeled and cubed
1 cup vanilla icecream
1-2 cups cold milk (as required)
A couple of drops of vanilla extract OR rosewater OR 1/4 tsp cardamom powder
Sugar if required
Ice cubes or crushed ice as required
Method:
1. Put the mangoes, vanilla icecream, 1 cup milk, sugar to taste and ice-cubes/crushed ice in a blender.
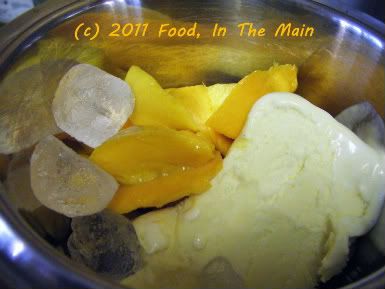 Blitz them till they are liquidised.
2. Blend in more milk or crushed ice as required to make the milkshake the consistency you like.
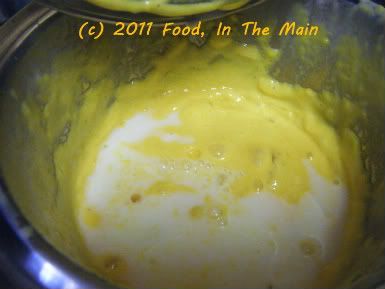 Blend in the vanilla extract, rosewater or cardamom powder, if using.
3. Serve the milkshake immediately in tall glasses.
 RECIPE: ALPHONSO MANGO MILKSHAKE
Ingredients:
2 ripe alphonso mangoes, peeled and cubed
1 cup vanilla icecream
1-2 cups cold milk (as required)
A couple of drops of vanilla extract OR rosewater OR 1/4 tsp cardamom powder
Sugar if required
Ice cubes or crushed ice as required
Method:
1. Put the mangoes, vanilla icecream, 1 cup milk, sugar to taste and ice-cubes/crushed ice in a blender. Blitz them till they are liquidised.
2. Blend in more milk or crushed ice as required to make the milkshake the consistency you like. Blend in the vanilla extract, rosewater or cardamom powder, if using.
3. Serve the milkshake immediately in tall glasses.
I saw this recipe by Rachel Allen on one of her shows – I like her because she’s lovely and because she’s Irish and because of the way she talks with a gentle Irish accent (rather than a strongly incomprehensible – but still lovely - accent), and because those of her recipes that I’ve tried have worked well - according to my husband. I can’t personally attest to this because while I may cook non-vegetarian dishes for him, I don’t taste them at any point during the process.
Cooking on this basis, coupled with the fact that I’m not experienced in non-veg cookery, is very much a case of “man, I hope this doesn’t kill Pete or my guests”. I’m a bit more confident with cooking chicken now, but I’m not entirely sure about pork/beef unless I’ve pressure-cooked it, and I’m frankly absolutely terrified of fish.
So the one thing that I can happily try, and which usually work, are cakes – and as always, the easier the recipe, the happier it makes me.
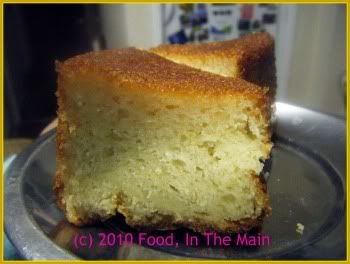
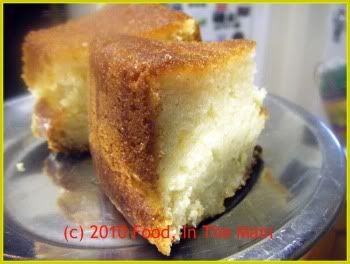
This cake, sharp and lemony and sweet and moist, with a very slightly grainy crumb because of the ground almonds, was so gorgeous that I’m tempted to experiment with making it again but this time without eggs, so that the non-egg eaters among my readers and family can also ooh and aah over it.
It’s easy enough to make, if slightly more time-consuming than my favourite put-all-the-ingredients-in-a-bowl-and-stir type of recipes. But the few extra minutes are SO worth it for this citrusy cake. The rosewater flavour in the soaking syrup is mild, though, even though I used rosehip syrup to try and boost the rose aroma and taste.
Oh well... at least I tried.
Recipe for: Lemon yogurt cake
 Ingredients:
1-1/2 cups self-raising flour
1 tsp baking powder
1/2 cup ground almonds
3/4 cup caster sugar (I used Tate & Lyle's)
1/4 tsp salt
2 large eggs
1 tbsp honey
1-1/4 cup lightly stirred Greek yogurt (I used Total brand)
Zest of one large lemon
3/4 cup oil
For the syrup
3/4 cup sugar
1/2 cup water
Juice of one lemon (Use the one you zested)
10 drops rosehip syrup
1 tbsp rosewater (use 2 tbsp if you dont have rosehip syrup)
Tip: Make the syrup while the cake is cooking.
Method:
1. Sift together the self-raising flour and baking powder.
 3. Whisk the eggs, add the honey
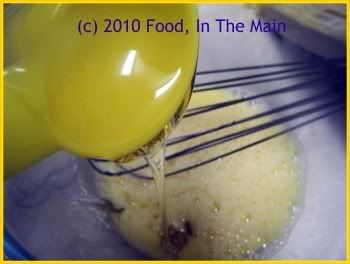 then add the yogurt,
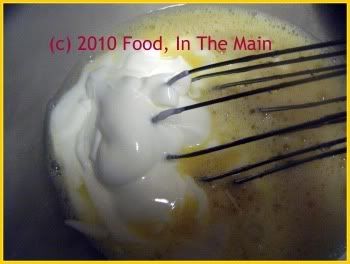 lime zest
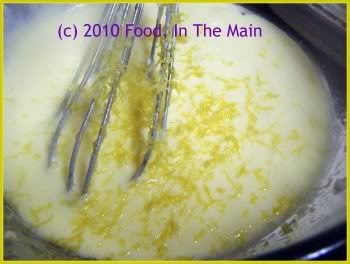 and oil.
 4. Add the dry ingredients to the wet and fold in till combined.
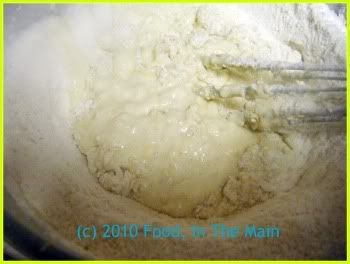 Do not beat. The batter will be quite thick.
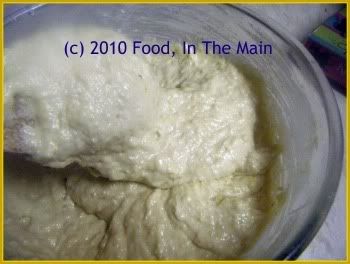 5. Grease an 8” round baking tin with butter, or spray with Pam or other non-stick spray.
6. Pour the batter into the pan and smooth the top, occasionally dipping the spatula in warm water to make the smoothing process easier. Bake in a 180C/350F preheated oven till the cake is cooked (about 30 minutes, but check with a tester.) It should have pulled away slightly from the sides of the pan.
7. Let the cake rest in the tin for 5 minutes, then turn it out onto a wire tray placed over a plate.
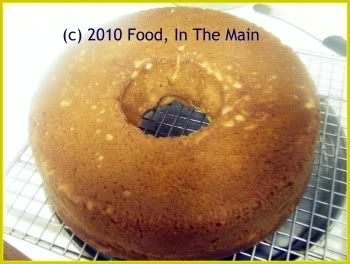 8. Cool the cake for a bit, then while it’s still warm, poke holes all over it with a skewer, including the edges of the cake.
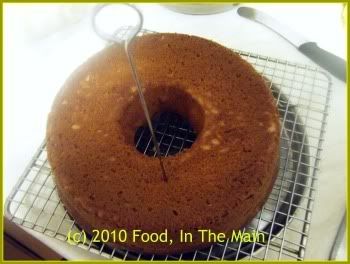 9. Spoon the lemon-rosewater syrup little by little evenly over the cake, waiting till it’s absorbed before adding more. Continue till the syrup is used up. Allow the cake to sit for 30 minutes before cutting.
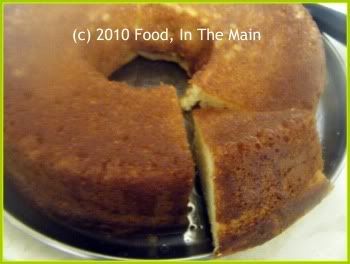 Serve the cake at room temperature.
 To make the syrup:
Place the sugar and water in a saucepan and heat till the sugar dissolves. Bring the sugar-water to a boil and let it bubble on medium-high for 7 minutes. Add the lemon juice, boil for 2 more minutes, then turn the heat off and let the syrup cool. When the syrup is cool, stir in the rosewater and rosehip syrup. Reserve till required.
RECIPE: LEMON YOGURT CAKE
Ingredients:
1-1/2 cups self-raising flour
1 tsp baking powder
1/2 cup ground almonds
3/4 cup caster sugar
1/4 tsp salt
2 large eggs
1 tbsp honey
1-1/4 cup lightly stirred Greek yogurt (I used Total brand)
Zest of one large lemon
3/4 cup oil
For the syrup:
3/4 cup sugar
1/2 cup water
Juice of one lemon (Use the one you zested)
10 drops rosehip syrup
1 tbsp rosewater (use 2 tbsp if you dont have rosehip syrup)
Tip: Make the syrup while the cake is cooking.
Method:
1. Sift together the self-raising flour and baking powder.
2. Stir in the ground almonds, caster sugar and salt.
3. Whisk the eggs, then whisk in the honey, yogurt, lime zest and oil.
4. Add the dry ingredients to the wet and fold in till combined. Do not beat. The batter will be quite thick.
5. Grease an 8” round baking tin with butter or spray Pam or other non-stick spray.
6. Pour the batter into the pan and smooth the top, occasionally dipping the spatula in warm water to make the smoothing process easier. Bake in a 180C/350F preheated oven till the cake is cooked (about 30 minutes, but check with a tester.) It should have pulled away slightly from the sides of the pan.
7. Let the cake rest in the tin for 5 minutes, then turn it out onto a wire tray placed over a plate.
8. Cool the cake for a bit, then while it’s still warm, poke holes all over it with a skewer, including the edges of the cake.
9. Spoon the lemon-rosewater syrup little by little evenly over the cake, waiting till it’s absorbed before adding more. Continue till the syrup is used up. Allow the cake to sit for 30 minutes before cutting. Serve the cake at room temperature.
To make the syrup:
Place the sugar and water in a saucepan and heat till the sugar dissolves. Bring the sugar-water to a boil and let it bubble on medium-high for 7 minutes. Add the lemon juice, boil for 2 more minutes, then turn the heat off and let the syrup cool. When the syrup is cool, stir in the rosewater and rosehip syrup. Reserve till required.
RECIPE: LEMON YOGURT CAKE
Ingredients:
1-1/2 cups self-raising flour
1 tsp baking powder
1/2 cup ground almonds
3/4 cup caster sugar
1/4 tsp salt
2 large eggs
1 tbsp honey
1-1/4 cup lightly stirred Greek yogurt (I used Total brand)
Zest of one large lemon
3/4 cup oil
For the syrup:
3/4 cup sugar
1/2 cup water
Juice of one lemon (Use the one you zested)
10 drops rosehip syrup
1 tbsp rosewater (use 2 tbsp if you dont have rosehip syrup)
Tip: Make the syrup while the cake is cooking.
Method:
1. Sift together the self-raising flour and baking powder.
2. Stir in the ground almonds, caster sugar and salt.
3. Whisk the eggs, then whisk in the honey, yogurt, lime zest and oil.
4. Add the dry ingredients to the wet and fold in till combined. Do not beat. The batter will be quite thick.
5. Grease an 8” round baking tin with butter or spray Pam or other non-stick spray.
6. Pour the batter into the pan and smooth the top, occasionally dipping the spatula in warm water to make the smoothing process easier. Bake in a 180C/350F preheated oven till the cake is cooked (about 30 minutes, but check with a tester.) It should have pulled away slightly from the sides of the pan.
7. Let the cake rest in the tin for 5 minutes, then turn it out onto a wire tray placed over a plate.
8. Cool the cake for a bit, then while it’s still warm, poke holes all over it with a skewer, including the edges of the cake.
9. Spoon the lemon-rosewater syrup little by little evenly over the cake, waiting till it’s absorbed before adding more. Continue till the syrup is used up. Allow the cake to sit for 30 minutes before cutting. Serve the cake at room temperature.
To make the syrup:
Place the sugar and water in a saucepan and heat till the sugar dissolves. Bring the sugar-water to a boil and let it bubble on medium-high for 7 minutes. Add the lemon juice, boil for 2 more minutes, then turn the heat off and let the syrup cool. When the syrup is cool, stir in the rosewater and rosehip syrup. Reserve till required.
My Deepavali preparations this year were sketchy and very last minute. About the only thing that didn’t fall into that "last-minute" category was one of the sweets that I made in celebration - and that mainly because I'd been thinking about making it at home at some point. The other sweet I made merely to keep up the momentum, even though I’d long held the opinion that it was best left to professionals to make. (Which was more or less proved correct, but that's for the next post.)
This kulfi was the first of the two sweets. I knew it was dead easy to make (having researched various blogs on the 'net), but just couldn’t be fagged to do it. The reason – lethargy. Pure, unrefined lethargy, completely innocent of adulteration by any justifiable excuse. (Aren’t you all glad to see ONE thing in this world that retains its original, if unworthy, quality? I knew you would be.)
Anyway, because Pete doesn’t like cardamom-flavoured milky sweets, I went with rosewater as the only flavouring for my hazelnut-rich kulfis. A good choice, although I ended up adding about ¼ cup rosewater to be able to taste it over the hazelnuts in the kulfi mixture.
By the way, I started out with raw skin-on hazelnuts. I roasted them, then rubbed off most of the skin before chopping them. If you’d like to avoid the deskinning process, use skinned hazelnuts to start with. If you don’t want the hassle of roasting the nuts, get skinned and roasted hazelnuts. And if you don’t want the annoyance of chopping the roasted skinned hazelnuts... can anybody guess where I’m going with this? Yep – get pre-skinned, pre-roasted, pre-chopped hazelnuts.
Just avoid the pre-eaten, pre-digested ones.
Recipe for: Hazelnut rosewater kulfi pops
 Ingredients:
1 can low-fat evaporated milk (to make 1-1/2 cups)
1/2 cup sweetened condensed milk (or to taste)
1/4 cup rosewater
1/3 cup hazelnuts
8 popsicle moulds
Method:
1. Roast the hazelnuts over medium-low heat, stirring often, till they turn a pale gold. Be careful not to burn them.
 2. When they are cool, chop them finely. A few larger pieces are ok for crunch. You can powder them if you want the flavour in the kulfi without the texture.
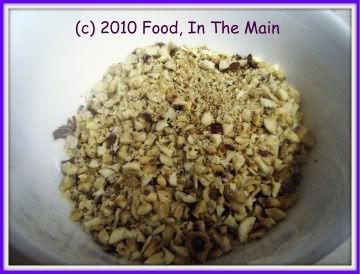 3. Bring the evaporated milk to a gentle boil, then turn off the heat and let cool.
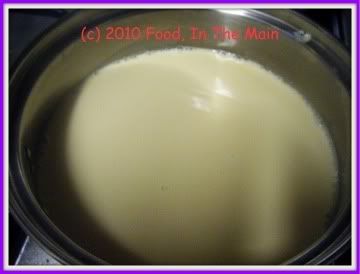 4. When the evaporated milk is at room temperature, add the rosewater and the condensed milk.
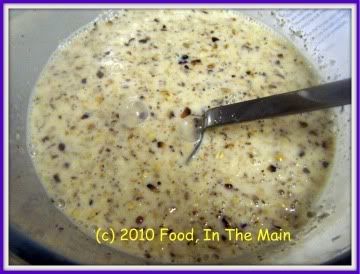
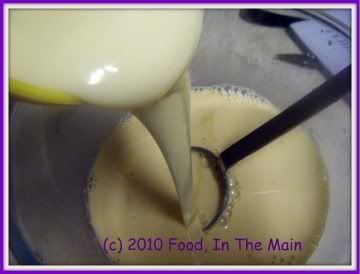 5. Then stir in all but 2 tbsp of the hazelnuts.
 6. Sprinkle some chopped hazelnuts at the bottom of the kulfi mould.
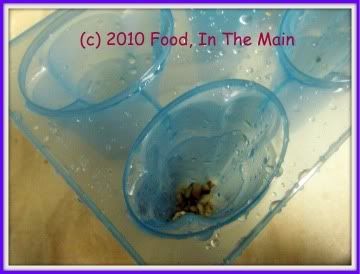 Then fill with the kulfi mixture.
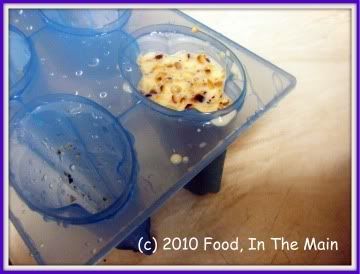 7. Place the filled kulfi moulds in the freezer for at least 8 hours or until frozen. To remove the frozen kulfi from the moulds, run them under hot water for a moment or two, then loosen carefully. Serve immediately.
RECIPE: HAZELNUT ROSEWATER KULFI POPS
Ingredients:
1 can low-fat evaporated milk (to make 1-1/2 cups)
1/2 cup sweetened condensed milk
1/4 cup rosewater
8 kulfi moulds
1/3 cup hazelnuts
8 popsicle moulds
Method:
1. Roast the hazelnuts over medium-low heat, stirring often, till they turn a pale gold. Be careful not to burn them.
2. When they are cool, chop them finely. A few larger pieces are ok for crunch. You can powder them if you want the flavour in the kulfi without the texture.
3. Bring the evaporated milk to a gentle boil, then turn off the heat and let cool.
4. When the evaporated milk is at room temperature, add the rosewater and the condensed milk.
5. Then stir in all but 2 tbsp of the hazelnuts.
6. Sprinkle some chopped hazelnuts at the bottom of the kulfi mould. Then fill with the kulfi mixture.
7. Place the filled kulfi moulds in the freezer for at least 8 hours or until frozen. To remove the frozen kulfi from the moulds, run them under hot water for a moment or two, then loosen carefully. Serve immediately.
7. Place the filled kulfi moulds in the freezer for at least 8 hours or until frozen. To remove the frozen kulfi from the moulds, run them under hot water for a moment or two, then loosen carefully. Serve immediately.
RECIPE: HAZELNUT ROSEWATER KULFI POPS
Ingredients:
1 can low-fat evaporated milk (to make 1-1/2 cups)
1/2 cup sweetened condensed milk
1/4 cup rosewater
8 kulfi moulds
1/3 cup hazelnuts
8 popsicle moulds
Method:
1. Roast the hazelnuts over medium-low heat, stirring often, till they turn a pale gold. Be careful not to burn them.
2. When they are cool, chop them finely. A few larger pieces are ok for crunch. You can powder them if you want the flavour in the kulfi without the texture.
3. Bring the evaporated milk to a gentle boil, then turn off the heat and let cool.
4. When the evaporated milk is at room temperature, add the rosewater and the condensed milk.
5. Then stir in all but 2 tbsp of the hazelnuts.
6. Sprinkle some chopped hazelnuts at the bottom of the kulfi mould. Then fill with the kulfi mixture.
7. Place the filled kulfi moulds in the freezer for at least 8 hours or until frozen. To remove the frozen kulfi from the moulds, run them under hot water for a moment or two, then loosen carefully. Serve immediately.
I got this recipe from a cookery book that I've had since I was about 14, I think. It's probably the first cookbook that I ever bought... and probably the least useful at the time to me, because it was a book on how to bake cakes. Worse, it was a foreign book and by that I mean it was not published in India - the recipes called for all sorts of ingredients that might have been common in the West but certainly werent easily available at home then, and the measurements were in ounces which certainly didnt make sense to me!
But I bought the cookery book anyway, for the princely sum of Rs 75. I didnt even have an oven, but I bought the book. How could I resist? It had such tantalising glossy photographs of exotic cakes, cookies and biscuits and the recipes sounded so exciting to make, plus they were droolably readable! (I digress as always - but I think I've missed my calling as a book reviewer! Any takers, after that very original description?)
I tried one recipe - a coffee-flavoured cake with icing - from my book when my mother got a round Bajaj oven, but I have to say it wasnt the howling success I wanted it to be. Well okay, there was some howling involved but that was from me because I was so disappointed. The cake was crusty at the bottom and not quite cooked through (the Bajaj oven's fault because the heat source was only from the bottom!) and the coffee icing was runny and wouldnt set (the summer heat's fault).
All in all, not the best start to a baking career, so it was quite a while (many years) before I tried any baking again. I dont quite know why I expected to start out being a master baker at my very first baking attempt, but in hindsight it can be put down to youthful overconfidence and unfamiliarity with life's downs!
But I still loved the cookbook. Every so often I would thumb through it, drooling at the photos and wondering at ingredients like "demerara sugar", "lemon curd", "golden syrup", "molasses" and the like - all items that I had never come across in all my life.
One cake that I'd wanted to make used rosewater as the main flavouring ingredient and I thought I could try it out at last, now that I had a proper oven, not to mention many cakes under my belft (not literally, folks!). However, every time I went to the Indian shops, the rosewater kept getting forgotten. Finally the right moment came along... the perfect mix of time, desire and the availability of the required ingredients in my pantry.
I'm so glad to say that the cake came out as gorgeous as I could have wanted. The honey content in it made the cake burn a little more than was ideal but luckily it was still very tasty. The delicate flavour of roses, especially in the icing, was sensational - a bit like eating Turkish delight but not so sweet or overpowering. I think this is one of the few cakes that I found delicious enough to warrant a second helping rightaway.
Recipe for: Rosewater cake

Ingredients:
1 cup plain flour
1 tbsp baking powder
2/3 cup caster sugar (or 1/2 cup if you prefer it less sweet)
1/2 cup butter, softened
4 tbsp clear honey
2 eggs, lightly beaten
4 tbsp rosewater
4 tbsp milk
1/2 cup sultanas
For the icing:
1-1/2 cups icing sugar
4 tbsp rosewater
1 tbsp lemon juice
Method:
1. Grease a 6" round cake tin and with silicone paper. Sift the flour with the baking powder into a large bowl.
2. Whisk the butter, sugar and honey together until pale and fluffy. Add the eggs, 2 tbsp at a time, beating well between additions.
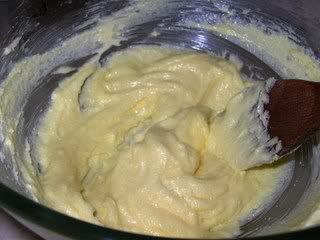
3. Fold in the flour and baking powder, then add the rosewater and the milk, turning the mixture over several times. Then mix in the sultanas.
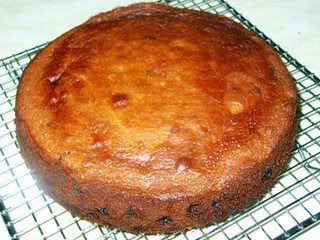
4. Pour the mixture into the prepared cake tin and bake at 180C until the cake tests done. Check the top of the cake after about 20 minutes - if it looks like turning brown too quickly, cover the top with foil or brown paper to prevent burning.
5. Cool the cake for 5 minutes, then remove from the tin and cool completely on a wire rack.
6. Sift the icing sugar into a bowl, add the rosewater and beat until smooth. If the mixture is too thick, add the lemon juice and beat again. (If it's too thin, add more icing sugar). The icing should be thick enough to coat the back of a spoon without dripping off, but should still be pourable.
7. Pour the icing over the top of the cake and let it drip down the sides.
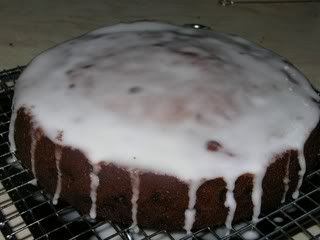
Smooth the top if necessary with a palette knife dipped in hot water. Let the icing set for a couple of hours before cutting the cake.
There's a traditional way of making jilebi that I just didnt bother with for two reasons: 1. I didnt have enough time. 2. I wasn't sure I could get the batter to ferment (kinda cold here now, plus see Reason 1 again).
So I followed a recipe (adapted only very slightly) from Bilbo of Smorgasboard for instant jilebis. I have to say it worked out rather well... Pete loved it (he even said it was as good as those from my favourite sweetshop in Birmingham - which, although not true, was very nice to hear!) and as for Rebecca, his daughter, she couldnt get enough of them.
Cant blame them, I love jilebis as well. They're one of the few Indian sweets that I can go on eating indefinitely... perhaps it's because they're not just tooth-achingly sweet but have a sour tang to them that comes from fermenting the batter.
Jilebis are lovely to eat crisp and hot, of course, but I especially love them the next day - I store them in the refrigerator - by which time they've lost most, but not all, of their crispness and gained a softness (and a sticky sugar glaze) that is just irresistible combined with the tangy/sweet taste. (I'm drooling here.)
Strangely enough, I dont like jangri, IMO jilebi's less attractive cousin, which starts out dripping with syrup and with a soft texture. (If anybody's thinking "jeez, what a fuss-budget she is" by now, I will gracefully admit to being one... sometimes.)
Anyway... back to my Diwali jilebis. Turned out I didnt have a proper jilebi press (press, mold, whatever), and my icing accessories had unaccountably gone AWOL. So I made do with a conical disposable plastic icing bag with the tip cut off, and poured the batter into it. Not the best idea, really - it kind of worked, but a good portion of the batter was wasted as it squirted out of the top and oozed down my hand and down the bag. It also meant that my jilebis turned out a bit wonky in shape. Then again, I'm not a professional halwai (sweet-maker) so they would have been shapeless no matter what I used.
I would suggest using one of the medium-size icing/piping nozzle to make jilebis... havent tried it that way, so I cant be more accurate. Odd, now that I think of it, but I havent actually seen jilebis being made so I dunno how the professionals do it!
Recipe for: Instant jilebi

Ingredients:
For the jilebi
--------------
1 cup plain flour
1 tsp chickpea/gram flour
1/2 tsp active dry yeast
1 cup water (a few tbsp more or less as required)
2 tablespoons fresh lemon juice
Oil for deep frying
For the sugar syrup
-------------------
2 cups sugar
2 cups water
1 tbsp rosewater
OR
1/2 tsp powdered cardamom seeds
Method:
1. Combine the flours and yeast in a bowl, add enough water to make a fairly thick but pourable batter. Let this sit for 10 minutes, then stir in the lemon juice.
2. To make the sugar syrup, combine the water and sugar in a pan, stirring over medium heat until the sugar dissolves completely.
3. Let the mixture boil briskly for 10-15 minutes and then turn off the heat.
4. Heat the oil in a wok. Fit a medium nozzle (not sure of size, but it shouldnt be one with a big opening, because the batter expands in the oil) onto an icing bag and pour the batter into it.
5. Squeeze the batter directly into the hot oil, looping the stream to make pretzel-shapes. Fry the jilebis one or two at a time (depending on the size of your wok) until a golden brown on both sides.
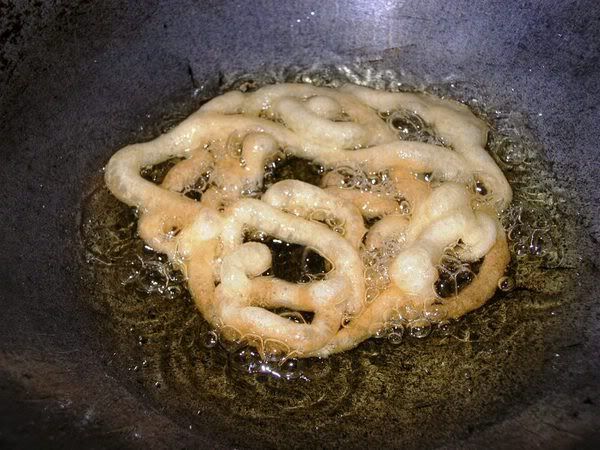
6. Drain and drop directly into the sugar syrup, soaking the jilebis for about 30 seconds each side.
7. Remove with a slotted spoon and place on a plate. Serve hot, cold or at room temperature.


