skip to main |
skip to sidebar
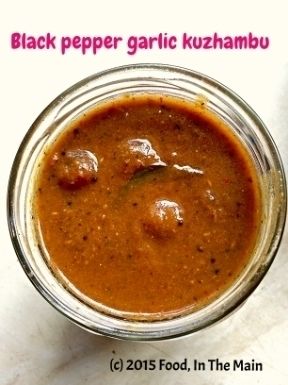
I simply had to post this kuzhambu recipe, because it is just literally so lip-smackingly good - thick, tangy, hot, spicy, a tiny bit sweet and entirely irresistible! The recipe is from a foodie group on Facebook of which I am a member, and I can't seem to find it again on FB (which I wanted to do for crediting purposes on my blog). I am SO pleased that I wrote it down on a piece of paper when I saw it on FB (not having had access to a printer or my own computer at that point). I state freely that this is not my own recipe, and I do really wish I knew whose it was. All I DO know for certain that it is comfort food whose ingredients are good for health.
I made the kuzhambu and refrigerated it just before going on a week-long trip on a narrowboat with my husband. It was a lovely, relaxing, stressfree holiday, with the most gorgeous, eye-poppingly pretty scenery... but that's only by the way. The main thing is, I knew that the food I would be eating on the boat (and off it, at the various canal-side pubs that we stopped at) would not be spicy enough for me, and I would be dying for something to tickle my palate when we got back.
And so it turned out.
I certainly enjoyed the food en route, but I couldn't wait to get stuck into hot and spicy comfort food when we got home - and this kuzhambu was absolutely just the thing. I could not have asked for anything better. All I had to do was make some rice - and because it was too late to make any vegetable side-dish to accompany it (and because I was much too hungry), I just microwaved a couple of poppadoms and ladled the kuzhambu on the rice. It tasted like heaven - but there was rather too much of the kuzhambu on the rice, because it was so full-on hot and peppery. It's really meant to be mixed with rice in small amounts, not in quantities like regular sambar or rasam. I had to tone the spice quotient down somewhat with a large dollop of Greek yogurt on the side of my plate, but that was a wonderful combination anyway.
Oh, and if you're wondering why I didn't mention the taste of the large amounts of garlic that went into the kuzhambu, it's because it doesn't come across as overly garlicky. So don't worry about it, and don't skimp on the garlic; in fact, next time I will probably add even more garlic. It's good for you, anyway, so no harm done.
One other thing - the correct amount of salt is essential, otherwise the kuzhambu tends to be on the sweetish side. I'm used to making do with less salt in my cooking than (after all, you can always add more, but you can't really undo oversalting disasters!) but in this case I did have to add some more. So, it would probably be best to start by adding 3/4 tsp salt, then taste-testing to see if your palate requires more. Let your tongue and palate be the judge.
Happy eating!
Recipe for: Black pepper garlic kuzhambu
Ingredients:
1/4 cup baby shallots/sambar onions
1 tbsp tamarind paste, dissolved in 1/2 cup water
1/2 tsp turmeric powder
1 tsp jaggery (raw palm sugar) (optional)
1 tbsp neutral oil
Salt to taste
To grind:
1-2 tsp black peppercorns (more if you love your black pepper)
6-8 dried red chillies
1 whole head of garlic (about 1/8 cup garlic cloves, peeled and chopped into chunks if very large)
2 tsp cumin seeds
1 medium onion
1 medium tomato
3 sprigs curry leaves
To temper:
1 tbsp nallennai (unrefined sesame oil)
1/2 tsp vendhayam (methi/fenugreek seeds)
2 tsp mustard seeds
10 curry leaves
Method:
1. Heat 1/2 tbsp oil in a small pan and add the first four items on the "To grind" list. Saute for 2-3 minutes on med-high, stirring, until the chillies turn a darker shade of red and the garlic is starting to turn colour. Then add the remaining ingredients and fry until the garlic is golden. Allow to cool, then grind to a smooth paste. Set aside till required.
2. Heat the remaining neutral oil, add the small onions and fry till golden (approx 3-4 minutes). Add the tamarind water, salt to taste, turmeric and jaggery. Bring it to a boil and let it bubble for 2 minutes.
3. Now add the ground paste and 2 cups water and mix well. Bring to a boil again and let it simmer for 10 minutes, or until it is thick enough to coat the back of a spoon.
4. As a final touch, heat the nallennai in a small pan, then add the mustard seeds and curry leaves. Cover and let the mustard seeds pop. Now tip in the fenugreek seeds and fry for 30 seconds or until the seeds turn a darker shade of brown. Be careful not to burn the seeds or they will be horribly bitter. Pour the tempering over the kuzhambu and stir it in. Let it simmer for another 3 minutes, then take the pan off the heat.
Serve sparingly over steamed white rice with a dollop of ghee, any dry vegetable curry and microwaved poppadoms.
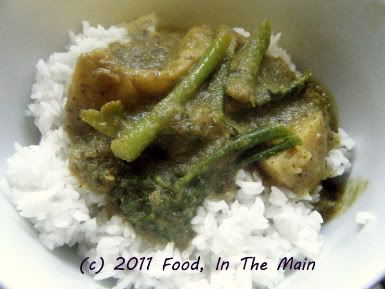
I call this a Thai-style curry because an authentic Thai curry was not what I had originally set out to make – and anything that’s not authentic can only be termed “-style” in the interests of accuracy (and also to forestall any comments from my self-adopted pet troll along the lines of “this isn’t how you make an authentic Thai curry, you pathetic poseur, call yourself a real cook?” and so on.)
Pete had asked if I could make him a South Indian fish curry, saying that all I had to do was make a regular Southie saucy vegetable curry and add the fish fillets to his portion in the last 7 minutes of cooking, as that was enough time for the fish to cook. I didn’t have a problem with that, so I quickly looked up a generic Kerala-style fish curry recipe online.
I can’t really tell you at what point the Kerala-style morphed to a Thai-style – I’m not certain, to tell you the truth - but the aroma of the frying masala definitely brought to mind a Thai curry rather than anything Kerala, so I threw in the towel (metaphorically, not literally) and added light coconut milk to the masala, because that’s what I associate with Thai curries.
It wasn’t the wrong thing to do, certainly, because the curry was pretty good when I tasted it. (I just wish I’d added carrots for some colour.) Pete was also right about the fish – it did cook in 7 minutes, but I was worried all the while that I was going to inadvertently poison him with undercooked fish. Actually, it was only after he woke up alive the next morning that I was finally reassured that I had cooked the fish properly!
(You there, in the back – stop sniggering. If you had as little experience in cooking fish as I do, you’d be empathising with me, and we both know it!)
Recipe for: Thai-style vegetable curry
 Ingredients:
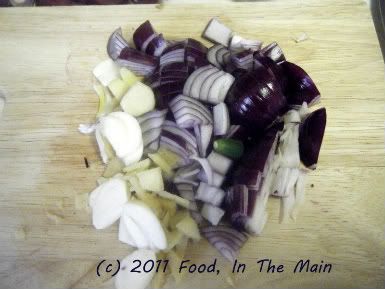
1 medium onion
2 cloves garlic, sliced
 1 tbsp coriander seeds
1/2 tsp fennel seeds
1/3 cup coriander leaves
2 green chillies
1" piece ginger, chopped
2 tsp oil
1/2 tsp turmeric powder
2 cups mixed vegetables (I used green beans, potatoes, courgettes), sliced into 1" pieces
1 cup light coconut milk
Salt to taste
1 cup water
Method:
1. Toast the coriander seeds in a dry skillet till they turn aromatic and dark. Let cool.
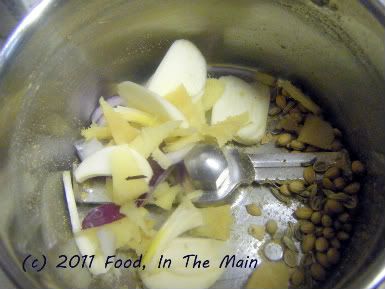
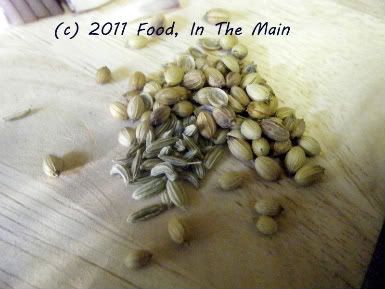 2. First grind together the green chillies, ginger, garlic, coriander seeds and fennel seeds;
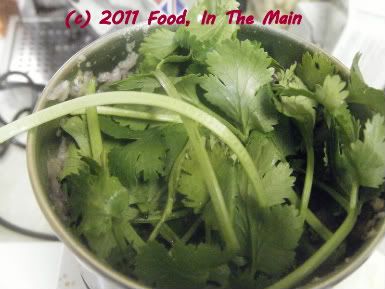
 then add the coriander leaves
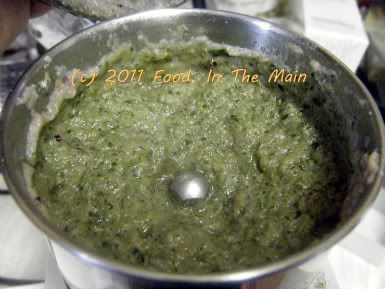
 and grind to a smooth paste.
 3. Heat the oil in a pan and add the ground paste and turmeric powder.
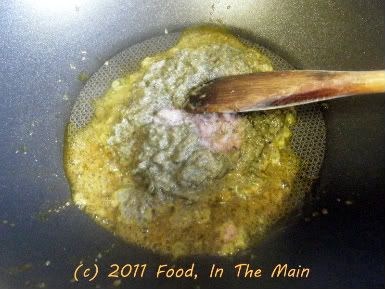 Fry the paste for a minute or so, stirring continuously. Then add the onions and let them cook for 5 minutes or so, till they start to turn soft.
4. Add the vegetables and stir-fry for 3-4 minutes, then add 1 cup water and bring the water to a gentle boil. Turn down the heat and simmer till the vegetables are nearly cooked.
5. Now pour in the coconut milk and stir, letting the curry simmer on medium-low till the vegetables are fully cooked.
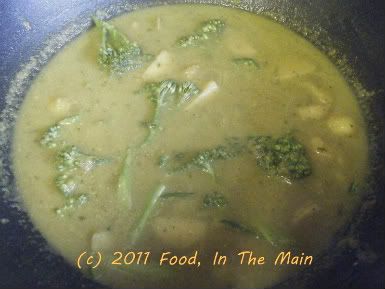 Add salt to taste and serve hot with plain white rice.
RECIPE: THAI-STYLE VEGETABLE CURRY
Ingredients:
1 medium onion
2 cloves garlic, sliced
1 tbsp coriander seeds
1/2 tsp fennel seeds
1/3 cup coriander leaves
2 green chillies
1" piece ginger, chopped
2 tsp oil
1/2 tsp turmeric powder
2 cups mixed vegetables (I used green beans, potatoes, courgettes), sliced into 1" pieces
1 cup light coconut milk
Salt to taste
1 cup water
Method:
1. Toast the coriander seeds in a dry skillet till they turn aromatic and dark. Let cool.
2. First grind together the green chillies, ginger, garlic, coriander seeds and fennel seeds, then add the coriander leaves.
3. Heat the oil in a pan and add the ground paste and turmeric powder. Fry the paste for a minute or so, stirring continuously. Then add the onions and let them cook for 5 minutes or so, till they start to turn soft.
4. Add the vegetables and stir-fry for 3-4 minutes, then add 1 cup water and bring the water to a gentle boil. Turn down the heat and simmer till the vegetables are nearly cooked.
5. Now pour in the coconut milk and stir, letting the curry simmer on medium-low till the vegetables are fully cooked. Add salt to taste and serve hot with plain white rice.
One of the things I do very well is daydream. The more important it is for me to pay attention, the easier I find it to slip into my own world – not to mention, the daydream is correspondingly detailed. One recurring bare-bones daydream is to have a cook at home. The actual details vary depending on my prevailing mood, but on different occasions I’ve day-dreamed about having a live-in cook (only briefly), someone who would make what I wanted the way I wanted it made, someone who would be a trained nutritionist and make healthy but superbly tasty dishes… the permutations are many and varied.
But the one daydream that keeps occurring with monotonous regularity is the one where I have a cook who does the necessary prepwork and all the other jobs that I find boring – peeling and cutting vegetables, searching out spices, beating eggs, chopping nuts, shallow-frying things on low heat, stirring milk, whatever. After which, he (or she – I’m an equal-opportunity day-dreamer) clears the workspace, throws away the rubbish and gets everything ready for me.
Then, when all is perfectly laid out in the kitchen, I sail in and set about cooking my chosen recipe. And, naturally, when I am done, my cook does the washing up and drying and putting away of all the utensils, leaving my kitchen in perfect order for the next time…
*sighhhhh*
A sous chef is what I need, come to think of it. Someone who will never aspire to chefdom or doing anything more interesting than the prepwork and the donkey work.
*sighhhhhhhhhhhhhhhhhhhhhhhhhhhhh*
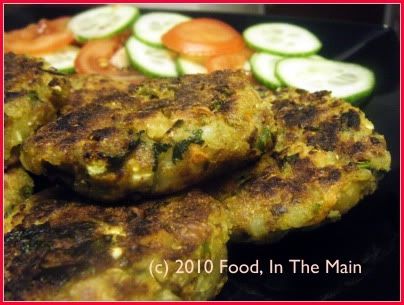
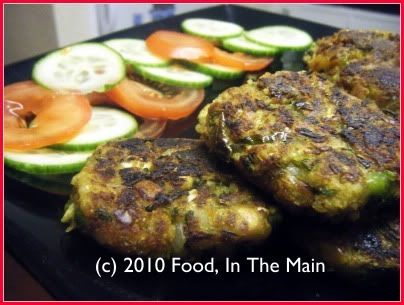
Anyway, here’s the recipe for the patties. Believe me when I say that I felt the lack of a sous chef very, very, very deeply indeed… but still, the takes-you-forever-to-cook-and-just-seconds-for-someone-to-eat patties are worth the annoying bitwork. In other words, they taste good enough to eat.
Recipe for: Vegetable chickpea patties
 Ingredients:
1/2 cup carrots, grated
1/2 cup potatoes, chopped
1/4 cup green beans, sliced into thin rounds
1/4 cup green pepper (capsicum), chopped
1/4 cup onions, chopped
2 cups cooked potatoes, mashed coarsely
1 tin (1-1/4 cups) cooked chickpeas, rinsed and drained
1 cup wholewheat breadcrumbs
1/4 cup coriander leaves, chopped
1 tsp Kitchen King masala (or garam masala)
1/4 tsp turmeric powder
1 tsp red chilli powder (or to taste)
1 tsp coriander seeds, powdered
1/2 tsp cumin seed powder
salt to taste
2 tbsp oil
Pam spray or more oil to shallow-fry
Method:
1. Place the chopped potatoes, carrots and green beans in a microwave-safe bowl and microwave covered for 5 minutes with 3-4 tbsp water, till half-cooked.
2. Add the mashed potatoes and the spices and mix well.
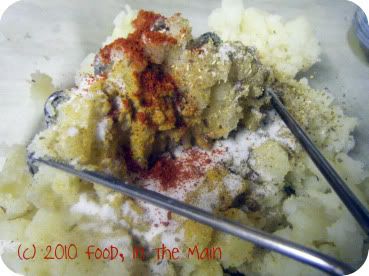 3. Then add the chickpeas and chopped onions.
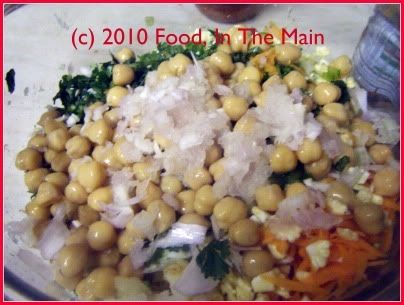 Crush the chickpeas coarsely with a masher or the back of a sturdy spoon.
4. Add the breadcrumbs and mix in.
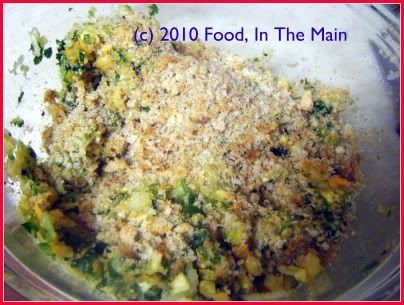 5. Heat the 2 tbsp oil and pour it on the mixture. Add salt to taste along with the coriander leaves, and mix thoroughly.
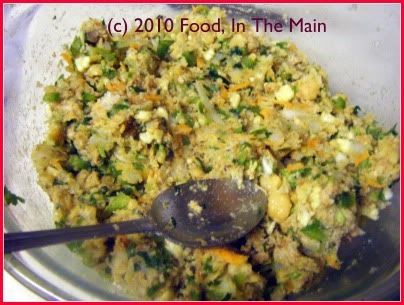 6. Now form small patties from the mixture and shallow-fry them in a non-stick pan (without crowding them) over medium-high heat.
 7. Brush the top surface of the patties with some oil (or spray some Pam) and turn the patties over carefully when golden brown on the underside.
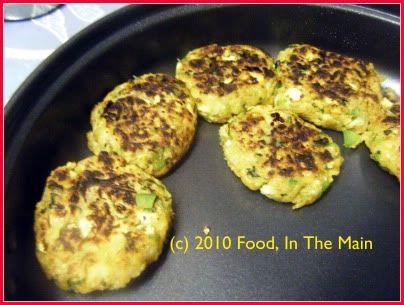 8. Serve warm with a salad for a light meal, or with ketchup for a snack.
 RECIPE: VEGETABLE CHICKPEA PATTIES
Ingredients:
1/2 cup carrots, grated
1/2 cup potatoes, chopped
1/4 cup green beans, sliced into thin rounds
1/4 cup green pepper (capsicum), chopped
1/4 cup onions, chopped
2 cups cooked potatoes, mashed coarsely
1 tin (1-1/4 cups) cooked chickpeas, rinsed and drained
1 cup wholewheat breadcrumbs
1/4 cup coriander leaves, chopped
1 tsp Kitchen King masala (or garam masala)
1/4 tsp turmeric powder
1 tsp red chilli powder (or to taste)
1 tsp coriander seeds, powdered
1/2 tsp cumin seed powder
salt to taste
2 tbsp oil
Pam spray or more oil to shallow-fry
Method:
1. Place the chopped potatoes, carrots and green beans in a microwave-safe bowl and microwave covered for 5 minutes with 3-4 tbsp water, till half-cooked.
2. Add the mashed potatoes and the spices and mix well.
3. Then add the chickpeas and chopped onions. Crush the chickpeas coarsely with a masher or the back of a sturdy spoon.
4. Add the breadcrumbs and mix in.
5. Heat the 2 tbsp oil and pour it on the mixture. Add salt to taste along with the coriander leaves, and mix thoroughly.
6. Now form small patties from the mixture and shallow-fry them in a non-stick pan (without crowding them) over medium-high heat.
7. Brush the top surface of the patties with some oil (or spray some Pam) and turn the patties over carefully when golden brown on the underside.
8. Serve warm with a salad for a light meal, or with ketchup for a snack.
This is what I call an "all-purpose" recipe because you can use whatever vegetables you have to hand. It's especially good for using up the odds-and-ends. The only reason I use the generic term "curry" is because it's not a kootu or anything specifically South Indian, and it is not quite proper North Indian because I used "curry powder" as a flavouring.
I know - gasp! What was I thinking, using store-bought "curry powder"? Me, who used to be authentically Indian and looked down my nose (only a short distance, given that my nose is regrettably lacking in ski-slope proportions) at any recipe that involved the use of "curry powder" especially with the words "mild Madras" preceding the term. Me, who used to be mildly scornful and pitying of the uninformed Brits who relied on curry powders to make their "Indian" curries. That me, now admitting without any apparent embarrassment to having "gone over" to the British side of Indian curries? WTF?
Actually, after years and years of using readymade garam masala powder in various dishes and not thinking twice about it being a store-bought item, I finally came around to admitting that "curry powder" was pretty much the same sort of thing.
However, I do still look down my sadly length-challenged nose at people who use curry powder as the sole flavouring for their versions of curries. My superiority imaginary superiority in the matter of "authentic" recipes is maintained quite satisfactorily (from my point of view, naturally) because I used "mild Madras curry powder" mainly to provide the "authentic British" flavour to this curry. I do not, I hasten to add, use it all the time.
There, that should pretty much re-establish my credentials. And if it doesn't, here's a gentle reminder - I am now, as my husband chooses to describe, a "Brindian", not an Indian...
Recipe for: Basic vegetable curry
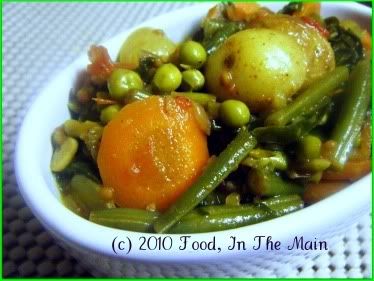 Ingredients:
2-3 small new potatoes, sliced into 1/2-cm thick rounds
1 carrot, peeled and sliced into 1/2-cm thick rounds
1/3 cup fresh or frozen green peas
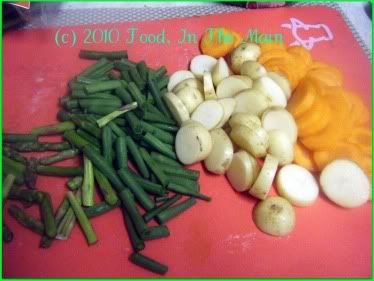 2 small onions, sliced
1/2 cup green beans, sliced 1" long
2 cups baby spinach leaves
1/2 cup roasted tomatoes OR 1 cup tomato puree + 1 tbsp concentrated tomato paste
1-2 small cloves garlic, chopped fine
1/2" piece ginger root, peeled and grated
1 tsp cumin seeds
salt to taste
2 tsp oil
1/2 tbsp mild Madras curry powder
Coriander leaves for garnish
Method:
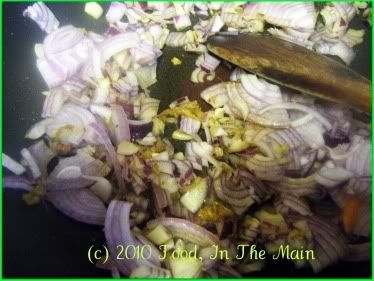
1. Heat the oil in a wide pan, add the cumin seeds and garlic, and fry on medium-low heat until the garlic softens (about 30 seconds).
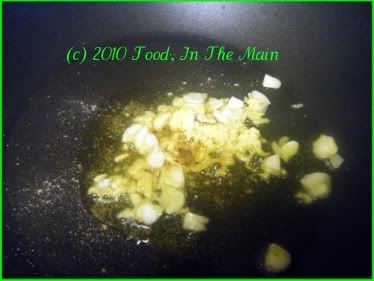 2. Then stir in the sliced onions, grated ginger and turmeric powder and fry till the onions become limp and turn translucent.
 3. Add the sliced potatoes, carrots, green beans and green peas along with 2 cups water and the curry powder.
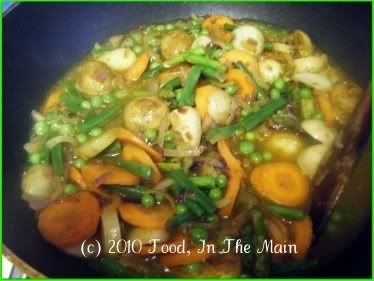 Bring it to a boil on high heat, then turn the heat down to medium and let the vegetables cook for 7-8 minutes.
4. Then add the roasted tomatoes.
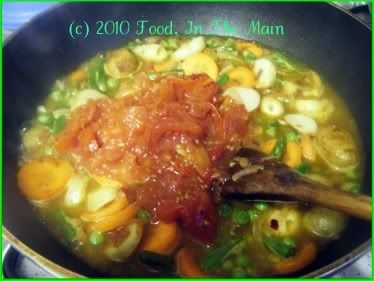 If you're using uncooked pureed tomatoes, turn the heat back up to high after adding the puree + concentrated paste, and let the liquid reduce by half.
5. Let the mixture simmer till the vegetables are fully cooked. Now add the spinach leaves.
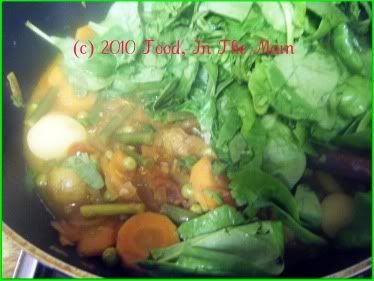 Turn the heat down to low and cover the pan for 3-4 minutes or till the spinach is wilted. Add salt to taste, stir it in well. Leave the curry on the hob for a few minutes more, if the gravy is not thick enough for you.
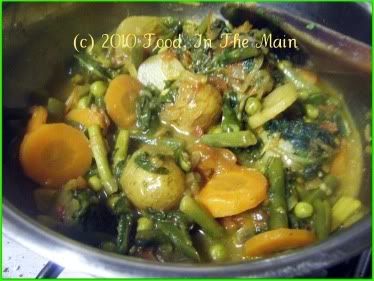 Garnish with coriander leaves and serve hot with plain rice, any Indian pickle and papad.
RECIPE: VEGETABLE CURRY
Ingredients
2-3 small new potatoes, sliced into 1/2-cm thick rounds
1 carrot, peeled and sliced into 1/2-cm thick rounds
1/3 cup fresh or frozen green peas
2 small onions, sliced
1/2 cup green beans, sliced 1" long
2 cups baby spinach leaves
1/2 cup roasted tomatoes OR 1 cup tomato puree + 1 tbsp concentrated tomato paste
1 tsp cumin seeds
1-2 small cloves garlic, chopped fine
1/2" piece ginger root, peeled and grated
salt to taste
2 tsp oil
1/2 tbsp mild curry powder
Coriander leaves for garnish
Method
1. Heat the oil in a wide pan, add the cumin seeds and garlic, and fry on medium-low heat until the garlic softens (about 30 seconds).
2. Then stir in the sliced onions, grated ginger and turmeric powder and fry till the onions become limp and turn translucent.
3. Add the sliced potatoes, carrots green beans and green peas along with 2 cups water and the curry powder. Bring it to a boil on high heat, then turn the heat down to medium and let the vegetables cook for 7-8 minutes.
4. Then add the roasted tomatoes. If you're using uncooked pureed tomatoes, turn the heat back up to high after adding the puree + concentrated paste, and let the liquid reduce by half.
5. Let the mixture simmer till the vegetables are fully cooked. Now add the spinach leaves. Turn the heat down to low and cover the pan for 3-4 minutes or till the spinach is wilted. Add salt to taste, stir it in well. Leave the curry on the hob for a few minutes more, if the gravy is not thick enough for you. Garnish with coriander leaves and serve hot with plain rice, any Indian pickle and papad.
I don’t understand why the supermarkets start stocking their shelves with Christmas-oriented goods fully three months ahead of the actual occasion. It pisses me off extremely much, not that anyone cares. Any small enthusiasm for the festival that I might otherwise muster goes right down the drain when almost everything is advertised as “perfect as a Christmas present”. I don’t know about everybody else, but if anybody thought to give me an electric toothbrush (for example) as a Christmas present, they would very soon get it jammed up an orifice not situated in the face and not meant for toothbrushes - electric or otherwise.
About the only thing I’m pleased about with regard to Christmas-oriented goods is when the produce shelves are stocked with things that are otherwise not to be found for the remainder of the year – cranberries, chestnuts, redcurrants, etc. Last week I found redcurrants on the shelves on a two-for-one offer, so I bought two boxes on an experimental basis. I’d never tasted redcurrants nor anything made with redcurrants. I thought this would be a good time to see what they were like and what I could make.
Here’s what I discovered: Redcurrants are sour. Mouth-puckeringly sour. Even when they'reinvitingly red and ripe, they're sharp enough to shrivel your fillings. There’s no way they could turn to sweet from that tart extreme - not without artificial help, anyway. They’re the most gorgeous looking berries, though… tiny, shiny and very red, like grape-bunches of little red rubies.
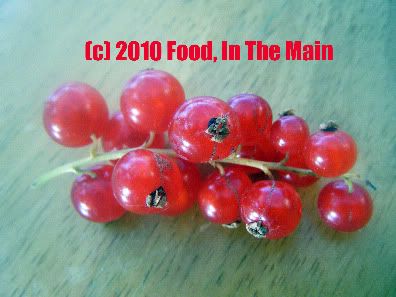
So, anyhow, eating those little rubies raw was out of the question. I googled redcurrant jam recipes and found one that combined redcurrants and strawberries. Perfect, because I had some somewhat squishily overripe strawberries in the fridge. But the recipe called for equal amounts by weight of both berries, and my strawberries were “currantly” (note the pun, note the pun!) outnumbered by about 2-1 in weight-y terms.
That was when I felt the Spirit of Enterprising Culinariness, so long dormant, take possession of me once again. (When one is possessed of this spirit, there’s nothing to do but give in to its directions.) Under its spell, I divided the berries into three more-or-less equal portions of about 1-1/4 cups. With the first portion I made redcurrant thokku/chutney. The thokku was a good use of the redcurrants, but the cooked-down berries retained so much of the tartness that the thokku had to go back on the hob for some repair-work. The ingredient quantities have been modified to reflect the “repair” so that you don’t have to cook the thokku twice like I did. But be warned, this is one sour chutney, best eaten along with dal and rice to give the meal extra zing. I ate it spread on toast, too.
Recipe for: Redcurrant thokku (chutney)

Ingredients:
1-1/4 cups redcurrants, washed and drained
2 tbsp oil
1 tsp cumin-coriander powder
1 htsp brown/black mustard seeds
5-6 fresh curry leaves
1/4 tsp asafoetida powder
1/4 tsp turmeric powder
2 tbsp sugar or jaggery
2 tsp red chilli powder
1/4 tsp roasted fenugreek seed powder
salt to taste
Method:
1. Heat the oil in a pan and add the cumin-coriander powder, curry leaves, mustard seeds and asafoetida powder.

Fry them for about a minute, till the mustard seeds pop.
2. Add the redcurrants to the pan and stir well. Let them cook for 2-3 minutes.
3. Now add the turmeric powder and red chilli powder and stir again.
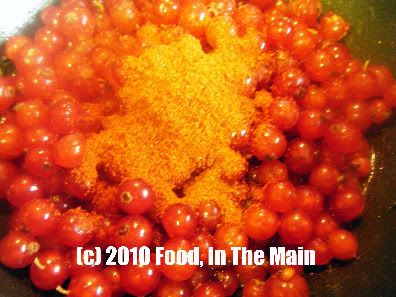
4. Let the redcurrants come to a gentle boil on medium heat, then stir in the sugar or jaggery.
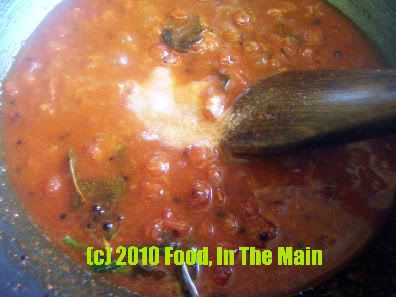
5. Let the berries cook down on a low simmer for 10-15 minutes until they lose their shape. You can mash them with a spoon.
6. Add salt to taste and finally the roasted fenugreek seed powder. Mix well. The thokku is done when the mixture becomes thick. Let it cool, then store in a tightly covered container. This stays good for 4-5 days.
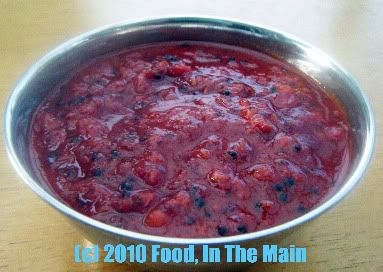
This redcurrant thokku is best used as a condiment with dal and rice.
RECIPE: REDCURRANT THOKKU (CHUTNEY)
Ingredients:
1-1/4 cups redcurrants, washed and drained
2 tbsp oil
1 tsp cumin-coriander powder
1 htsp brown/black mustard seeds
5-6 fresh curry leaves
1/4 tsp asafoetida powder
1/4 tsp turmeric powder
2 tbsp sugar or jaggery
2 tsp red chilli powder
1/4 tsp roasted fenugreek seed powder
salt to taste
Method:
1. Heat the oil in a pan and add the cumin-coriander powder, curry leaves, mustard seeds and asafoetida powder.
Fry them for about a minute, till the mustard seeds pop.
2. Add the redcurrants to the pan and stir well. Let them cook for 2-3 minutes.
3. Now add the turmeric powder and red chilli powder and stir again.
4. Let the redcurrants come to a gentle boil on medium heat, then stir in the sugar or jaggery. 5. Let the berries cook down on a low simmer for 10-15 minutes until they lose their shape. You can mash them with a spoon.
6. Add salt to taste and finally the roasted fenugreek seed powder. Mix well. The thokku is done when the mixture becomes thick. Let it cool, then store in a tightly covered container. This stays good for 4-5 days.
This redcurrant thokku is best used as a condiment with dal and rice.
One of my favourite aunts is my B mami. Nobody can help liking her, she’s just so kind, good-natured, fun and always good for a laugh. And to top that off, she’s also an absolutely amazing cook. She can make better bhelpuri and pani puri than anyone I know, and the other North Indian dishes she makes are just as awesome. Maybe it’s because she lived for so many years in the North (and north-east), and perhaps learnt them from North Indian friends, but I personally don’t think that’s the real reason. The real reason is that she’s just an awesome cook, full stop.
My visit to their place in Mathura (along with my youngest aunt and her daughter who was maybe three or four years old then) is still vivid in my memory. This was over 15 years ago, but good times leave their imprints on your brain, don’t they? But – and I don’t know just how much I should be embarrassed by this – one of THE most enduring of those memories was the train trip back. What’s embarrassing about a train trip memory, you ask? Well, the answer is that it’s not so much the train trip that was embarrassing, as my memory of WHY that trip was memorable. I might as well spit it out (not literally) – it was the bharwan bhindi (okra stuffed with a mixture of spice powders) that B mami had packed for our train journey, with instructions to eat that first in case it turned bad in the heat.
That was the best bhindi I’d ever had, bar none. I’ve made this before, but not to my mami’s recipe. A few weeks back I emailed her asking for her recipe for bharwa bhindi, which she kindly sent me. I then sat on it for a few weeks more, not because of my usual procrastination but because I just didn’t get a chance to lay my paws on fresh okra. That occasion happened a couple of weeks back and I made B mami’s bharwan bhindi rightaway. (That this recipe didn’t get posted rightaway was due to a combination of procrastination + lack of time + unfamiliarity with online photo editing software).
The okra was pretty good – not as good as mami’s (no surprise there) even with the benefit of her recipe – but a creditable effort, nonetheless.
Recipe for: Stuffed bhindi (okra)
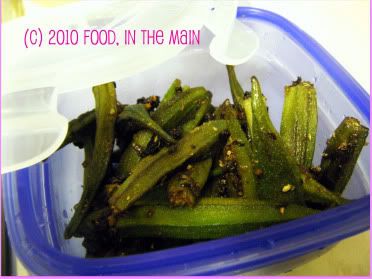
Ingredients:
250 gms ladies finger/okra/bhindi
1/2 tsp haldi (turmeric) powder
1 tbsp dhania (coriander) powder
1 tbsp jeera (cumin) powder
1 tsp chilly powder (or to taste)
1 tsp aamchur (dried sour mango) powder - optional
1/4 tsp hing (asafoetida) powder
salt to taste
oil as required (about 2 tbsp)
1 medium onion, grated or very finely minced
Method:
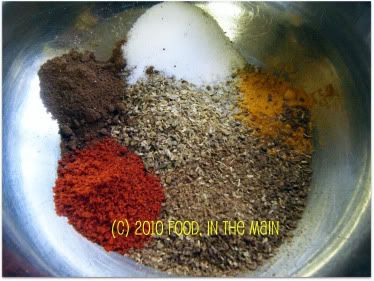
1. Mix the various powders together to make the stuffing masala and check that it tastes okay to you. Reserve.
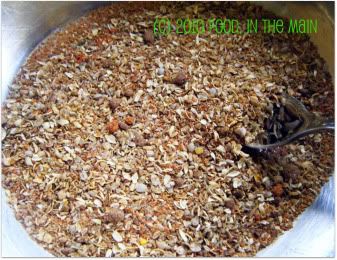
2. Cut the tops off the okra (I leave the tail on but it can also be removed if preferred.) Make vertical slits in each one, taking care not to go right through to the other side.
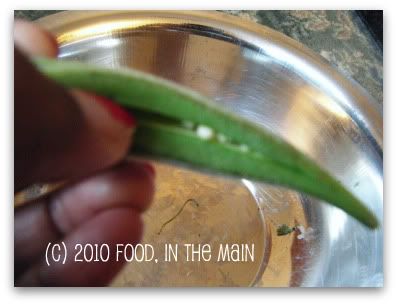
3. Carefully stuff each okra with the masala powder, using a small blunt butter knife
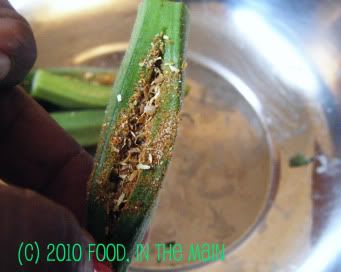
until all the okra is done. You can use any remaining masala on the okra as it cooks, it's up to you.
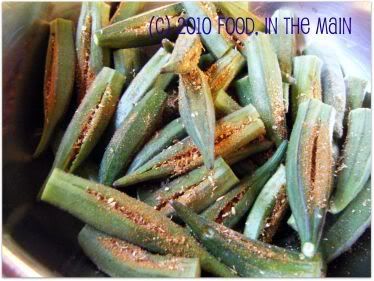
4. Now heat 1 tbsp oil in a non-stick saute pan and add the finely minced/grated onion.
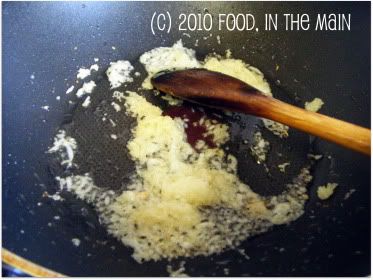
5. When the onion is soft and beginning to turn colour, add the stuffed okra. Carefully turn over the okra so that the onions are distributed more or less evenly.
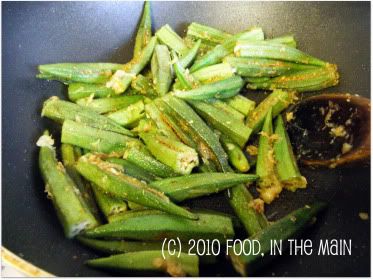
6. Fry the stuffed bhindi on medium-high, turning them over occasionally. Add more oil as required. Don't cover the pan or the okra will become gooey. Add salt to taste when the okra is cooked and slightly crisp, with brown spots.
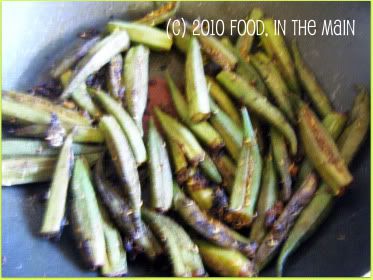
Serve the stuffed bhindi hot with rotis or as a side dish with rice and dal.
Take-out. Take-away. Call it what you will, all it means is that you're going to be eating something cooked in some pokey little kitchen by Bangladeshi cooks (most likely if it's a takeaway in the Midlands) who labour under the misapprehension that a bucketload of oil is a good substitute for taste and flavour. I might be doing a disservice to the rare takeaway place which doesn’t follow this rule of thumb, but on the whole, my statement holds true, sadly enough.
I don’t see why takeaways shouldn’t be able to do good, healthy, wholesome food, considering they have at hand all the resources they need. Various friends have asked me – probably only in jest – why I don’t start my own takeaway, but the thought just doesn’t appeal. I do like cooking, but if I had to do it all day every day, whether from home or a business premises, I would come to hate it very quickly. (I admit that about the only activity - if you can call it that - I could or would do all day, every day, all the time would be reading... but nobody’s paying me to read books just for personal enjoyment, more’s the pity.)
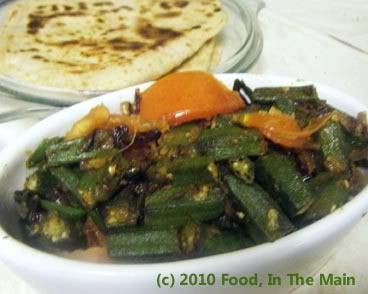
Anyway, since I had a couple of packets of okra from India (via Tesco, of course - "eat local" doesn't even come into the question!) to use up and Pete likes okra, I decided to make a restaurant-style side dish – with plenty of green chillies (fried separately) for myself, and with no chillies for him. Both versions were just so simple but tasty. To harp away on the same topic, I honestly don’t understand how the takeaway chefs could oilify (new word there) a basic dish like this and ruin it. Shame that most takeaway eaters will never realise what they're missing in the way of authentic fare. If they only knew...
Recipe for: Take-away style bhindi (okra) bhaji
Ingredients:
500 gm okra (about 4 cups, sliced 1" long)2 small onions2 small tomatoes1 large garlic clove, sliced into thin matchsticks3-4 green chillies, sliced diagonally into strips2 tsp cumin seeds1 tsp coriander powder1/2 tsp turmeric powder1 tsp Kitchen King masala (or use garam masala)Salt to taste2 tsp oil
Method:
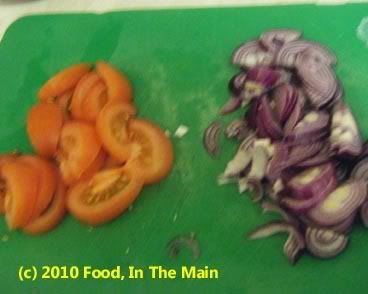
1. Slice the tomatoes into 1/2-cm thick wedges and slice up the onions thinly.
2. Heat the oil in a pan and add the cumin seeds and turmeric powder; fry for 20 seconds. They should become a darker shade of brown.
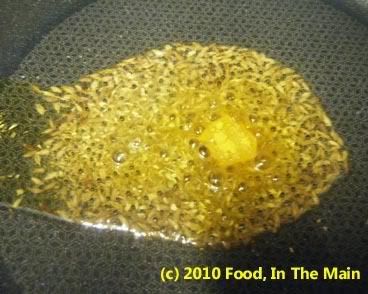
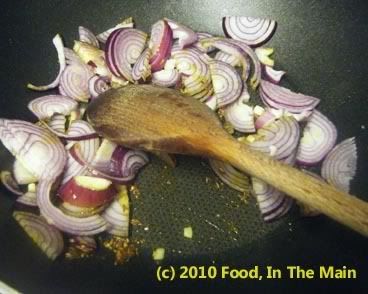
3. Add the sliced onions and garlic, and green chilli strips (if using), and stir-fry till they begin to turn translucent, about 5 minutes.
4. Now add the okra and stir it in. Let it cook on medium-high heat, stirring once in a while.

5. Once the okra is cooked and the onions are nicely browned, add the tomato wedges.
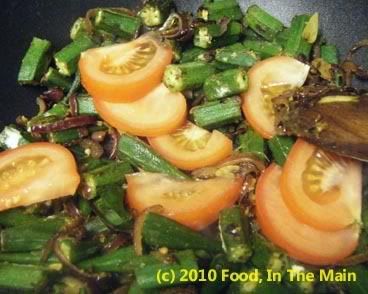
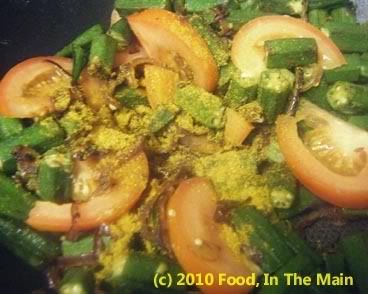
6. Stir-fry on high for 2-3 minutes or till the tomatoes JUST begin to soften. They should not get mushy. Add the Kitchen King/garam masala and salt to taste, and mix it in. Cook the okra for another couple of minutes. Serve warm with chapaties and any dal.
This is the karela recipe I was being so mysterious about, about a month ago or so. Those of you who do NOT remember what I was being mysterious about, please click on the link for a memory refresh. (Oh, the things I do for the convenience of my readers...! Might I have made a new follower, perhaps, or even two, by being thoughtful and ironic? One does so hope so.)
So yes, this is yet another karela recipe - and what’s more, I have another one up my sleeve (a post, not a karela), although that is not as radical as this one. This, though... this is THE most radical recipe I’ve ever made featuring this bitter vegetable, and I have to say that it really tested my karela-love. I would definitely consider this to be the penultimate conclusive test of karela-love, no question. The ultimate conclusive test, of course, being the willing consumption of fresh-squeezed karela juice. (You’d have to strap me down for that one, I reckon, and force-feed me it through a tube.)
This is an Oriya recipe, which I got from here and I consider myself very brave to have used Indian karela, which is way more bitter than the Chinese karela used in the original. Okay, the truth is that I would probably have used Chinese karela too, if only I’d had it handy. But I didn’t. Chinese karela is much less knobblier on the outside and much less bitter on the inside than the Indian variety.
Anyway, the reason I tried this recipe is because it uses mustard paste – and I love the sharp tangy taste of mustard paste and mustard oil. It’s a fairly recently discovered love, just short of a year old, actually.
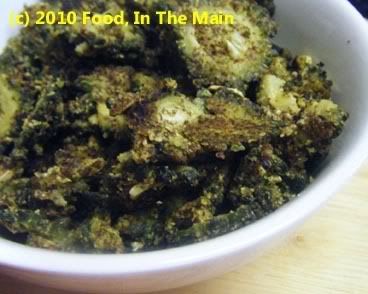
Perhaps the end result would have been less bitter if I’d done the salting-waiting-squeezing routine that removes some of the bitterness from this vegetable, but I didn’t. Call it foolhardiness. However, I still liked the end result – I know, I know, shocking! The mustardiness was as yummy and nose-clearingly sharp as ever, underlaid by the bitterness of the karela. I just couldn’t eat the mustardy karela on its own, though. It needed toning down with cold curd rice... which turned out to be the perfect combination, in the end.
(Total "karela" usage count in one post: 13, including this one. Do I get an award?)
Recipe for: Mustardy karela
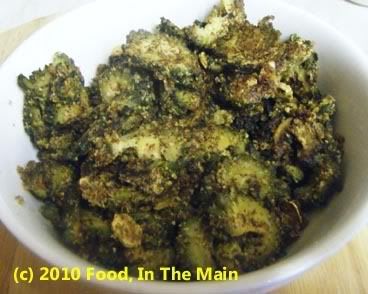
Ingredients:
2 cups bittergourd, sliced into rounds
Oil for pan frying (about 3-4 tbsp)
2 tbsp rice flour
1/2 tsp turmeric powder
salt to taste
3 tbsp mustard seeds
3-4 fresh green chillies (or to taste)
3 cloves garlic
Method:
1. Dry grind the mustard seeds and then add chillies, garlic and water.
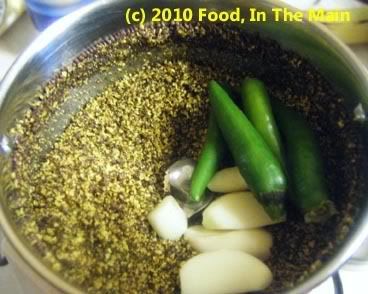
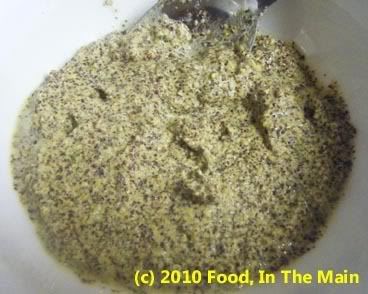
Make a thick paste with a little water so that it can coat the bitter gourd completely.
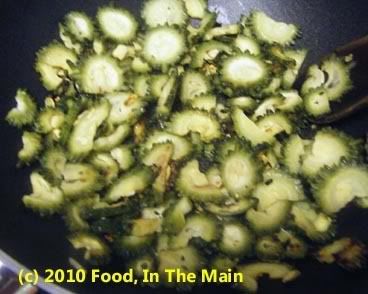
2. Steam-cook the sliced bittergourd with a few tbsp water
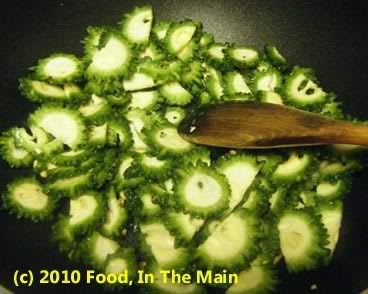
till done, but not mushy.
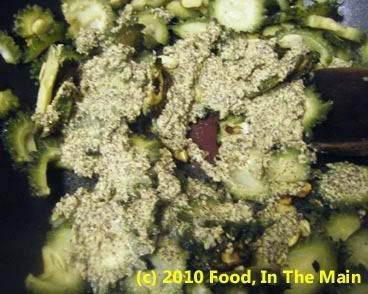
3. Mix the mustard paste with the cooked bitter gourd.
4. Then add the turmeric, rice flour and salt to taste.
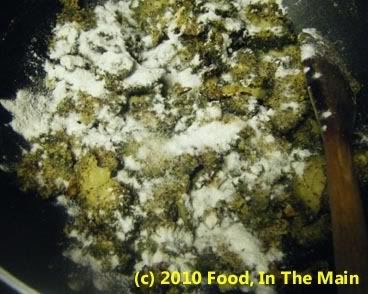
Mix in till evenly distributed.
5. Heat 3-4 tbsp oil in a shallow frying pan. Add the bitter gourd, spread them out gently,
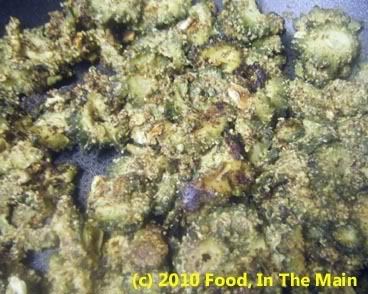
and fry the pieces on both sides till crisp and well done.
6. Serve as a side dish with rice and dal.
