I can't seem to get enough of karela or bittergourd nowadays - I really love these ugly knobbly vegetables that look like a bit like rats with a long tail. A couple of days back, I went to my favourite "Indian" shop in Wellington for vegetables, and was beyond thrilled to find small baby karela for sale. I picked out the freshest 10 and came home joyfully, having decided how I was going to cook them. Stuffed, basically. I didn't want the stuffing to be the usual onion masala or potato masala or peanut-based masala - mainly because I didn't want to spend time cooking the stuffing. Bad enough that I would have to wait for the karela itself to cook.
So I just put together a random mixture of flours and spices, toasted the mix in a dry pan until fragrant, then used some oil and water to bind the powdery mix and make it amenable to stuffing, basically.
I admit that this recipe uses more oil than usual, but it's worth it if you love karela and only make it once in a while. It was SO delicious. I had the stuffed karela with lemon masoor dal and rice and a little ghee, and felt like I had gone to heaven without having to die first. Yes, THAT good.
So good that I forgot to take a photo before diving into the karela. Oops...
Recipe for: Stuffed karela
Ingredients:
6-8 small (about 4-5 inches length) tender karela
For the masala paste
1/4 cup soya flour or jowar flour
1/2 cup chickpea flour (besan/kadalai maavu)
1/8 cup rice flour
4 tbsp coriander powder
1 tsp cumin powder
1/2 tsp aniseed powder
1/2 tsp fennel powder
1 tsp garam masala/rasam powder/any other masala you prefer
2 tsp red chilli powder (or to taste)
1/4 tsp asafoetida powder
Salt to taste
4 tbsp oil
Method:
1. Lightly peel the karela so that the ridges no longer stick out. Make a slit in each karela from end to end, being careful not to cut right through to the other side.
2. Use the handle of a small spoon to gouge out the inner seeds and membrane.
3. At this point you can rub salt on the inside and outside of the karela and let it sit for a few hours so that some of the bitter juices are drawn out. If you do this, be sure to squeeze the juices out, then wash the karela well to remove the excess salt. Pat dry with kitchen paper and reserve.
4. Mix together all the ingredients for the masala paste, bar the oil. Heat a pan and dry toast the mixed masala powder, stirring constantly, until the flours start to smell fragrant and savoury. Be careful not to burn it.
5. Once the masala mix is toasted, transfer it to a container. This might be more than you require, but you can always store the excess for another day in an airtight container. I prefer to make extra, because I don't like it when I find out halfway through stuffing that there isn't enough masala paste to fill all the karela. so you can use all of the toasted mix, or just half, depending on how many karela you have and their size.
6. Now add 2 tbsp of the oil to the masala powder and stir it in. The paste needs to come together enough that if you pinch some together, it shouldn't fall apart. You can add a bit more oil to get the powder to that stage, or you can add a little water. Either way, don't make it into a gooey paste.
7. Once the masala mix is ready, use your fingers to stuff it into the karela. Once they are all stuffed, you can use kitchen string to tie the karela so the stuffing doesn't come out (it tends to expand a bit as it cooks), but it's not strictly necessary especially if the karela is small.
8. Heat the remaining 2 tbsp oil in a pan and add 1/4 tsp asafoetida to it. As soon as it sizzles, put the stuffed karela in the pan and stir them gently so they are coated in the oil. Sprinkle 2-3 tbsp water over the karela and close the pan. Cook the karela covered over medium-low heat for 15 minutes or until they soften and turn a paler green. After that take the lid off and turn up the heat a bit more, occasionally turning them over, until they turn brown and crisp on all sides.
Serve hot with dal and rice.
Showing posts with label fennel. Show all posts
Showing posts with label fennel. Show all posts
Tuesday, January 26, 2016
Wednesday, July 20, 2011
Thai-style vegetable curry
I call this a Thai-style curry because an authentic Thai curry was not what I had originally set out to make – and anything that’s not authentic can only be termed “-style” in the interests of accuracy (and also to forestall any comments from my self-adopted pet troll along the lines of “this isn’t how you make an authentic Thai curry, you pathetic poseur, call yourself a real cook?” and so on.)
Pete had asked if I could make him a South Indian fish curry, saying that all I had to do was make a regular Southie saucy vegetable curry and add the fish fillets to his portion in the last 7 minutes of cooking, as that was enough time for the fish to cook. I didn’t have a problem with that, so I quickly looked up a generic Kerala-style fish curry recipe online.
I can’t really tell you at what point the Kerala-style morphed to a Thai-style – I’m not certain, to tell you the truth - but the aroma of the frying masala definitely brought to mind a Thai curry rather than anything Kerala, so I threw in the towel (metaphorically, not literally) and added light coconut milk to the masala, because that’s what I associate with Thai curries.
It wasn’t the wrong thing to do, certainly, because the curry was pretty good when I tasted it. (I just wish I’d added carrots for some colour.) Pete was also right about the fish – it did cook in 7 minutes, but I was worried all the while that I was going to inadvertently poison him with undercooked fish. Actually, it was only after he woke up alive the next morning that I was finally reassured that I had cooked the fish properly!
(You there, in the back – stop sniggering. If you had as little experience in cooking fish as I do, you’d be empathising with me, and we both know it!)
Recipe for: Thai-style vegetable curry
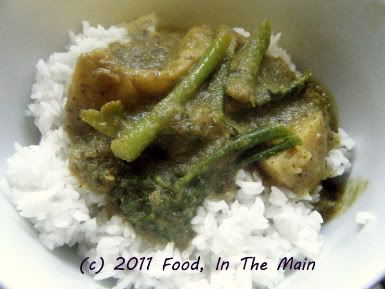
Ingredients:
1 medium onion
2 cloves garlic, sliced
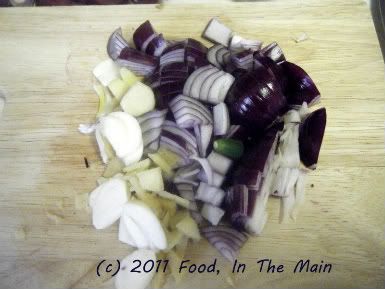
1 tbsp coriander seeds
1/2 tsp fennel seeds
1/3 cup coriander leaves
2 green chillies
1" piece ginger, chopped
2 tsp oil
1/2 tsp turmeric powder
2 cups mixed vegetables (I used green beans, potatoes, courgettes), sliced into 1" pieces
1 cup light coconut milk
Salt to taste
1 cup water
Method:
1. Toast the coriander seeds in a dry skillet till they turn aromatic and dark. Let cool.
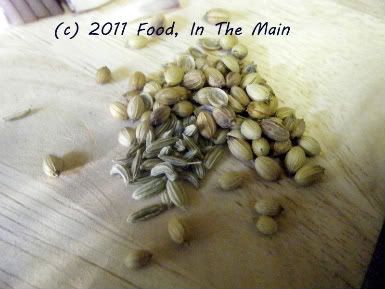
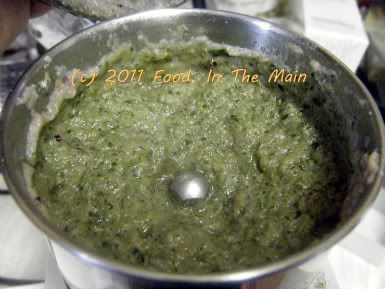
2. First grind together the green chillies, ginger, garlic, coriander seeds and fennel seeds;
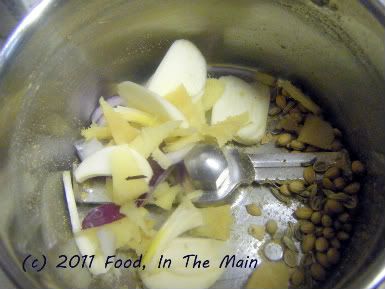
then add the coriander leaves
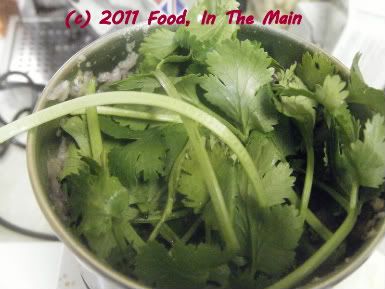
and grind to a smooth paste.
3. Heat the oil in a pan and add the ground paste and turmeric powder.
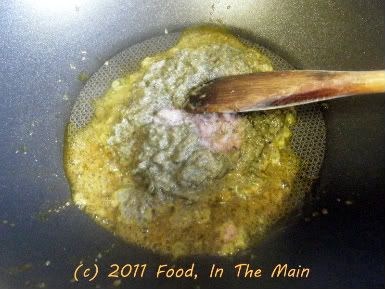
Fry the paste for a minute or so, stirring continuously. Then add the onions and let them cook for 5 minutes or so, till they start to turn soft.
4. Add the vegetables and stir-fry for 3-4 minutes, then add 1 cup water and bring the water to a gentle boil. Turn down the heat and simmer till the vegetables are nearly cooked.
5. Now pour in the coconut milk and stir, letting the curry simmer on medium-low till the vegetables are fully cooked.
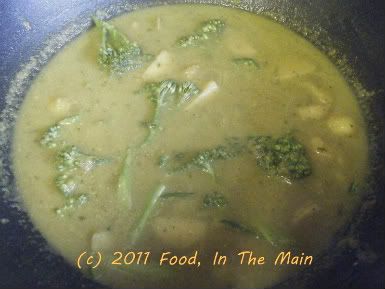
Add salt to taste and serve hot with plain white rice.
RECIPE: THAI-STYLE VEGETABLE CURRY
Ingredients:
1 medium onion
2 cloves garlic, sliced
1 tbsp coriander seeds
1/2 tsp fennel seeds
1/3 cup coriander leaves
2 green chillies
1" piece ginger, chopped
2 tsp oil
1/2 tsp turmeric powder
2 cups mixed vegetables (I used green beans, potatoes, courgettes), sliced into 1" pieces
1 cup light coconut milk
Salt to taste
1 cup water
Method:
1. Toast the coriander seeds in a dry skillet till they turn aromatic and dark. Let cool.
2. First grind together the green chillies, ginger, garlic, coriander seeds and fennel seeds, then add the coriander leaves.
3. Heat the oil in a pan and add the ground paste and turmeric powder. Fry the paste for a minute or so, stirring continuously. Then add the onions and let them cook for 5 minutes or so, till they start to turn soft.
4. Add the vegetables and stir-fry for 3-4 minutes, then add 1 cup water and bring the water to a gentle boil. Turn down the heat and simmer till the vegetables are nearly cooked.
5. Now pour in the coconut milk and stir, letting the curry simmer on medium-low till the vegetables are fully cooked. Add salt to taste and serve hot with plain white rice.
Pete had asked if I could make him a South Indian fish curry, saying that all I had to do was make a regular Southie saucy vegetable curry and add the fish fillets to his portion in the last 7 minutes of cooking, as that was enough time for the fish to cook. I didn’t have a problem with that, so I quickly looked up a generic Kerala-style fish curry recipe online.
I can’t really tell you at what point the Kerala-style morphed to a Thai-style – I’m not certain, to tell you the truth - but the aroma of the frying masala definitely brought to mind a Thai curry rather than anything Kerala, so I threw in the towel (metaphorically, not literally) and added light coconut milk to the masala, because that’s what I associate with Thai curries.
It wasn’t the wrong thing to do, certainly, because the curry was pretty good when I tasted it. (I just wish I’d added carrots for some colour.) Pete was also right about the fish – it did cook in 7 minutes, but I was worried all the while that I was going to inadvertently poison him with undercooked fish. Actually, it was only after he woke up alive the next morning that I was finally reassured that I had cooked the fish properly!
(You there, in the back – stop sniggering. If you had as little experience in cooking fish as I do, you’d be empathising with me, and we both know it!)
Recipe for: Thai-style vegetable curry

Ingredients:
1 medium onion
2 cloves garlic, sliced

1 tbsp coriander seeds
1/2 tsp fennel seeds
1/3 cup coriander leaves
2 green chillies
1" piece ginger, chopped
2 tsp oil
1/2 tsp turmeric powder
2 cups mixed vegetables (I used green beans, potatoes, courgettes), sliced into 1" pieces
1 cup light coconut milk
Salt to taste
1 cup water
Method:
1. Toast the coriander seeds in a dry skillet till they turn aromatic and dark. Let cool.

2. First grind together the green chillies, ginger, garlic, coriander seeds and fennel seeds;

then add the coriander leaves

and grind to a smooth paste.

3. Heat the oil in a pan and add the ground paste and turmeric powder.

Fry the paste for a minute or so, stirring continuously. Then add the onions and let them cook for 5 minutes or so, till they start to turn soft.
4. Add the vegetables and stir-fry for 3-4 minutes, then add 1 cup water and bring the water to a gentle boil. Turn down the heat and simmer till the vegetables are nearly cooked.
5. Now pour in the coconut milk and stir, letting the curry simmer on medium-low till the vegetables are fully cooked.

Add salt to taste and serve hot with plain white rice.
RECIPE: THAI-STYLE VEGETABLE CURRY
Ingredients:
1 medium onion
2 cloves garlic, sliced
1 tbsp coriander seeds
1/2 tsp fennel seeds
1/3 cup coriander leaves
2 green chillies
1" piece ginger, chopped
2 tsp oil
1/2 tsp turmeric powder
2 cups mixed vegetables (I used green beans, potatoes, courgettes), sliced into 1" pieces
1 cup light coconut milk
Salt to taste
1 cup water
Method:
1. Toast the coriander seeds in a dry skillet till they turn aromatic and dark. Let cool.
2. First grind together the green chillies, ginger, garlic, coriander seeds and fennel seeds, then add the coriander leaves.
3. Heat the oil in a pan and add the ground paste and turmeric powder. Fry the paste for a minute or so, stirring continuously. Then add the onions and let them cook for 5 minutes or so, till they start to turn soft.
4. Add the vegetables and stir-fry for 3-4 minutes, then add 1 cup water and bring the water to a gentle boil. Turn down the heat and simmer till the vegetables are nearly cooked.
5. Now pour in the coconut milk and stir, letting the curry simmer on medium-low till the vegetables are fully cooked. Add salt to taste and serve hot with plain white rice.
Friday, July 15, 2011
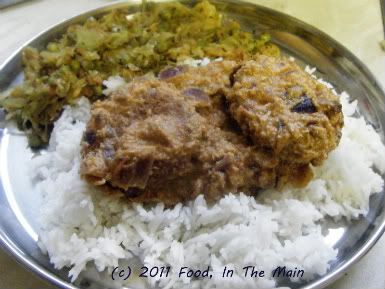
Vada-kari (lentil fritters in tomato-coconut gravy)
Serendipity isn't something that manifests itself often in my life, so the rare occasions that it does, it's very exciting. On the day after I made the baked cabbage-onion masala vadas, I saw a recipe for vada-kari (literal meaning "curry made from vadas") on Srivalli's blog. There I was, with day-old vadas to hand, and there it was, a recipe to use them - like I said, exciting!
I think this particular curry must originaly have come about as a way of using up stale, hard vadas that would not otherwise be edible to most people - the fact that I like to nibble on them is by the way. I'm not most people. Nor are, I suspect, most people me. (It works both ways, as you can see. Hehe.)
Anyway, I changed very little from the original recipe, except perhaps the quantities. Oh, and I omitted the fried gram because I didn't have any, and reduced the quantity of coconut. It was one heck of a tasty curry, and the plump vadas, juicy from soaking up the liquid from the gravy, were delicious. I had them over rice with a simple cabbage-peas dry curry. Yum-my. Thank you, Srivalli's mother, for providing the recipe for vada-kari.
Man, do I love ever my fellow-food bloggers and their wide variety of homespun recipes! Long live the Internet, I say.
Recipe for: Vada-kari (lentil fritters in tomato-coconut gravy)
Ingredients:
About 8 day-old paruppu vadas (baked or fried)
1 medium tomato, chopped
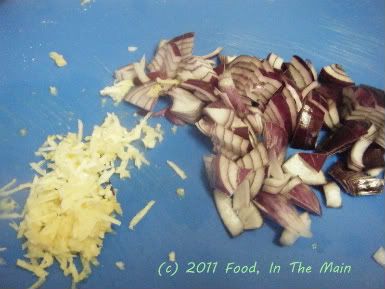
1 medium onion, chopped fine
1 tsp ginger-garlic, grated
3 tsp oil
Salt to taste
Coriander leaves for garnish
For the ground masala:
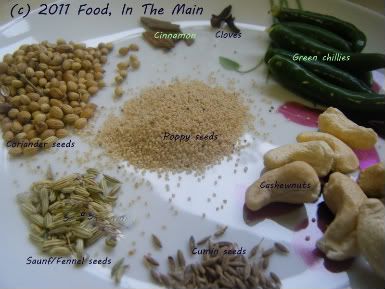
1/2 tsp fennel/saunf
1 tsp coriander seeds
1 tsp poppy seeds
1/4 tsp cumin seeds
1/2" piece cinnamon stick
2 cloves
3-5 fresh green chillies
5 cashewnuts
5-6 coconut pieces, each about 2cm long (or 2 tbsp grated coconut)
Method:
1. Heat one tsp of oil and fry all the ingredients for the ground masala till aromatic.
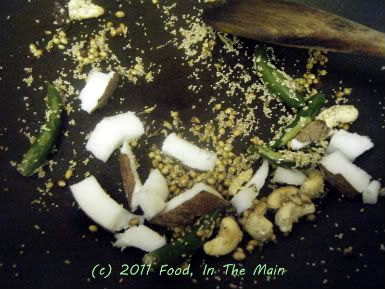
Add the coconut pieces/grated coconut and stir-fry for another two minutes, then remove to a plate and set aside to cool.
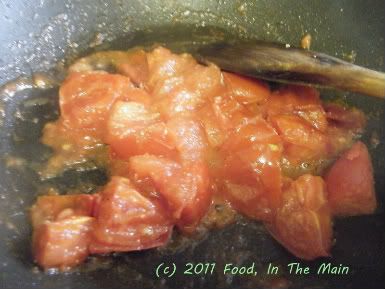
2. Heat the other tsp of oil and fry the tomatoes till they are mushy. Set aside to cool.
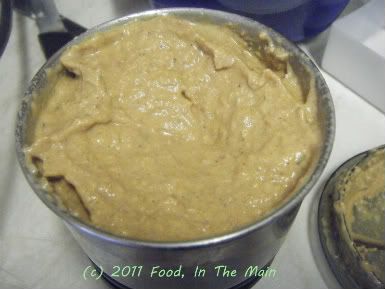
3. Once they are all cool, grind the fried ingredients and the tomatoes to a smooth paste using a little warm water if necessary. Reserve.
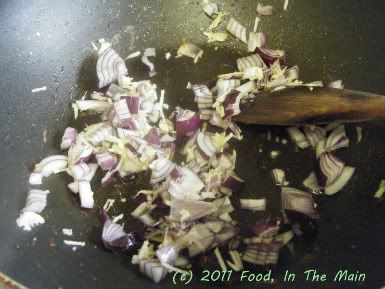
4. Now heat the remaining oil and add the ginger-garlic paste, stirring for 30 seconds or so.
5. Then add the onions and fry till they become soft and turn pale brown.
6. Next, add the ground masala paste and stir it in,
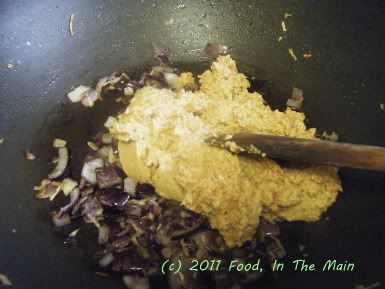
adding a cupful of water.
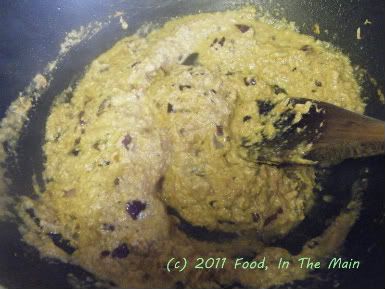
You can add a little more water at this stage, depending on how many vadas you have.
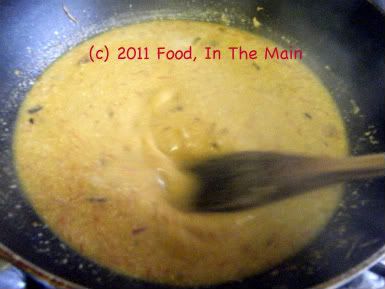
5. Bring to a gentle boil over medium heat and simmer the gravy for 5 minutes or so, till it comes together and starts to thicken.
6. Drop the vadas into the gravy now and simmer the curry for 2-3 minutes, spooning the gravy over the vadas occasionally, if necessary.
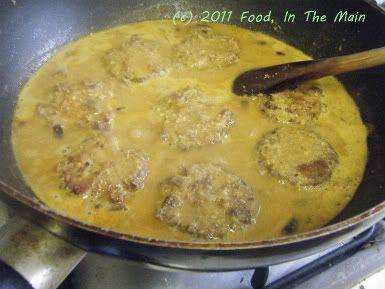
Garnish with coriander leaves and serve hot with idlis or dosas, or over rice if you like. Add a dry vegetable curry for a complete meal.
Note: If the curry sits for a while, the vadas will absorb the moisture and make the curry very thick.
RECIPE: VADA-KARI (LENTIL FRITTERS IN TOMATO-COCONUT GRAVY)
Ingredients:
About 8 day-old paruppu vadas (baked or fried)
1 medium tomato, chopped
1 medium onion, chopped fine
1 tsp ginger-garlic paste
3 tsp oil
Salt to taste
Coriander leaves for garnish
For the ground masala:
1/2 tsp fennel/saunf
1 tsp coriander seeds
1 tsp poppy seeds
1/4 tsp cumin seeds
1/2" piece cinnamon stick
2 cloves
3-5 fresh green chillies
5 cashewnuts
5-6 coconut pieces, each about 2cm long (or 2 tbsp grated coconut)
Method:
1. Heat one tsp of oil and fry all the ingredients for the ground masala till aromatic. Add the coconut pieces/grated coconut and stir-fry for another two minutes, then remove to a plate and set aside to cool.
2. Heat the other tsp of oil and fry the tomatoes till they are mushy. Set aside to cool.
3. Once they are all cool, grind the fried ingredients and the tomatoes to a smooth paste using a little warm water if necessary. Reserve.
4. Now heat the remaining oil and add the ginger-garlic paste, stirring for 30 seconds or so.
5. Then add the onions and fry till they become soft and turn pale brown.
6. Next, add the ground masala paste and stir it in, adding a cupful of water. You can add a little more water at this stage, depending on how many vadas you have.
5. Bring to a gentle boil over medium heat and simmer the gravy for 5 minutes or so, till it comes together and starts to thicken.
6. Drop the vadas into the gravy now and simmer the curry for 2-3 minutes, spooning the gravy over the vadas occasionally, if necessary.
Garnish with coriander leaves and serve hot with idlis or dosas, or over rice if you like. Add a dry vegetable curry for a complete meal.
Note: If the curry sits for a while, the vadas will absorb the moisture and make the curry very thick.
I think this particular curry must originaly have come about as a way of using up stale, hard vadas that would not otherwise be edible to most people - the fact that I like to nibble on them is by the way. I'm not most people. Nor are, I suspect, most people me. (It works both ways, as you can see. Hehe.)
Anyway, I changed very little from the original recipe, except perhaps the quantities. Oh, and I omitted the fried gram because I didn't have any, and reduced the quantity of coconut. It was one heck of a tasty curry, and the plump vadas, juicy from soaking up the liquid from the gravy, were delicious. I had them over rice with a simple cabbage-peas dry curry. Yum-my. Thank you, Srivalli's mother, for providing the recipe for vada-kari.
Man, do I love ever my fellow-food bloggers and their wide variety of homespun recipes! Long live the Internet, I say.
Recipe for: Vada-kari (lentil fritters in tomato-coconut gravy)

Ingredients:
About 8 day-old paruppu vadas (baked or fried)
1 medium tomato, chopped
1 medium onion, chopped fine
1 tsp ginger-garlic, grated

3 tsp oil
Salt to taste
Coriander leaves for garnish
For the ground masala:

1/2 tsp fennel/saunf
1 tsp coriander seeds
1 tsp poppy seeds
1/4 tsp cumin seeds
1/2" piece cinnamon stick
2 cloves
3-5 fresh green chillies
5 cashewnuts
5-6 coconut pieces, each about 2cm long (or 2 tbsp grated coconut)
Method:
1. Heat one tsp of oil and fry all the ingredients for the ground masala till aromatic.

Add the coconut pieces/grated coconut and stir-fry for another two minutes, then remove to a plate and set aside to cool.
2. Heat the other tsp of oil and fry the tomatoes till they are mushy. Set aside to cool.

3. Once they are all cool, grind the fried ingredients and the tomatoes to a smooth paste using a little warm water if necessary. Reserve.

4. Now heat the remaining oil and add the ginger-garlic paste, stirring for 30 seconds or so.
5. Then add the onions and fry till they become soft and turn pale brown.

6. Next, add the ground masala paste and stir it in,

adding a cupful of water.

You can add a little more water at this stage, depending on how many vadas you have.

5. Bring to a gentle boil over medium heat and simmer the gravy for 5 minutes or so, till it comes together and starts to thicken.
6. Drop the vadas into the gravy now and simmer the curry for 2-3 minutes, spooning the gravy over the vadas occasionally, if necessary.

Garnish with coriander leaves and serve hot with idlis or dosas, or over rice if you like. Add a dry vegetable curry for a complete meal.
Note: If the curry sits for a while, the vadas will absorb the moisture and make the curry very thick.
RECIPE: VADA-KARI (LENTIL FRITTERS IN TOMATO-COCONUT GRAVY)
Ingredients:
About 8 day-old paruppu vadas (baked or fried)
1 medium tomato, chopped
1 medium onion, chopped fine
1 tsp ginger-garlic paste
3 tsp oil
Salt to taste
Coriander leaves for garnish
For the ground masala:
1/2 tsp fennel/saunf
1 tsp coriander seeds
1 tsp poppy seeds
1/4 tsp cumin seeds
1/2" piece cinnamon stick
2 cloves
3-5 fresh green chillies
5 cashewnuts
5-6 coconut pieces, each about 2cm long (or 2 tbsp grated coconut)
Method:
1. Heat one tsp of oil and fry all the ingredients for the ground masala till aromatic. Add the coconut pieces/grated coconut and stir-fry for another two minutes, then remove to a plate and set aside to cool.
2. Heat the other tsp of oil and fry the tomatoes till they are mushy. Set aside to cool.
3. Once they are all cool, grind the fried ingredients and the tomatoes to a smooth paste using a little warm water if necessary. Reserve.
4. Now heat the remaining oil and add the ginger-garlic paste, stirring for 30 seconds or so.
5. Then add the onions and fry till they become soft and turn pale brown.
6. Next, add the ground masala paste and stir it in, adding a cupful of water. You can add a little more water at this stage, depending on how many vadas you have.
5. Bring to a gentle boil over medium heat and simmer the gravy for 5 minutes or so, till it comes together and starts to thicken.
6. Drop the vadas into the gravy now and simmer the curry for 2-3 minutes, spooning the gravy over the vadas occasionally, if necessary.
Garnish with coriander leaves and serve hot with idlis or dosas, or over rice if you like. Add a dry vegetable curry for a complete meal.
Note: If the curry sits for a while, the vadas will absorb the moisture and make the curry very thick.
Labels:
aamai vadai,
cashewnuts,
cinnamon stick,
cloves,
coconut,
cumin seeds,
fennel,
garlic,
Ginger,
green chillies,
onions,
paruppu vada,
poppy seeds,
saunf,
tomatoes
Sunday, October 26, 2008
Poached egg curry
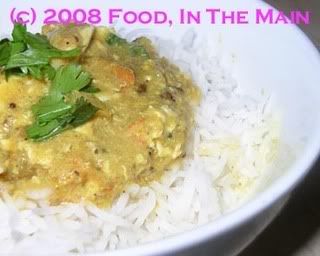
I’m no photographer, so even the most beautiful looking food becomes a little less beautiful seen through my camera lens – oh all right, a LOT less beautiful. So when it comes to food that isn’t straightforward, fuss-free food porn fodder, I really don’t stand a chance at making it look pretty. All I can promise is that it will taste great – like this poached egg curry I made. Original recipe here
I was in a rush and didn’t have the time to let the gravy boil down to the sort of thicker consistency I wanted, so I quickly whisked a beaten egg into the gravy to thicken it. Well, that worked fine, but what I hadn’t foreseen was that the beaten egg would make the gravy look like… well, let’s just say not particularly aesthetic.
Food porn to the eyes it wasn't, sisters (and the odd occasional brother)… but it was food porn for the palate, that’s fer sure. I probably wouldn’t serve this curry to guests as such, but it’ll do just fine for family and good friends! (That’s because they’ll have to love you to want to try this - ok, slight exaggeration):o) seriously, though, it’s good comfort food.
Recipe for: Poached egg curry
Ingredients:
4 eggs
2 onion, chopped
2 tomatoes, chopped
1/4 cup light coconut milk
1/4 tsp turmeric powder
1/2 tsp garam masala
1/2 chilli powder
3/4 tsp black peppercorns
1 tsp coriander seeds
1/2 tsp white poppy seeds (khus-khus)
1 tsp fennel seeds (saunf)
1 tsp mustard seeds
1/2 tsp urad dal
A few curry leaves
1 tbsp chopped coriander
2 tsp oil
1 cup water (or as required)
Salt to taste
Method:
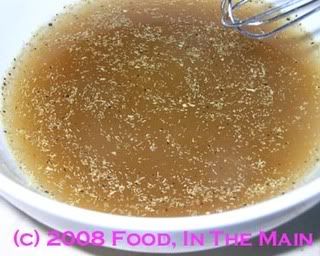
1. Grind the coriander seeds, poppy seeds (khus-khus), fennel and black pepper to a fine powder.

Mix with 1 cup water and set aside.
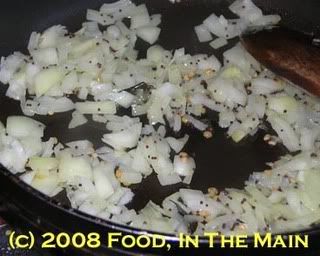
2. Heat the oil in a pan, add mustard seeds and urad dal, cover and let the mustard splutter. Then add the curry leaves and chopped onions. Fry till the onion becomes soft and light brown.
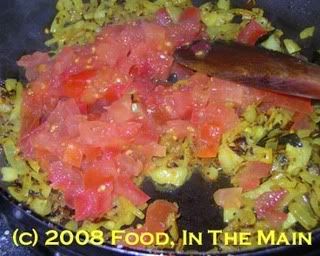
3. Now add the chopped tomatoes and fry till it becomes soft.
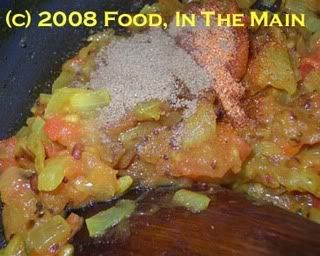
4. Add chilli powder, garam masala and turmeric powder and fry for 30 seconds, stirring.
5. Mix the coconut milk with the ground-masala water from Step 1.
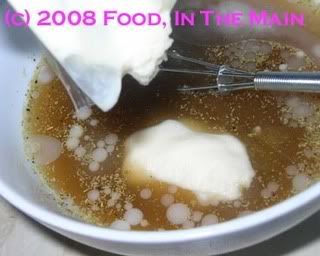
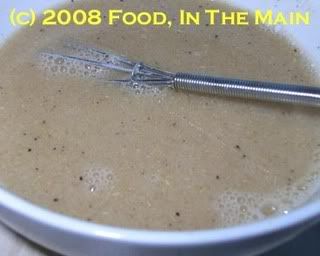
Add salt to taste and mix well.
6. Pour this in the pan,
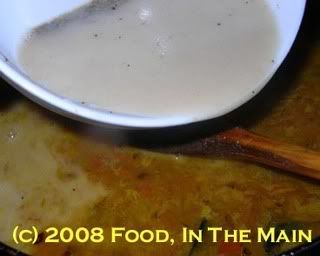
let it come to a boil,
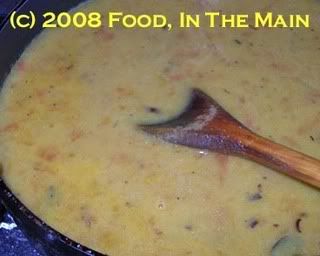
then break the eggs gently, one by one, into the gravy.
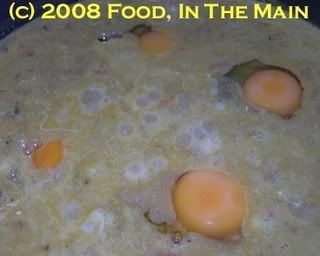
7. Do not stir the gravy after this, but let it come to a gentle simmer and keep it on medium heat for 5-6 minutes, or till the eggs are cooked.
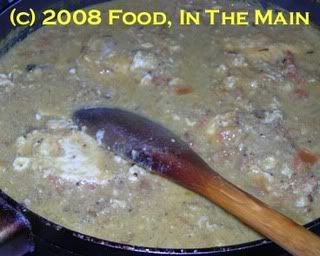
8. Garnish with coriander leaves and serve hot with plain rice or pulao.
I was in a rush and didn’t have the time to let the gravy boil down to the sort of thicker consistency I wanted, so I quickly whisked a beaten egg into the gravy to thicken it. Well, that worked fine, but what I hadn’t foreseen was that the beaten egg would make the gravy look like… well, let’s just say not particularly aesthetic.
Food porn to the eyes it wasn't, sisters (and the odd occasional brother)… but it was food porn for the palate, that’s fer sure. I probably wouldn’t serve this curry to guests as such, but it’ll do just fine for family and good friends! (That’s because they’ll have to love you to want to try this - ok, slight exaggeration):o) seriously, though, it’s good comfort food.
Recipe for: Poached egg curry

Ingredients:
4 eggs
2 onion, chopped
2 tomatoes, chopped
1/4 cup light coconut milk
1/4 tsp turmeric powder
1/2 tsp garam masala
1/2 chilli powder
3/4 tsp black peppercorns
1 tsp coriander seeds
1/2 tsp white poppy seeds (khus-khus)
1 tsp fennel seeds (saunf)
1 tsp mustard seeds
1/2 tsp urad dal
A few curry leaves
1 tbsp chopped coriander
2 tsp oil
1 cup water (or as required)
Salt to taste
Method:
1. Grind the coriander seeds, poppy seeds (khus-khus), fennel and black pepper to a fine powder.

Mix with 1 cup water and set aside.

2. Heat the oil in a pan, add mustard seeds and urad dal, cover and let the mustard splutter. Then add the curry leaves and chopped onions. Fry till the onion becomes soft and light brown.

3. Now add the chopped tomatoes and fry till it becomes soft.

4. Add chilli powder, garam masala and turmeric powder and fry for 30 seconds, stirring.

5. Mix the coconut milk with the ground-masala water from Step 1.


Add salt to taste and mix well.
6. Pour this in the pan,

let it come to a boil,

then break the eggs gently, one by one, into the gravy.

7. Do not stir the gravy after this, but let it come to a gentle simmer and keep it on medium heat for 5-6 minutes, or till the eggs are cooked.

8. Garnish with coriander leaves and serve hot with plain rice or pulao.
Monday, September 24, 2007
Kiwi Gee's Recipes From Down Under - Peanut-corn vadas
Deficient in iron? Love peanuts? Love sweetcorn? If you answer "yes" to any or all of these questions, then this recipe from Kiwi Gee is for you. She says: "Got this recipe from some cookbook in my previous life when I actually had time to pore over such things. Just as well that I remember how to make it, coz I have no idea where that cookbook is now…".
Well, that's the advantage of having a blog - now this recipe need never be forgotten! These are the tastiest vadas I've ever had and it was difficult to stop at just one or two. Good thing the kids were home with one of their friends who's adventurous (food-wise) for his age, with a typical teenager's appetite! Iron-rich though these vadas are, thanks to the peanuts, they are not for the extreme diet-conscious. But once in a while, especially if it's a rainy cold day, they're awesome. Especially when had hot.
Recipe for: KiwiGee's Peanut corn vadas

Ingredients:
Raw peanuts – 200 gms (about a cup)
Corn kernels (fresh or tinned or frozen) – 200 gms
Fresh green chillies – 2-4, depending on chilli tolerance
Corn flour – 2 to 4 tbsp
Rice flour - 1/3 cup (my addition)
Onion – 1 large, chopped
Coriander leaves – a handful
Curry leaves – a handful
Fennel seeds – 1 tsp
Cumin seeds – 1 tsp
Salt – as per taste
Oil to fry
Method:
1. Soak peanuts in water for half an hour. If corn is frozen, make sure it is thawed completely.
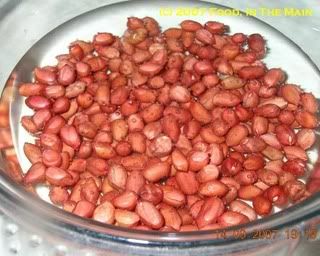
2. Then grind corn and peanuts coarsely along with the green chillies.
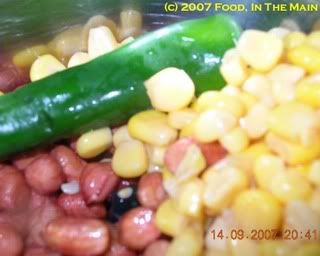
3. In the last run of the grinding, add the saunf (fennel) and jeera (cumin) seeds, onion, coriander and curry leaves, as well as the salt.
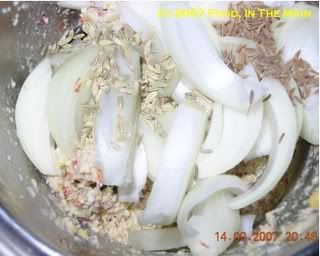
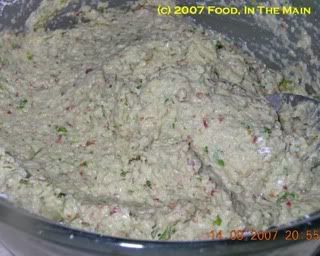
4. Grind the mixture using no or very little water. It has to be roughly the consistency that can be patted into a flat, round shape that won’t come apart when you fry it – this is a bit of a hit-and-miss, but practice makes perfect.
5. To the ground mixture, add the corn flour and rice flour and mix well (add more flour if necessary, and adjust seasoning). If you have added too much water to your mixture while grinding, then you may need to add some extra flour to thicken the mixture – don’t worry, you can’t go wrong with the flour.
6. Take a small ball of the mixture (size of a plum) and flatten it on an oiled surface (your palm or a plate or whatever) to make a flat round disc of max 1 cm depth.
7. Meanwhile, heat the oil. When the oil is at the right temperature, drop the discs in slowly one by one. Fry till then are a dark golden brown, then drain - and then the best bit – eat hot. Note that because of the peanuts, the vada will be much darker than the normal vada.
Well, that's the advantage of having a blog - now this recipe need never be forgotten! These are the tastiest vadas I've ever had and it was difficult to stop at just one or two. Good thing the kids were home with one of their friends who's adventurous (food-wise) for his age, with a typical teenager's appetite! Iron-rich though these vadas are, thanks to the peanuts, they are not for the extreme diet-conscious. But once in a while, especially if it's a rainy cold day, they're awesome. Especially when had hot.
Recipe for: KiwiGee's Peanut corn vadas

Ingredients:
Raw peanuts – 200 gms (about a cup)
Corn kernels (fresh or tinned or frozen) – 200 gms
Fresh green chillies – 2-4, depending on chilli tolerance
Corn flour – 2 to 4 tbsp
Rice flour - 1/3 cup (my addition)
Onion – 1 large, chopped
Coriander leaves – a handful
Curry leaves – a handful
Fennel seeds – 1 tsp
Cumin seeds – 1 tsp
Salt – as per taste
Oil to fry
Method:
1. Soak peanuts in water for half an hour. If corn is frozen, make sure it is thawed completely.

2. Then grind corn and peanuts coarsely along with the green chillies.

3. In the last run of the grinding, add the saunf (fennel) and jeera (cumin) seeds, onion, coriander and curry leaves, as well as the salt.

4. Grind the mixture using no or very little water. It has to be roughly the consistency that can be patted into a flat, round shape that won’t come apart when you fry it – this is a bit of a hit-and-miss, but practice makes perfect.
5. To the ground mixture, add the corn flour and rice flour and mix well (add more flour if necessary, and adjust seasoning). If you have added too much water to your mixture while grinding, then you may need to add some extra flour to thicken the mixture – don’t worry, you can’t go wrong with the flour.

6. Take a small ball of the mixture (size of a plum) and flatten it on an oiled surface (your palm or a plate or whatever) to make a flat round disc of max 1 cm depth.
7. Meanwhile, heat the oil. When the oil is at the right temperature, drop the discs in slowly one by one. Fry till then are a dark golden brown, then drain - and then the best bit – eat hot. Note that because of the peanuts, the vada will be much darker than the normal vada.
Subscribe to:
Posts (Atom)

