skip to main |
skip to sidebar
I may have mentioned once or twice or a few dozen times that, or the first 30 or so years of my life, I hated parakkai (also known as pavakkai, karela, bittermelon or bittergourd - or, if you're my husband, as "green rats"). If you're a karela lover, today's recipe will be right up your street. If you're not a karela lover, this recipe will still be quite a way up your street because you will not taste the bitterness from the vegetable at all.
If you know your karela at all, you would think it's hard to mask the bitterness, but because everything is roasted and there are lots of other ingredients, the resultant powder has no discernible bitterness. At least, none that I could taste. And I didn't even peel the skin or discard the seeds (although if they're red and hard, DO scoop them out and discard) or salt the cut bittergourd to reduce the bitterness. Because I'm lazy and that's the way I roll, baby.
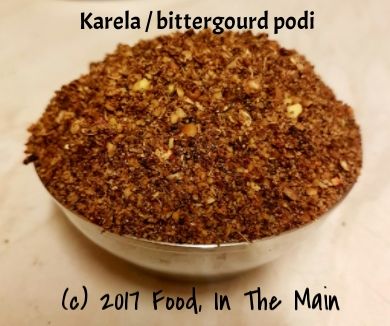
I ate this mixed with rice and ghee, I ate it sprinkled over roasted vegetables, I ate it as a side with kootu and roti, I ate it mixed with yogurt both as a dip and as a salad dressing - it's my most favourite thing at the moment, and it seems to work with everything.
Best of all, since the karela is oven roasted with only a mimimal amount of oil, it's a healthy podi. There are versions where the vegetable is deep fried until crisp, but - while I love deep fried foods with a deep and abiding love - I see no need to load this podi with unnecessary calories.
Recipe for: Bittergourd / pavakkai / karela podi
Ingredients:
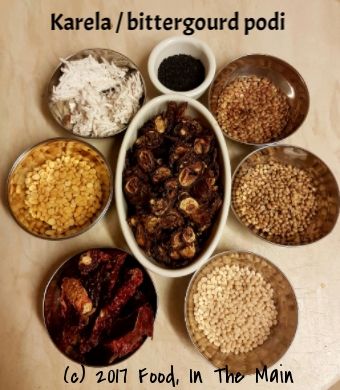
3-4 medium size tender karela
10 dried red Kashmiri chillies
2 tbsp coriander seeds
2 tbsp whole urad dal
2 tbsp chana dal
2 tbsp kollu or horsegram
2 tbsp fresh or frozen grated unsweetened coconut
1 tbsp black sesame seeds (regular will probably also do)
Handful of curry leaves (fresh or frozen)
2-3 cloves of garlic, halved
1 small gooseberry sized ball of tamarind (seeds and strings removed if any)
1/2 tsp asafoetida powder
1/2 tsp + 1 tbsp oil
Salt to taste (or about 1.5 tsp)
Method:
1. Thinly slice the karela, mix with 1 tbsp oil and roast in a 180C/350F oven until the slices are brown with very little green showing. This should take about 30 minutes, but be sure to stir them around every 10 minutes so that they crisp evenly. Let them cool completely.
2. Heat the oil in a wok and add the red chillies. Roast on a medium-low flame, stirring often until the chillies turn a darker shade, about 5 minutes. Be careful not to burn them or you'll regret the fumes! Remove to a plate and cool.
3. Add the coriander seeds, the sesame seeds and all the dals. Dry roast them, stirring often, until they are toasted and fragrant, and turn a darker shade. Again, don't burn them or the podi will taste bitter. Add to the roasted chillies and let cool.
4. Finally, add the coconut, curry leaves, garlic and tamarind and toast in the pan, stirring frequently, until the coconut has turned golden brown and has no more moisture in it - yet again, be careful not to burn it.
5. Once all the ingredients are cool, grind them into a slightly coarse powder. Add salt and asafoetida powder and mix well. Store in an airtight container.
This variation on the classic arachuvitta vengaya sambar, that I posted way back when, came about thanks indirectly to my cousin Chitra, who is not only a fun person but also a really good cook. She’s in Seattle now on holiday and I deeply regret that I did not get the opportunity to invite myself over for a meal at her daughter’s place while I was there – mainly because I had to leave pretty much as she arrived, and there was no time.
I still vividly remember the chole she had made when we were in Madras – this is going back well over 10 years – which was hands down the best I’ve ever had, EVER. I haven’t had the opportunity of pigging out on her food in years now, and she can only have got better and better.
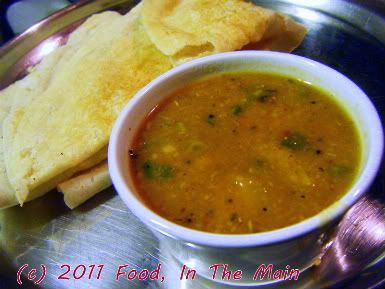
Anyway, the other day when I was Skyping with my mother, she mentioned Chitra's variation on arachuvitta sambar, so of course I had to try it out rightaway. It came out absolutely spectacular, and I kid you not, I was more than happy to eat it morning noon and night – with plain rice, with curd rice, with dosas, with idlis, with Greek yogurt... it was the star turn every single time. Needless to say, the sambar didn’t even last three days – and I was the only one eating it! If there was anybody else to share it with, I’d have had to make TWO bucketsful!
Note: If you can get the little Indian sambar onions or shallots, use those. I think they’re far more flavourful than regular onions – especially if you’re going to the trouble of making this arachuvitta sambar.
And for my fellow Tamils... this literally IS "arachuvitta vengaya sambar" :-)
Recipe for: Arachuvitta vengaya sambar - Version 2
 Ingredients:
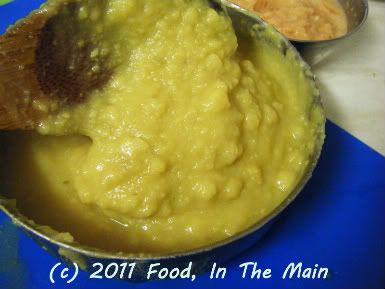
1 cup tuvar/toor dal/thuvaram paruppu, to make 2 cups well cooked and mashed dal
 2 tsp tamarind paste dissolved in 5-6 cups water OR lime-sized ball of tamarind, pulp extracted to make 5-6 cups tamarind water
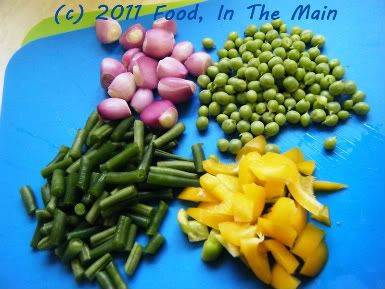 1/4 cup green beans sliced
1/4 cup fresh peas
10-12 sambar onions or 1 medium onion sliced
1/4 cup capsicum, cut in 1/2" pieces
Ground masala 1
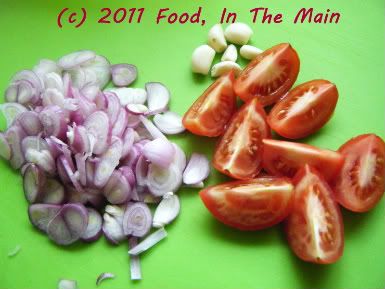 1 tsp oil
5-6 cloves garlic
10-15 sambar onions (preferably), to make 1/4 cup sliced
2 small tomatoes, cut into pieces
Ground masala 2
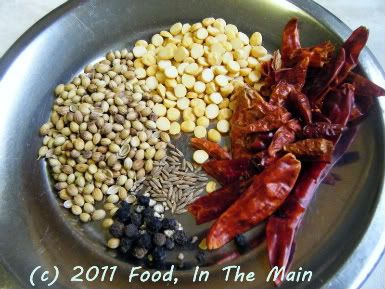 1 tsp oil
2 tsp coriander seeds
2 tsp kadala paruppu/chana dal
5-6 dried red chillies (or to taste)
1/2 tsp cumin seeds
1/2 tsp black peppercorns
3-4 tbsp fresh coconut (pieces or grated)
For tempering
1 tsp oil
1 htsp mustard seeds
a few fresh or frozen curry leaves
1/2 tsp turmeric powder
1/4 tsp asafoetida powder
3-4 tbsp coriander leaves chopped, for garnish
Method:
1. Heat 1 tsp oil and add the mustard seeds, curry leaves, turmeric powder and asafoetida powder.
1 tsp oil
2 tsp coriander seeds
2 tsp kadala paruppu/chana dal
5-6 dried red chillies (or to taste)
1/2 tsp cumin seeds
1/2 tsp black peppercorns
3-4 tbsp fresh coconut (pieces or grated)
For tempering
1 tsp oil
1 htsp mustard seeds
a few fresh or frozen curry leaves
1/2 tsp turmeric powder
1/4 tsp asafoetida powder
3-4 tbsp coriander leaves chopped, for garnish
Method:
1. Heat 1 tsp oil and add the mustard seeds, curry leaves, turmeric powder and asafoetida powder.
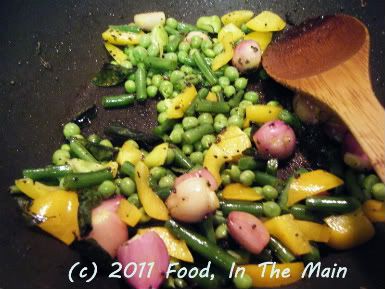
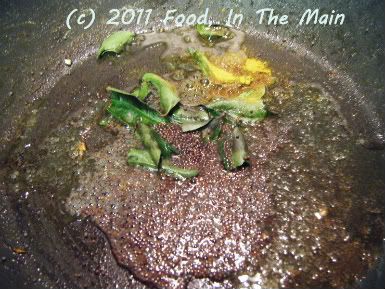 Let the mustard seeds pop, then add the green beans, peas, sambar onions and capsicum, sauteing for 3-4 minutes.
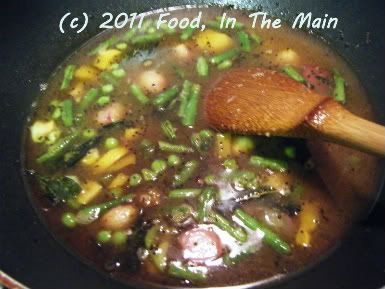
 Pour in the tamarind water and bring to a boil, then turn down the heat to a gentle simmer till the vegetables are cooked - 10 minutes or so.
 2. While the vegetables are cooking, make the tempering. Heat 1 tsp oil in a small pan and add the garlic, sliced onions and tomatoes.
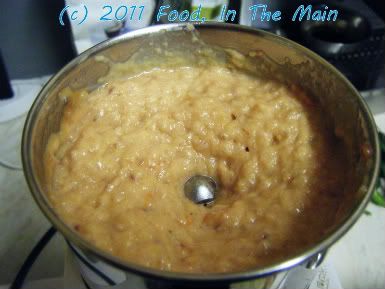
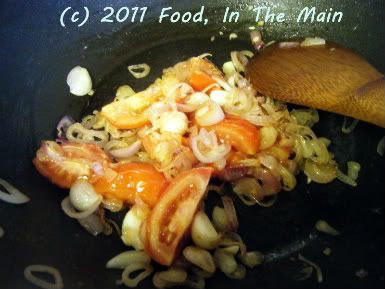 Cook till the onions are soft and the tomatoes are breaking down. Remove from the heat. Once they are cool, grind them to a smooth paste. Reserve.
 3. To make Ground Masala 2, heat a tsp of oil and add the ingredients, stir frying till the red chillies turn a darker shade and the dal and coriander seeds are aromatic and turn colour. If you are using pieces of coconut rather than grated, fry them for a little bit longer, but make sure not to burn any of the ingredients.
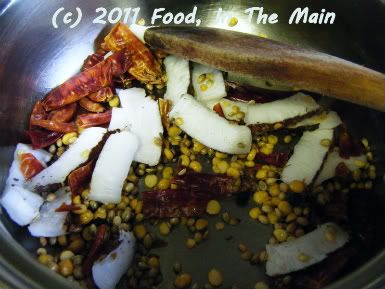 Remove from the heat and let cool, then grind to a smooth paste using a few tbsp of warm water as required. Reserve.
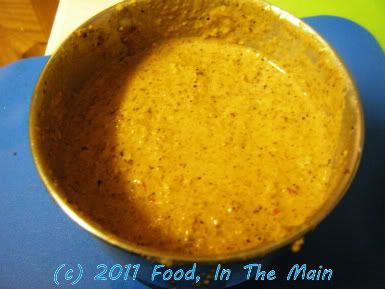 4. Once the vegetables are cooked, stir the tomato-onion paste into the tamarind water and let it boil for 2 minutes.
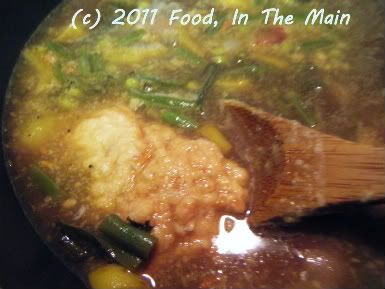 5. Now stir in the mashed cooked dal, making sure there are no lumps.
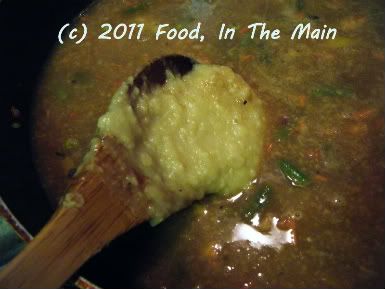 6. After a couple more minutes, add the ground coconut masala
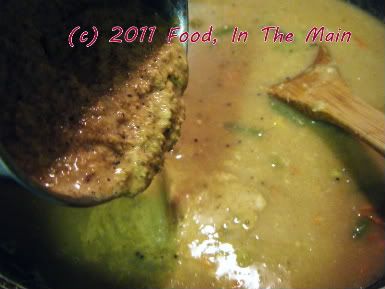 and salt to taste, then bring the sambar back to a gentle simmer. Let it cook for 4-5 minutes longer, till the contents are well homogenised.
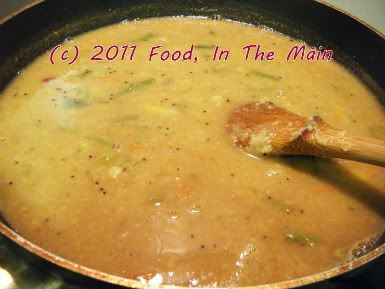 7. Garnish with the chopped coriander and serve hot with rice and any dry vegetable curry, or with dosas and idlis for an extra-special meal.
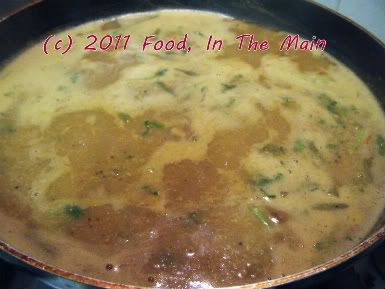 RECIPE: ARACHUVITTA VENGAYA SAMBAR - VERSION 2
Ingredients:
1 cup tuvar/toor dal/thuvaram paruppu, to make 2 cups well cooked and mashed dal
2 tsp tamarind paste dissolved in 5-6 cups water OR lime-sized ball of tamarind, pulp extracted to make 5-6 cups tamarind water
1/4 cup green beans sliced into 1" lengths
1/4 cup fresh peas
10-12 sambar onions or 1 medium onion sliced
1/4 cup capsicum, cut in 1/2" pieces
Ground masala 1
1 tsp oil
5-6 cloves garlic
10-15 sambar onions (preferably), to make 1/4 cup sliced
2 small tomatoes, cut into pieces
Ground masala 2
1 tsp oil
2 tsp coriander seeds
2 tsp kadala paruppu/chana dal
5-6 dried red chillies (or to taste)
1/2 tsp cumin seeds
1/2 tsp black peppercorns
3-4 tbsp fresh coconut (pieces or grated)
For tempering
1 tsp oil
1 htsp mustard seeds
a few fresh or frozen curry leaves
1/2 tsp turmeric powder
1/4 tsp asafoetida powder
3-4 tbsp coriander leaves chopped, for garnish
Method:
1. Heat 1 tsp oil and add the mustard seeds, curry leaves, turmeric powder and asafoetida powder. Let the mustard seeds pop, then add the green beans, peas, sambar onions and capsicum, sauteing for 3-4 minutes. Pour in the tamarind water and bring to a boil, then turn down the heat to a gentle simmer till the vegetables are cooked - 10 minutes or so.
2. While the vegetables are cooking, make the tempering. Heat 1 tsp oil in a small pan and add the garlic, sliced onions and tomatoes. Cook till the onions are soft and the tomatoes are breaking down. Remove from the heat. Once they are cool, grind them to a smooth paste. Reserve.
3. To make Ground Masala 2, heat a tsp of oil and add the ingredients, stir frying till the red chillies turn a darker shade and the dal and coriander seeds are aromatic and turn colour. If you are using pieces of coconut rather than grated, fry them for a little bit longer, but make sure not to burn any of the ingredients. Remove from the heat and let cool, then grind to a smooth paste using a few tbsp of warm water as required. Reserve.
4. Once the vegetables are cooked, stir the tomato-onion paste into the tamarind water and let it boil for 2 minutes.
5. Now stir in the mashed cooked dal, making sure there are no lumps.
6. After a couple more minutes, add the ground coconut masala and salt to taste, then bring the sambar back to a gentle simmer. Let it cook for 4-5 minutes longer, till the contents are well homogenised.
7. Garnish with the chopped coriander and serve hot with rice and any dry vegetable curry, or with dosas and idlis for an extra-special meal.
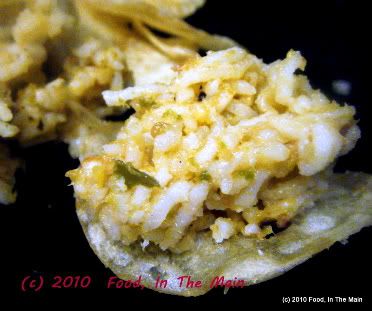
This is the last post for 2010. I would like to wish everybody - regular commenters, lurkers, casual browsers and the odd passers-by - a wonderful, exciting, fulfilling but above all else, a HAPPY new year 2011! I could have seen the old year out on my blog with something sweet, but I think I'll save that for the new year. So the year 2010 on my blog ends with a simple thogayal that uses a rather hated vegetable - brussels sprouts - to make a dish that is entirely suited to Indian taste-buds. I used baby brussels sprouts (couldn't resist buying them, they looked so cute) but regular sized ones will work just as well in this recipe.
Recipe for: Tomato-brussels sprouts thogayal
 Ingredients:
1 cup brussels sprouts, quartered
3 medium plum tomatoes, quartered
4 fresh green chillies, chopped (or to taste)
4 dried red chillies (or to taste)
1 tsp cumin seeds
2 tsp urad dal
1/4 tsp asafoetida powder
Large marble-sized piece of tamarind fruit (or 3/4 tsp tamarind paste)
Salt to taste
4 tsp oil
Method:
1. Heat 2 tsp oil in a pan and add the asafoetida powder, cumin seeds and green chillies. Fry for 45 seconds, then add the tomatoes and cook on medium heat till the tomatoes are cooked.
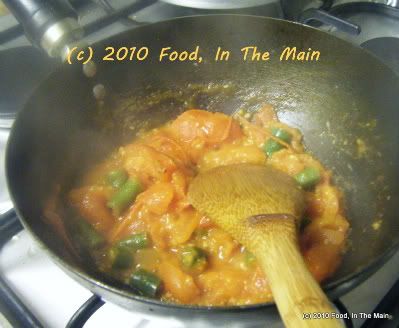 Remove from heat and reserve.
2. Heat the remaining oil in another pan and fry the dry red chillies and urad dal for 30 seconds,
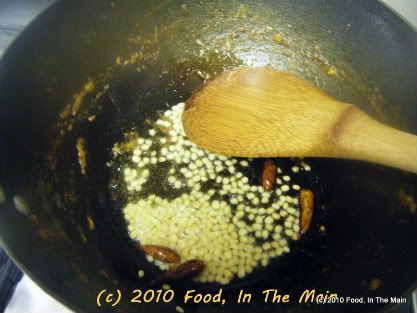 then add the brussels sprouts and stir well.
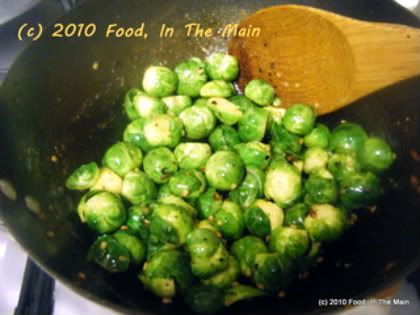 3. Add 3-4 tbsp water, cover the pan and let the sprouts cook till done on low heat, about 8-10 minutes.
4. Grind the cooled tomatoes with the tamarind to a smooth paste, then add the sprouts and grind to a fairly coarse paste. Add salt to taste and mix well.
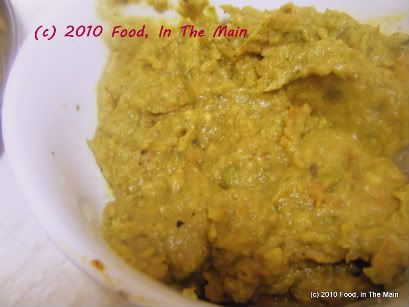 Serve as a side with idlis, dosa, chapaties, etc. Also good mixed with plain
cooked rice and ghee.
RECIPE: TOMATO-BRUSSELS SPROUTS THOGAYAL
Ingredients:
1 cup brussels sprouts, quartered
3-4 medium tomatoes, quartered
4 fresh green chillies, chopped (or to taste)
4 dried red chillies (or to taste)
1 tsp cumin seeds
2 tsp urad dal
1/4 tsp asafoetida powder
Large marble-sized piece of tamarind fruit (or 3/4 tsp tamarind paste)
Salt to taste
4 tsp oil
Method:
1. Heat 2 tsp oil in a pan and add the asafoetida powder, cumin seeds and green chillies. Fry for 45 seconds, then add the tomatoes and cook on medium heat till the tomatoes are cooked. Remove from heat and reserve.
2. Heat the remaining oil in another pan and fry the dry red chillies for 30 seconds, then add the brussels sprouts and stir well.
3. Add 3-4 tbsp water, cover the pan and let the sprouts cook till done on low heat, about 8-10 minutes.
4. Grind the cooled tomatoes with the tamarind to a smooth paste, then add the sprouts and grind to a fairly coarse paste. Add salt to taste and mix well. Serve as a side with idlis, dosa, chapaties, etc. Also good mixed with plain cooked rice and ghee.
There's something I wanted to say before I began this post... I wonder what it was.... hmmm. Oh yeah. This recipe marks my 401th post. I can't help wondering how long it's going to take me to reach the 500 mark. When I see bloggers (like Raji at Talimpu) post one new recipe literally every day of the week (weekends not included), week after week, I cannot but feel genuine amazement and respect. I can bet that most of these bloggers have far, far busier lives than I do, with kids to look after and all... and yet I'm the one who is the least prolific. My problem is that I'd rather read than do anything else when I have the time - so I keep falling back on familiar recipes that don't take any extra time or effort. I've really got to change that procrastinatory attitude as well... I think I'll wait till the New Year for that, though. Yeah I know, pathetic. Joke and attitude both. However, I yam what I tuber, as Popeye would say... not. So, today's recipe is simple. Simple simple simple. In other words, simple. And, if you can reduce the oil-content to nil, it can quite literally be guilt-free (rather than almost guilt-free as it is now). The recipe is for cabbage thogayal/chutney, without using even a teaspoon of the dreaded coconut. It tastes so MUCH like the authentic version that it's unbelievable. Remember, I'm saying this as a person who's unable to fool her taste buds all of the time - I simply cannot bring myself to say that something is tasty when it is not... and sod how healthy it's meant to be. So if I say that this thogayal loses nothing but the cholesterol from the coconut while tasting exactly the same - believe me, it's true. My sister can vouch for it, too - both what I've just said and the thogayal. The first time I made it, I couldn't believe how yummy it was. I had to keep reminding myself that even if I ate ALL the thogayal at one sitting, it would still mean that I'd only eaten all the cabbage. It was an amazing realisation! Kind of like the way I felt when I started driving by myself after getting my licence - I had to keep reminding myself not to flinch if I saw a police car as I was a legitimate driver with a full driving licence! It took a while to stop feeling like a fraud. This thogayal, then, is the eating equivalent of your full driving licence, where you will need to feel neither guilty nor a fraud for eating all of it. The BEST part, however, is that you won't need a learner licence or pass any exams to get this licence. Is that a deal or is that a deal?Recipe for: Almost guilt-free cabbage thogayal
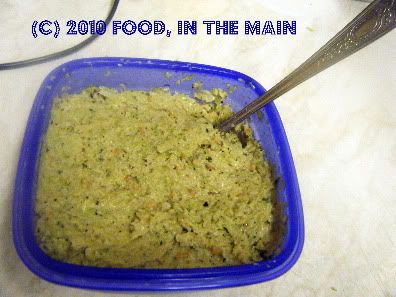
Ingredients:
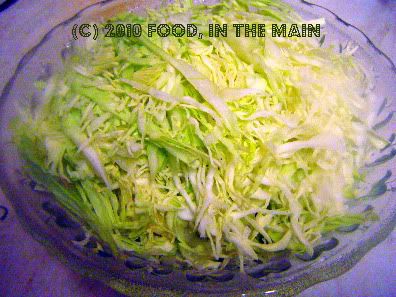
4 cups thinly sliced green cabbage
3-4 dried red chillies (or to taste)
2 tsp oil
1 tbsp urad dal
10 fresh curry leaves
1/2 tsp tamarind paste (or large marble-sized piece of dried tamarind)
1/4 tsp asafoetida powder
Salt to taste
Method:
1. Heat the oil in a frying pan and add the curry leaves, red chillies, urad dal and asafoetida powder.
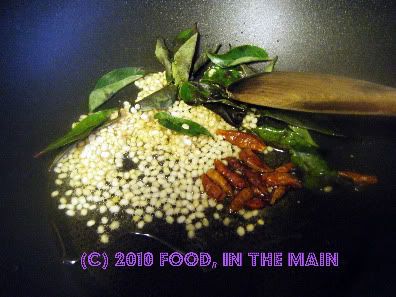
2. Fry these till the dals are golden brown and the red chillies a darker shade. Remove all the red chillies and most of the dal and curry leaves. Reserve for later.
3. Add the sliced green cabbage to the pan (adding a tsp oil more if you feel like it), stir well and let it cook on medium heat till the cabbage is soft and wilted.
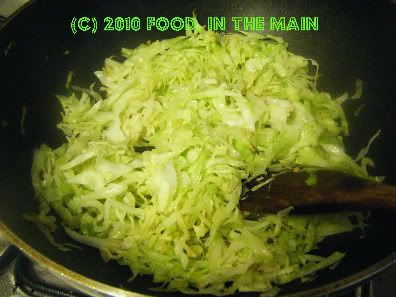
4. Let the cabbage cool.
5. Put all the chillies, the tamarind, and all but 1/2 tsp of the dal/curry leaves in a mixie along with some of the cabbage, and grind it to a smooth paste.
6. Now add the rest of the cabbage and grind to a more coarse paste. Add the remaining 1/2 tsp dal/curry leaves and give it all one quick final whirl so that the dal remains mostly whole to provide a bit of crunch.
7. Remove to a serving bowl and add salt to taste. Mix well and serve immediately with hot plain rice and ghee and any vegetable dish. This thogayal is also good as a side dish for dosas, idlis, etc and makes a great base for sandwiches.
Note: The thogayal's shelf life is not particularly good if left outside, especially in hot weather; any leftovers should be stored in the fridge in a tightly-closed container and used within 2 days.
RECIPE FOR: ALMOST GUILT-FREE CABBAGE THOGAYAL
Ingredients:
4 cups thinly sliced green cabbage
3-4 dried red chillies (or to taste)
2 tsp oil
1 tbsp urad dal
10 fresh curry leaves
1/2 tsp tamarind paste (or large marble-sized piece of dried tamarind)
1/4 tsp asafoetida powder
Salt to taste
Method:
1. Heat the oil in a frying pan and add the curry leaves, red chillies, urad dal and asafoetida powder.
2. Fry these till the dals are golden brown and the red chillies a darker shade. Remove all the red chillies and most of the dal and curry leaves. Reserve for later.
3. Add the sliced green cabbage to the pan (adding a tsp oil more if you feel like it), stir well and let it cook on medium heat till the cabbage is soft and wilted.
4. Let the cabbage cool.
5. Put all the chillies, the tamarind, and all but 1/2 tsp of the dal/curry leaves in a mixie along with some of the cabbage, and grind it to a smooth paste.
6. Now add the rest of the cabbage and grind to a more coarse paste. Add the remaining 1/2 tsp dal/curry leaves and give it all one quick final whirl so that the dal remains mostly whole to provide a bit of crunch.
7. Remove to a serving bowl and add salt to taste. Mix well and serve immediately with hot plain rice and ghee and any vegetable dish. This thogayal is also good as a side dish for dosas, idlis, etc and makes a great base for sandwiches.
Note: The thogayal's shelf life is not particularly good if left outside, especially in hot weather; any leftovers should be stored in the fridge in a tightly-closed container and used within 2 days.
I find I'm a bit worried about getting more and more radical with my bitter melon/bitter gourd/karela/pavakkai recipes, in that I’m using this vegetable in a less and less disguised fashion, as it were. I won't hide the fact that I'm feeling kind of - wait for it – meloncholy, the sort that leaves a.... yes, a somewhat bitter taste behind...
Time was when the only way I would even look at this knobbly-looking vegetable was if it was coated in seasoned gram flour and deep fried. And even then it wasn’t exactly welcome on my plate (or on my palate, heh. Tell me you love these punny asides, because I won’t accept a negative answer. What, did you think this was a democratic blog? Tut).
First I made my own karela chips. Then this. And this. And now, karela masala rice! Where oh where will it all end???
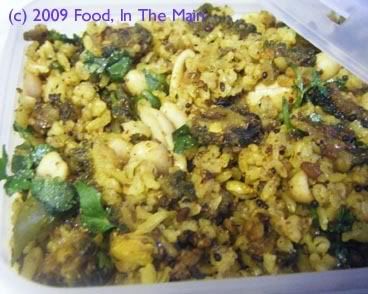
Be warned, readers, this recipe is only for those who love this vegetable. (Although, all evidence to the contrary, I still maintain that I’m not a member of the aforementioned karela-loving group. I mean yeah, I eat it. But would I reach for karela over, say, potatoes? Or green beans? Or plantains? No way, no how.) I used brown basmati instead of white rice, and cooked it with a bit of turmeric powder as per Suganya’s advice on her blog, Tasty Palettes – note that the idea for this recipe, and part of the method, is derived from her own post. I added peanuts for crunch (and some relief from the bitterness) and had a cool cucumber raita on the side, which is also, I think, essential to balance the taste.
Remember that rhetorical question I asked earlier? The one I didn’t answer, because it was rhetorical? (See paragraph 3.) Well, its status has just been downgraded from rhetorical to literal, because I’m answering it.
The karela radicality, my dear friends, does not end with this post. It cannot, because there is more to come, a recipe that is even more uncompromising when it comes to bringing the bitterness to the fore. And no clue, not one, about where that radicalisation will end, or when, or even how...
But for now, here’s the recipe to go with this post.
Recipe for: Bitter melon brown rice
Ingredients
1-1/2 cups brown basmati rice, soaked in water for 10 minutes
3 cups bitter melon/karela, sliced
3/4 tsp tamarind paste
1/2 tsp turmeric powder
1 tsp urad dal 1 tsp brown mustard seeds
2 tsp oil
a few fresh curry leaves
3-4 tbsp garlic masala powder (or to taste)
Salt to taste
1/4 cup roasted salted peanuts
chopped coriander leaves for garnish
Method
1. Cook the soaked brown basmati rice in plenty of water to which 1 tsp turmeric powder has been added.
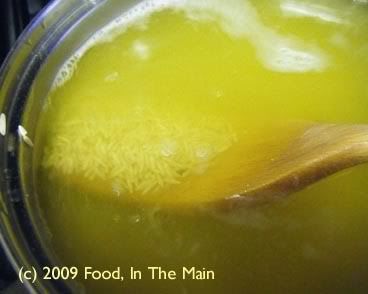
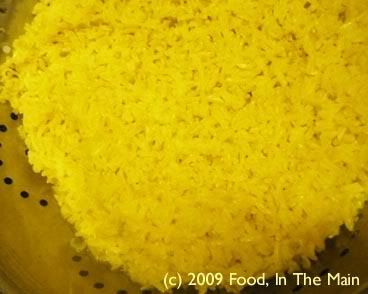
Drain rice and cool when cooked.
2. Dissolve the tamarind paste in 4 cups water and pour along with sliced karela in a saucepan. 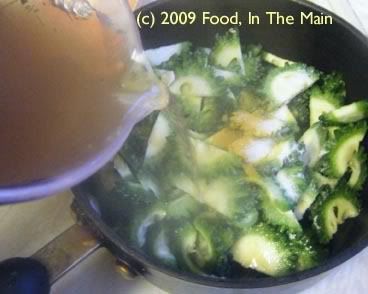
Cook the karela till done, but not mushy. Drain the cooked vegetable and reserve.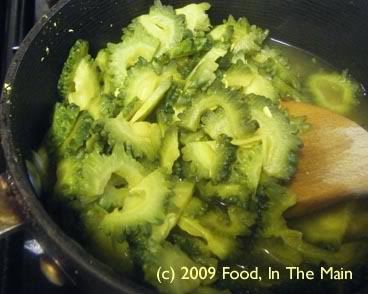
3. In a wide kadai or wok, heat the 2 tsp oil. Add the curry leaves, urad dal and mustard leaves. Cover till the mustard seeds pop, and the urad dal is golden brown. 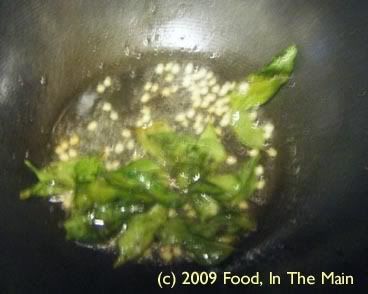
4. Add the cooked karela now and stir till the tempering is evenly distributed. 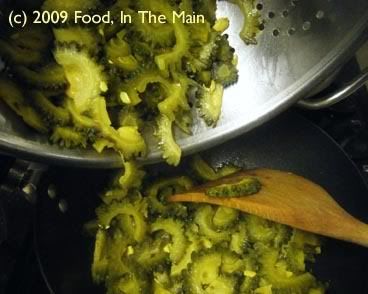
5. Sprinkle 2-3 tbsp of the garlic masala powder and stir it in. 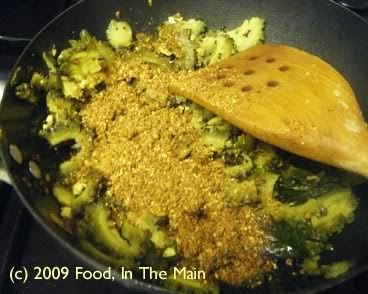
6. Roast the karela over medium heat in the pan, till it starts to crisp up. (You can add 2-3 tsp oil to speed up this process, if you like.)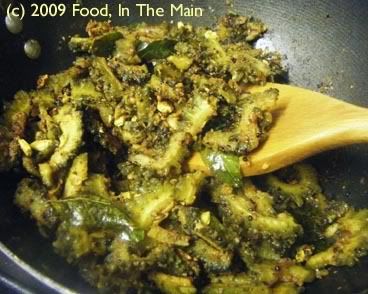
7. Add the cooked rice now, add salt to taste, and mix carefully till the vegetable is evenly distributed. 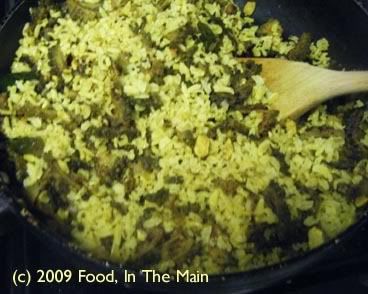
8. Stir-fry the rice till it's heated through, then add the peanuts and mix in. 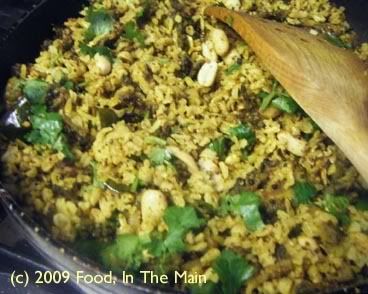 9. Sprinkle the chopped coriander over, and serve the rice hot with a cool cucumber raita and crisps or poppadums.
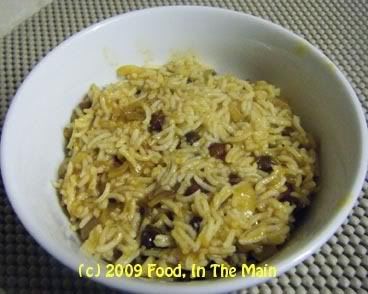
Here’s a sort of Southie version of kala chana masala, cooked with tomato and onions and tamarind and sambar masala to make a tangy, spicy and really mouth-wateringly aromatic puli kuzhambu.
Yep, that’s it. No more story to this than the preceding.
And you thought I couldn’t be brief and pointful… (as opposed to pointless)
Recipe for: Kala chana puli kuzhambu
Ingredients:
1 can black chickpeas (kala chana)
1 large tomato
1 large onion
2 green chillies
pinch of asafoetida powder
1/2 tsp turmeric powder
1 tsp coriander powder
1/4 tsp roasted fenugreek powder
1 heaped tsp sambar powder
1/2 tsp red chilli powder (or to taste)
1-1/2 tsp tamarind paste
2 tsp oil
1 tbsp rice flour
2 cups water (more if reqd)
Salt to taste
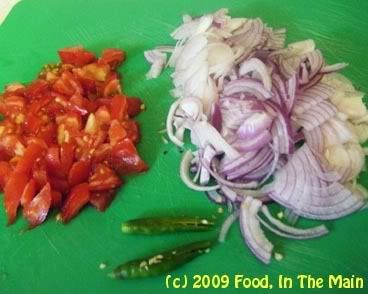
1. Slice the onion, chop the tomato and vertically slit the green chillies.
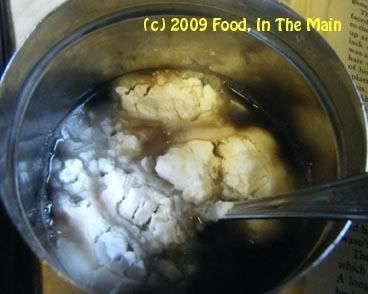
2. Dissolve the tamarind paste in 1/2 cup hot water, add the rice flour and whisk it in so that there are no lumps. Reserve.
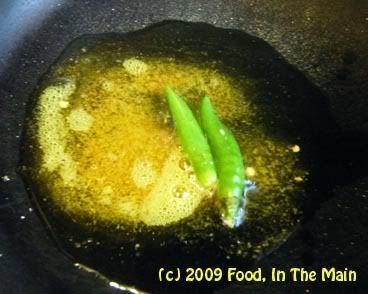
3. Heat the oil in a pan, add the coriander powder, the asafoetida powder, the turmeric powder and the green chillies, and fry these for 30 seconds.
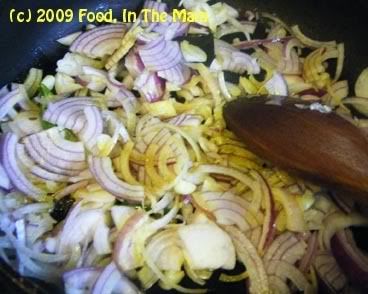
4. Add the sliced onions and stir-fry till they begin to soften.
5. Add the chopped tomato now and cook it till it begins to turn mushy.
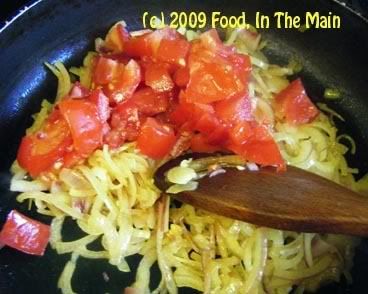
6. Next add the roasted fenugreek powder, the red chilli powder and the sambar powder and stir it all in. Fry this for 2 minutes.
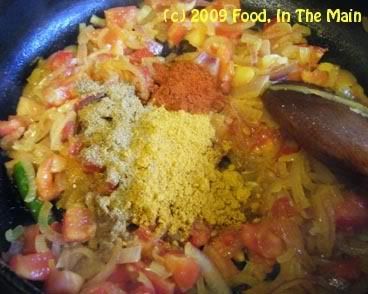
7. Then add the drained black chickpeas to the pan 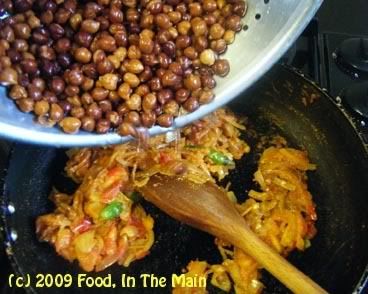
and stir for 2-3 minutes till they are coated well with the masala. 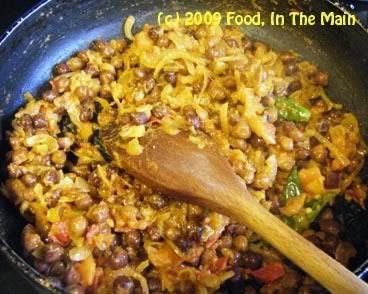
8. Pour in the tamarind water now, add another 1-1/2 cups water and salt to taste. Bring it to a bubbling boil, then reduce the heat to medium-low and simmer the kuzhambu for 10 minutes or till it comes "together" and is no longer watery. That is, it should be fairly thick.  Let the kuzhambu "rest" covered for 10 minutes, then serve it hot over cooked rice.
Years ago, when my dad was based in Srinagar with me and my siblings studying in Madras, my mother used to shuttle between the two cities. I’m guessing she was torn between wanting to take care of us in Madras – I was in the first year of college and my sister and brother still in school – and being with my dad whose health was not good at the time.
It was a fairly odd sort of arrangement for us, because we kids lived with our maternal grandparents in their large home… except that we occupied the upstairs and they lived in the downstairs portion. My grandmother would cook for herself and my granddad, as they were very orthodox and did not believe – quite rightly, too – that I could maintain their high standards of “patthu” and “yecchal” and all the rest of the overdone Brahmin Iyer kitchen rituals. My grandparents might also have suspected that I couldn’t be bothered about observing any of it… something that they could not accept for themselves.
Also, our school and college timings and my granddad’s morning puja rituals (with my grandma cooking food only after her morning bath, and that food allowed to be eaten only after the puja was over) were totally incompatible – if we had waited for all that to take place every morning, getting to school on time would have been impossible.
Whatever the reason, therefore, I had use of the kitchen upstairs to cook basic stuff for me and my sibs, with my grandma providing things like sambar or kootu or whatever took her fancy.
So, every time before my mother left for Srinagar, she would make some fridge staples to last us a few weeks and save me having to cook anything more than the basic rice and dal – I was not particularly enthusiastic about kitchen duties at that point. One of the things she made was black pepper vattha kuzhambu– but in concentrated form, like pulikachal. Anytime I wanted a quick kuzhambu, all I had to do was boil up some tamarind water, dissolve 2-3 tbsp of the concentrate in it – and voila! The gravy was ready in a jiffy.
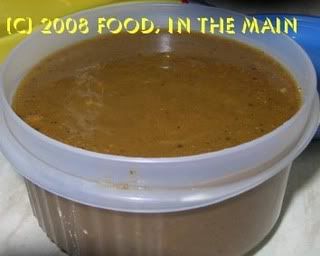
This recipe that I came across reminded me strongly of that long-ago milagu kuzhambu, so I decided to make it, to see if it was anything like that in my memory. And do you know what… it was actually exactly like my mom didn’t make! (sorry about the anticlimax). :o) But… it was fiery and aromatic and a little of it was plenty for one meal, so it lasted me ages in the fridge. I thoroughly recommend this milagu kuzhambu to anybody who likes the hot peppery taste generated by plenty of hot black peppercorns supplemented with some dried red chillies. That, some hot plain rice, a dollop of ghee and – yes, yes, yes, always the pan-fried potatoes for perfect nostalgia and a satisfying meal… ahhhh…
Recipe for: Milagu kuzhambu
Ingredients:
2 tbsp black peppercorns
2 tbsp cumin seeds
2 tbsp tur dal
2 tbsp coriander seeds
1/4 tsp asafoetida powder
12-15 curry leaves
4-5 dried red chillies
1 htsp tamarind paste
Salt to taste
2 tsp oil (Nallennai for preference)
1/4 tsp turmeric powder
1/2 tsp mustard seeds
1/2 tsp urad dal
Salt to taste
Water as required
Method:
1. Heat 1/2 tsp oil in a pan, add the peppercorns, cumin seeds, coriander seeds, tur dal, curry leaves and red chillies and fry on medium heat. Take the pan off the heat when the dal turns golden and let it cool.
2. Grind the roasted ingredients to a fine powder. Then add 1/2 cup water along with the tamarind paste and grind to a homogenous masala paste. It will thicken quite quickly, so add a little more water as required to make it thick and pourable.
3. Heat the remaining oil in the pan, add the mustard seeds and urad dal, cover the pan and let the seeds pop on high heat for a 30-60 seconds. Add the asafoetida powder now along with the turmeric powder.
4. Dissolve the masala paste in 1-1/2 cups water and pour into the pan. Add salt to taste and stir.
5. Let the kuzhambu come to a boil (add water if it is too thick, but dont make the kuzhambu runny), then simmer on medium heat for 5 minutes.
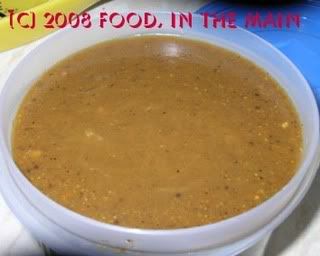
Serve hot with steamed rice, a serving of cooked tur dal if you like, and a topping of ghee. Mix, eat and immediately enter pepper heaven.
This kuzhambu stays good for a couple of weeks in an airtight container kept in the fridge. Use a clean dry spoon every time.


