skip to main |
skip to sidebar
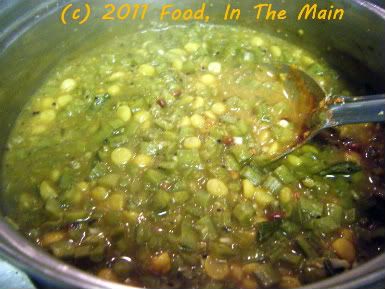
Until my mother mentioned it, I didn’t know that kothavarakkai (cluster beans) could even be made into kootu (although, thinking about it, there’s no reason why not – it’s just that it never occurred to me).
This kootu, however, is quite different from the other kootu recipes I’ve posted so far. I probably wouldn’t have liked it as a kid (preferring it as usili above all, because kothavarakkai has a mild bitterness to it that the dal disguised). But, as a more discerning adult, I have to say I welcomed the chance to learn another way to prepare this vegetable. It was definitely to my taste, what with all the kadalai paruppu in it, but my mother was dissatisfied because she felt it would’ve been better with less of that particular dal.
We’ve agreed to disagree on the issue.
Recipe for: Kothavarakkai kootu
 Ingredients:
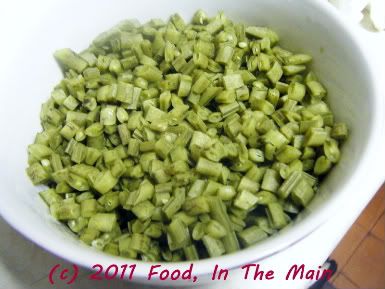
2 cups kothavarakkai, chopped
 1/4 cup masoor dal, cooked and mashed
1/4 cup chana dal/kadalai paruppu, soaked for 15 minutes
1 tsp tamarind paste dissolved in 2 cups water
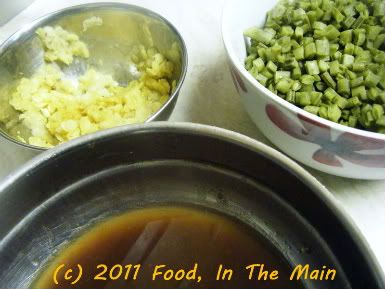 2-3 tbsp finely grated coconut
2 tsp oil
2 heaped tsp sambar powder
1 tsp coriander powder
1 tsp brown mustard seeds
1 tbsp whole urad dal (or regular broken urad dal if you don't have whole)
1/4 tsp asafoetida powder
a few fresh curry leaves, torn up
1 tbsp rice flour
Salt to taste
Method:
1. Pressure cook the kothavarakkai with 2 cups tamarind water (3 whistles) or microwave (8-10 minutes in an 800W oven on full power). You can also cook it on the hob with 2 cups tamarind water till the vegetable is soft.
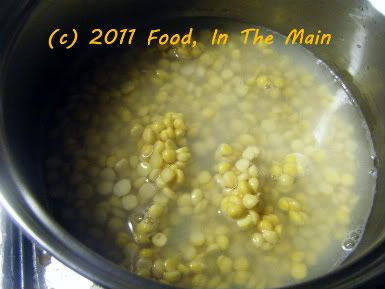
2. Cook the soaked chana dal/kadalai paruppu in 1 cup water on the hob until it is cooked but still retains its shape (should be able to easily squash the dal between your finger and thumb). There should not be too much water left.
 3. Add the kothavarakkai to the chana dal along with the cooking water. The liquid level should be just enough to cover the dal and vegetable (you can add more water if required).
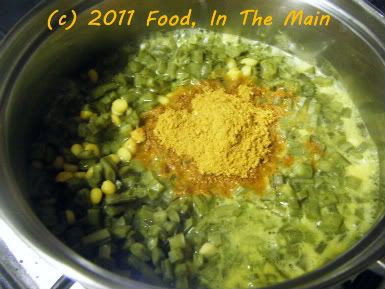
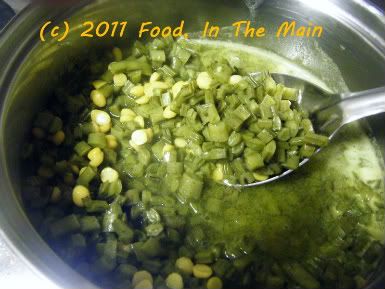 4. Add two heaped tsp sambar powder and stir it in.
 5. Add salt to taste and stir that in too.
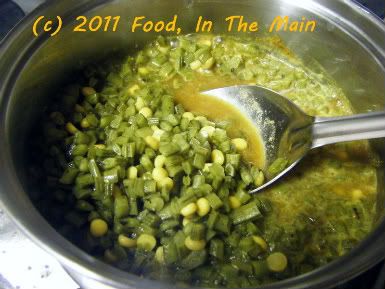 6. Mix the cooked masoor dal and 1 tbsp rice flour with some water from the pan itself, to make a pourable paste, and mix that in with the kothavarakkai in the pan.
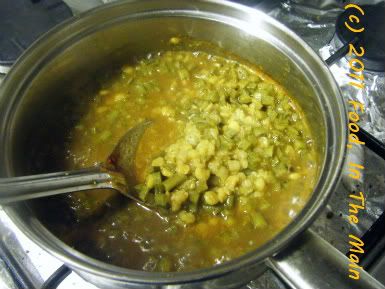 Let this simmer on medium-low heat for 5 minutes.
7. In the meantime, heat 2 tsp oil in a small pan. Add the asafoetida powder, 1 tbsp whole urad dal, 1 tsp mustard seeds, the curry leaves and 1 tsp coriander powder and let it fry for 30-40 seconds on medium-high heat. When the urad dal starts turning a lovely reddish colour, add the grated coconut and fry till it begins to get a pale brown tinge and smells nutty and fried.
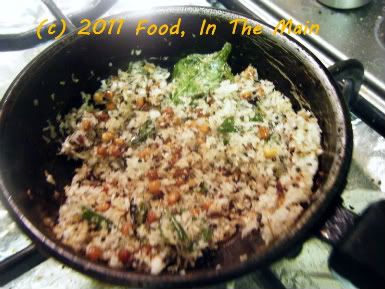 8. Add the fried coconut mix immediately to the kothavarakkai and stir it in.
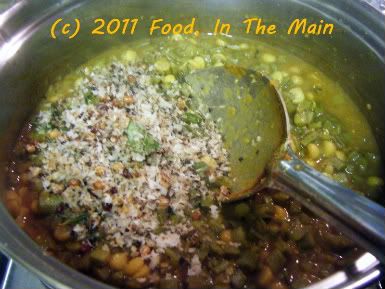 Bring the kootu to a boil and let it remain on high heat for 2 minutes. Then take it off the heat and let it rest for 10 minutes. Serve warm with steamed white rice and appalam or vadam and any pickle.
RECIPE: KOTHAVARAKKAI KOOTU
Ingredients:
2 cups kothavarakkai, chopped
1/4 cup masoor dal, cooked and mashed
1/4 cup chana dal, soaked for 15 minutes
1 tsp tamarind paste dissolved in 2 cups water
2-3 tbsp finely grated coconut
2 tsp oil
2 heaped tsp sambar powder
1 tsp coriander powder
1 tsp brown mustard seeds
1 tbsp whole urad dal (or regular broken urad dal if you don't have whole)
1/4 tsp asafoetida powder
a few fresh curry leaves, torn up
1 tbsp rice flour
Salt to taste
Method:
1. Pressure cook the kothavarakkai with 2 cups tamarind water (3 whistles) or microwave (8-10 minutes in an 800W oven on full power). You can also cook it on the hob with 2 cups tamarind water till the vegetable is soft.
2. Cook the soaked chana dal/kadalai paruppu in 1 cup water on the hob until it is cooked but still retains its shape (should be able to easily squash the dal between your finger and thumb). There should not be too much water left.
3. Add the kothavarakkai to the chana dal along with the cooking water. The liquid level should be just enough to cover the dal and vegetable (you can add more water if required).
4. Add two heaped tsp sambar powder and stir it in.
5. Add salt to taste and stir that in too.
6. Mix the cooked masoor dal and 1 tbsp rice flour with some water from the pan itself, to make a pourable paste, and mix that in with the kothavarakkai in the pan. Let this simmer on medium-low heat for 5 minutes.
7. In the meantime, heat 2 tsp oil in a small pan. Add the asafoetida powder, 1 tbsp whole urad dal, 1 tsp mustard seeds, the curry leaves and 1 tsp coriander powder and let it fry for 30-40 seconds on medium-high heat. When the urad dal starts turning a lovely reddish colour, add the grated coconut and fry till it begins to get a pale brown tinge and smells nutty and fried.
8. Add the fried coconut mix immediately to the kothavarakkai and stir it in. Bring the kootu to a boil and let it remain on high heat for 2 minutes. Switch off the heat and serve warm with steamed white rice and appalam or vadam and any pickle.
Over the last few years, I’ve been testing my limits with that most unattractive of vegetables, the bittergourd (or karela, bitter melon, pavakkai or whatever name you call it – my husband terms them “rats”), to see just HOW much I love it.
I used to hate it completely, in any form, as a kid. In my late teens or thereabouts, I would as a concession eat them deep fried (yes, I know, very broad-minded of me) mainly because the ones from Hot Chips in Abhiramapuram were sensational.
Eventually, after a couple of decades, I got around to eating them pan-fried crisp, as a dry curry. After that things moved a lot more rapidly in the experimentation department, and I moved on to karela-without-frying-too-much, karela as a semi-dry curry cooked with onions and tomatoes, karela with mustard paste (a double-whammy in the strong flavour department).
While karela pitla (South Indian style) is probably not as scary as it used to be, or even as full-on as karela-with-mustard-paste, I still had to see if I'd like it - just to drive away the last of the childhood fear and hatred of the karela's bitter flavour. And, of course, I passed the test with flying colours, practically inhaling the pitla which my mother made a day or two before she left Shrewsbury.
The only karela-based item that I know I won't like is karela juice. Where that is concerned, I think I'm as blinkered as I ever was, with just one standard reaction: "No way Felipe." (Jose wasn't available.)
Recipe for: Bittergourd/karela/pavakkai pitla
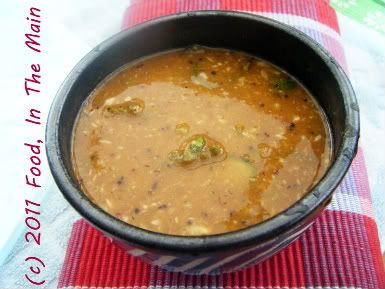
Ingredients:
2 medium karela/bittergourd/pavakkai, sliced into rounds
1 cup masoor dal, cooked
1 tbsp tamarind paste
3 tsp gingelly oil (or any neutral cooking oil)
1 tsp mustard seeds
2 tbsp sambar powder
2 tbsp finely grated coconut
1/2 tsp asafoetida powder
1 tbsp rice flour
Salt to taste
a few fresh curry leaves, torn up
3-4 cups water
Method:
1. Heat the oil in a small pan and add the asafoetida powder, mustard seeds and curry leaves.
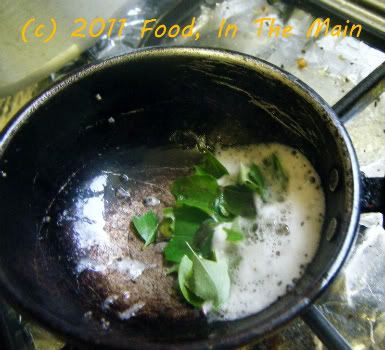 Cover and let the seeds pop, then add the grated coconut.
 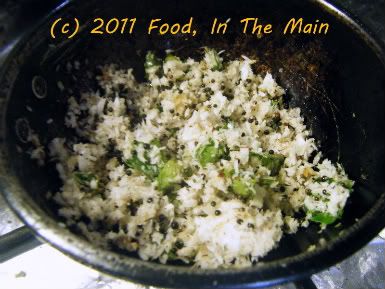 Fry on medium heat till the coconut is light brown and aromatic.
 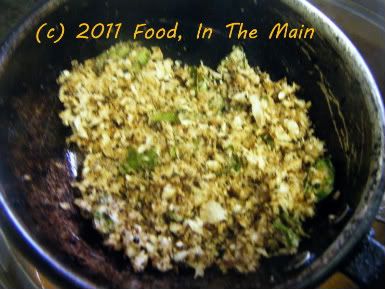 Remove from heat and set aside till required.
2. Put about a cupful of water in a pan along with the karela/bittergourd/pavakkai and turmeric powder.
 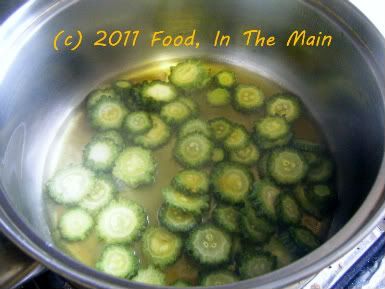 Let it cook till it becomes soft.
3. Dissolve the tamarind paste in 2 cup water and add it to the cooked karela/bittergourd/pavakkai.
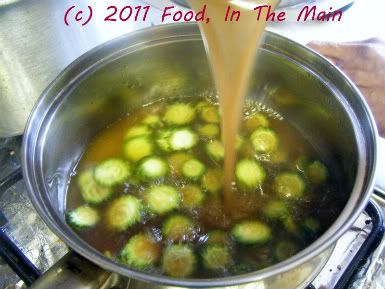 4. Bring this to a boil, then add the sambar powder and rice powder and stir till well mixed.
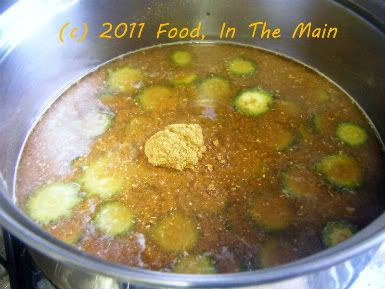 5. Stir in the cooked masoor dal
 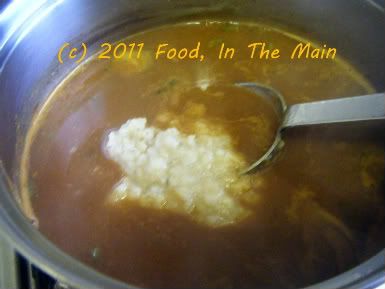 6. Add salt to taste along with the roasted coconut and mix in.
 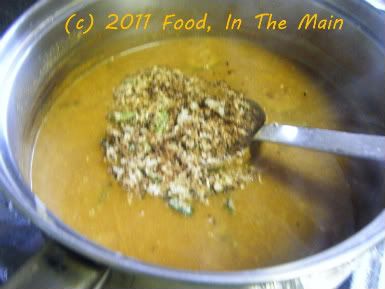 7. Boil the pitla for a few minutes longer till it thickens.
 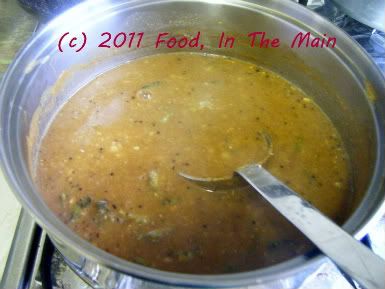 Serve hot with rice.
 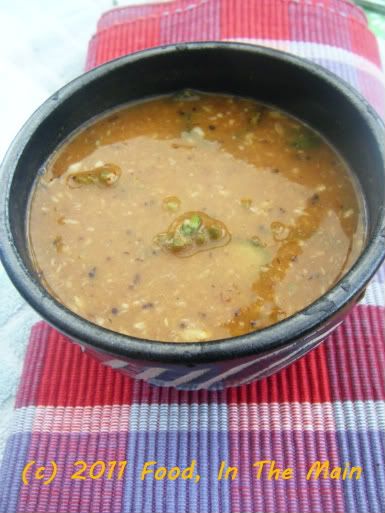 RECIPE: BITTERGOURD/KARELA/PAVAKKAI PITLA
Ingredients:
2 medium karela/bittergourd/pavakkai, sliced into rounds
1 tbsp tamarind paste
3 tsp gingelly oil (or any neutral cooking oil)
1 tsp mustard seeds
2 tbsp sambar powder
2 tbsp finely grated coconut
1/2 tsp asafoetida powder
1 tbsp rice flour
Salt to taste
a few fresh curry leaves, torn up
3-4 cups water
Method:
1. Heat the oil in a small pan and add the asafoetida powder, mustard seeds and curry leaves. Cover and let the seeds pop, then add the grated coconut. Fry on medium heat till the coconut is light brown and aromatic. Remove from heat and set aside till required.
2. Put about a cupful of water in a pan along with the karela/bittergourd/pavakkai and turmeric powder. Let it cook till it becomes soft.
3. Dissolve the tamarind paste in 2 cup water and add it to the cooked karela/bittergourd/pavakkai.
4. Bring this to a boil, then add the sambar powder and rice powder and stir till well mixed.
5. Stir in the cooked masoor dal.
6. Add salt to taste along with the roasted coconut and mix in.
7. Boil the pitla for a couple of minutes longer. Serve hot with rice.
I guess I could have called this a vattha kuzhambu except for the fact that I carefully refrained from using manthakkali or chundakkai vatthal (dried berries). This puli kuzhambu tastes very nice, if you ask me. If, however, you DON'T want to ask me, I guess you'll have to make it and discover this fact for yourself, won't you?
Recipe for: Flaxseed puli kuzhambu (tamarind gravy)
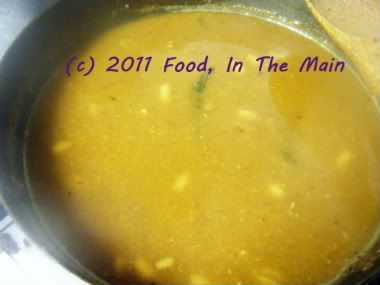 Ingredients:
2 tbsp dry-roasted flaxseeds
1 htbsp sambar powder
2 tsp rice flour
1/4 cup roasted peanuts
Lime-sized amount of tamarind/2 tsp tamarind paste
2 tsp tuvar dal
1 tsp mustard seeds
1/2 tsp vendhayam/fenugreek seeds
5-6 fresh/frozen curry leaves
1 tbsp gingelly oil/nallennai
Salt to taste
4-5 cups water
Method:
1. Pound or grind the flaxseeds to a fine powder.
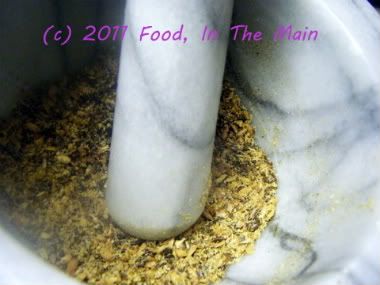 2. Dissolve the tamarind in 4 cups water (or extract the pulp from the dry tamarind). Reserve.
3. Heat the oil in a pan, add the asafoetida powder, tuvar dal, fenugreek seeds, curry leaves, and mustard seeds. Cover and let the seeds pop, let the dal turn golden brown,
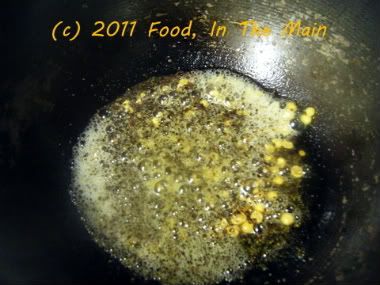 then pour in the tamarind water.
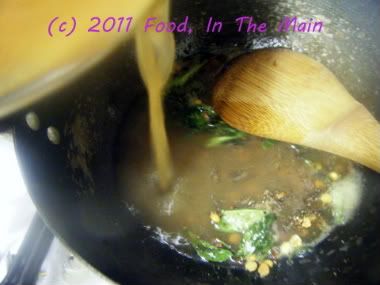 Let this come to a brisk boil.
4. While it is coming up to the boil, mix together the flaxseed powder, sambar powder and rice flour,
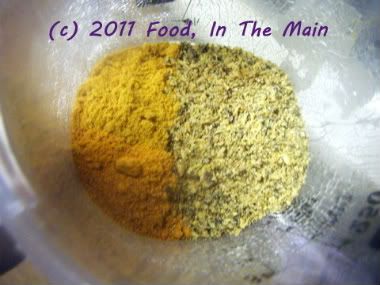 add 1/4 cup water and whisk to a pourable mixture without lumps.
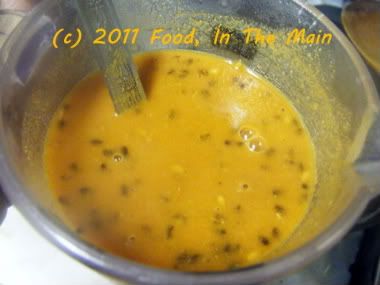 5. Now pour this into the tamarind water and stir it in, along with salt to taste.
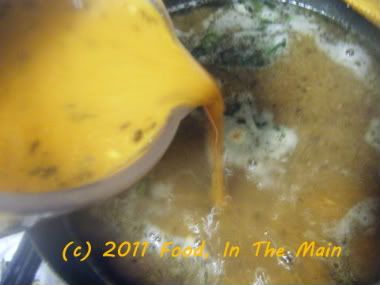 6. Keep the heat on medium and let the kuzhambu simmer for 10 minutes to let the flavours come together, and for it to thicken. Then add the peanuts and allow the kuzhambu to boil for 5 minutes more.
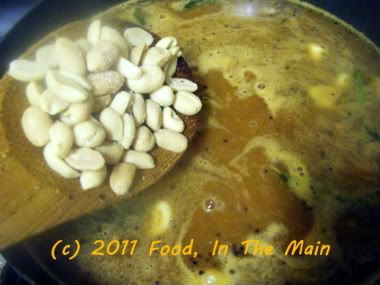 7. The longer the kuzhambu sits, the better it will taste. Reheat before serving, along with steamed rice and any kootu or vegetable curry.
RECIPE: FLAXSEED PEANUT PULI KUZHAMBU (TAMARIND GRAVY)
Ingredients:
2 tbsp dry-roasted flaxseeds
1 htbsp sambar powder
2 tsp rice flour
1/4 cup roasted peanuts
Lime-sized amount of tamarind/2 tsp tamarind paste
2 tsp tuvar dal
1 tsp mustard seeds
1/2 tsp vendhayam/fenugreek seeds
5-6 fresh/frozen curry leaves
1 tbsp gingelly oil/nallennai
Salt to taste
4-5 cups water
Method:
1. Pound or grind the flaxseeds to a fine powder.
2. Dissolve the tamarind in 4 cups water (or extract the pulp from the dry tamarind). Reserve.
3. Heat the oil in a pan, add the asafoetida powder, tuvar dal, fenugreek seeds, curry leaves, and mustard seeds. Cover and let the seeds pop, let the dal turn golden brown, then pour in the tamarind water. Let this come to a brisk boil.
4. While it is coming up to the boil, mix together the flaxseed powder, sambar powder and rice flour, add 1/4 cup water and whisk to a pourable mixture without lumps.
5. Now pour this into the tamarind water and stir it in, along with salt to taste.
6. Keep the heat on medium and let the kuzhambu simmer for 10 minutes to let the flavours come together, and for it to thicken. Then add the peanuts and allow the kuzhambu to boil for 5 minutes more.
7. The longer the kuzhambu sits, the better it will taste. Reheat before serving, along with steamed rice and any kootu or vegetable curry.
7. The longer the kuzhambu sits, the better it will taste. Reheat before serving, along with steamed rice and any kootu or vegetable curry.
RECIPE: FLAXSEED PEANUT PULI KUZHAMBU (TAMARIND GRAVY)
Ingredients:
2 tbsp dry-roasted flaxseeds
1 htbsp sambar powder
2 tsp rice flour
1/4 cup roasted peanuts
Lime-sized amount of tamarind/2 tsp tamarind paste
2 tsp tuvar dal
1 tsp mustard seeds
1/2 tsp vendhayam/fenugreek seeds
5-6 fresh/frozen curry leaves
1 tbsp gingelly oil/nallennai
Salt to taste
4-5 cups water
Method:
1. Pound or grind the flaxseeds to a fine powder.
2. Dissolve the tamarind in 4 cups water (or extract the pulp from the dry tamarind). Reserve.
3. Heat the oil in a pan, add the asafoetida powder, tuvar dal, fenugreek seeds, curry leaves, and mustard seeds. Cover and let the seeds pop, let the dal turn golden brown, then pour in the tamarind water. Let this come to a brisk boil.
4. While it is coming up to the boil, mix together the flaxseed powder, sambar powder and rice flour, add 1/4 cup water and whisk to a pourable mixture without lumps.
5. Now pour this into the tamarind water and stir it in, along with salt to taste.
6. Keep the heat on medium and let the kuzhambu simmer for 10 minutes to let the flavours come together, and for it to thicken. Then add the peanuts and allow the kuzhambu to boil for 5 minutes more.
7. The longer the kuzhambu sits, the better it will taste. Reheat before serving, along with steamed rice and any kootu or vegetable curry.
My first ever experiment with cooking with redcurrants was redcurrant thokku. It was, despite my best efforts, still rather too sour to be used as a mix for cooked rice - according to the feedback received from my palate. The best I could do with the thokku was use it – sparingly - as a condiment with (any) dal and rice.
So, with the second of the three batches of redcurrants, as a further experiment, I made thokku with the addition of roasted tomatoes, which I usually have to hand in the fridge because roasted tomatoes make everything taste better. Need I add that “everything” is limited to whatever is made USING the roasted tomatoes? No, I thought not. (But I’ve added it anyway, in case there’s someone whose answer to that question was “Yes”. *heehee*)
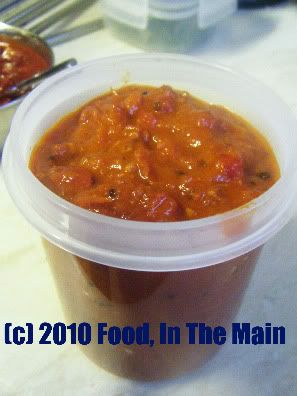
This thokku was more readily palatable, with the sourness of the berries tempered by the sweetness of the roasted tomatoes. It’s as nice mixed with plain rice as any regular tomato thokku, and is also a good accompaniment for dosas, idlis and the like. The verdict from my palate, which while admitting that quality-wise this thokku is the much better improved version, also insists that it’s best had in smaller portions than regular tomato thokku. So there you have it – my palate has spoken.
Recipe for: Roasted tomato redcurrant thokku
Ingredients
1-1/4 cups redcurrants, washed and drained
2 cups chopped roasted or regular tomatoes, pureed
2 tbsp oil
2-3 cloves garlic
1 tsp cumin-coriander powder
1 htsp brown/black mustard seeds
5-6 fresh curry leaves
1/4 tsp asafoetida powder
1/4 tsp turmeric powder
1 tsp sambar powder (optional)
1 tsp jaggery
1 tbsp lemon juice
3 tsp red chilli powder (or to taste)
1/4 tsp roasted fenugreek seed powder
salt to taste
Method:
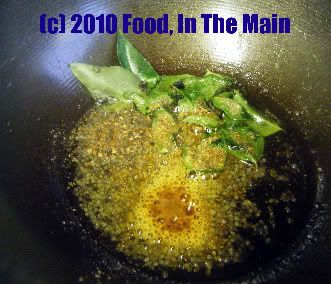
1. Heat the oil, add the garlic, cumin-coriander powder, mustard seeds, curry leaves, asafoetida powder and turmeric powder. Stir for 30 seconds or so.
2. Add the redcurrants and red chilli powder. Mix well, cooking the berries on medium low flame until they are soft and squashed.
3. Now pour in the pureed tomatoes and mix again.

4. Bring the mixture to a boil, stirring every so often, then bring down the heat to low and let it bubble gently for 12-15 minutes, till it is thick. Add the sambar powder now, along with the jaggery and salt to taste.
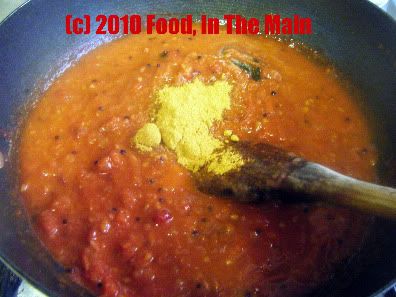
Stir well. If the thokku is a bit watery, let it cook for another 5 minutes on medium heart and leave the thokku on the heat for a couple of minutes longer. There should not be any liquid in the thokku, it should be quite thick. If you like a smooth texture, puree the thokku after it cools down.
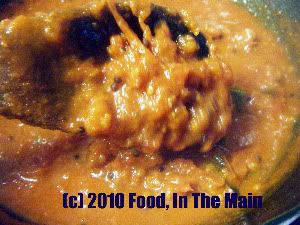
Let the thokku cool down completely before transferring to a clean jar with a tight lid. The thokku stays good for 2-3 days at room temperature. Mix with plain rice to make tomato rice with a difference, or serve as a side dish with dosas, idli etc.RECIPE: ROASTED TOMATO REDCURRANT THOKKU
Ingredients:
1-1/4 cups redcurrants, washed and drained
2 cups chopped roasted or regular tomatoes, pureed
2 tbsp oil
2-3 cloves garlic
1 tsp cumin-coriander powder
1 htsp brown/black mustard seeds
5-6 fresh curry leaves
1/4 tsp asafoetida powder
1/4 tsp turmeric powder
1 tsp sambar powder (optional)
1 tsp jaggery
1 tbsp lemon juice
3 tsp red chilli powder (or to taste)
1/4 tsp roasted fenugreek seed powder
salt to taste
Method:
1. Heat the oil, add the garlic, cumin-coriander powder, mustard seeds, curry leaves, asafoetida powder and turmeric powder. Stir for 30 seconds or so.
2. Add the redcurrants and red chilli powder. Mix well, cooking the berries on medium low flame until they are soft and squashed.
3. Now pour in the pureed tomatoes and mix again.
4. Bring the mixture to a boil, stirring every so often, then bring down the heat to low and let it bubble gently for 12-15 minutes, till it is thick. Add the sambar powder now, along with the jaggery and salt to taste.
Stir well. If the thokku is a bit watery, let it cook for another 5 minutes on medium heart and leave the thokku on the heat for a couple of minutes longer. There should not be any liquid in the thokku, it should be quite thick. If you like a smoother texture, puree the thokku after it has cooled down.
Let the thokku cool down completely before transferring it to a clean jar with a tight lid. The thokku stays good for 2-3 days at room temperature. Mix with plain rice to make tomato rice with a difference, or serve as a side dish with dosas, idli etc.
I've always been convinced that white rice is best for South Indian food - Sona Masoori rice, for preference. Even basmati rice, that queen of all rice, comes second here... if only because its own heavenly aroma and flavour tend to get downplayed by the competing flavours of the accompanying dishes. Sona masoori rice, however, is the perfect vehicle to exhibit the pungent, spicy, hot, sour and piquant flavours that are the trademark of South Indian dishes such as sambar, rasam, kootu etc, without itself taking centre stage. So with sona masoori and basmati rice in my pantry, I was not sure that brown rice would play a big role in my cooking. Still, when I came across a small packet of brown basmati rice in the supermarket, I impulsively bought it. It was surprising how long it took to cook the rice - way more than any white rice, and the typical aroma of basmati wasn't immediately evident either. Since I didn't quite know what to make with the cooked brown rice, I decided to make a sort of vegetable fried rice, only without too much of the frying. I have to say that I was pleasantly surprised by the taste of the brown basmati. It was chewy in a nice way, with a flavour reminiscent of "aval" or "poha" (beaten rice). I liked it a lot, and while it will not be replacing my beloved sona masoori or Tilda basmati any time soon for traditional Southie dishes, I think I will be using brown rice a lot more in other areas. It's nice to no longer be a brown rice virgin! Recipe for: Curried brown rice
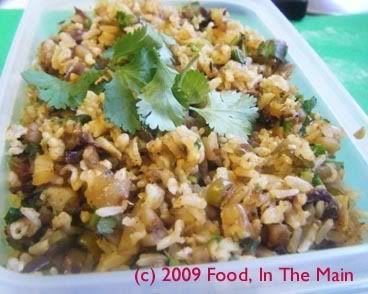
Ingredients:
3 cups brown basmati rice, cooked and cooled
1/2 cup green beans, sliced into thin rounds1 medium potato, chopped into 1/2 cm pieces1 medium onion, sliced thin1 scallion, sliced thin2 green chillies, sliced vertically1 tsp cumin seeds1/2 tsp red chilli powder
1 tsp sambar powder2 tsp oilSalt to tasteFresh coriander leaves, to garnishMethod:
1. Heat the oil in a pan, add the cumin seeds and green chillies. Fry for 40 seconds or till the seeds turn a darker shade of brown. 2. Add the vegetables to the pan now and stir, then pour in 1/8 cup water, cover the pan, turn the heat down to medium-low, and let the vegetables steam-cook till done. 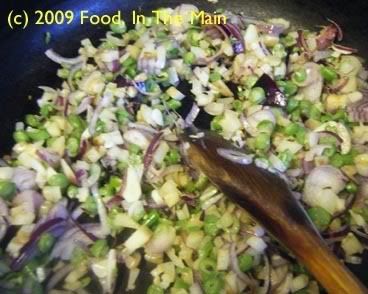
3. Now add the red chilli powder and sambar powder to the cooked vegetables along with salt to taste, and mix it well. Turn the heat up and let the vegetables caramelize a little. 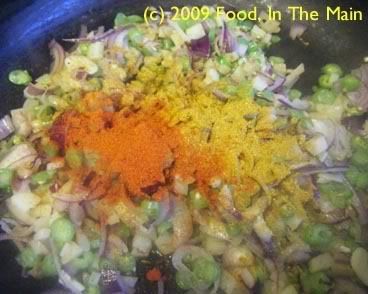
4. Throw in the cooked brown rice and stir till everything is well mixed. 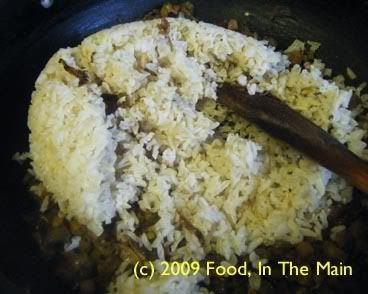
5. Add chopped coriander leaves and serve hot with a raita, if preferred. 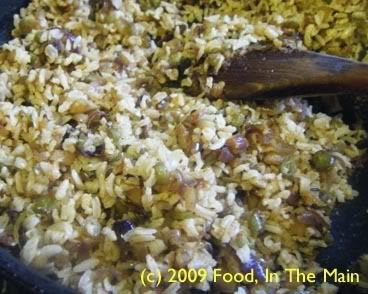
I may have said this before, but I don’t think there exists a bean that I would not like. I’d never tasted black beans before, so when I saw a small bag of black beans in my local supermarket, I couldn’t resist buying it. I fully intended to make “black beans and rice”, a dish I’d come across enough times that the two main ingredients – black beans and rice (duh) – had paired almost inseparably in my mind, like other famous duos. Torville and Dean. Fred and Ginger. Savitri and Satyavan. Tom and Jerry. Peaches and cream. Black beans and rice. (You must have got the idea by now - but feel free to add other famous duos to the list if you think they pair up better.)
Anyway, by the time I’d soaked the beans overnight and cooked them in the pressure cooker, inexplicably I didn’t feel like making the classic Caribbean-style black beans and rice. Pete was away and there was only me for dinner, and I felt very much in the mood for comfort food. And that to me is Indian food. Actually, getting more precise, South Indian food. But because that phrase “black beans and rice” was still jingling about in my head, refusing to be split apart, I decided to make a lateral move and South Indianise the black-beans-and-rice, keeping the pairing but changing it to my taste. Hey, Torville and Dean giving a Bharatanatyam performance on ice are still Torville and Dean, right?
Actually, I’d rather nobody answered that question. Just make the black-beans-and-rice South-Indian-style and we’ll say no more about any of it, okay?
Recipe for: Black beans and rice, South Indian style
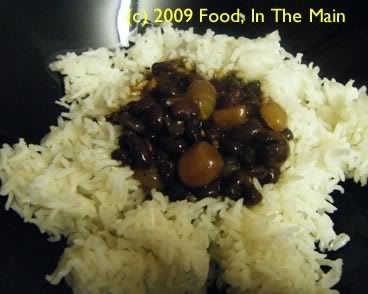
Ingredients
1 cup black beans, soaked overnight
1 tsp tamarind paste
1/2 cup tiny pearl onions (or use regular onions chopped fine)
2 green chillies, slit vertically halfway (optional)
1 tsp sambar powder
1/2 tsp Kitchen King masala powder (or use garam masala)
1/2 tsp fenugreek seeds
1 tsp coriander powder
2 tsp oil
1 tsp mustard seeds
½ tsp turmeric powder
¼ tsp asafetida powder
1 tbsp rice flour
Salt to taste
Water as required
Method:
1. Pressure-cook the soaked black beans with 1.5 cups water till soft. Reserve along with the cooking liquid.
2. In a pan, heat the oil and add the fenugreek seeds, mustard seeds, asafetida powder, coriander powder and turmeric.
3. Cover the pan and let the seeds pop (about 30 seconds), then add the slit green chillies and the onions.
4. Mix well and let the onions cook for 3 minutes, then add the cooked black beans, the sambar powder and the Kitchen King/garam masala powder.
5. Dissolve the tamarind paste and rice flour in 1.5 cups water and add this to the pan. Let the mixture come to a boil, then turn down the heat and let it simmer for 15 minutes.

6. Add salt to taste. The gravy should not be runny, but should be fairly thick. If it’s runny, let it boil for a few minutes longer; if too thick, thin with a little water. Serve hot over cooked white rice.
Here’s a sort of Southie version of kala chana masala, cooked with tomato and onions and tamarind and sambar masala to make a tangy, spicy and really mouth-wateringly aromatic puli kuzhambu.
Yep, that’s it. No more story to this than the preceding.
And you thought I couldn’t be brief and pointful… (as opposed to pointless)
Recipe for: Kala chana puli kuzhambu
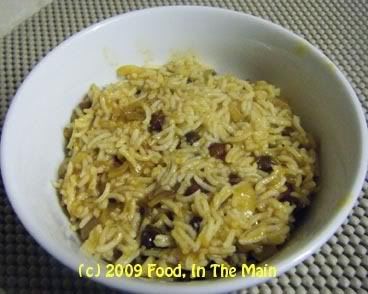
Ingredients:
1 can black chickpeas (kala chana)
1 large tomato
1 large onion
2 green chillies
pinch of asafoetida powder
1/2 tsp turmeric powder
1 tsp coriander powder
1/4 tsp roasted fenugreek powder
1 heaped tsp sambar powder
1/2 tsp red chilli powder (or to taste)
1-1/2 tsp tamarind paste
2 tsp oil
1 tbsp rice flour
2 cups water (more if reqd)
Salt to taste
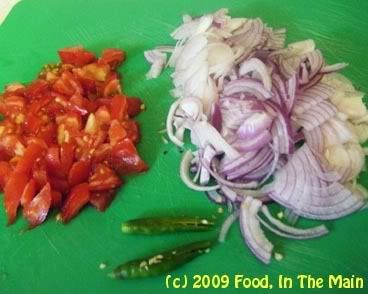
1. Slice the onion, chop the tomato and vertically slit the green chillies.
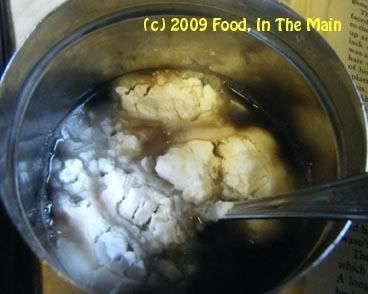
2. Dissolve the tamarind paste in 1/2 cup hot water, add the rice flour and whisk it in so that there are no lumps. Reserve.
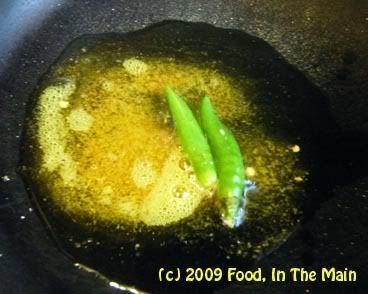
3. Heat the oil in a pan, add the coriander powder, the asafoetida powder, the turmeric powder and the green chillies, and fry these for 30 seconds.
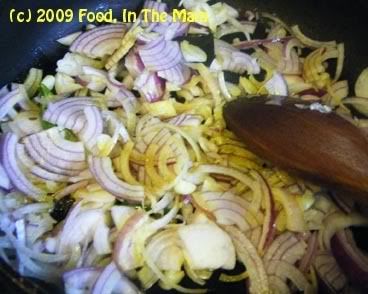
4. Add the sliced onions and stir-fry till they begin to soften.
5. Add the chopped tomato now and cook it till it begins to turn mushy.
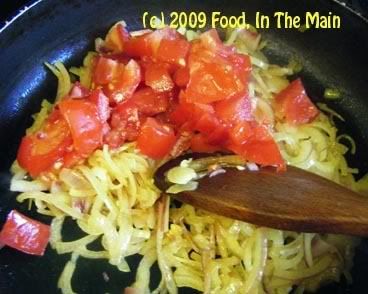
6. Next add the roasted fenugreek powder, the red chilli powder and the sambar powder and stir it all in. Fry this for 2 minutes.
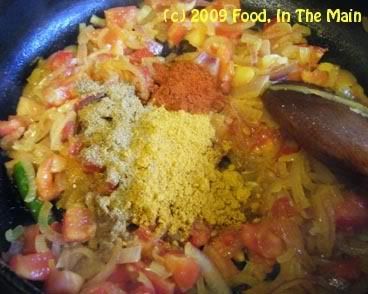
7. Then add the drained black chickpeas to the pan 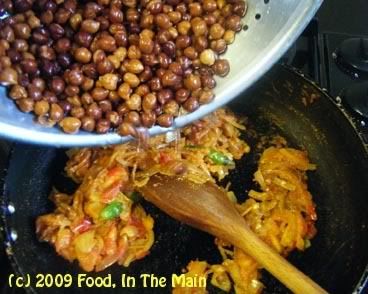
and stir for 2-3 minutes till they are coated well with the masala. 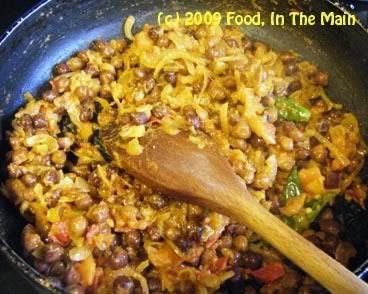
8. Pour in the tamarind water now, add another 1-1/2 cups water and salt to taste. Bring it to a bubbling boil, then reduce the heat to medium-low and simmer the kuzhambu for 10 minutes or till it comes "together" and is no longer watery. That is, it should be fairly thick.  Let the kuzhambu "rest" covered for 10 minutes, then serve it hot over cooked rice.


