skip to main |
skip to sidebar
I’ve always liked kootu with lots of dal in it, even when some of the kootus have plenty of cooked and mashed dal in them to start with. If any time my mother made vazhakkai kootu, for instance, which has cooked mashed tur dal to thicken it, I would still want lots of cooked-but-firm chana dal in it, as well as plenty of crunchy fried urad dal in the tempering. Nothing less would do.
I like lots of urad dal tempering in dry vegetable dishes too, and always have. And because I do my own cooking, I’m at perfect liberty to use vast quantities of any dal I like without anybody questioning the authenticity of what are meant to be traditional recipes.
Still, I’m not so wrapped up in my own quirks that I don’t realise that other people might not share my preferences, so I usually tone down the quantities of dals in the recipes I publish on this blog, in the hope that I (and my recipes) will come across as normal to readers. (I’m not entirely sure that the ploy works, though. Does it?)
This kootu is pretty simple, and you can use pretty much whatever vegetables you have at hand (but I wouldn’t recommend okra, fresh or frozen). I use a pressure-cooker to cook the vegetables and dal together, but if you don't have one, or don't like to use it, the dals can be cooked separately, the vegetables steamed or boiled separately, and then brought together from Step 7. I'd recommend the pressure-cooker, though - it makes things much simpler. I personally feel that the dals make it not only nutritious but also very tasty. Have the kootu over rice, with a couple of microwaved appalam/poppadums and any pickle (I recommend mango thokku) and a cup of yogurt on the side, and you will discover one of the many ways to gain entry into my personal foodie heaven.
Recipe for: Two-dal vegetable kootu
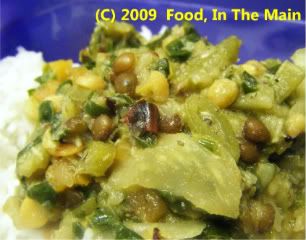
Ingredients:
2.5 cups vegetables cut up small (I used cabbage, carrots, runner beans, potatoes and spinach)
1/4 cup chana dal
1/4 cup whole masoor dal
1/2 tsp turmeric powder
2 dried red chillies, chopped up fine1 tsp oil2 tbsp urad dal2 tsp brown mustard seeds1 tsp cumin seeds1/4 tsp asafoetida powder (optional)Salt to tasteAbout 2.5 cups water, or as required
Grind to a smooth paste:
3 tbsp grated fresh or frozen coconut (thawed)
4-5 green chillies (or to taste)
1/2 tsp cumin seeds
1 tbsp rice flour
Method:
1. If using cabbage, shred finely. Chop up any other vegetables you're using into small even-sized pieces.

2. Wash the two dals in cold water.
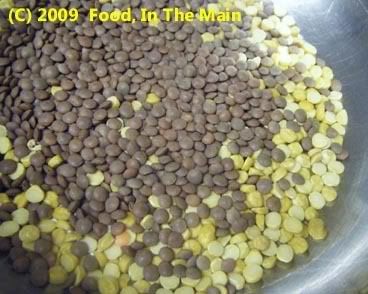
3. In an appropriately sized vessel that can go in your pressure cooker, place the dals at the bottom, then add the "hard" vegetables (like potatoes, carrots, etc), and finally the easy-cook vegetables like cabbage and frozen peas. If using spinach, DO NOT add to the vessel at this point.
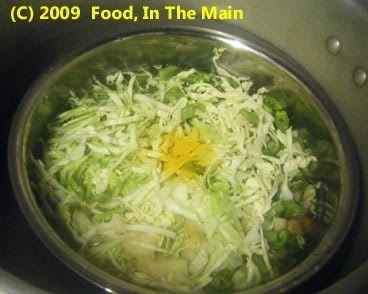
Top with the turmeric powder and add enough water to just about cover the vegetables.
4. Pressure-cook for three whistles, and let the pressure drop naturally before opening the cooker.
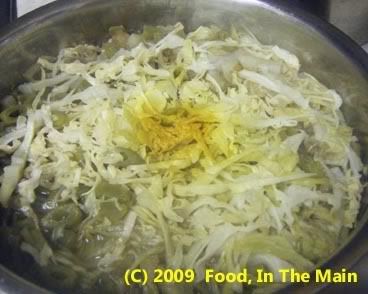
5. In a pan, heat the oil. Add the mustard seeds, chopped dried red chillies, cumin seeds, urad dal and asafoetida powder. Cover and let the mustard seeds pop (about 30 seconds). The urad dal should have turned a golden brown.
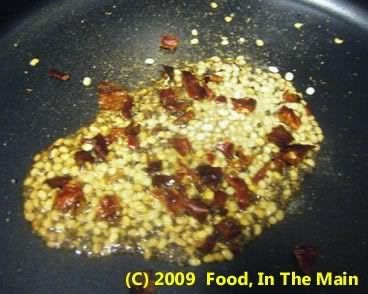
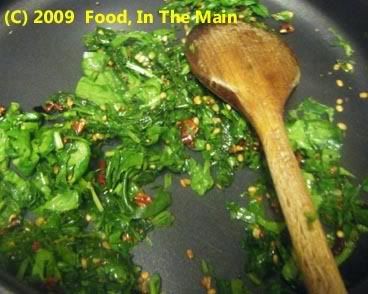
6. Add the spinach leaves now (if using)

and stir fry till it is wilted but still green.
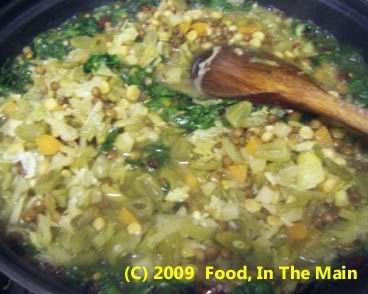
7. Lower the heat and add the cooked dal + vegetables to the pan (the liquid will sputter, so be careful).
8. Pour in the ground coconut masala.
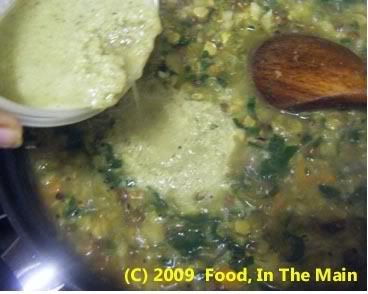
Add salt to taste and mix well. Add more water if required (the kootu can be thick or a bit runny, depending on your taste. I keep it thick if it's a side dish for rotis or chapatis, and a bit runnier if it's to be served over rice.)
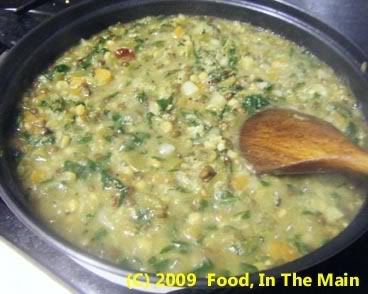
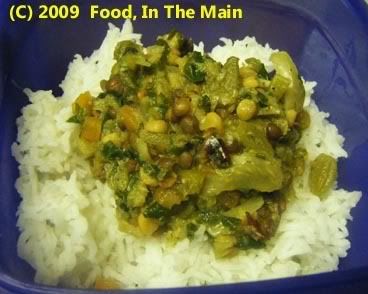
9. Serve hot over plain steamed white rice, or with chapaties.
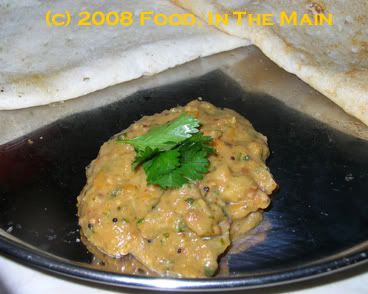
I've had my eye on a tomato chutney recipe that Hema of Vegetarian Concoctions posted on her blog back in February. I’m assuming it was a variation on her own Chettinadu tomato chutney, but really it’s her friend Ranjini’s recipe. (Thanks, ladies!)
I’ve been meaning to make it ever since (how many times do you think I might have said this over the years?) – and now, only a couple of months later, here I am, posting about my attempt at making the chutney!
The ingredients are pretty much the same, only the proportions are somewhat different, because I made a larger quantity than specified in the recipe (me being forced to use up some tomatoes that were getting suspiciously soft – and how many times have you heard THAT from me about some vegetable or other?). Oh okay, I also substituted a couple of ingredients…
It’s a pretty good chutney and keeps well for a day or so. Probably would live a bit longer in the fridge, but I didn’t bother with that.
I had it with dosas made with the muthu samba rice that I nearly threw out...
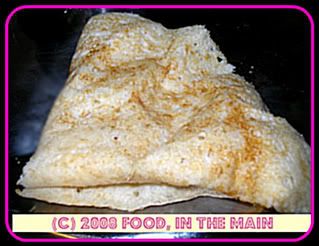
but I’m glad I didn’t, because now I can send this post off to Srivalli’s Dosa Mela in the happy aftermath of my samba experiment!
Recipe for: Chettinadu tomato chutney
Ingredients:
2 medium onions, chopped
5-6 small tomatoes, chopped
½” piece ginger, chopped or sliced
2 tbsp chana dal
1 tbsp urad dal
¼ tsp fenugreek seeds
Turmeric – a pinch
1 tbsp chopped coriander
1 tbsp mint leaves, chopped
4 dried red chillies (or to taste)
Pinch of asafoetida powder (optional)
1 tbsp and 1 tsp oil
Salt to taste
1 tsp mustard seeds
A few fresh curry leaves, torn in half
Method:
1. Heat 1 tbsp of oil, and red chillies, urad dal, chana dal, fenugreek seeds and asafoetida powder.
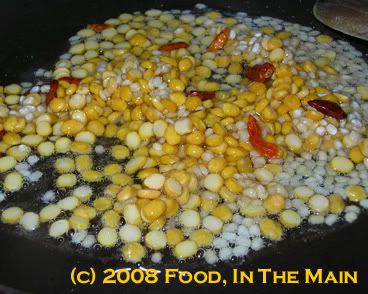
2. Stir till the dals turn golden brown,
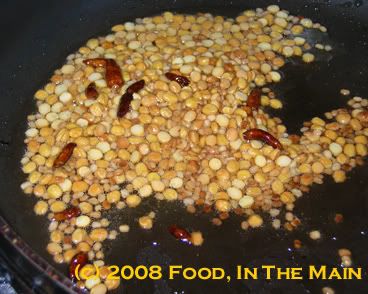
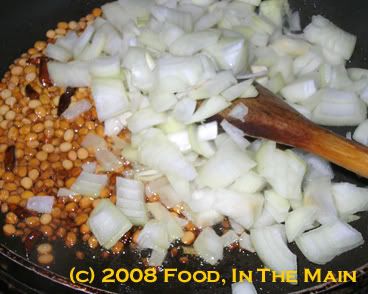
then add onion and cook till soft and translucent.
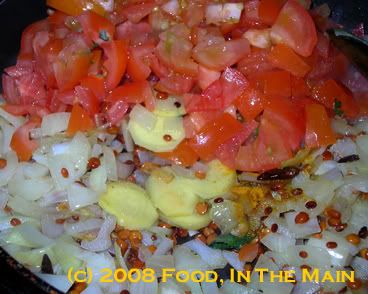
3. Then add the chopped tomatoes, ginger and turmeric powder and cook till the tomatoes turn mushy.
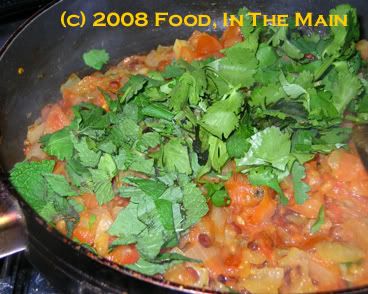
4. Add the mint and coriander leaves and stir them in.
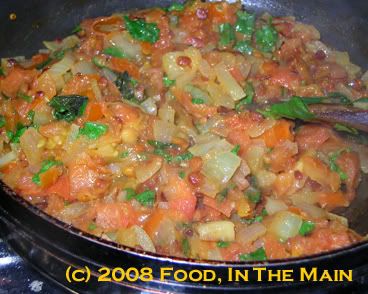
Cook for a minute or two, then turn the heat off.
5. Once the mixture is cool, grind it to a fairly smooth paste (with maybe 2-3 tbsp of water if required) and mix in salt to taste.
6. Heat the remaining tsp of oil in a small pan. Put in the mustard seeds and curry leaves, cover and let the seeds pop.
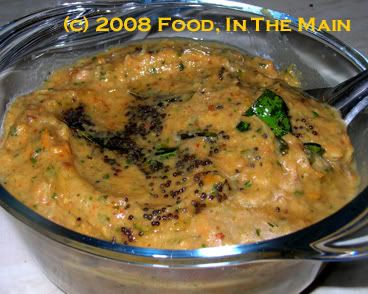
7. Pour this tempering over the tomato chutney and serve with dosa, idli, chapati, etc.
This isnt so much about a recipe as about an experience - one that I never, ever, EVER want to undergo again. As far as I'm concerned, it was more traumatic than any other disaster I've had in the kitchen. Yeah, it even beat cakes that wouldnt rise, cakes that looked and tasted like sweetened Fevicol, muffins that refused to part from their cases, rice that congealed into a lump, dosa batter that over-fermented and bubbled over spectacularly all over the kitchen counter and thence to the floor with a smell reminiscent of damp rotting garbage... and so on. Those disasters, difficult as they were to deal with, were restricted to me and my ego - they didn’t affect anyone else. Especially physically.
But the occasion I'm talking about very nearly forced us to evacuate the house, it was that bad. Let me start at the beginning, though. Ever since I saw Sra’s sambar kaaram post on her blog When My Soup Came Alive, I’d been wanting to make it. It sounded like just the thing – versatile enough to be used as molagapodi or as emergency seasoning/added flavour for vegetables and so on.
The first item on her list of ingredients was dry red chillies. Now I only had fiery little red chillies, not the long, less hot ones that are more commonly used in Indian kitchens. I’d been looking for the latter, but for some reason they’re not available on the online grocery shop I use or in the Indian shop in Telford. The only other place I knew of was Birmingham, and it certainly wasn’t worth the trip there for just one item.
Anyway, the chillies I had were termed “extra hot chillies” – but they didn’t have a more specific name. I suspect they were birds eye chillies, because they were less than an inch long. I wasn’t going to make sambar kaaram in the quantities specified by Sra, so I scaled down the recipe to more manageable proportions – and cut down on the little red devils even more, knowing how potent they were.
Dry-roast the ingredients separately, the instructions said. The first item was the chillies. At this point, I should have foreseen what would happen – and if any of you would have realised it, if you were in my position, hats off to you. I guess I didn’t have my thinking cap on that day. So what I did was throw about 1/8 cup of the little dry red chillies in my hot pan and start dry-roasting them.
I had taken the precaution of shutting the doors and windows and turning on the extractor fan, so I wasn’t too worried about any fumes affecting Pete. I expected some fumes, because dry-roasting red chillies always releases fumes, but I was confident of being able to handle it without much trouble.
Within a few moments, though, it felt like the air in the kitchen had been replaced with some toxic gas. The fumes from the chillies were extremely potent – I could hear Pete coughing in the next room. I didn’t want to open the kitchen door to go out because I knew the fumes would escape out there, making it even worse for Pete. So I turned off the heat, hoping that the air would soon clear. But it just seemed to get worse, and every breath I took felt like I was drawing fire into my lungs. I was coughing so hard that I couldn’t breathe, and my eyes were stinging. I opened the window to let in fresh air, but that didn’t help either. I had panicky thoughts of the fumes getting into my neighbour’s garage and affecting them as well, imagining that they would alert the police about poison gas and I'd be arrested as a terrorist for attempted biological warfare or for disturbing the peace or poisoning the neighbours or something. I know it sounds ridiculous and exaggerated, but those fumes were no joke, believe me.
Eventually I had to get out of the kitchen, and it DID affect the other rooms when I opened the door to get out – but it wasn’t as strong out there as it was inside. Besides, we fled upstairs after opening the doors to the conservatory and the back garden. Still, it took a couple of hours before I could muster up the courage to re-enter the kitchen and even then the residual fumes started me coughing again.
I’m not kidding when I say that chemical warfare had nothing on those red chillies – they would be a cheap, deadly and most effective way to incapacitate any enemy… as long as you could ensure that the fumes didn’t get back to you!
That was a lesson learnt the hard way… but those are the lessons that you never forget, right? I treat those little red bombs with the greatest respect now.
So did I throw them away? Not on your Nellie, not after all the trouble I’d gone through! I made the sambar kaaram, and it was as tasty as I’d imagined it on reading Sra’s recipe. Of course it was hideously hot despite my having reduced the amount of chillies when I scaled down the ingredients... so I had to repair it by adding more of the other items on the list.
Oh, other than reducing the quantities used, I haven’t changed Sra’s recipe or instructions.
Recipe for: Sambar kaaram
Dry red chillies: 50 gm
Coriander seeds: 25 gm
Fenugreek/Methi seeds: 5 gm
Cumin/jeera seeds: 5 gm
Black gram/urad dal: 10 gm
Salt, to taste
Garlic cloves: to taste (I used 10 fat cloves for a very garlicky taste)
Method:
1. Dry roast the first five ingredients separately.
2. Let cool and grind to a powder, then add salt.
3. Crush garlic roughly, add to the powder and run it in the grinder again.
4. Store in an airtight container.
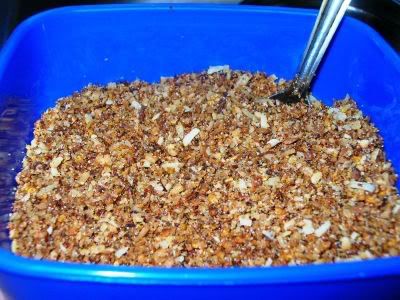
Finally got a chance to make thengai molagapodi - I've been wanting to do so for ages, but couldnt find a suitable coconut. Last week I got lucky - so here's the result.
This is the recipe my mother gave me, and there are no changes at all. No substitutions either, not even wrt the tamarind. I usually use tamarind paste in my recipes, for convenience, but not this time. A large marble-sized piece of dried tamarind fruit, she'd said, so a large marble-sized piece of dried tamarind was what I used - and with the expected excellent result.
Recipe for: Thengai molagapodi
Ingredients:
2 cups fresh grated coconut
2 tbsp chana dal
2 tbsp urad dal
7-8 dried red chillies (or to taste)
1 large marble-sized piece of dried tamarind
Salt to taste
1/4 tsp asafoetida powder (optional)
1 tsp oil
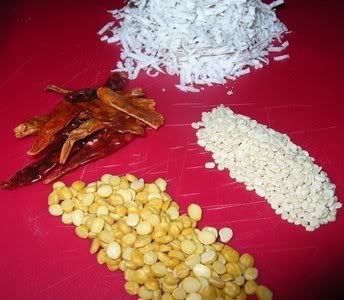
Clockwise from top: Grated coconut, urad dal, chana dal, dried red chillies
Method:
1. Heat the oil in a wide pan. Fry the chana dal, urad dal and red chillies till the dals turn golden brown and the chillies are shiny dark red. Remove from the oil and set aside.

2. In the same pan, roast the grated coconut over medium heat, stirring frequently.

3. Roast the coconut until the gratings are a golden brown and give off a nice roasted aroma. This will take at least 10 minutes - dont rush the process and be careful not to burn the coconut.

4. Let it cool, then dry-grind the chillies, dals and tamarind as finely as possible.
5. Add the toasted coconut and salt to taste, and grind to a slightly coarse texture. It shouldnt be a smooth powder.
This podi is good mixed with rice and ghee, or as a side dish for idli, dosa, etc.
I like this particular cooking event hosted by Sweetnicks, and I'm pleased that I havent missed too many episodes - just the first one entirely. I took part in the second ARF/5-a-day event, but was too late sending my link to Sweetnicks (mainly from sheer ignorance).
The other events hosted by food bloggers are usually out of bounds for me for various reasons - not enough time/inclination/imagination/expertise/take your pick - but since I've been trying to eat more veg and generally be more healthy, this event appeals to me a lot. It isnt difficult either - I mean, vegetables and fruit are everyday items on the menu, so putting up a post is easily accommodated. As an added bonus, I get to feel like I belong with the other food bloggers. It's all good! Yay for Sweetnicks! :)
Anyway, my entry for ARF/5-a-day #3 is poricha kuzhambu - a favourite with all of us when we were growing up and especially so for my mother, because she could use up all the odds and ends of vegetables left at the end of the week. It's my brother's all-tmie favourite, I think - paired with coconut thogayal (a type of chutney) and sutta appalam (poppadums which have been cooked directly on an open flame instead of being deep fried). I like an added extra with that - narthangai, which is a type of green citron (my best guess, since I dont have the English word for this fruit), salted and sun-dried.
My reason for making poricha kuzhambu was pretty much because I had lots of bits of vegetables - carrots, cabbage, green beans, spinach, potatoes, chayote squash. And I added some frozen green peas as well, because I love peas. It's an incredibly healthy recipe, containing all these veggies as well as protein in the form of moong dal. It's also very simple if you use a pressure cooker.

Moong dal
Recipe for: Poricha kuzhambu (South Indian vegetable 'stew')
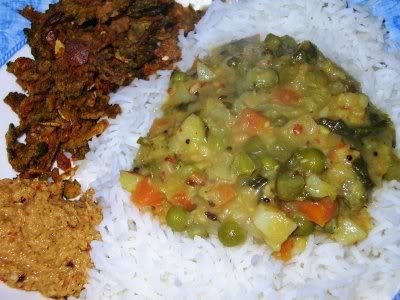
Poricha kuzhambu, served over rice with coconut thogayal and fried bitter-melon crisps (brought over from India!)
Ingredients:
4 cups mixed vegetables, chopped (any combination of carrots, green beans, cabbage, spinach, potatoes, chayote squash, aubergine, peas, etc, but not okra)
1/2 cup moong dal
1/2 tsp turmeric powder
Grind together to a smooth paste, using a few tbsp warm water:
2-3 tbsp grated coconut
1 tsp black peppercorns
3-4 dry red chillies (or to taste)
1 tsp cumin seeds
2 tsp rice flour
For tempering:
1 tsp oil
2 tsp whole cumin seeds
2 tsp mustard seeds
7-8 curry leaves
2 tsp urad dal
pinch of asafoetida powder
Method:
1. Pressure cook the dal and vegetables together with turmeric powder for about 3 whistles. When the cooker can be opened safely, stir the vegetables and dal till mixed.
If not using a pressure cooker, cook the dal separately in plenty of water till soft and mushy. Drain most of the water and mash the dal. Cook the vegetables separately in just enough water to cover, till they are somewhat overdone but not a helpless mush. Mix the two together, add salt to taste, and set aside.
2. In a deep pan, heat the oil. Put in the mustard seeds, cover, and let them pop. Add the rest of the tempering ingredients and stir till the urad dal turns reddish.
3. Now pour in the vegetable-dal mixture. Stir in the coconut masala paste until it is well amalgamated with the vegetables.

4. Add more water if the mix is too thick, and stir. Bring to a boil, then reduce the heat and let it simmer gently for five minutes.
5. Serve hot over steamed rice, or with chapaties.
Well, when I say "South Indian style", I really mean "my mother's style", but it's not far off the truth as descriptions go - I mean, my mother IS South Indian, and it IS her style. Heh.
I'll also say this - spinach cooked this way is probably an acquired taste unless you REALLY love the taste. I quite like spinach, plus I've acquired the taste, so I face no problems whatsoever!
Ideally, the two ingredients that would make this completely authentic are: 1. mor molagai - green chillies that have been soaked in salt and buttermilk (dont know the recipe myself - and not likely to make it either, because of a lack of strong sunshine in these here parts...) and sundried. These are fried in oil and sometimes used to season certain dishes, but more usually eaten as an accompaniment with yogurt and rice, rather like appalam/poppadum.
2. Karuvadam - these are usually made with pumpkin and spiced up with red chillies. I dont know what else goes into the recipe, but again, they are dried in the sun and stored away. They make their appearance occasionally, fried and added to certain dishes - like keerai. I'm not sure if karuvadam have any equivalent in western cuisine, so I dont have a comparable to explain with. They're very intense in flavour, so a little goes a long way.
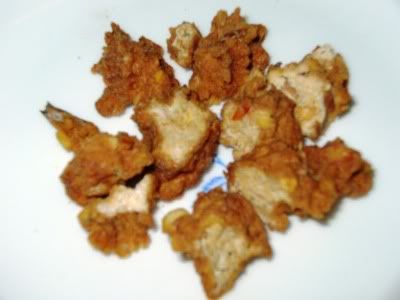
Of the two items, I had the karuvadam - a small stash which I used up boldly in the certain knowledge that I will be replenishing my stock very soon on my India trip!
Keerai made this way is a classic accompaniment for vattha kuzhambu and rice. I had an added extra - simple pan-fried potatoes.
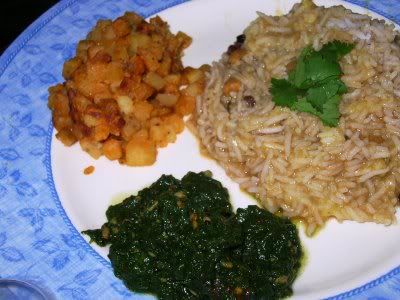
Oh by the way... keerai can be made without the karuvadam, too. They arent essential, just a tasty extra.
Recipe for: Keerai with karuvadam
Ingredients:
3 cups spinach, chopped, washed and drained
Karuvadam - about 4-5 pieces
2-3 dry red chillies - or 4-5 mor molagai pieces, if you be so lucky as to have them!
2 tsp urad dal
1 tsp mustard seeds
Salt to taste
Pinch of asafoetida
3-4 tbsp vegetable or sunflower oil to fry the karuvadam and mor molagai
1 tsp coconut oil (Indian brands like Parachute, etc) - optional
Method:
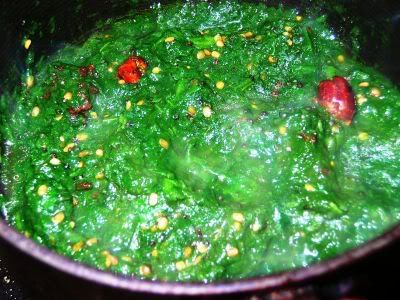
1. Cook the keerai with 3-4 tbsp water in a closed pan till wilted. Let it cool. You can now mash it for a robust texture or run it in the blender a couple of times till it's pureed. I prefer an in-between texture - not too rough but not completely smooth, either.
2. Put the keerai back in the pan along with salt to taste, and let it simmer on low along with 1/3 cup water.
3. Heat the vegetable oil in a small pan and fry the karuvadam and mor molagai (if using). Remove from oil and set aside for the moment.
4. Spoon out most of the remaining oil, leaving about a tsp in the pan. Add the asafoetida, mustard seeds, urad dal and the dry red chillies. Cover the pan and let the seeds splutter and the urad dal turns light brown.
5. Pour this seasoning directly on the keerai and mix well. Add the karuvadam and turn the heat off. Pour the tsp of coconut oil over the keerai and mix again. Serve hot as a side dish with vattha kuzhambu and rice.
One of the ways that we South Indian vegetarians get our protein and fresh vegetables AND manage to eat healthy at the same time - paruppu usili, made with two kinds of lentils or dals. I use a 50:50 mix of thuvar dal and chana dal for the usili, but it would be just as okay to to use only one or the other. Some people add shredded coconut to the lentil mixture, but all I can say to that is - YUK!
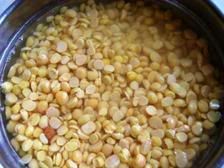
The soaked dals.
When my mother made this, she would ensure that the accompanying gravy dish (to be eaten with steamed rice) did not contain any lentils, to ensure that we didnt have TOO much protein in the diet. Paruppu usili would be a wonderful pairing with Mika's coconut sambar or Ammani's eri kolli, as neither item contains a major proportion of lentils in its recipe.
Usili can be made with green beans, cabbage, even banana flower (vazhaippoo) that I am aware of. I cant think of any other vegetable that would lend itself to such a method of cooking. This is not to say, of course, that there aren't any enterprising cooks who've used other vegetables to make usili, and very possibly with a great deal of success!
I used a combination of green cabbage and green beans because I didnt have enough of either vegetable, but the two together made just the right amount.
Recipe for: Cabbage and beans paruppu usili
Ingredients:
1 cup thuvar dal or chana dal (or a mix of both in any proportion to make up one cup)
3-4 dry red chillies
a pinch of asafoetida powder (optional)
Salt to taste
Green beans (chopped)/green or white cabbage (shredded) - 3 generous cups
For tempering:
2 tsp urad dal
2 tsp black mustard seeds
4-5 curry leaves (optional)
2 tsp oil
Method:
1. Soak the dal(s) in hot water for 2 hours, then grind to a coarse paste along with the dry red chillies and salt. The paste should be thick.
2. Spread the paste on a shallow greased plate (or use idli steamer plates if you have them) and steam for 12 minutes or so. If using a pressure cooker to steam the paste, do not use the weight.
3. Let the steamed usili mix cool down. When it is cool, crumble the mix by hand so that there are no big lumps - it should look like bulgur grains, more or less.
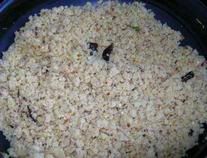
Usili crumbled
4. Meanwhile, cook the cabbage/green beans in the microwave oven in a covered bowl, (usually takes 8-9 minutes) with a little water. (If using green beans AND cabbage, make sure the beans are at the bottom of the bowl - this is because they cook slower than cabbage.)
5. Heat one tsp oil in a wok or kadai, then put in the mustard seeds, urad dal and curry leaves (if using). Cover the wok and let the seeds splutter.
6. Add the crumbled usili and mix well, frying until the usili begins to acquire golden brown spots at the bottom. Turn out into a bowl and set aside.
7. In the same wok, heat the remaining tsp of oil and fry the cooked cabbage/beans for a couple of minutes on high heat, being careful that it doesnt begin to burn. Add salt to this, if required.
8. Finally, add the usili to the cabbage/beans and combine well.
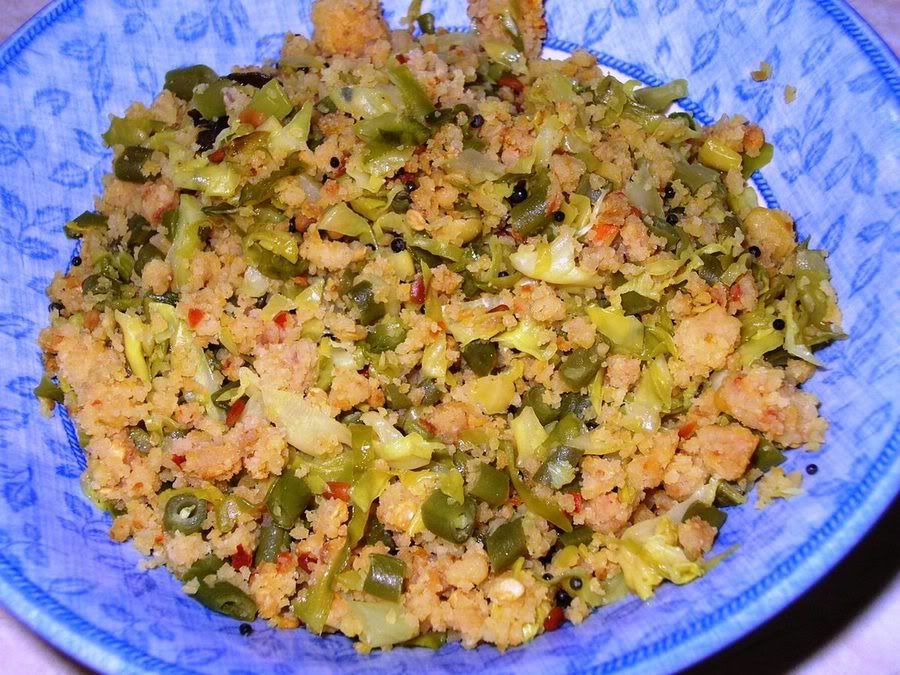
Tadaaaaaa! The end product.
Serve hot.


