This post has been languishing since Christmas 2016, and I think it's time it saw the light of day.
For Christmas lunch, I made roast chicken for Pete (and Pete alone, as the sole non-vegetarian). The rest of the menu consisted of a large tray of roasted vegetables with lots of roasted garlic, cauliflower cheese, pulao, dal, rmint and cauliflower parathas, rasam, yogurt rice and plain rice. And boondi raita.
There were three desserts - gulab jamun cheesecake brought by a friend, cranberry and orange pies made by my sister (spectacular with cream) and this pudding pie that I made. With two non-ovo people in the family (my mother doesn't eat eggs, and my older niece is allergic to eggs so ditto), I wanted to make a dessert that everyone could eat. It had to be chocolate flavoured on request from my sister-in-law because she is a chocolate fiend and will eat practically anything if it has chocolate in it. As an added bonus, my niece is almost as crazy about chocolate. The icing on the cake (in a matter of speaking, that is) was that my niece's best friend ... but you know what I was going to say, right?
So chocolate pudding it was, a non-baked version made with cornflour. To be absolutely honest, I didn't care for it much - I can take or leave chocolate, and I don't really like moussey desserts. It's the texture of mousse that puts me off, mostly.
Anyway, everybody who mattered liked it, and that's all I wanted. Be warned though, this pudding pie doesn't keep well, even refrigerated.
(As for me, I had no room for dessert, but I did have cranberry-orange pie for breakfast the next morning.)
Recipe for: Chocolate pudding pie
Ingredients:
1 9-inch pie crust, readymade or prepared at home
3 cups whole milk (almond milk if you want it to be vegan)
1/4 cup cornflour
1/3 cup sugar
3 tbsp cocoa powder
3 tbsp chocolate chips (semi-sweet if you have it)
1 tsp vanilla extract
pinch of sea salt
Method:
1. Whisk together the cornflour and one cup of the milk to a smooth mixture in a medium saucepan. Then add the remaining milk and cocoa powder, the sugar and the salt. (Note: The cocoa powder will not combine with the milk until you start to whisk the mixture over heat.)
2. Bring the mixture to a boil over medium heat, whisking occasionally. Once it comes to a boil, lower the heat and keep it to a slow rolling boil, whisking constantly until it thickens, about 5 minutes or so.
3. Take the pan off the heat and add the chocolate chips and vanilla, stirring until the chips have dissolved. Pour the filling into the pie shell and let it cool for about 3 minutes, then place a sheet of non-stick paper over the top to form a skin from forming. After 10 minutes, put the pie in the refrigerator and leave it there for a minimum of 3 hours.
Showing posts with label cornflour. Show all posts
Showing posts with label cornflour. Show all posts
Wednesday, February 01, 2017
Thursday, March 31, 2011
Onion gravy
And this time it's REAL gravy, the Western kind, not the inadequate translation of some South Indian kuzhambu into English!
Yesterday's supper for Pete was sausages and mash (mashed potatoes), and he was hankering after onion gravy to go with it. So I looked through some gravy recipes online and discovered that it's not exactly a complicated thing to make. The main ingredients are onions and stock.
I don't usually go to the trouble of making stock from scratch, so I used a fancy pork-flavour Knorr stock cube (the one currently being peddled by chef Marco Pierre White on TV) to make the stock. I'm sure a vegetarian stock cube will do just as well, for those of you who are purists. They probably taste the same, anyhow.
Anyway, the secret to a lipsmacking onion gravy lies in the way the onions are cooked - basically with some butter, long and slow, till they are brown and caramelised BUT NOT BURNT. The balsamic vinegar is the final touch.
The onion gravy was oh-my-GOD yummy and savoury - the balsamic giving that extra oomph, if you ask me. I barely managed to get some photos before Pete whisked away his plate.
Onion gravy is not particularly photogenic, especially in my hands - I'm a crap photographer. So that's why the mash and gravy look the way they do in the photos... but if flavour could be uploaded into the pix, believe me, you'd totally be licking your computer screens!
Recipe for: Onion gravy
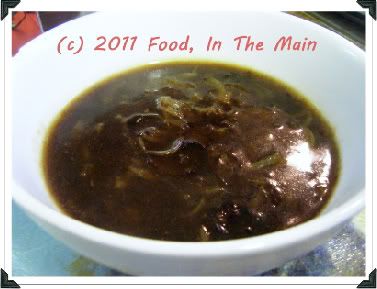
Ingredients:
2 medium onions, halved and sliced thinly
2-1/2 cups stock, instant or home-made
1/2 tbsp good quality balsamic vinegar
3/4 tsp butter
1 tsp sugar
1 tbsp cornflour
1 tsp oil (any mild/flavourless oil)
Pepper and salt to taste
Method:
1. Heat the butter and oili n a saucepan, add the sliced onion and stir well. Fry the onions on medium-high heat for 3-4 minutes, stirring, until they just start to turn colour.
2. Then turn the heat right down, cover the pan and let the onions cook for 10 minutes or till they are brown and soft.
3. Now stir in the sugar and balsamic vinegar and cook the onions for 2-3 minutes on medium-low heat.
4. Then pour in the stock and bring to a boil. After 2-3 minutes, dissolve the cornflour in some water (or in some stock taken from the pan) and add it to the gravy.
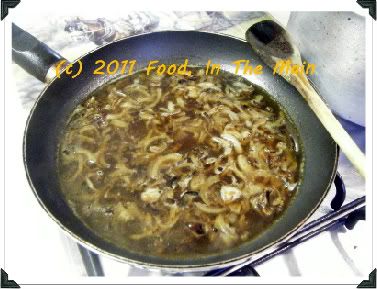
5. Stir well, then add salt and pepper to taste. Let the gravy simmer till it thickens. Ideally, it should not be runny.
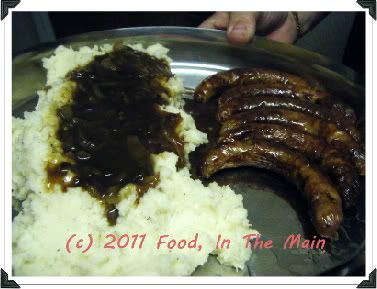
Serve hot with vegetarian (or real) sausages and mashed potatoes for a very English supper.
RECIPE: ONION GRAVY
Ingredients:
2 medium onions, halved and sliced thinly
2-1/2 cups stock, instant or home-made
1/2 tbsp good quality balsamic vinegar
3/4 tsp butter
1 tsp sugar
1 tbsp cornflour
1 tsp oil (any mild/flavourless oil)
Pepper and salt to taste
Method:
1. Heat the butter and oili n a saucepan, add the sliced onion and stir well. Fry the onions on medium-high heat for 3-4 minutes, stirring, until they just start to turn colour.
2. Then turn the heat right down, cover the pan and let the onions cook for 10 minutes or till they are brown and soft.
3. Now stir in the sugar and balsamic vinegar and cook the onions for 2-3 minutes on medium-low heat.
4. Then pour in the stock and bring to a boil. After 2-3 minutes, dissolve the cornflour in some water (or in some stock taken from the pan) and add it to the gravy.
5. Stir well, then add salt and pepper to taste. Let the gravy simmer till it thickens. Ideally, it should not be runny.
Serve hot with vegetarian (or real) sausages and mashed potatoes for a very English supper.
Yesterday's supper for Pete was sausages and mash (mashed potatoes), and he was hankering after onion gravy to go with it. So I looked through some gravy recipes online and discovered that it's not exactly a complicated thing to make. The main ingredients are onions and stock.
I don't usually go to the trouble of making stock from scratch, so I used a fancy pork-flavour Knorr stock cube (the one currently being peddled by chef Marco Pierre White on TV) to make the stock. I'm sure a vegetarian stock cube will do just as well, for those of you who are purists. They probably taste the same, anyhow.
Anyway, the secret to a lipsmacking onion gravy lies in the way the onions are cooked - basically with some butter, long and slow, till they are brown and caramelised BUT NOT BURNT. The balsamic vinegar is the final touch.
The onion gravy was oh-my-GOD yummy and savoury - the balsamic giving that extra oomph, if you ask me. I barely managed to get some photos before Pete whisked away his plate.
Onion gravy is not particularly photogenic, especially in my hands - I'm a crap photographer. So that's why the mash and gravy look the way they do in the photos... but if flavour could be uploaded into the pix, believe me, you'd totally be licking your computer screens!
Recipe for: Onion gravy

Ingredients:
2 medium onions, halved and sliced thinly
2-1/2 cups stock, instant or home-made
1/2 tbsp good quality balsamic vinegar
3/4 tsp butter
1 tsp sugar
1 tbsp cornflour
1 tsp oil (any mild/flavourless oil)
Pepper and salt to taste
Method:
1. Heat the butter and oili n a saucepan, add the sliced onion and stir well. Fry the onions on medium-high heat for 3-4 minutes, stirring, until they just start to turn colour.
2. Then turn the heat right down, cover the pan and let the onions cook for 10 minutes or till they are brown and soft.
3. Now stir in the sugar and balsamic vinegar and cook the onions for 2-3 minutes on medium-low heat.
4. Then pour in the stock and bring to a boil. After 2-3 minutes, dissolve the cornflour in some water (or in some stock taken from the pan) and add it to the gravy.

5. Stir well, then add salt and pepper to taste. Let the gravy simmer till it thickens. Ideally, it should not be runny.

Serve hot with vegetarian (or real) sausages and mashed potatoes for a very English supper.
RECIPE: ONION GRAVY
Ingredients:
2 medium onions, halved and sliced thinly
2-1/2 cups stock, instant or home-made
1/2 tbsp good quality balsamic vinegar
3/4 tsp butter
1 tsp sugar
1 tbsp cornflour
1 tsp oil (any mild/flavourless oil)
Pepper and salt to taste
Method:
1. Heat the butter and oili n a saucepan, add the sliced onion and stir well. Fry the onions on medium-high heat for 3-4 minutes, stirring, until they just start to turn colour.
2. Then turn the heat right down, cover the pan and let the onions cook for 10 minutes or till they are brown and soft.
3. Now stir in the sugar and balsamic vinegar and cook the onions for 2-3 minutes on medium-low heat.
4. Then pour in the stock and bring to a boil. After 2-3 minutes, dissolve the cornflour in some water (or in some stock taken from the pan) and add it to the gravy.
5. Stir well, then add salt and pepper to taste. Let the gravy simmer till it thickens. Ideally, it should not be runny.
Serve hot with vegetarian (or real) sausages and mashed potatoes for a very English supper.
Labels:
balsamic vinegar,
beef stock,
butter,
cornflour,
oil,
onions,
sugar,
vegetable stock
Thursday, May 13, 2010
Browned butter apple cake
I have baked a good number of cakes in the years since I started this blog, and a good few of them are based around fruits, fresh or dried. Apples, oranges and bananas feature a lot among those, simply because I usually have those fruits around the house. Bananas figure a lot because they tend to go overripe before we can eat them (they have to be slightly underripe for Pete, and perfectly ripe for me – which doesn’t leave a big window of opportunity for the poor bananas!) Some overripe bananas can be sliced into cereal but beyond that, they get turned into cakes. Oranges I use a lot of because I love their flavour in cakes. As for apples, again, those with blemishes caused by mishandling or old age find their way into baked goods.
The apples I used in this cake fell into the latter category – they were beginning to shrivel with age, and needed to be used. Conveniently enough, I came across an eggless apple cake recipe that incorporated flaxseed and was so completely decadent (all that butter...!) that I felt I just HAD to make it. Boy, it sure didn’t tell a lie, that recipe... the texture of the cake was excellent, and the taste – oh my!
The blogger from whom I got this recipe said in her blog that the cake was just as nice cold, but I have to say that it was okay cold, but when served hot with vanilla ice-cream, the cake was absolutely spectacular! I don’t use the word “spectacular” often, but this cake totally deserves the accolade. Especially as we ate it over 4-5 days, and it lost nothing in the way of taste when it was reheated in the microwave oven.
Let me say that this is not a cake to be made everyday, or every week, or once a month, or even once in two months... but when you DO make it, be sure to enjoy it down to the last crumb and don’t skimp on the quality of the ice-cream either.
PS. The cake would probably look better with sliced apples arranged prettily, but for some reason I had decided to chop up the apples, so that was that.
Recipe for: Browned butter apple cake
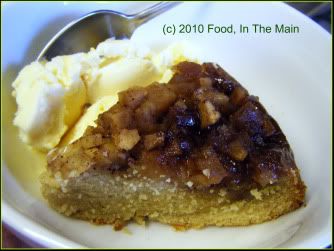
Ingredients:
For the brown butter:
2 tbsp unsalted butter
1/3 cup light brown sugar
1/2 tsp cinnamon
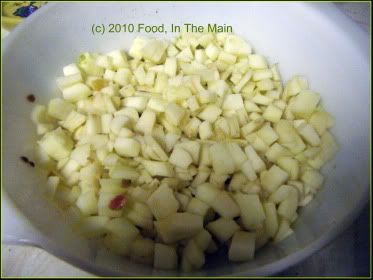
4 medium apples, peeled and chopped into 1-cm cubes
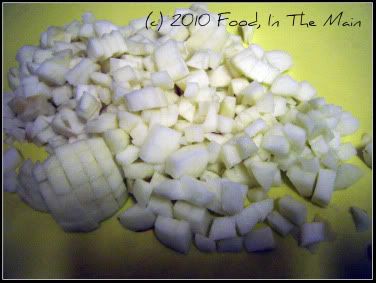
1. Heat the butter in a medium pan over medium heat until melted and bubbly,
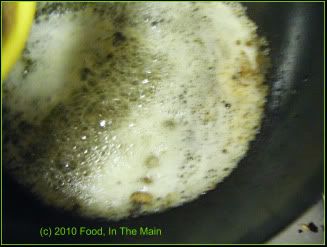
then add the brown sugar
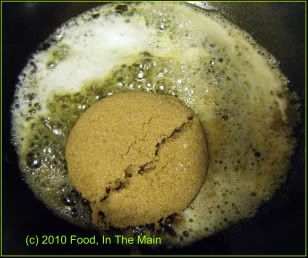
and stir till the sugar caramelises and turns golden brown. Be careful not to burn it.
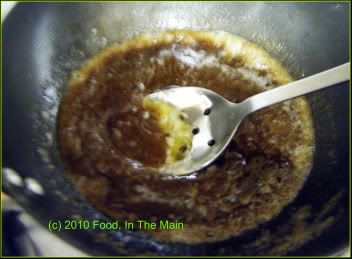
Stir in the cinnamon and pour the mixure into an 8" pan that's been sprayed with Pam. Spread the apples evenly over the caramelised sugar.
For the cake:
1-1/4 cups AP flour
1/4 tsp nutmeg powder
1/2 tsp baking soda
1/4 tsp sea salt
1/3 cup unsalted butter or margarine
2 tsp vanilla extract
3/4 cup sugar
2 tbsp flaxseed powder
2 tbsp cornstarch/cornflour
1/4 cup milk
1/3 cup yogurt
Method:
1. Sift together the salt, flour, nutmeg and baking soda into a medium bowl.
2. Cream the butter and sugar with the vanilla extract till fluffy and light.
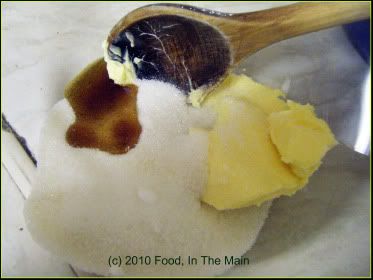
3. Beat in the cornstarch/cornflour and the milk, mixing well.
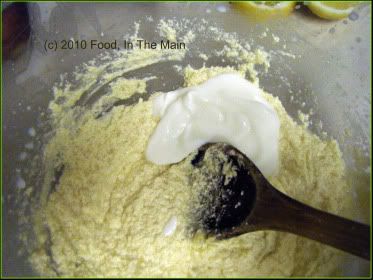
4. Add the flour mixture and yogurt a third at a time and beat till smooth.
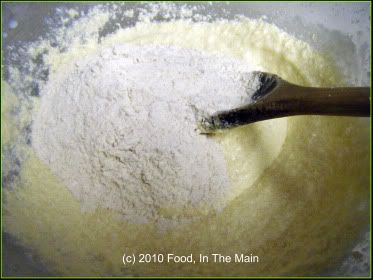
5. Add the flaxseed powder and beat again. If the batter is very thick, beat in a bit more milk, tbsp by tbsp, until the batter is thick but of dropping consistency.
6. Spoon the batter evenly over the apples in the pan.
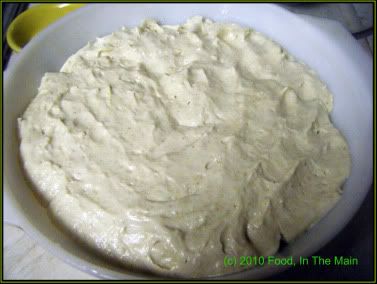
7. Bake the cake for 40-50 minutes at 180C or till a cake tester comes out dry.
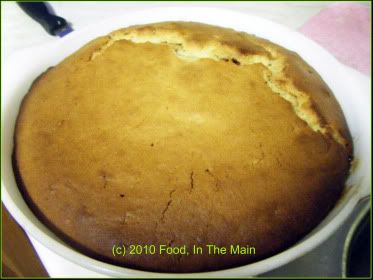
8. While the cake is still hot, run a thin knife around the edges and place a plate over the cake, then carefully turn it upside down.
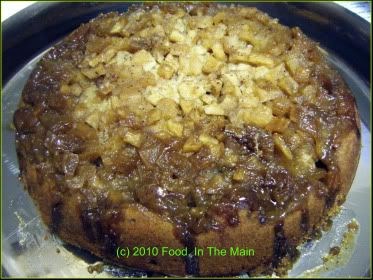
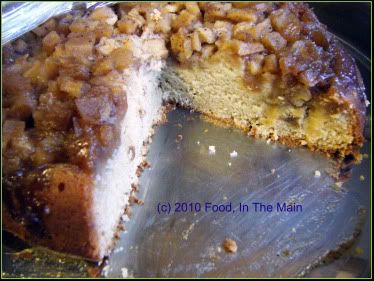
Serve the cake warm with best quality vanilla ice cream. The cake stays good for 3-4 days in a cool environment.
The apples I used in this cake fell into the latter category – they were beginning to shrivel with age, and needed to be used. Conveniently enough, I came across an eggless apple cake recipe that incorporated flaxseed and was so completely decadent (all that butter...!) that I felt I just HAD to make it. Boy, it sure didn’t tell a lie, that recipe... the texture of the cake was excellent, and the taste – oh my!
The blogger from whom I got this recipe said in her blog that the cake was just as nice cold, but I have to say that it was okay cold, but when served hot with vanilla ice-cream, the cake was absolutely spectacular! I don’t use the word “spectacular” often, but this cake totally deserves the accolade. Especially as we ate it over 4-5 days, and it lost nothing in the way of taste when it was reheated in the microwave oven.
Let me say that this is not a cake to be made everyday, or every week, or once a month, or even once in two months... but when you DO make it, be sure to enjoy it down to the last crumb and don’t skimp on the quality of the ice-cream either.
PS. The cake would probably look better with sliced apples arranged prettily, but for some reason I had decided to chop up the apples, so that was that.
Recipe for: Browned butter apple cake

Ingredients:
For the brown butter:
2 tbsp unsalted butter
1/3 cup light brown sugar
1/2 tsp cinnamon
4 medium apples, peeled and chopped into 1-cm cubes

1. Heat the butter in a medium pan over medium heat until melted and bubbly,

then add the brown sugar

and stir till the sugar caramelises and turns golden brown. Be careful not to burn it.

Stir in the cinnamon and pour the mixure into an 8" pan that's been sprayed with Pam. Spread the apples evenly over the caramelised sugar.

For the cake:
1-1/4 cups AP flour
1/4 tsp nutmeg powder
1/2 tsp baking soda
1/4 tsp sea salt
1/3 cup unsalted butter or margarine
2 tsp vanilla extract
3/4 cup sugar
2 tbsp flaxseed powder
2 tbsp cornstarch/cornflour
1/4 cup milk
1/3 cup yogurt
Method:
1. Sift together the salt, flour, nutmeg and baking soda into a medium bowl.
2. Cream the butter and sugar with the vanilla extract till fluffy and light.

3. Beat in the cornstarch/cornflour and the milk, mixing well.

4. Add the flour mixture and yogurt a third at a time and beat till smooth.

5. Add the flaxseed powder and beat again. If the batter is very thick, beat in a bit more milk, tbsp by tbsp, until the batter is thick but of dropping consistency.
6. Spoon the batter evenly over the apples in the pan.

7. Bake the cake for 40-50 minutes at 180C or till a cake tester comes out dry.

8. While the cake is still hot, run a thin knife around the edges and place a plate over the cake, then carefully turn it upside down.


Serve the cake warm with best quality vanilla ice cream. The cake stays good for 3-4 days in a cool environment.
Tuesday, January 06, 2009
Vegetable-macaroni hotpot
One of the burdens that has to be borne by reasonably musical adults who have had anything to do with children, directly or indirectly, is the retention in memory of nursery rhymes set to music. My knowledge of nursery rhymes was extensive - even before I spent a lot of time with my little cousin (right from when she was a baby to until she was about 11 years old). But at least I didn’t sing any of them, because I’d only ever read them. Unfortunately, however, Hema as a toddler was extremely attached to her nursery rhyme tape, with the songs sung by some famous(ish) Indian female singer whose name I can’t remember. (For some reason Tarla Dalal comes to mind, but it was NOT her, that much I’m sure of. She doesn’t sing, does she?)
Anyway, coming back to unintentionally selective programmed memory, I assure you that I hardly ever think of nursery rhymes in normal circumstances. BUT – let a trigger word happen and, like an obedient robot, my brain clicks on and plays the relevant rhyme on a permanent loop. Yesterday, somebody in the office mentioned a problem with mice in their home, and all day my brain was singing “Three blind mice, three blind mice. See how they run. See how they run. They all ran after the farmer’s wife, she cut off their tails with a carving knife, did ever you see such a thing in your life as three blind mice.” (I wrote the entire rhyme down in the faint hope of someone else acquiring the ear-worm. Misery shared is… well, misery doubled, but at least I won’t be alone.)
So. All that was merely a prelude to posting about the one-pot vegetable-and-pasta dinner that I made to accompany what remained of my pav buns. One of the ingredients in this recipe was macaroni. Yep, I made the recipe to my personal internal music system which had set itself to play “Yankee Doodle went to town, riding on a pony. He tucked a feather in his cap and called it macaroni. (chorus) Laa la la la la la la, laa la la la laa lah. Laa la la la la la la la la la la la laa lah” all the time - and, as it turned out, all night.
(My brain didn’t leave out a single la, and neither have I. Just thought I’d mention it.)
Recipe for: Vegetable-macaroni hotpot
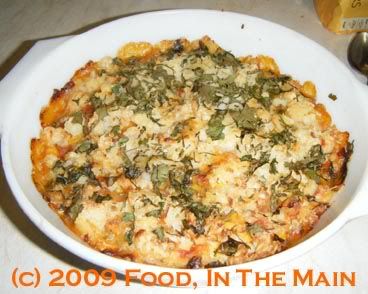
Ingredients:
1 large cup macaroni, slightly undercooked
1 large onion, chopped fine
2 tomatoes, chopped
2 potatoes boiled, cooled and grated
1 green bell pepper, cut into strips
1/2 cup canned or frozen sweetcorn kernels
2-3 spring onions, chopped fine
1 tsp ginger-garlic paste
1 tsp red chilli powder (or to taste)
1/2 tsp sambar powder
1 tsp sugar
1 htbsp corn flour
2 tbsp grated cheese of choice (sharp cheddar is good - jalapeno or habanero cheese if you like it spicy)
1 tbsp coriander leaves, chopped
1 tbsp butter
Salt to taste
Method:
1. Heat the butter in a pan till it melts.
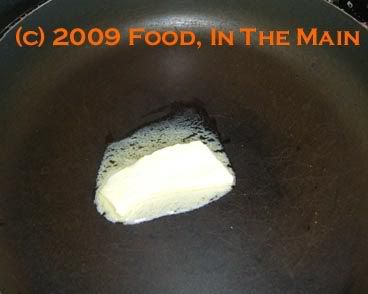
2. Add ginger-garlic paste, fry for 15 seconds, then add the chopped onion and spring onions.
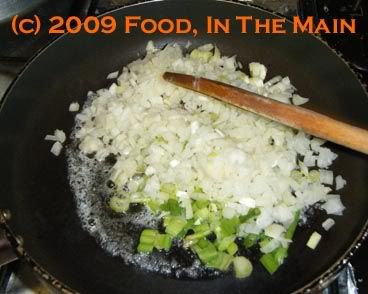
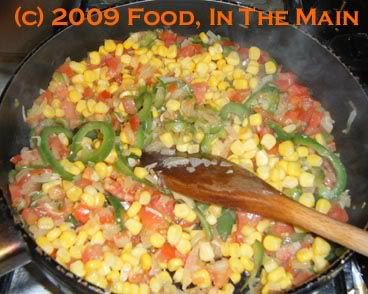
3. Add the capsicum
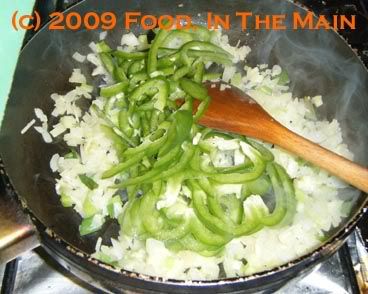
then the tomatoes and corn and fry for 2 minutes.
4. Mix the cornflour in 1 cup water till dissolved, add chilli powder and salt. Pour into the pan, stirring well.
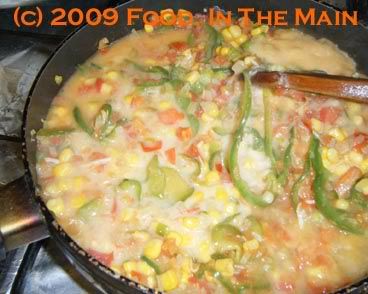
5. Bring the mixture to a rolling boil, then turn down the heat and simmer until thickened but not till it becomes solid. It should still be pourable.
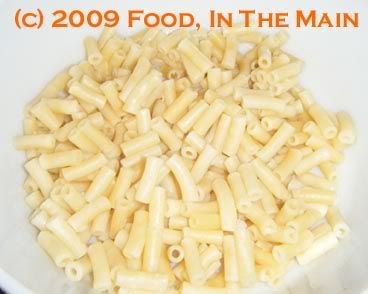
6. Place the cooked macaroni in a buttered oven-safe casserole dish.
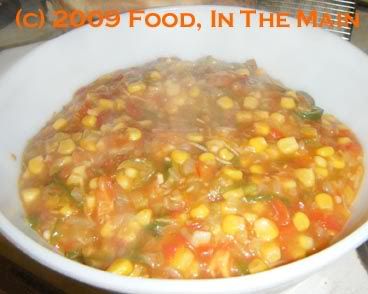
7. Pour the vegetable sauce over the macaroni.
8. Mix together the cheese and grated potato
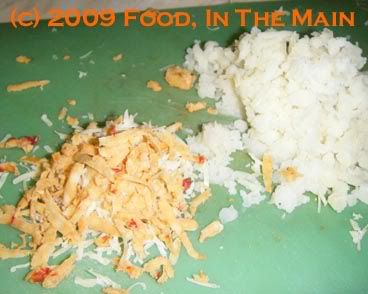
and sprinkle evenly over the sauce, followed by the chopped coriander.
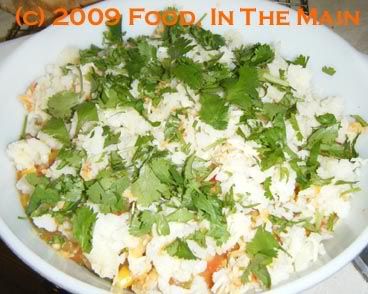
9. Bake in a hot oven (200C) for 15 minutes or till the potato-cheese topping becomes golden brown.
10. Serve hot with warm, lightly buttered dinner rolls.
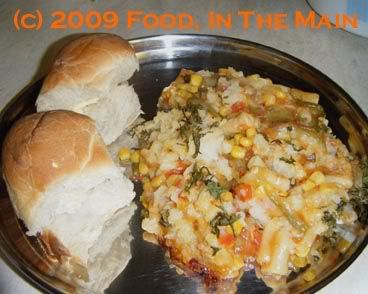
Anyway, coming back to unintentionally selective programmed memory, I assure you that I hardly ever think of nursery rhymes in normal circumstances. BUT – let a trigger word happen and, like an obedient robot, my brain clicks on and plays the relevant rhyme on a permanent loop. Yesterday, somebody in the office mentioned a problem with mice in their home, and all day my brain was singing “Three blind mice, three blind mice. See how they run. See how they run. They all ran after the farmer’s wife, she cut off their tails with a carving knife, did ever you see such a thing in your life as three blind mice.” (I wrote the entire rhyme down in the faint hope of someone else acquiring the ear-worm. Misery shared is… well, misery doubled, but at least I won’t be alone.)
So. All that was merely a prelude to posting about the one-pot vegetable-and-pasta dinner that I made to accompany what remained of my pav buns. One of the ingredients in this recipe was macaroni. Yep, I made the recipe to my personal internal music system which had set itself to play “Yankee Doodle went to town, riding on a pony. He tucked a feather in his cap and called it macaroni. (chorus) Laa la la la la la la, laa la la la laa lah. Laa la la la la la la la la la la la laa lah” all the time - and, as it turned out, all night.
(My brain didn’t leave out a single la, and neither have I. Just thought I’d mention it.)
Recipe for: Vegetable-macaroni hotpot

Ingredients:
1 large cup macaroni, slightly undercooked
1 large onion, chopped fine
2 tomatoes, chopped
2 potatoes boiled, cooled and grated
1 green bell pepper, cut into strips
1/2 cup canned or frozen sweetcorn kernels
2-3 spring onions, chopped fine
1 tsp ginger-garlic paste
1 tsp red chilli powder (or to taste)
1/2 tsp sambar powder
1 tsp sugar
1 htbsp corn flour
2 tbsp grated cheese of choice (sharp cheddar is good - jalapeno or habanero cheese if you like it spicy)
1 tbsp coriander leaves, chopped
1 tbsp butter
Salt to taste
Method:
1. Heat the butter in a pan till it melts.

2. Add ginger-garlic paste, fry for 15 seconds, then add the chopped onion and spring onions.

3. Add the capsicum

then the tomatoes and corn and fry for 2 minutes.

4. Mix the cornflour in 1 cup water till dissolved, add chilli powder and salt. Pour into the pan, stirring well.

5. Bring the mixture to a rolling boil, then turn down the heat and simmer until thickened but not till it becomes solid. It should still be pourable.
6. Place the cooked macaroni in a buttered oven-safe casserole dish.

7. Pour the vegetable sauce over the macaroni.

8. Mix together the cheese and grated potato

and sprinkle evenly over the sauce, followed by the chopped coriander.

9. Bake in a hot oven (200C) for 15 minutes or till the potato-cheese topping becomes golden brown.
10. Serve hot with warm, lightly buttered dinner rolls.

Labels:
bell pepper,
butter,
cheddar,
chilli powder,
coriander leaves,
cornflour,
garlic,
Ginger,
habanero,
jalapeno,
macaroni,
onions,
potatoes,
spring onions,
sweet corn,
tomatoes
Saturday, December 10, 2005
Vattha kuzhambu (tamarind-based gravy for rice)
I believe there is vattha kuzhambu powder available for purchase in some places... and I know that some people have a recipe for it. I'm not one of them. I make vattha kuzhambu like my mother does - with good old sambar powder. One thing to note - the sambar powder I use is the original stuff that I get from India, ground to a fine powder in a proper mill. I havent tried making vattha kuzhambu using MTR or GITS or any of those other ready-made varieties of sambar powder.
Anyway, in my opinion, you gotta add two kinds of dried berries to make an authentic vattha kuzhambu - marathakkalikai and chundakkai.
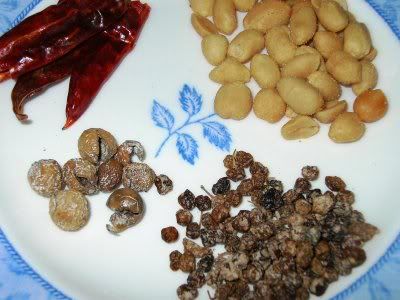
Clockwise from bottom right: Marathakkali, chundakkai, dried red chillies, roasted peanuts
Again, these are most likely acquired tastes. Chundakkai, especially, are really bitter if you bite into them... but I do like the overall aroma and the flavour they impart to the kuzhambu. Marathakali are much more my favourite - fried and mixed with ghee and rice, they're really rather yummy. Better yet, they're also supposed to be good for you. For cleansing the blood, or something like that. Okay, I really need to find out more about them. Watch this space.
Because vattha kuzhambu is not made with any significant amount of dal, South Indians get their protein by pairing it with paruppu thogayal - somewhat like hummous, but made with tuvar dal and bengal gram dal, rather than cooked chickpeas. It's usually bland. I havent had it or made it in years, to tell the truth, because I personally prefer to make beans or cabbage paruppu usili as an accompaniment. Keerai (spinach) is another good side-dish for this kuzhambu.
Recipe for: Vattha kuzhambu
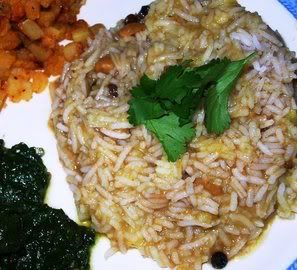
Ingredients:
1 tsp tamarind paste, dissolved in 4 cups warm water
2 tsp sambar powder
1 tsp tuvar dal
1-2 tsp dried marathakkali berries
4-5 dried chundakkai
10-12 fenugreek seeds
1 tsp mustard seeds
2 dried red chillies, broken in half
1/2 tsp red chilli powder (optional)
3/4 tsp freshly ground black pepper
2-3 tsp oil
4-5 curry leaves
pinch of asafoetida
2 tbsp roasted de-skinned peanuts
1 tbsp rice flour or cornflour (for thickening the gravy if required)
Salt to taste
Method:
1. Heat the oil in a pan and fry the dried berries for 30 seconds or so.
2. Add the asafoetida, dry red chillies, curry leaves, mustard seeds, fenugreek seeds and tuvar dal to the oil and stir. Fry till the mustard seeds pop and the tuvar dal turns golden brown. The berries should be dark brown now, but be careful that they dont burn.
3. Add the sambar powder, ground black pepper and red chilli powder (if using) and stir. Then pour in the tamarind water.
4. If you are using the peanuts, drop those in as well and let the tamarind water boil for 15-20 minutes or until it has reduced by a third.
5. Mix the cornflour/rice flour with some water to make a pourable paste, and stir it into the kuzhambu. Add salt to taste.
6. Boil it for another 5 minutes, until it is the consistency you like.
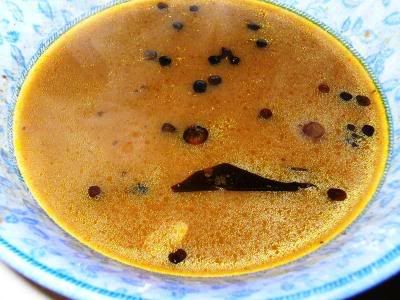
7. Serve hot with steamed rice, keerai and paruppu usili or - for an extra special touch - pan-fried potatoes Indian style.
Anyway, in my opinion, you gotta add two kinds of dried berries to make an authentic vattha kuzhambu - marathakkalikai and chundakkai.

Clockwise from bottom right: Marathakkali, chundakkai, dried red chillies, roasted peanuts
Again, these are most likely acquired tastes. Chundakkai, especially, are really bitter if you bite into them... but I do like the overall aroma and the flavour they impart to the kuzhambu. Marathakali are much more my favourite - fried and mixed with ghee and rice, they're really rather yummy. Better yet, they're also supposed to be good for you. For cleansing the blood, or something like that. Okay, I really need to find out more about them. Watch this space.
Because vattha kuzhambu is not made with any significant amount of dal, South Indians get their protein by pairing it with paruppu thogayal - somewhat like hummous, but made with tuvar dal and bengal gram dal, rather than cooked chickpeas. It's usually bland. I havent had it or made it in years, to tell the truth, because I personally prefer to make beans or cabbage paruppu usili as an accompaniment. Keerai (spinach) is another good side-dish for this kuzhambu.
Recipe for: Vattha kuzhambu

Ingredients:
1 tsp tamarind paste, dissolved in 4 cups warm water
2 tsp sambar powder
1 tsp tuvar dal
1-2 tsp dried marathakkali berries
4-5 dried chundakkai
10-12 fenugreek seeds
1 tsp mustard seeds
2 dried red chillies, broken in half
1/2 tsp red chilli powder (optional)
3/4 tsp freshly ground black pepper
2-3 tsp oil
4-5 curry leaves
pinch of asafoetida
2 tbsp roasted de-skinned peanuts
1 tbsp rice flour or cornflour (for thickening the gravy if required)
Salt to taste
Method:
1. Heat the oil in a pan and fry the dried berries for 30 seconds or so.
2. Add the asafoetida, dry red chillies, curry leaves, mustard seeds, fenugreek seeds and tuvar dal to the oil and stir. Fry till the mustard seeds pop and the tuvar dal turns golden brown. The berries should be dark brown now, but be careful that they dont burn.
3. Add the sambar powder, ground black pepper and red chilli powder (if using) and stir. Then pour in the tamarind water.
4. If you are using the peanuts, drop those in as well and let the tamarind water boil for 15-20 minutes or until it has reduced by a third.
5. Mix the cornflour/rice flour with some water to make a pourable paste, and stir it into the kuzhambu. Add salt to taste.
6. Boil it for another 5 minutes, until it is the consistency you like.

7. Serve hot with steamed rice, keerai and paruppu usili or - for an extra special touch - pan-fried potatoes Indian style.
Tuesday, September 27, 2005
This time it's apple pie
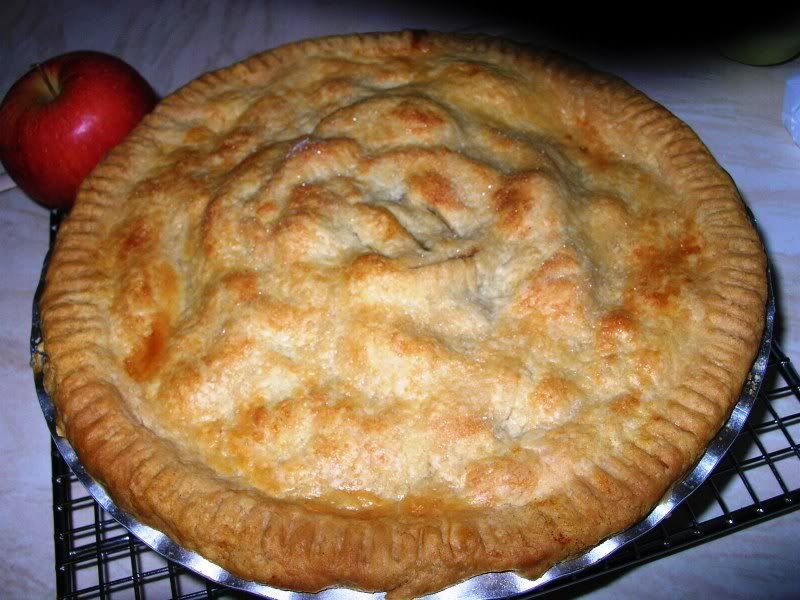
And a better pie than my first attempt, although still not anywhere near perfect to look at. I'm not going to make any more pies for awhile, though... they're simply too calorious (to coin a word) for words - all that butter and margarine and sugar - extravagantly sinful. I baked this pie just to ensure that the first one wouldnt remain a one-off effort :)
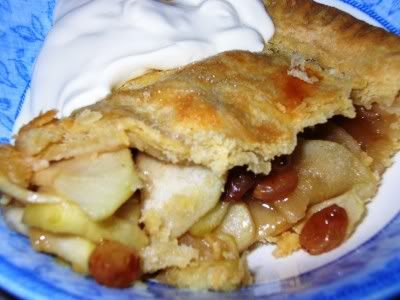
This was a deliberate pie. With raisins. Too, I remembered to brush the top of the pie with milk AND sprinkle it with white sugar before baking - something I'd neglected the first time around. The milk gave the pie a beautiful golden glaze, and the sparkly sugar crystals provided the finishing touch. I have to say it looked very pretty! I ate the odd bit of it but my sweet tooth is very easily satisfied and I was glad of the unsweet crust to temper the sweetness of the filling.
My husband and friends demolished the pie in two sittings. Well, I'm glad about that, that's a good thing, else I'd have been a very sad bunny. There's nothing more disheartening than to see something you've made (expending great effort, too) sitting there uneaten and unappreciated until you have to throw it away.
Recipe for: Double-crust apple pie
Ingredients:
For the pie dough (crust):
2 1/2 cups plain flour
1/2 teaspoon salt
1 tsp cinnamon powder
1/2 cup cold butter, cut into small pieces
6 tablespoons cold margarine (can use shortening instead)
5-7 tablespoons ice water
Method:
1. Stir together the flour, cinnamon powder and salt in a medium bowl.
2. Cut in the butter with two knives. Add the margarine and combine with a large fork until the mixture resembles coarse oatmeal.
3. Sprinkle the water, 1 tablespoon at a time, over the flour mixture and stir
with a fork until all the flour is moistened and the dough holds together
and doesn’t crumble.
4. Gather into a ball. Knead lightly (but not too much) until the dough is smooth. It's ok if the butter is still a bit lumpy. Lumpy is good!
5. Divide the dough into two, form into smooth balls, wrap each ball in clingfilm and refrigerate for at least 30 minutes.
For the apple filling:
4 large Granny Smith apples, cored, peeled and evenly sliced (or cubed, according to preference. I sliced mine.)
Juice of one lemon
1/2 cup white sugar
1/2 cup light brown sugar
1 tsp cinnamon powder
1/2 tsp grated nutmeg/cloves or allspice
1/2 cup golden raisins
1-1/2 tbsp cornflour
1-1/2 tbsp quick cooking tapioca, powdered
1. Toss the apple slices with the lemon juice.
2. Mix the rest of the ingredients together in a separate bowl and set aside.
Assembling the pie:
Method:
1. Roll out one ball of pie dough (leave the other in the fridge till required) on a lightly floured surface into a 10-inch circle, about 1/2 cm thick.
2. Lift up the circle of dough carefully and centre it in an 8" pie dish. Pat it gently in place at the bottom and up the sides.
3. Trim the edge even with the rim of the pie dish.
4. Roll out the other ball of dough into a circle that is about 1 inch larger than the rim of the pie dish. Set aside.
5. Put in a layer of sliced or cubed apples and sprinkle liberally with the sugar-raisin mixture. Add layers of fruit, sprinkling each layer with the sugar mixture. Mound the apples slightly in the centre and top off with the remaining sugar mixture.
5. Place the second circle of pastry over the fruit filling and trim the edge to about half an inch larger than the bottom crust. (I used scissors!)
6. Tuck the overhanging top edge under the bottom crust. Crimp the edges all around with the tines of a fork. Make a few slits at the top so that the steam can come out while the pie is baking.
7. Refrigerate the uncooked pie for 15-20 minutes. Then brush the top with some cold milk and sprinkle some white sugar all over.
8. Place in a pre-heated oven and cook at 180C (350F) for 45 minutes or so, until the top is golden and a skewer passes easily through the fruit when it's poked in the top.
9. Let the pie cool completely before slicing. It can be served warm (re-heat in a hot oven for 5 minutes or use the microwave) or cold with cream/vanilla icecream.

This was a deliberate pie. With raisins. Too, I remembered to brush the top of the pie with milk AND sprinkle it with white sugar before baking - something I'd neglected the first time around. The milk gave the pie a beautiful golden glaze, and the sparkly sugar crystals provided the finishing touch. I have to say it looked very pretty! I ate the odd bit of it but my sweet tooth is very easily satisfied and I was glad of the unsweet crust to temper the sweetness of the filling.
My husband and friends demolished the pie in two sittings. Well, I'm glad about that, that's a good thing, else I'd have been a very sad bunny. There's nothing more disheartening than to see something you've made (expending great effort, too) sitting there uneaten and unappreciated until you have to throw it away.
Recipe for: Double-crust apple pie

Ingredients:
For the pie dough (crust):
2 1/2 cups plain flour
1/2 teaspoon salt
1 tsp cinnamon powder
1/2 cup cold butter, cut into small pieces
6 tablespoons cold margarine (can use shortening instead)
5-7 tablespoons ice water
Method:
1. Stir together the flour, cinnamon powder and salt in a medium bowl.
2. Cut in the butter with two knives. Add the margarine and combine with a large fork until the mixture resembles coarse oatmeal.
3. Sprinkle the water, 1 tablespoon at a time, over the flour mixture and stir
with a fork until all the flour is moistened and the dough holds together
and doesn’t crumble.
4. Gather into a ball. Knead lightly (but not too much) until the dough is smooth. It's ok if the butter is still a bit lumpy. Lumpy is good!
5. Divide the dough into two, form into smooth balls, wrap each ball in clingfilm and refrigerate for at least 30 minutes.
For the apple filling:
4 large Granny Smith apples, cored, peeled and evenly sliced (or cubed, according to preference. I sliced mine.)
Juice of one lemon
1/2 cup white sugar
1/2 cup light brown sugar
1 tsp cinnamon powder
1/2 tsp grated nutmeg/cloves or allspice
1/2 cup golden raisins
1-1/2 tbsp cornflour
1-1/2 tbsp quick cooking tapioca, powdered
1. Toss the apple slices with the lemon juice.
2. Mix the rest of the ingredients together in a separate bowl and set aside.
Assembling the pie:
Method:
1. Roll out one ball of pie dough (leave the other in the fridge till required) on a lightly floured surface into a 10-inch circle, about 1/2 cm thick.
2. Lift up the circle of dough carefully and centre it in an 8" pie dish. Pat it gently in place at the bottom and up the sides.
3. Trim the edge even with the rim of the pie dish.
4. Roll out the other ball of dough into a circle that is about 1 inch larger than the rim of the pie dish. Set aside.
5. Put in a layer of sliced or cubed apples and sprinkle liberally with the sugar-raisin mixture. Add layers of fruit, sprinkling each layer with the sugar mixture. Mound the apples slightly in the centre and top off with the remaining sugar mixture.
5. Place the second circle of pastry over the fruit filling and trim the edge to about half an inch larger than the bottom crust. (I used scissors!)
6. Tuck the overhanging top edge under the bottom crust. Crimp the edges all around with the tines of a fork. Make a few slits at the top so that the steam can come out while the pie is baking.
7. Refrigerate the uncooked pie for 15-20 minutes. Then brush the top with some cold milk and sprinkle some white sugar all over.
8. Place in a pre-heated oven and cook at 180C (350F) for 45 minutes or so, until the top is golden and a skewer passes easily through the fruit when it's poked in the top.
9. Let the pie cool completely before slicing. It can be served warm (re-heat in a hot oven for 5 minutes or use the microwave) or cold with cream/vanilla icecream.
Labels:
AP flour,
applesauce,
brown sugar,
butter,
cinnamon powder,
cornflour,
lemon juice,
margarine,
nutmeg,
raisins,
salt,
tapioca,
white sugar
Subscribe to:
Posts (Atom)

