Showing posts with label garam masala. Show all posts

Thursday, November 24, 2016

Pan-roasted brussels sprouts

Brussels sprouts are a great favourite with me, especially since I discovered that they could be roasted in the oven. That is definitely my most preferred way to eat these little green cabbagey things. My mother and I are the only two people in my family who would willingly and happily eat sprouts. My husband turns green at the sight of a sprout. Despite that, he always insists on having this vegetable as a side dish at Christmas dinner, and he'll even put a couple of them on his plate - but they remain untouched all through the meal and then they go straight into the bin. I've asked him why he wants sprouts on the table if he hates them so much, and why he puts them on his plate if he never means to eat them. The only answer I've received is a stubborn "There should be Brussels sprouts at Christmas dinner. It's a tradition." Yeah, his Christmas tradition being never to eat sprouts.

Anyway, my mother-in-law, brother-in-law, my niece and I all make up for Pete's boycott of the sprouts, because we all love them.

Today, inspired by Masterchef Australia 2016 (which I have been watching diligently and religiously), I decided to pan-fry my sprouts. I usually add a lot of chilli powder to my dry curries, but for some reason I refrained, just limiting myself to a pinch of Jaffna curry powder. 


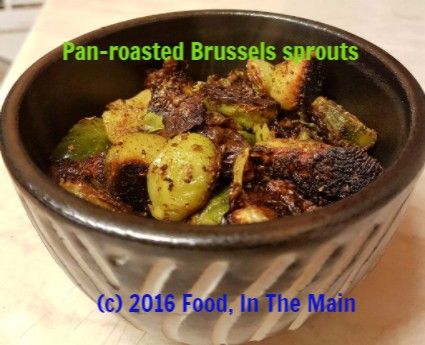
Cooking the sprouts on a slightly higher heat, covered, for 15 or so minutes helped them "caramelise" where they were in contact with the hot pan. Masterchef contestants (and judges) are very big on caramelisation, which I've interpreted as "crisp in places and just very slightly burnt". 

Well, whatever the actual definition, the sprouts were absolutely delicious! i'm not joking when I say that I kept eating them straight from the pan - the caramelised bits were lovely and crunchy, the inner bits were soft... seriously, just thinking about it is making me salivate. I still have a few sprouts left and I'm very certain I'll be making this again tomorrow. Thank you, Masterchef Australia, for the caramelisation fixation!

Recipe for: Pan-roasted Brussels sprouts

 photo 20e928ffe4de493eb7c245729642318e_zpsiqk4ncnk.jpg

Ingredients:

15 medium sprouts
1 tbsp oil
1/4 tsp asafoetida powder (optional)
1/2 tsp coriander powder
1/2 tsp Jaffna curry powder (or any curry powder or garam masala you might have)
Salt to taste

Method:

1. Trim the sprouts and cut into quarters.

2. Heat the oil in a pan. Add the asafoetida powder and coriander powder and stir it for 30 seconds. Then add the quartered sprouts, sprinkle the curry powder or garam masala over, and stir to coat the sprouts in the oil and spices.

3. Keep the heat just below medium-high and cover the pan. Let the sprouts cook for 15 minutes undisturbed. Then take off the lid and check to see that they are cooked. They should be beautifully caramelised from the prolonged undisturbed contact with the hot pan. Sprinkle the salt over the cooked sprouts and stir it in.

4. Take the pan off the heat and serve the sprouts hot as a side with rice and sambar. (I ate most of them straight from the pan because they were just that delicious.)

Thursday, November 03, 2016

Blackeyed bean curry

I love my local "Indian" shop in Wellington. Del, the owner, is a really nice man with a great sense of humour and enough knowledge of rugby to engage with Pete. Plus, he keeps adding new products, especially in the fresh frozen section. I might not get a wide variety of fresh and exotic vegetables there, although most of the Indian staples are easily available, but there's plenty in the frozen section to keep me happy.

Like the fresh frozen black eyed beans that I bought the other day. (I also bought a couple of bags of some type of mystery greens, but that's another story.) I guess my foodie friends will understand when I say that my cup of happiness ranneth (new word!) over when I saw the fresh beans and green chickpeas in the freezer section. 

I made a curry the same evening with the black eyed beans - really tasty it was, too. I won't say that it will rock your world, although it should. (Mine wobbled a bit on its axis.)

Recipe for: Blackeyed bean curry
  
 photo 3c815a01-06df-43e4-b706-5b7b4fe807a1_zpsxbpircn9.jpg

Ingredients:

2 tsp oil
2 cups fresh frozen blackeyed beans
1 medium potato, sliced into strips
3 large tomatoes, chopped fine
1 large onion, chopped fine
3-4 green chillies, minced (or to taste)
1" piece ginger, grated
2 cloves garlic, minced
1/2 tsp coriander powder
1/2 tsp cumin powder
1 tsp Kitchen King masala (or garam masala)
1-2 cups water
1/4 cup yogurt
Salt to taste
Juice of half a lime
Coriander leaves for garnish

Method:

1. Heat the oil in a saucepan and add the onion, green chillies, ginger and garlic along with the coriander and cumin powder. Mix well and fry on medium heat for 2-3 minutes, stirring frequently, until the onion starts to soften.

2. Now add the chopped tomatoes and sliced potatoes and stir-fry for 4-5 minutes. Add the frozen blackeyed beans, pour in a cupful of water and bring the mixture to a boil. Then cover the pan, turn down the heat and let the beans cook for 10 minutes. Stir once in a while so that the masala does not burn. Add a little more water if required.

3. Once the potatoes and beans are cooked, and the sauce is thick, stir in the yogurt over medium heat. Do not let it boil after adding the yogurt. Add salt to taste and mix it in, then the lime juice. Turn off the heat, sprinkle the beans with the chopped coriander and serve hot with rice or chapaties. 

Tuesday, January 26, 2016

Stuffed karela (bitter melon, bitter gourd)

I can't seem to get enough of karela or bittergourd nowadays - I really love these ugly knobbly vegetables that look like a bit like rats with a long tail. A couple of days back, I went to my favourite "Indian" shop in Wellington for vegetables, and was beyond thrilled to find small baby karela for sale. I picked out the freshest 10 and came home joyfully, having decided how I was going to cook them. Stuffed, basically. I didn't want the stuffing to be the usual onion masala or potato masala or peanut-based masala - mainly because I didn't want to spend time cooking the stuffing. Bad enough that I would have to wait for the karela itself to cook. 

So I just put together a random mixture of flours and spices, toasted the mix in a dry pan until fragrant, then used some oil and water to bind the powdery mix and make it amenable to stuffing, basically. 

I admit that this recipe uses more oil than usual, but it's worth it if you love karela and only make it once in a while. It was SO delicious. I had the stuffed karela with lemon masoor dal and rice and a little ghee, and felt like I had gone to heaven without having to die first. Yes, THAT good.

So good that I forgot to take a photo before diving into the karela. Oops... 

Recipe for: Stuffed karela


Ingredients:
6-8 small (about 4-5 inches length) tender karela

For the masala paste
1/4 cup soya flour or jowar flour
1/2 cup chickpea flour (besan/kadalai maavu)
1/8 cup rice flour
4 tbsp coriander powder
1 tsp cumin powder
1/2 tsp aniseed powder
1/2 tsp fennel powder
1 tsp garam masala/rasam powder/any other masala you prefer
2 tsp red chilli powder (or to taste)
1/4 tsp asafoetida powder
Salt to taste
4 tbsp oil

Method:

1. Lightly peel the karela so that the ridges no longer stick out. Make a slit in each karela from end to end, being careful not to cut right through to the other side.

2. Use the handle of a small spoon to gouge out the inner seeds and membrane.

3. At this point you can rub salt on the inside and outside of the karela and let it sit for a few hours so that some of the bitter juices are drawn out. If you do this, be sure to squeeze the juices out, then wash the karela well to remove the excess salt. Pat dry with kitchen paper and reserve.

4. Mix together all the ingredients for the masala paste, bar the oil. Heat a pan and dry toast the mixed masala powder, stirring constantly, until the flours start to smell fragrant and savoury. Be careful not to burn it.

5. Once the masala mix is toasted, transfer it to a container. This might be more than you require, but you can always store the excess for another day in an airtight container. I prefer to make extra, because I don't like it when I find out halfway through stuffing that there isn't enough masala paste to fill all the karela. so you can use all of the toasted mix, or just half, depending on how many karela you have and their size.

6. Now add 2 tbsp of the oil to the masala powder and stir it in. The paste needs to come together enough that if you pinch some together, it shouldn't fall apart. You can add a bit more oil to get the powder to that stage, or you can add a little water. Either way, don't make it into a gooey paste.

7. Once the masala mix is ready, use your fingers to stuff it into the karela. Once they are all stuffed, you can use kitchen string to tie the karela so the stuffing doesn't come out (it tends to expand a bit as it cooks), but it's not strictly necessary especially if the karela is small.

8. Heat the remaining 2 tbsp oil in a pan and add 1/4 tsp asafoetida to it. As soon as it sizzles, put the stuffed karela in the pan and stir them gently so they are coated in the oil. Sprinkle 2-3 tbsp water over the karela and close the pan. Cook the karela covered over medium-low heat for 15 minutes or until they soften and turn a paler green. After that take the lid off and turn up the heat a bit more, occasionally turning them over, until they turn brown and crisp on all sides.

Serve hot with dal and rice.

Monday, June 03, 2013

We Knead to Bake #5 - Bialys

(Adapted from King Arthur Flour)
First off, I have to apologise for the delay in posting my version of this month's challenge - actually, last month's, now. In my defence, my laptop was on a dreadful go-slow, and on top of that, the Internet connection at home was unavailable all of last week as we'd changed over from AOL to BT... and the engineer from BT could only come last Friday to actually install whatever he needed to install for us to go online. So now we have a superfast connection... but my laptop has not received the memo yet, methinks. It's extremely frustrating to work on photographs when it takes 5 minutes to save every change that's made. But this post had to be published, and I didn't want to risk being thrown out of this group for a perceived lack of participation. (I but jest, I know Aparna is very forgiving!)

Anyway, those of you who are still dropping by my blog might be wondering who's been writing my posts for me. I wonder that myself, because the last few posts show every sign of having been dashed off by someone who didn't know how to write, who didn't want to write in the first place and who had a dozen different distractions. That was me. Distracted and reluctant. And it showed in my writing - hastily done for the sake of doing it, not because I was enjoying the process. I'm still in the reluctant phase, so this probably isn't going to be a long post. I just wanted to make my excuses for the quality of my posts lately. I know I can do better, and I probably eventually will.

On to the bialys. I've made them twice - they're pretty easy to make, but the reason I made them the second time is because the onion filling got burnt practically to cinders. My first mistake was to cook the onions for too long on the hob, and my second mistake was to leave the overcooked onions to cool in the frying pan itself. That was a rookie mistake, really. So the already overcooked onion simply got incinerated when they spent 20 minutes in a 230C oven. The bialys tasted great, so Pete and I ate the bready part after I'd chiselled off the charred onions.

This anecdote is merely to emphasise that it's very important to cook the onions till just soft and no more. And remove the cooked onions to a bowl where they can cool.

The second batch of bialys was spectacularly tasty. You can add chopped, cooked smoked bacon to the onion mix for the non-vegetarians, like I did. Believe me, those bacon bialys just vanished.

Recipe for:
Bialys

 photo DSCF8779_zpsf5ae616b.jpg

Ingredients:

For the dough:
1 teaspoon instant yeast
1 tbsp sugar
1 1/4 cup warm water
3 cups all-purpose flour (use bread flour if you can find it or all-purpose flour + 1 tbsp vital wheat gluten)
1 tsp salt
Milk for brushing the dough

For the Onion Filling:
1 tbsp oil
3 medium onions, finely chopped
1 1/2 tsp cumin seeds
3/4 tsp garam masala
Salt to taste

Method:

1. Make the dough first. Put the yeast, sugar, salt and flour in a large bowl. Mix well and then add the warm water in a steady stream. Knead until the dough comes together as a mass and then let the dough rest for 10 minutes. This will help the dough absorb water. Knead again, adding a little more water or flour (not too much) if you need it, until your dough is smooth and elastic but not sticky.
2. Shape tre dough into a ball and put it in a well-oiled bowl, turning the dough till it is well coated. Cover and let it rise till about double. This should take about 2 hours. If you’re not making the bialys right away, you can refrigerate the dough overnight at this point. When ready to make them, keep the dough at room temperature for about half an hour and then proceed with the rest of the recipe.
3. In the meantime, make the filling. Heat the oil in a pan, and add the cumin seeds. When the crackle, add the onions, and sauté over low to medium heat. Sprinkle a little salt and continue sautéing until they become soft and turn golden brown in colour. Add the garam masala and stir well. Keep the caramelised onions aside to cool.
4. Sprinkle your work surface lightly with flour and place the dough on it. Divide it into 8 equal pieces and shape each one into a roll by flattening it and then pinching the ends together to form a smooth ball. Place the rolls on a lightly greased baking sheet and cover them with a towel. Let them rise for about one hour (about 1 1/2 to 2 hours for refrigerated dough) till pressing with a finger on the top leaves a dent.
5. Work on one piece at a time, while you keep the others covered so they don’t dry out. When the rolls are ready, pick them up one at a time and using your fingers, form the depression in the middle. Hold the roll like a steering wheel with your thumbs in the middle and your fingers around the edges. Pinch the dough between your thumb and fingers, rotating as you go and gradually making the depression wider without actually poking a hole through.
 photo DSCF8775_zpsfb1e1d2f.jpg
6. Remember not to press on the edges, or they will flatten out. Once shaped, you should have a depression about 3” in diameter with 1” of puffy dough around the edge, so your Bialy should be about 4” to 5” in diameter. Prick the centre of the bialys with a fork so the centre doesn’t rise when baking.
7. Place the shaped dough on a parchment lined (or greased) baking tray leaving about 2 inches space between them. Place the caramelised onion filling in the depressions of each Bialy. Brush the outer dough circle with milk. Bake the bialys at 230C (450F) for about 15 minutes till they’re golden brown in colour.
 photo DSCF8777_zps0bbfddc6.jpg
Cool them on a rack. Serve slightly warm or at room temperature.

Sunday, January 27, 2013

Curried devils (deviled eggs)

I recently read a book called "The Secret Supper Club" by Dana Bate, which was about this woman who worked as a research assistant, but whose dream was to become a cook - or chef, I suppose (which is really just a posh word for "cook"). It was a good if light read, just what I'd wanted at that point. 
currieddevil1_zps3757ac92 photo currieddevil1_zps3757ac92-1_zps4f045cec.jpg

I'm not really going to do a book review, but I had to mention the book because there were a few recipes at the end, of things that she'd made for her secret supper club guests, and the first of them was a recipe for deviled eggs. The rest of the recipes I was not interested in because they were rather too elaborately non-vegetarian. But this one seemed doable, so I did. 

I made a couple of minor changes, but mostly this recipe is as the book had it. The filling turned out to be much more lemon-sharp than I'd anticipated, and I think it's because I used perhaps a tablespoon's worth of lemon juice rather than the 1/2 tsp called for. It wasn't really a huge mistake for us, in any case, because Pete and I both love the sourness.

Recipe for: Curried devils (deviled eggs)
currieddevil_zpsb0e41ab3 photo currieddevil_zpsb0e41ab3-1_zps754e8507.jpg
Ingredients:

8 large eggs
1/4 cup mayonnaise
1 tsp Dijon mustard
1/2 tsp medium or mild curry powder (or use 1/4 tsp garam masala)
1/2 tsp lemon juice
1 tbsp finely chopped fresh chives
1/4 tsp smoked hot paprika/cayenne pepper
Kosher salt & freshly milled black pepper, to taste
1/2 tsp sweet paprika for garnish

Method:
1. Place the eggs carefully in a large saucepan and fill with cold water to come up to 1" above the eggs.
2. Bring to a bubbling boil, then turn the heat off, cover the pan and leave for exactly 14 minutes.
3. Then drain off the water and fill the pan again with very cold water, to stop the eggs cooking any further. Set aside for 10 minutes, then peel the eggs and slice them in half vertically.
4. Remove the yolks to a small bowl. Mash them smooth with a fork, then add the mayonnaise, Dijon mustard, curry powder/garam masala, lemon juice, chives and hot paprika and mix thoroughly. Taste the mixture, adding a bit more of whatever you feel is lacking. Add salt (careful with this as the mayonnaise will already have salt) and pepper to taste and mix one final time.
5. Spoon the egg yolk mixture into a sealable sandwich bag or Ziploc bag (or use a disposable pastry bag) piling the filling as far as possible into one corner. Snip off the corner of the bag with scissors, then pipe the mixture into the egg whites. Sprinkle with a little sweet paprika to garnish, and serve at room temperature or cold.
Note: If you have any mixture left over (and going by my experience, you will), use it in a sandwich, or as a spread on toast. You can store the unused mixture in a sealed container in the refrigerator for a day.

Friday, May 04, 2012

Pinto bean parathas

I'm beginning to wonder if I should call these "recipes" - they're so basic and samey in the making, especially if you're Indian and make/eat rotis/parathas/etc often. Still, the difference in flavour is obviously marked, different with every filling you choose to use (well, duh, I know).


I don't think I've used a beany filling before, so it's an opportunity to say I used a beany filling and, at the same time, increase the number of recipes on my blog by one. My aim this year is to reach 500 posts, and oh man, is it ever a slooooowwww process! I'm currently at 467, and it's high time I touched the 500 mark - especially as this blog has been going for close on 7 years!


(Actually, it will complete 7 years on the 17th of May - I just checked!). All compliments, congratulations and wah-bhai-wahs as well as encouragement to continue will be graciously and humbly accepted.)

So, the pinto bean filling - it came about simply because there was a small box of leftover cooked beans in the fridge. I just LOVE pinto beans - they're so creamy when cooked, the texture is just lovely. They're probably my most favourite bean, next to chickpeas which, ok, are not a bean really, I know... but you know what I mean, don't you?

Recipe for: Pinto bean parathas
DSCF8137

Ingredients:
2 cups whole wheat flour
1/2 cup plain yogurt
1/2 tsp omam (ajwain/bishopsweed/carom seeds)
1/3 cup cooked pinto beans
DSCF8128
1/2 tsp garam masala/pav bhaji masala or spice mix of choice
Water as required
Salt to taste
Pam spray/oil/butter/ghee as required


Method:
1. Put the flour and omam in a medium size bowl, make a well in the middle and add the yogurt. Mix it in, then make a soft dough using just as much water as required. Knead for 2-3 minutes, then cover the bowl and leave the dough to rest for 30 minutes.
2. Mash together the pinto beans, garam masala/pav bhaji masala and salt to taste. Reserve.
DSCF8129
3. Pinch off a small lime-sized bit off the dough and roll it out on a lightly floured board.
4. Place a tablespoon of the pinto bean paste in the middle of the rolled out dough,
DSCF8130
bring the edges in and make a ball, being careful to seal the filling inside fully. Then roll the ball out into a round paratha.
DSCF8127
5. Heat a tava/pancake pan on medium high and place a paratha on it. Cook the paratha for about 30 seconds, then flip it over and spray it with Pam or spread a little butter/oil/ghee.
DSCF8136
Turn it over again and do the same with the other side. Cook both sides until the paratha acquires golden brown spots. Continue the same way with the rest of the dough.
6. Serve hot with pickles and yogurt, or with any gravy curry, or even coconut chutney.


RECIPE FOR: PINTO BEAN PARATHAS

Ingredients:
2 cups whole wheat flour
1/2 cup plain yogurt
1/2 tsp omam (ajwain/bishopsweed/carom seeds)
1/3 cup cooked pinto beans
1/2 tsp garam masala/pav bhaji masala or spice mix of choice
Water as required
Salt to taste
Pam spray/oil/butter/ghee as required


Method:
1. Put the flour and omam in a medium size bowl, make a well in the middle and add the yogurt. Mix it in, then make a soft dough using just as much water as required. Knead for 2-3 minutes, then cover the bowl and leave the dough to rest for 30 minutes.
2. Mash together the pinto beans, garam masala/pav bhaji masala and salt to taste. Reserve.
3. Pinch off a small lime-sized bit off the dough and roll it out on a lightly floured board. 
4. Place a tablespoon of the pinto bean paste in the middle of the rolled out dough, bring the edges in and make a ball, being careful to seal the filling inside fully. Then roll the ball out into a round paratha. 
5. Heat a tava/pancake pan on medium high and place a paratha on it. Cook the paratha for about 30 seconds, then flip it over and spray it with Pam or spread a little butter/oil/ghee. Turn it over again and do the same with the other side. Cook both sides until the paratha acquires golden brown spots. Continue the same way with the rest of the dough. 
6. Serve hot with pickles and yogurt, or with any gravy curry or even chutney. 

Sunday, September 25, 2011

Golden beet and split-pea dal


Yesterday I went to a supermarket called Morrisons, which I visit only occasionally. It turned out to be very exciting, in the event, because I saw display after display of vegetables and fruits that I'd only ever seen in "ethnic" markets before... bittergourd (albeit the Chinese kind), colocasia, bottlegourd, plantains, curry leaves and so on, along with even more exotic heirloom items - tomatoes and golden beets and pink beets.

To say that I was thrilled is an understatement - Pete was amused by my ecstatic squeaks of joy as I came upon more and more things, some of which I'd only seen in Singapore, or heard of from other food blogs. My first instinct was to buy everything in sight, but in the end I restricted myself to buying some heirloom tomatoes and beetroots (and some spiky looking rambutan. I just couldnt resist those fruits).

Photobucket
To get back to the beets, they looked absolutely lovely when they were peeled - a sort of golden orangey pink, all the shades of a glorious sunset. The intensity of the colours lessened somewhat when the beets were cooked, but they were still very apparent. I have to say I prefer these heirloom beets to the regular red ones because they don't turn everything they touch to a lurid pink. And they still taste like proper beets. They definitely made my dal look pretty in pastel shades! Don't you think so too?

PS. The rambutan? Pete and I ate them. They were beautifully sweet.

Recipe for: Golden beet and split-pea dal Photobucket
Ingredients:

2-3 medium heirloom golden/pink beets, cooked
 Photobucket
1 cup green split-peas, cooked Photobucket 2 medium red onions, sliced thinly
-5 fresh green chillies, sliced thinly
2 medium tomatoes, chopped
2-3 garlic cloves, sliced
 Photobucket
1 tsp cumin-coriander powder
1 tsp Kitchen King masala (or other garam masala)
1 tbsp oil
Fresh coriander leaves for garnish
Salt to taste
1-2 cups water

Method:
1. Heat the oil in a pan and add the chillies and garlic cloves. Fry for a minute or so, until it's fragrant, then add the cumin-coriander powder. Photobucket
2. Add the sliced onions and fry till they start to become soft Photobucket
then add the chopped tomatoes and fry till they're mushy and soft. Photobucket
3. Add the chopped cooked beets and mix them in with the masala, Photobucket
then add the cooked split-peas.
 Photobucket
Pour in a cup or two of water, depending on how thick you want the dal, and stir well.
Photobucket
4. Bring to a gentle boil, then stir in the Kitchen King/garam masala. Add salt to taste.
 Photobucket
5. Turn off the heat after a couple of minutes, then stir in the chopped coriander.
 Photobucket
Serve hot over rice or with rotis.

RECIPE: GOLDEN BEET AND SPLIT-PEA DAL

Ingredients:
2-3 medium heirloom golden/pink beets, cooked
1 cup green split-peas, cooked
2 medium red onions, sliced thinly
4-5 fresh green chillies, sliced thinly
2 medium tomatoes, chopped
2-3 garlic cloves, sliced
1 tsp cumin-coriander powder
1 tsp Kitchen King masala (or other garam masala)
1 tbsp oil
Fresh coriander leaves for garnish
Salt to taste
1-2 cups water

Method:
1. Heat the oil in a pan and add the chillies and garlic cloves. Fry for a minute or so, until it's fragrant, then add the cumin-coriander powder.
2. Add the sliced onions and fry till they start to become soft then add the chopped tomatoes and fry till they're mushy and soft.
3. Add the chopped cooked beets and mix them in with the masala, then add the cooked split-peas. Pour in a cup or two of water, depending on how thick you want the dal, and stir well.
4. Bring to a gentle boil, then stir in the Kitchen King/garam masala. Add salt to taste.
5. Turn off the heat after a couple of minutes, then stir in the chopped coriander. Serve hot over rice or with rotis.

Tuesday, June 21, 2011

Spring onion and carom seed (ajwain/omam) chapaties

I like making chapaties with spring onions because you get their lovely delicate flavour and you can still have a romantic evening without worrying about allium breath. Not that I had a romantic evening when I made these yesterday – I was by myself because Pete’s in Scotland on work… or so he says. Personally I think it’s because he wanted to take the new love of his life – a Range Rover Sport Supercharged – on a long journey, hoping to find a Porsche or Ferrari en route that would be willing to take him on. Not that I was bothered. I mean, if you had a choice between spring onion chapaties and a road trip in a supercharged Range Rover, which would you go for, huh? The spring onion chapaties, right? Right?
*sighhhhhhhhhhhhhh* Still - the chapaties are very yummy. Just not as exciting as the road trip.

Recipe for: Spring onion and carom seed (ajwain/omam) chapaties
Photobucket
Ingredients:

3 cups wholewheat flour
5-6 spring onions, green and white parts chopped fine
Photobucket
1/2 tsp Kitchen King or other garam masala
1 tsp carom seeds/ajwain/omam
Milk as required
Salt to taste (optional)

Method:

1. Put the flour, garam masala and ajwain/carom seeds along with salt to taste in a large bowl and mix well.
Photobucket
Then add the chopped spring onions and stir them in.
Photobucket
2. Make a well in the centre and add milk, a little at a time.
Photobucket
3. Stir the milk into the flour mix until it comes together, then knead into a pliable but fairly stiff dough.
Photobucket
4. Pinch off lemon-sized pieces of dough and roll them into chapaties, using more flour to dust the chapaties and stop them sticking.
5. Cook the chapaties one by one on a tava, spraying each side with Pam, occasionally pressing down lightly with a spatula to let them acquire golden brown spots.
Photobucket
6. Keep warm in a cloth-lined tin and serve hot with dal and any curry.
Photobucket

RECIPE: SPRING ONION AND AJWAIN/CAROM SEED/OMAM CHAPATIES

Ingredients:
3 cups wholewheat flour
5-6 spring onions, green and white parts chopped fine
1/2 tsp Kitchen King or other garam masala
1 tsp carom seeds/ajwain/omam
Milk as required
Salt to taste (optional)

Method:
1. Put the flour, garam masala and ajwain/carom seeds along with salt to taste in a large bowl and mix well.
Then add the chopped spring onions and stir them in.
2. Make a well in the centre and add milk, a little at a time.
3. Stir the milk into the flour mix until it comes together, then knead into a pliable but fairly stiff dough.
4. Pinch off lemon-sized pieces of dough and roll them into chapaties, using more flour to dust the chapaties and stop them sticking.
5. Cook the chapaties one by one on a tava, spraying each side with Pam, occasionally pressing down lightly with a spatula to let them acquire golden brown spots.
6. Keep warm in a cloth-lined tin and serve hot with dal and any curry.

Thursday, June 02, 2011

Hot-sweet vegetable curry

This recipe was a sort of off-the-cuff, make-it-up-as-you-go-along creation – and it tasted really nice. It wasn’t so much sweet as it was hot, because I used a Scotch bonnet pepper, and hot is how I like things... but the sweetness was there, all the same.

And that, it would appear, is all I have to say about it. I've been trying to come up with some kind of spin to eke out this post, but I believe I've run out of imagination. I need a ghost-writer with a sense of humour and endless creativity. Any takers?

Recipe for: Hot-sweet vegetable curry
Photobucket
Ingredients:

1/2 cup fingerling or salad potatoes, sliced in 1cm rounds
1/2 cup ripe mango,cubed
1/2 cup tomatoes, chopped
1/4 cup green beans, sliced on the diagonal
1/4 cup carrots, sliced in thin sticks
1/4 cup bottlegourd, sliced in thin sticks
Photobucket
1/2 cup onions, chopped fine
1 cup milk
1/2 tsp cinnamon powder
1 tsp grated ginger
1/2 tsp Kitchen King masala (or your favourite garam masala)
Green chillies to taste
5-6 cashewnuts
2 tbsp oil
A generous handful of chopped coriander leaves for garnish

Method:

1. Toss the sliced potatoes with 1 tbsp oil and roast in the oven at 180C/350F, stirring them after 15 minutes, until they are golden and cooked - about 30 minutes or so. Reserve.
Photobucket
2. Heat 1/2 tbsp oil in a pan and add the ginger and cinnamon powder.
Photobucket
3. Add the chopped tomatoes and cook for 3-4 minutes, or till they start to break up.
Photobucket
4. Add the chopped mangoes and the chillies, if using. Cook them on medium-high heat, stirring occasionally, until they become soft.
Photobucket
Remove from the heat and let the mixture cool.
Photobucket
Once it's cool, puree along with the cashewnuts and reserve.
5. Now heat the remaining 1/2 tbsp oil and fry the chopped onions.
Photobucket
6. When the onions are soft and pale brown, add the sliced carrots, beans and bottlegourd.
Photobucket
Add one cup water, cover the pan and let the vegetables cook till just done.
7. Stir in one cup milk and bring the mixture to a gentle boil on medium heat.
Photobucket
8. Add the pureed tomato-mango mixture and mix it in along with the Kitchen King masala powder..
Photobucket
9. Bring to a gentle boil, then add the oven-fried potatoes and stir them in.
Photobucket
10. Let the curry simmer for 6-7 minutes on medium heat. I like the gravy to be fairly thick, but if you prefer it more runny, add water or milk as required and simmer for a few minutes longer. Add salt to taste. Then garnish with chopped coriander leaves and serve hot with steamed rice.
Photobucket

RECIPE: HOT-SWEET VEGETABLE CURRY
Ingredients:

1/2 cup fingerling or salad potatoes, sliced in 1cm rounds
1/2 cup ripe mango,cubed
1/2 cup tomatoes, chopped
1/4 cup green beans, sliced on the diagonal
1/4 cup carrots, sliced in thin sticks
1/4 cup bottlegourd, sliced in thin sticks
1/2 cup onions, chopped fine
1 cup milk
1/2 tsp cinnamon powder
1 tsp grated ginger
1/2 tsp Kitchen King masala (or your favourite garam masala)
Green chillies to taste
5-6 cashewnuts
2 tbsp oil
A generous handful of chopped coriander leaves for garnish

Method:

1. Toss the sliced potatoes with 1 tbsp oil and roast in the oven at 180C/350F, stirring them after 15 minutes, until they are golden and cooked - about 30 minutes or so. Reserve.
2. Heat 1/2 tbsp oil in a pan and add the ginger and cinnamon powder.
3. Add the chopped tomatoes and cook for 3-4 minutes, or till they start to break up.
4. Add the chopped mangoes and the chillies, if using. Cook them on medium-high heat, stirring occasionally, until they become soft.
Remove from the heat and let the mixture cool.
Once it's cool, puree along with the cashewnuts and reserve.
5. Now heat the remaining 1/2 tbsp oil and fry the chopped onions.
6. When the onions are soft and pale brown, add the sliced carrots, beans and bottlegourd.
Add one cup water, cover the pan and let the vegetables cook till just done.
7. Stir in one cup milk and bring the mixture to a gentle boil on medium heat.
8. Add the pureed tomato-mango mixture and mix it in along with the Kitchen King masala powder..
9. Bring to a gentle boil, then add the oven-fried potatoes and stir them in.
10. Let the curry simmer for 6-7 minutes on medium heat. I like the gravy to be fairly thick, but if you prefer it more runny, add water or milk as required and simmer for a few minutes longer.Add salt to taste. Then garnish with chopped coriander leaves and serve hot with steamed rice.

Monday, January 10, 2011

Cassava/tapioca in flaxseed masala

Cassava/tapioca is one of the many root vegetables I like because of its association with the years that I lived in Dar-es-Salaam as a kid. I mainly knew it in its roasted or fried form, although I also liked its boiled and salted avatar. I’d seen recipes for cassava from fresh, but never any for dried cassava.
Photobucket
I'd come into possession of dried cassava pieces a few weeks ago, when I had tagged along with Pete to York (or somewhere thereabouts) where he was to meet someone to collect some esoteric sound equipment. The ride was itself worth it for the scenery, but even better was the fact that the meeting point turned out to be right next to a reasonably big “Indian” store – well, it was actually an Iraqi store, but it contained enough Indian/Mediterranean/Middle-Eastern stuff to make me happy.


I wanted to explore the shop, but Pete said his contact would be there imminently and the whole exchange wouldn’t take 5 minutes, so I resigned myself to a quick trip into the store to get some whole urad dal which I’d run out of. I saw plenty of interesting things in there to make me wish I could browse for a bit, but I didn’t hang around as we had a 3-hour drive back to Shrewsbury (and I was working the next day, so it was in my best interests to get back home as soon as possible) - and I was on a promise to my husband, in any case.

I believe that keeping my virtuous promise to Pete (“I’ll only be a minute at the shop, honest” - which he didn’t really believe since he knew what I was like) was instantly rewarded in the form of a serendipitous call from Pete’s contact to say that he was running late by about 30-40 minutes. I must have lit up the street with my delighted smile, because my husband gave me a grin and said “Oh all right, go on with you, only don’t buy up the shop will ya?”

I didn’t buy up the shop, but I did have a thoroughly enjoyable time browsing every aisle and its contents, trying to figure out what the items were (made somewhat difficult because sometimes I didn’t know the script or the language), and finding things to buy that I didn’t know I wanted to try until I saw them. Among other, more mundane things, I bought two (to me) exotic items - a bag of dried cassava/tapioca pieces, and something called “mograbiyeh”, made of semolina (which Google revealed later was like couscous, except the grains were the size of peppercorns).

I reserved the mograbiyeh for later and decided to experiment with the dried cassava/tapioca first. To be honest, I didn’t have the first idea what to make with it, but I figured Step 1 would be to rehydrate them. So I turned out a third of the bag into a bowl of water and let it soak overnight. I still didn’t know what Step 2 ought to be, and Google didn’t really suggest any recipes specifically using dried cassava.


I decided to bake the rehydrated pieces (which, I assumed, had been originally cooked and then dried) in the oven, because I really do love cassava chips and I had my Dar-es-Salaam memories in mind. Sadly, they mostly turned into baked wood chips and had to be consigned to the bin, my teeth not being what they once were.

My second experiment was to soak and then deep-fry the pieces to see if that would make better chips. The experiment was a success in a way, because the end result was definitely better wood chips; but in terms of edibility, not so much. My teeth continued to be not what they once were.

Now there was only the final third of the bag left to play around with, and I decided that the only thing to do now was improvise a curry. So I did. And here it is in recipe form, in all its successful glory.


Recipe for: Cassava/tapioca in flaxseed masala

Photobucket

Ingredients:

Photobucket
1 cup dried cassava/tapioca pieces, soaked in water for 3-4 hours
1 tbsp flaxseeds
6-7 black peppercorns
1/2 tsp cumin seeds
1/2 tsp coriander seeds
2 cloves garlic
4-5 dry red chillies (or to taste)
1/2 tsp tamarind paste
2 medium onions, sliced thin
1 cup chopped tomatoes
1/2 tsp garam masala (I used Kitchen King)
1 tbsp oil
Salt to taste
Coriander leaves to garnish

Method:

1. Break up the soaked cassava/tapioca pieces into more or less even bits. Boil them in water until they are cooked. They should be very soft (easily pierced with a knife tip) but not mushy.
Photobucket
Drain and reserve.

2. Grind the flaxseeds, peppercorns, cumin seeds, coriander seeds, garlic and red chillies to a fairly smooth paste, without adding water.
Photobucket

3. Heat the oil in a pan and fry and ground masala paste for 1 minute, stirring briskly.

4. Add the sliced onions and fry for 3-4 minutes, or until they start to turn translucent.
Photobucket

5. Now add the tomatoes and stir them in.
Photobucket
Let them cook down with the onions until mushy.
Photobucket

6. Next, add the cooked cassava/tapioca pieces Photobucket
and mix them with the tomato-onion masala.
Photobucket

7. Dissolve the tamarind paste in 1-1/2 cups water and pour it in. Stir well and add salt to taste.
Photobucket

8. Bring to a gentle boil, then turn down the heat and let the curry simmer for 5 minutes while the gravy thickens.
Photobucket
Garnish with coriander leaves before serving hot with cooked millet or quinoa. Can also be eaten with chapaties/rotis.

RECIPE: CASSAVA/TAPIOCA IN FLAXSEED MASALA

Ingredients:

1 cup dried cassava pieces, soaked in water for 3-4 hours
1 tbsp flaxseeds
6-7 black peppercorns
1/2 tsp cumin seeds
1/2 tsp coriander seeds
2 cloves garlic
4-5 dry red chillies (or to taste)
1/2 tsp tamarind paste
2 medium onions, sliced thin
1 cup chopped tomatoes
1/2 tsp garam masala (I used Kitchen King)
1 tbsp oil
Salt to taste
Coriander leaves to garnish

Method:

1. Break up the soaked cassava/tapioca pieces into more or less even bits. Boil them in water until they are cooked. They should be very soft (easily pierced with a knife tip) but not mushy. Drain and reserve.
2. Grind the flaxseeds, peppercorns, cumin seeds, coriander seeds, garlic and red chillies to a fairly smooth paste, without adding water.
3. Heat the oil in a pan and fry and ground masala paste for 1 minute, stirring briskly.
4. Add the sliced onions and fry for 3-4 minutes, or until they start to turn translucent.
5. Now add the tomatoes and stir them in. Let them cook down with the onions until mushy.
6. Next, add the cooked cassava/tapioca pieces and mix them with the tomato-onion masala.
7. Dissolve the tamarind paste in 1-1/2 cups water and pour it in. Stir well and add salt to taste.
8. Bring to a gentle boil, then turn down the heat and let the curry simmer for 5 minutes. Garnish with coriander leaves before serving hot with cooked millet or quinoa. Can also be eaten with chapaties/rotis.