Thursday, November 24, 2016

Pan-roasted brussels sprouts

Brussels sprouts are a great favourite with me, especially since I discovered that they could be roasted in the oven. That is definitely my most preferred way to eat these little green cabbagey things. My mother and I are the only two people in my family who would willingly and happily eat sprouts. My husband turns green at the sight of a sprout. Despite that, he always insists on having this vegetable as a side dish at Christmas dinner, and he'll even put a couple of them on his plate - but they remain untouched all through the meal and then they go straight into the bin. I've asked him why he wants sprouts on the table if he hates them so much, and why he puts them on his plate if he never means to eat them. The only answer I've received is a stubborn "There should be Brussels sprouts at Christmas dinner. It's a tradition." Yeah, his Christmas tradition being never to eat sprouts.

Anyway, my mother-in-law, brother-in-law, my niece and I all make up for Pete's boycott of the sprouts, because we all love them.

Today, inspired by Masterchef Australia 2016 (which I have been watching diligently and religiously), I decided to pan-fry my sprouts. I usually add a lot of chilli powder to my dry curries, but for some reason I refrained, just limiting myself to a pinch of Jaffna curry powder. 


Cooking the sprouts on a slightly higher heat, covered, for 15 or so minutes helped them "caramelise" where they were in contact with the hot pan. Masterchef contestants (and judges) are very big on caramelisation, which I've interpreted as "crisp in places and just very slightly burnt". 

Well, whatever the actual definition, the sprouts were absolutely delicious! i'm not joking when I say that I kept eating them straight from the pan - the caramelised bits were lovely and crunchy, the inner bits were soft... seriously, just thinking about it is making me salivate. I still have a few sprouts left and I'm very certain I'll be making this again tomorrow. Thank you, Masterchef Australia, for the caramelisation fixation!

Recipe for: Pan-roasted Brussels sprouts

 photo 20e928ffe4de493eb7c245729642318e_zpsiqk4ncnk.jpg

Ingredients:

15 medium sprouts
1 tbsp oil
1/4 tsp asafoetida powder (optional)
1/2 tsp coriander powder
1/2 tsp Jaffna curry powder (or any curry powder or garam masala you might have)
Salt to taste

Method:

1. Trim the sprouts and cut into quarters.

2. Heat the oil in a pan. Add the asafoetida powder and coriander powder and stir it for 30 seconds. Then add the quartered sprouts, sprinkle the curry powder or garam masala over, and stir to coat the sprouts in the oil and spices.

3. Keep the heat just below medium-high and cover the pan. Let the sprouts cook for 15 minutes undisturbed. Then take off the lid and check to see that they are cooked. They should be beautifully caramelised from the prolonged undisturbed contact with the hot pan. Sprinkle the salt over the cooked sprouts and stir it in.

4. Take the pan off the heat and serve the sprouts hot as a side with rice and sambar. (I ate most of them straight from the pan because they were just that delicious.)

Sunday, November 13, 2016

Triple ginger white-chocolate cookies


Okay, I have a confession to make - I might as well be up front about it. I hate white chocolate. I think it's far too sweet and it isn't even proper chocolate. Another confession: I've kind of gone off chocolate bakes in general, although I did like my orgasmic brownies. More to the point, everybody else liked it a lot more, so they disappeared very quickly. 

The problem of the day was there was half a bar of white chocolate in my cupboard that had been there for absolutely ages - possibly even years, because I can't remember the last time I used white chocolate in anything! Still, I didn't want to throw it away because I'm stingy like that. 

I was toying with the idea of making a white chocolate and raspberry something but wasn't sure what that should be - apart from the small matter of not having any raspberries in the house. My husband tried to convince me to let the white chocolate be and make ginger nut biscuits instead. I make a really mean spicy ginger nut biscuit that he loves, but I wasn't in the mood because they're quite labour-intensive. Also because I didn't want that white chocolate sitting around for a single moment longer. So, as a compromise, I finally decided I would make cookies with ginger AND the white chocolate. And that is how these cookies happened. 

My husband thought the cookies were lovely. Some friends who popped by also thought the same, so they went back home happily accompanied by a dozen. My husband was happy, my friends were happy. I tried a cookie myself and I thought it was ok (considering it contained white chocolate). Still, I was happy too, because no more white chocolate in the house... and no more coming in ever if I have a say in it! 

Recipe for:
Triple-ginger white chocolate cookies

 photo 6fcea889-71aa-4fe5-9764-eff51452c169_zpsrpteivsy.jpg

Ingredients:

2 tsp grated ginger
1 tsp ginger powder
2 tbsp chopped stem ginger
225gm plain flour
3/4 tsp baking soda
1 large egg
150gm butter
100gm light brown sugar
50gm dark brown sugar
150gm white chocolate, chopped into small pieces (or use white chocolate chips)
2 tsp vanilla extract
1/2 tsp nutmeg

Method:

1. In a large bowl, cream together the butter and sugar until light and fluffy. Add the egg and the vanilla and beat until well combined.

2. Now add the flour, grated ginger, nutmeg and ginger powder to the bowl and mix with a wooden spoon until it comes together in a dough. Fold in the chopped stem ginger and the white chocolate until they are evenly distributed. Refrigerate the dough for at least 30 minutes, as it will be too sticky to work with otherwise.

3. Preheat the oven to 180C/350F. While the oven is heating, form walnut-sized balls from the chilled dough and place 1.5 inches apart on a baking sheet lined with non-stick foil. Bake for about 10 minutes or until the cookies are golden brown. (The time will vary a little depending on your oven - mine is a fan-assisted oven.) If you have to bake the cookies in batches like I did (because I only have one baking sheet that I actually like), remember to keep the dough refrigerated between bakes so that it doesn't soften too much.

The cookies will be quite soft at first, so leave them on the tray for 2 minutes before carefully removing them to a wire rack to cool completely. They will crisp up as they cool.

If you like your cookies crisp around the edges but softer in the middle (I do), take them out of the oven after about 8-9 minutes. My husband likes them crisp so I baked his for the full 10 minutes.

Saturday, November 12, 2016

Apple, cucumber and carrot salad

Salads aren't my most favourite food, if I am to be honest. Seeing a recipe for salad on anyone's blog doesn't usually float my boat. So I don't expect this simple recipe to turn the Internet's head and send millions of unique visitors my way. But it really was a refreshing salad when I ate it yesterday, and I thought it worthwhile to make a post of it. The best part was that the apples were from my own little container tree, which has done rather well this year. i think I got about 20 apples from it, all told. It's only got two branches!

I had picked a couple of apples to see if they were edible or whether I would have to make an apple crisp or cake, because last month when I tried one, it was much too sour to make pleasant eating. (I made a cake with the apples then). They are meant to be eating apples, you see. But this time they were perfect, beautifully juicy and sweet with the right amount of tartness. Really lovely. Why I fancied a salad using the apples, I have no idea. I don't usually want a salad for dinner. But I had also picked some mint too, and I wanted to use that. So here it is. I can assure you that the salad is refreshing and I really enjoyed it. It is not any more exciting than that, unfortunately.

No wait, that's not quite true. There was SOME excitement while I was slicing the vegetables - I used a mandoline to make wafer-thin slices, and it was so viciously sharp and efficient at its job that I found I had sliced a bit off the side of my forefinger before I knew it. I cursed a bit and ran cold water over my finger, then went back to the mandoline. And it happened AGAIN, this time to my thumb. It was painful, but at least I can claim that I put myself into my salad. You don't have to do the same, though. I'm sure the salad would taste just as nice without the blood, sweat (metaphorically speaking) and tears.

Recipe for:
Apple, cucumber and carrot salad


 photo 9a86087f-b4a3-4aa1-a80c-4d580c057999_zpspafi9lb4.jpg


Ingredients:

2 medium eating apples
1 small cucumber
1 medium carrot
2 tbsp walnuts
handful of Chinese cabbage or lettuce, shredded very fine

For the dressing:
1 tbsp lime juice
1 tbsp olive oil
1 tbsp very finely chopped mint
1 tbsp honey
1 tsp apple balsamic vinegar
Salt to taste

1. Slice the cucumber, apples and carrot very thinly (I used a mandoline).

2. Whisk together the ingredients for the dressing. Adjust the taste to your requirement.

3. Mix the salad vegetables together, then add the dressing a little at a time - you may not require all of it, so go easy. Sprinkle the walnuts on top and eat immediately.

Friday, November 11, 2016

Mixed vegetable pakoda v2

I've posted a pakoda recipe before, but I thought I'd do a post on this version because, for one, it IS slightly different and for another, I really REALLY like my photo and think it deserves to be enshrined on my blog for posterity to view over and over.

HAHAHAHA!

My mother's version (which is the only one I've used all these years) for vegetable pakoda does not involve ginger-garlic paste. This time I decided to add it, and gosh, what a difference it made to the taste! The mint also added a refreshing note. I recommend it. 


Oh, and while you're considering my recommendation, make sure you guys admire my beautiful photo of the pakodas. I recommend that too.

Recipe for:
Mixed vegetable pakoda

 photo 9d02ee62-6afc-47c2-8255-d76b419ef479_zpsbsmepbnl.jpg

Ingredients:
1 medium potato
10-12 green beans
1/5 small cauliflower
1 medium carrot
1 cup spinach
1/4 cup green peas
1 medium onion
1 tbsp ginger-garlic paste
2 tbsp finely chopped mint

1 tsp omam/ajwain/oregano seeds
1 tsp red chilli powder
1 tsp coriander powder
1.5 - 2 cups chickpea flour
2 tbsp rava/semolina
Salt to taste
Oil for deep frying

Method:

1. Peel the carrot. Chop all the vegetables into thin 1/2-inch long strips.

2. Heat the oil in a deep wok. While the oil is heating, in a large mixing bowl, mix together all the chopped vegetables, spice powders, grated ginger and garlic, the semolina and the chickpea flour. Mix well, then add salt to taste and mix again. Add 1/4 cup water and mix with your hands to a thick dough. It should not be runny at all, because the vegetables will exude water. And once the dough is mixed, use it straightaway.

3. Drop a small piece of dough in the oil - if it floats to the top rightaway, the oil is ready. Drop the mixture carefully into the oil by the tablespoonful. Don't crowd the oil or the pakodas will not be crisp and soak up the oil. Once they are an even golden brown, remove from the oil and drain onto kitchen paper.

4. Serve warm. Great with drinks.

Monday, November 07, 2016

No-cook green chutney

This is such a simple recipe that I'm slightly embarrassed that I'm making it an actual post. However, consider this a record of the ingredients for this chutney. Bear in mind that the ingredients are not set in stone. The coriander and mint are necessary, but the spinach can be omitted, you can use peanuts or walnuts instead of the almonds, add or omit the sunflower seeds or substitute some other seeds... you get the idea.

This chutney can be used as is, as a condiment to go with samosas and other Indian snacks, as a sandwich spread, as a dip mixed into yogurt. It could even be good with pasta, if you consider it as a sort of fat-free Indian "pesto". I haven't tried that, but there's no reason to think it won't be nice. It's versatiie, zingy and easy to make. Last but not the least. this is a healthy chutney - 
not in the sense of "I've halved the sugar so I'm calling this healthy" or "I've added spinach to the vegetable pakodas that I deep fried, so I'm calling it healthy" - but actually good for you. That's all.

Oh - one more thing. I had this chutney with khatta dhokla yesterday (made from a packet mix, so sue me). And today, I dolloped a couple of spoonfuls over my bowlful of oven-roasted veggies (Charlotte potatoes, broccoli, cauliflower, red onion) and enjoyed every last bite of my light supper. See what I'm saying about this green chutney being versatile?

Recipe for: Green chutney

 photo 741f192e-023b-42ad-9e51-83ada681778e_zpstbxa8yqe.jpg


Ingredients:

3 cups chopped coriander
1 cup chopped mint
1/2 cup chopped spinach
1-2 green chillies, chopped (or to taste)
10-12 almonds, skinned
2 tbsp mixed seeds (I used sunflower and melon)
1/2 tsp cumin seeds
1/2 tsp sugar
Juice of half a lemon (or to taste)
Salt to taste
Water as required

Method:

1. Grind together all the ingredients (except the salt and lemon juice) to a smooth paste.

2. Mix in the lemon juice and salt to taste. The consistency should be softly runny, not very thick. 

3. That's it. It's ready to use. 

Thursday, November 03, 2016

Blackeyed bean curry

I love my local "Indian" shop in Wellington. Del, the owner, is a really nice man with a great sense of humour and enough knowledge of rugby to engage with Pete. Plus, he keeps adding new products, especially in the fresh frozen section. I might not get a wide variety of fresh and exotic vegetables there, although most of the Indian staples are easily available, but there's plenty in the frozen section to keep me happy.

Like the fresh frozen black eyed beans that I bought the other day. (I also bought a couple of bags of some type of mystery greens, but that's another story.) I guess my foodie friends will understand when I say that my cup of happiness ranneth (new word!) over when I saw the fresh beans and green chickpeas in the freezer section. 

I made a curry the same evening with the black eyed beans - really tasty it was, too. I won't say that it will rock your world, although it should. (Mine wobbled a bit on its axis.)

Recipe for: Blackeyed bean curry
  
 photo 3c815a01-06df-43e4-b706-5b7b4fe807a1_zpsxbpircn9.jpg

Ingredients:

2 tsp oil
2 cups fresh frozen blackeyed beans
1 medium potato, sliced into strips
3 large tomatoes, chopped fine
1 large onion, chopped fine
3-4 green chillies, minced (or to taste)
1" piece ginger, grated
2 cloves garlic, minced
1/2 tsp coriander powder
1/2 tsp cumin powder
1 tsp Kitchen King masala (or garam masala)
1-2 cups water
1/4 cup yogurt
Salt to taste
Juice of half a lime
Coriander leaves for garnish

Method:

1. Heat the oil in a saucepan and add the onion, green chillies, ginger and garlic along with the coriander and cumin powder. Mix well and fry on medium heat for 2-3 minutes, stirring frequently, until the onion starts to soften.

2. Now add the chopped tomatoes and sliced potatoes and stir-fry for 4-5 minutes. Add the frozen blackeyed beans, pour in a cupful of water and bring the mixture to a boil. Then cover the pan, turn down the heat and let the beans cook for 10 minutes. Stir once in a while so that the masala does not burn. Add a little more water if required.

3. Once the potatoes and beans are cooked, and the sauce is thick, stir in the yogurt over medium heat. Do not let it boil after adding the yogurt. Add salt to taste and mix it in, then the lime juice. Turn off the heat, sprinkle the beans with the chopped coriander and serve hot with rice or chapaties. 

Saturday, October 22, 2016

Kesar pista nankhatai (Saffron-pistachio cookies)


Until yesterday, I'd only ever seen nankhatai in photos on various blogs (most of them very, very beautifully shot photos, I might add). Never seen them in real life, never eaten any (not that I know of and not by that name), never baked any. Since Diwali is next week, and because I'd just bought a lovely big bag of pistachios recently, and also because our friends were going to drop by and I wanted to bake something for them with an Indian touch, I decided to make nankhatai with the pistachios and the last of my stash of saffron. The recipe I followed is on Nandita's Saffron Trail blog. My only two additions were pistachio nuts in the dough itself, and extra milk as the ghee alone was nowhere near enough to bind the mixture together to make a dough. 


And what a good decision it was. I love saffron - although I don't use it often because it's expensive - and I love pistachios, and I know they're a flavour match made in heaven (fictitious place, obvs, but the match is very real and the flavours are very lovely!). These cookies are very moreish - they're not too sweet, the saffron flavour is awesome, the pistachios are delicious and the semolina gives the nankhatai a lovely crunch. Be sure to use fine semolina, though, otherwise, the nankhatai might have a sandy mouthfeel rather than crispness. Happy eating, people!

Recipe for:
Kesar pista nankhatai (saffron pistachio cookies)


 photo f5710913-d2ea-438a-900c-989e2ced8eb0_zps6y1brntg.jpg

Ingredients:

1.5 cups plain flour

2.5 tbsp chickpea flour
1/2 tbsp fine sooji (semolina)
1/2 tsp baking soda
1/4 cup slivered pistachio nuts
2 tbsp finely chopped pistachios (optional)
1/2 cup powdered sugar
1/2 cup melted ghee (clarified butter)
1/4 tsp saffron strands, crushed in a small mortar-pestle
Milk as required

Method:


1. Preheat the oven to 180C/350F.


2. Sift together the flours, semolina and baking soda in a medium bowl. Mix in the slivered pistachio nuts and set aside. Warm 2 tbsp of the milk and let the saffron steep in it for 5 minutes.


3. In a large bowl, mix together the ghee, powdered sugar and saffron-milk until smooth, then add the flour mixture. Add extra milk a tablespoon at a time until you can form a soft dough. Be careful not to add too much liquid.


4. Roll the dough into balls the size of large marbles and place on a cookie sheet lined with non-stick paper or foil, leaving a gap of about 1.5 inches. At this point, if you wish, you can make a dimple in the centre of each cookie with your thumb and sprinkle a pinch of the chopped pistachios. If not, just flatten each ball slightly and place in the preheated oven.


5. Bake for 15-18 minutes or until the cookies are a pale brown, switching the tray around after 10 minutes so that they brown evenly.


6. Remove to a wire cooling rack. The cookies will crisp up as they cool.


7. Try not to eat all the nankhatai yourself.

Wednesday, September 21, 2016

Orgasmic cocoa walnut brownies

Brownies are my nemesis. I don't make them particularly often, and pretty much every past effort has ended up overbaked, dry and crumbly - not exactly ideal, when I like them chewy on the outside and fudgy in the centre. And with nuts in, to cut through the sweetness. 

Two weeks back I baked brownies again, using fancy dark chocolate, because I wanted to take them to a friend's new apartment where we had been invited for dinner. While those brownies were not too bad, they were still drier than I wanted. Sort of dusty tasting. This was disappointing and annoying, especially because I'd used expensive chocolate to make it. Nobody else seemed to mind and the brownies were gobbled down, but I was still not really happy with the result.

I nearly decided not to bother making them again, but those darned brownies kept bobbing about in the back of my mind, never quite going away. (Well, obviously not the ACTUAL brownies, but the thought of them.) Yesterday around midnight I finally gave in to the compulsion and decided to make them with cocoa powder (and the remainder of the dark chocolate from last time). Just regular cocoa powder (actually Tesco's own brand, so the very opposite of posh!) which had been lurking in the back of the cupboard for ages.

I made the brownies with hope, but no expectation that it would be what I wanted. For once, I managed to ignore my inner voice which was as usual screaming "but it's not FULLY baked yet!" and removed the brownies from the oven when the centre was still slightly shiny. A toothpick inserted into the centre went in with just a little resistance and came out mostly clean - perfect! The brownies were absolutely sensational - orgasmic, even. Just goes to show that expensive ingredients do not necessarily transform into fabulous baked goods. If you have not come across this tattuvam (truth, in Tamil) anywhere else before, or realised it for yourself during your own cooking experiments, then this is where you heard it first. Credit where it's due, after all, haha!

Here's another truth - underbaking a brownie is preferable to overbaking it. If, like me, you've baked cakes but are not particularly experienced with brownies, your instinct will be to ensure that the toothpick comes out clean. This is a good instinct when it comes to cakes, where underbaking would be disastrous, but it does not apply to brownies. Keep that in mind, and you'll be fine! More importantly, so will your brownies.

 photo d52aa14a-96c6-4a36-be57-028dff9eed1f_zpsytmsaois.jpg

Recipe for: Orgasmic walnut cocoa brownies

Ingredients:

140gm unsalted butter, cut into cubes
230gm granulated sugar
50gm unsweetened cocoa powder
30gm dark chocolate
1 htsp instant coffee granules
1/4 tsp kosher salt (or regular if you don't have kosher)
1 tsp pure vanilla extract
2 large eggs
65gm all-purpose flour
1/3 cup nuts of choice (I used walnuts), broken into small pieces

Method:

1. Preheat your oven to 170C. Line an 8"square tin with nonstick aluminium foil such that there is an overhang on all sides. This will make removing the brownies from the pan way easy!

2. Put the butter, sugar, salt, coffee granules and chocolate in a microwave safe bowl and heat it on high for 30 seconds, then stir with a wooden spoon. Repeat until the butter and chocolate are completely melted and smooth.

3. Tip in the cocoa powder and vanilla and stir until fully incorporated.

4. Add the eggs one at a time, stirring well. Then the flour, first mixing it in, then beating the mixture vigorously until it is thick and shiny. Stir in the nuts, if using.

5. Pour/scrape the mixture into the prepared tin - it will be quite thick - and level it. Bake for 20 minutes, or until the top of the mixture loses its shine. This may take a little more time in your oven, but after 20 minutes keep a very sharp watch on the brownies. Underbaking is always preferable to overbaking! A toothpick inserted into the center of the mix should come out mostly clean.

Remove the tin from the oven and let the brownies cool completely before cutting. If you can resist temptation, after the brownies are cool, put them in the fridge for 30 minutes. When cutting them, dip your knife in water every so often, to get clean cuts. Or, if you're like me, never mind refrigerating, just dive in!

Saturday, August 20, 2016

Lime-vanilla sugar cookies

The basic sugar cookie recipe was from a colleague who made hers first from a recipe on the back of some cookie mix or other. She brought some leftover cookies to work just before Christmas break last year, and they were SO delicious that I asked her for the recipe. I'm not really a cookie person - either eating or making - but her cookies really were incredibly moreish. 

The first time I made the plain sugar cookies was last Saturday - they turned out really well, and Pete loved them. He insisted that we should take some to a friend's barbeque party. She had two types of desserts for the guests but her daughter decided that she was going to make herself a dessert with my cookies, layering them with strawberries that been macerated with sugar, and clotted cream (like an ersatz strawberry shortcake) and declared it a superhit. 

In the meantime, my friend's husband was quietly putting away cookie after cookie, looking sheepish when he was rumbled, but not letting it stop him from taking a couple more. There must have been at least 40 cookies in the container, but by the end of the party they were all gone to the last crumb. That was definitely a pleasing result in my eyes, both because the cookies came out so well and because everyone liked them, from the 7-year-old granddaughter to the 70-year old neighbour!

All week since, Pete had been begging me to make some more. Yesterday I chose to make them but give it a citrusy twist, because I love citrus-flavoured things. Lime was my flavouring of choice. Again, the cookies turned out really well - which I guess convinced me that it wasn't a fluke the first time around (really, I'm not famous for baking cookies). 

I liked these lime-flavoured cookies quite a lot myself, and so did Pete. And so did Pete's son and his girlfriend who dropped by. Like me, Andy is not really a cookie person, but he said "these are the best cookies I've ever eaten" and went on to prove it by eating half a dozen in quick succession. As for his girlfriend, she scarfed down a few, and then took charge of the bag containing the 2-3 dozen that I packed for them to take away. I'm not sure Andy will be seeing very much of them, unless he is V E R Y nice to her... 

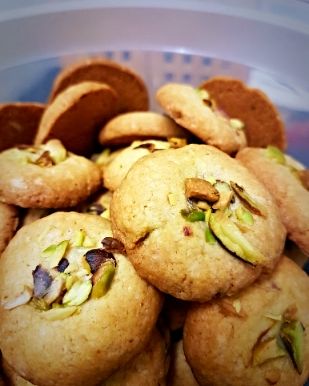
By the way, I got about 60 cookies from the amount of dough that this recipe makes - but mine were small, about the diameter of an Oreo. If you make bigger cookies, you will get fewer (yes, well, duh). I also toyed with the idea of icing them with a simple lemon icing (lemon juice + icing sugar mixed to a spreadable consistency) but laziness got the better of me. Besides, I didn't really think the icing was essential. 

One last tip - the dough is best worked with when chilled.  

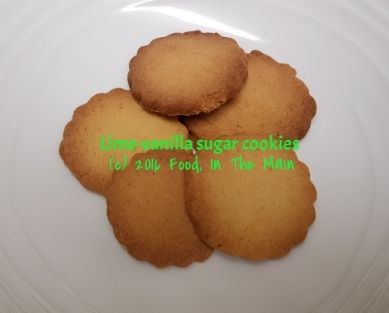
Recipe for: Lime-vanilla sugar cookies


 photo 20e51a30-6f41-48d7-b81b-2b913b8d297b_zpsxsjczgof.jpg

Ingredients:

150gm softened unsalted butter
150gm caster (superfine) sugar
300gm plain (AP) flour
1.5 tsp best-quality vanilla extract
1/2 tsp pure lime oil (optional)
Zest of one lime
1 medium egg, beaten

Method:

1. Cream butter and sugar using a wooden spoon in a large mixing until light and fluffy (I did this by hand, takes about 7-8 minutes).

2. Add the beaten egg, the lime zest, lime oil and vanilla extract and beat it in. 

3. Add the flour in 4-5 installments, mixing just until incorporated. When it comes together into a rough dough, dust your hands with some flour and form the dough into a ball. Place the ball on some clingfilm or a sheet of non-stick foil and flatten it evenly till about 1/2 inch thick. Cover completely and place in the refrigerator to chill for about an hour. 

4. Scatter some flour on your working space. Turn out the chilled dough onto the floured space and gently roll the dough out until it is evenly 3-4mm thick. You may need to dip the rolling pin into flour now and then to stop the dough sticking. You can divide the dough into two before rolling out, to make it easier. Keep the other half chilled in the meantime. 

5. Using a cookie cutter of choice, stamp out the cookies, dipping the cutter into flour each time. Re-roll the remaining dough and cut out until the dough is used up. 

6. Transfer the cookies onto a sheet lined with non-stick foil or baking paper, leaving about an inch in between them as they will spread a little. Place the cookie sheet in the fridge again to chill for 15 minutes. 

7. Preheat your oven to 180C/350F (mine is a fan-assisted oven) and bake the cookies for 10-11 minutes or until they are a pale golden brown. You can turn the sheet around after 5-6 minutes to let them brown evenly, if you like. 

8. Let them cool on the sheet for a couple of minutes, then transfer carefully to a cooling rack until completely cool. Store in an airtight jar. 

Sunday, April 24, 2016

Eggless orange almond cookies

My little niece, who is nearly 6 years old, has been allergic to eggs since she was a baby. If she eats anything with even a trace of eggs, within about 15 minutes of ingesting it, she gets very uneasy and then invariably throws up. Once she's evacuated the contents of her little tummy, she's right back to normal, bouncy and happy while people around her deal with the aftermath. 

Obviously an allergy to eggs, while not as terrible as various other food-related allergies that children can have, does mean that she has to be very careful when she eats away from home - especially when it's a kiddie birthday party and there are tempting cakes and cookies on offer. Also because no party-organising parent really wants to have to deal with a kid who's having an allergic reaction that could escalate to life-endangering! However, touch wood, my niece is not fatally allergic to eggs, so her allergy is probably one of the easier types of problems to deal with. After all, it's easy enough to make egg-free food, especially cakes, cookies and ice creams. This holds true especially for home bakers. 


I made these orange almond cookies last week as a trial, to see how they would turn out prior to making them for my sister to take back for my niece when she returns to Seattle next week. The cookies turned out incredibly crisp and orangey and really tasty, and they disappeared really rather quickly. So I'm making a double batch today, because there would be a one-man mutiny if I didn't keep a few cookies back for home consumption. And here's the recipe so YOU can make it too. 

Oh by the way, I've taken to weighing out my ingredients for baking - I have the most basic of Salter kitchen scales that can weigh up to 500gms or 1/2 kilo. What's more, it can be tucked away neatly in its weighing bowl with its own plastic lid. Don't ask what's the big deal here, if you're the kind that weighs things automatically - until now I've not been the sort of person who bothered with all that "fussiness" (as I considered it). I'm not yet 100% on the side of weighing every single time...but I'm far more likely to do it than not. I consider myself to be the new improved version of me. 

Recipe for: Eggless orange almond cookies

Ingredients:

115 gms unsalted butter, softened
100 gms caster or granulated) sugar (I've tried it with both and it doesn't seem to have made any difference to the end result)
155 gms plain flour
1 tbsp orange juice
1/2 tsp pure orange oil (optional)
3-4 drops of orange food colouring (optional)
Zest of one orange
1 tsp vanilla extract (or 1/2 tsp cardamom seed powder if you prefer)
1/4 cup slivered or sliced almonds

Method:

1. Beat the butter and sugar in a large bowl until light and fluffy. By hand will do - I used a wooden spoon.

2. Add the rest of the ingredients apart from the sliced/slivered almonds and mix together until fully incorporated. Place the almonds on a plate. 

3. Chill the dough in the refrigerator for an hour for it to firm up. Line a flat baking sheet with a Silpat mat or with nonstick baking paper. 

4. Break off pieces of dough (about the size of a large marble), roll them into a ball and press them into the almonds. 

5. Place the cookie dough balls on the lined tray (almond side up) and flatten each one slightly. (You may need to wash and dry your hands every so often to stop the dough sticking as it starts to warm up). Leave 2 inches space between cookies as they will spread. Put the remaining dough back in the fridge if you can't use it all in one batch. 

6. Bake the cookies in a 180C oven for 9-12 minutes (or until the edges turn golden brown). Leave the cookies on the sheet for a minute, then transfer carefully with a spatula on to wire cooling racks. They will crisp up as they cool. 

Tuesday, January 26, 2016

Stuffed karela (bitter melon, bitter gourd)

I can't seem to get enough of karela or bittergourd nowadays - I really love these ugly knobbly vegetables that look like a bit like rats with a long tail. A couple of days back, I went to my favourite "Indian" shop in Wellington for vegetables, and was beyond thrilled to find small baby karela for sale. I picked out the freshest 10 and came home joyfully, having decided how I was going to cook them. Stuffed, basically. I didn't want the stuffing to be the usual onion masala or potato masala or peanut-based masala - mainly because I didn't want to spend time cooking the stuffing. Bad enough that I would have to wait for the karela itself to cook. 

So I just put together a random mixture of flours and spices, toasted the mix in a dry pan until fragrant, then used some oil and water to bind the powdery mix and make it amenable to stuffing, basically. 

I admit that this recipe uses more oil than usual, but it's worth it if you love karela and only make it once in a while. It was SO delicious. I had the stuffed karela with lemon masoor dal and rice and a little ghee, and felt like I had gone to heaven without having to die first. Yes, THAT good.

So good that I forgot to take a photo before diving into the karela. Oops... 

Recipe for: Stuffed karela


Ingredients:
6-8 small (about 4-5 inches length) tender karela

For the masala paste
1/4 cup soya flour or jowar flour
1/2 cup chickpea flour (besan/kadalai maavu)
1/8 cup rice flour
4 tbsp coriander powder
1 tsp cumin powder
1/2 tsp aniseed powder
1/2 tsp fennel powder
1 tsp garam masala/rasam powder/any other masala you prefer
2 tsp red chilli powder (or to taste)
1/4 tsp asafoetida powder
Salt to taste
4 tbsp oil

Method:

1. Lightly peel the karela so that the ridges no longer stick out. Make a slit in each karela from end to end, being careful not to cut right through to the other side.

2. Use the handle of a small spoon to gouge out the inner seeds and membrane.

3. At this point you can rub salt on the inside and outside of the karela and let it sit for a few hours so that some of the bitter juices are drawn out. If you do this, be sure to squeeze the juices out, then wash the karela well to remove the excess salt. Pat dry with kitchen paper and reserve.

4. Mix together all the ingredients for the masala paste, bar the oil. Heat a pan and dry toast the mixed masala powder, stirring constantly, until the flours start to smell fragrant and savoury. Be careful not to burn it.

5. Once the masala mix is toasted, transfer it to a container. This might be more than you require, but you can always store the excess for another day in an airtight container. I prefer to make extra, because I don't like it when I find out halfway through stuffing that there isn't enough masala paste to fill all the karela. so you can use all of the toasted mix, or just half, depending on how many karela you have and their size.

6. Now add 2 tbsp of the oil to the masala powder and stir it in. The paste needs to come together enough that if you pinch some together, it shouldn't fall apart. You can add a bit more oil to get the powder to that stage, or you can add a little water. Either way, don't make it into a gooey paste.

7. Once the masala mix is ready, use your fingers to stuff it into the karela. Once they are all stuffed, you can use kitchen string to tie the karela so the stuffing doesn't come out (it tends to expand a bit as it cooks), but it's not strictly necessary especially if the karela is small.

8. Heat the remaining 2 tbsp oil in a pan and add 1/4 tsp asafoetida to it. As soon as it sizzles, put the stuffed karela in the pan and stir them gently so they are coated in the oil. Sprinkle 2-3 tbsp water over the karela and close the pan. Cook the karela covered over medium-low heat for 15 minutes or until they soften and turn a paler green. After that take the lid off and turn up the heat a bit more, occasionally turning them over, until they turn brown and crisp on all sides.

Serve hot with dal and rice.

Monday, January 25, 2016

Pineapple upside down cake

All these years of blogging, all these cakes I've made... and I've never posted a pineapple upside down cake recipe! It's kinda retro and old fashioned, apparently, but I've never understood how anything can be "in fashion" or "outdated" when it comes to food - especially if it's a tasty, delicious recipe. Who cares if it's from the '70s or the '50s or the '80s? For heaven's sake, it's FOOD, not fashion. It annoys me tremendously when some idiot foodista or television chef somewhere labels a particular greens or grain or fruit as "fashionable" or "healthy" or "THE must-have item", and the entire bleddy food blog world immediately features it, so that there is a landslide of samey same posts. I dislike food fads with a passion! Okay, my soapbox rant is over for today. 

So, pineapple cake. I only made it because Pete bought a bag of fresh pineapple "fingers" that was so acidic and sharp, it could have stripped the enamel from your teeth no problem. He then had the brainwave of making pineapple upside down cake. Or rather, getting me to make it. Since I had a simple, one-bowl sort of recipe (based on a BBC Good Food recipe) for this cake, I acceded to his request. 

While the recipe called for pineapple syrup and vanilla extract to flavour the cake, I didn't have either ingredient, my pineapple being fresh rather than canned. But there was enough pineapple juice at the bottom of the bag, which I substituted for the syrup. And then simply ignored the fact that there was no vanilla extract in my store cupboard. It didn't matter, anyway. The cake smelt amazing as it baked, so fragrant and pineappley, and it tasted as beautiful as it smelt. I love this cake - I just can't understand why it took me so long to post the recipe!

Recipe for: Pineapple upside down cake
 photo 2d2ece7f-b3c8-47c1-b7db-79daeb003197_zps6kmbngue.jpg

Ingredients: 

For the topping

50 gm softened butter
50 gm soft light brown sugar
Fresh pineapple fingers or tinned pineapple slices

For the cake

100 gm softened butter
100 gm soft light brown sugar
125 gm plain flour
1 tsp baking powder
1/2 tsp baking soda
2 large eggs
2 tbsp pineapple juice
1 tsp vanilla extract (if you have it)

Method:

1. Preheat the oven to 180C/350F. 

2. Beat the butter and sugar for the topping until soft and creamy. Spread this as best as possible around the bottom and halfway up the sides of a 7" round cake pan. 

3. Arrange the pineapple slices and cherries (if using) over this such that the entire bottom of the tin is covered with as few spaces as possible. 

4. In a big bowl, add all the cake ingredients and beat until the batter is soft and smooth, and the ingredients well mixed. 

5. Drop the batter by spoonfuls over the pineapple rings and spread evenly to cover.

6. Bake for 30-45 minutes until a tester inserted in the cake comes out clean. The cake could take longer than 45 minutes, or be done in less. Test at 35 minutes, then every 5-7 minutes until it is cooked. 

7. Let it sit in the pan for 10 minutes, then turn it out onto a serving plate. Eat warm, with or without vanilla ice cream.