Showing posts with label dark cocoa powder. Show all posts

Tuesday, November 03, 2009

End-of-the-line chocolate banana marble cake

If I were a house-proud, kitchen-efficient, recipe-perfect kitchen goddess who knows exactly what’s in her larder/pantry down to the last half-teaspoon and thus plans or even creates new recipes to finish up comestibles according to their expiry date, I would probably be terminally ashamed to know me. Luckily I’m not a kitchen goddess, so I’m not really ashamed of me, and only mildly embarrassed to admit to having a kitchen that is cluttered with bits and pieces of various things that are nearly-but-not-quite at the end of their edible life.

Once in a while, though, I manage to finish off a couple or three items in one recipe – usually cakes, because they’re fairly forgiving of odd additions so long as you get the flour-leavening-fat ratio reasonably right. This cake is one such. I call it an end-of-the-line cake because its ingredients are pretty much all end of the line - very overripe bananas, the last of a tin of cocoa powder, a couple of tablespoons or so of chocolate chips, some nuts, some buckwheat flour and some very lumpy dark brown sugar.

In hindsight, I should have used that dark brown sugar elsewhere (or maybe even just fed the dustbin with it - the effort I had to expend to break down the damn lumps... honestly!) because I was supposed to be making a marble cake.


As you would expect, marble cakes look their best when they have a light-coloured and a dark coloured portion. Using dark brown sugar for the batter made it quite dark… and then adding the cocoa to part of it made it darker still, so that the marbling was not exactly what you’d call visible. Dark and darker isn’t really a contrast.

*sigh*

Oh well, non-domestic non-kitchen non-goddess proposes, and God(dess) - possibly Domestic, possibly not - disposes...

Luckily the cake tasted good even if it didn’t make the mark on the fair-and-pretty factor.

Recipe for:
Chocolate banana marble cake
Photobucket
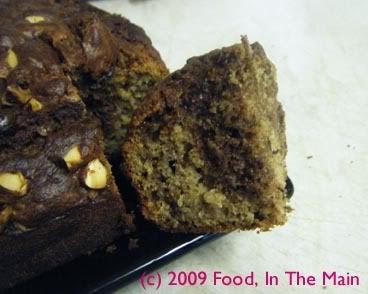
(That shadowy effect on the wedge of cake isn't a shadow - it's the cocoa-dark portion! So much for marbling...)

Ingredients:

1-1/2 cups AP flour
1/4 cup buckwheat flour
2 tsp baking powder
1/4 tsp baking soda
1/4 tsp salt
3/4 cup oil
3/4 cup dark brown sugar
3 small overripe bananas, mashed
2 tsp vanilla extract
2 eggs
6 tbsp Greek yogurt
2 tbsp chopped toasted nuts
2 tbsp dark chocolate chips
1/2 cup cocoa powder

Method:

1. Heat oven to 180C/350F. Spray 7" square pan with nonstick cooking spray.

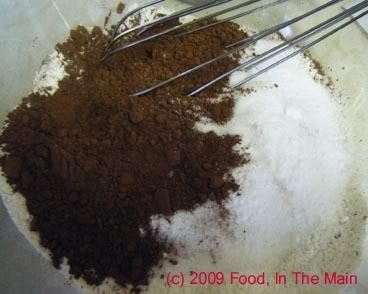
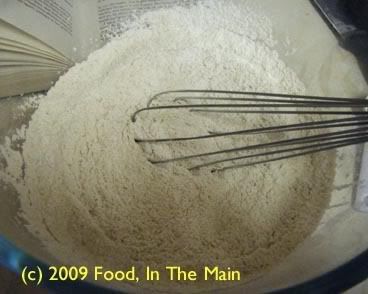
2. In a big bowl, whisk together the flours, baking powder, baking soda, and salt.
Photobucket

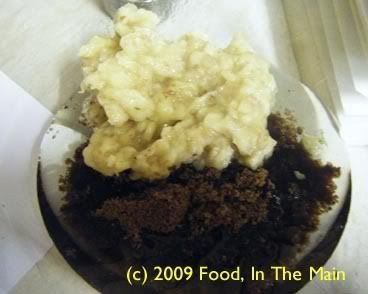
3. In another mixing bowl, combine the oil, sugar, and bananas.
Photobucket

Beat until combined.

4. Add the eggs and vanilla to the mix and beat.

Photobucket

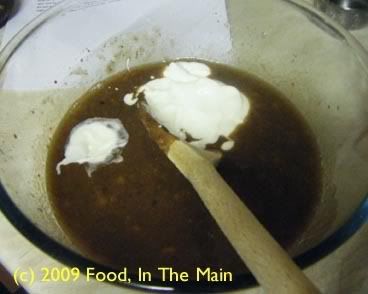
5. Then mix in the yogurt.

Photobucket

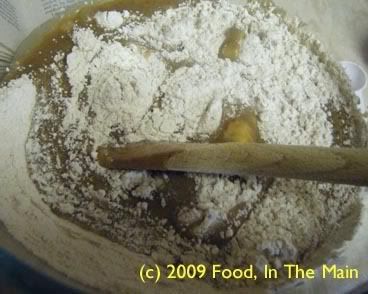
6. Add the dry ingredients to the wet mixture and fold in.
Photobucket

7. Spoon half the batter into the greased pan in dollops.

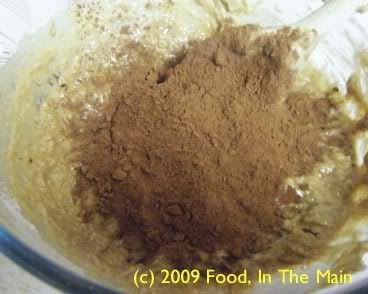
8. Add cocoa to the remaining batter in the mixing bowl and stir until just combined.
Photobucket

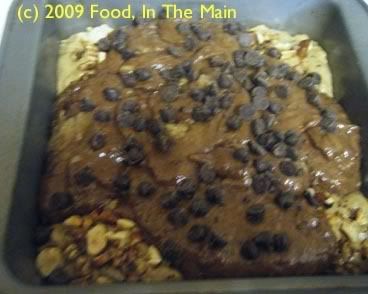
9. Spoon chocolate batter in clumps around the pan, leaving some lighter colored spaces.
Photobucket

Sprinkle the nuts and choc chips over the top of the batter. Use a knife to swirl the batters together, taking care not to mix them too much.

10. Bake for 35-40 minutes or until tester comes out with just a few crumbs attached.

Cool cake in pan on wire rack for 15 minutes before removing the cake. Cool completely before cutting.

Saturday, May 23, 2009

Eggless triple chocolate buttermilk cupcakes

Not the snappiest of titles for a post - or a recipe - but on the plus side, there's no room for misunderstanding as to what it is, I guess. Perhaps I should have called it "Eggless triple chocolate butterfree buttermilk vanilla scented cupcakes" and done away with the ingredient list altogether...

Never mind, I'll save that ingredients-as-title idea for another post. Never let a good idea go waste. Recycle, recycle, recycle, isn't that the mantra?

The reason I made these cupcakes was because I stopped Pete from buying cupcakes from the supermarket with the promise that I'd make some at home. (Honestly, the list on the back of the package had E-ngredients rather than ingredients! I'm all for Pete having a long, long life - no-one could pray for that more - but I'd rather he retained his human qualities through all of it rather than become an artificial life form through ingesting manufactured chemicals.)

Anyway, since my mother's a chocolate fiend but not one that devours any chocolate derivations with egg in it, I made the cupcakes eggless. The recipe is more or less from
Nic at Baking Bites, with a few changes.

Photobucket

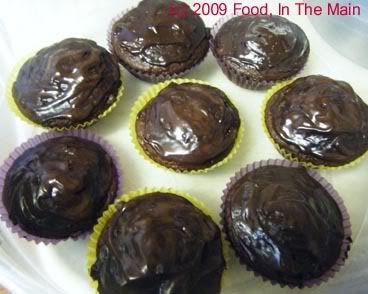
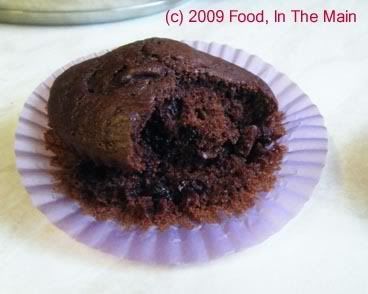
Here's a cupcake before the ganache went on. I took a bite out of it just to see what it was like - and because I'm not terribly fond of icing or frosting. Glad to say that the cupcake was just as delicious in its double-chocolate version as with the final chocolate addition.

Recipe for:
Eggless triple choc buttermilk cupcakes

Photobucket

Ingredients:

1-3/4 cups self-rising flour
¼ cup cocoa powder
¾ cup sugar
1 tsp baking soda
½ tsp salt
1-1/4 cup buttermilk, room temp
¼ cup oil
1 tsp cider vinegar
1 tsp vanilla extract
¼ cup semi-sweet mini chocolate morsels

For the ganache:

4 ounces (110 gms) dark chocolate, cut into small pieces
1/3 cup heavy whipping cream
1 tbsp unsalted butter


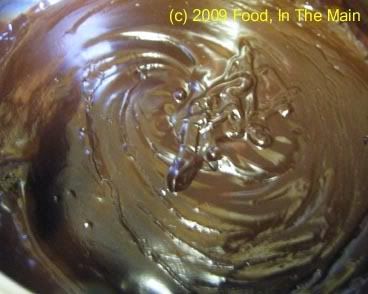
Bring the cream to a boil in a heavy-bottom saucepan. Take it off the heat and add the butter and chocolate, stirring till it's all melted and thickened and shiny. Place in the fridge for the ganache to get to a spreading consistency, if preferred.
Photobucket

Method for cupcakes:

1. Preheat oven to 180C. Line two 12-cup cupcake pans with paper cups.

2. In a large bowl, whisk together flour, sugar, baking soda and salt.

Photobucket

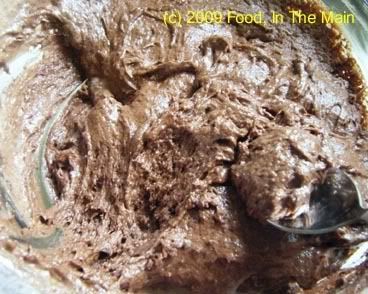
3. Pour in the buttermilk, oil, vinegar, vanilla and stir till just combined.

Photobucket

The batter will be quite thick.

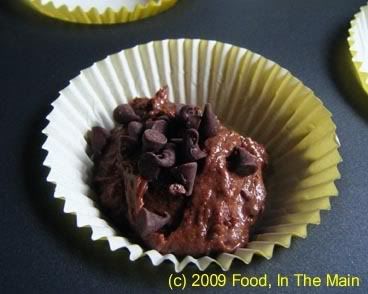
4. Put 1 tsp batter in a cup, add about 10 mini morsels,

Photobucket

then cover with another tsp batter. It’s ok if the morsels don’t stay in the centre. Finish up the rest of the batter the same way.

Photobucket

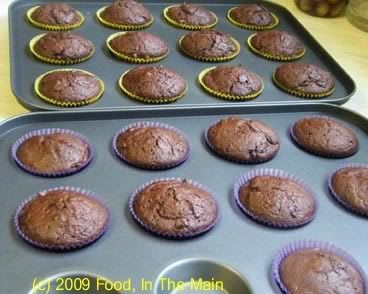
5. Bake for 15 minutes or till done when tested with a thin skewer.

Photobucket

Photobucket

6. Cool, then dip the tops into ganache (or spread the ganache with a small spatula)

Photobucket

and set the cupcakes aside in a cool place till the ganache hardens.

Thursday, July 03, 2008

Tiger cake

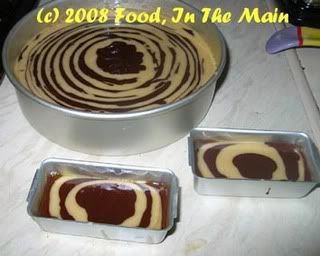
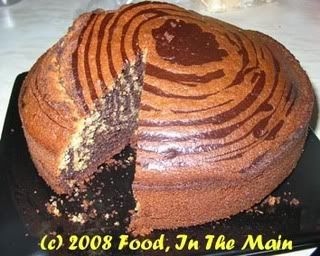
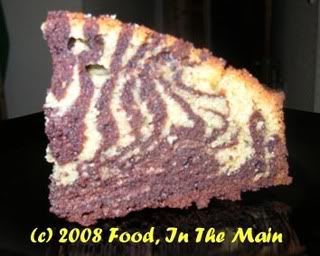
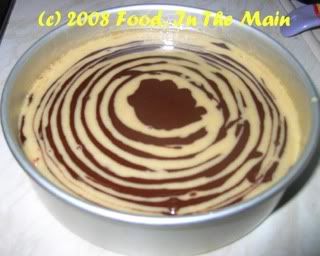
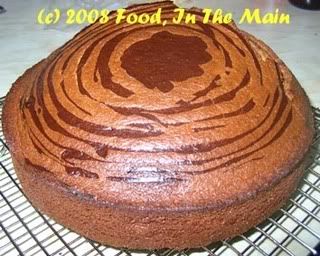
Relax, folks, this cake is just a zebra masquerading as a tiger :) I thought the "stripes" looked more tigerish than zebraesque, so I renamed it. What's in a name, after all.

Whoever thought up this technique was (is?) a genius in his or her own way. Such a simple thing to do, with such spectacular results (especially if done perfectly) - no fiddly procedures, no cutting cakes into shapes, or glueing them with icing or marzipan to construct edifices. Just two batters used alternately. Absolute genius, I tell you.

My cousin Hema and I made this cake - or rather, Hema made it under instructions. Normally I shy away from baking cakes that use more than two eggs - maximum 3 - but this time as I was instructing, it seemed better to follow the recipe exactly instead of improvising. (She can learn improvisation by herself!)

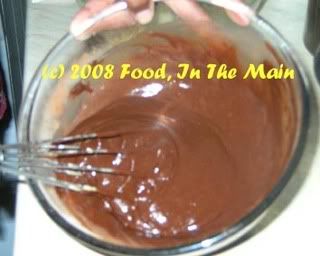
As it turned out, we should have gone with our instinct and "loosened" the chocolate batter which had become thicker than the plain one by addition of cocoa powder. Because we didnt do that in the first place, the first few layers of chocolate didnt fall easily off the spoon and didnt quite make it to the centre of the cake pan.


Oh well... live and learn. (The recipe below has the correct revised measurements.)

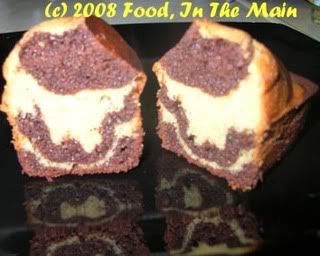
Despite our initial hiccup, the inside of the cake looked spectacular when cut.


It had risen rather a lot on one side while baking - probably because the batter was not mixed quite right? - and I surreptitiously pushed it down (carefully!) with the heel of my hand when nobody was looking. Not too much and not too hard, though, because I didnt want to ruin it totally!

All in all, this is a nice cake and excellent for impressing your guests and making them think you're a baking genius!


Previous recipes baked with Hema:
Peanut butter cookies, Cashew vanilla cookies, Cranberry orange cookies


Edited to add: Thanks, Divya, for pointing out that I'd said 1/2 tbsp cocoa powder, instead of 1/2 cup! 1/2 tbsp would have done no good at all! Thanks for being so observant! (Recipe has been updated) :)

Recipe for:
Tiger cake


Ingredients:

4 eggs
1 cup sugar
1 cup milk
1 cup oil
1 tsp vanilla extract
2 cups plain flour
2 tsp baking powder
1/4 tsp salt
1/2 cup dark cocoa powder
Milk as required

Method:

1. In a large mixing bowl, combine eggs and sugar until creamy and light in colour.


2. Add milk and oil and continue beating till well blended.

3. Add vanilla. Gradually add flour and then beat until the batter is smooth.

4. Divide mixture into 2 equal portions. Keep one portion plain.

5. Add cocoa powder to the other and mix well. Add enough milk to thin out the batter to the consistency of the plain portion.


6. Preheat oven to 180C. Scoop a ladle of plain batter into the middle of the baking pan.

7. Then scoop a ladle of the cocoa batter and pour it in the centre on top of the plain batter. Continue this way until the batters are finished. The more you "layer" them, the more stripes you will get in the finished cake.


Do NOT spread the batter or tilt the pan to distribute the mixture.

8. Bake for 40 minutes or till the cake tests done.

Tuesday, August 16, 2005

Courgette chocolate cake

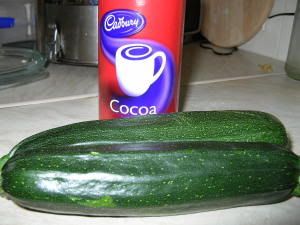
I did it! I actually made a cake with courgettes - otherwise known as zucchini. It's a boring vegetable if you ask me, with no real taste of its own. I guess that's a good thing in SOME ways, but if I come across any mushy pieces of courgette in anything I'm eating, I generally set them to one side under the "ick" category, to be avoided. That said, courgettes dont gross me out the way eggplant/brinjals/aubergines do.

I had a surfeit of courgettes thanks to one of the guys in the office who has a smallholding and grows his own vegetables. He must be a pretty good farmer, because he brought enough courgettes for everybody in the office to have at least 3-4 each. It must be nice growing your own veg... but it needs time and effort. Lucky for my colleague that he only works part-time, so I guess he's got both.

Image hosted by Photobucket.com

Anyway, after ratatouille one day (forgot to take pix) and courgette-tomato pasta the next, I still had 2 courgettes left and, frankly, I was getting a bit tired of the darn things.

Then while going through my favourite food blogs (as usual), I suddenly remembered "Chocolate & Zucchini"... and that led me to wonder if courgette cake could really be edible. Well, the only way to find out was to make it - and I stuck by my decision despite the barrage of "bleahs" and yarking noises from my colleagues and family. It was a good decision, as it turned out, because the cake was worth it.

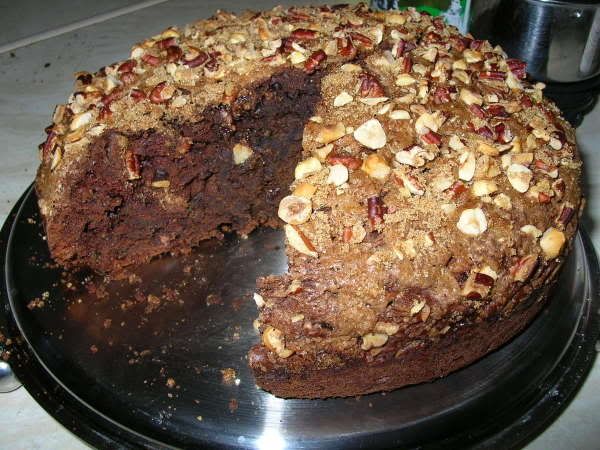
I guess the blandness of the courgettes worked in the cake's favour, because it totally took on the flavours of the cocoa and chocolate chunks - so much so, it was easy to forget that there was actual vegetable matter in the cake. All in all, the best way to use up any extra courgettes, in my opinion.

I didnt frost the cake this time, because I used a nut topping. But next time I make this cake, I think I will split it in two (or bake it in two tins) and sandwich it together with chocolate icing - that would be just perfect, methinks.

Recipe for:
Courgette chocolate cake

Image hosted by Photobucket.com

Ingredients:

2 cups flour
1/2 cup plain cocoa powder (I used Cadbury's)
1 tsp baking powder
1/2 tsp baking soda
1/4 tsp salt
2-1/4 cups brown sugar (I substituted 1 cup Splenda)
1/2 cup soft butter (I used margarine)
3 large eggs
1 tsp vanilla extract
2 cups finely grated courgette (I left the skin on)
1/2 cup dark chocolate chunks

For the topping:
1/2 cup mix of chopped nuts (I used hazelnuts, brazil nuts and pecans)
1/4 cup brown sugar - (I prefer not to use Splenda here)

Method:

1. Heat the oven to 180C (350F). Grease a 9" round cake tin and dust with cocoa powder.

2. Sift together the flour, cocoa, baking powder, baking soda and salt in a bowl.

3. In a bowl, beat the butter/margarine with the sugar/Splenda until fluffy and light. Add the vanilla extract.

4. Add the eggs one at a time, beating well between additions.

5. Reserving 1/2 cup of the flour-cocoa mix, fold in the rest with the egg mixture. The batter will be very thick and difficult to handle, but dont be tempted to add any extra moisture.

6. Once the flour has been incorporated well, toss the grated courgettes and the chocolate chunks with the reserved 1/2 cup flour, then fold it all in. The moisture from the courgettes will make the batter easier to handle.

7. Transfer the batter to the greased and floured baking tin and smooth the top.

8. Mix the topping ingredients together and sprinkle evenly over the top of the cake.

9. Bake for 40-50 minutes or till done (check by inserting a tester or toothpick in 2-3 places to make sure).

10. Take the cake out of the oven but leave it in the tin for 20 minutes. Then unmould and cool completely on a wire rack.

This cake can be split and iced, if desired, and it's also lovely served with chocolate or vanilla icecream.

Sunday, July 31, 2005

Deep dark chocolate cake

I've tried out quite a few chocolate cake recipes in the last 2-3 years, but this is the one that I like best and make the most often. It's not a complicated recipe (the most important criterion for me as I'm not a naturally gifted baker), so there's no need to faff about with separating eggs and beating the whites separately, or melting chocolate pieces over a double boiler, and other fiddly procedures like that. It's a straightforward, easily followed recipe.

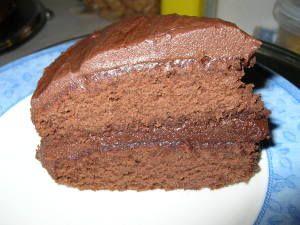
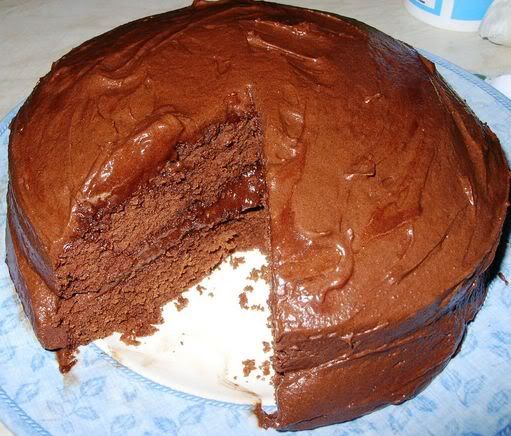
And the end result is superb... dark and very chocolatey without being cloying, with a lovely moist interior that doesnt even require cream or icecream. Not that you CANT serve up a slice with clotted cream or icecream... it's just that it would be rather like gilding a lily!

Image hosted by Photobucket.com

What's probably the most difficult thing to believe - I dont eat much of it myself! I cant - my sweet tooth is not particularly pronounced, so this cake in particular is always made with Pete as the end-user, so to speak. He's only too pleased that I only ever cut the thinnest slice for myself... it leaves him all that much more!

It's also the cake with which I've been trying to entice some dear friends from India into visiting me... perhaps this post will finally persuade them. You reading this, girls?

Recipe for:
Deep dark chocolate cake


Image hosted by Photobucket.com

Ingredients:

2 cups plain flour
1-1/4 cups sugar
1 tsp baking soda
1/2 tsp baking powder
1/4 tsp salt
1/2 cup butter
3/4 cup cocoa powder
2 tsp vanilla extract
2 eggs
1 cup hot water

For the frosting:

1/3 cup butter
1/2 cup cocoa powder
1/3 cup milk
2-1/2 cups icing sugar
1 tsp vanilla extract

Method:

1. Generously grease two 7-inch round cake pans. Pre-heat the oven to 180C (350F).

2. In a small bowl, whisk together the hot water and cocoa until smooth. Let cool.

3. Sift the flour, salt, baking powder and baking soda together and set aside.

4. Beat the butter and sugar in a large bowl until fluffy and light. Add the eggs one at a time, beating well after each addition. Beat in the vanilla extract.

5. Add the flour and the cocoa alternately to the butter-and-egg mix, mixing well after each addition. Start and end with the flour.

6. Divide the batter even between the two cake pans and cook for 30 minutes or until a toothpick or cake tester inserted in the centre comes out dry.

7. Turn off the oven and let the cakes rest in the pans for 5 minutes. Carefully remove the cakes from the pans and let cool completely on wire racks before frosting them.

Frosting:

1. Beat the butter and cocoa powder till well mixed. Add the vanilla essence as well.

2. Add 1/2 cup of the icing sugar and mix carefully, then add a tbsp of the milk to the icing mix and beat again.

3. Continue adding the icing sugar and milk alternately until it's all used up.

4. Beat the frosting until it is thick enough to spread.

5. When the cakes are cold, first sandwich them together with a third of the frosting, then spread the rest of it over the top and sides.

This cake tastes even better on the second day - if there's anything left of it, that is.

Tuesday, May 17, 2005

Chocolate-orange marble sponge cake

Image hosted by Photobucket.com
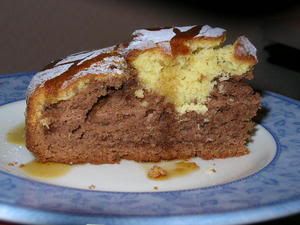
Chocolate-orange marble sponge cake. It turned out pretty good - soft and spongy without the kind of choking dryness that defies all attempts at swallowing. It would have been nicer still had I not forgotten about it in the oven (I did say I'm an amateur cook, prone to distractions!)... the extra 10 minutes that it spent in the oven made the top of the cake a bit crispy. It also developed cracks *sigh*. Not unpleasant, really, but also not required. The cake was just sweet enough for me, but my husband doesnt just have a sweet tooth - he has a mouthful of them! So I drizzled some pure Canadian maple syrup (difficult to get in the UK, I kid you not) over the top of the cake. A satisfactory ending for all.

Chocolate-orange marble sponge cake:

Ingredients:

2 cups all-purpose or cake flour
2-1/2 tsp baking powder
1/2 tspsalt
2/3 cup butter or margarine
1-1/2 cups sugar (I used 3/4 cup 'light' sugar and 1/2 cup Splenda granular to make 1-1/4 cups, but I like my cake with less sugar)
3 large eggs
1 tsp extract of vanilla
3/4 cup milk (I used whole milk)
1/4 cup unsweetened cocoa powder, sifted
2 tbsp orange-flavoured liqueur or concentrated orange juice, or failing that, freshly squeezed juice from 1/2 a medium-sized orange
1 tbsp grated orange rind

Method:

1. Sift flour, baking powder and salt in a bowl and set aside.

2. Cream the butter or margarine in another bowl, add sugar/Splenda mix gradually and keep creaming till the mixture is soft and fluffy. Note that the addition of Splenda granular means that the mixture may well become a bit stiff.

3. Add the eggs one at a time, and beat thoroughly after each addition. Then add the vanilla.

4. Now add the flour mix and the milk alternately, starting and ending with the flour, and only stirring to mix. DO NOT BEAT.

5. Divide this batter in half. Add the unsweetened cocoa powder to one half and stir until blended.

6. To the other half, add the orange rind and liqueur/concentrate/fresh juice, whichever you are using. Stir until blended.

7. Spoon the batter into an 8" round cake pan that has been greased or lined with silicone paper. Alternate the chocolate and orange batter in the pan. There will be more batter than can be accommodated in one layer, so continue spooning the batter alternately over the first layer, making sure that the orange batter goes over the chocolate batter in the pan.

8. Bake for 45 minutes in a 1800C oven (350 Fahrenheit), or until done. Test with a skewer.

9. Let the cake stand in the pan for a couple of minutes, then turn out onto a wire rack and let cool. Sprinkle the top lightly with confectioners sugar when the cake has cooled completely.

10. Serve with a drizzle of maple syrup for those who like their cake sweet, or with orange-flavoured cream.