skip to main |
skip to sidebar
I don't make sweets often, but once in a while something like Cilantro's fruit kesari catches my fancy, and then it's like a craving - so here's my craving, which I made yesterday. It's just a coincidence that it's Deepavali and the kesari is appropriate as an offering. It's even more convenient that I could use up some over-soft soft fruit that I might have thrown away if not for the craving.
Now if only someone would make me thenkuzhal and thattai...
Ah well. Happy Deepavali to everybody, and may light and happiness be ever in your lives.
Recipe for: Fresh fruit rava kesari
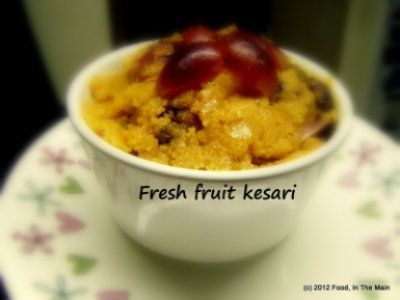
Ingredients:
1/2 cup rava/sooji/semolina
1-1/2 cups water
1/8 tsp saffron threads (a pinch) left to soak in 1/4 cup warm milk for 15 minutes
10-12 seedless red grapes, halved or quartered
1 small orange, peeled and segments chopped
1 small ripe banana, chopped
1 small ripe plum, stoned and chopped
1 tbsp raisins or sultanas (optional)
1/2 cup sugar
1/4 tsp cardamom powder
5 tsp ghee
2 tbsp nuts (I used walnuts and pecans)
Method:
1. Heat 2 tsp ghee in a heavy-based medium size pan and fry the rava/sooji/semolina on medium heat, stirring frequently, for about 5 minutes till the rava turns a slightly darker shade and smells roasted. Be careful that it doesn't burn. Remove to a bowl till required.
2. In the same pan, heat another tsp ghee and fry the nuts on medium heat, stirring till they are fragrant and turn a darker shade. Remove the nuts from the pan and reserve.
3. Heat the fourth tsp of ghee in the same pan, and add all the fruits, letting them cook on medium-low heat till they are soft and squishy, about 5 minutes.
4. Now add the water and sugar. Bring to a boil, then lower the heat a little and let it simmer for 5 minutes, stirring until the sugar dissolves completely.
5. Add the roasted rava/sooji/semolina now, stirring all the while to mix evenly. Let this cook until the kesari begins to thicken, then add the saffron milk and stir it in. Keep stirring frequently to ensure that it does not burn or become lumpy.
6. When the kesari is no longer watery and has "come together" in a soft mass, stir in the fried nuts along with the remaining tsp ghee. Serve the kesari warm in small bowls.
Tip: You can also spread the kesari on a greased plate and let it cool, then cut it into squares or diamonds for a more elegant (and convenient) presentation.
There's a sad, sad pun in the title, which you'll probably realise in a moment when I tell you my latest project - a new food blog, on Wordpress rather than Blogger (in a bid to try something different) and featuring only non-vegetarian recipes. Here, my friends, is where it is: Non-Veg Food, In The Main
Ok, I'm TOTALLY thinking what you're thinking, and I know exactly what you're thinking - what on earth is this woman doing starting yet another blog when she's been neglecting the ones she DOES have? I know, I know. I'm probably all kinds of a fool for doing this, but... who knows, it might kick-start my mojo and make me a food blogger again instead of a food-blog lurker.
And yes, since I'm pretty much a rank beginner in the non-vegetarian cooking arena, my skills are very basic, and so is my knowledge. The recipes that will feature in my new blog will be mainly for the beginner cook, but I hope to improve my culinary skills as we go along. The trick will be in cooking without tasting, because after all, I'm vegetarian! Fingers crossed for luck!
Another one what, you ask? Do you even have to ask? Another anniversary, that's what. I completed My BLOG completed 8 years on May 17 2012, and nobody, including me, remembered. You'd think my blog - shy, retiring and unassuming like me though it is - would have drawn my attention to its 8th birthday in some shy, retiring, unassuming way... but no. Apparently, my blog - with whom which I have conversations while typing up recipes and posts - is not a real entity.
Who knew? The world in my head seems as real as the world outside my head. Not that anyone can say for sure how real that is... I mean, for all you know, we could just be the dreamworld of some unknown super-being who didn't even have to create the world as we know it, merely dream about our world as we think we know it. I know. It boggles my mind too.
And with that sufficiently mysterious, pseudo-philosophical and pseudo-theological remark, let me drink drink a metaphorical flute of champagne to mark the (till now unmarked) passing of yet another year for my food blog. Here's to Year 9, and may it see more than just imaginary conversations! Cheers! *metaphorical hiccup*
This gorgeous emerald coloured chutney is many kinds of pretty - pretty beautiful, pretty tasty, pretty versatile, pretty healthy, pretty easy to make...
So go and make it. Pretty please.
Recipe for: Spinach-onion-cabbage chutney
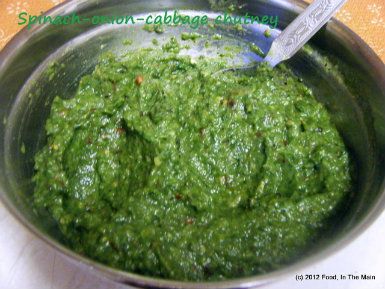
Ingredients:
1 cup spinach leaves
1/2 cup cabbage, sliced
1 medium onion, sliced
A good handful of chives
2 cloves garlic, sliced
1 tbsp oil
2 tsp urad dal
1 tsp tamarind paste or a gooseberry sized piece of tamarind
5-6 dried red chillies (or to taste)
1/4 tsp asafoetida powder (optional)
2 tsp mustard seeds
4-5 fresh or frozen curry leaves
Salt to taste
Method:
1. Heat the oil and when it shimmers, add the mustard seeds and cover the pan till they finish popping.
2. Now add the urad dal, red chillies, curry leaves and asafoetida powder. Stir-fry till the urad dal turns a pale golden brown and the red chillies are a shiny darker shade.
3. Add the garlic, chives and onion and stir-fry till the onions start to soften and turn translucent.
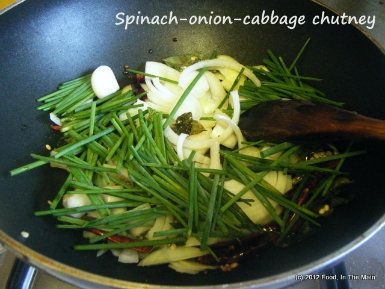
4. Add the cabbage and fry it till it wilts,
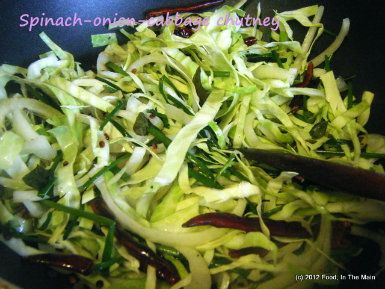
then the spinach until it wilts too.
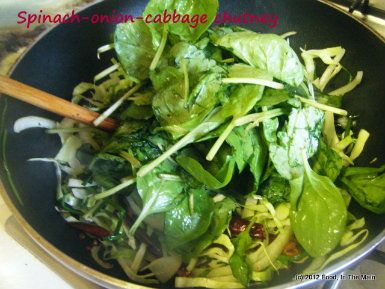
Let this mixture cool.
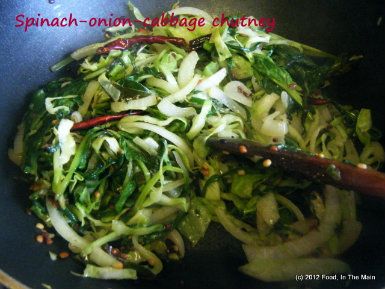
5. Pick out the red chillies and grind them to a smooth paste with the tamarind and a couple of spoonfuls of the vegetable mixture.
6. Now add the rest of the cabbage-onion-spinach mix
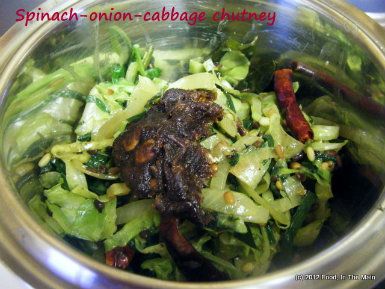
and grind it to a fairly smooth consistency - but not to a puree. It should be a little bit coarse.
7. Remove the chutney to a bowl, add salt to taste and mix well. This can be mixed with rice or eaten as a side dish/dip with chapaties, dosas, idlis etc.
RECIPE: SPINACH-ONION-CABBAGE CHUTNEY
Ingredients:
1 cup spinach leaves
1/2 cup cabbage, sliced
1 medium onion, sliced
A good handful of chives
2 cloves garlic, sliced
1 tbsp oil
2 tsp urad dal
1 tsp tamarind paste or a gooseberry sized piece of tamarind
5-6 dried red chillies (or to taste)
1/4 tsp asafoetida powder (optional)
2 tsp mustard seeds
4-5 fresh or frozen curry leaves
Salt to taste
Method:
1. Heat the oil and when it shimmers, add the mustard seeds and cover the pan till they finish popping.
2. Now add the urad dal, red chillies, curry leaves and asafoetida powder. Stir-fry till the urad dal turns a pale golden brown and the red chillies are a shiny darker shade.
3. Add the garlic, chive and onion and stir-fry till the onions start to soften and turn translucent.
4. Add the cabbage and fry it till it wilts, then the spinach until it wilts too. Let this mixture cool.
5. Pick out the red chillies and grind them to a smooth paste with the tamarind and a couple of spoonfuls of the vegetable mixture..
6. Now add the rest of the cabbage-onion-spinach mix and grind it to a fairly smooth consistency - but not to a puree. It should be a little bit coarse.
7. Remove the chutney to a bowl, add salt to taste and mix well. This can be mixed with rice or eaten as a side dish/dip with chapaties, dosas, idlis etc.
You know, it's really nice not to be the proverbial frog in the well, and it's all the hundreds of food blogs that I have to thank for introducing me to the enticing, amazing world of home-style food recipes... and showing me the thousands of possibilities with everyday vegetables and fruit that would never have occurred to me otherwise.
Take thogayal, for instance - I knew three kinds: Coconut-only, coconut-with-cabbage, and coconut-with-pumpkin-or-chayote squash. I didn't even imagine that thogayal could be made with carrots, beets, bell peppers, spinach, etc... and as for making it without coconut - wow! The first time I made thogayal with just cabbage was such a revelation! All the taste of the dish I loved without loading it up with coconut - I can't tell you how much I loved it.
In that spirit, I decided to make thogayal with a bunch of red radishes with their greens because I didn't feel like eating them raw (they were pretty pungent!).
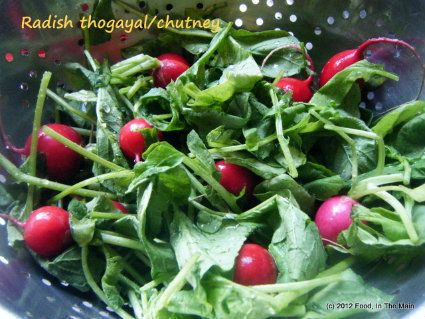
I was actually a bit worried that the thogayal would be smelly... but as it turned out, you would not have known that it was made with radishes, because the typical smell of the radishes was totally gone. I'm absolutely certain that even radish haters would love this chutney. You could probably even try it with the more typically Indian white radish or mooli - I'm going to do so if and when I get my hands on some. But until then, red radish thogayal will fill its place perfectly.
Recipe for: Radish thogayal/chutney
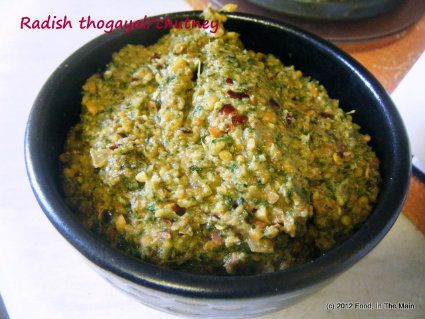
Ingredients:
10-12 small red radishes or 1 medium white mooli/radish, chopped
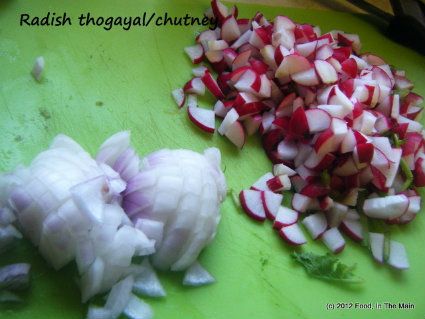
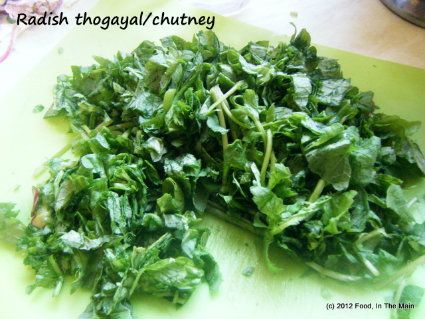
1 cup radish greens (or use spinach) (optional)
2 medium onions, chopped
5-6 dried red chillies (or to taste)
2 tbsp tur/toor/tuvar dal
3 tbsp urad dal

1 tbsp tamarind paste
a few fresh/frozen curry leaves
3 tsp oil
1/2 tsp asafoetida powder (optional)
Salt to taste
Method:
1. Heat 1 tsp oil in a pan, add the asafoetida powder and let it sizzle, then add the chopped onions and radish.
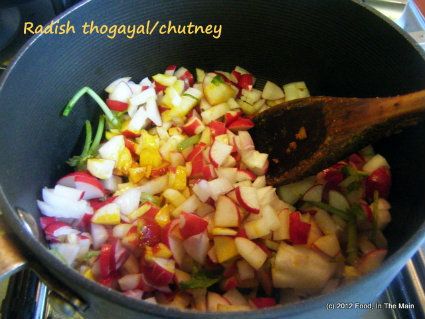
Stir-fry over medium heat for 3-4 minutes, until the radish is nearly cooked and the onions are turning soft (6-7 minutes).
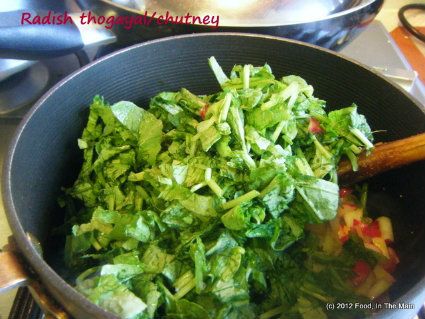 Add the chopped greens and cook till they wilt. Remove from the heat and let cool.
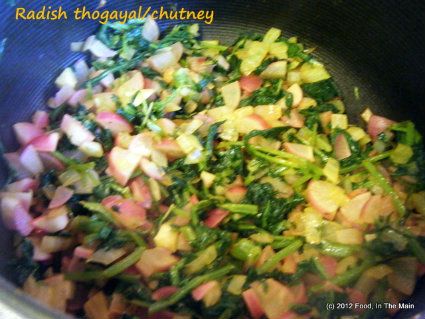 2. In another small pan, heat the remaining oil and add the red chillies, urad dal, toor dal and curry leaves.
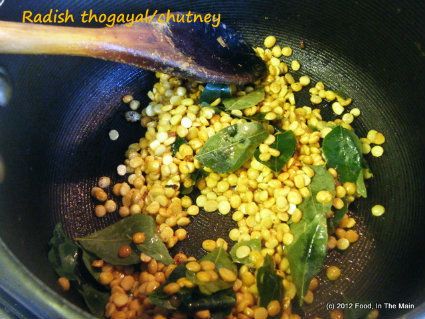 Fry, stirring, till the dals are golden brown and the red chillies turn a shade darker. Remove from the heat.
3. When all of it is completely cool, transfer to a mixie/grinder, add the tamarind paste and grind it to a fairly smooth mix.
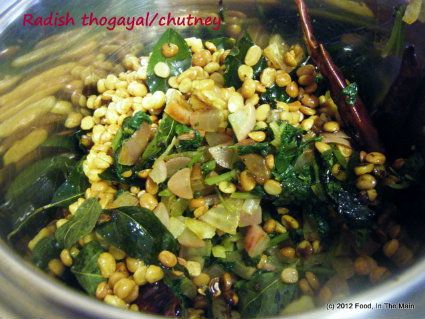 4. Add salt to taste and mix it in. Serve as a side dish with rice, chapaties, bread or as a dip with snacks.
RECIPE: RADISH THOGAYAL/CHUTNEY
Ingredients:
10-12 small red radishes or 1 medium white mooli/radish, chopped
1 cup radish greens (or use spinach) (optional)
2 medium onions, chopped
5-6 dried red chillies (or to taste)
2 tbsp tur/toor/tuvar dal
3 tbsp urad dal
1 tbsp tamarind paste
a few fresh/frozen curry leaves
3 tsp oil
1/2 tsp asafoetida powder (optional)
Salt to taste
Method:
1. Heat 1 tsp oil in a pan, add the asafoetida powder and let it sizzle, then add the chopped onions and radish. Stir-fry over medium heat for 3-4 minutes, until the radish is nearly cooked and the onions are turning soft (6-7 minutes). Add the chopped greens and cook till they wilt. Remove from the heat and let cool.
2. In another small pan, heat the remaining oil and add the red chillies, urad dal, toor dal and curry leaves. Fry, stirring, till the dals are golden brown and the red chillies turn a shade darker. Remove from the heat.
3. When all of it is completely cool, transfer to a mixie/grinder, add the tamarind paste and grind it to a fairly smooth mix.
4. Add salt to taste and mix it in. Serve as a side dish with rice, chapaties, bread or even as a dip with snacks.
Well, here I am after an unscheduled break from my food blog. It’s not that I haven’t wanted to, bla bla bla, it’s just that I’ve not had much free time, hey nonny no, and what little free time I’ve had in the evenings I’ve spent reading, yada yada yada. So, in short – same ol’ same ol’.
I’ve made handvoh before, years and years and YEARS back when I was living in Madras. It was probably one of the first “exotic” recipes that I tried from a recipe printed in *ugh* Women’s Era *cringe*. However, as much as I hate the thought of that awful magazine now, I remember the recipe worked beautifully - the batter behaved itself faultlessly, fermenting in the heat as stated in the recipe, and then steam-cooking in the ilupachatti (kadai/wok) that I used. It was all the more thrilling because the handvoh tasted great and it was not something that had ever been made by my mother, to my recollection. It wasn’t a family staple, let’s say. Just think - I'd actually made something entirely new to me from a magazine recipe - and it turned out well!
That said, this recipe, that I cobbled together after reading a few others on the Internet did not seem at all familiar or bring to mind my original handvoh experience. The only common factor was that this tasted great, too. Can’t complain about that, can you?
Recipe for: Courgette/zucchini handvoh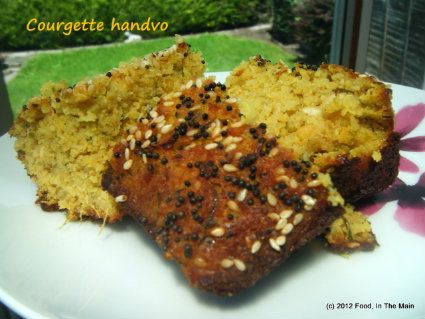
Ingredients:
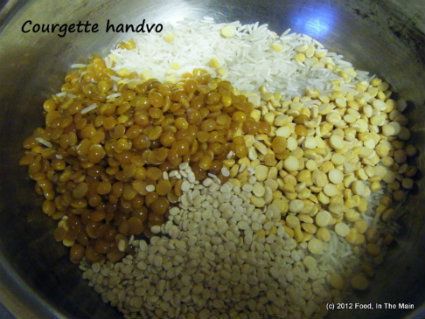
1 cup long grain rice
1/4 cup chana dal
1/4 cup tur/toor/tuvar dal
1/4 cup urad dal
 1 cup yogurt
2 tbsp ginger-garlic-green chilli paste - (1.5" piece ginger + 4-5 garlic cloves + 6-8 green chillies (reduce chillies as per taste))
1.5 packed cups grated courgette/zucchini
salt to taste
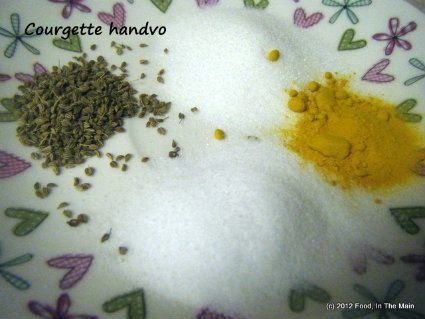
1/2 tsp ajwain/omam
2 tsp sugar
1/2 tsp turmeric powder
3/4 tsp baking powder
1/2 tsp baking soda
2 tbsp sesame seeds
 3 tbsp oil
2 tsp mustard seeds
1/4 tsp asafoetida powder
1/2 tsp red chilli powder
a few curry leaves
Method:
1. Wash the rice and dals and soak them in water for 6 hours.
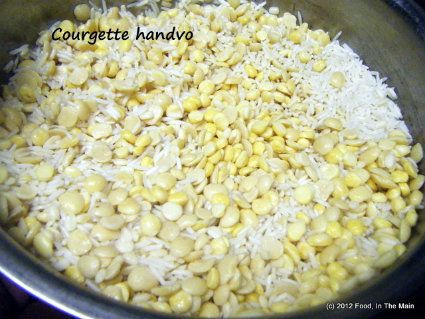 Then drain and grind along with the yogurt to a paste - it should be fairly coarse, not smooth.
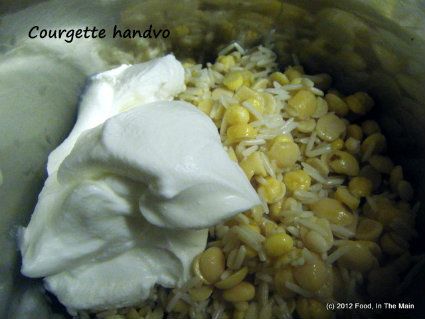 Try to add as little water as possible while grinding.
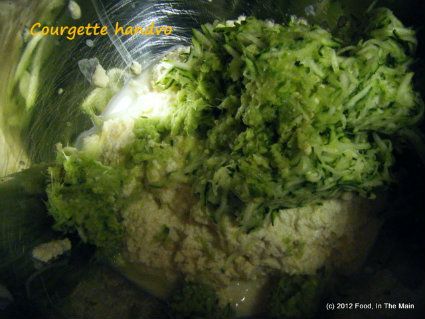
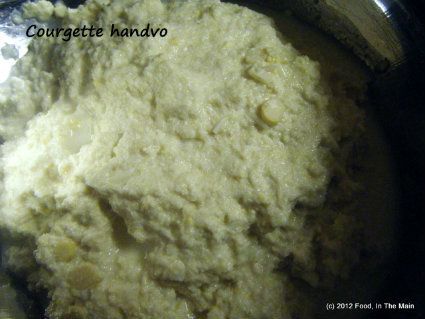 2. Put the batter in a medium bowl and add the ginger-garlic-green chilli, grated courgette/zucchini
 salt, sugar, ajwain/omam and turmeric.
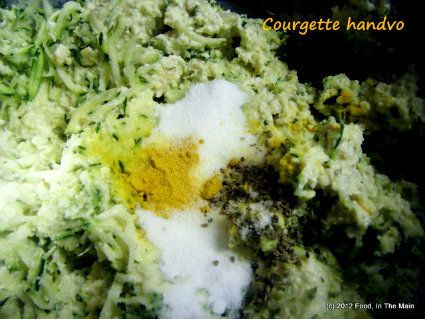 Mix well.
4. Heat 1 tbsp oil and fry the curry leaves for 15-20 seconds, then add the red chilli powder and turn the heat off. Pour this mixture into the batter and mix again.
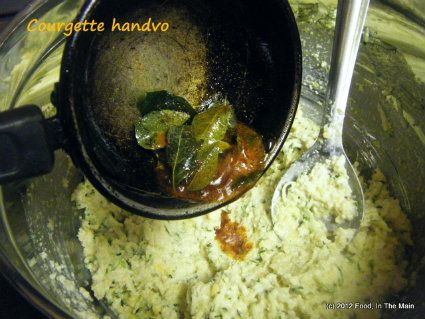 Let the batter rest covered at room temperature overnight, or for 7-8 hours.
5. Cover and let this batter rest for 6-7 hours or overnight (no need to refrigerate).
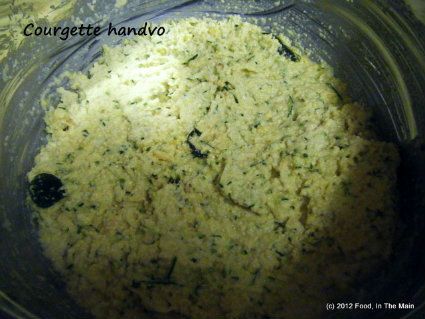 6. In the morning (or after 6-7 hours), add the baking powder and baking soda and mix thoroughly.
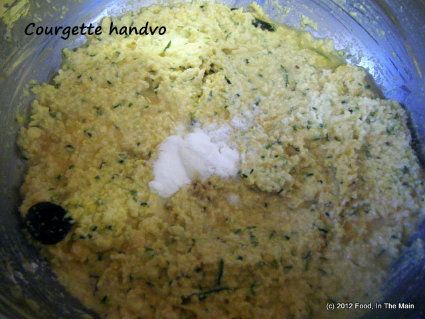 7. Line an 8" cake pan (round or square, doesnt matter) with non-stick paper/foil and spoon the batter into the pan.
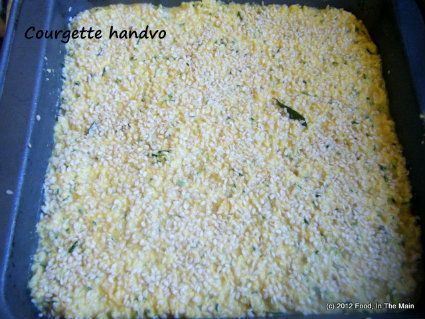 8. Sprinkle the sesame seeds evenly on top of the batter.
9. Heat the remaining oil in a small skillet and add the mustard seeds. Cover and let the seeds pop (about 30 seconds), then add the asafoetida powder and turn the heat off.
10. Drizzle this seasoning over the sesame seeds on top of the batter.
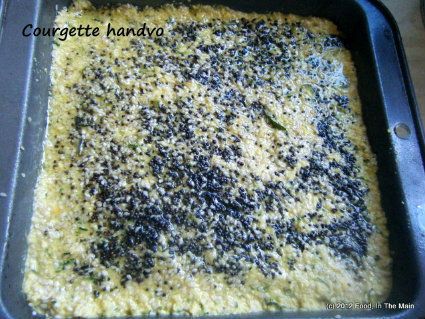 11. Cover the pan with aluminium foil and bake at 180C/350F for 40 minutes or so, or till a cake tester comes out clean. (Remember that the size of the pan you use will determine the amount of time that the handvoh takes to cook.)
12. Uncover the pan and broil the handvoh until the top turns golden brown.
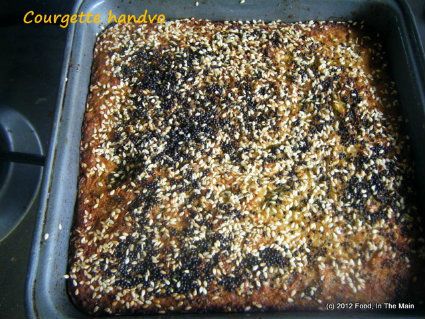 Let it rest in the pan for 10 minutes before cutting.
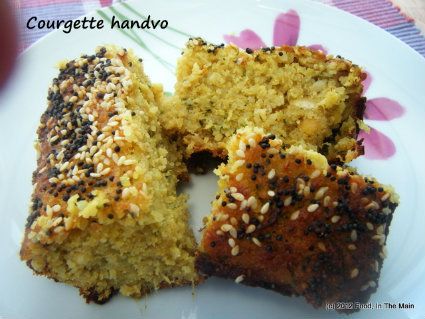 Serve warm with any chutney or even tomato ketchup.
RECIPE: COURGETTE/ZUCCHINI HANDVOH
Ingredients:
1 cup long grain rice
1/4 cup chana dal
1/4 cup tur/toor/tuvar dal
1/4 cup urad dal
1 cup yogurt
2 tbsp ginger-garlic-green chilli paste - (1.5" piece ginger + 4-5 garlic cloves + 6-8 green chillies (reduce chillies as per taste))
1.5 packed cups grated courgette/zucchini
salt to taste
1/2 tsp ajwain/omam
2 tsp sugar
1/2 tsp turmeric powder
3/4 tsp baking powder
1/2 tsp baking soda
2 tbsp sesame seeds
3 tbsp oil
2 tsp mustard seeds
1/4 tsp asafoetida powder
1/2 tsp red chilli powder
a few curry leaves
Method:
1. Wash the rice and dals and soak them in water for 6 hours. Then drain and grind along with the yogurt to a paste - it should be fairly coarse, not smooth.Try to add as little water as possible while grinding.
2. Put the batter in a medium bowl and add the ginger-garlic-green chilli, grated courgette/zucchini, salt, sugar, ajwani/omam and turmeric. Mix well.
4. Heat 1 tbsp oil and fry the curry leaves for 15-20 seconds, then add the red chilli powder and turn the heat off. Pour this mixture into the batter and mix again. Let the batter rest covered at room temperature overnight, or for 7-8 hours.
5. Cover and let this batter rest for 6-7 hours or overnight (no need to refrigerate).
6. In the morning (or after 6-7 hours), add the baking powder and baking soda and mix thoroughly.
7. Line an 8" cake pan (round or square, doesnt matter) with non-stick paper/foil and spoon the batter into the pan.
8. Sprinkle the sesame seeds evenly on top of the batter.
9. Heat the remaining oil in a small skillet and add the mustard seeds. Cover and let the seeds pop (about 30 seconds), then add the asafoetida powder and turn the heat off.
10. Drizzle this seasoning over the sesame seeds on top of the batter.
11. Cover the pan with aluminium foil and bake at 180C/350F for 40 minutes or so, or till a cake tester comes out clean. (Remember that the size of the pan you use will determine the amount of time that the handvoh takes to cook.)
12. Uncover the pan and broil the handvoh until the top turns golden brown. Let it rest in the pan for 10 minutes before cutting. Serve warm with any chutney or even tomato ketchup.
I think I may have found the most PERFECT masala recipe I've ever tried, and all thanks to Sangeeta of Banaras ka Khana blog. Her blog is one of my favourites, because she has North Indian recipes which are not so well known (at least to me) as the usual things you get endlessly everywhere. I like reading about typical everyday recipes which are still not common outside of individual homes, and Sangeeta's blog is the perfect place to find these.
I tried this masala with cooked chickpeas because I had some, and loved the result so much that I've made it (with different dals) four times in the last 10 days... although not (yet) with the original split chickpeas (or chana dal) that Sangeetha used. I've tried it both as a thick sauce and as a runnier one, and it makes not a whit of difference - other than the clingy sauce is better with whole chickpeas.
I reduced the peppercorns to 1/2 tsp because I can't take the heat from them (but chilli-heat is more than bearable, go figure), but otherwise the recipe is no different - well, apart from having used chickpeas, that is. Do try it - it's pretty quick to make, too, especially if you use canned chickpeas.
Recipe for: Chana bhuna
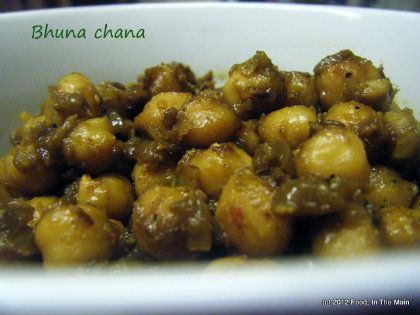
Ingredients:3-4 cups cooked chickpeas (or two cans' worth)
1 large onion, chopped fine
1 tbsp ghee or oil (I used oil)
1 tsp cumin seeds
Salt to taste
For grinding:
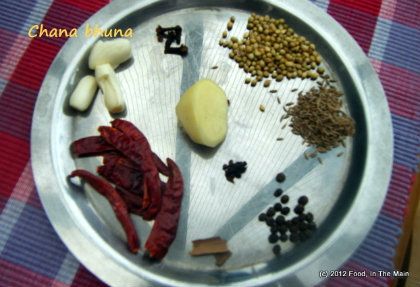
1/2" piece cinnamon stick
1 small black cardamom (seeds only)
1 htsp coriander seeds
1 htsp cumin seeds
2 cloves
4-5 dried red chillies (or to taste)
3 garlic cloves
1" ginger root
1/2 tsp black peppercorns
1/2 tsp turmeric powder
1/2 tsp amchoor (dried raw mango) powder - optional
3-4 tbsp water
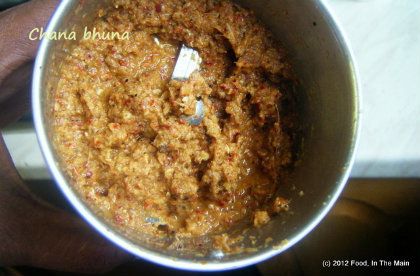
Method:1. Grind all the ingredients for the masala into a smooth, fairly thick paste. Use only as much water as required to make it smooth.
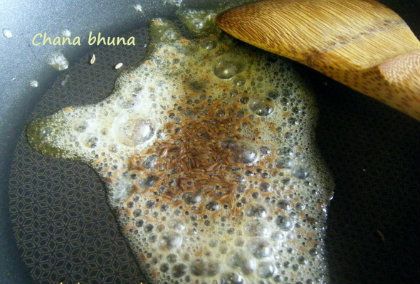
2. Heat the oil/ghee in a pan, then add the cumin seeds.
3. Once the seeds sizzle, add the chopped onion and stir.
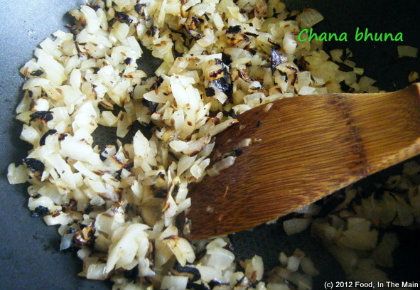
Let it cook on low heat for 15 minutes or so, till it becomes soft and pinkish.
4. Now add the ground masala paste to the cooked onion
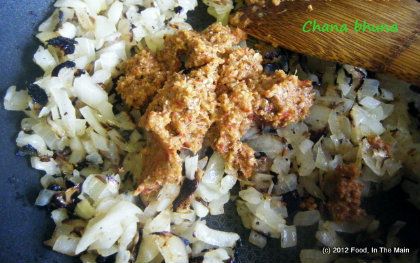
and stir it in.
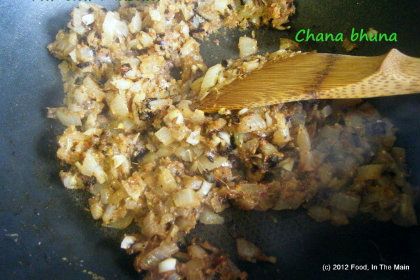
5. Fry it (bhuno) on low heat for 5-7 minutes, stirring frequently, till the paste is well amalgamated, thick and intensely aromatic. Any excess water should have evaporated.
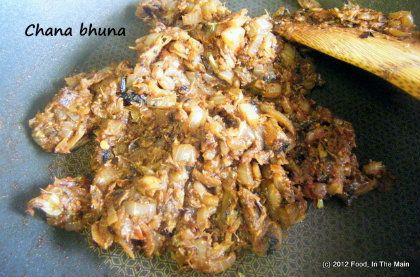
6. Now add the chickpeas along with salt to taste
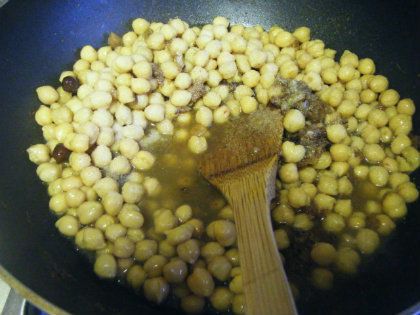
and stir till it is all well mixed.
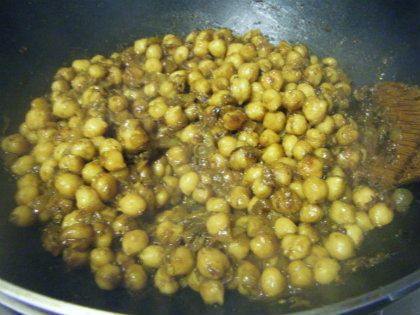
7. Let it cook for 2-3 minutes more (longer if it is watery), then take it off the heat.
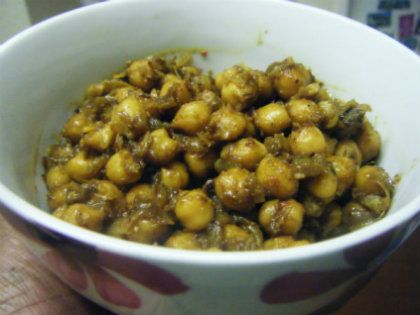
Serve hot with chapaties or puris.
Note: The curry tastes best when the masala coats the chickpeas thickly, so make sure the masala is not runny.
RECIPE: CHANA BHUNA
Ingredients:
3-4 cups cooked chickpeas (or two cans' worth)
1 large onion, chopped fine
1 tbsp ghee or oil
1 tsp cumin seeds
Salt to taste
For grinding:
1/2" piece cinnamon stick
1 small black cardamom (seeds only)
1 htsp coriander seeds
1 htsp cumin seeds
2 cloves
4-5 dried red chillies (or to taste)
3 garlic cloves
1" ginger root
1/2 tsp black peppercorns
1/2 tsp turmeric powder
1/2 tsp amchoor (dried raw mango) powder - optional
3-4 tbsp water
Method:
1. Grind all the ingredients for the masala into a smooth, fairly thick paste. Use only as much water as required to make it smooth.
2. Heat the oil in a pan, then add the cumin seeds.
3. Once the seeds sizzle, add the chopped onion and stir. Let it cook on low heat for 15 minutes or so, till it becomes soft and pinkish.
4. Now add the ground masala paste to the cooked onion and stir it in.
5. Fry it (bhuno) on low heat for 5-7 minutes, stirring frequently, till the paste is well amalgamated, thick and intensely aromatic. Any excess water should have evaporated.
6. Now add the chickpeas along with salt to taste and stir till it is all well mixed.
7. Let it cook for 2-3 minutes more, then take it off the heat. Serve hot with chapaties or puris.
Note: The curry tastes best when the masala coats the chickpeas thickly, so make sure the masala is not runny.
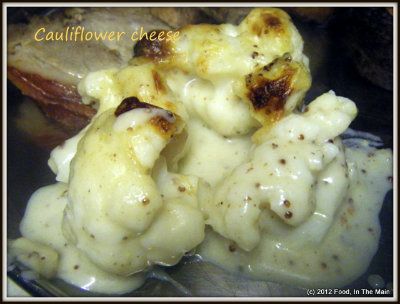
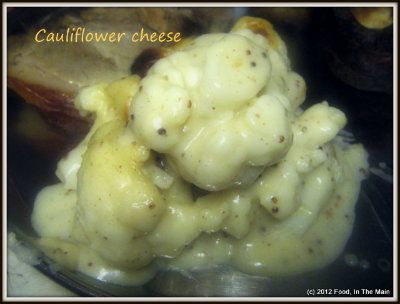
While I could probably eat my weight in green cabbage and would do so willingly, cauliflower isn't as welcome on my plate. While there are a couple of ways of making cauliflower that can be snuck past my fussy tastebuds (think oven-roasted cauliflower or cauliflower usili), there is literally only one way that Pete can be persuaded to eat this vegetable - and that is if it's hidden under a layer of cheese and white sauce. Yesterday turned out to be the day that I made this for my husband for the first time, because there was just too much cauliflower for one person to finish off especially when that person is not particularly fond of this smelly vegetable (but ask her to eat potatoes and see what happens - just stay a safe distance away while you watch!).
Oh, do you remember me saying that mustard just loves cheese? I proved it for the umptieth time with this recipe.
Recipe for: Cauliflower cheese
Ingredients:
1/2 small cauliflower, separated into more or less evenly sized florets
1/2 cup + 2 cups milk + more as required
1/2 cup Cheddar cheese, grated
2 tbsp butter
2 tbsp plain flour
1 tbsp wholegrain prepared mustard
freshly ground black pepper, to taste
sea salt, to taste
Method:
1. Cook the cauliflower with 1/2 cup milk and enough water to cover the florets, until done but not overcooked. (It is cooked when a skewer goes through the thickest part of the floret without too much resistance.
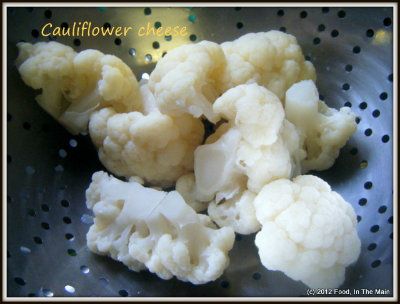
Drain and place in an oven-safe casserole dish.
2. Heat a heavy-based saucepan and put the flour and butter in.
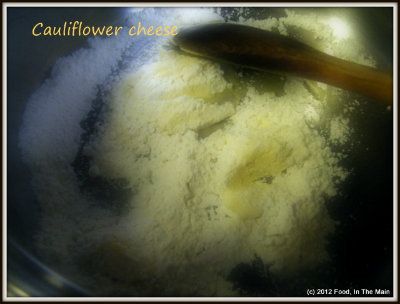
Cook it on medium heat, stirring continuously until the butter and flour are well incorporated and the flour smells good (3-4 minutes).
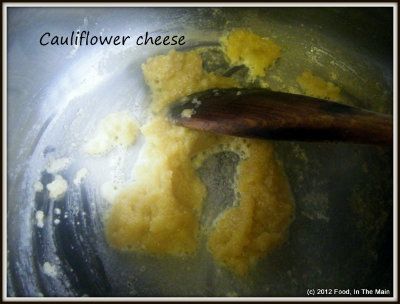
3. Stir in the mustard,
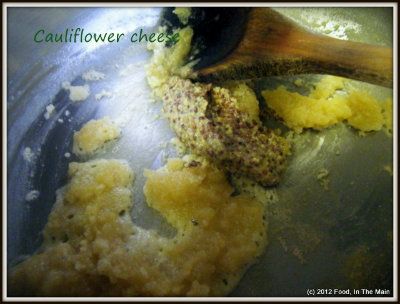
then add the remaining 2 cups milk all at once and whisk the mixture well so that there are no lumps.
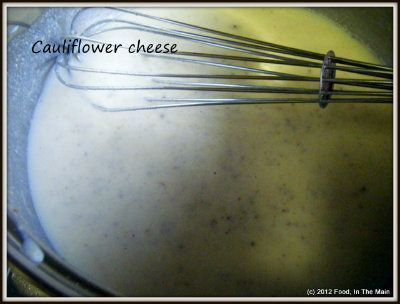
Add the cheese and stir till it melts in.
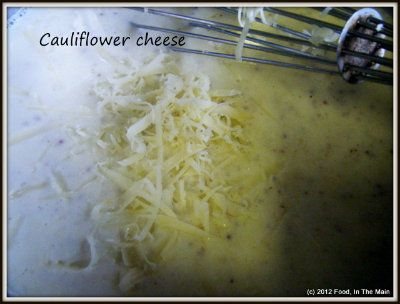
5. Cook the sauce till it thickens and becomes glossy (about 5 minutes on medium-low heat), stirring it to stop it catching on the bottom.
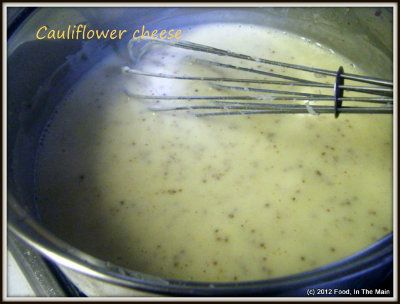
6. Add salt and pepper to taste. Pour the sauce over the cooked florets.
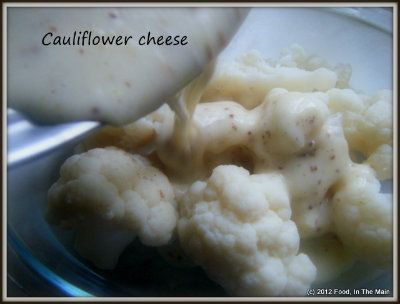
You can sprinkle on some more cheese now if you like.
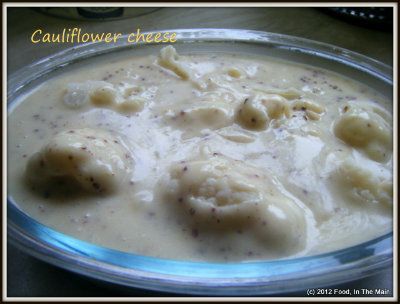
7. Cook it at 180C/350F for 15-20 minutes until the sauce is bubbling and the top is golden brown.
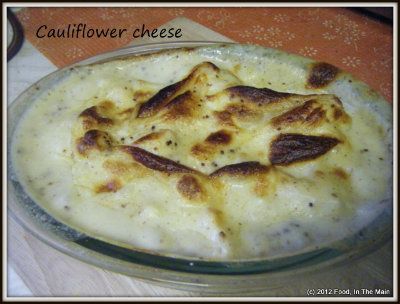
Let the cauliflower cheese rest for 2-3 minutes before serving it up.
 RECIPE: CAULIFLOWER CHEESE
Ingredients:
1/2 small cauliflower, separated into more or less evenly sized florets
1/2 cup + 2 cups milk + more as required
1/2 cup Cheddar cheese, grated
2 tbsp butter
2 tbsp plain flour
1 tbsp wholegrain mustard
freshly ground black pepper, to taste
sea salt, to taste
Method:
1. Cook the cauliflower with 1/2 cup milk and enough water to cover the florets, until done but not overcooked. The cauliflower is cooked when a skewer goes through the thickest part of the floret without too much resistance. Drain and place in an oven-safe casserole dish.
2. Heat a heavy-based saucepan and put the flour and butter in. Cook it on medium heat, stirring continuously until the butter and flour are well incorporated and the flour smells good (3-4 minutes).
3. Stir in the mustard, then add the remaining 2 cups milk all at once and whisk the mixture well so that there are no lumps. Add the cheese and stir till it melts in.
5. Cook the sauce till it thickens and becomes glossy (about 5 minutes on medium-low heat), stirring it to stop it catching on the bottom.
6. Add salt and pepper to taste. Pour the sauce over the cooked florets. You can sprinkle on some more cheese now if you like.
7. Cook it at 180C/350F for 15-20 minutes until the sauce is bubbling and the top is golden brown. Let the cauliflower cheese rest for 2-3 minutes before serving it up.


