skip to main |
skip to sidebar
When I was new to pasta and found out that there were all sorts of different shapes available, I used to imagine that they would all taste different as well, perhaps because of being made from different things (in keeping with the varied shapes). I didn’t realise then that the pasta shapes were made with different styles of sauces in mind – thick and meaty sauces would need large shapes that would hold the sauce, pasta salads would only require small shapes with no "holding" characteristics and so on.
So when a more world-cuisine-savvy friend of mine pointed out that all pasta, no matter the shape or size, were made from durum wheat (with minor variations like the addition of egg or spinach), I was terribly disappointed.
“You mean they all have different names and look different but are made from the same ingredients?" I asked disbelievingly."Yes," he said, uncompromisingly. "Are you quite sure? They're all made from the same ingredients?” I asked for the second time in as many minutes, unwilling to let go of my illusion that each had its own taste.
“Yes, quite sure,” he said again, unable to figure out why I sounded so let-down.
I persisted with my questioning even in the face of his blunt reply. “Then they all taste the same? Just the sauces are different? All the cooked pasta have the same bland taste?"
“YES,” he said, again uncompromisingly but this time with an added edge of irritation.
“But then what’s the POINT?” I wailed.
“What do you mean, what’s the point?” Full-on exasperation, there.
“What’s the POINT of having different shapes if it’s all just the same damn thing? What’s the big deal about pasta then? It’s really the sauce that matters, not the pasta itself.”
And that was when I got the lecture about diff’rent strokes for diff’rent folks, to use a phrase not coined by me in a context probably totally unlike the original coining.
Although I eventually learnt to accept that all pasta may just be pasta but none of them are JUST pasta, still in my heart of hearts there lingers the faint echo of my original outburst... “But what’s the big deal about pasta, then?”
On the other hand, I’ve had people say to me, on being informed that South Indian cuisine is based predominantly around rice with different “sauces” (sambar, rasam, kootu, etc) to flavour it: “But rice is just like pasta then, isn’t it?”
It has been only with the greatest reluctance that I could bring myself to admit that yes, in that ONE way rice IS like pasta... but it’s also so very much MORE than pasta! Different varieties of rice, when cooked, taste and smell different and have different textures. I’m guessing that it’s only of late that scientists have been “inventing” new varieties of rice – but even that is only reinvention (using Nature’s bounty) at best, or tampering (with Nature’s bounty) at worst.
Pasta, on the other hand, completely an artificial invention (seen any pasta fields lately, folks?), has no distinguishing natural characteristics by way of shape or size (beyond those created by humans) or taste (beyond the “taste” of the sauce in which it is dunked).
So, bottomline - no, pasta is most definitely not like rice.
However, over the years, I’ve quite learnt to like pasta and I do understand about the shapes and sizes and uses.
Here’s a recipe with one of each – size, shape and use.
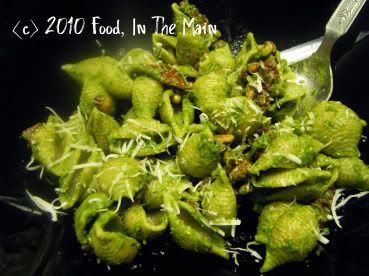
Recipe for: Pasta with rocket (arugula) pesto
Ingredients:
Whole-wheat pasta - orecchiette or conchigliette for choice, but penne or farfalle will do
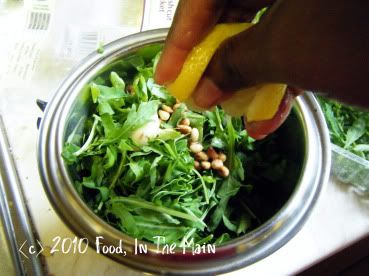
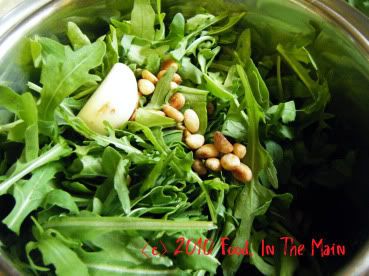
4 cups rocket (arugula), washed and patted dry
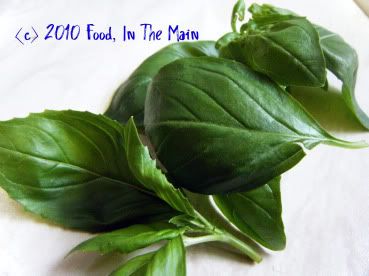
1/4 cup fresh basil leaves
3-4 cloves of garlic
1 tbsp fresh lemon juice
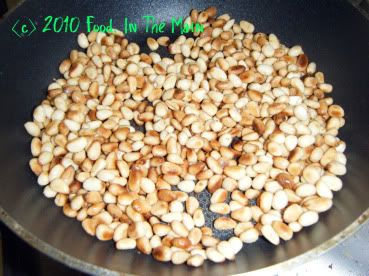
3/4 cup pine nuts (can substitute walnuts)
About 1/4 cup good quality extra virgin olive oil
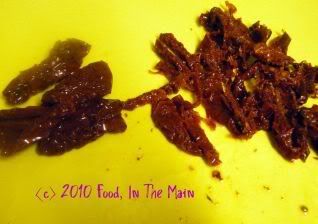
1/3 cup sundried tomatoes in oil, well drained
Salt and pepper to taste
Grated or shaved Parmigiano reggiano for garnish
Method:
1. Toast the pine nuts in a skillet till golden brown, taking care not to burn them. Set aside to cool.
2. In a food processor or mixie, add half the toasted pine nuts (reserving the other half), garlic, rocket (arugula) leaves and basil. Squeeze or pour the lemon juice over the leaves.
3. Now add olive oil little by little, as required, to help grind the leaves and nuts smoothly.
You might not need to use all the olive oil, just use as much as required.
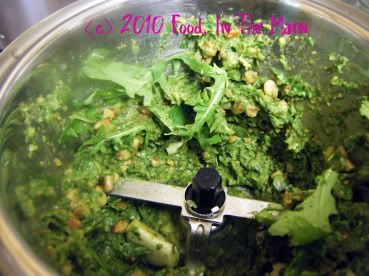
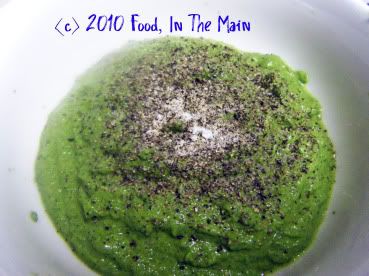
4. When the ingredients have been ground up into a fairly smooth pesto, remove the pesto to a bowl.
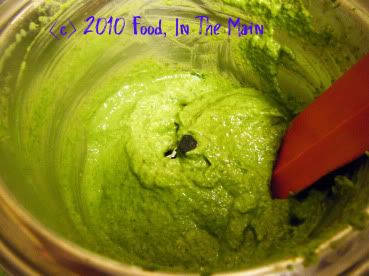
5. Add plenty of pepper and salt to taste.
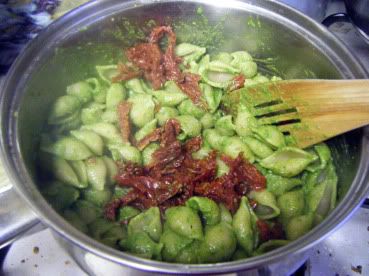
6. Cook the pasta till al dente in plenty of salted water, and drain off the water when the pasta is done. Return the pasta to the pan.
7. Slice the drained sundried tomatoes thinly.
8. Add 3-4 tbsp of the pesto to the pasta and mix in thoroughly. Taste for seasoning and add more pesto if required, making sure that every bit of the pasta is covered.
Add the sliced sundried tomatoes and stir them in,
then add the reserved toasted pine nuts. Toss or stir the pasta to distribute the pine nuts evenly.
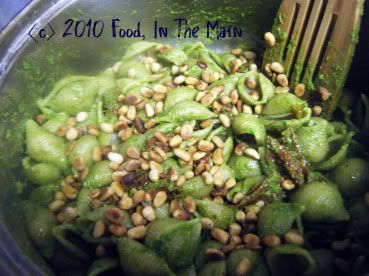
9. Serve the pasta in warmed bowls with generous shavings or gratings of parmigiano reggiano as garnish.
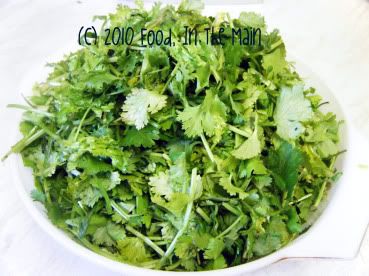
I don’t often get the chance to make kothamalli thokku (or thogayal – I tend to use the terms interchangeably in this case) because... does anybody want to take a guess why? No, it’s not because it’s not available in the local supermarkets. Coriander IS available quite easily. It’s just that it does not come particularly cheap – about £1.79 for a small bunch. I usually prefer to wait till I get a chance to go to the Pakistani/Indian shops in Birmingham, where I can get coriander at ridiculous prices... like two very large bunches for about £1.
True, they are not conveniently pre-washed, pre-tidied and pre-packed in plastic boxes like in the supermarkets – these humongous bunches come with soil still attached to the stems/roots, necessitating some amount of prep work at home before you can use them... but that inconvenience is the (non-monetary) price that you pay for the low (monetary) price.
I could grow my own coriander, I suppose, and I have done – but that’s in small quantities for everyday use. Let’s have no more about that. I’m not a farmer. Nor even a proper gardener, really.
Anyway, kothamalli thokku is for those of us that love coriander and don’t find the herb “soapy” or “disgusting”. It doesn’t require any cooking and since it’s basically mainly ground-up coriander leaves and stems, it tastes strongly of – yep, you guessed it, coriander! It tastes even stronger if you don’t have much tolerance for chillies and reduce the dried-red-chilli quotient in the recipe.
(And as an aside, let me add that although I do like flat-leaf parsley, the term “soapy” would apply far more accurately to it than to coriander. Just saying.)
I like kothamalli thokku best as a side for curd rice, although it’s also pretty good with dosas, chapaties, etc (especially mixed in with a small quantity of Greek yogurt). Yum!
Recipe for: Kothamalli thokku
Ingredients:
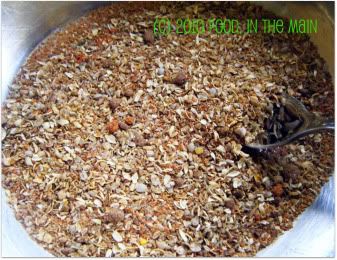
2-3 bunches coriander (to make about 5 cups chopped)
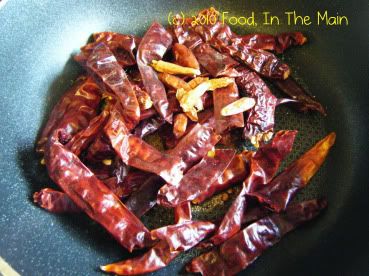
10-15 dried red chillies (depending on heat and as per taste)
2-3 tbsp urad dal
2 tsp oil
1/2 level tsp asafoetida powder
1/2 small lemon-size tamarind (or 1 htsp tamarind paste)
Salt to taste
Method:
1. Wash the coriander, removing only the woody stems. Spread out to dry on a towel overnight, or dry thoroughly with paper towels.

2. Chop the coriander leaves and stems roughly, to assist with grinding it without using water. (From experience, leaving them whole usually ends with the stems winding themselves around the blade of the mixie - I use Sumeet - and bringing things to a grinding halt. So to speak.)
3. Roast the red chillies in 1/2 tsp oil on med-low heat till they turn a darker colour and are aromatic. Remove to a plate and let cool.
4. Heat the remaining oil and add the asafoetida powder and the urad dal. Fry the dal till it turns golden brown.
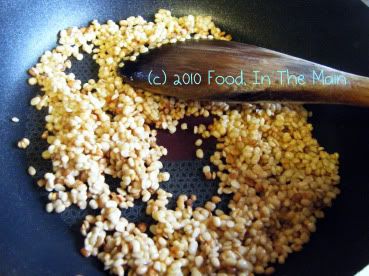
Reserve 1/2 tbsp and add the remaining dal to the chillies and let cool.
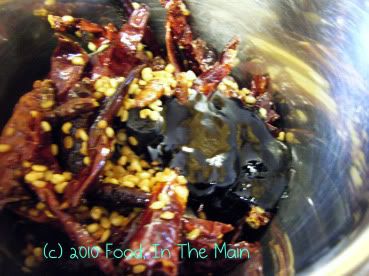
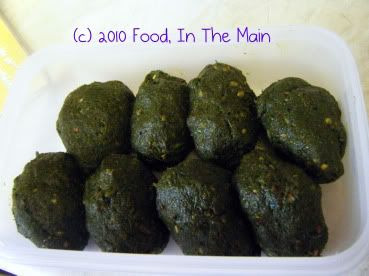
5. Grind the red chillies, tamarind and dal first coarsely, then add a handful of the chopped coriander.
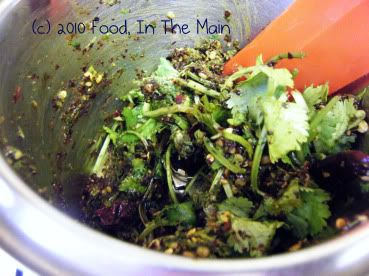
6. Grind to a smoothish paste

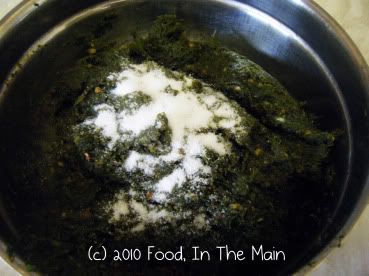
then add another handful of coriander and grind again. Continue as before, adding the remaining coriander bit by bit until it is all ground smoothly. Try to refrain from using any water to grind the coriander, as it will help the thokku last longer.
7. When all the coriander has been used up, add the reserved dal and give it one last whirl to break up the dal a bit - but don't whizz it smooth, the pieces give a pleasing bite to the thokku.

Add salt to taste, then mix well.
8. Store the thokku in the fridge and use a clean dry spoon every time. It makes sense to make small balls of the thokku and store them in a tightly lidded container. To use, take out one thokku ball at a time and store in a separate container, so as to keep the rest from getting inadvertently contaminated.
One of my favourite aunts is my B mami. Nobody can help liking her, she’s just so kind, good-natured, fun and always good for a laugh. And to top that off, she’s also an absolutely amazing cook. She can make better bhelpuri and pani puri than anyone I know, and the other North Indian dishes she makes are just as awesome. Maybe it’s because she lived for so many years in the North (and north-east), and perhaps learnt them from North Indian friends, but I personally don’t think that’s the real reason. The real reason is that she’s just an awesome cook, full stop.
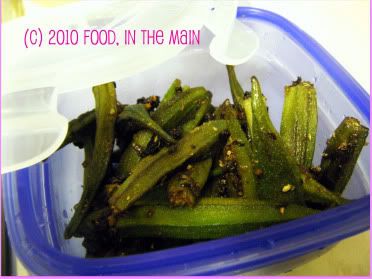
My visit to their place in Mathura (along with my youngest aunt and her daughter who was maybe three or four years old then) is still vivid in my memory. This was over 15 years ago, but good times leave their imprints on your brain, don’t they? But – and I don’t know just how much I should be embarrassed by this – one of THE most enduring of those memories was the train trip back. What’s embarrassing about a train trip memory, you ask? Well, the answer is that it’s not so much the train trip that was embarrassing, as my memory of WHY that trip was memorable. I might as well spit it out (not literally) – it was the bharwan bhindi (okra stuffed with a mixture of spice powders) that B mami had packed for our train journey, with instructions to eat that first in case it turned bad in the heat.
That was the best bhindi I’d ever had, bar none. I’ve made this before, but not to my mami’s recipe. A few weeks back I emailed her asking for her recipe for bharwa bhindi, which she kindly sent me. I then sat on it for a few weeks more, not because of my usual procrastination but because I just didn’t get a chance to lay my paws on fresh okra. That occasion happened a couple of weeks back and I made B mami’s bharwan bhindi rightaway. (That this recipe didn’t get posted rightaway was due to a combination of procrastination + lack of time + unfamiliarity with online photo editing software).
The okra was pretty good – not as good as mami’s (no surprise there) even with the benefit of her recipe – but a creditable effort, nonetheless.
Recipe for: Stuffed bhindi (okra)
Ingredients:
250 gms ladies finger/okra/bhindi
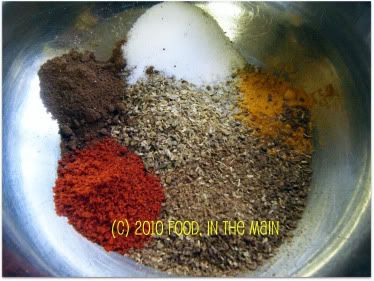
1/2 tsp haldi (turmeric) powder
1 tbsp dhania (coriander) powder
1 tbsp jeera (cumin) powder
1 tsp chilly powder (or to taste)
1 tsp aamchur (dried sour mango) powder - optional
1/4 tsp hing (asafoetida) powder
salt to taste
oil as required (about 2 tbsp)
1 medium onion, grated or very finely minced
Method:
1. Mix the various powders together to make the stuffing masala and check that it tastes okay to you. Reserve.
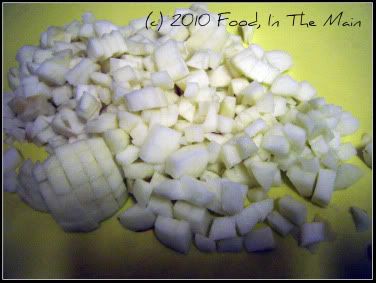
2. Cut the tops off the okra (I leave the tail on but it can also be removed if preferred.) Make vertical slits in each one, taking care not to go right through to the other side.
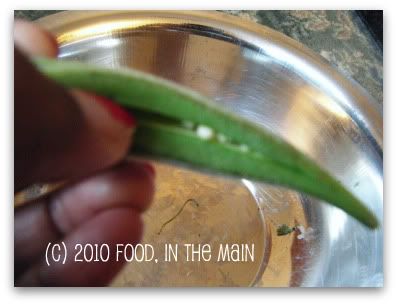
3. Carefully stuff each okra with the masala powder, using a small blunt butter knife
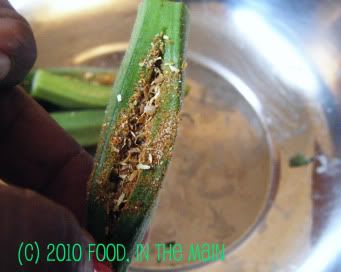
until all the okra is done. You can use any remaining masala on the okra as it cooks, it's up to you.

4. Now heat 1 tbsp oil in a non-stick saute pan and add the finely minced/grated onion.
5. When the onion is soft and beginning to turn colour, add the stuffed okra. Carefully turn over the okra so that the onions are distributed more or less evenly.
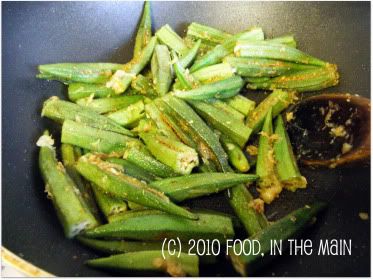
6. Fry the stuffed bhindi on medium-high, turning them over occasionally. Add more oil as required. Don't cover the pan or the okra will become gooey. Add salt to taste when the okra is cooked and slightly crisp, with brown spots.
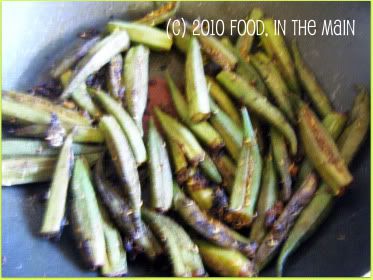
Serve the stuffed bhindi hot with rotis or as a side dish with rice and dal.
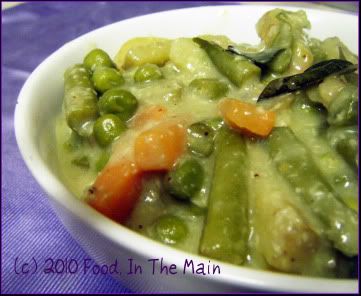
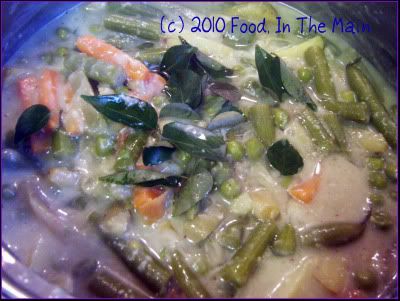
I have a slightly odd love-dislike (not hate, never that) affair with aviyal, that classic Kerala dish of vegetables in coconut gravy. There are specific requirements for both the love and the dislike to happen. I love aviyal when:
a. It is made with thinly cut vegetables (and does not involve aubergines)
b. It uses tamarind for that hint of sourness rather than buttermilk or curds
c. It is eaten fresh and hot
I dislike aviyal when:
a. The vegetables are cut in a fashion that brings to mind large railway sleepers – and about as thick as well!
b. It contains buttermilk or curds (this one pretty obvious, huh?)
c. It’s cold and/or old (as in more than a day old). Reheated aviyal does nothing for me – especially if it was made with buttermilk or curds.
I do realise that probably hundreds of thousands of people do make aviyal with buttermilk (or curds). Small aside: Should I mention both buttermilk and curds every single time, or will just one or the other do? Pls leave your opinion in the comments section, even if it's too late to matter for this post. :) But there will be other posts, after all, and what if this situation occurs again and I am left without a majority opinion to heed? What then, huh? What then?
So, anyway... since my mother has always used tamarind and prefers the taste, I do too. I’ve always considered aviyal a complicated dish, carefully nurturing my ignorance by never even considering it worthwhile to see how it was made. This year, though, when my mother said she’d made aviyal for the Tamil New Year, I felt a slight craving for it. Too bad she lives a few thousand miles away in Seattle... so naturally I was forced to make it myself.
The thing that sealed the deal for me was that I actually had young, fresh, tender green bananas in the house plus some fresh bottlegourd. I had bought them practically wholesale from a quick trip to Birmingham with Pete. He was picking up some speakers that he’d bought, and I tagged along - because I like tagging along in general, and also because of the always-hopeful thought in the back of my mind that I might be able to pick up some Indian vegetables. Well, actually, that thought is always at the forefront of my mind. (Do I HAVE to be 100% honest? Fine, it was the ONLY thought in my mind.)
As I was saying, aviyal was on the cards and I wanted to make it exactly like my mother does. I rang her for the recipe and got instructions that more or less said “cut and cook vegetables, grind coconut with green chillies, add tamarind, mix well, season with coconut oil and curry leaves”.
Was that it, I asked her, a trifle confused. Was she holding back on me? Where were the complicated instructions? That was the entire recipe? That was what I’d considered difficult all this while? How embarrassing!
So I made the aviyal – and believe me, cutting the vegetables was the most complicated part. The aviyal tasted just as it did in the memorybank of tastes that is stored somewhere in my head (or in my tongue?)... and since Pete didn’t want any part of it, there was enough for my meal the next day too. Yeah, I reheated it. AND liked it. Yes, I know what I said earlier. My excuse is that I’ve not had aviyal at all for many years, so I’m allowed to be contradictory of my own self in my own post. So there you have it.
Recipe for: Aviyal
Ingredients:
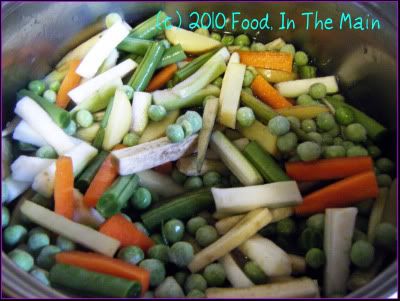
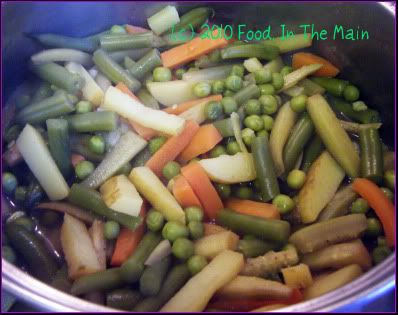
3 cups mixed vegetables, sliced into 1/2-cm thick matchsticks (a combination of carrots, potatoes, green plantains, green beans, bottlegourd/squash/courgettes, peas)
3 tbsp freshly grated coconut
4-5 green chillies (or to taste)
1/2 tsp cumin seeds
2 tbsp coconut oil 1/2 tsp tamarind paste
8-10 fresh curry leaves
salt to taste
Method:
1. Cook all the vegetables till done, but not mushy.
You can do this in a pressure cooker (much quicker than anyhow else) or on the hob, or in the microwave.
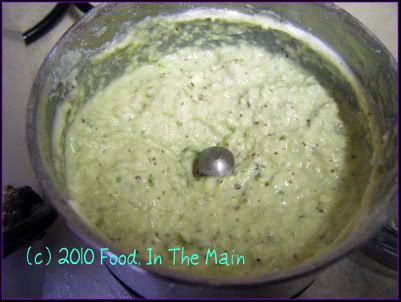
2. Grind together the coconut, cumin seeds and green chillies
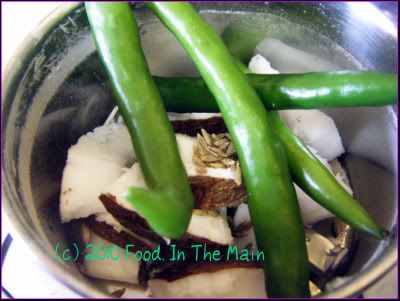
to a smooth paste using warm water.
3. Add the coconut paste to the vegetables along with salt to taste, and mix well. Mix tamarind paste with 2-3 tbsp water and add that as well (increase to 1/2 cup water if there isn't enough to make a gravy).
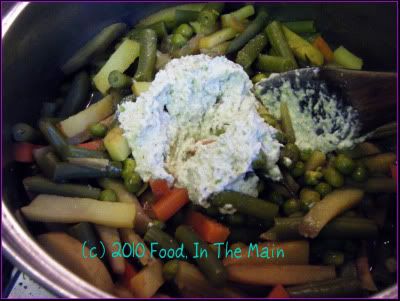
4. Sprinkle the curry leaves over, then pour in the coconut oil and mix again.
Heat the aviyal thoroughly (careful not to burn it) and serve hot with steamed rice.
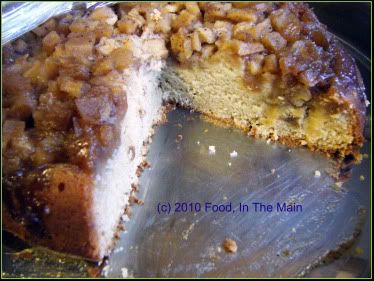
I have baked a good number of cakes in the years since I started this blog, and a good few of them are based around fruits, fresh or dried. Apples, oranges and bananas feature a lot among those, simply because I usually have those fruits around the house. Bananas figure a lot because they tend to go overripe before we can eat them (they have to be slightly underripe for Pete, and perfectly ripe for me – which doesn’t leave a big window of opportunity for the poor bananas!) Some overripe bananas can be sliced into cereal but beyond that, they get turned into cakes. Oranges I use a lot of because I love their flavour in cakes. As for apples, again, those with blemishes caused by mishandling or old age find their way into baked goods.
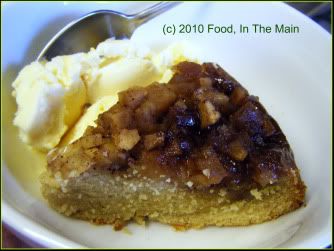
The apples I used in this cake fell into the latter category – they were beginning to shrivel with age, and needed to be used. Conveniently enough, I came across an eggless apple cake recipe that incorporated flaxseed and was so completely decadent (all that butter...!) that I felt I just HAD to make it. Boy, it sure didn’t tell a lie, that recipe... the texture of the cake was excellent, and the taste – oh my!
The blogger from whom I got this recipe said in her blog that the cake was just as nice cold, but I have to say that it was okay cold, but when served hot with vanilla ice-cream, the cake was absolutely spectacular! I don’t use the word “spectacular” often, but this cake totally deserves the accolade. Especially as we ate it over 4-5 days, and it lost nothing in the way of taste when it was reheated in the microwave oven.
Let me say that this is not a cake to be made everyday, or every week, or once a month, or even once in two months... but when you DO make it, be sure to enjoy it down to the last crumb and don’t skimp on the quality of the ice-cream either.
PS. The cake would probably look better with sliced apples arranged prettily, but for some reason I had decided to chop up the apples, so that was that.
Recipe for: Browned butter apple cake
Ingredients:
For the brown butter:
2 tbsp unsalted butter
1/3 cup light brown sugar
1/2 tsp cinnamon
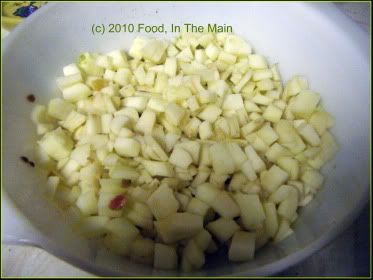
4 medium apples, peeled and chopped into 1-cm cubes
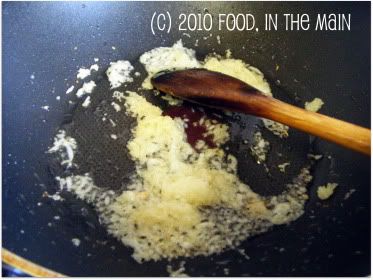
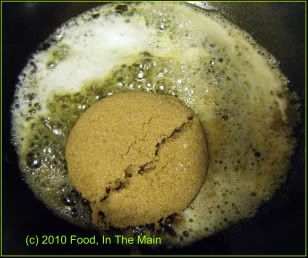
1. Heat the butter in a medium pan over medium heat until melted and bubbly,
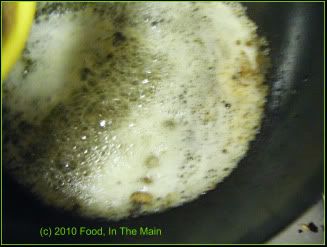
then add the brown sugar
and stir till the sugar caramelises and turns golden brown. Be careful not to burn it.
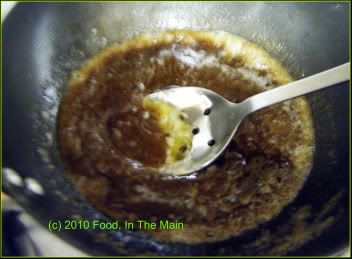
Stir in the cinnamon and pour the mixure into an 8" pan that's been sprayed with Pam. Spread the apples evenly over the caramelised sugar.
For the cake:
1-1/4 cups AP flour
1/4 tsp nutmeg powder
1/2 tsp baking soda
1/4 tsp sea salt
1/3 cup unsalted butter or margarine
2 tsp vanilla extract
3/4 cup sugar
2 tbsp flaxseed powder
2 tbsp cornstarch/cornflour
1/4 cup milk
1/3 cup yogurt
Method:
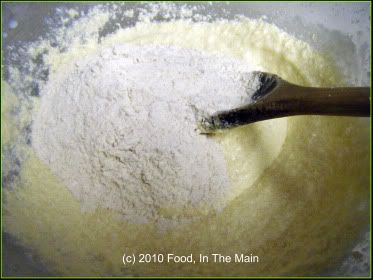
1. Sift together the salt, flour, nutmeg and baking soda into a medium bowl.
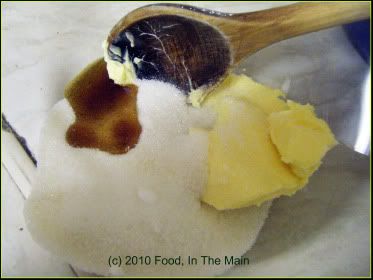
2. Cream the butter and sugar with the vanilla extract till fluffy and light.
3. Beat in the cornstarch/cornflour and the milk, mixing well.
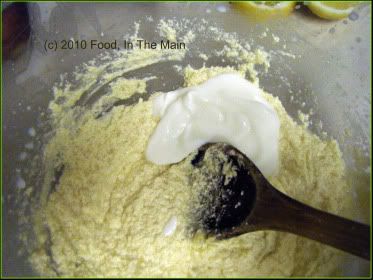
4. Add the flour mixture and yogurt a third at a time and beat till smooth.
5. Add the flaxseed powder and beat again. If the batter is very thick, beat in a bit more milk, tbsp by tbsp, until the batter is thick but of dropping consistency.
6. Spoon the batter evenly over the apples in the pan.

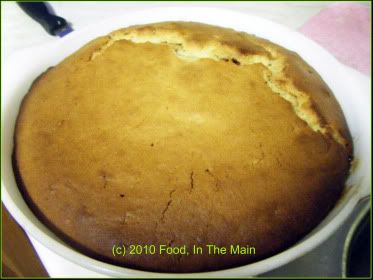
7. Bake the cake for 40-50 minutes at 180C or till a cake tester comes out dry.
8. While the cake is still hot, run a thin knife around the edges and place a plate over the cake, then carefully turn it upside down.
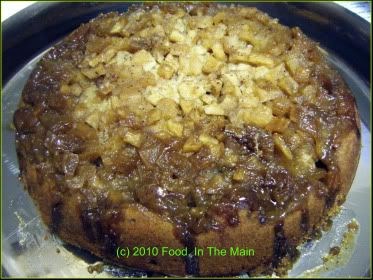
Serve the cake warm with best quality vanilla ice cream. The cake stays good for 3-4 days in a cool environment.

