
I can't seem to get enough of karela or bittergourd nowadays - I really love these ugly knobbly vegetables that look like a bit like rats with a long tail. A couple of days back, I went to my favourite "Indian" shop in Wellington for vegetables, and was beyond thrilled to find small baby karela for sale. I picked out the freshest 10 and came home joyfully, having decided how I was going to cook them. Stuffed, basically. I didn't want the stuffing to be the usual onion masala or potato masala or peanut-based masala - mainly because I didn't want to spend time cooking the stuffing. Bad enough that I would have to wait for the karela itself to cook.
So I just put together a random mixture of flours and spices, toasted the mix in a dry pan until fragrant, then used some oil and water to bind the powdery mix and make it amenable to stuffing, basically.
I admit that this recipe uses more oil than usual, but it's worth it if you love karela and only make it once in a while. It was SO delicious. I had the stuffed karela with lemon masoor dal and rice and a little ghee, and felt like I had gone to heaven without having to die first. Yes, THAT good.
So good that I forgot to take a photo before diving into the karela. Oops...
Recipe for: Stuffed karela
Ingredients:
6-8 small (about 4-5 inches length) tender karela
For the masala paste
1/4 cup soya flour or jowar flour
1/2 cup chickpea flour (besan/kadalai maavu)
1/8 cup rice flour
4 tbsp coriander powder
1 tsp cumin powder
1/2 tsp aniseed powder
1/2 tsp fennel powder
1 tsp garam masala/rasam powder/any other masala you prefer
2 tsp red chilli powder (or to taste)
1/4 tsp asafoetida powder
Salt to taste
4 tbsp oil
Method:
1. Lightly peel the karela so that the ridges no longer stick out. Make a slit in each karela from end to end, being careful not to cut right through to the other side.
2. Use the handle of a small spoon to gouge out the inner seeds and membrane.
3. At this point you can rub salt on the inside and outside of the karela and let it sit for a few hours so that some of the bitter juices are drawn out. If you do this, be sure to squeeze the juices out, then wash the karela well to remove the excess salt. Pat dry with kitchen paper and reserve.
4. Mix together all the ingredients for the masala paste, bar the oil. Heat a pan and dry toast the mixed masala powder, stirring constantly, until the flours start to smell fragrant and savoury. Be careful not to burn it.
5. Once the masala mix is toasted, transfer it to a container. This might be more than you require, but you can always store the excess for another day in an airtight container. I prefer to make extra, because I don't like it when I find out halfway through stuffing that there isn't enough masala paste to fill all the karela. so you can use all of the toasted mix, or just half, depending on how many karela you have and their size.
6. Now add 2 tbsp of the oil to the masala powder and stir it in. The paste needs to come together enough that if you pinch some together, it shouldn't fall apart. You can add a bit more oil to get the powder to that stage, or you can add a little water. Either way, don't make it into a gooey paste.
7. Once the masala mix is ready, use your fingers to stuff it into the karela. Once they are all stuffed, you can use kitchen string to tie the karela so the stuffing doesn't come out (it tends to expand a bit as it cooks), but it's not strictly necessary especially if the karela is small.
8. Heat the remaining 2 tbsp oil in a pan and add 1/4 tsp asafoetida to it. As soon as it sizzles, put the stuffed karela in the pan and stir them gently so they are coated in the oil. Sprinkle 2-3 tbsp water over the karela and close the pan. Cook the karela covered over medium-low heat for 15 minutes or until they soften and turn a paler green. After that take the lid off and turn up the heat a bit more, occasionally turning them over, until they turn brown and crisp on all sides.
Serve hot with dal and rice.
Tuesday, January 26, 2016
Monday, January 25, 2016
Pineapple upside down cake
All these years of blogging, all these cakes I've made... and I've never posted a pineapple upside down cake recipe! It's kinda retro and old fashioned, apparently, but I've never understood how anything can be "in fashion" or "outdated" when it comes to food - especially if it's a tasty, delicious recipe. Who cares if it's from the '70s or the '50s or the '80s? For heaven's sake, it's FOOD, not fashion. It annoys me tremendously when some idiot foodista or television chef somewhere labels a particular greens or grain or fruit as "fashionable" or "healthy" or "THE must-have item", and the entire bleddy food blog world immediately features it, so that there is a landslide of samey same posts. I dislike food fads with a passion! Okay, my soapbox rant is over for today.
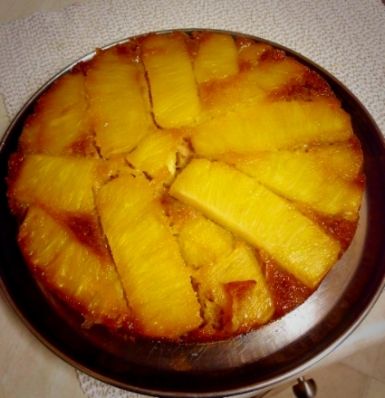
So, pineapple cake. I only made it because Pete bought a bag of fresh pineapple "fingers" that was so acidic and sharp, it could have stripped the enamel from your teeth no problem. He then had the brainwave of making pineapple upside down cake. Or rather, getting me to make it. Since I had a simple, one-bowl sort of recipe (based on a BBC Good Food recipe) for this cake, I acceded to his request.
While the recipe called for pineapple syrup and vanilla extract to flavour the cake, I didn't have either ingredient, my pineapple being fresh rather than canned. But there was enough pineapple juice at the bottom of the bag, which I substituted for the syrup. And then simply ignored the fact that there was no vanilla extract in my store cupboard. It didn't matter, anyway. The cake smelt amazing as it baked, so fragrant and pineappley, and it tasted as beautiful as it smelt. I love this cake - I just can't understand why it took me so long to post the recipe!
Recipe for: Pineapple upside down cake
Ingredients:
For the topping
50 gm softened butter
50 gm soft light brown sugar
Fresh pineapple fingers or tinned pineapple slices
For the cake
100 gm softened butter
100 gm soft light brown sugar
125 gm plain flour
1 tsp baking powder
1/2 tsp baking soda
2 large eggs
2 tbsp pineapple juice
2 tbsp pineapple juice
1 tsp vanilla extract (if you have it)
Method:
1. Preheat the oven to 180C/350F.
2. Beat the butter and sugar for the topping until soft and creamy. Spread this as best as possible around the bottom and halfway up the sides of a 7" round cake pan.
3. Arrange the pineapple slices and cherries (if using) over this such that the entire bottom of the tin is covered with as few spaces as possible.
4. In a big bowl, add all the cake ingredients and beat until the batter is soft and smooth, and the ingredients well mixed.
5. Drop the batter by spoonfuls over the pineapple rings and spread evenly to cover.
6. Bake for 30-45 minutes until a tester inserted in the cake comes out clean. The cake could take longer than 45 minutes, or be done in less. Test at 35 minutes, then every 5-7 minutes until it is cooked.
7. Let it sit in the pan for 10 minutes, then turn it out onto a serving plate. Eat warm, with or without vanilla ice cream.
Subscribe to:
Posts (Atom)
