skip to main |
skip to sidebar
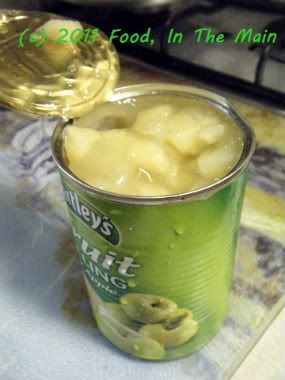
I call these “apple pie muffins” not because they use cinnamon or smell of apple pie – okay, they DO smell of apple pie because of the spices but that’s beside the point – but because they literally have apple pie filling in them. Bramley apple pie filling from a tin, to be precise. Pete had been asking me to make these muffins, but I’d been stalling as I didn’t think his suggestion would work out.
 Wet apple pie filling in the middle of a muffin, I thought, would make them soggy after baking, so I offered to make apple muffins using chopped-up apples in the batter. But no, he didn’t want chopped-up-apple muffins, although (he hastened to add) those were pretty good the last time I’d made them. He wanted apple-pie filling IN the muffins, as filling.
So, since I could see no graceful way out of it, I made the muffins as specified, with apple pie filling plopped into the centre (and topped with a little more batter - my idea).
To my genuine surprise, the apple pie filling didn’t make the muffins soggy in the centre. The idea actually worked out really well, although next time I will add some cinnamon powder to the apple pie filling to freshen its rather bland taste. Well, it was tinned filling after all, not fresh.
The bottomline, though, is that Pete’s idea was a yummilicious success – and for that, hats off to him.
Recipe for: Apple pie muffins
Wet apple pie filling in the middle of a muffin, I thought, would make them soggy after baking, so I offered to make apple muffins using chopped-up apples in the batter. But no, he didn’t want chopped-up-apple muffins, although (he hastened to add) those were pretty good the last time I’d made them. He wanted apple-pie filling IN the muffins, as filling.
So, since I could see no graceful way out of it, I made the muffins as specified, with apple pie filling plopped into the centre (and topped with a little more batter - my idea).
To my genuine surprise, the apple pie filling didn’t make the muffins soggy in the centre. The idea actually worked out really well, although next time I will add some cinnamon powder to the apple pie filling to freshen its rather bland taste. Well, it was tinned filling after all, not fresh.
The bottomline, though, is that Pete’s idea was a yummilicious success – and for that, hats off to him.
Recipe for: Apple pie muffins
 Ingredients:
1/2 cup butter/margarine
1/3 cup sugar
4 tbsp cream
2 eggs
1 cup self-raising flour
1/2 tsp baking powder
1 tsp cinnamon/mixed spice
2 tsp vanilla extract
1/2 tin ready-made Bramley apple pie filling
Method:
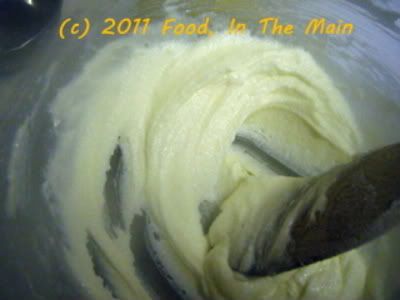
1. In a large bowl, cream the butter and sugar till fluffy.
2. Beat in the cream.
Ingredients:
1/2 cup butter/margarine
1/3 cup sugar
4 tbsp cream
2 eggs
1 cup self-raising flour
1/2 tsp baking powder
1 tsp cinnamon/mixed spice
2 tsp vanilla extract
1/2 tin ready-made Bramley apple pie filling
Method:
1. In a large bowl, cream the butter and sugar till fluffy.
2. Beat in the cream.
 3. Beat in the eggs one at a time.
 4. Lightly fold in the flour and baking powder.
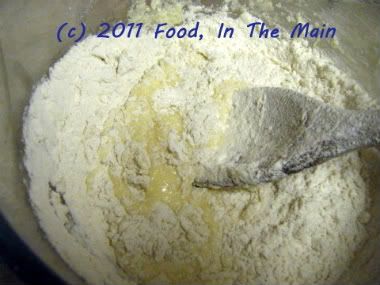 5. Add the mixed spice/cinnamon and vanilla and stir till the wet and dry ingredients are just mixed. The batter should be thick.
 6. Place paper muffin cases in a muffin pan, and add the dough into each case by the rounded tablespoonful. Take a small spoon and make a dip in the middle of the dough.
 7. Now place a teaspoonful of the apple filling in the dip, then a tsp of the dough on top of the filling.
 Continue till all the cases are filled.
 8. Bake the muffins at 180C for 20-25 minutes, testing after 20 minutes to see if they are cooked. The muffins should be golden on top.
 9. Remove the tray from the oven and let the muffins cool. Serve warm.
 RECIPE: APPLE PIE MUFFINS
Ingredients:
1/2 cup butter/margarine
1/3 cup sugar
4 tbsp cream
2 eggs
1 cup self-raising flour
1/2 tsp baking powder
1 tsp cinnamon/mixed spice
2 tsp vanilla extract
1/2 tin ready-made Bramley apple pie filling
Method:
1. In a large bowl, cream the butter and sugar till fluffy.
2. Beat in the cream.
3. Beat in the eggs one at a time.
4. Lightly fold in the flour and baking powder.
5. Add the mixed spice/cinnamon and vanilla and stir till the wet and dry ingredients are just mixed. The batter should be thick.
6. Place paper muffin cases in a muffin pan, and add the dough into each case by the rounded tablespoonful. Take a small spoon and make a dip in the middle of the dough.
7. Now place a teaspoonful of the apple filling in the dip, then a tsp of the dough on top of the filling. Continue till all the cases are filled.
8. Bake the muffins at 180C for 20-25 minutes, testing after 20 minutes to see if they are cooked. The muffins should be golden on top.
9. Remove the tray from the oven and let the muffins cool. Serve warm.
RECIPE: APPLE PIE MUFFINS
Ingredients:
1/2 cup butter/margarine
1/3 cup sugar
4 tbsp cream
2 eggs
1 cup self-raising flour
1/2 tsp baking powder
1 tsp cinnamon/mixed spice
2 tsp vanilla extract
1/2 tin ready-made Bramley apple pie filling
Method:
1. In a large bowl, cream the butter and sugar till fluffy.
2. Beat in the cream.
3. Beat in the eggs one at a time.
4. Lightly fold in the flour and baking powder.
5. Add the mixed spice/cinnamon and vanilla and stir till the wet and dry ingredients are just mixed. The batter should be thick.
6. Place paper muffin cases in a muffin pan, and add the dough into each case by the rounded tablespoonful. Take a small spoon and make a dip in the middle of the dough.
7. Now place a teaspoonful of the apple filling in the dip, then a tsp of the dough on top of the filling. Continue till all the cases are filled.
8. Bake the muffins at 180C for 20-25 minutes, testing after 20 minutes to see if they are cooked. The muffins should be golden on top.
9. Remove the tray from the oven and let the muffins cool. Serve warm.
I unearthed this cake recipe from a binder of printed-off recipes from long ago (over 7 years) which I rediscovered last week. The recipe was from the New Yorker.
I know why I’d printed it off (because, intriguingly, olive oil is one of the ingredients in the cake) and I also know why I didn’t end up making it right away – because blood oranges are also among the ingredients. I didn’t have a clue what blood oranges were, at that point, and didn’t know where I could source them either.
I didn’t think about substituting regular oranges (duh) – because I didn’t have much experience baking, and I didn’t know if the recipe would work without the blood oranges that were called for.
Lastly, but not leastly (Why can’t it be said that way? Well, I have now, and it’s here to stay. More fun than “last but not least”, isn’t it?) I literally had no idea what “supreming an orange” was. I mean, I could safely assume that “blood orange” was a variety of orange. But “supreme of orange” could have been, for all I knew, really bad English to mean that blood oranges were supreme among oranges. Well, how was I to know any different?
It’s only fairly recently that I learnt what it is to “supreme an orange” – basically, a flashy, “cheffy” way of using a paring knife to peel an orange, cut out the segments and remove the seeds and as much of the white pith as possible, retaining only the juicy inner bits.
Phooey. We’ve been doing it in India forever, mainly to feed the orange to toddlers. Of course ours is a hands-on technique, literally – and yeah, the end result isn’t as pretty as when an orange is “supremed” with a knife. But it is also an unfussy way of doing a simple job. Ah well... I guess Western chefs didn’t invent the technique with the intention of feeding toddlers; their orange supremes are usually to garnish fancy desserts.
Each technique obviously has its plus points. But for the purposes of THIS recipe, fancy supreming was really not required, as the slices would neither be retained whole, nor used as a garnish. And had I known this 7 years ago, I might have tried the cake 7 years ago.
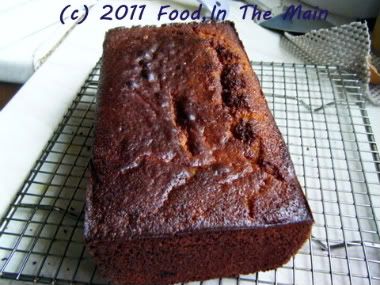
However, that’s neither here nor there (just don’t ask me where, please). This is my first olive oil cake, and I admit I was wondering if the oil would taste nice in a sweet citrus-flavoured cake. I was very relieved not to be able to taste it at all, when I sampled the cake later. The cake is not very sweet, because I misread the instructions and ended up with a very liquidy batter necessitating the addition of more flour... but I didn't add any extra sugar.
The recipe below shows the adjusted quantities. However, it still takes a LONG time to bake – I had to leave mine shortly after I’d put the batter in the oven, to drop off my stepson and his girlfriend at their respective homes. What with having to drive to two destinations 12 miles apart (more or less) through a HORRIBLY thick fog late at night on narrow country roads, it took me a good hour and a half to return.
My husband, deep in work mode, had not even realised there was a cake slowly charring in the oven, so by the time I dashed in to the rescue, the cake was PRETTY brown and rather crisper on top than I would have liked. However, much to my surprise, it was not crisp and overdone all the way through – in fact, it was perfectly done on the inside. So obviously it had needed the long cooking period. If I’d been in the house, I would probably have sheltered the cake with aluminium foil after an hour or so, to prevent it from over-browning.
So, as I was saying, the cake may not be very sweet even with the adjusted sugar quantity. I like it that way but if you have a sweeter tooth, I’d suggest you make a simple icing with orange juice and icing sugar and pour it (or spread it – whichever your preference) over the top of the cake after it has cooled.
Recipe for: Citrus olive oil cake
 Ingredients:
3 medium oranges
1 small lemon
1-1/4 cup sugar
Buttermilk or plain yogurt
3 large eggs
2 cups all-purpose flour
1 1/2 teaspoons baking powder
1/2 teaspoon baking soda
1/4 teaspoon salt
2 tsp vanilla extract
2/3 cup extra virgin olive oil
Method:
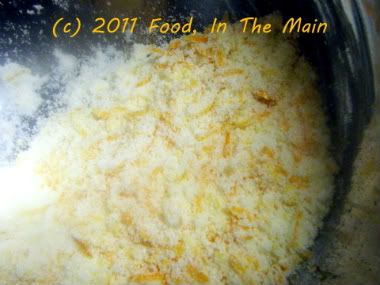
1. Preheat oven to 350 degrees. Grease a 9-by-5-inch loaf pan really well. Grate zest from 2 oranges and the lemon, and place in a bowl with sugar. Using your fingers, rub ingredients together until the zest is evenly distributed in the sugar.
Ingredients:
3 medium oranges
1 small lemon
1-1/4 cup sugar
Buttermilk or plain yogurt
3 large eggs
2 cups all-purpose flour
1 1/2 teaspoons baking powder
1/2 teaspoon baking soda
1/4 teaspoon salt
2 tsp vanilla extract
2/3 cup extra virgin olive oil
Method:
1. Preheat oven to 350 degrees. Grease a 9-by-5-inch loaf pan really well. Grate zest from 2 oranges and the lemon, and place in a bowl with sugar. Using your fingers, rub ingredients together until the zest is evenly distributed in the sugar.
 2. Cut the zested oranges in half and remove the segments. Remove as much of the white pith as possible, retaining the inner pulp. Do this over a bowl so that you don't waste the juice or any pulp. Keep the pulp in small chunks as much as possible, rather than disintegrate it.
 3. Cut the remaining orange in half and squeeze the juice into a measuring cup. Do the same with the zested lemon.
4. Add enough buttermilk or yogurt to the juice to make 2/3 cup liquid.
3. Cut the remaining orange in half and squeeze the juice into a measuring cup. Do the same with the zested lemon.
4. Add enough buttermilk or yogurt to the juice to make 2/3 cup liquid.
 5. Pour the mixture into the bowl with sugar and whisk well,
 then whisk in the eggs one by one.
 6. In another bowl, whisk together flour, baking powder, baking soda and salt. Gently whisk dry ingredients into the wet ones.
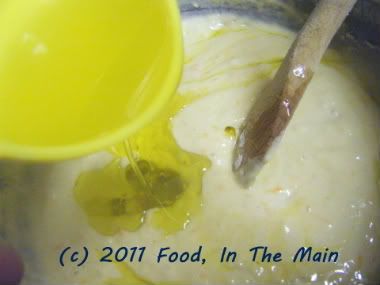
 7. Now, using a spatula, fold in the oil a little at a time.
 8. Fold in the pieces of orange segments.
 Pour the batter into the prepared pan and smooth the top.
 9. Bake the cake for at least 55 minutes (cover the top with foil if it looks like browning too quickly), or until it is golden and a tester inserted in the cake comes out clean.
 Cool on a rack for 5 minutes, then unmould carefully and cool to room temperature right-side up.
You can make a simple icing for the top, if you have a strong sweet tooth.
(Caveat: Ovens differ in temperature, so don't put your trust totally in the baking time given. Check the cake after about 45 minutes and keep checking every so often till it is cooked.)
RECIPE: CITRUS OLIVE OIL CAKE
Ingredients:
3 medium oranges
1 small lemon
1-1/4 cups sugar
Buttermilk or plain yogurt
3 large eggs
2 cups all-purpose flour
1 1/2 teaspoons baking powder
1/2 teaspoon baking soda
1/4 teaspoon salt
2/3 cup extra virgin olive oil
Method:
1.Preheat oven to 350 degrees. Grease a 9-by-5-inch loaf pan really well. Grate zest from 2 oranges and the lemon, and place in a bowl with sugar. Using your fingers, rub ingredients together until the zest is evenly distributed in the sugar.
2. Cut the zested oranges in half and remove the segments. Remove as much of the white pith as possible, retaining the inner pulp. Do this over a bowl so that you don't waste the juice or any pulp. Keep the pulp in small chunks as much as possible, rather than disintegrate it.
3. Cut the remaining orange in half and squeeze the juice into a measuring cup.
4. Add enough buttermilk or yogurt to the juice to make 2/3 cup liquid.
5. Pour the mixture into the bowl with sugar and whisk well, then whisk in the eggs one by one.
6. In another bowl, whisk together flour, baking powder, baking soda and salt. Gently whisk dry ingredients into the wet ones.
7. Now, using a spatula, fold in the oil a little at a time.
8. Fold in the pieces of orange segments. Scrape the batter into the prepared pan and smooth the top.
9. Bake the cake for at least 55 minutes (cover the top with foil if it looks like browning too quickly), or until it is golden and a tester inserted in the cake comes out clean. Cool on a rack for 5 minutes, then unmould and cool to room temperature right-side up. You can make a simple icing for the top, if you have a strong sweet tooth.
Cool on a rack for 5 minutes, then unmould carefully and cool to room temperature right-side up.
You can make a simple icing for the top, if you have a strong sweet tooth.
(Caveat: Ovens differ in temperature, so don't put your trust totally in the baking time given. Check the cake after about 45 minutes and keep checking every so often till it is cooked.)
RECIPE: CITRUS OLIVE OIL CAKE
Ingredients:
3 medium oranges
1 small lemon
1-1/4 cups sugar
Buttermilk or plain yogurt
3 large eggs
2 cups all-purpose flour
1 1/2 teaspoons baking powder
1/2 teaspoon baking soda
1/4 teaspoon salt
2/3 cup extra virgin olive oil
Method:
1.Preheat oven to 350 degrees. Grease a 9-by-5-inch loaf pan really well. Grate zest from 2 oranges and the lemon, and place in a bowl with sugar. Using your fingers, rub ingredients together until the zest is evenly distributed in the sugar.
2. Cut the zested oranges in half and remove the segments. Remove as much of the white pith as possible, retaining the inner pulp. Do this over a bowl so that you don't waste the juice or any pulp. Keep the pulp in small chunks as much as possible, rather than disintegrate it.
3. Cut the remaining orange in half and squeeze the juice into a measuring cup.
4. Add enough buttermilk or yogurt to the juice to make 2/3 cup liquid.
5. Pour the mixture into the bowl with sugar and whisk well, then whisk in the eggs one by one.
6. In another bowl, whisk together flour, baking powder, baking soda and salt. Gently whisk dry ingredients into the wet ones.
7. Now, using a spatula, fold in the oil a little at a time.
8. Fold in the pieces of orange segments. Scrape the batter into the prepared pan and smooth the top.
9. Bake the cake for at least 55 minutes (cover the top with foil if it looks like browning too quickly), or until it is golden and a tester inserted in the cake comes out clean. Cool on a rack for 5 minutes, then unmould and cool to room temperature right-side up. You can make a simple icing for the top, if you have a strong sweet tooth.
I guess I could have called this a vattha kuzhambu except for the fact that I carefully refrained from using manthakkali or chundakkai vatthal (dried berries). This puli kuzhambu tastes very nice, if you ask me. If, however, you DON'T want to ask me, I guess you'll have to make it and discover this fact for yourself, won't you?
Recipe for: Flaxseed puli kuzhambu (tamarind gravy)
 Ingredients:
2 tbsp dry-roasted flaxseeds
1 htbsp sambar powder
2 tsp rice flour
1/4 cup roasted peanuts
Lime-sized amount of tamarind/2 tsp tamarind paste
2 tsp tuvar dal
1 tsp mustard seeds
1/2 tsp vendhayam/fenugreek seeds
5-6 fresh/frozen curry leaves
1 tbsp gingelly oil/nallennai
Salt to taste
4-5 cups water
Method:
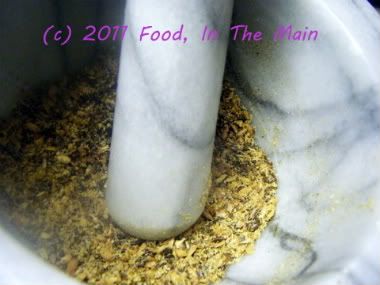
1. Pound or grind the flaxseeds to a fine powder.
Ingredients:
2 tbsp dry-roasted flaxseeds
1 htbsp sambar powder
2 tsp rice flour
1/4 cup roasted peanuts
Lime-sized amount of tamarind/2 tsp tamarind paste
2 tsp tuvar dal
1 tsp mustard seeds
1/2 tsp vendhayam/fenugreek seeds
5-6 fresh/frozen curry leaves
1 tbsp gingelly oil/nallennai
Salt to taste
4-5 cups water
Method:
1. Pound or grind the flaxseeds to a fine powder.
 2. Dissolve the tamarind in 4 cups water (or extract the pulp from the dry tamarind). Reserve.
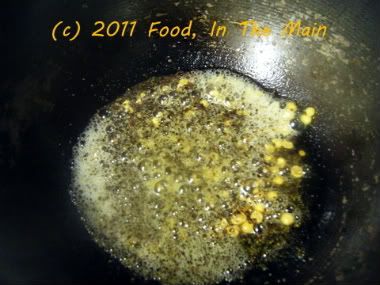
3. Heat the oil in a pan, add the asafoetida powder, tuvar dal, fenugreek seeds, curry leaves, and mustard seeds. Cover and let the seeds pop, let the dal turn golden brown,
2. Dissolve the tamarind in 4 cups water (or extract the pulp from the dry tamarind). Reserve.
3. Heat the oil in a pan, add the asafoetida powder, tuvar dal, fenugreek seeds, curry leaves, and mustard seeds. Cover and let the seeds pop, let the dal turn golden brown,
 then pour in the tamarind water.
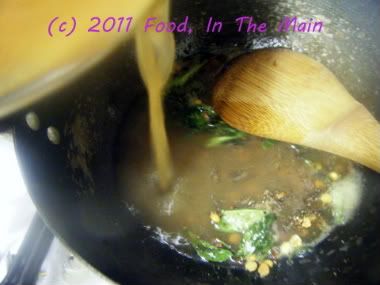 Let this come to a brisk boil.
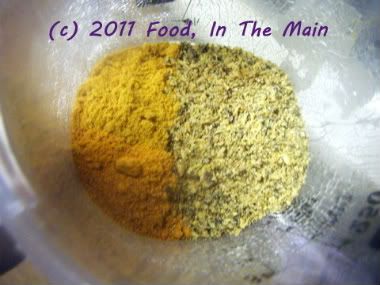
4. While it is coming up to the boil, mix together the flaxseed powder, sambar powder and rice flour,
Let this come to a brisk boil.
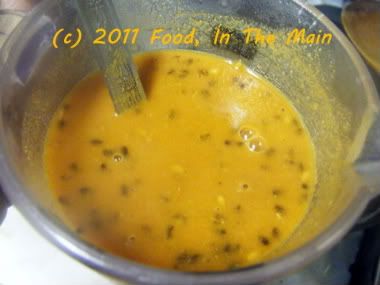
4. While it is coming up to the boil, mix together the flaxseed powder, sambar powder and rice flour,
 add 1/4 cup water and whisk to a pourable mixture without lumps.
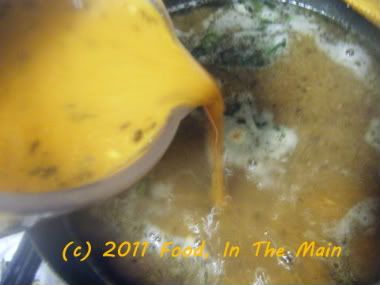
 5. Now pour this into the tamarind water and stir it in, along with salt to taste.
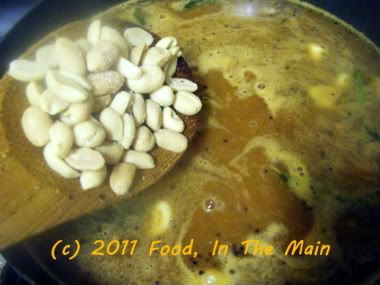
 6. Keep the heat on medium and let the kuzhambu simmer for 10 minutes to let the flavours come together, and for it to thicken. Then add the peanuts and allow the kuzhambu to boil for 5 minutes more.
 7. The longer the kuzhambu sits, the better it will taste. Reheat before serving, along with steamed rice and any kootu or vegetable curry.
RECIPE: FLAXSEED PEANUT PULI KUZHAMBU (TAMARIND GRAVY)
Ingredients:
2 tbsp dry-roasted flaxseeds
1 htbsp sambar powder
2 tsp rice flour
1/4 cup roasted peanuts
Lime-sized amount of tamarind/2 tsp tamarind paste
2 tsp tuvar dal
1 tsp mustard seeds
1/2 tsp vendhayam/fenugreek seeds
5-6 fresh/frozen curry leaves
1 tbsp gingelly oil/nallennai
Salt to taste
4-5 cups water
Method:
1. Pound or grind the flaxseeds to a fine powder.
2. Dissolve the tamarind in 4 cups water (or extract the pulp from the dry tamarind). Reserve.
3. Heat the oil in a pan, add the asafoetida powder, tuvar dal, fenugreek seeds, curry leaves, and mustard seeds. Cover and let the seeds pop, let the dal turn golden brown, then pour in the tamarind water. Let this come to a brisk boil.
4. While it is coming up to the boil, mix together the flaxseed powder, sambar powder and rice flour, add 1/4 cup water and whisk to a pourable mixture without lumps.
5. Now pour this into the tamarind water and stir it in, along with salt to taste.
6. Keep the heat on medium and let the kuzhambu simmer for 10 minutes to let the flavours come together, and for it to thicken. Then add the peanuts and allow the kuzhambu to boil for 5 minutes more.
7. The longer the kuzhambu sits, the better it will taste. Reheat before serving, along with steamed rice and any kootu or vegetable curry.
7. The longer the kuzhambu sits, the better it will taste. Reheat before serving, along with steamed rice and any kootu or vegetable curry.
RECIPE: FLAXSEED PEANUT PULI KUZHAMBU (TAMARIND GRAVY)
Ingredients:
2 tbsp dry-roasted flaxseeds
1 htbsp sambar powder
2 tsp rice flour
1/4 cup roasted peanuts
Lime-sized amount of tamarind/2 tsp tamarind paste
2 tsp tuvar dal
1 tsp mustard seeds
1/2 tsp vendhayam/fenugreek seeds
5-6 fresh/frozen curry leaves
1 tbsp gingelly oil/nallennai
Salt to taste
4-5 cups water
Method:
1. Pound or grind the flaxseeds to a fine powder.
2. Dissolve the tamarind in 4 cups water (or extract the pulp from the dry tamarind). Reserve.
3. Heat the oil in a pan, add the asafoetida powder, tuvar dal, fenugreek seeds, curry leaves, and mustard seeds. Cover and let the seeds pop, let the dal turn golden brown, then pour in the tamarind water. Let this come to a brisk boil.
4. While it is coming up to the boil, mix together the flaxseed powder, sambar powder and rice flour, add 1/4 cup water and whisk to a pourable mixture without lumps.
5. Now pour this into the tamarind water and stir it in, along with salt to taste.
6. Keep the heat on medium and let the kuzhambu simmer for 10 minutes to let the flavours come together, and for it to thicken. Then add the peanuts and allow the kuzhambu to boil for 5 minutes more.
7. The longer the kuzhambu sits, the better it will taste. Reheat before serving, along with steamed rice and any kootu or vegetable curry.
How do you come up with new recipes? Or new variations on old recipes? According to what I’ve read about professional chefs and from what semi-professional food bloggers write on their super-professional looking blogs, they spend hours (days, weeks, years... a lifetime?) experimenting with new flavours and colours and fusions and whatnot. They’re never discouraged by failure, they never tire of trying the same recipe over and over until they get it right, they spend every spare moment away from their actual jobs on perfecting a recipe – and when the dish makes its triumphal entry onto a menu or a blog, it’s to the exciting fanfare of self-blown trumpets ably backed up by the fluting of friends, fans and family.
All very impressive, and all very well... but what I’ve always wanted to know is - who actually eats the end results of those endless experimentations? It’s easy enough with the successful results, but what if the recipe isn’t to anybody’s taste? What about the downright failures? (Ok, the dustbin would be the grateful recipient there, fair enough.) What about the not-so-successful-but-not-dumpworthy-either results? These experimentally creative folk must have mighty accommodating families. Because mine, sadly, isn’t made that way. My family is thrilled to eat the nice things but completely remorseless about shunning the less edible. And if something is not to their taste made one way, there’s no chance that they’d try it made some other way – ESPECIALLY on an experimental basis.
Can’t blame them. I’m that way too. If a recipe is a failure for whatever reason, I never look back. I certainly don’t have the patience or the willingness to try it different ways till I hit upon the right one. There are billions of recipes out there, a few million of which I want to try, so repeatedly trying one recipe just isn’t going to happen. Plus, there’s the question of cost, not to mention food wastage. I’m the first to admit that I could probably do much better in the latter department, so deliberately making something again that wasn’t a success the first time around – nope, not happening.
Now, how I happen upon recipes is through sheer chance - I don't have the imagination or the creativity to actively invent something. My kind of invention is passive. Oh bother, there's that bit of stuff left, I don't want to store it in a teeny box in the fridge... heck, let's see what happens if I just use it in this recipe. And that's how my variations evolve. This one came about because I wanted to finish up the last of the oven-dried tomatoes I'd made two weeks back. So much for experimentation...
Recipe for: Sundried/ovendried tomato coconut thogayal
 Ingredients:
1/3 cup grated coconut
2 tbsp sundried or oven-dried tomatoes (not the kind packed in oil)
marble sized piece of dried tamarind OR 1/2 tsp tamarind paste
4-8 dried red chillies (or to taste)
2 cloves garlic, sliced
2 tsp urad dal
10-12 curry leaves
1/8 tsp asafoetida powder
2 tsp oil
Salt to taste
4-6 tbsp hot water as required
Method:
1. Rehydrate the sun-dried tomatoes in hot water for 15 minutes. Drain off the water and reserve.
Ingredients:
1/3 cup grated coconut
2 tbsp sundried or oven-dried tomatoes (not the kind packed in oil)
marble sized piece of dried tamarind OR 1/2 tsp tamarind paste
4-8 dried red chillies (or to taste)
2 cloves garlic, sliced
2 tsp urad dal
10-12 curry leaves
1/8 tsp asafoetida powder
2 tsp oil
Salt to taste
4-6 tbsp hot water as required
Method:
1. Rehydrate the sun-dried tomatoes in hot water for 15 minutes. Drain off the water and reserve.
 2. Heat the oil in a small pan, then add the asafoetida powder, red chillies, curry leaves, urad dal and garlic, and fry it all on medium heat, stirring, till the dal turns golden brown.
 3. Cool, then grind the above (reserving 1/2 tsp of the fried dal) along with 2 tsp coconut and the tamarind to a smooth paste. Then add the rehydrated tomatoes and the rest of the coconut, adding 3-4 tbsp hot water, and grind again to a smooth paste.
 4. Remove to a bowl and add salt to taste and the reserved fried urad dal, mixing well to combine thoroughly.
5. Serve with a dollop of ghee/nallennai (gingelly oil) added to steamed rice, or as a side dish for dosas, chapathis, idlis etc.
RECIPE: SUNDRIED/OVENDRIED TOMATO COCONUT THOGAYAL
Ingredients:
1/3 cup grated coconut
2 tbsp sundried or oven-dried tomatoes (not the kind packed in oil)
marble sized piece of dried tamarind OR 1/2 tsp tamarind paste
4-8 dried red chillies (or to taste)
2 cloves garlic, sliced
2 tsp urad dal
10-12 curry leaves
1/8 tsp asafoetida powder
2 tsp oil
Salt to taste
4-6 tbsp hot water as required
Method:
1. Rehydrate the sun-dried tomatoes in hot water for 15 minutes. Drain off the water and reserve.
2. Heat the oil in a small pan, then add the asafoetida powder, red chillies, curry leaves, urad dal and garlic, and fry it all on medium heat, stirring, till the dal turns golden brown.
4. Remove to a bowl and add salt to taste and the reserved fried urad dal, mixing well to combine thoroughly.
5. Serve with a dollop of ghee/nallennai (gingelly oil) added to steamed rice, or as a side dish for dosas, chapathis, idlis etc.
RECIPE: SUNDRIED/OVENDRIED TOMATO COCONUT THOGAYAL
Ingredients:
1/3 cup grated coconut
2 tbsp sundried or oven-dried tomatoes (not the kind packed in oil)
marble sized piece of dried tamarind OR 1/2 tsp tamarind paste
4-8 dried red chillies (or to taste)
2 cloves garlic, sliced
2 tsp urad dal
10-12 curry leaves
1/8 tsp asafoetida powder
2 tsp oil
Salt to taste
4-6 tbsp hot water as required
Method:
1. Rehydrate the sun-dried tomatoes in hot water for 15 minutes. Drain off the water and reserve.
2. Heat the oil in a small pan, then add the asafoetida powder, red chillies, curry leaves, urad dal and garlic, and fry it all on medium heat, stirring, till the dal turns golden brown.
3. Cool, then grind the above (reserving 1/2 tsp of the fried dal) along with 2 tbsp coconut and the tamarind to a smooth paste. Then add the rehydrated tomatoes and the rest of the coconut, adding 3-4 tbsp hot water, and grind again to a smooth paste.
4. Remove to a bowl and add salt to taste and the reserved fried urad dal, mixing well to combine thoroughly.
5. Serve with a dollop of ghee/nallennai (gingelly oil) added to steamed rice, or as a side dish for dosas, chapathis, idlis etc.
I first heard of Paul Hollywood, the chef, when I watched a recent TV show/competition to determine Britain’s best amateur baker. The contestants were amazing, their skills superb – they were absolutely NOT amateurs. I mean, if at all they were “amateurs” it was only in that they were not famous “professional” chefs, running restaurants or publishing cookbooks. Otherwise, in terms of skills, talent and imagination, I’m pretty certain they would have given any “professional chefs” a run for their money if they (the professionals) were in the competition rather than merely judging it!
Anyway, Paul Hollywood is an expert on baking, and I came across his recipe for blueberry muffins on the BBC Food website. According to him, they were the best muffins ever. I would probably have just glanced at the recipe and continued browsing, had it not been for a couple of things – the minimal number of ingredients and the simple instructions and, more intriguingly, his advice to refrigerate the batter, preferably overnight, before baking the muffins.
Refrigerate? OVERNIGHT? And here I’d been under the impression, courtesy the gazillion muffin recipes on the Net, that the biggest selling point of this particular type of baked goody was that it was practically instantaneous – basically, make the batter (don’t even stop to break up the lumps) and bake the muffins.
He said his recipe would make 12 muffins. I thought that the batter wouldn’t stretch to 6 muffins never mind 12, there was so little of it. But it did, just... although the 12 muffins were the size of small cupcakes. (I never like to specify the number of muffins, in any case. It’s such a subjective thing, depending very much on how small or how large you wish to make them.)
I made only one change to Mr Hollywood’s recipe – I added some vanilla extract because I love it, because I simply can’t help myself, and because I’m not entirely sure that I would ever love just nutmeg as a flavouring.
And so to the muffins... Oh. My. God. They were not so much muffins as fairy cakes, so light and lovely that I was quite happy there were others in the house to eat ‘em, or I would have demolished them all myself. They were THAT good. I dunno if it was the overnight resting, or the butter in the recipe (it’s been a while since I used butter in a muffin recipe) but the muffins were sensational!
I try to learn a new technique or ingredient from every recipe I try, familar or unfamiliar. The abiding lesson from this recipe was: Always stud the batter with blueberries after putting the batter into the cake cases (this goes for any berry or soft fruit), rather than mix them in with the batter and THEN fill the cases. That way you can control where the berries go so they don’t burst messily against the side of the cases while cooking; they stay in the centre, where they were placed, making for a neat result. This really is a brilliant tip, one to always remember. I don’t know why I couldn’t have come up with the idea myself, it's so simple. But sadly I didn't, and a vote of thanks is definitely due Mr Hollywood!
Recipe for: Overnight blueberry muffins
 Ingredients:
1/2 cup plain flour
1/2 cup butter
1/4 cup caster sugar
2 free-range eggs
1-1/2 tsp baking powder
1/2 cup fresh blueberries
pinch nutmeg
1 tsp good quality vanilla extract
Method:
1. Cream the butter and sugar together till fluffy.
Ingredients:
1/2 cup plain flour
1/2 cup butter
1/4 cup caster sugar
2 free-range eggs
1-1/2 tsp baking powder
1/2 cup fresh blueberries
pinch nutmeg
1 tsp good quality vanilla extract
Method:
1. Cream the butter and sugar together till fluffy.
 2. Then add the eggs one by one.
3. Mix for three minutes. Then add the flour, baking powder and nutmeg
2. Then add the eggs one by one.
3. Mix for three minutes. Then add the flour, baking powder and nutmeg ,
stir to combine into a thick batter. Do not beat.
,
stir to combine into a thick batter. Do not beat.
 4. Refrigerate the batter for at least an hour, preferably overnight. Just before baking, stir in the vanilla.
5. Place paper cases in a muffin pan. Place a spoonful of muffin mixture into each muffin case, filling each to just over half way.
4. Refrigerate the batter for at least an hour, preferably overnight. Just before baking, stir in the vanilla.
5. Place paper cases in a muffin pan. Place a spoonful of muffin mixture into each muffin case, filling each to just over half way.
 6. Stud each muffin with 5-8 blueberries, pushing them very lightly into the batter.
 7. Bake in an oven set at 200C/400F for 20 minutes, or until golden on top.
 Serve warm.
 RECIPE: OVERNIGHT BLUEBERRY MUFFINS
Ingredients:
1/2 cup plain flour
1/2 cup butter
1/4 cup caster sugar
2 free-range eggs
1-1/2 tsp baking powder
1/2 cup fresh blueberries
pinch nutmeg
1 tsp good quality vanilla extract
Method:
1. Cream the butter and sugar together till fluffy.
2. Then add the eggs one by one.
3. Mix for three minutes. Then add the flour, baking powder and nutmeg, stir to combine. Do not beat.
4. Refrigerate for at least an hour, preferably overnight.
5. Place paper cases in a muffin pan. Place a spoonful of muffin mixture into each muffin case, filling each to just over half way.
6. Stud each muffin with about five blueberries.
7. Bake in an oven set at 200C/400F for 20 minutes, or until golden on top. Serve warm.
RECIPE: OVERNIGHT BLUEBERRY MUFFINS
Ingredients:
1/2 cup plain flour
1/2 cup butter
1/4 cup caster sugar
2 free-range eggs
1-1/2 tsp baking powder
1/2 cup fresh blueberries
pinch nutmeg
1 tsp good quality vanilla extract
Method:
1. Cream the butter and sugar together till fluffy.
2. Then add the eggs one by one.
3. Mix for three minutes. Then add the flour, baking powder and nutmeg, stir to combine. Do not beat.
4. Refrigerate for at least an hour, preferably overnight.
5. Place paper cases in a muffin pan. Place a spoonful of muffin mixture into each muffin case, filling each to just over half way.
6. Stud each muffin with about five blueberries.
7. Bake in an oven set at 200C/400F for 20 minutes, or until golden on top. Serve warm.
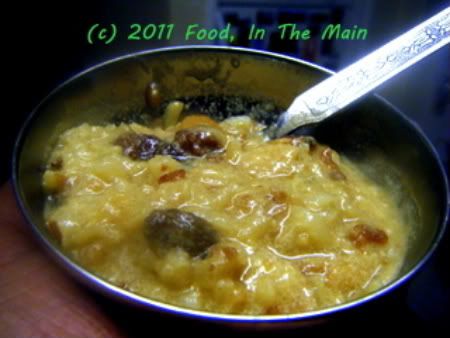
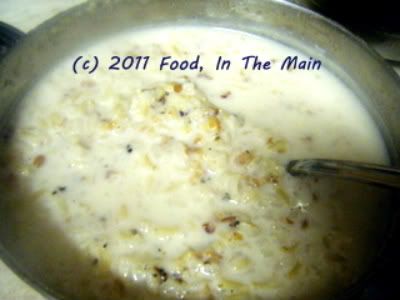
My two pennies on the matter of brown-rice chakkara pongal: It takes longer to cook but tastes chewier and better than regular chakkara pongal.
Other points to note:
1. It might not take YOU as long as it did me to cook the brown rice, even in a pressure cooker, if you know:
a) how long it takes to cook brown rice, and
b) how much liquid to add per measure of brown rice so that it is not just perfectly cooked, but perfectly overcooked (as required for pongal).
2. Following on from 1(b) above - and if 1(a) and (b) don’t apply to you, the way they didn’t to me - your pressure-cooked brown rice+dal might be slightly swimming in milk. This will not matter if:
a) You boil the heck out of the pongal to reduce down the excess milk to the consistency you like, and
b) You like your chakkara pongal to be slightly runny even when cold, rather than so thick that you can slice it.
3. I substituted flaked almonds for the more traditional cashewnuts because I didn’t have the more traditional cashewnuts. You don’t have to do what I did. Especially if you DO have cashewnuts.
With these facts and caveats to hand, you may now go on to the
Recipe for: Brown rice chakkara pongal
 Ingredients:
1 tbsp moong dal
3 tbsp brown basmati rice
1/4 cup jaggery
Seeds from 3 cardamom pods
1-1/2 cups milk
2 tbsp flaked almonds
2 tbsp raisins
1 htsp ghee
About 1/4 cup water
Method:
1. Toast the moong dal in a pan, shaking it frequently so that the dal doesnt burn, until the dal changes to a darker colour.
Ingredients:
1 tbsp moong dal
3 tbsp brown basmati rice
1/4 cup jaggery
Seeds from 3 cardamom pods
1-1/2 cups milk
2 tbsp flaked almonds
2 tbsp raisins
1 htsp ghee
About 1/4 cup water
Method:
1. Toast the moong dal in a pan, shaking it frequently so that the dal doesnt burn, until the dal changes to a darker colour.
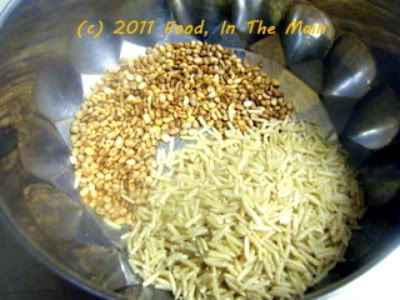 2. Pressure cook the dal, rice and milk for at least 5 whistles, preferably turning down the heat after 3 whistles and letting it simmer for 10 minutes before turning up the heat again.
3. Let the pressure reduce on its own before opening the cooker. Mash the rice and dal a bit - it's ok if there's some milk left in the container.
2. Pressure cook the dal, rice and milk for at least 5 whistles, preferably turning down the heat after 3 whistles and letting it simmer for 10 minutes before turning up the heat again.
3. Let the pressure reduce on its own before opening the cooker. Mash the rice and dal a bit - it's ok if there's some milk left in the container.
 4. Meanwhile, heat the ghee in a pan and fry the raisins and almond flakes until toasted light brown. Remove from the heat and pour onto the milk-dal mixture.
5. Now place the jaggery and water in a pan and let the jaggery dissolve.
4. Meanwhile, heat the ghee in a pan and fry the raisins and almond flakes until toasted light brown. Remove from the heat and pour onto the milk-dal mixture.
5. Now place the jaggery and water in a pan and let the jaggery dissolve.  Once it is dissolved and the water is bubbling,
  pour the milk-dal mixture into it and stir well.
 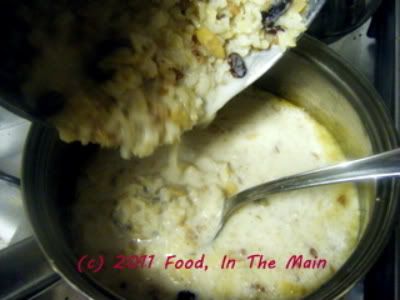 If the chakkara pongal is runny, let it simmer for 5-10 minutes or till the pongal thickens. (It will thicken a bit more on cooling.)
  Serve warm.
RECIPE: BROWN RICE CHAKKARA PONGAL
Ingredients:
1 tbsp moong dal
3 tbsp brown basmati rice
1/4 cup jaggery
Seeds from 3 cardamom pods
1-1/2 cups milk
2 tbsp flaked almonds
2 tbsp raisins
1 htsp ghee
About 1/4 cup water
Method:
1. Toast the moong dal in a pan, shaking it frequently so that the dal doesnt burn, until the dal changes to a darker colour.
2. Pressure cook the dal, rice and milk for at least 5 whistles, preferably turning down the heat after 3 whistles and letting it simmer for 10 minutes before turning up the heat again.
3. Let the pressure reduce on its own before opening the cooker. Mash the rice and dal a bit - it's ok if there's some milk left in the container.
4. Meanwhile, heat the ghee in a pan and fry the raisins and almond flakes until toasted light brown. Remove from the heat and pour onto the milk-dal mixture.
5. Now place the jaggery and water in a pan and let the jaggery dissolve. Once it is dissolved and the water is bubbling, pour the milk-dal mixture into it and stir well. If the chakkara pongal is runny, let it simmer for 5-10 minutes or till the pongal thickens. (It will thicken a bit more on cooling.) Serve warm.
Serve warm.
RECIPE: BROWN RICE CHAKKARA PONGAL
Ingredients:
1 tbsp moong dal
3 tbsp brown basmati rice
1/4 cup jaggery
Seeds from 3 cardamom pods
1-1/2 cups milk
2 tbsp flaked almonds
2 tbsp raisins
1 htsp ghee
About 1/4 cup water
Method:
1. Toast the moong dal in a pan, shaking it frequently so that the dal doesnt burn, until the dal changes to a darker colour.
2. Pressure cook the dal, rice and milk for at least 5 whistles, preferably turning down the heat after 3 whistles and letting it simmer for 10 minutes before turning up the heat again.
3. Let the pressure reduce on its own before opening the cooker. Mash the rice and dal a bit - it's ok if there's some milk left in the container.
4. Meanwhile, heat the ghee in a pan and fry the raisins and almond flakes until toasted light brown. Remove from the heat and pour onto the milk-dal mixture.
5. Now place the jaggery and water in a pan and let the jaggery dissolve. Once it is dissolved and the water is bubbling, pour the milk-dal mixture into it and stir well. If the chakkara pongal is runny, let it simmer for 5-10 minutes or till the pongal thickens. (It will thicken a bit more on cooling.) Serve warm.
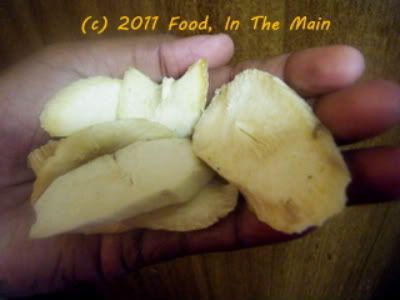
Cassava/tapioca is one of the many root vegetables I like because of its association with the years that I lived in Dar-es-Salaam as a kid. I mainly knew it in its roasted or fried form, although I also liked its boiled and salted avatar. I’d seen recipes for cassava from fresh, but never any for dried cassava.
I'd come into possession of dried cassava pieces a few weeks ago, when I had tagged along with Pete to York (or somewhere thereabouts) where he was to meet someone to collect some esoteric sound equipment. The ride was itself worth it for the scenery, but even better was the fact that the meeting point turned out to be right next to a reasonably big “Indian” store – well, it was actually an Iraqi store, but it contained enough Indian/Mediterranean/Middle-Eastern stuff to make me happy.
I wanted to explore the shop, but Pete said his contact would be there imminently and the whole exchange wouldn’t take 5 minutes, so I resigned myself to a quick trip into the store to get some whole urad dal which I’d run out of. I saw plenty of interesting things in there to make me wish I could browse for a bit, but I didn’t hang around as we had a 3-hour drive back to Shrewsbury (and I was working the next day, so it was in my best interests to get back home as soon as possible) - and I was on a promise to my husband, in any case.
I believe that keeping my virtuous promise to Pete (“I’ll only be a minute at the shop, honest” - which he didn’t really believe since he knew what I was like) was instantly rewarded in the form of a serendipitous call from Pete’s contact to say that he was running late by about 30-40 minutes. I must have lit up the street with my delighted smile, because my husband gave me a grin and said “Oh all right, go on with you, only don’t buy up the shop will ya?”
I didn’t buy up the shop, but I did have a thoroughly enjoyable time browsing every aisle and its contents, trying to figure out what the items were (made somewhat difficult because sometimes I didn’t know the script or the language), and finding things to buy that I didn’t know I wanted to try until I saw them. Among other, more mundane things, I bought two (to me) exotic items - a bag of dried cassava/tapioca pieces, and something called “mograbiyeh”, made of semolina (which Google revealed later was like couscous, except the grains were the size of peppercorns).
I reserved the mograbiyeh for later and decided to experiment with the dried cassava/tapioca first. To be honest, I didn’t have the first idea what to make with it, but I figured Step 1 would be to rehydrate them. So I turned out a third of the bag into a bowl of water and let it soak overnight. I still didn’t know what Step 2 ought to be, and Google didn’t really suggest any recipes specifically using dried cassava.
I decided to bake the rehydrated pieces (which, I assumed, had been originally cooked and then dried) in the oven, because I really do love cassava chips and I had my Dar-es-Salaam memories in mind. Sadly, they mostly turned into baked wood chips and had to be consigned to the bin, my teeth not being what they once were.
My second experiment was to soak and then deep-fry the pieces to see if that would make better chips. The experiment was a success in a way, because the end result was definitely better wood chips; but in terms of edibility, not so much. My teeth continued to be not what they once were.
Now there was only the final third of the bag left to play around with, and I decided that the only thing to do now was improvise a curry. So I did. And here it is in recipe form, in all its successful glory.
Recipe for: Cassava/tapioca in flaxseed masala
 Ingredients:
 1 cup dried cassava/tapioca pieces, soaked in water for 3-4 hours
1 tbsp flaxseeds
6-7 black peppercorns
1/2 tsp cumin seeds
1/2 tsp coriander seeds
2 cloves garlic
4-5 dry red chillies (or to taste)
1/2 tsp tamarind paste
2 medium onions, sliced thin
1 cup chopped tomatoes
1/2 tsp garam masala (I used Kitchen King)
1 tbsp oil
Salt to taste
Coriander leaves to garnish
Method:
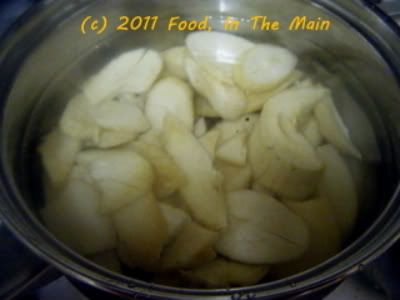
1. Break up the soaked cassava/tapioca pieces into more or less even bits. Boil them in water until they are cooked. They should be very soft (easily pierced with a knife tip) but not mushy.
1 cup dried cassava/tapioca pieces, soaked in water for 3-4 hours
1 tbsp flaxseeds
6-7 black peppercorns
1/2 tsp cumin seeds
1/2 tsp coriander seeds
2 cloves garlic
4-5 dry red chillies (or to taste)
1/2 tsp tamarind paste
2 medium onions, sliced thin
1 cup chopped tomatoes
1/2 tsp garam masala (I used Kitchen King)
1 tbsp oil
Salt to taste
Coriander leaves to garnish
Method:
1. Break up the soaked cassava/tapioca pieces into more or less even bits. Boil them in water until they are cooked. They should be very soft (easily pierced with a knife tip) but not mushy.
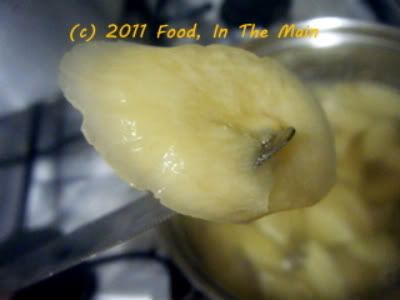 Drain and reserve.
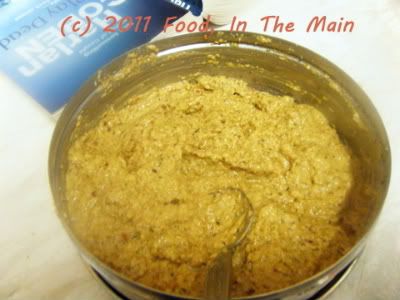
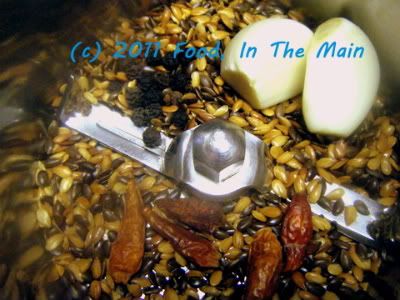
2. Grind the flaxseeds, peppercorns, cumin seeds, coriander seeds, garlic and red chillies to a fairly smooth paste, without adding water.
Drain and reserve.
2. Grind the flaxseeds, peppercorns, cumin seeds, coriander seeds, garlic and red chillies to a fairly smooth paste, without adding water.
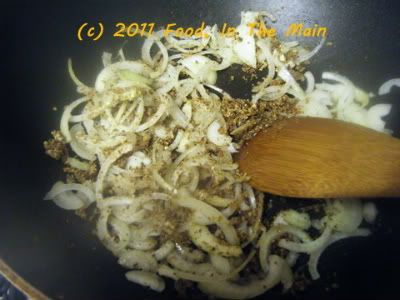
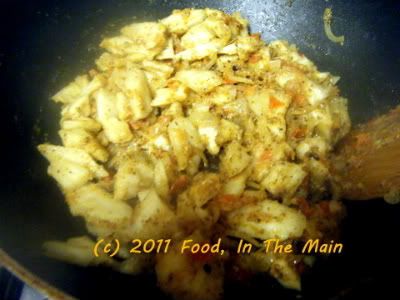
 3. Heat the oil in a pan and fry and ground masala paste for 1 minute, stirring briskly.
4. Add the sliced onions and fry for 3-4 minutes, or until they start to turn translucent.
3. Heat the oil in a pan and fry and ground masala paste for 1 minute, stirring briskly.
4. Add the sliced onions and fry for 3-4 minutes, or until they start to turn translucent.
 5. Now add the tomatoes and stir them in.
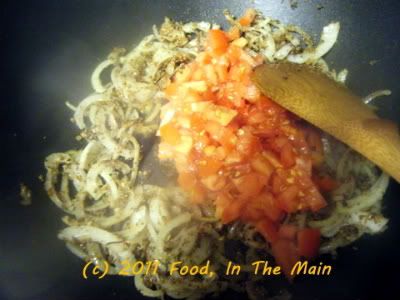 Let them cook down with the onions until mushy.
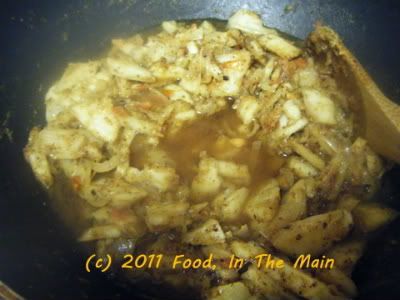
 6. Next, add the cooked cassava/tapioca pieces
 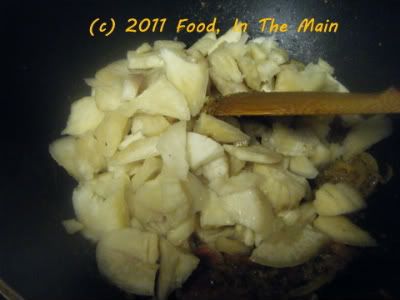 and mix them with the tomato-onion masala.
 7. Dissolve the tamarind paste in 1-1/2 cups water and pour it in. Stir well and add salt to taste.
 8. Bring to a gentle boil, then turn down the heat and let the curry simmer for 5 minutes while the gravy thickens.
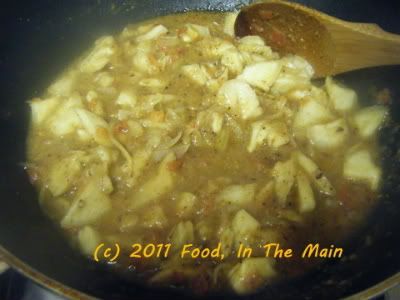 Garnish with coriander leaves before serving hot with cooked millet or quinoa. Can also be eaten with chapaties/rotis.
RECIPE: CASSAVA/TAPIOCA IN FLAXSEED MASALA
Ingredients:
1 cup dried cassava pieces, soaked in water for 3-4 hours
1 tbsp flaxseeds
6-7 black peppercorns
1/2 tsp cumin seeds
1/2 tsp coriander seeds
2 cloves garlic
4-5 dry red chillies (or to taste)
1/2 tsp tamarind paste
2 medium onions, sliced thin
1 cup chopped tomatoes
1/2 tsp garam masala (I used Kitchen King)
1 tbsp oil
Salt to taste
Coriander leaves to garnish
Method:
1. Break up the soaked cassava/tapioca pieces into more or less even bits. Boil them in water until they are cooked. They should be very soft (easily pierced with a knife tip) but not mushy. Drain and reserve.
2. Grind the flaxseeds, peppercorns, cumin seeds, coriander seeds, garlic and red chillies to a fairly smooth paste, without adding water.
3. Heat the oil in a pan and fry and ground masala paste for 1 minute, stirring briskly.
4. Add the sliced onions and fry for 3-4 minutes, or until they start to turn translucent.
5. Now add the tomatoes and stir them in. Let them cook down with the onions until mushy.
6. Next, add the cooked cassava/tapioca pieces and mix them with the tomato-onion masala.
7. Dissolve the tamarind paste in 1-1/2 cups water and pour it in. Stir well and add salt to taste.
8. Bring to a gentle boil, then turn down the heat and let the curry simmer for 5 minutes. Garnish with coriander leaves before serving hot with cooked millet or quinoa. Can also be eaten with chapaties/rotis.
Garnish with coriander leaves before serving hot with cooked millet or quinoa. Can also be eaten with chapaties/rotis.
RECIPE: CASSAVA/TAPIOCA IN FLAXSEED MASALA
Ingredients:
1 cup dried cassava pieces, soaked in water for 3-4 hours
1 tbsp flaxseeds
6-7 black peppercorns
1/2 tsp cumin seeds
1/2 tsp coriander seeds
2 cloves garlic
4-5 dry red chillies (or to taste)
1/2 tsp tamarind paste
2 medium onions, sliced thin
1 cup chopped tomatoes
1/2 tsp garam masala (I used Kitchen King)
1 tbsp oil
Salt to taste
Coriander leaves to garnish
Method:
1. Break up the soaked cassava/tapioca pieces into more or less even bits. Boil them in water until they are cooked. They should be very soft (easily pierced with a knife tip) but not mushy. Drain and reserve.
2. Grind the flaxseeds, peppercorns, cumin seeds, coriander seeds, garlic and red chillies to a fairly smooth paste, without adding water.
3. Heat the oil in a pan and fry and ground masala paste for 1 minute, stirring briskly.
4. Add the sliced onions and fry for 3-4 minutes, or until they start to turn translucent.
5. Now add the tomatoes and stir them in. Let them cook down with the onions until mushy.
6. Next, add the cooked cassava/tapioca pieces and mix them with the tomato-onion masala.
7. Dissolve the tamarind paste in 1-1/2 cups water and pour it in. Stir well and add salt to taste.
8. Bring to a gentle boil, then turn down the heat and let the curry simmer for 5 minutes. Garnish with coriander leaves before serving hot with cooked millet or quinoa. Can also be eaten with chapaties/rotis.

