skip to main |
skip to sidebar
And by that I mean Nupur's version of Madhur Jaffrey's lubia polo. Ever since I read about the Persian dried limes, my one ambition was to somehow source it so that I could make this dish. I didnt want to use lime juice - how boring! So finally I came across a website that sold ingredients for Iraqi, Iranian, Turkish and other such exotic cuisine, so I lavishly ordered away. And in a few days, a little neatly packed box arrived all the way from - er, Germany, actually. Preserved limes, dried lime, dried lime powder - all of these are now in my possession. I have to tell you, the dried lime smells mouth-watering - like neer elumichangai that has ever so slightly fermented.
Anyway, with the dried lime and the dried lime powder (using which is a lot less finicky work than manually separating the black bits from the whole dried limes, I can tell you), I made lubia polo.
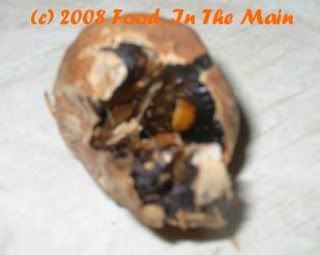
Dried lime tapped open with a hammer
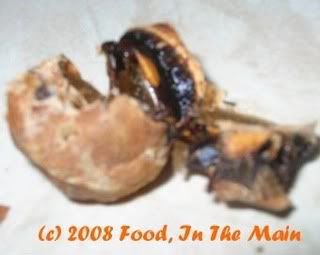
Then pulled apart by hand
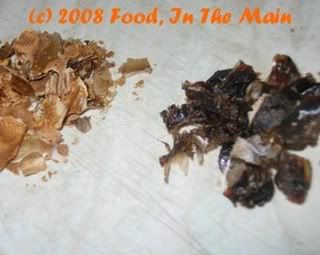
The black interior contents scraped out (on the right) and the discarded lime peel (left)
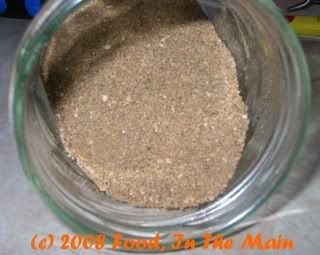
Readymade powdered dried lime - a much simpler option
And then I suddenly realised that the post had been hanging fire for at least 10 days, and it would be perfect for Zlamushka's "Tried and Tasted" event that's currently happening - assuming I'm not too late with my offering.
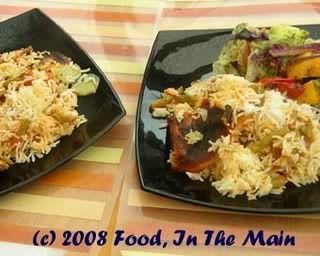
This baked green-bean and potato rice has the least amount of spices and seasoning that I've ever seen... and yet the end result is so INCREDIBLY flavourful! I followed pretty much the same method as Nupur, except that instead of garam masala I used a couple of pinches of my extremely potent, aromatic, home-made dhansak masala!
I have to admit that my lubia polo did not turn out as beautifully shaped as Nupur's, nor did it hold together nicely. But that was because I didnt - dont - have the right-shaped non-stick pan, nor even a heavy-bottomed non-non-stick (how else do you say it?) pan... so I improvised with a shallow vessel I use in the pressure cooker. It was too thin so the potato slices at the bottom got a bit burnt and the rice didnt get a chance to crisp up. But, like I said, it was fantastically tasty, even if not picture-perfect to look at. In any case, if you're looking for picture perfection, the blog to go to is Nupur's! :)
Recipe for: Nupur's lubia polo
Ingredients:
1 cup basmati rice, washed and soaked for 15 minutes
2 cups green beans, halved
1 onion, chopped
1 potato, peeled and sliced thin
1/2 cup tomato puree
1/2 tsp turmeric
1 tbsp olive oil
1 tsp butter
Salt to taste
1 tsp garam masala/pav bhaji masala/dhansak masala
1 htsp powdered dried lime OR 1 tbsp fresh lime juice
Method:
1. Boil the rice in 2 cups of lightly salted water till almost done. Drain well and reserve.
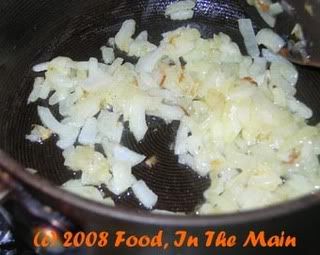
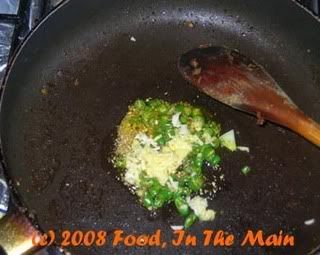
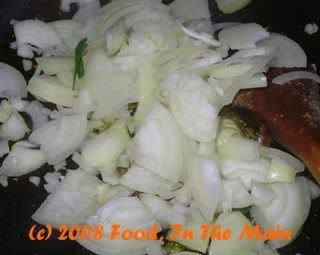
2. Heat the olive oil in a skillet and fry the chopped onion till soft and light brown.
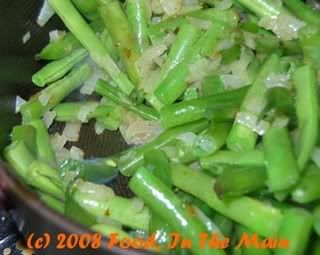
3. Add the green beans and saute for a few minutes,
then add the tomato puree and whichever masala you're using.
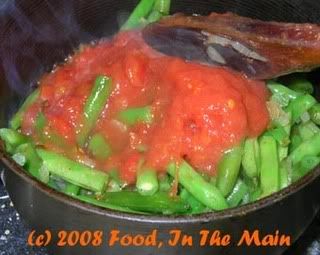
4. Simmer the beans till tender, then add salt to taste. The sauce should be fairly thick now. Add 1 heaped tsp dried lime powder, mix and set aside.
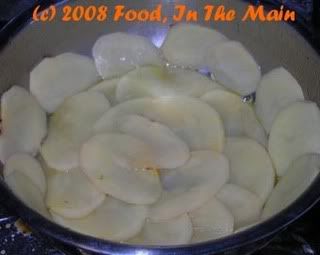
5. In a medium deep non-stick pan, melt 1 tsp butter. Stir in 1/2 tsp turmeric and water. Layer the bottom of the pan with the thinly sliced potato.
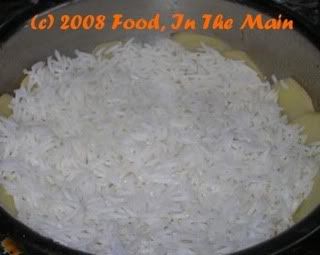
6. Put half the rice over the potatoes,
then pour over the green bean mixture,
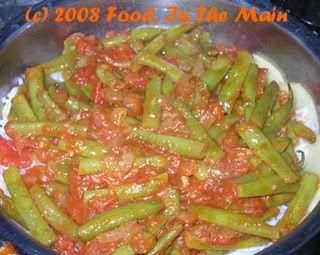
and finally the rest of the rice.
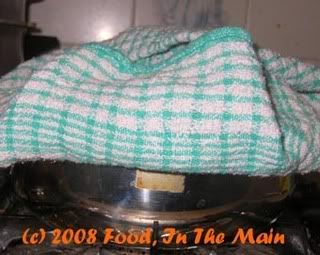
7. Cover the pan and leave on medium heat for 10 minutes, then lower the heat to its lowest point.
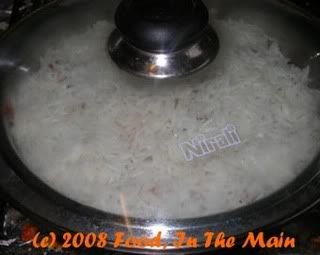
Place a clean dish towel under the lid and fold the hanging edges back on top of the lid.
9. Cook on low heat for 20 minutes or so, then let the pilaf rest for 10 minutes.
10. After the resting time, invert the pan onto a serving dish. The pilaf should unmold itself whole - but if it doesnt (like mine) dont worry... it will still taste delicious!
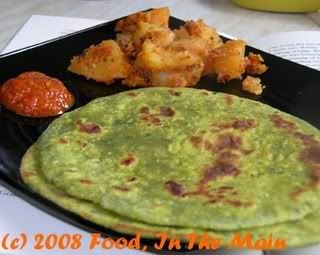
When I saw this post on Taste Goblet, I knew I had to try it. Usually the posts here about fabulous cakes, way beyond my basic baking abilities. Thank goodness I dont need to have any special talent to drool at the gorgeous photos and read the write-ups and marvel at Chitra's patience and baking genius, and did I mention her beautiful photos? This recipe, though, was definitely one I could do, so I did. Thanks, Chitra!
Recipe for: Spinach masala chapaties
Ingredients:
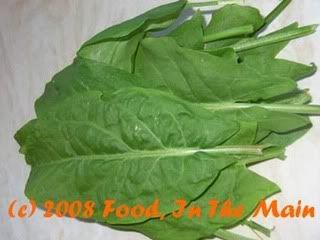
2 cups spinach, chopped
½ cup coriander
1” piece ginger, sliced thin
2 garlic cloves
2 small red onions, chopped
3-4 green chillies, sliced (or to taste)
1 cup warm milk
2-3 cups atta
Salt as required
1 tsp turmeric powder
1 tbsp ghee
Method:
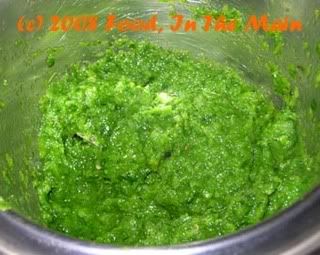
1. Blitz the spinach, coriander, ginger, garlic, onions, chillies in a food processor
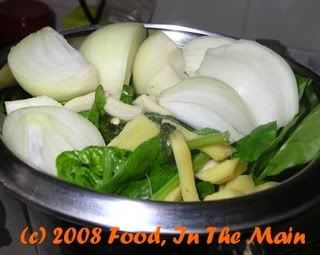
without adding water, until finely chopped but not mushy.
2. Put the atta in a large bowl and rub the ghee into it. Then add the chopped spinach mixture and add turmeric powder.
3. Add salt to taste, then make a soft but not overly sticky dough using as much milk as required. Knead the dough really well on a lighly floured surface, as for bread, for 5-7 minutes.
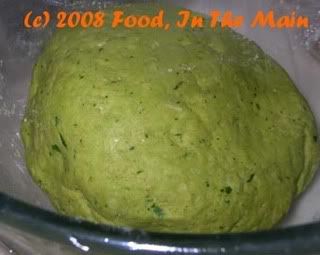
4. Leave the dough covered in the bowl for an hour.
5. After an hour, make chappaties as normal.
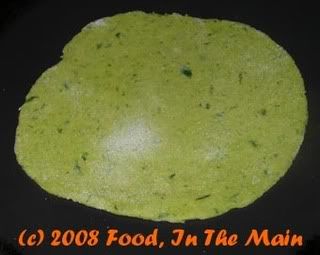
You can either make these as phulkas, smearing a little ghee after they’re cooked.
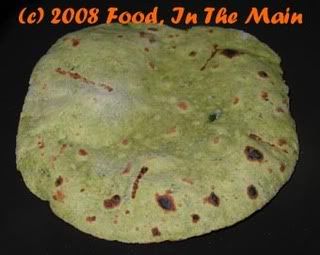
6. Or use ghee/oil/Pam (whichever you feel like) to cook the chappaties on the tawa itself.
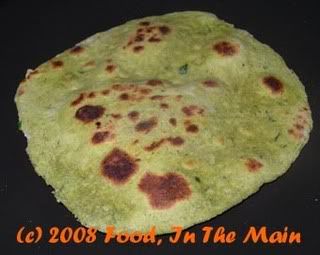
7. Serve warm with any curry.
I’m pretty sure I don’t have much to say in this post, so of course I’m going to try and say it in as many words as possible. It’s obligatory to do so, the First Law of Writing (except that it’s always been an unwritten law, ironically) which I am now vocalising via the written word. The self-styled “expert” analysts who contribute to newspapers, especially in the political and economic areas, are the most obvious propagators of this law. The less you have to say, the more verbose you get. You might have noticed that your favourite writer pretty much always leaves you wanting more. On the other hand, the boring ones just as predictably can lay an entire rainforest’s worth of trees to waste with just one article.
Now I’m beginning to feel like A A Gill, the food and restaurant critic of The Times. He’s supposed to review different restaurants but usually writes for more than half the article (every single time, too) about something completely irrelevant and as far off the topic of food and restaurants as... let’s say, as far off as Big Brother is from an intelligent programme. As one of his readers put it: “I think I finally have the hang of an AA Gill "restaurant review". Talk about something that has nothing whatsoever to do with restaurants (hernia operations, personal loves and loathes, politicians, etc.) and then, at the end, write the name, address and a brief, caustic opinion.
Louise, London, UK”
So, now that we have the “nothing much to say” out of the way, let me say a few brief words about this biscuit/cookie: It’s eggless, it’s nice, it was made by my cousin Hema during her visit to Shrewsbury, and she took it home with her so that her lucky parents could have a taste of her first baking efforts.
That’s all I really had to say in the first place.
Recipe for: Cranberry orange cookies

Ingredients:
1 cup granulated sugar
1/4 cup butter, softened
1/8 cup milk
3 tbsp fresh orange juice
1 tbsp yogurt
1-1/2 cups plain/all purpose flour
1/2 tsp baking powder
1/8 tsp salt
1/8 tsp baking soda
1/2 cup chopped dried cranberries
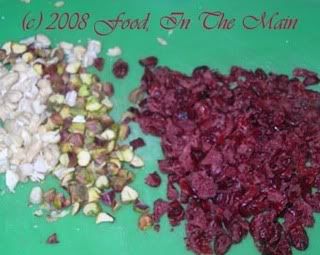
1/4 cup chopped nuts (we used pistachios and cashewnuts)
Method:
1. Preheat the oven to 190°C/375°F.
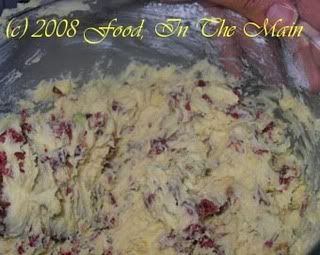
2. Cream together the sugar and butter in a large bowl.
3. Stir in milk, orange juice and yogurt.
4. Stir in flour, baking powder, salt and baking soda.

Add cranberries and nuts

and stir lightly into the dough.
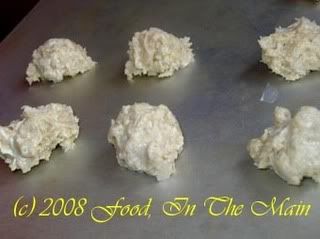
4. Form dough into balls (approximate will do) with slightly wetted fingers and drop onto cookie sheet.
5. Bake 10 to 15 minutes or until light brown around the edges.

Immediately remove from cookie sheet and cool.
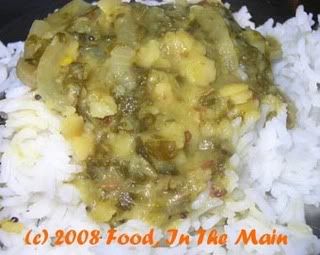
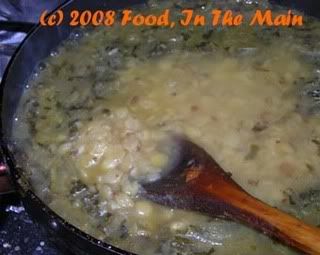
This has been possibly one of the tastiest dals I've made - and I'm not sure what gave it that extra oomph. I'm aware this is not the most inspiring of things for any cook to say... I mean, if a cook doesnt know what makes his/her recipe a hit, who would?
Still, as I said - no idea what made the dal stand out, especially as the ingredients used were (are) absolutely standard. All I can think of is that perhaps it was the sorrel, as freshly harvested as any greens could get, that made the difference. I got the leaves from my container garden two minutes before I used them. I also had a cupful of water left over from cooking green beans for Pete, so I added that to the dal instead of plain water - but I cant see that it would have made much difference. Bean cooking water is just bean cooking water, not a flavour developer. Right?
I've always thought that sorrel was the English name for gongura, the sour greens so typically used in Andhra cooking. Since I havent actually seen gongura (except in the finished dish made by someone else!) or cooked with it before, I just assumed my sorrel was gongura. Only, my mother said it couldnt be gongura because the leaves werent the right shape (this was when they were just beginning to grow).
True enough, the leaves were broad and flat rather than narrow and tapered... but they were sour. Not mouth-puckeringly so, but with a pleasant sort of sourness, rather like tamarind leaves. Since they were green and sour, I christened them gongura, and made the dal that I've been hankering after ever since I had it first at a friend's place, many many MANY moons ago. Dont anybody tell me it's not gongura... because my response will only be this: "It's a different KIND of gongura, so there."
So there.
Recipe for: Sorrel dal
Ingredients:
1 cup tur dal, cooked
2 cups gongura leaves, washed and sliced
1 medium onion, minced
1 tsp ginger, grated
3-4 fresh green chillies (or to taste), sliced very thin
2 tsp oil
1 tsp coriander powder
1 tsp mustard seeds
1 tsp cumin seeds
1 tsp ghee
1-2 dry red chillies
Salt to taste
1-1/2 cups water
Method:
1. Heat the oil in a pan, add the mustard seeds, cover and let them pop. Then add the ginger, green chillies and coriander powder and fry for 30 seconds or so.
2. Throw in the onions and saute them till they begin to soften and become pale brown.
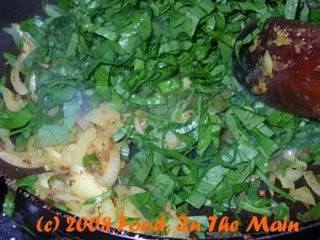
3. Now add the sorrel leaves and stir till they begin to wilt.
4. Pour in the water
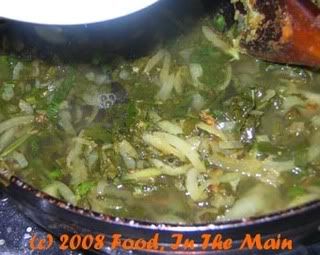
and let it simmer for 4-5 minutes.

5. Then add the cooked tur dal and salt to taste, and stir.
Let the dal come to a gentle bubbling simmer.
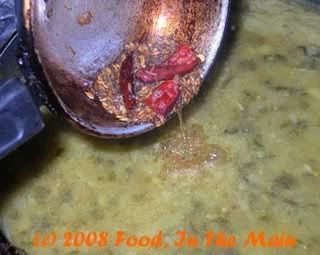
6. In the meanwhile, heat 1 tsp ghee in a small pan. Break the dry red chillies in two or three pieces and add them to the ghee. Then add the cumin seeds and let them fry for 30 seconds till fragrant and brown.
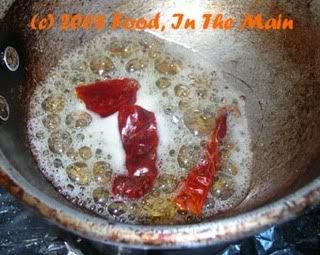
Pour this tempering on the dal and mix.
Serve hot over rice or with chapaties.
Over the next few days - or weeks, depending on the levels of sloth and indifference - I'll be posting a few recipes of cookies and cakes that Hema (my cousin) and I baked. Well, mostly Hema, with me hovering around "instructing". Yes, that's what I like to call it. The first of these was eggless peanut butter cookies.
So here is a recipe for eggless cashew vanilla cookies. There arent any takers for cookies in my house, unless you count Hobnobs (chocolate-covered digestives) of which Pete is inordinately fond. I'm not likely to be making those, so I stand by my statement that there arent any takers for cookies in my house.
It's only because Hema was there that I made cookies at all. These were nice, but I think they would have been better with the cashews being lightly toasted first rather than used raw as I did. And also, be very sure to remove the cookies from the baking tray after 2 minutes - they will get increasingly more difficult to remove if they cool on the tray itself. You have been warned.
Recipe for: Cashew vanilla cookies

Ingredients:
1 cup plain/all purpose flour
1/2 tsp baking powder
1/4 tsp baking soda
1/8 tsp salt
1/4 cup soft butter
1/2 cup brown sugar
1 tsp vanilla extract
1/3 cup yogurt (original recipe said to use cream)
4 tbsp chopped cashews (lightly toasted if you like)
Method:
1. Preheat the oven to 180°C/350°F.
2. Sift together the flour, salt, baking powder and soda.
3. Cream the butter, sugar and vanilla. Beat until smooth.
4. Add flour mixture and yogurt, stir in till well incorporated.

5. Mix in cashews.
6. Drop by tablespoons (or use lightly wetted fingers to shape into balls) on ungreased (yes, ungreased) cookie sheet 1-1/2 inches apart.
Bake for 10-12 minutes or until the tops are golden brown.

7. Cool 2 minutes in the oven, then immediately remove to racks. Cool and store in an airtight container.
Up until now, kale had been a green that I bypassed almost automatically at the supermarket, although I always stopped to debate over whether to try it or not. Despite the bags advertising their contents as "tender curly leaf kale", my decision was always "not". Mainly because the sliced leaves looked so very tough, but also partly because, rightly or wrongly, I associated kale with Russian cooking from all the Russian folk tales and fairy tales that I'd read. It sure didnt seem like the most attractive vegetable... maybe more like poor man's fare.
Anyway, on the last shopping trip that I did with my mother and Hema, I threw in a bag of sliced kale, hoping to make something - anything - with it at some point. Days passed, my mother and cousin left, a week went by thereafter and still the kale sat in the little refrigerator in the shed (as opposed to the big one in the kitchen), almost but not quite forgotten. It didnt even have the grace to wilt or get soggy, like regular spinach does. It just stayed there, looking resilient and green and pretty much like it would be happy to sit there for as long as it wished.
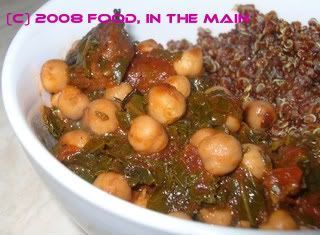
So, last week I went trawling for kale recipes - I didnt want any Indian-style recipes this time, so it took a while to find something that seemed like it would taste interesting. Finally I came across a chorizo-chickpea-kale stew on Tamarind & Thyme, and since I had veggie sausages at hand, I decided to go with that. The recipe was pretty simple, really, and I was pleased to have smoked paprika at hand, as specified. What I didnt have was dry sherry, so I thought to use red wine - which also, unfortunately, I didnt have. So in the end, I used port (fortified wine). It seemed to work pretty well. I also reduced the amount of smoked paprika in the recipe, because I've discovered from experience that it can be VERY overpowering if not used sparingly. Again, I dont know if it's a quality of the particular kind of smoked paprika I have, or whether all smoked paprika tastes like that... but I was happy to go with just two pinches of it, rather than 1/2 tsp. That would have been wayyy too much.
After trying the stew, Pete thought that the kale was rather too strong a green for this recipe, although overall it was savoury and tasty. I liked it too, but I have to agree with him on this - despite my best efforts, the kale was still rather tough to the bite. Perhaps next time I'll use spinach, which we both love, and see how it works out.
I served the kale with another first - red quinoa, which I've never tried before. I found the seeds quite cute and I liked the white "ring" that appeared around their middle. Red quinoa has a funny taste by itself, but I'm sure it will lend itself to being combined with various things. As a matter of fact, I used leftover quinoa to make another dish - but that's for another post!
Maybe kale is best suited for Indian recipes incorporating dal and other vegetables. Time (an some more experimentation) will tell.
Recipe for: Veggie sausage, chickpea and kale stew
Ingredients:
1/2 cup vegetarian sausage, sliced 1 cm thick
1 medium onion, chopped
1 clove garlic, thinly sliced
2 tbsp olive oil
1 cup cooked chickpeas (canned is easiest)
2 cups kale, sliced
1/8 cup dry sherry (I used port)
1/2 cup chopped tomatoes (I used a small tin of crushed plum tomatoes)
½ tsp smoked paprika (I used 2 pinches)
½ cup water
Salt and freshly ground black pepper to taste
Method:
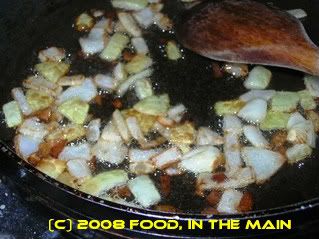
1. Heat a sauté pan over medium heat and pour in the olive oil.
2. Add the chopped onion and sauté till it begins to soften.
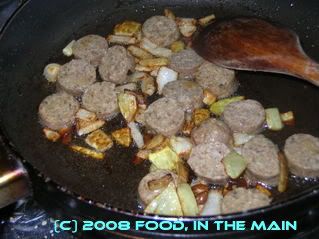
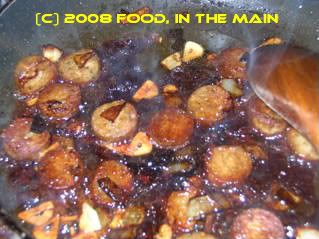
3. Add the sausage and continue frying until the sausage starts to crisp and the onions are golden.
4. Add the garlic and let it sizzle for a minute (don’t let it burn).
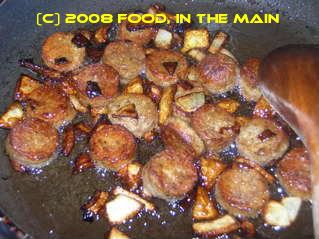
5. Add the dry sherry/port and let it bubble and then reduce.
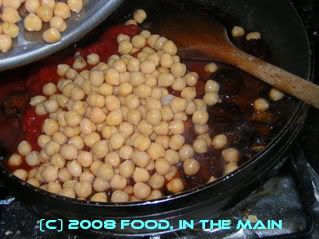
6. When the port has bubbled away almost completely, add the drained and rinsed chickpeas,
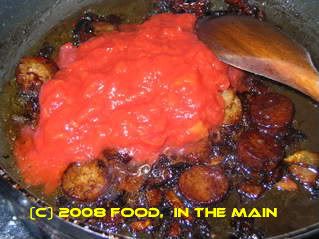
the chopped tomatoes and the paprika.
7. Mix it about for a couple of minutes, then add ½ cup water and let it simmer gently for 4-5 minutes.
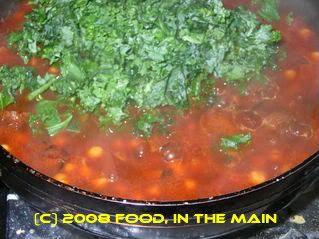
8. Now toss in the kale, add ¼ cup water if the sauce looks too thick, cover the pan and let the kale steam.
9. Check every five minutes, giving the whole thing a stir, to see if the kale is done. If it’s not done to your liking, add a little more water, cover the pan and let it cook some more.

10. Add salt and pepper to taste, mix well,
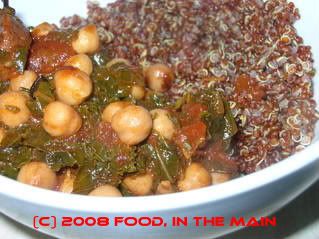
and serve hot with good bread, over rice or with quinoa (like I did).
Note: How to cook quinoa - Rinse the quinoa well under running water in a strainer with a fine mesh. If you try to rinse quinoa seeds in a regular pan, you will lose a lot of the little guys down the sink when you try to pour away the water. Trust me on this, this is the VoE (Voice of Experience) talking - quinoa seeds are VERY light, and float off quicker than you would imagine. The instructions on the quinoa packet dont tell you this - all it says is "rinse the quinoa 3-4 times". Hmph. (On my more paranoid days I tend to think that it's a ploy by the company to provide as little information as possible. That way, people using quinoa for the first time will have to buy another packet of the stuff sooner than they planned, after helplessly watching the washed seeds disappear down the plughole. Hey, this could even be true!)
1. Rinse 3/4 cup quinoa and drain.
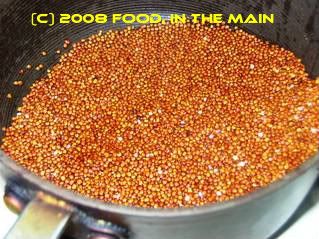
Roast it without oil in a pan until a few grains begin to pop.
2. Add 1-1/2 cups of water, bring to a boil, cover and simmer for about 15 minutes, or until the water is absorbed. The quinoa seeds will have a white "ring" around them when done.
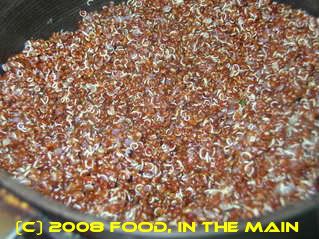
Remove from heat and let stand for 10 minutes. Fluff with a fork and let cool.