skip to main |
skip to sidebar
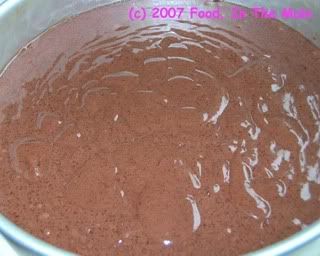
I'm not sure I quite know what to say about this pudding cake... by anybody's reckoning it should have been a disaster, considering my mistakes - I cant blame the recipe, it was from "Gourmet July 2005", according to the printout. And yet it turned out to be a delicious cake.
In hindsight, I think the blueberries went in with too much liquid and the cake simply wouldnt set because the batter was so liquidy. The original recipe confidently said that the blueberries would sink to the bottom, so when I poured the blueberry mixture over the cake batter, I expected the blueberries to perform as per the recipe.
Although I waited expectantly, the blueberries didnt sink. They just pooled in the middle of the batter, creating a sunken effect, and didnt even bother to give an impression of being cooperative enough to do as the recipe indicated.
Right about then, while I gazed at my concave batter, I got that sinking feeling (I suppose I should have been glad that SOMEthing sank, even if it wasnt the darned blueberries) which precedes a culinary catastrophe. I did debate for a moment whether I should just throw it all in the bin and wash my hands of the whole thing - but I would have felt far too guilty throwing away perfectly fresh, lovely and expensive blueberries without even trying to salvage them!
Good thing, too. Like I said, the cake should have been a disaster but somehow it worked. I had to bake it for far, far longer than the recipe said, because the bloomin' blueberries simply wouldnt set in the centre! Not that I blame the blueberries... there was far too much liquid, so it took an extra long time. By which time, of course, the cake part was well cooked and somewhat crusty around the edges, although not burnt. I finally switched off the oven when the blueberries had a sort of jelly like texture in the centre - still not "set" but I hoped that (like with baked cheesecakes) the centre would firm up as it cooled.

It did set, but it was like a chewy jam/jelly in the middle with lots of fruit in every bite! Doesnt sound particularly appetising (nor does it look it in the photo above), but no amount of descriptions can do justification to the taste, which was just lovely - perhaps the extra long time in the oven concentrated the flavours of the blueberries, I dunno. But in any case, it disappeared like magic (it helps that there are two hungry teenagers here right now, but still), helped along by some thick fresh cream.
Next time I make this, I'll make sure that the blueberries are not poached in too much water - that, I think, was the main problem with what I did. The recipe below rectifies the things I think I did wrong. So, hopefully anybody who tries this recipe will have a more conventional looking cake that also tastes lovely!
Recipe for: Blueberry pudding cake

Ingredients:
1/3 cup sugar
PLUS
1/2 cup sugar
1/4 cup water
1 tbsp fresh lemon juice
1 tsp cornflour
1-1/2 cups blueberries
1 cup all-purpose flour
1-3/4 tsp baking powder
1 tsp salt
1 large egg
1/2 cup milk
3 tbsp unsalted butter - melted and cooled slightly
1 tsp vanilla
Method:
1. Preheat oven to 180C. Spray an 8" round pan with Pam.
2. Stir together 1/3 cup sugar with water, lemon juice, and cornstarch in a
small saucepan, then stir in blueberries.

Bring to a simmer and let it cook 3 minutes, stirring occasionally. Remove from heat.

3. Whisk together flour, baking powder, salt, and remaining 1/2 cup sugar in a
medium bowl.
4. Whisk together egg, milk, butter, and vanilla in a large bowl.

Then add flour mixture, whisking until just combined.
5. Put batter in the baking pan.

Then pour blueberry mixture evenly over the batter (berries will sink - hopefully!).

6. Bake until a knife inserted into centre of cake portion (towards the side, not the centre of the cake) comes out clean, 35-40 minutes.
7. Cool in pan on a rack for five minutes, then remove to a serving plate.

Serve warm with fresh strawberries and cream or icecream.

Description:
"Plump blueberries, cooked until juicy and poured over a simple batter,
create a deliciously moist pudding cake bursting with summer fruit."
Source: "Gourmet July 2005"
I've had this recipe for SOOOOOOOO long in my recipe file that the paper had actually started yellowing when I chanced upon it. I think it's about 6 years old because it's in the file that I filled with printouts of recipes - food that I longed for in those days when I was desperate for authentic Indian food that I didnt have to make (didnt get anywhere much with that attitude, actually). I hadnt got to the point where I'd started actually making the food I craved, I was merely browsing recipes like mad and printing them off!
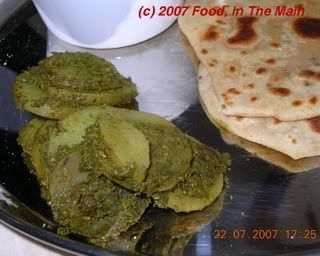
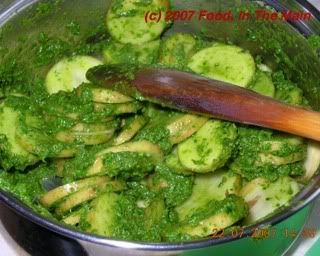
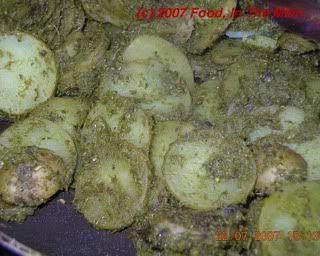
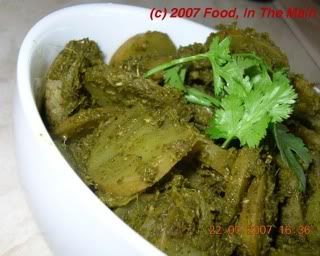
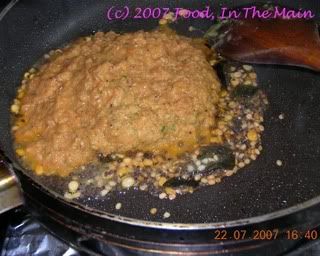
Anyhow, on to the recipe. I hope y'all know that these potatoes arent green from mould, or green from too much exposure to light, or even green from envy. They're only green because of the masala used to coat them :)
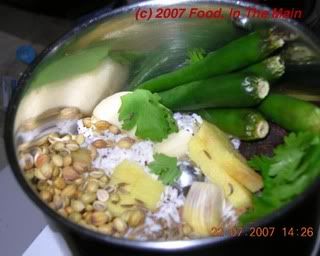
Oh by the way, if you dont like fresh cilantro/coriander leaves, dont even bother making this recipe. It's mainly coriander leaves with a bunch of other stuff thrown in. I actually didnt think it would work, because the recipe calls for just 1 tsp oil and no water. As it turned out, I did add 2-3 tbsp water because I thought it might burn. It might NOT have, but I wasnt trusting enough to risk it!
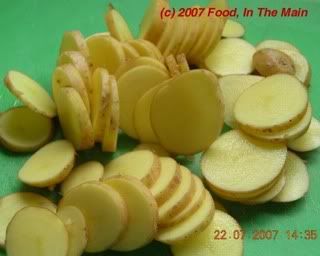
This is a very simple recipe. Just slice your potatoes - make sure they're salad potatoes that will hold their shape even when cooked, you dont want them reducing to a mush - grind your masala, put the two together and pan-fry-steam-cook till the 'taties are done. That's it. Oh, just one more thing - did I say that this is a slightly adapted Sanjeev Kapoor recipe? No? Well, it's a slightly adapted Sanjeev Kapoor recipe.
Recipe for: Haraa aloo (Green potatoes)
Ingredients:
4-6 salad potatoes, sliced 1/3 cm thick
1 small bunch coriander leaves (about 1 generous cupful)
Fresh geen chillies to taste (I used 5)
1" piece ginger, sliced
2 cloves garlic
2 tbsp coconut grated
Tamarind - large marble sized piece, or 1 tsp if using paste
1 tsp cumin seeds
1 tsp coriander seeds
1/2 tsp fennel seeds
1/2 tsp turmeric powder
1 tsp oil
Salt to taste
Method:
1. Make a smooth paste by grinding together everything but the potatoes, salt and oil, using as little water as possible.
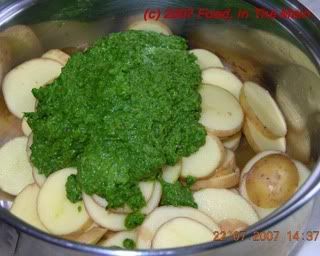
2. Mix this paste with the potato slices so that each slice is well coated.
3. Heat the oil in a pan and add the potatoes. Stir well, then cover with a tight-fitting lid.
4. Cook the potatoes over a low flame, adding 2-3 tbsp if you think the masala is going to burn at the bottom of the pan.
5. When the potatoes are cooked, add salt to taste and stir.
6. Let the potatoes cook for a minute longer, then turn off the hob.
7. Serve hot with chapaties and dal.
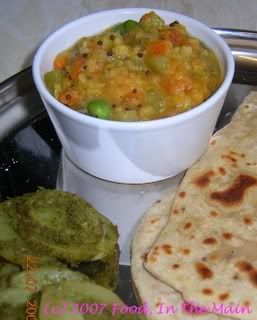
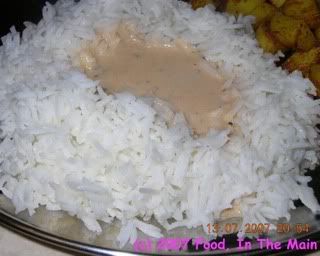
This is a classic South Indian recipe, one made probably in every home. And equally probably it will vary slightly from home to home, never really exactly the same anywhere.
I've done my version (or rather, my mom's version - actually, probably my grandmother's version and so on upwards!) earlier, except that in my family it's called "poricha kuzhambu" and it varies ever so slightly from Kiwi Gee's. For instance, I've never known it to have pureed tomatoes in it, or ginger, and it's one of the few items we make that doesnt have coriander leaves as garnish!
But, as I already said, each to his/her own. And, as Kiwi Gee says, it's "Esply good for rotis on ‘onionless’ days. Nowadays, it is a boon to me as I get my veggies and dhal into one simple dish that is quick to cook and nutritious to eat. And easy to camouflage the veggies in all that dhal, esply as far as feeding the hungry hordes (kids) goes".
So there you are - a way to get those dreaded veggies into your kids, if you have them (kids, I mean). If you dont, it's merely a good way to incorporate all the odds and ends of vegetables that you might have in the fridge. Either way, a good recipe to have on hand. ("This koottu can be made with different veggies – white pumpkin, carrots, frozen mixed veggies, cabbage, spinach, zucchini, etc. ")
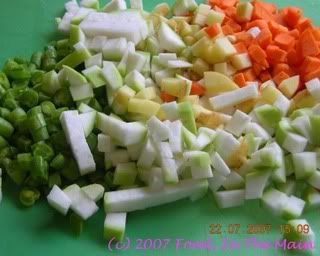
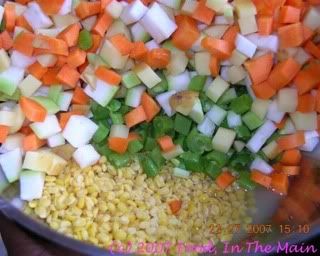
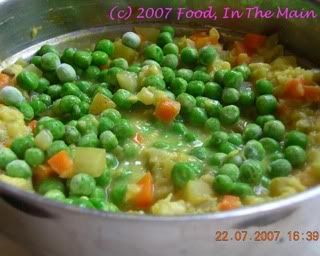
Kiwi Gee used "choko" (in the strange language of Down Under *wink* it refers to chayote squash/Bangalore kathirikkai!), but I didnt have any on hand as it's not a vegetable that's seen in the local supermarkets. Luckily I did have a half of doodhi (bottle gourd), so I used that in its place. Also added a chopped carrot, a potato, some green beans and, at the very end of cooking, frozen green peas. (What's life without green peas, eh?).
Recipe for: Poricha kootu
2 cups chopped mixed veggies (any combination of potatoes, carrots, green beans, chayote squash, eggplant - if you absolutely must - etc)
1/4 cup moong dal
Salt to taste
Turmeric powder (a pinch)
1 tsp oil
For the seasoning:
Coriander leaves
Curry leaves
1 tsp Mustard seeds
1 tsp channa dal
1 tsp urad dal
pinch asafoetida powder
For the paste:
2-4 green chillies
1 tsp cumin seeds
2 tbsp grated ococonut
5 pepper corns
Small piece of ginger
1 large tomato (or two medium ones)
Method:
1. Wash the moong dal, drain and add a cupful of water along with the vegetables and a pinch of turmeric powder.
2. Pressure cook the vegetables and the moong dal for 3 whistles or until the dal is well mushy. Set aside.
3. Chop tomatoes into small bits and grind to a fine paste along with ginger, green chillies, cumin seeds, coconut and pepper corns – grind raw.
4. In a kadhai, heat the oil, add the hing powder, mustard seeds, channa and urad dhal and curry leaves.
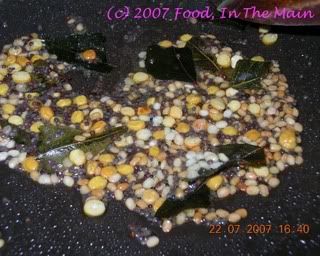
5. When mustard pops and dhals are reddish, add the paste.
6. Fry for a minute, then add the pressure cooked vegetables and dhal along with the frozen peas if using.

7. Keep stirring till it all comes to a boil (adding water if reqd to keep it at a pouring consistency), then add salt, mix and switch hob off.
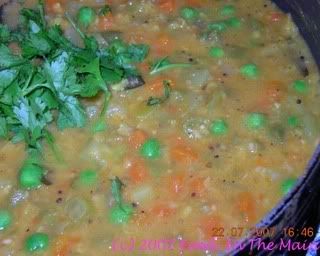
8. Sprinkle chopped coriander on top. Use as a side dish with rice or rotis.
It's always a pleasure when an eggless cake recipe turns out to be damn near perfect. Even better when it's an orange cake, because I think that the flavour of oranges in cakes and desserts (not to mention the fruit itself) is probably one of the loveliest in the world. I think so, anyway.
So that's why, whenever I come across a new orange cake recipe, I tend to want to try it out, even if I've already found one that works perfectly. There's no such thing as perfection, right? There's always the possibility of something even better around the corner. (That's a disastrous attitude for marriage and relationships, leading to much hokery-pokery, but definitely a positive trait when it comes to cookery!)
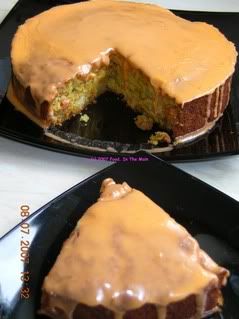
When it comes to icing this cake, take a tip from me and DONT BE IMPATIENT! Wait for the cake to cool completely. Make sure you dont add too much orange juice (or Grand Marnier, if you're using it) to the icing and make it runny. WAIT for the icing to set before you cut the cake - putting the cake in the refrigerator for 30 minutes is worth it.
If you look at the photos I've taken, you will most likely notice that I didnt follow a WORD of my own advice, although I should have known better. I was too impatient to wait for the cake to cool completely. I added too much orange juice and didnt bother to rectify it with more icing sugar. I most certainly didnt wait for the icing to set before I cut the cake - which is why you see the icing runnels on the cut side of the cake... not the best effect. Luckily, the cake tasted absolutely gorgeous - moist without being heavy and oh SO orangey!
Anyway. Those who cant do, teach. Those who cant teach, preach. So... do as I say, folks, not as I do! :)
Recipe for: Eggless iced orange cake

Ingredients:
1-1/2 cups all-purpose flour
3/4 cup granulated sugar
1 tsp baking soda
1/2 tsp baking powder
1 cup fresh squeezed orange juice (with pulp, no problem)
1/3 cup sunflower oil
2 tbsp grated orange peel/zest
1/2 cup golden sultanas
For the icing (mix together to make a thick pourable icing)
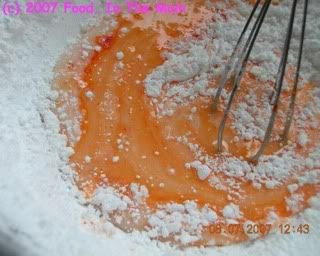
3 cups superfine (icing sugar)
2 tbsp (or as required) orange juice or Grand Marnier
1 drop deep orange food colouring (optional)
1/2 tsp orange zest
Method:
1. Grease an 8" round cake pan. Preheat oven to 180C.
2. In a medium bowl, stir together the flour, sugar, baking soda and baking powder until well mixed.
3. Add the oil and orange zest.

4. Then pour in the orange juice.
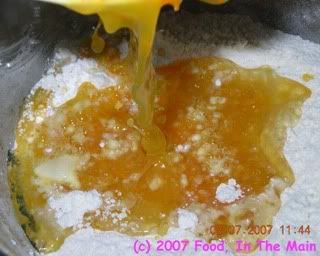
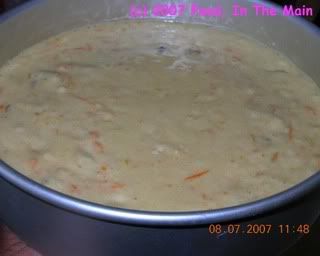
5. Stir just enough to combine the ingredients without beating - dont overstir - and immediately pour into the prepared baking pan.
6. Bake for 40-45 minutes or till the cake tests done and is golden brown on top.
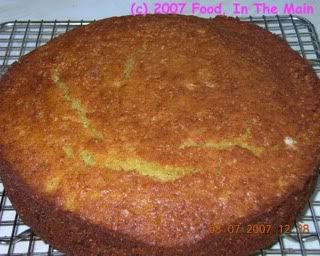
7. Cool completely before pouring the icing over the top of the cake. Let it drip down the side in runnels.
If the icing seems a bit soft, put the cake in the fridge for 30 minutes before cutting.
The idea for this recipe came about for no reason other than I had a fat half of a large beef tomato sitting around after Pete had had his bacon sarnies for "tea" - dinner to us normal folk. Apparently he couldnt resist the call of the (wild) bacon in the fridge, so he succumbed. The siren song of the fresh crusty bread also contributed to his downfall.
Of course I didnt let him ignore the call of the tomato and the lettuce (because that way I can pretend that his tea wasnt all bad), thus elevating his basic bacon butty into the classic BLT (bacon-lettuce-tomato - if any vegetarians need this abbreviation clarifying).
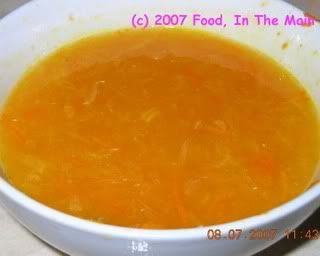
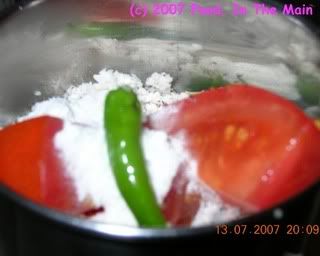
But that is beside the point. The point is, since my "tea" was going to be just for me, I decided to go simple and make a mor kuzhambu. Since the tomato was sitting out on the counter, on impulse I added it to the coconut-green chilly-cumin that was in my little grinder, before grinding it all to a smooth paste.
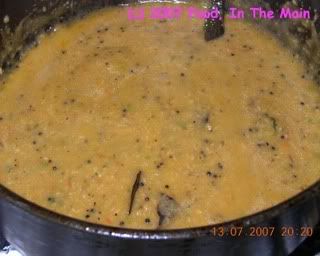
The mor kuzhambu didnt taste radically different, much to my relief, but I guess the tomato made a gentle variation to the taste, also giving it a pretty colour (as I didnt use turmeric powder). And not the least, I think it might have stopped the yogurt from curdling too easily. I use Greek yogurt, which is lovely but doesnt take kindly to being heated. (Kinda like me. Heat curdles the yogurt on the outside, while I curdle on the inside - but the end result is the same... unfit for human consumption/company).
I dont make curd at home - and because of that, I dont have home made sour buttermilk, which is traditionally used to make mor kuzhambu. My compromise is to water down unsweetened low-fat Greek yogurt and add a tsp of tamarind paste to make up for the lack of sourness. Works for me.
Recipe for: Tomato mor kuzhambu
Ingredients:
1 cup Greek yogurt + 2 cups water (or just use 3 cups sour buttermilk)
2 tbsp grated coconut
1 large tomato, sliced
4-5 fresh green chillies (or to taste)
1 htsp rice flour
1/2 tsp cumin seeds
1 tsp tamarind paste (omit if using sour buttermilk)
Salt to taste
2 tsp oil
1 tsp black mustard seeds
a few fresh curry leaves
pinch of asafoetida (optional)
Method:
1. Whisk the yogurt and water till blended. It shouldnt be too runny or too thick. Reserve till required.
2. Grind the grated coconut, tomato, green chillies, cumin seeds and rice flour to a smooth paste.
Mix with 1/4 cup water and reserve.
3. In a pan, heat the oil. Add the mustard seeds and curry leaves and cover for 30 seconds till the mustard has popped.
4. Turn down the heat and pour in the ground coconut mixture, stirring briskly. Add the asafoetida powder if using. Let this simmer for 2-3 minutes.
5. Now slowly pour in half a cup of the yogurt mixture, stirring all the while, so that it doesnt curdle. Add the remaining thinned yogurt, add salt to taste and stir well.
6. Let the kuzhambu heat through on low heat. Do not bring it to a boil.
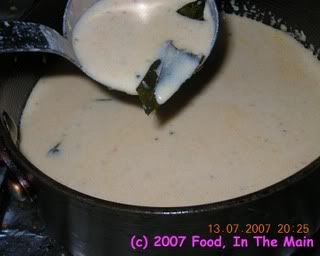
Serve hot with plain rice and any kootu or dry vegetable curry.
Yesterday evening I was sorting out some of the hundreds of pages of dessert and baking recipes that I've printed out over the years - and yeah, only a fraction of them have been tried and posted. The others were printed out at various moments when I was feeling energetic and optimistic (not to mention, overenthusiastic) about trying complicated gateaux or gourmet dessert recipes...
But in the end, all I've ever done is read through them with just two thoughts running through my head over and over during the reading process.
The first thought: "Wow, that sounds so fantastic, too bad it's so complicated". And the next one: "Too bad I dont know anybody who would make it..." - and most important, this - "...and call me over to taste it!... followed by the first thought, followed yet again by the second thought (ofc with the all-important second part of the second thought)... and so on. You get the idea. I could probably go on like this all evening, so the expedient thing would be to agree that yes, you get the idea. :)
Anyway, I came across this recipe that had the intriguing title of "Amazon cake". Amazon cake? I thought. Why Amazon cake? So I quickly read through the recipe, which was ridiculously simple and, better yet, didnt require eggs. Ah-HA. The printout said that the recipe was from The New York Times, adapted from Cafe Beaujolais by Margaret Fox and John S Bear. That's all I know about it. (It never got around to explaining why Amazon, so I remain intrigued. And ignorant.)
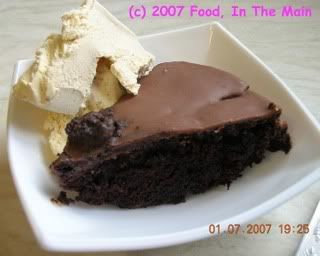
So of course, since chocolate cake is the all-time favourite of my family, I made it. Easy as easy as can be and the cake was quite lovely. You wouldnt have known that it didnt contain eggs. I cut down on the sugar in the cake from 1 cup to slightly less than 3/4 cup, but that's because I was planning to frost it. If you dont want to frost it, use 1 heaping cup sugar for the cake.
The crumb was moist but not dense, and the end product disappeared like magic.
The Amazin' Amazon cake is here to stay!
Recipe for: Amazin' Amazon eggless chocolate cake
1-1/2 cups flour
1/3 cup unsweetened cocoa powder
1 tsp baking soda
3/4 cup sugar
1/2 tsp salt
5 tbsp oil (corn oil, canola, vegetable or sunflower oil)
1-1/2 tsp vanilla extract
1 tbsp cider vinegar
1 cup cold water
Method:
1. Heat the oven to 350F (180C). Grease a round 9" baking pan.
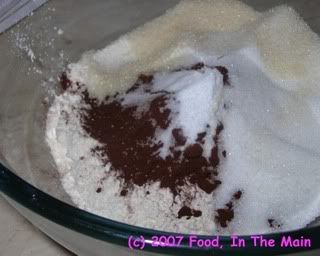
2. Whisk together the flour, cocoa, baking soda, sugar and salt in a medium bowl.
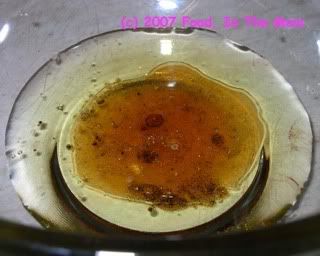
3. In a separate bowl, whisk together the oil, vanilla and vinegar with 1 cup cold water.
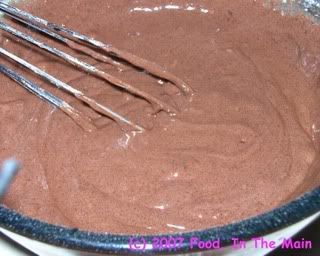
4. Then add the dry ingredients (flour mix) and whisk it all together, until the batter is lump free.
5. Pour into the prepared pan and bake for 40-45 minutes or till the cake tests done.
6. Cool before removing from the pan. Frost the cake when it is completely cool (any frosting is fine), or just sift icing sugar over the top before serving.
I never know what to do with raspberries.
I know people make raspberry coulis, raspberry sorbets, raspberry granita and all the other raspberry-based things... but they seem complicated...
So I never know what to do with raspberries.
I bought a lovely looking box of these berries the other day, from Tesco. The label said they were an extra sweet, perfectly ripe variety imported from Turkey, and to emphasise their extra sweetness and perfect ripeness, not to mention their importedness, the price on these was extra pumped up as well.
But I bought the raspberries anyway.
Took them home, ate one to check on its sweetness. Admittedly it was larger and sweeter than most of the raspberries I've eaten so far (usually English varieties), but still tart enough to make my tongue attempt to tie itself into a Gordian knot.
So I still didnt know what to do with the raspberries. I asked Pete if he would like them with icecream but he kindly declined and suggested that I "make something" with it.
Hm.
So I said to Pete (just as kindly), FUNNY HOW THAT POSSIBILITY HADNT CROSSED MY MIND!
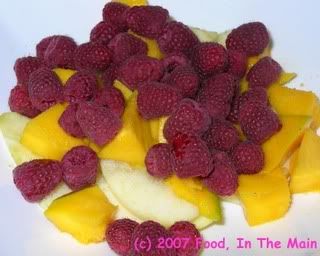
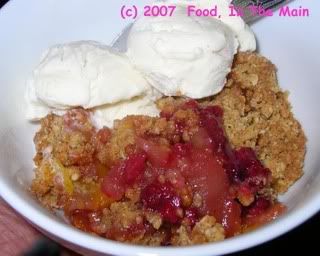
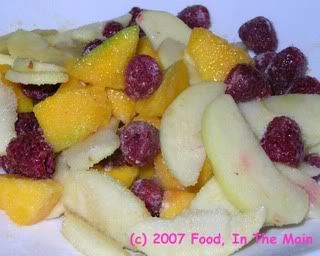
Then I stomped off gracefully - and possibly daintily, too - to seek inspiration from my baking books. The first page I opened at random had a recipe for apple crumble. EUREKA! A crumble! I went back to the fridge and took out the raspberries and half a mango that was awaiting consumption (and by that, I hasten to add, I mean it was waiting to be eaten, not to waste away from tuberculosis). Anyway, an apple got added along the way... and just like that, I knew what to do with the raspberries.
Recipe for: Raspberry, apple and mango crumble
Ingredients:
1/3 cup + 1 tbsp all-purpose flour
1/4 cup dark brown sugar
1/4 tsp ground cinnamon
small pinch salt
1/4 cup oats
3-1/3 tbsp cold butter, cut into small pieces
1/2 ripe mango, peeled and cubed
1/2 cup raspberries
1 medium apple, peeled, cored and sliced
1/4 cup white sugar
2/3 tbsp resh lime juice
Method:
1. Preheat oven to 180C.
2. In a small bowl, combine 1/3 cup flour, brown sugar, cinnamon, salt, and oats.

Mix the butter in with fingers, until the oat mixture forms clumps. Cover and refrigerate till required.
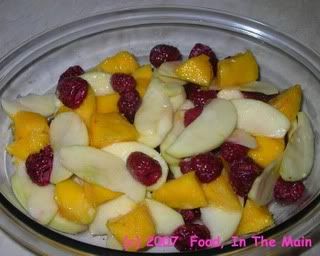
3. Put the raspberries, apples and mango in a bowl. Add remaining 1 tbsp flour, granulated sugar, and lime juice; toss gently to combine.
4. Transfer fruit to a shallow 6” round or oval gratin dish.
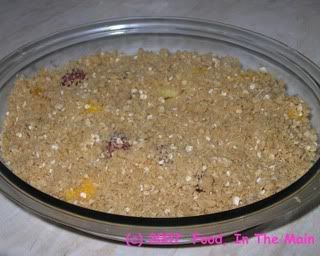
Distribute topping (oat mixture) evenly over the fruit.
5. Bake until topping is golden brown and juices bubble (about 40 minutes).
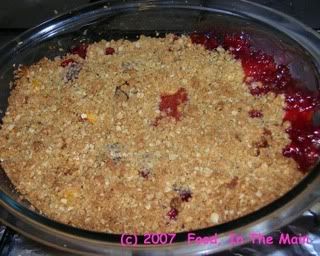
Remove from oven and let cool slightly.
6. Serve warm with ice cream.